Google Cloud Platform: Single NIC BIG-IP VE
The following diagram shows a basic single NIC deployment of BIG-IP VE in the Google Cloud Platform environment.
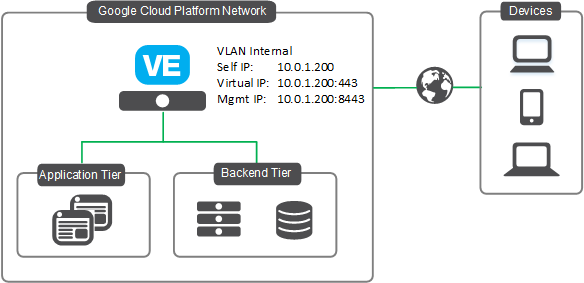
As the diagram shows, all access to the BIG-IP VE is through the same IP address and virtual network interface (vNIC). When you first boot BIG-IP VE, the system automatically creates networking objects (vNIC 1.0, an internal VLAN, and an internal self IP address) for you, and sets the port for the BIG-IP Configuration utility to 8443.
Because only one self IP address is available in this configuration, the BIG-IP VE high availability feature is not available. (You cannot create an active-standby pair.)
If you have two or more applications that need access to the same port, you have options, including:
- Use a template created by F5.
- BIG-IP VE supports Server Name Indicator (SNI), which allows a single virtual IP address to host multiple domains. For more information, see https://support.f5.com/csp/article/K13452.
- If you are using Windows/IIS web sites, add a DNS record for each domain name and have them both point to the same IP address. The browser sends the URL in the host header field of the request to serve the correct web site.
- Use BIG-IP iRules to make pool decisions based on header content.
Watch a video of the deploy process:
Step summary
This is a specific example, which you can use to test a single NIC deployment. When done, you can send traffic to your application servers through BIG-IP VE.
| Step | Task | Details |
|---|---|---|
| 1 | Choose an F5 license | Choose an F5 license. You can get a trial license if you need one. |
| 2 | Create firewall rules | You can add firewall rules to your network before you deploy, or to the instance itself, during or after the deployment.
|
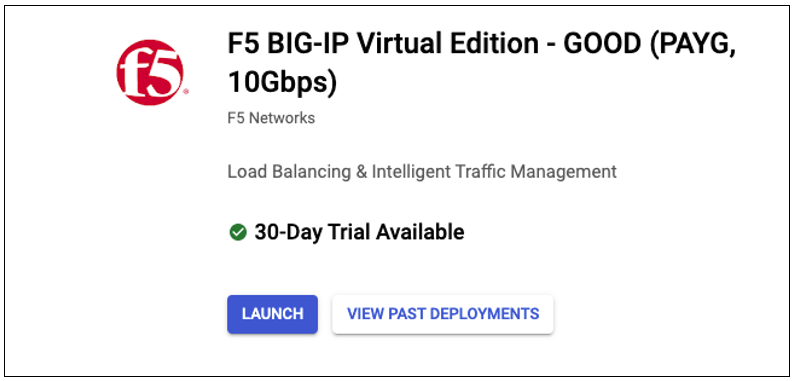
| 3 | Deploy a BIG-IP VE instance | Go to the Marketplace and select the F5 image you want to deploy. |
| 4 | Change the external IP to static | When you deploy BIG-IP VE, the external IP address is ephemeral, meaning it changes when BIG-IP VE reboots. Change the external IP to static (). |
| 5 | Set an admin password for BIG-IP VE | Use SSH to connect to the BIG-IP VE instance and set an admin password, which you will use to connect to the Configuration utility. For connection details, see this doc. |
| 6 | License BIG-IP VE | Use the admin account to log in to the BIG-IP Configuration utility (https://<public-ip-address:8443>). |
| 7 | Provision BIG-IP VE | Enable the modules you need. |
| 8 | Create a pool and add members to it | Create a pool that contains your application servers. |
| 9 | Create a virtual server | Create a virtual server, which provides a destination for your inbound traffic and points to the pool of application servers. |
Step details
Deploy BIG-IP VE in Google Cloud
To use BIG-IP VE in Google Cloud, deploy it in your project.
In the Google Cloud Platform Console, in the top left corner, click the Navigation menu icon.
In the left pane, click Marketplace.
In the Search for solutions field, type
F5and from the results, click the image you want.Click Launch.
Complete the form.
Screen Notes 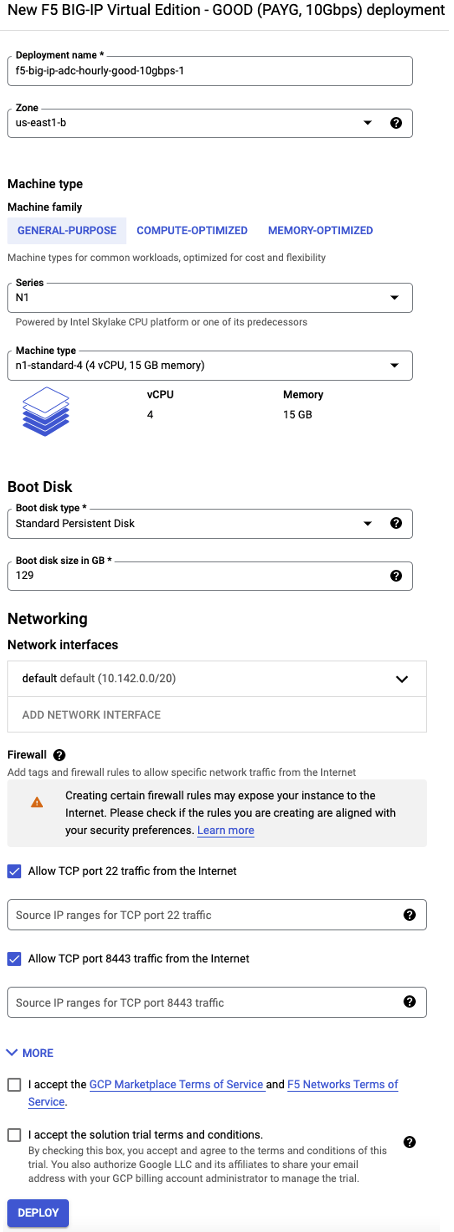
- For the machine type (Machine Family + Series), choose at least 2 vCPU and 4 GB memory. For each additional vCPU, add at least 2 GB of memory. Because of this requirement, the n1-highcpu instance types are NOT supported.
- Port 22 allows SSH access to BIG-IP VE; port 8443 provides access to the web-based BIG-IP Configuration utility.
- Accept all Google terms.
Click Deploy.
The instance launches. Wait at least five minutes before you use SSH to connect.
Set an admin password for BIG-IP VE
The first time you boot BIG-IP VE, you must connect to the instance and create a strong admin password. You will use the admin account and password to access the BIG-IP Configuration utility.
If this management interface connects to the Internet, create a strong password.
Use an SSH tool to connect to the BIG-IP VE instance as admin.
If you use… Do this… In the Google Console, On the window that opens, click the Settings icon, click Change Linux Username, type admin, and click Change.In the Google Console, Type admin@before the instance name, for example:gcloud compute –project "teamproject" ssh –zone "us-central1-f" "admin@instancename"PuTTY Before you connect, add your key in the Google console (). To ensure you are at the tmsh command prompt, type
tmsh.Change the admin password:
modify auth password adminPress Enter. The terminal screen displays the message:
changing password for admin

new password:
Type the new password and press Enter.
The terminal screen displays the message:
confirm passwordRe-type the new password and press Enter.
Ensure that the system retains the password change:
save sys configPress Enter. The terminal screen displays the message:
Saving Ethernet mapping...done
For more details about how SSH connections work in Google Cloud Platform, see this topic.
License BIG-IP VE
You must enter license information before you can use BIG-IP VE.
Open a web browser and log in to the BIG-IP Configuration utility by using
httpswith the external IP address and port 8443, for example:https://<external-ip-address>:8443. The username isadminand the password is the one you set previously.On the Setup Utility Welcome page, click Next.
On the General Properties page, click Activate.
In the Base Registration key field, enter the case-sensitive registration key from F5.
For Activation Method, if you have a production or Eval license, choose Automatic and click Next.
If you chose Manual, complete these steps:
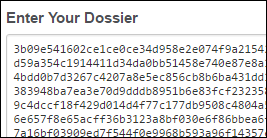
In the Step 1: Dossier field, copy all of the text and then click Click here to access F5 Licensing Server.

A separate web page opens.
On the new page, click Activate License.
In the Enter your dossier field, paste the text and click Next.
Accept the agreement and click Next.
On the Activate F5 Product page, copy the license text in the box. Now go back to the BIG-IP Configuration utility and paste the text into the Step 3: License field.
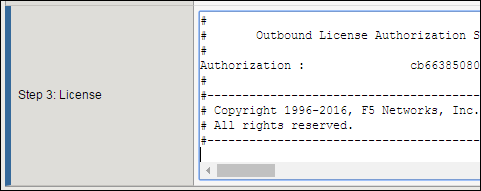
Click Next.
The BIG-IP VE system registers the license and logs you out. When the configuration change is successful, click Continue to provision BIG-IP VE.
Provision BIG-IP VE
You must confirm the modules you want to run before you can begin to work in the BIG-IP Configuration utility.
Open a web browser and log in to the BIG-IP Configuration utility.
On the Resource Provisioning screen, change settings if necessary and click Next.
On the Device Certificates screen, click Next.
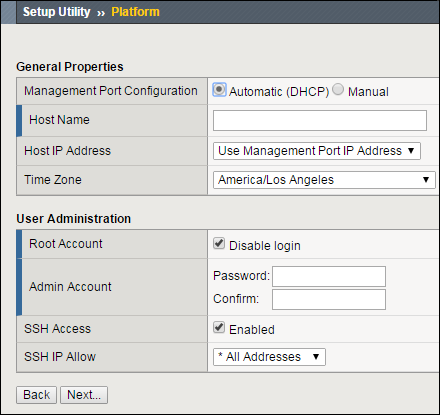
On the Platform screen, in the Admin Account field, re-enter the password for the admin account and click Next.
BIG-IP VE logs you out.
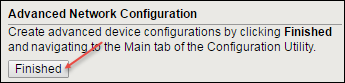
When you log back in, on the screen, in the Advanced Network Configuration area, click Finished.
Create a pool and add members
Traffic goes through BIG-IP VE to a pool. You must add your application servers to this pool.
Open a web browser and go to the BIG-IP Configuration utility, for example:
https://<external-ip-address>:8443.On the Main tab, click .
Click Create.
In the Name field, type
web_pool. Names must begin with a letter, be fewer than 63 characters, and can contain only letters, numbers, and the underscore (_) character.For Health Monitors, move
httpsfrom the Available to the Active list.Choose the load balancing method or retain the default setting.
In the New Members section, in the Address field, type the IP address of the application server.
In the Service Port field, type a service port, for example,
443.Click Add.
The list now contains the member.
Add additional pool members as needed and click Finished.
Create a virtual server
A virtual server listens for packets destined for the external IP address. You must create a virtual server that points to the pool you created.
In the BIG-IP Configuration utility, click the Main tab, and then click .
Click Create and complete the following information.
Field Value Name A unique name Destination Address/Mask BIG-IP VE’s private IP address Service Port 443HTTP Profile http SSL Profile (Client) clientssl SSL Profile (Server) serverssl Source Address Translation Auto Map Default Pool web_poolNote
These values are for demonstration only. For details about securing a web application with SSL, see the product documentation at askf5.com.
Click Finished.
Traffic to the BIG-IP VE external IP address will now go to the pool members. To test in a browser, type: https://<external-IP-address>.