Lab 3: Exploring Rate Limiting & Routes
The following lab tasks will guide you through the configuration of Rate Limiting feature sets.
Rate Limiting can be used to implement a variety of L7 security controls; assisting in L7 DDoS,
protecting heavy URLs (service process impactful) or mitigating impacts to other controlled endpoints.
Routes in F5 XC can be utilized to accomplish L7 routing based on URI to multiple origin pools.
Expected Lab Time: 20 minutes
Task 1: Establishing a Baseline
In this task you will access a test website/webpage to experience access without a Rate Limiting Policy
engaged. Following completion of Task1, you will build a Rate Limit Policy (Task2) and then test the
Rate Limited experience (Task3).
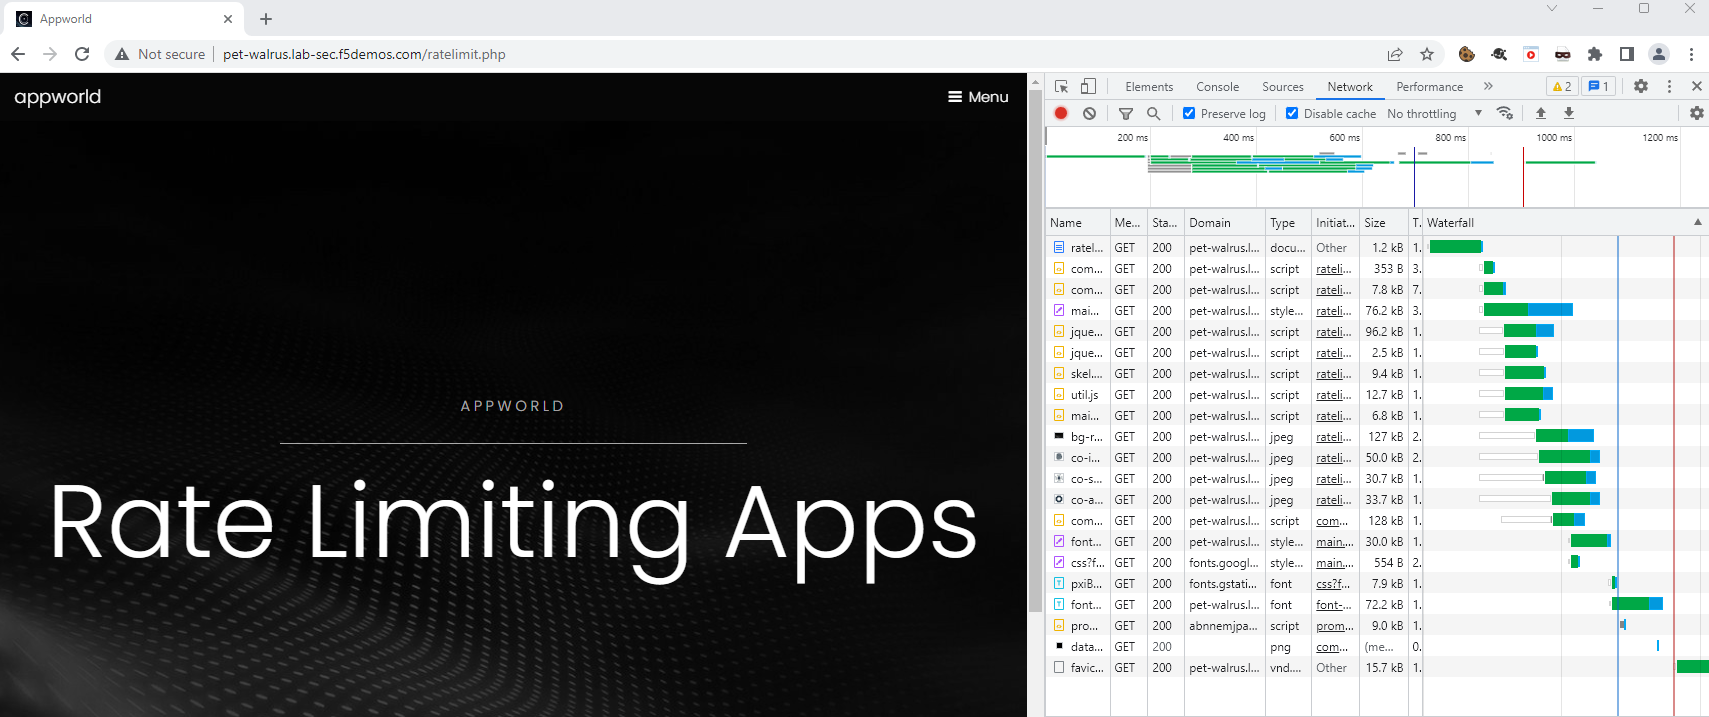
In your local web browser access the following link, replacing namespace with your own:
http://<namespace>.lab-sec.f5demos.com/ratelimit.php
Refresh the page multiple times and notice you do not receive any errors nor blocked
messages. You can also open your browser’s developers to observe requests receiving 200Ks.
Let’s change that behavior.
|
|
Task 2: Creating a Rate Limiting Policy
In this task you will add a Rate Limiting Policy to the application Load Balancer previously created.
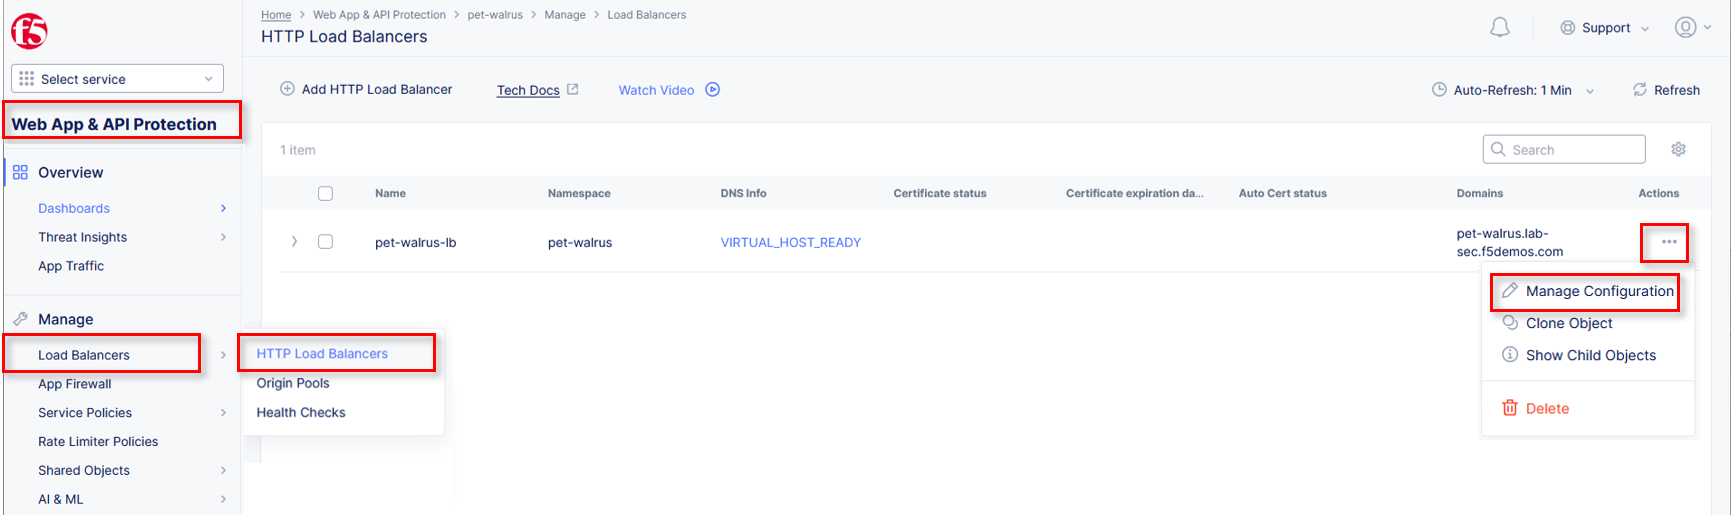
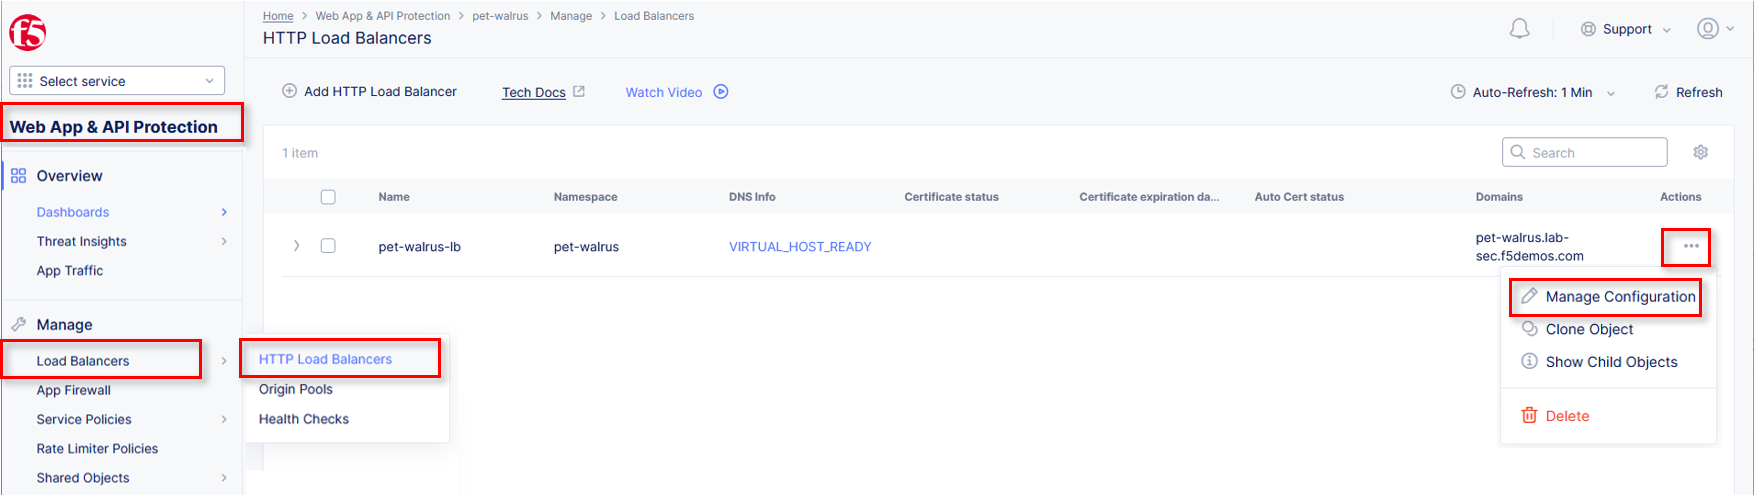
Return to the Web App & API Protection configuration window. In the left-hand
navigation, expand Manage and click Load Balancers > HTTP Load Balancers.
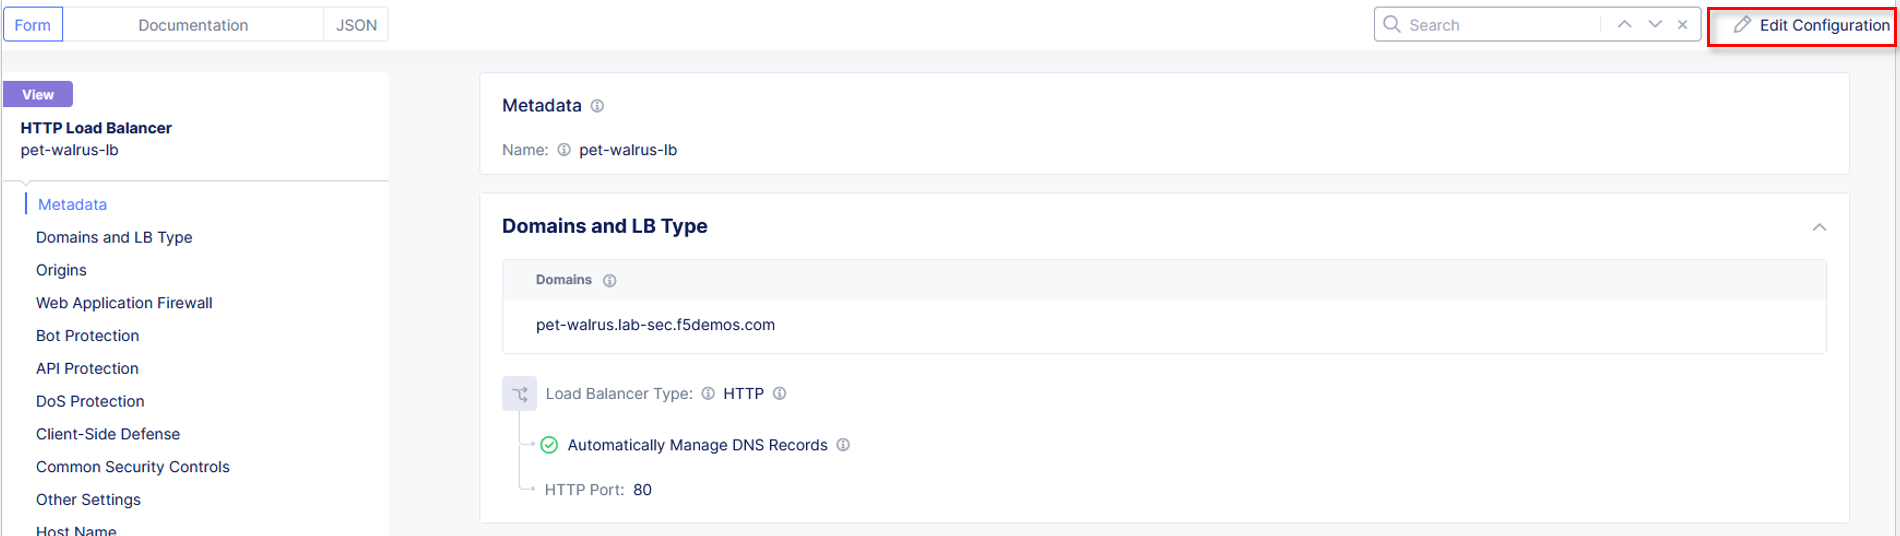
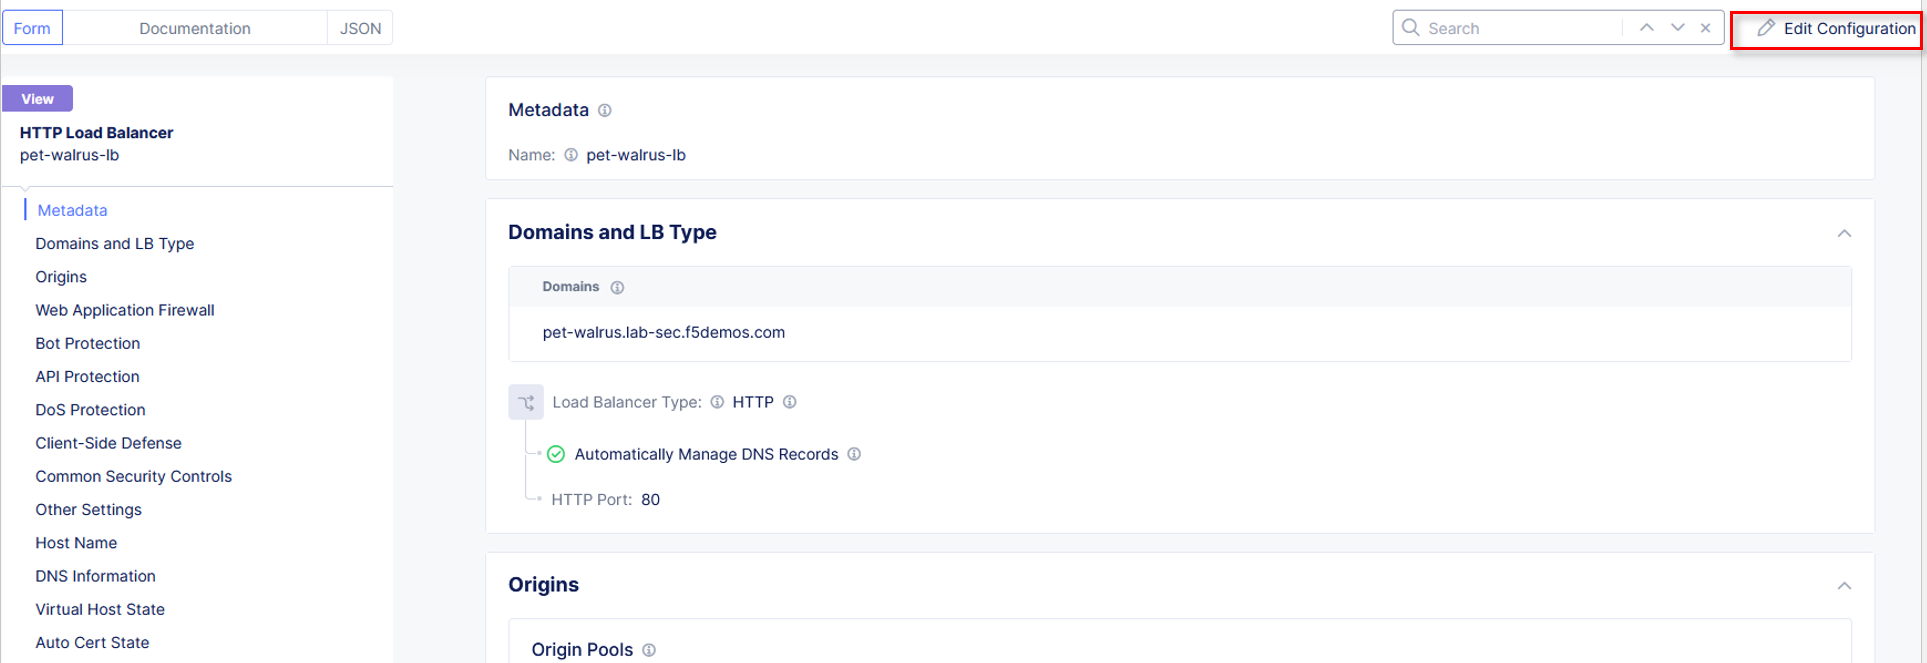
Use the Action Dots and click Manage Configuration Click Edit Configuration in the top right-hand corner.
|
|
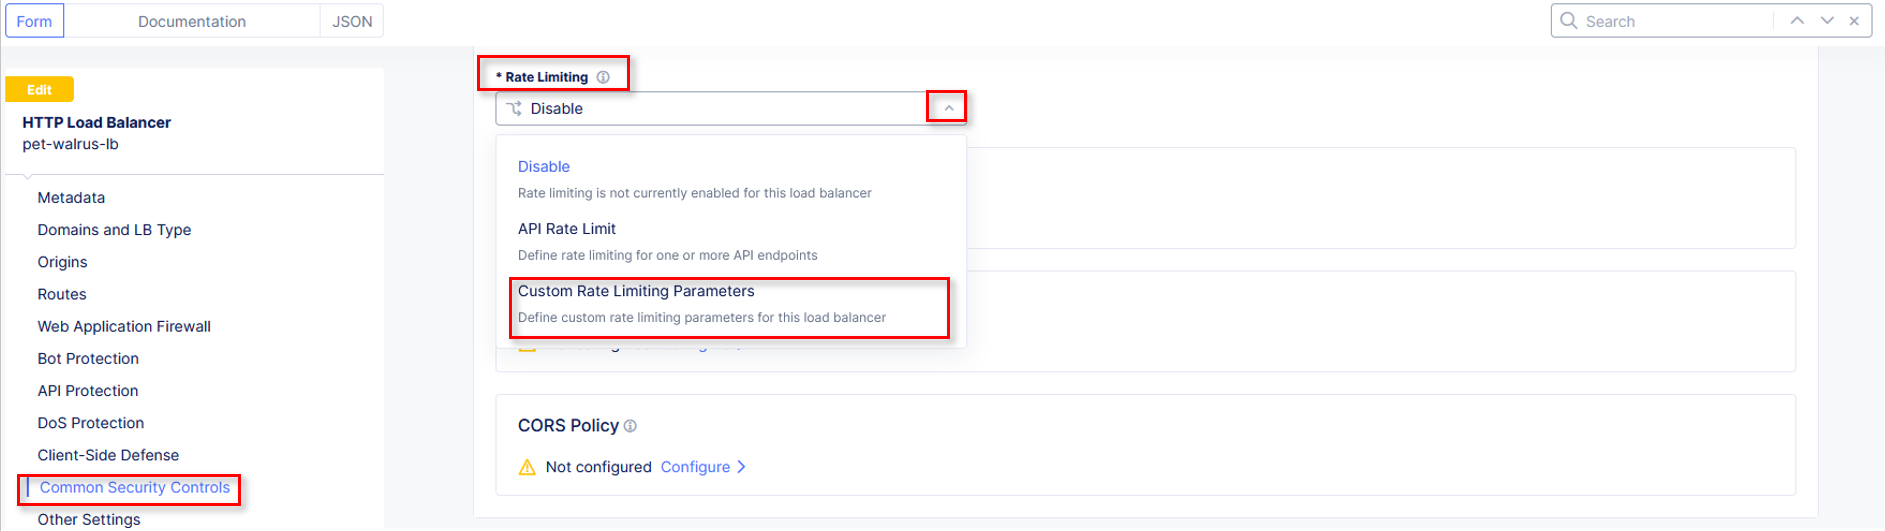
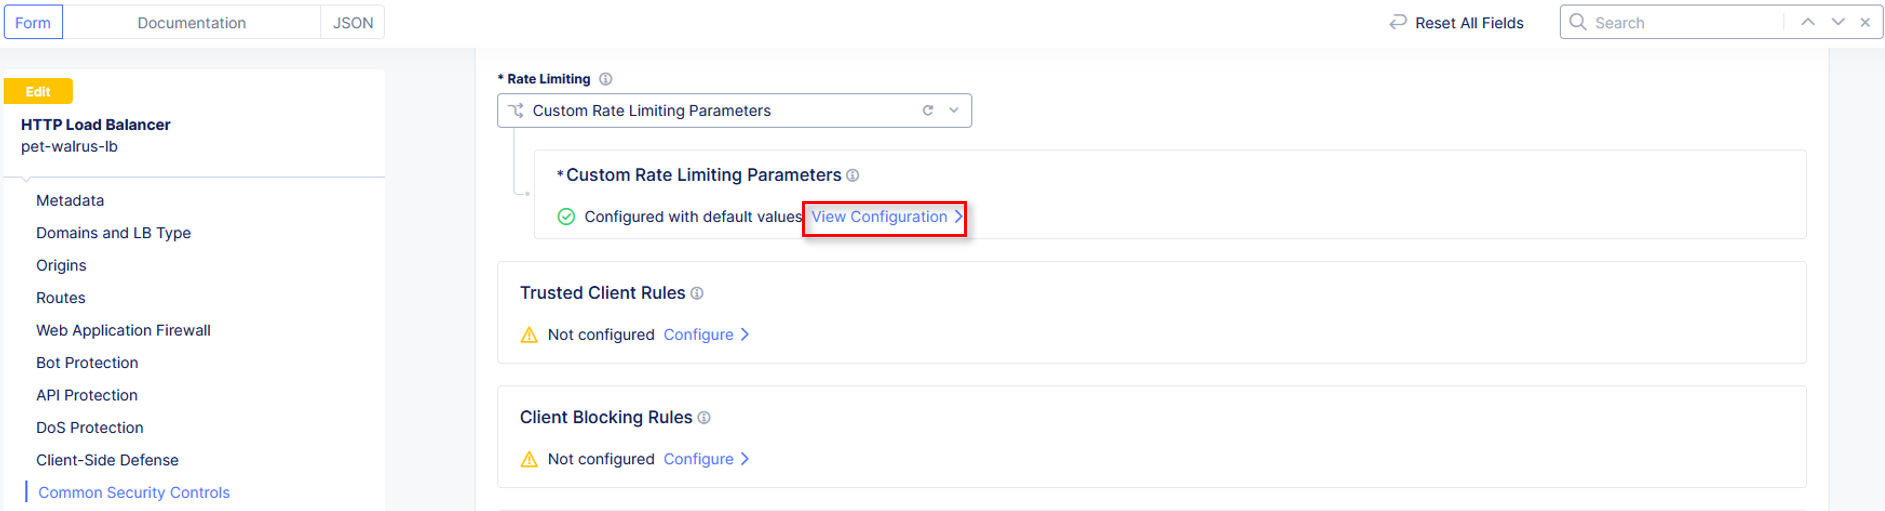
Click Common Security Controls in the left-hand navigation & locate Rate Limiting. Click the dropdown for Rate Limiting and select Custom Rate Limiting Parameters.
|
|
In the expanded Custom Rate Limiting Parameters click the View Configuration Link.
|
|
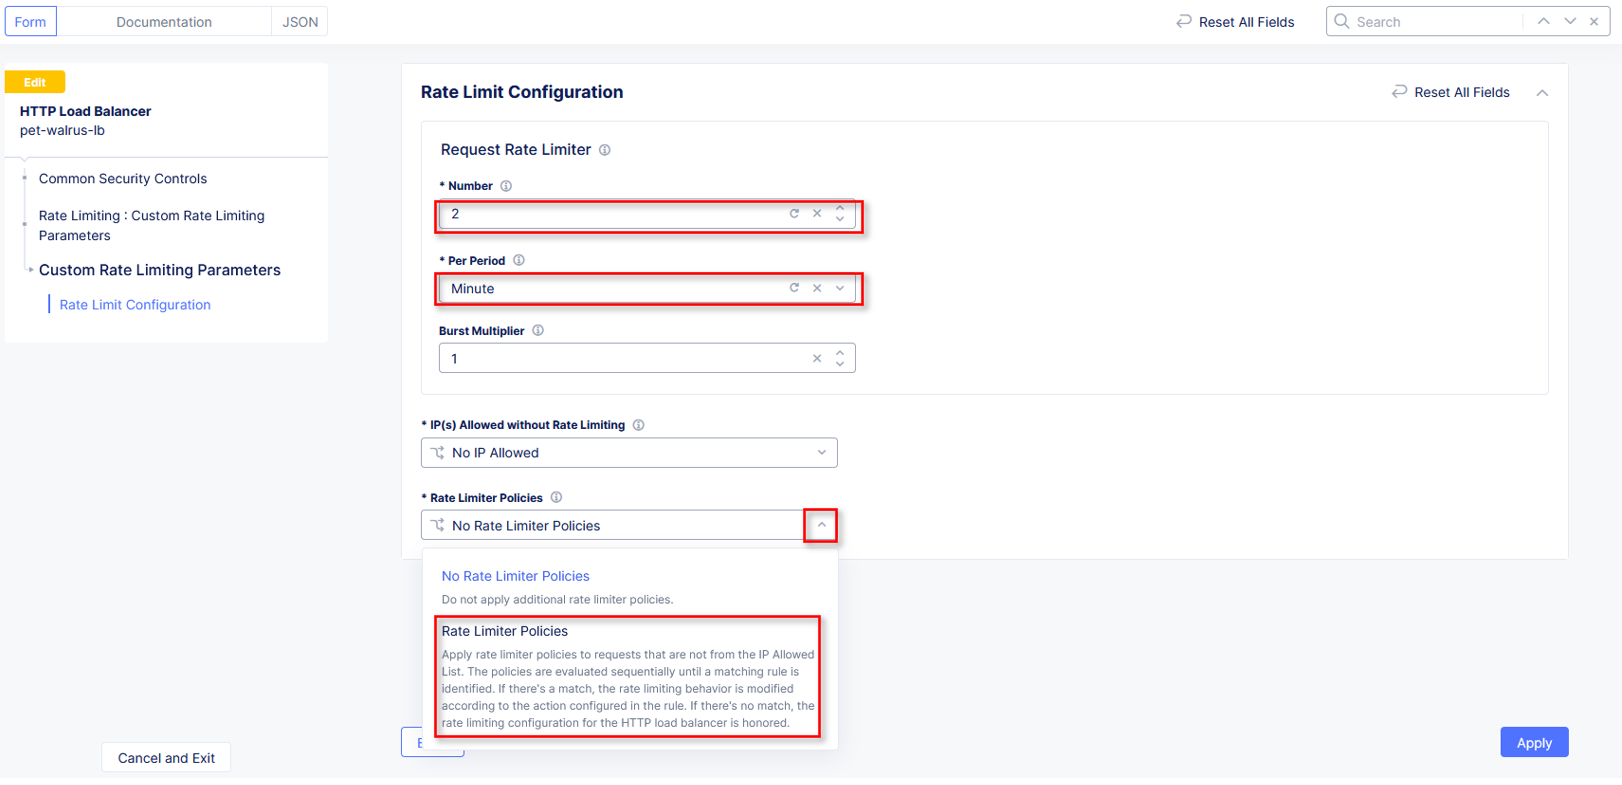
In the resulting Rate Limit Configuration window, in the Request Rate Limiter
section set the following values as shown:
Number: 2 Per Period: Minute Burst Multiplier: 1
Click the drop-down for Rate Limiter Policies and select Rate Limiter Policies.
|
|
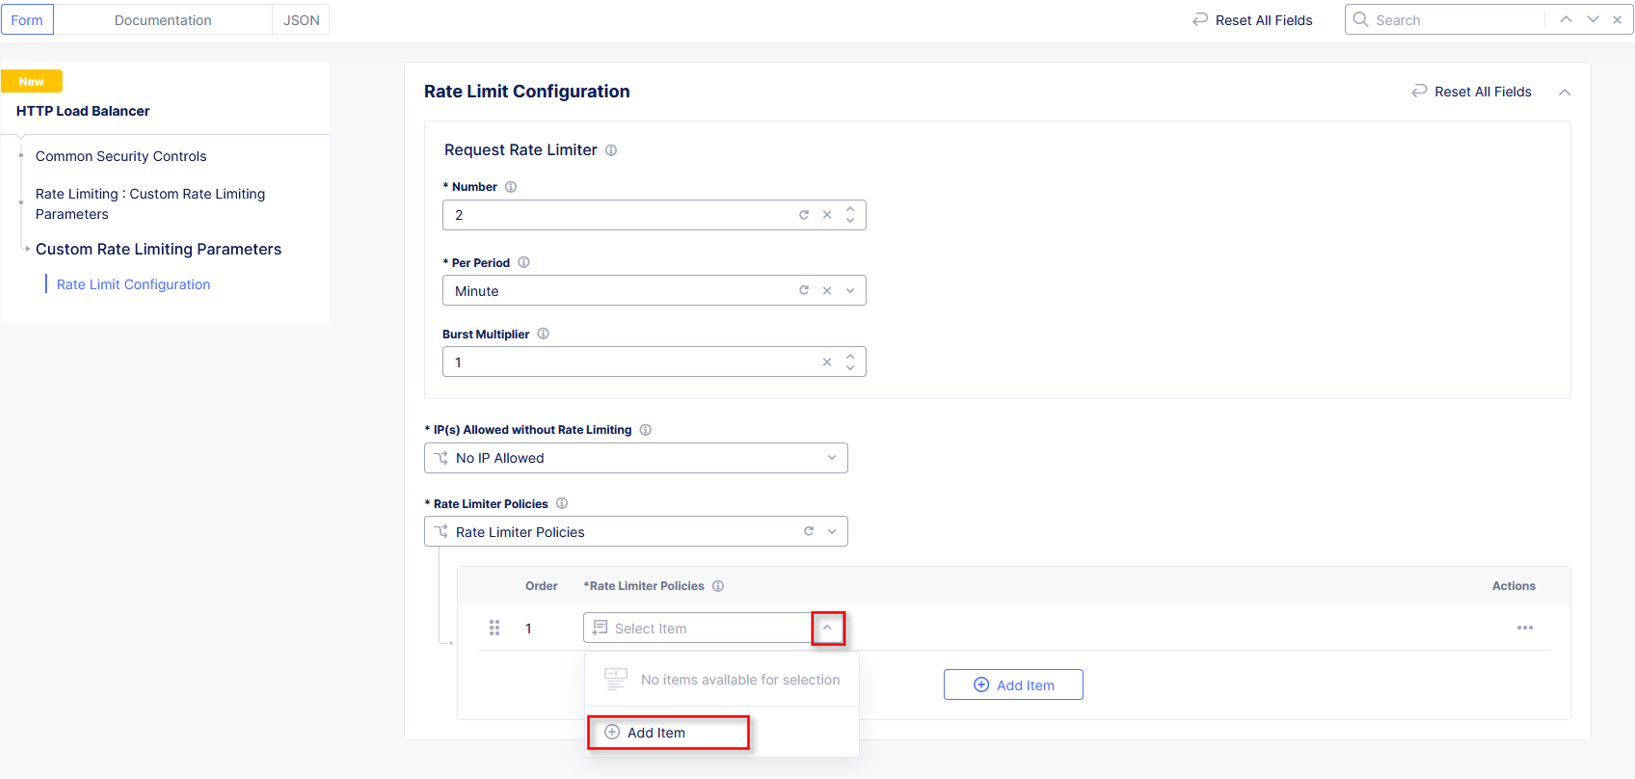
In the new row for Rate Limiter Policies, click the dropdown an then select Add
Item from the list as shown.
|
|
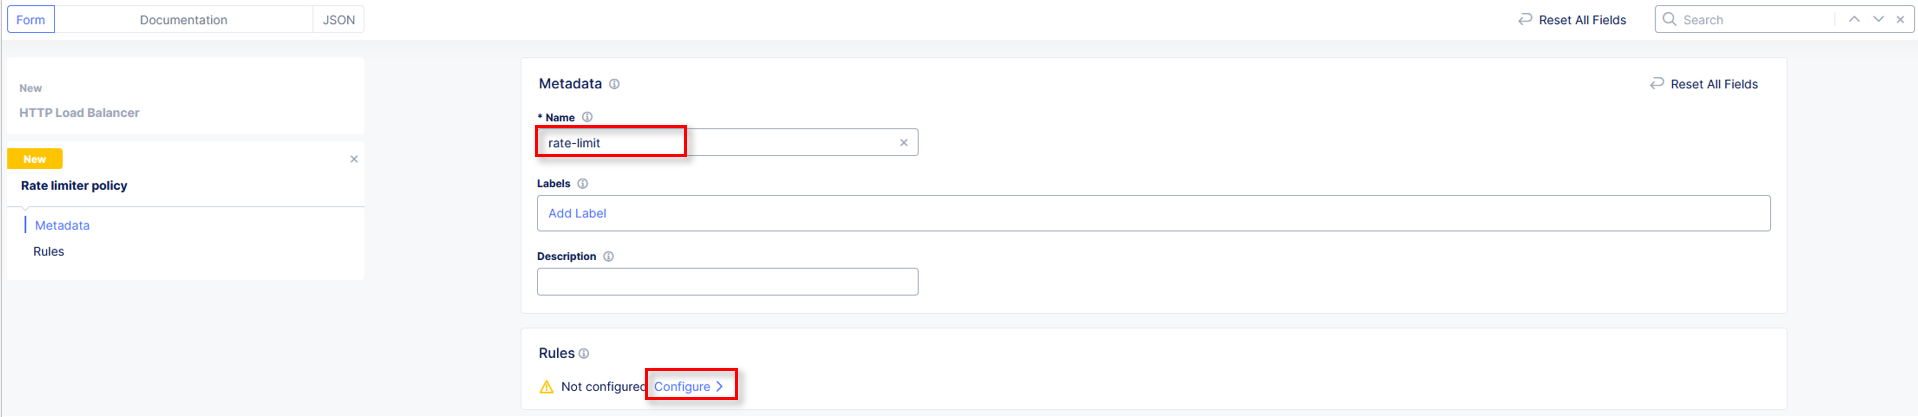
In the Rate Limiter Policy window, enter rate-limit in the Name field in
Metadata section and then click Configure within the Rules section.
In the resulting Rules window, click Add Item.
|

|
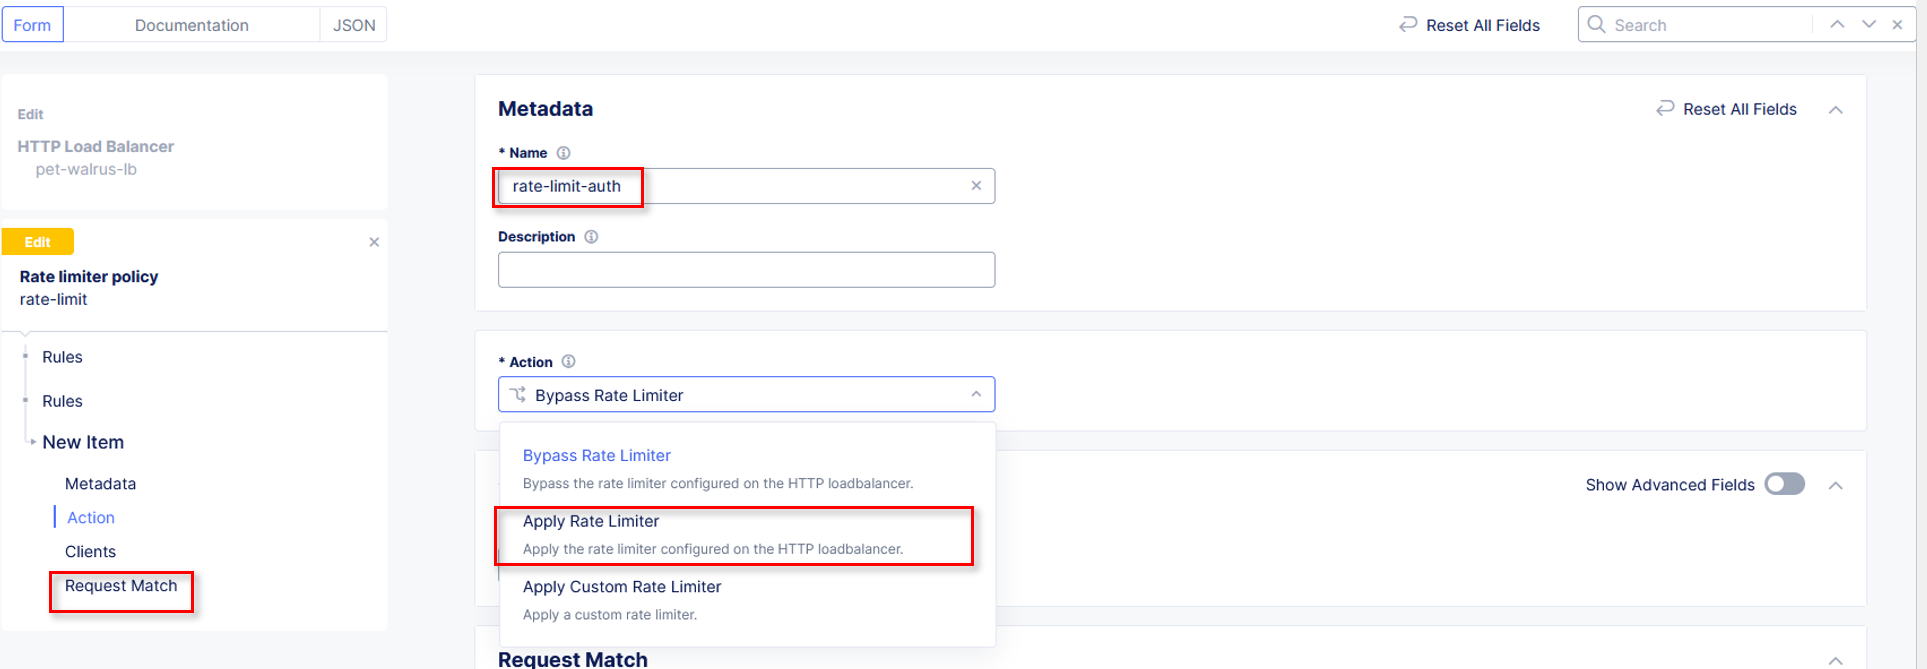
In the Rate Limiter Policy window within the Metadata section input
rate-limit-auth into the Name field.
Using the Actions drop-down select, Apply Rate Limiter. In the left-hand navigation, click on Request Match.
|
|
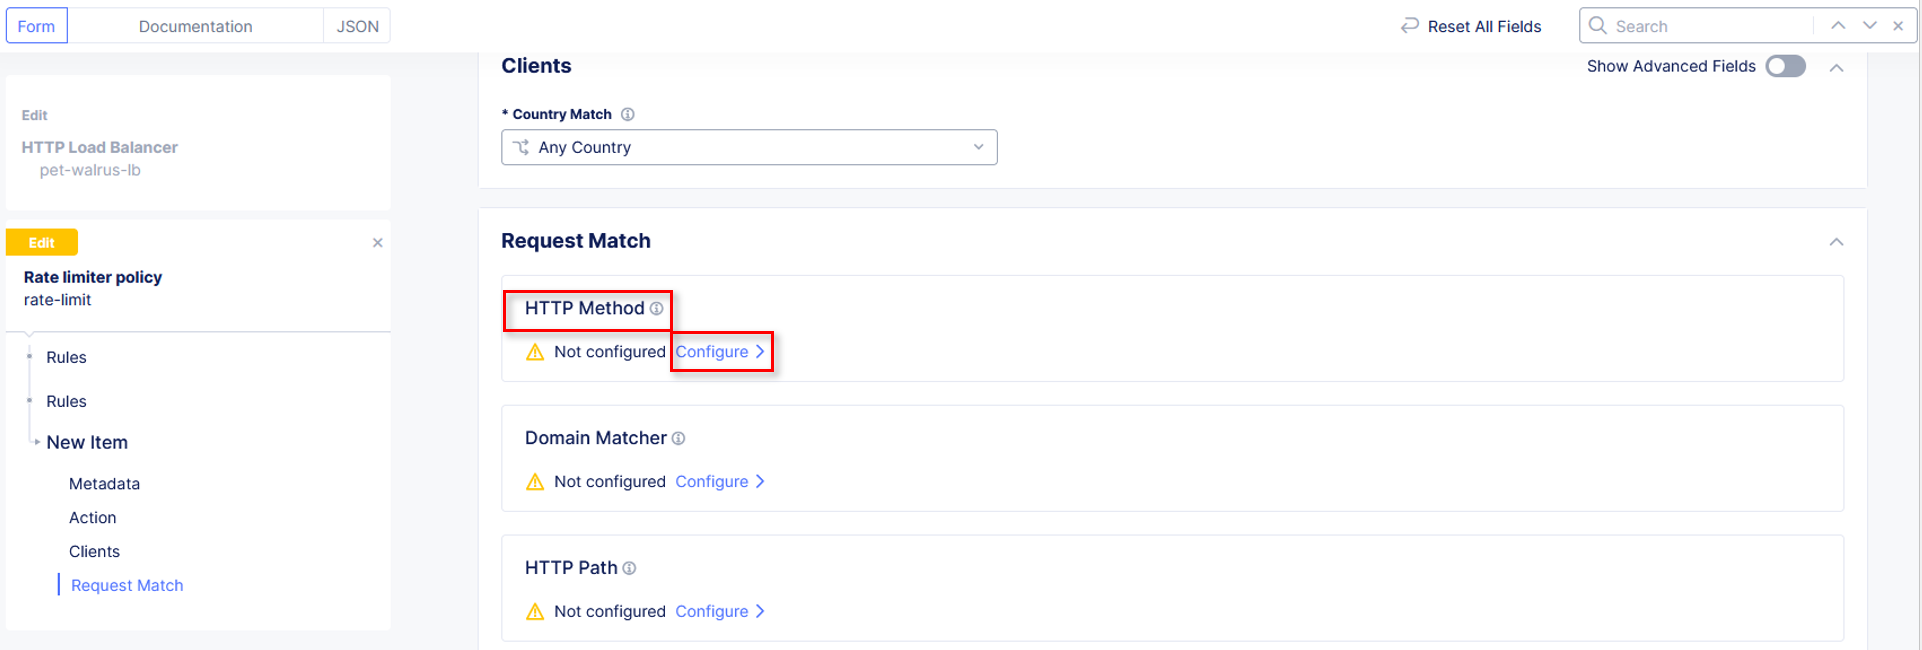
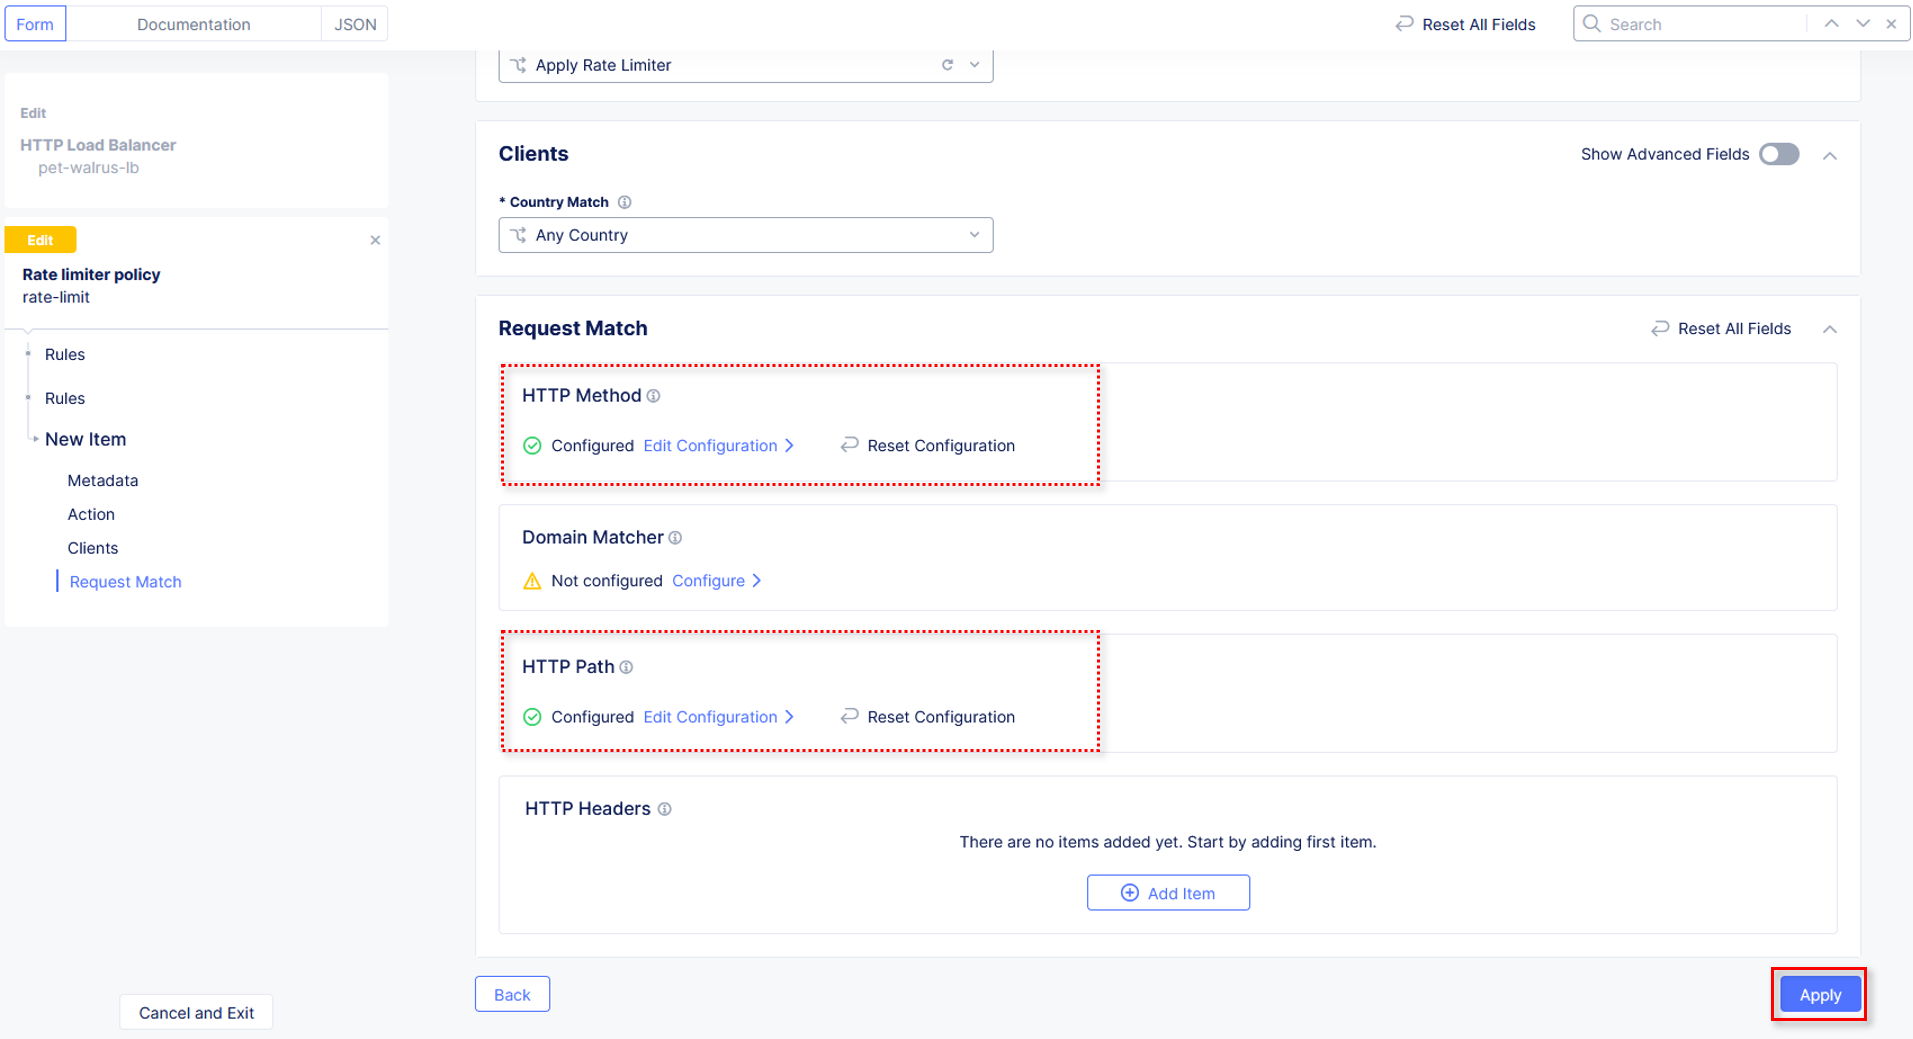
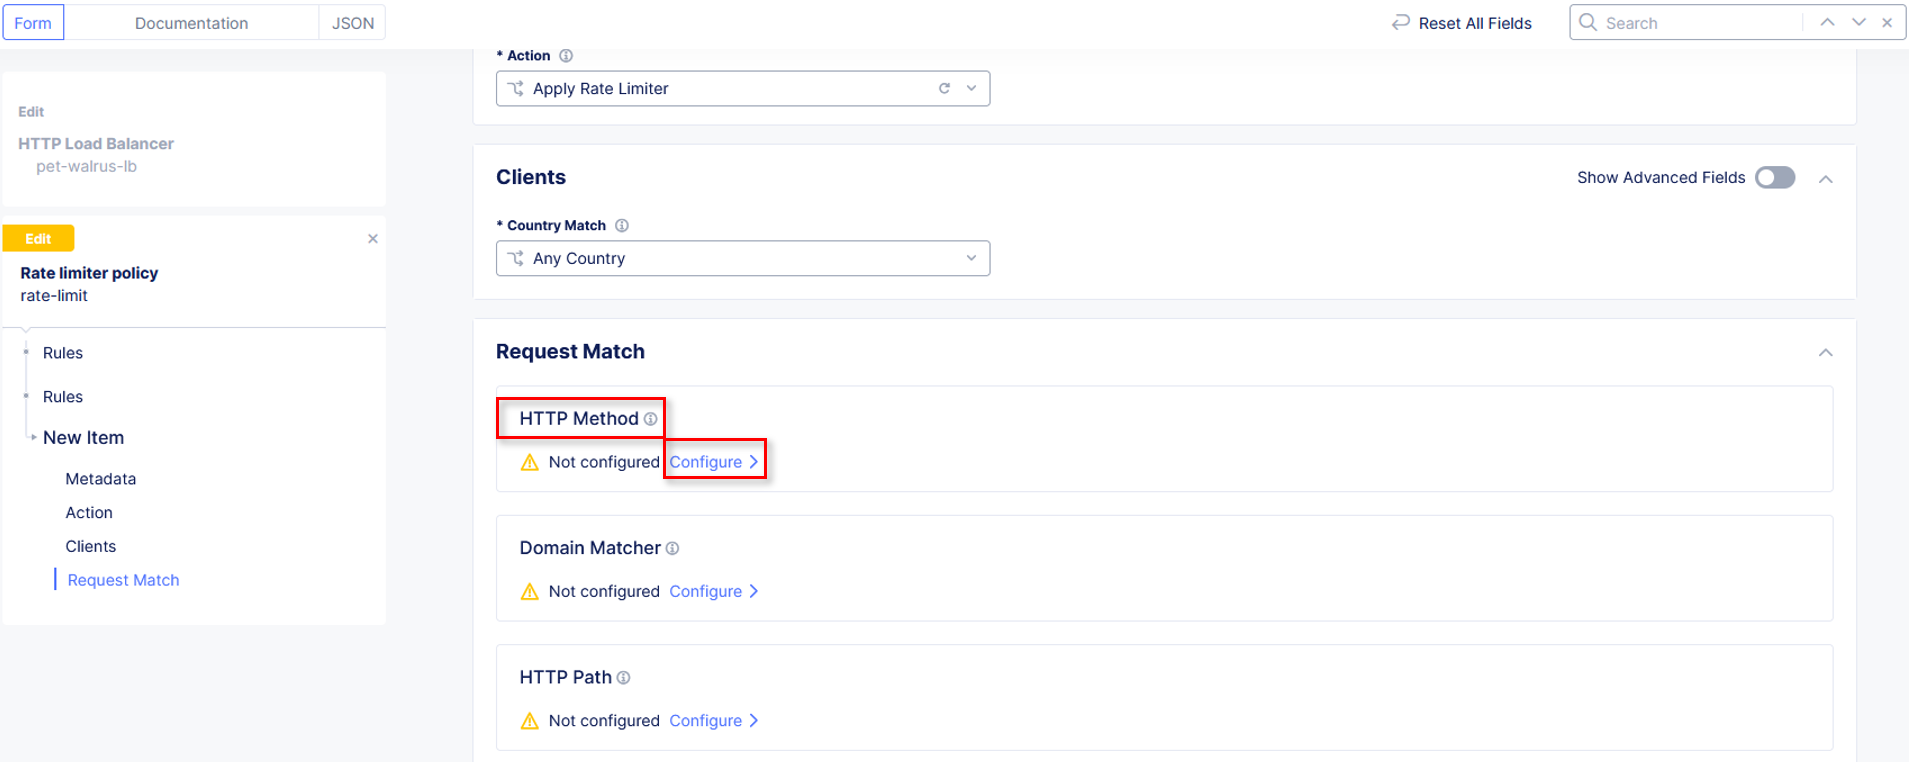
In the Request Match section and select the Configure link in the HTTP Method
section as shown.
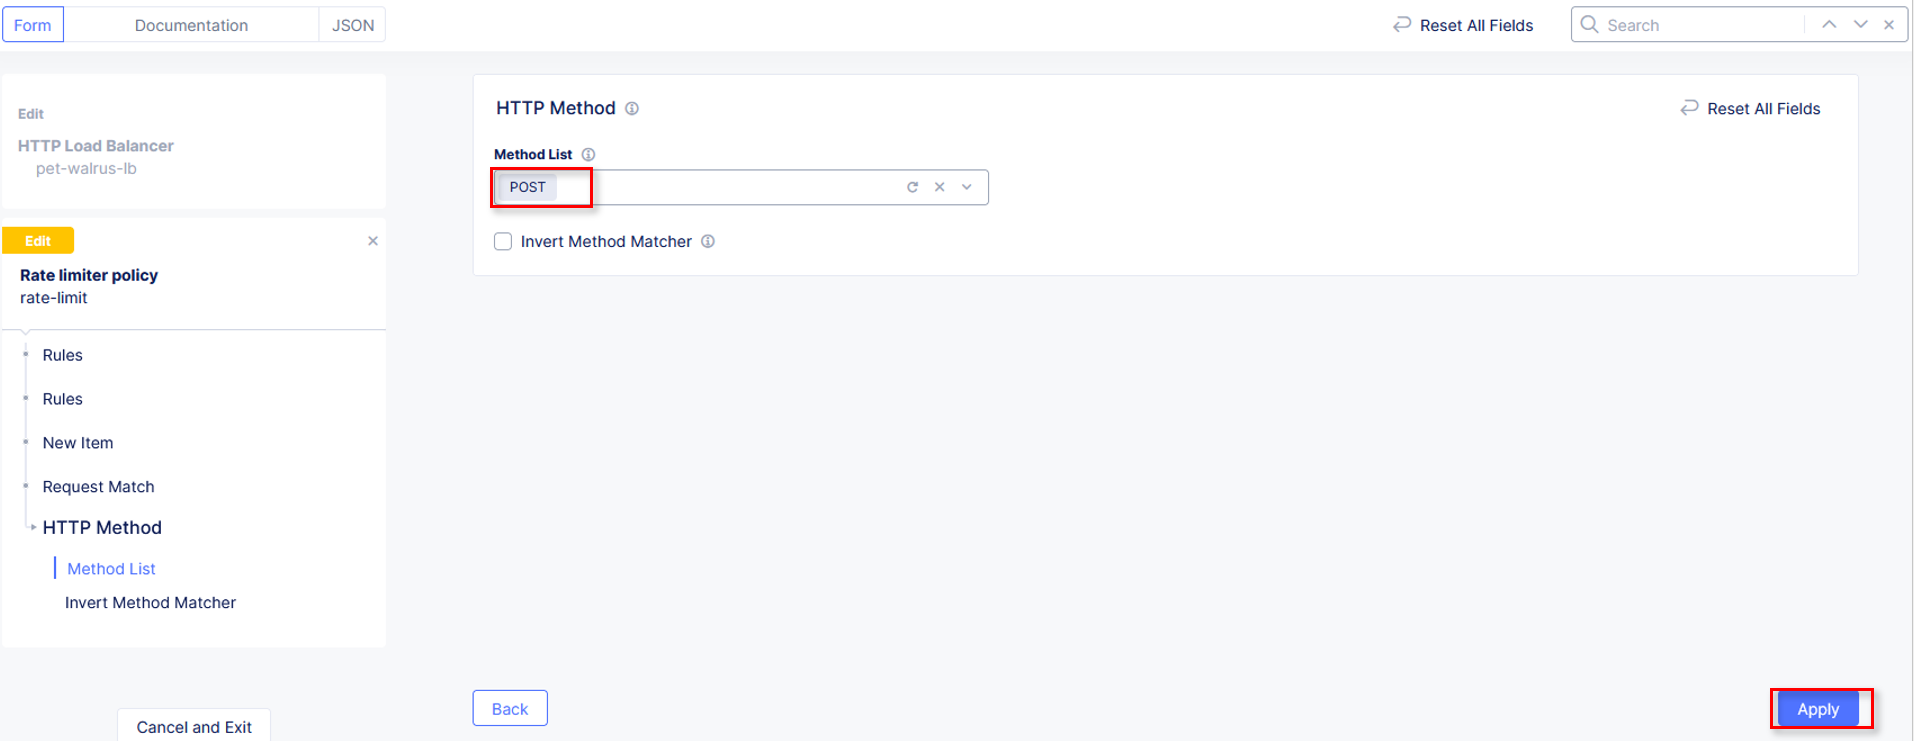
In the resulting HTTP Method window under Method List, select POST then
click Apply.
|
|
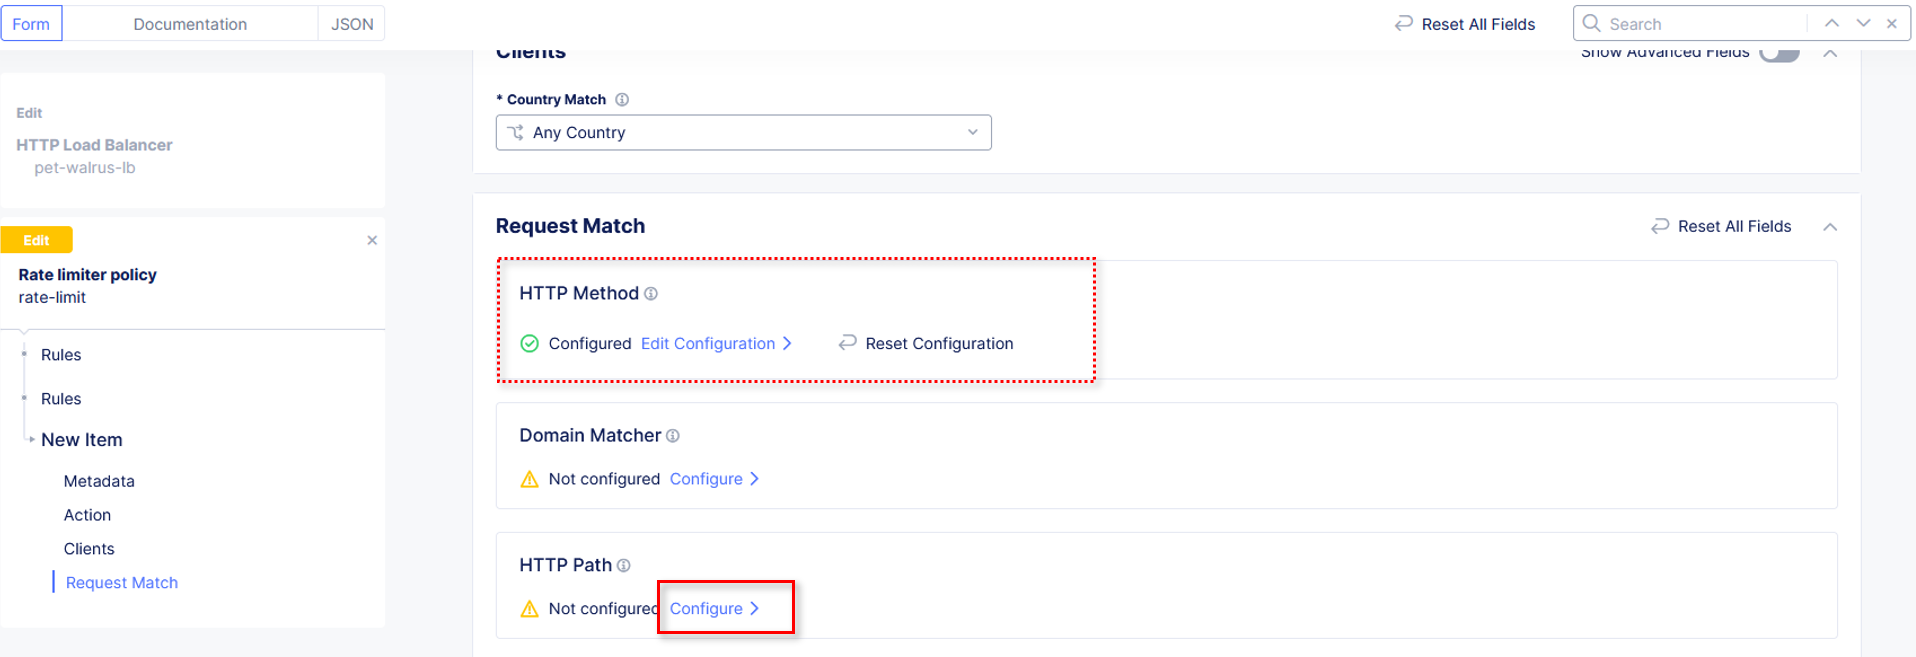
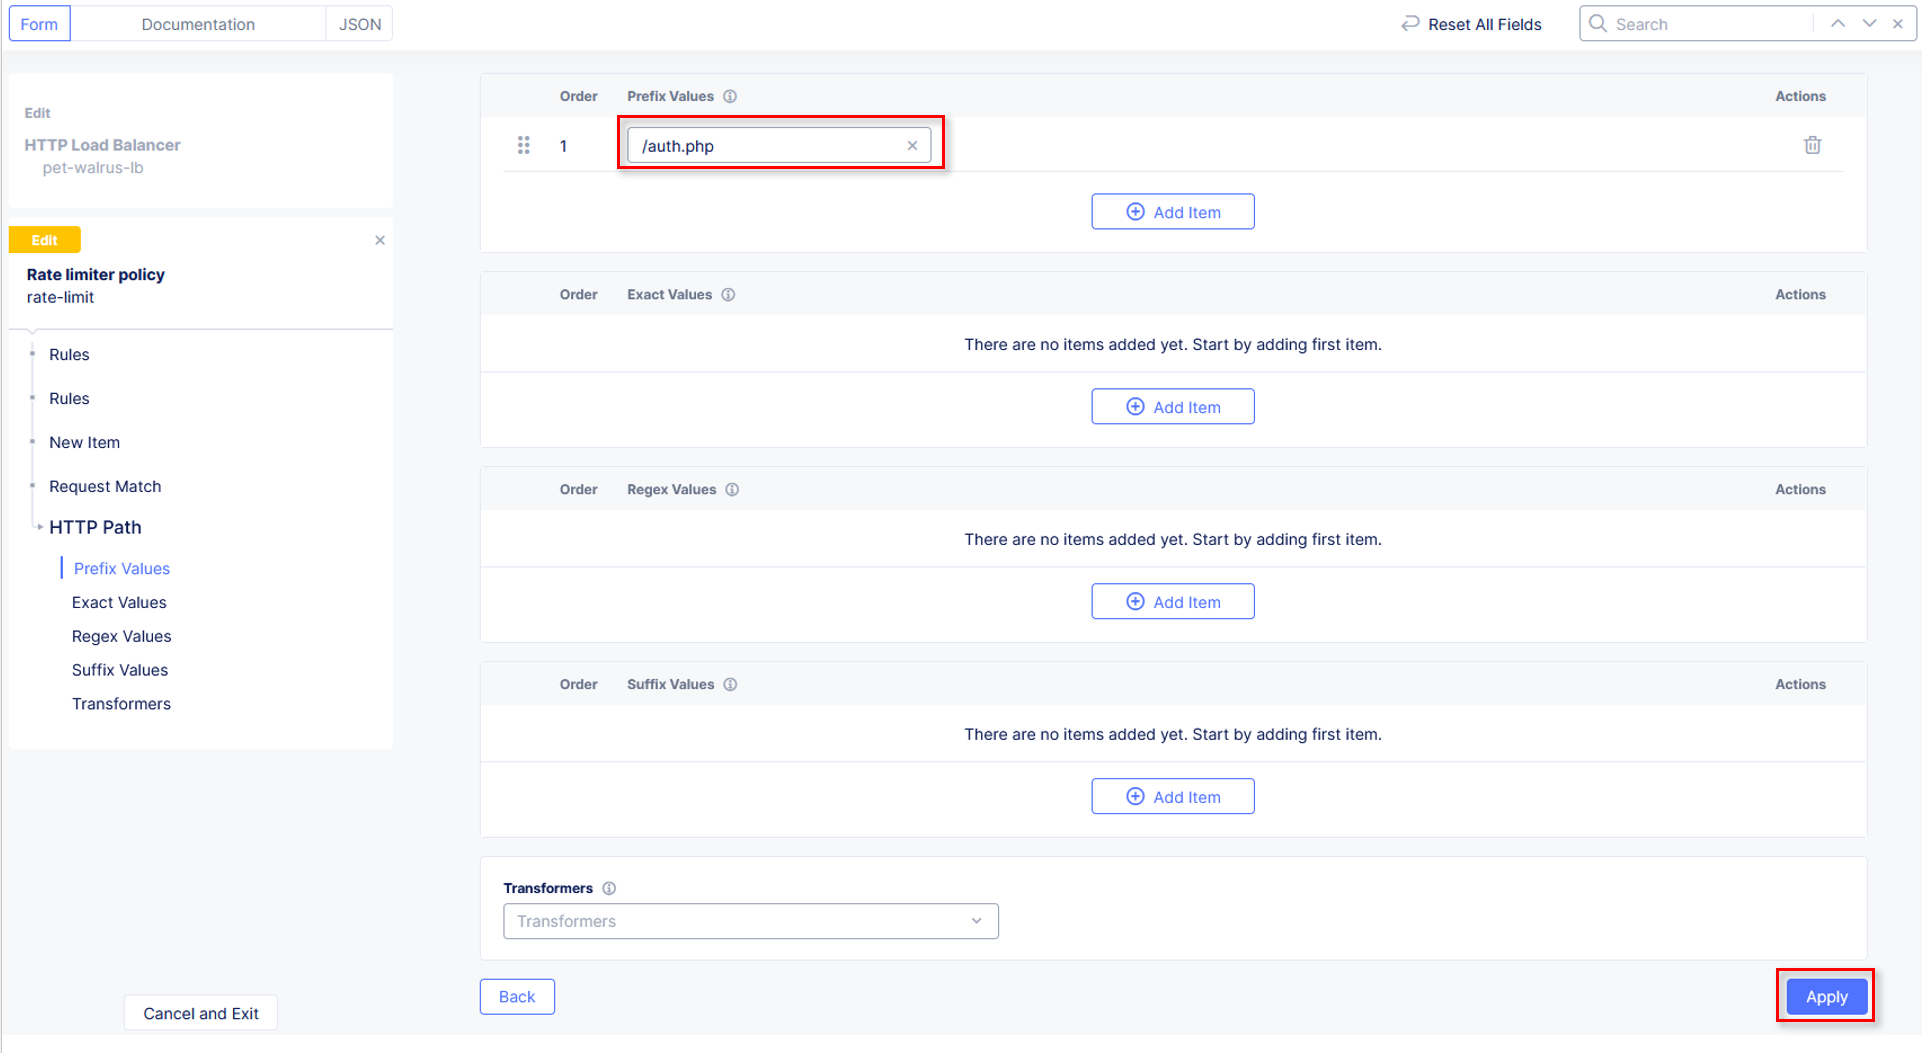
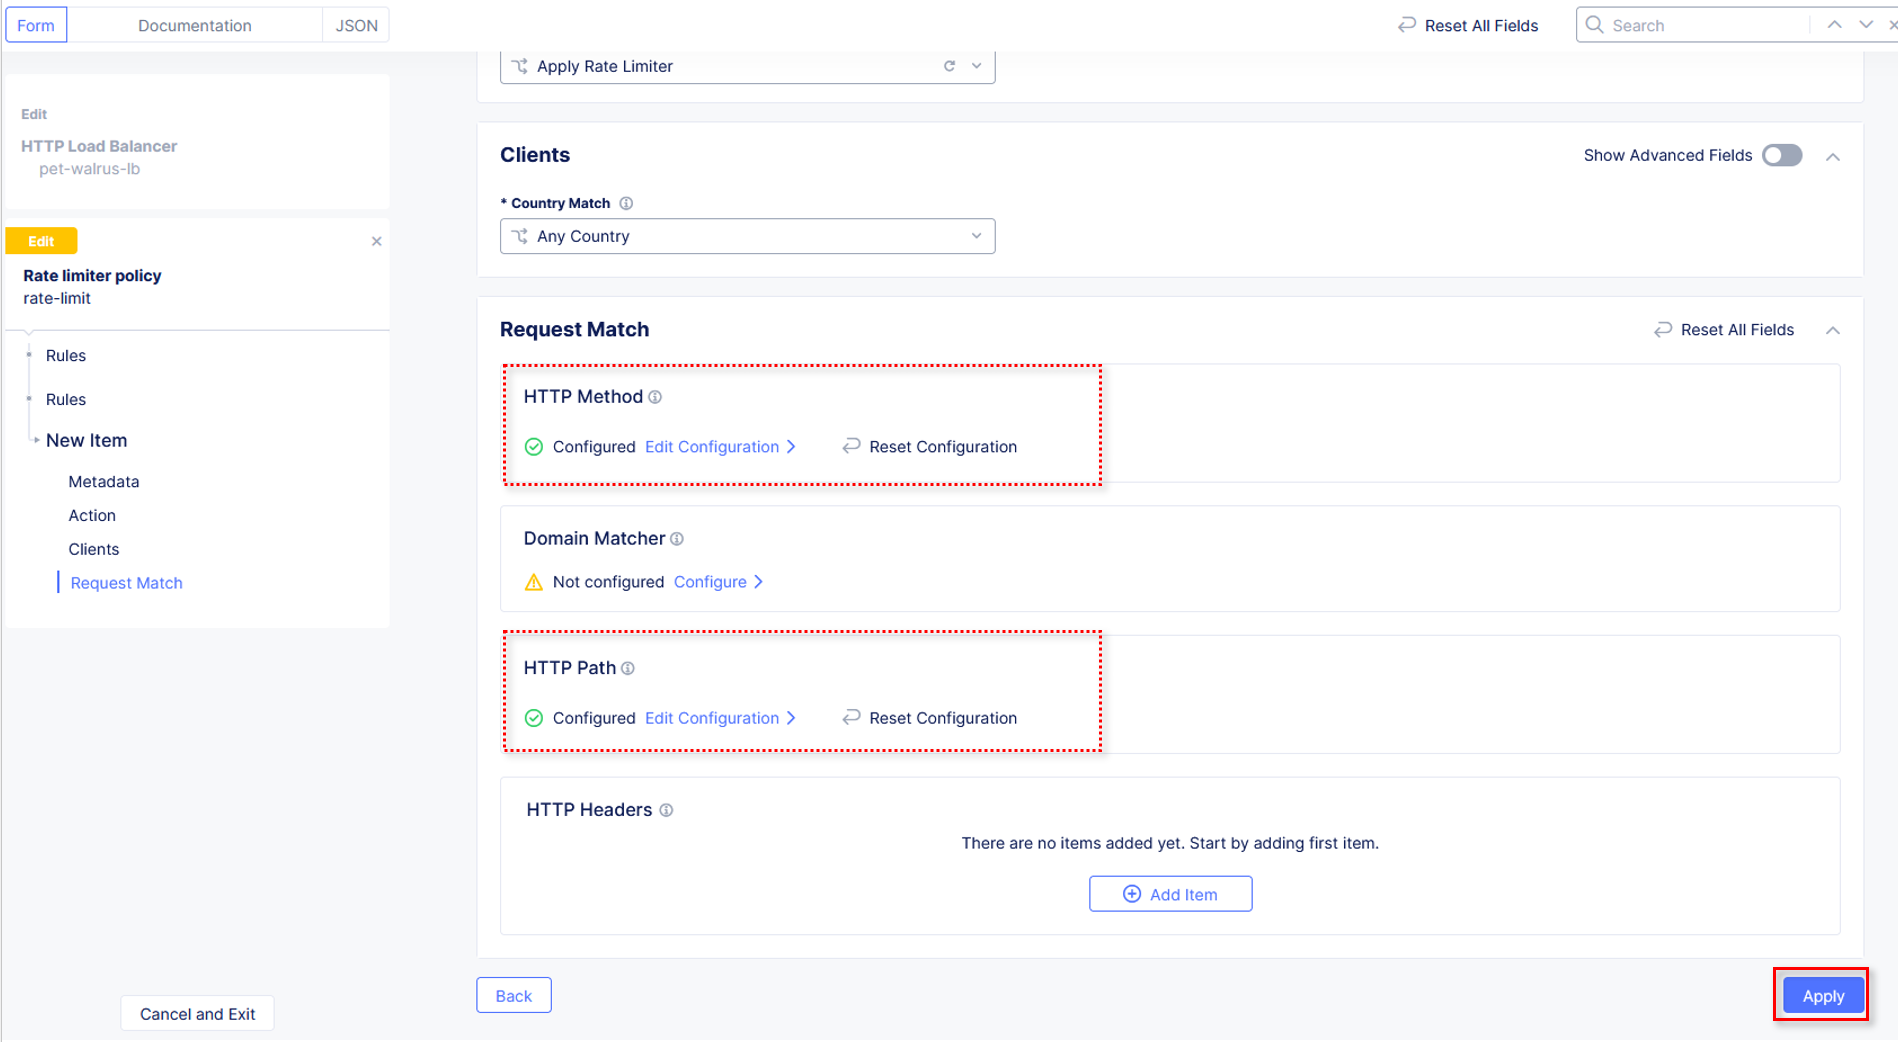
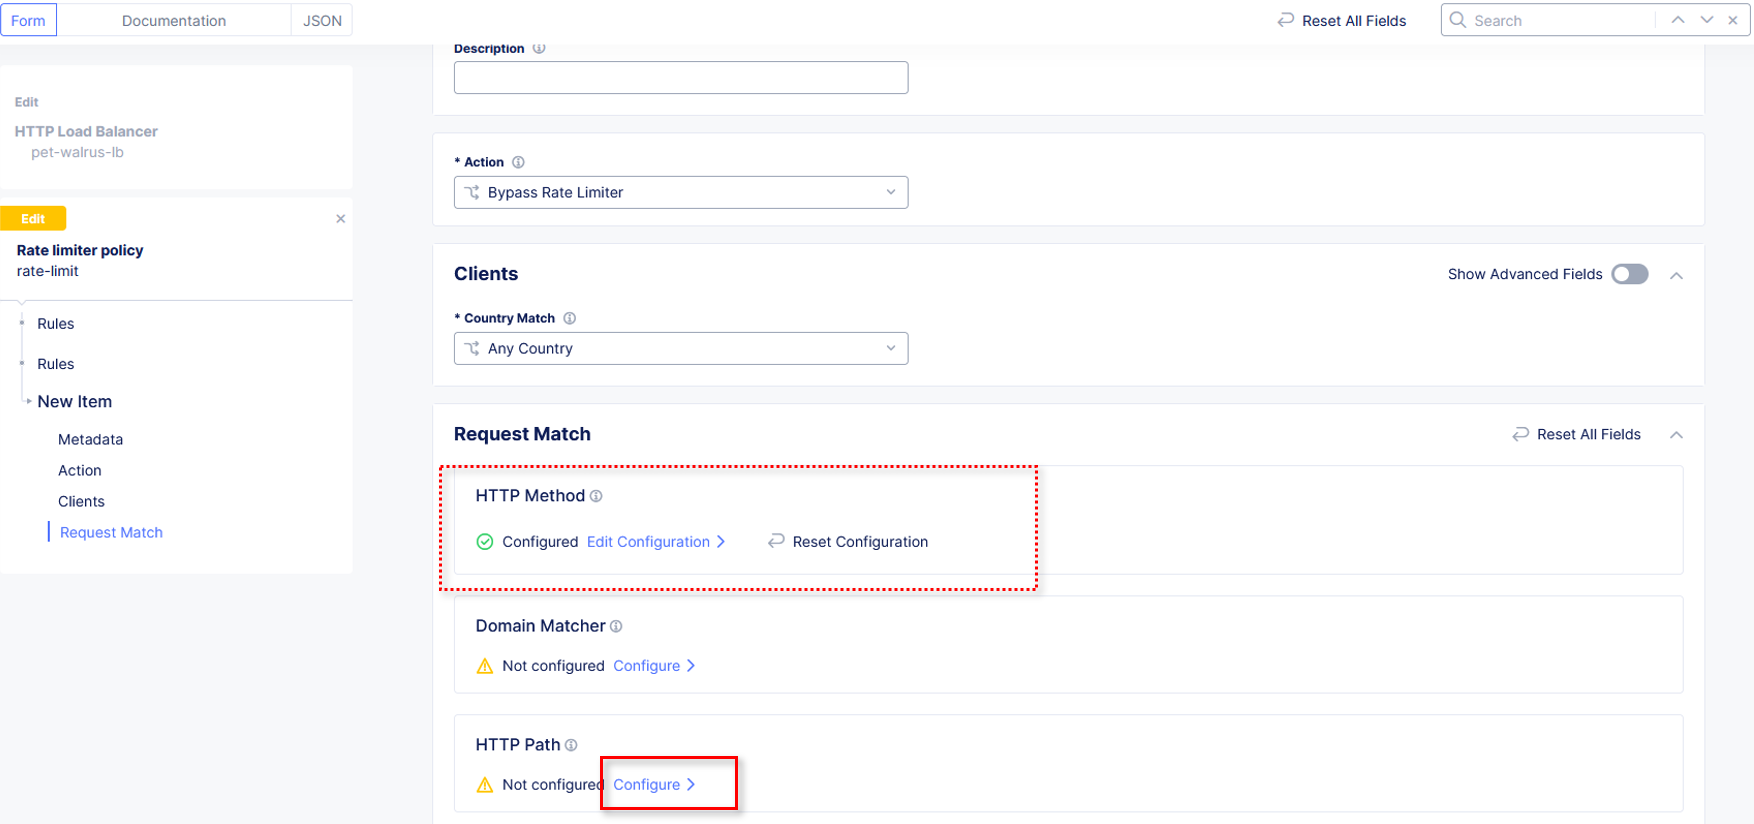
Observe that HTTP Method now appears Configured. Further down in the Request Match section, select the Configure link in the
HTTP Path section as shown.
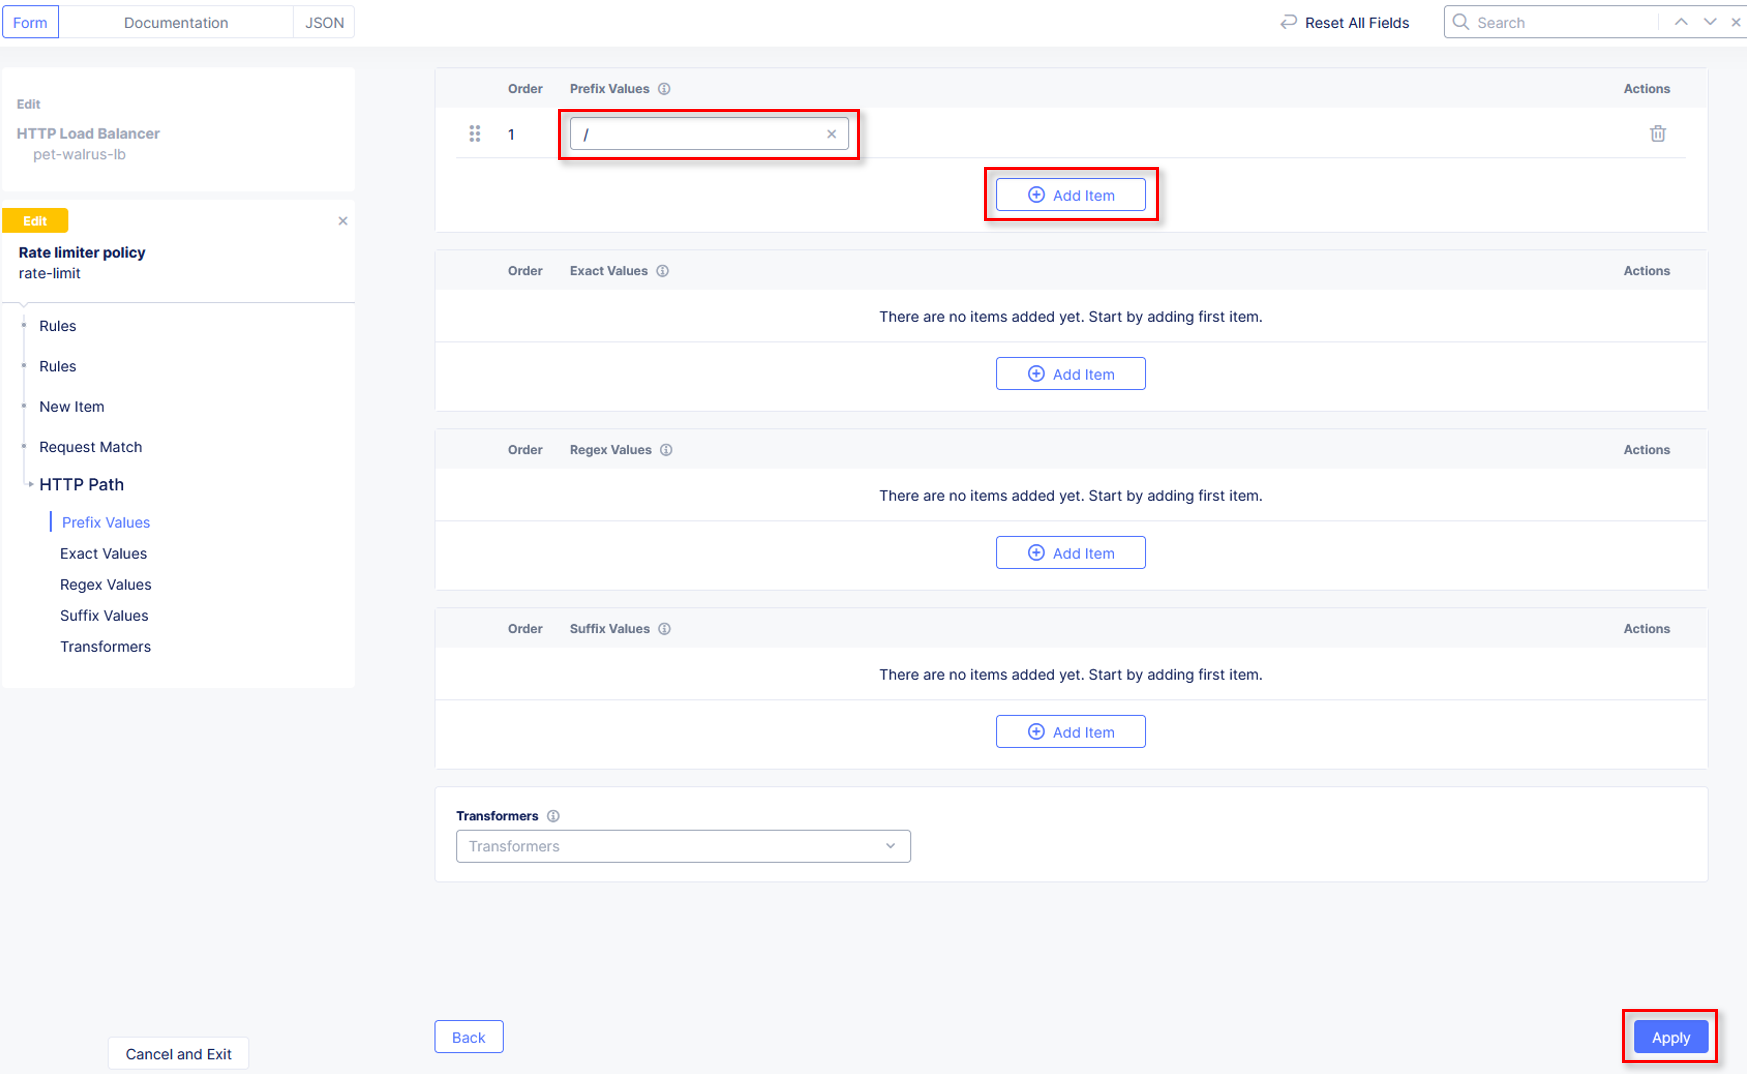
Observe the various Path definition options, click Add Item in the Prefix Values
section the input /auth.php as shown and then click Apply.
|
|
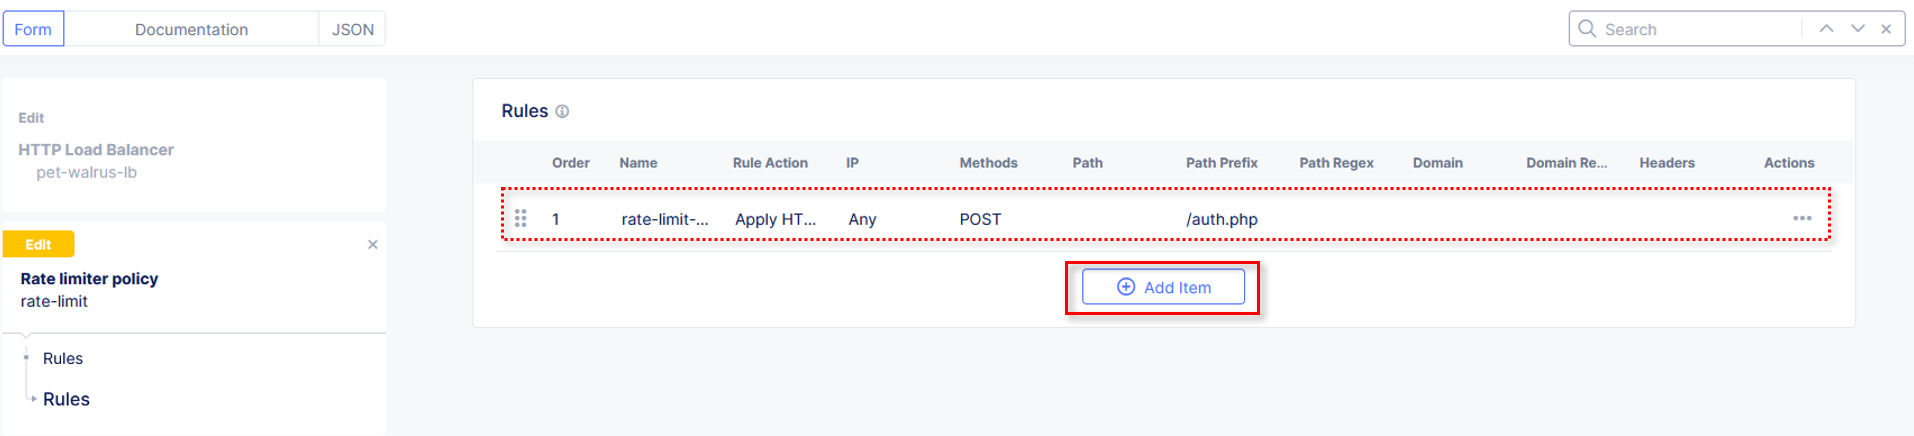
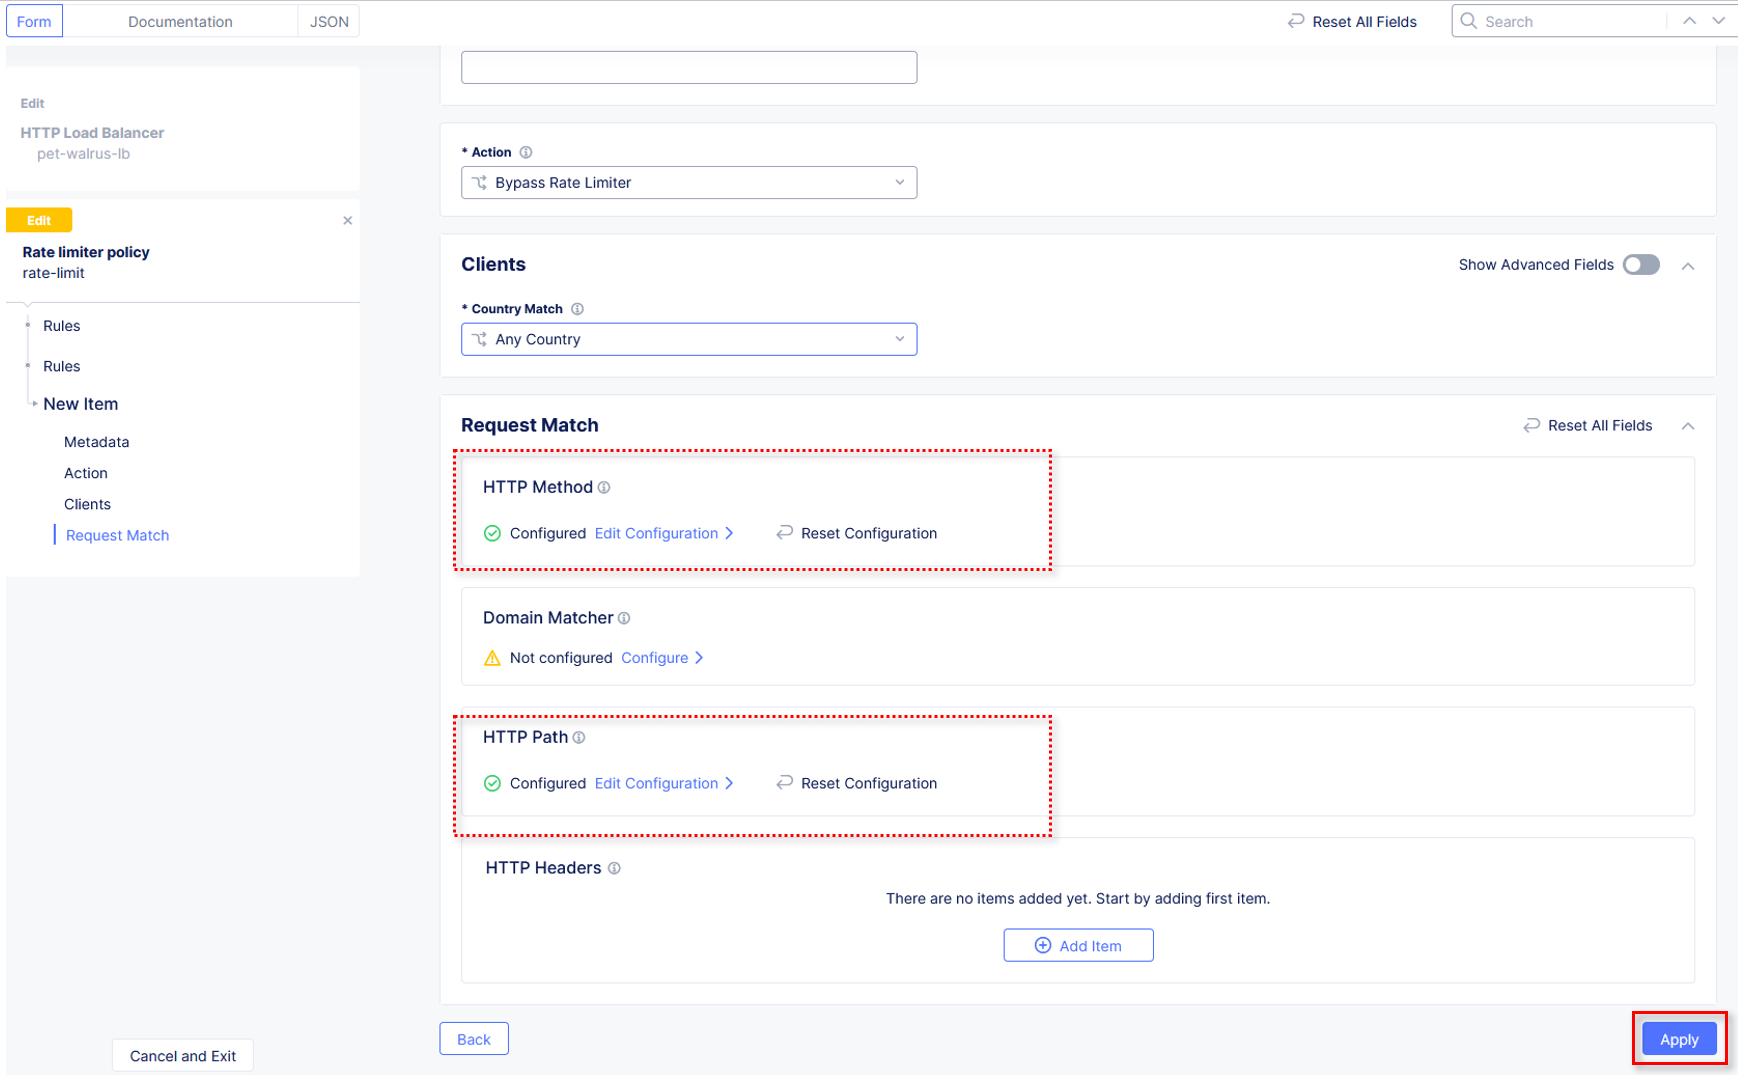
Observe that HTTP Path now also appears Configured. Click Apply on the
Rate Limiter Policy window.
Observe the rate limit rule just created and click Add Item to build another rule.
|
|
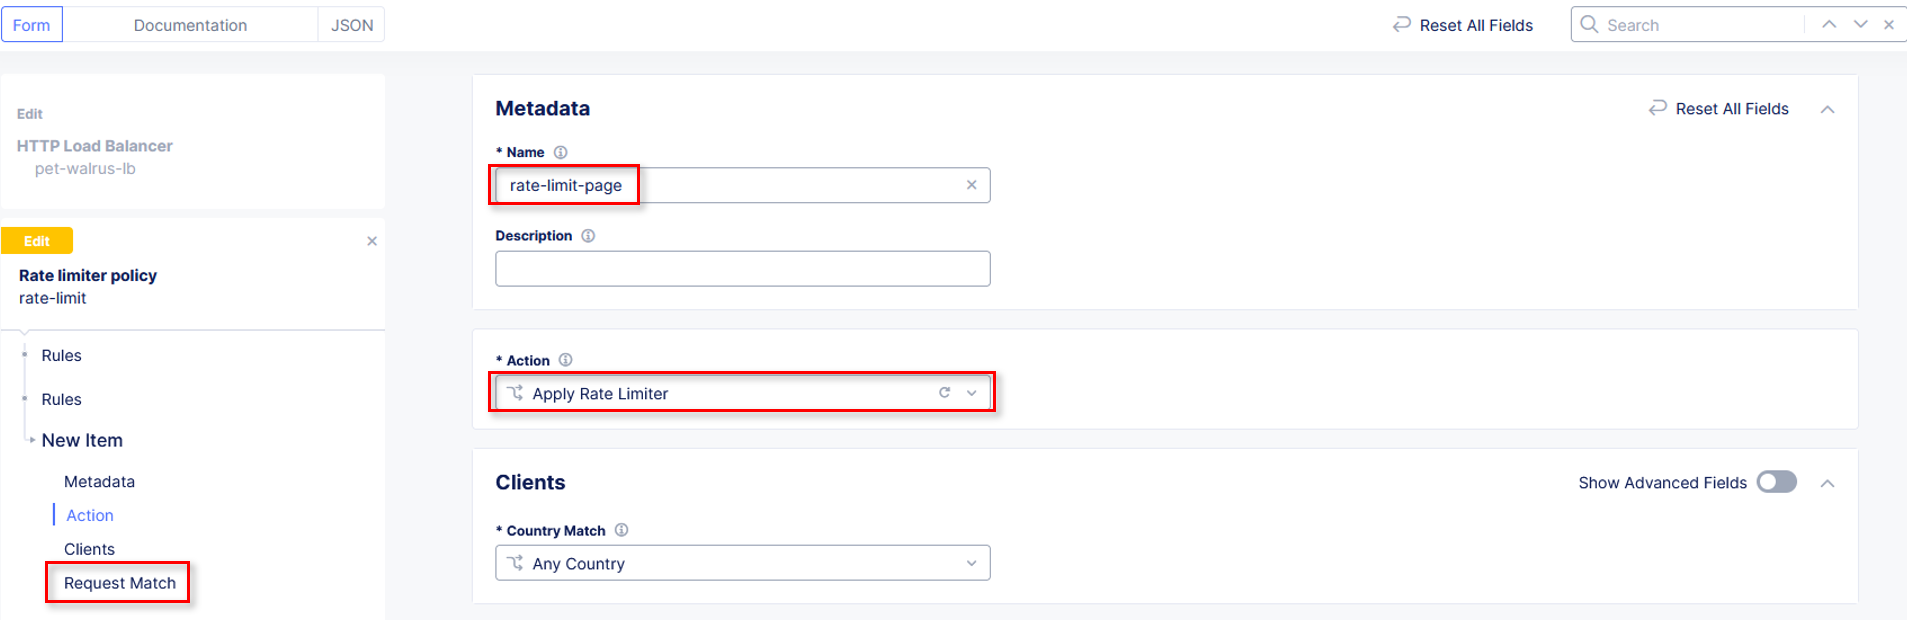
In the Rate Limiter Policy window within the Metadata section input
rate-limit-page into the Name field.
Using the Actions drop-down select, Apply Rate Limiter. In the left-hand navigation, click on Request Match.
|
|
In the Request Match section and select the Configure link in the HTTP Method
section as shown.
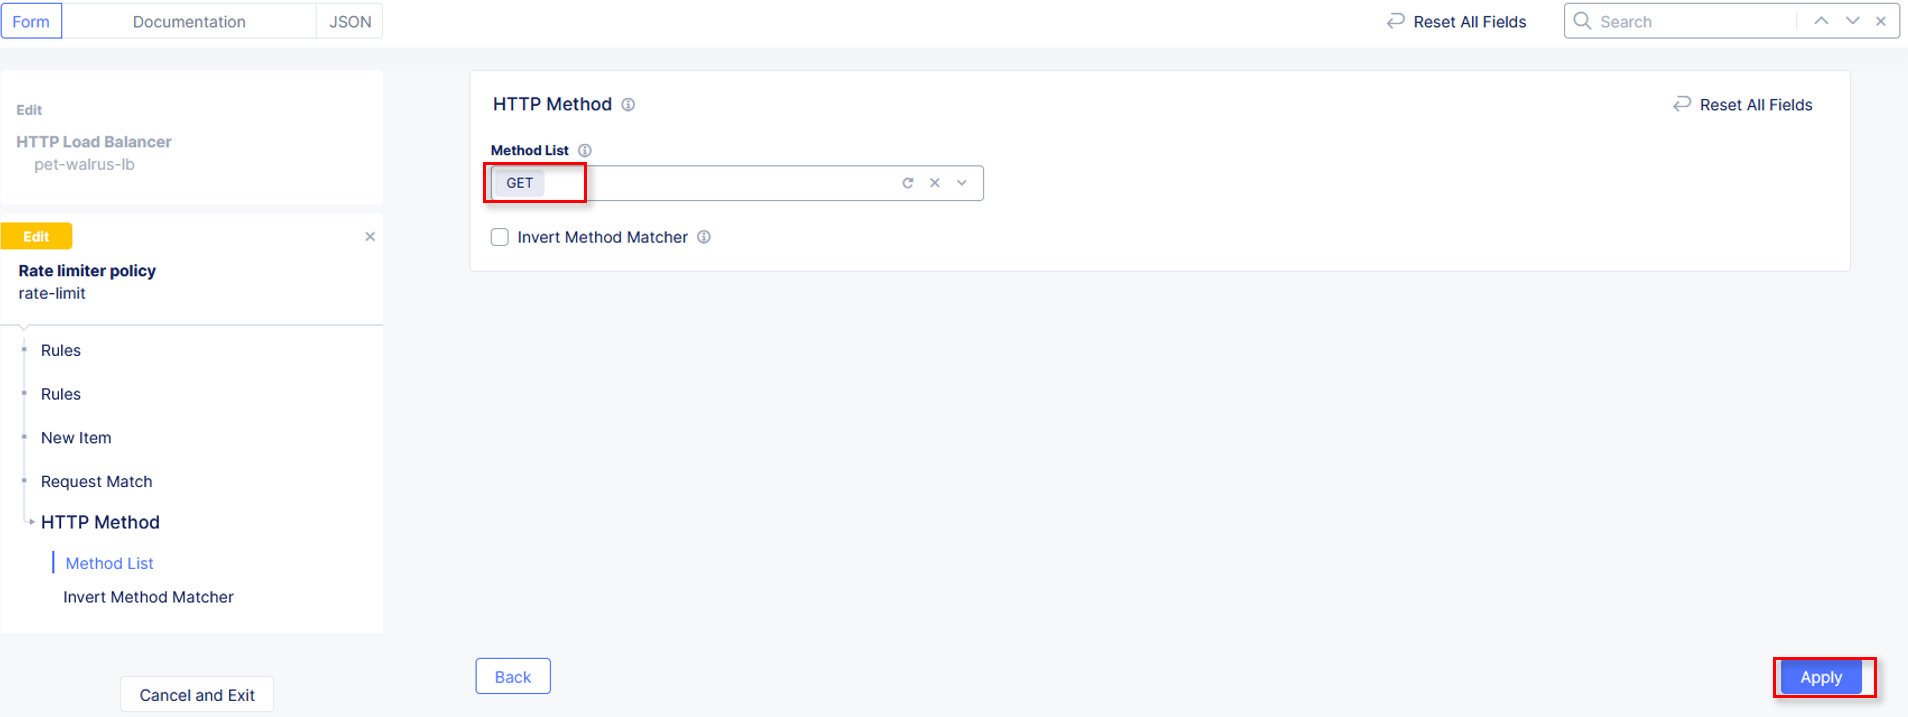
In the resulting HTTP Method window under Method List, select GET then
click Apply.
|
|
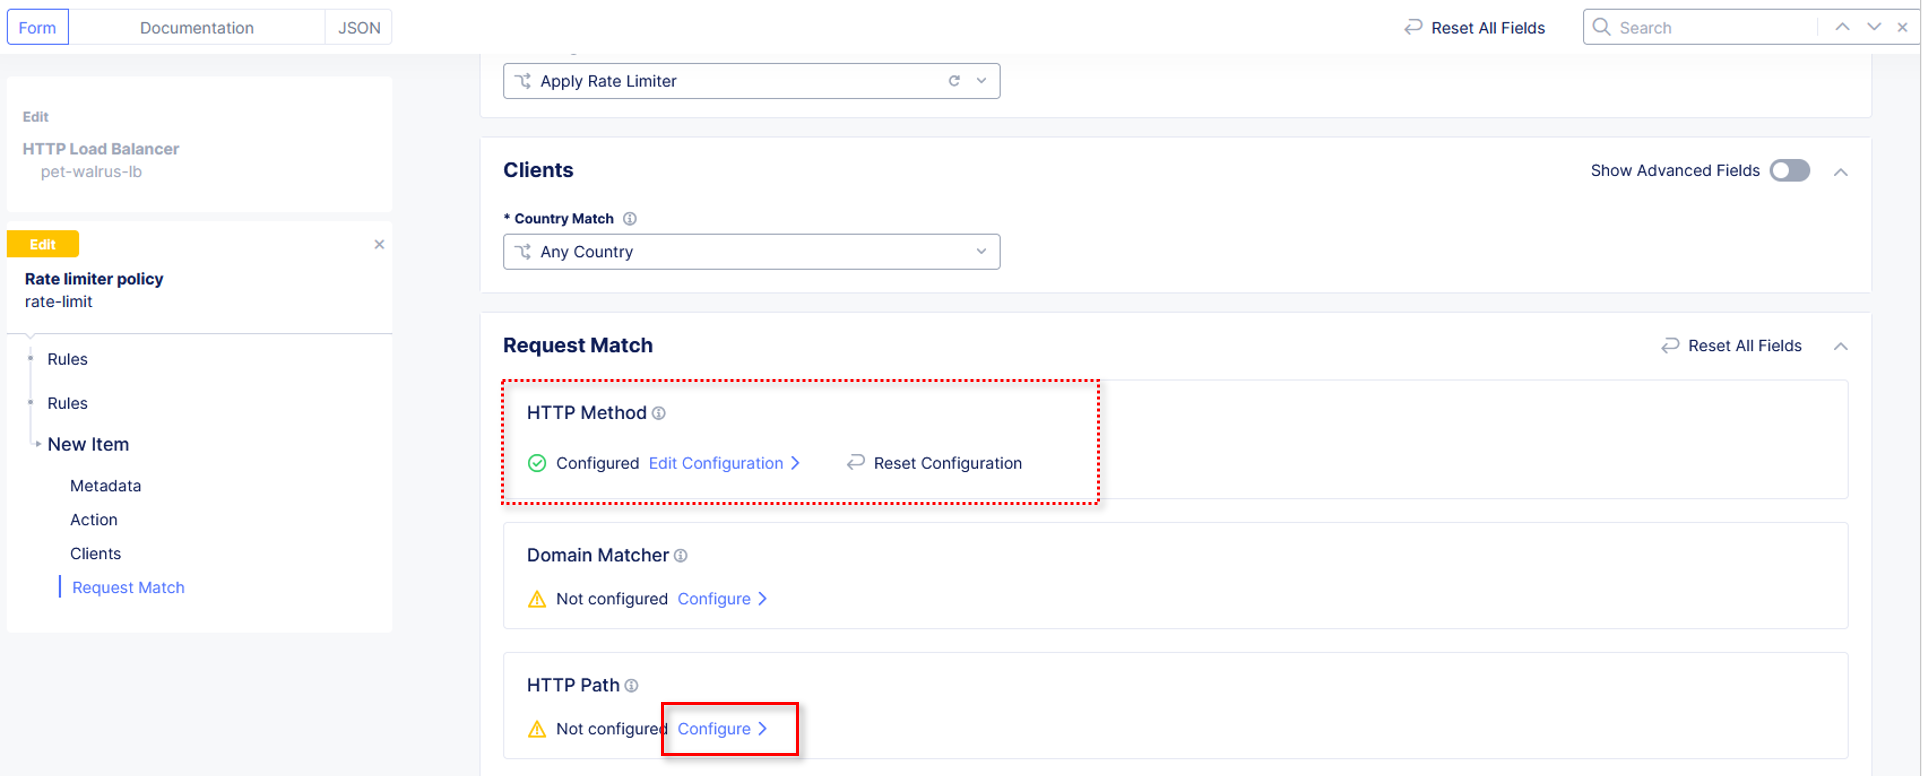
Observe that HTTP Method now appears Configured. Further down in the Request Match section, select the Configure link in the
HTTP Path section as shown.
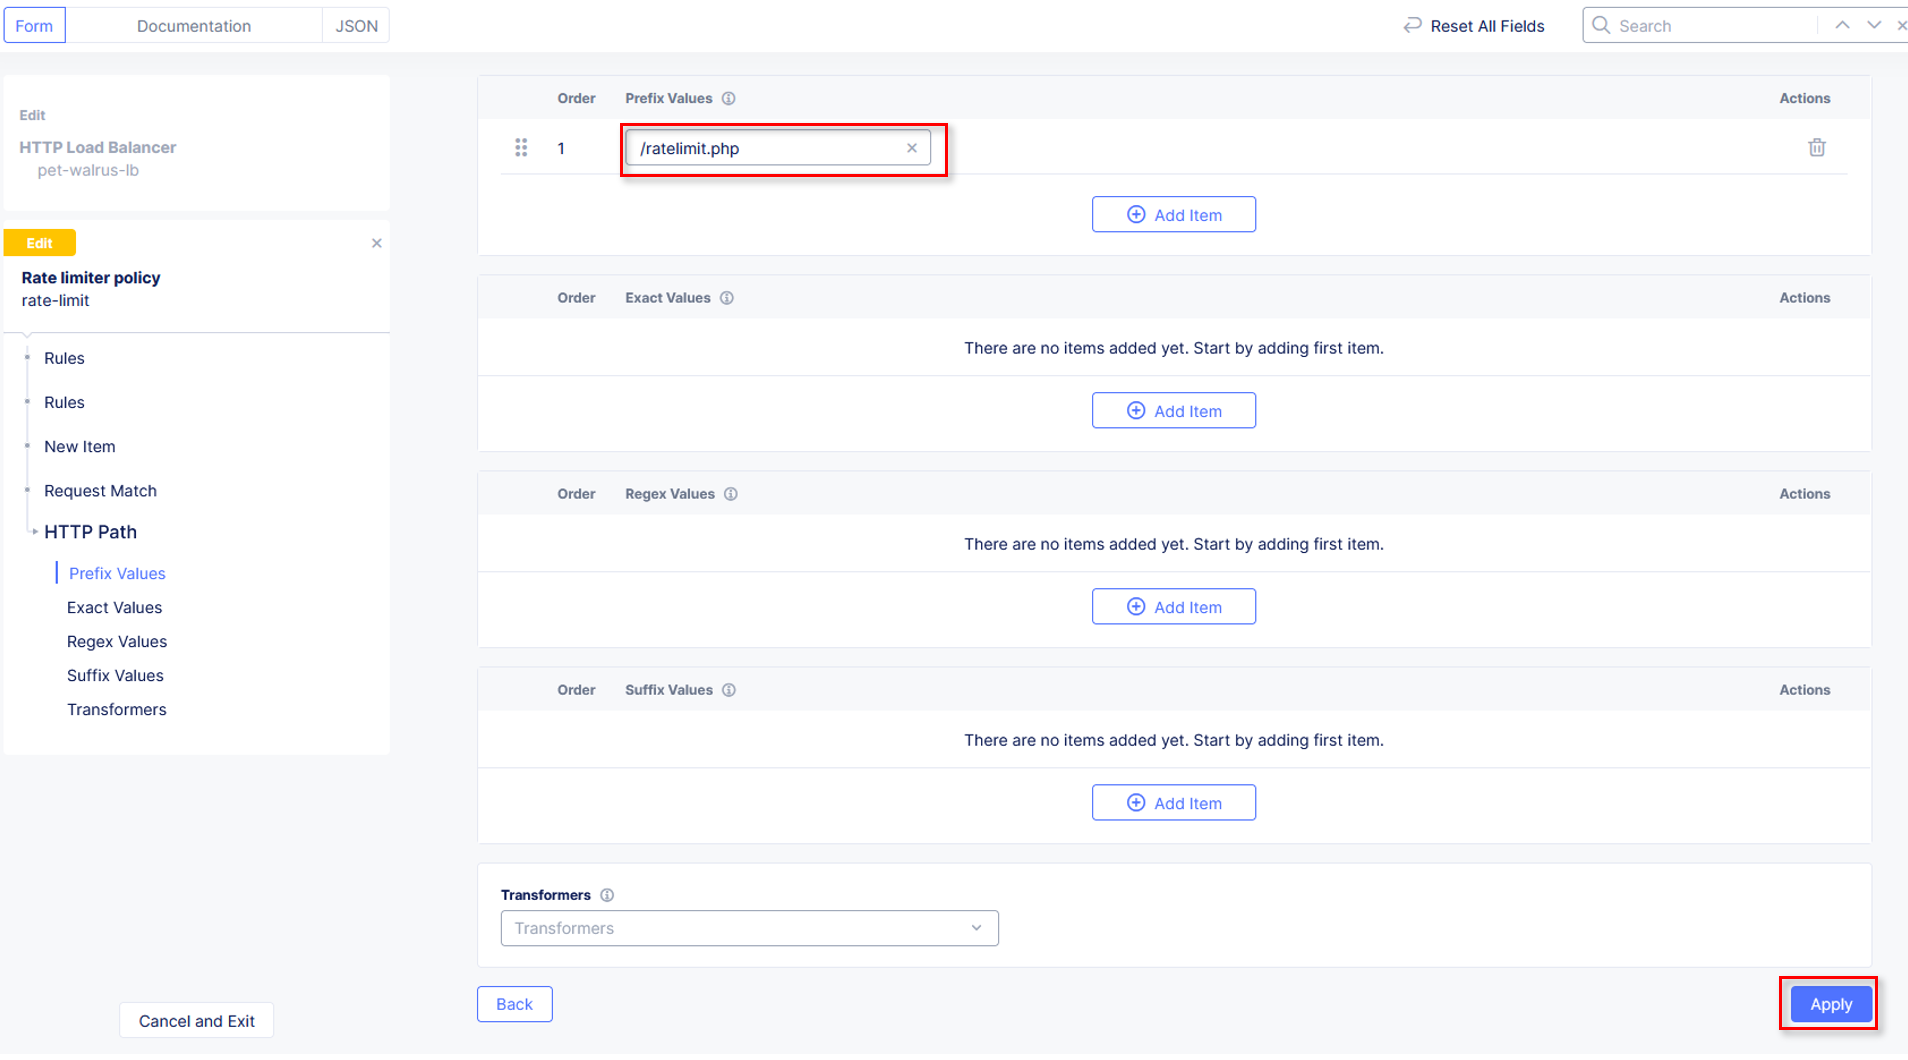
Observe the various Path definition options, click Add Item in the Prefix Values
section the input /ratelimit.php as shown and then click Apply.
|
|
Observe that HTTP Path now also appears Configured. Click Apply on the
Rate Limiter Policy window.
Observe the added rate limit rule and click Add Item to build another rule.
|

|
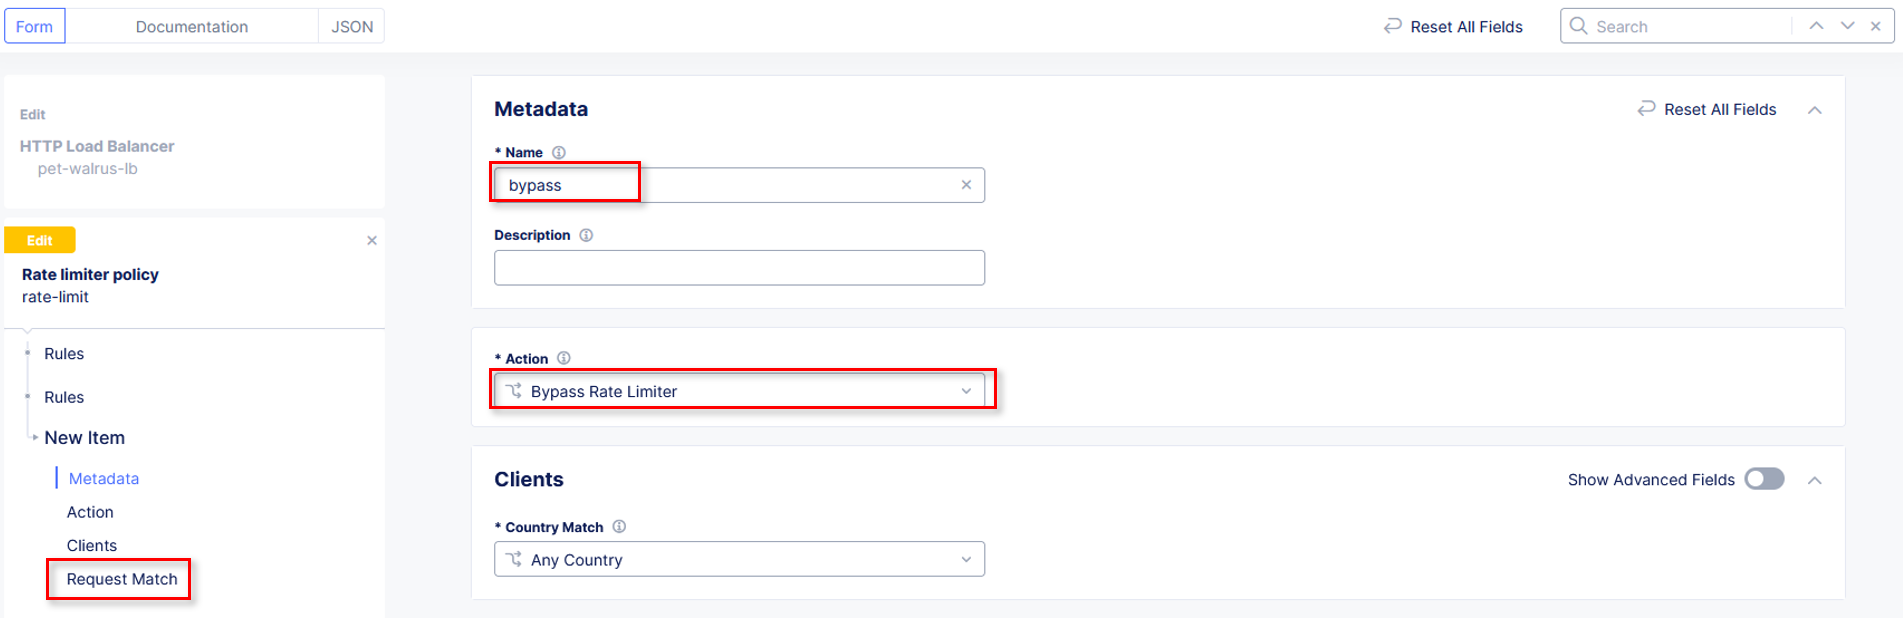
In the Rate Limiter Policy window within the Metadata section input
bypass into the Name field.
Using the Actions drop-down, select Bypass Rate Limiter. In the left-hand navigation, click on Request Match.
|
|
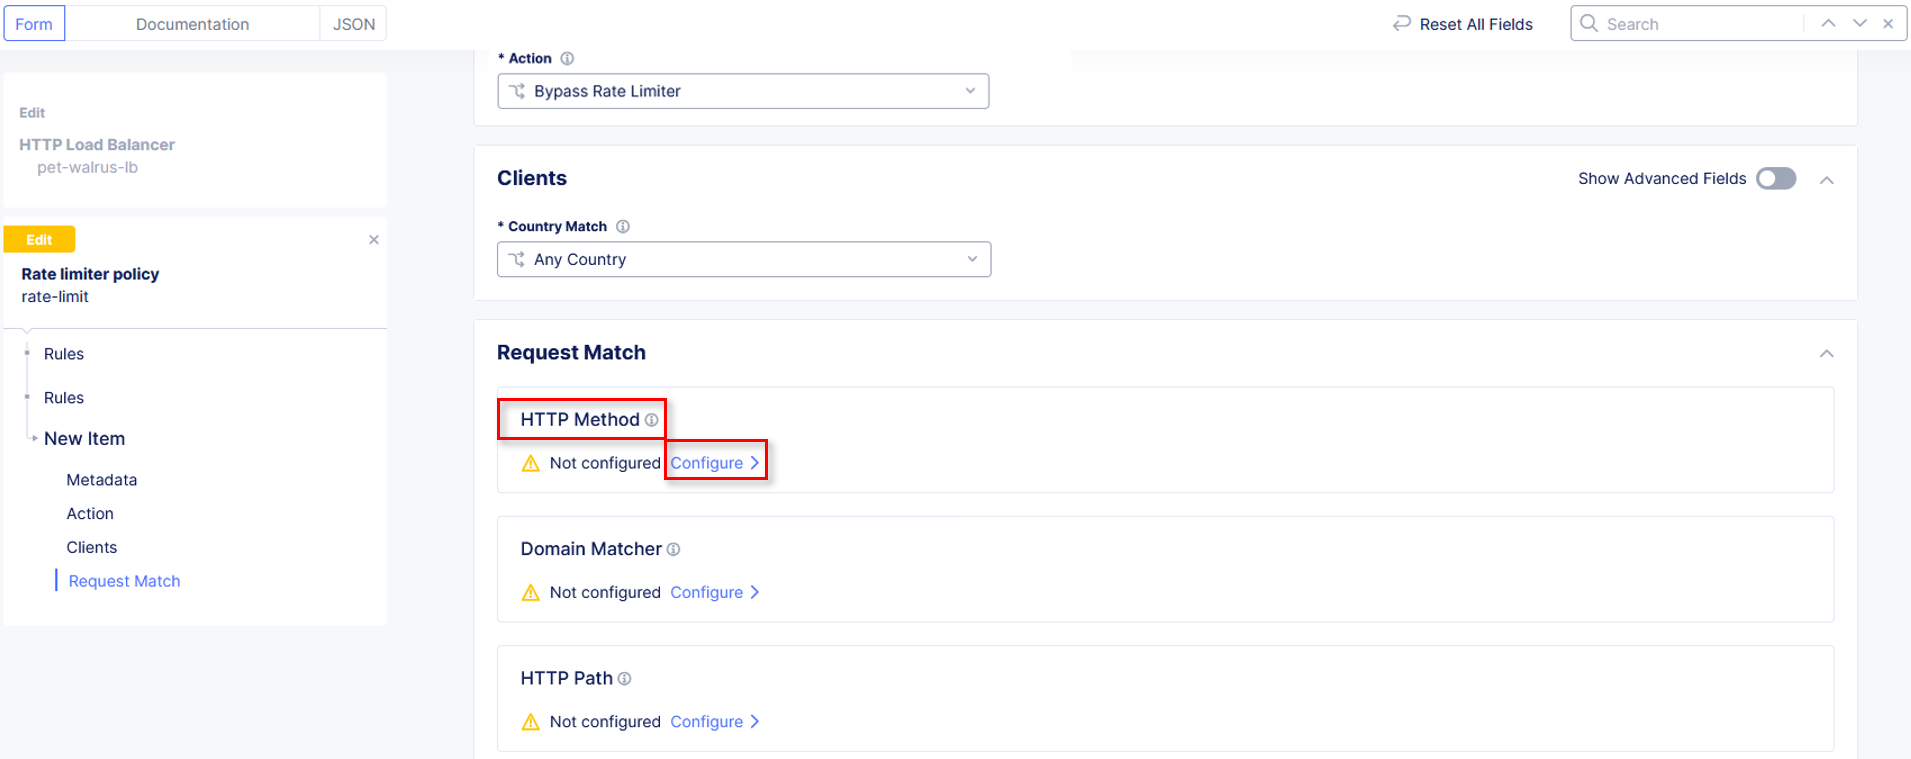
In the Request Match section, select the Configure link in the HTTP Method
section as shown.
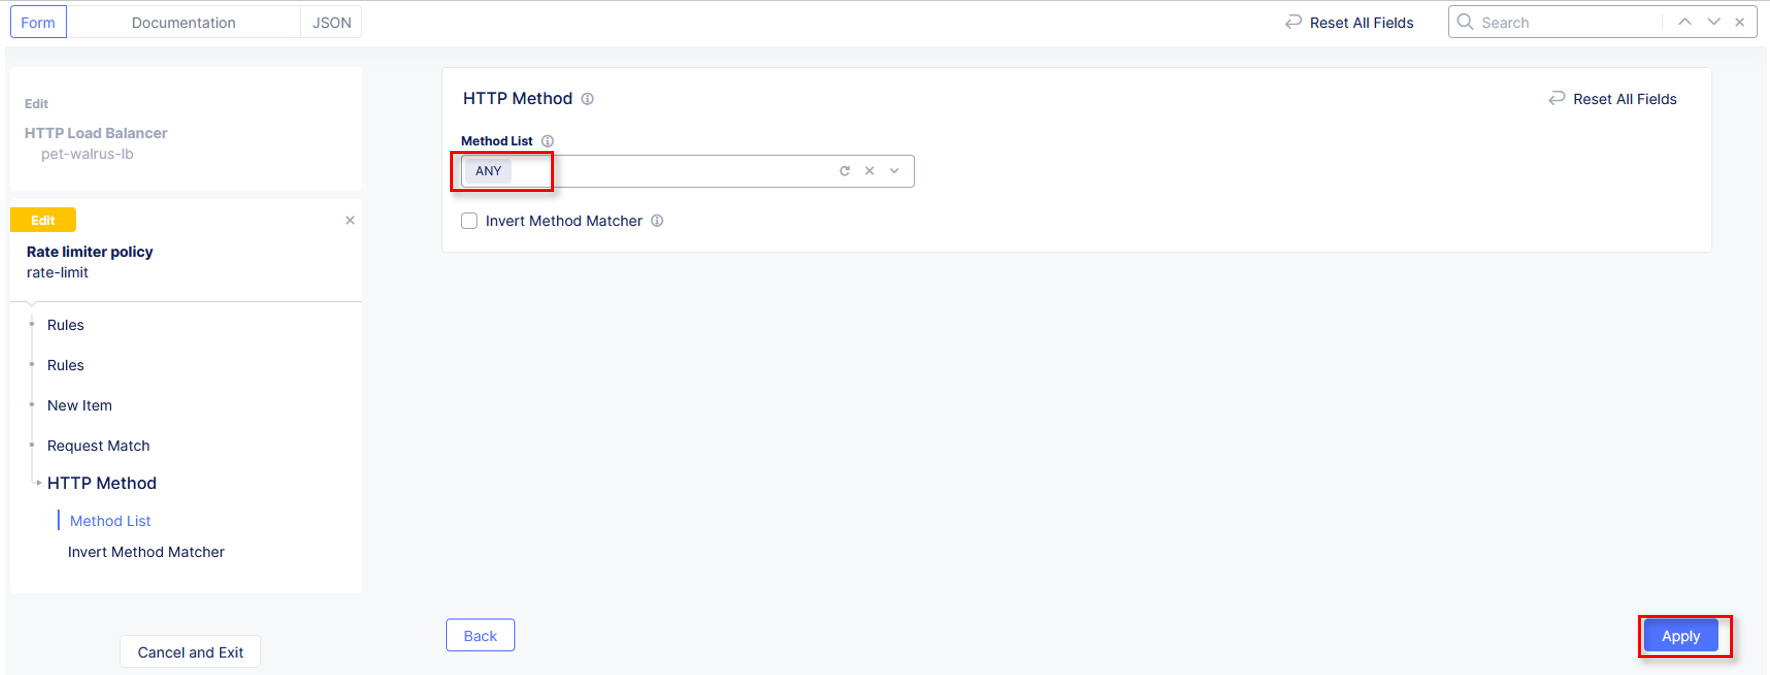
In the resulting HTTP Method window under Method List, select ANY then
click Apply.
|
|
Observe that HTTP Method now appears Configured. Further down in the Request Match section, select the Configure link in the
HTTP Path section as shown.
Observe the various Path definition options, click Add Item in the Prefix Values
section the input / as shown and then click Apply.
|
|
Observe that HTTP Path now also appears Configured. Click Apply on the
Rate Limiter Policy window.
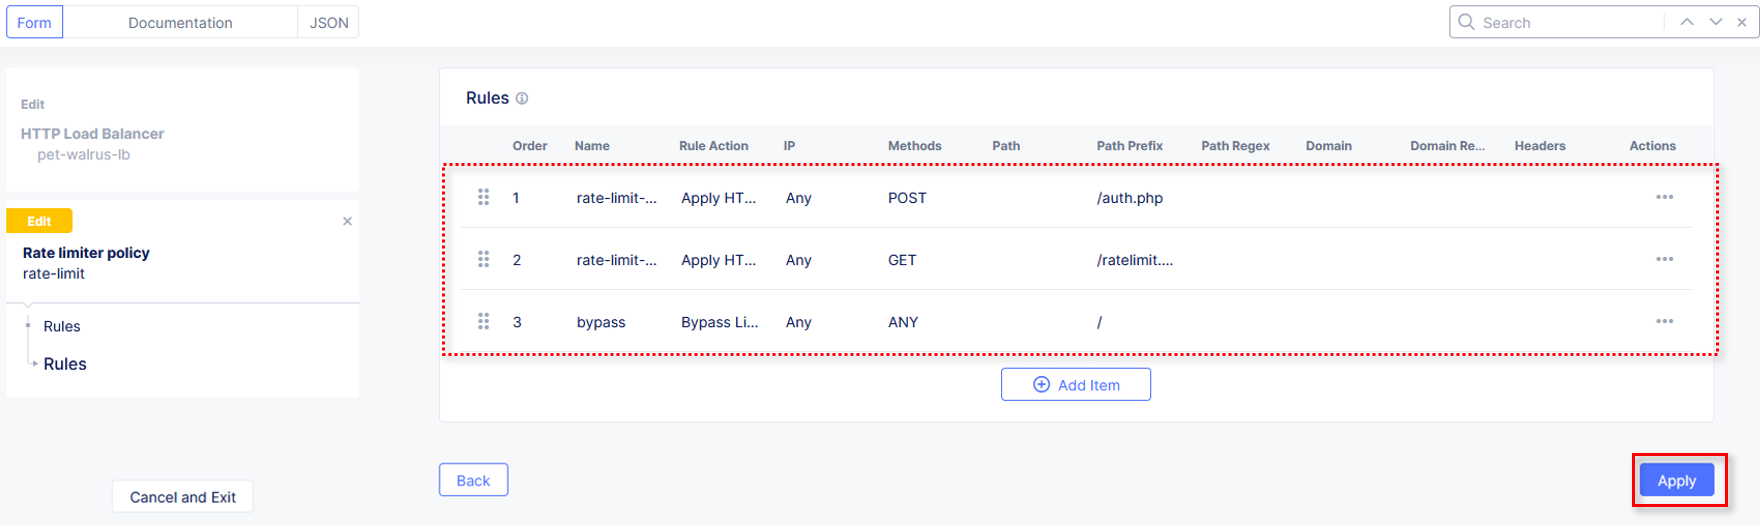
Observe the three created rate limit rules and click Apply.
|
|
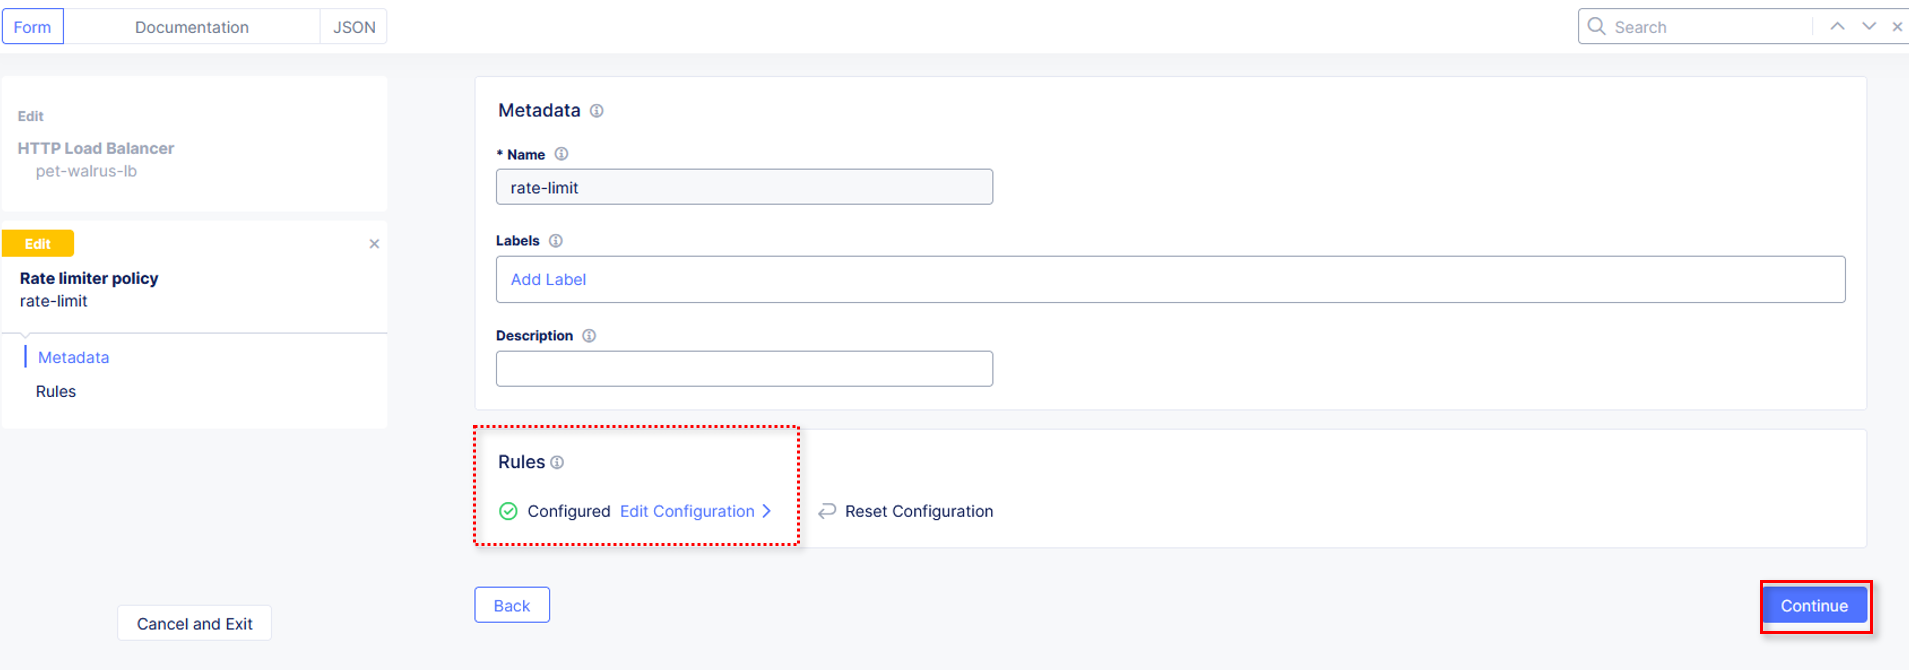
Observe that rules are now Configured. Complete the custom Rate Limiter Policy by
clicking Continue.
|
|
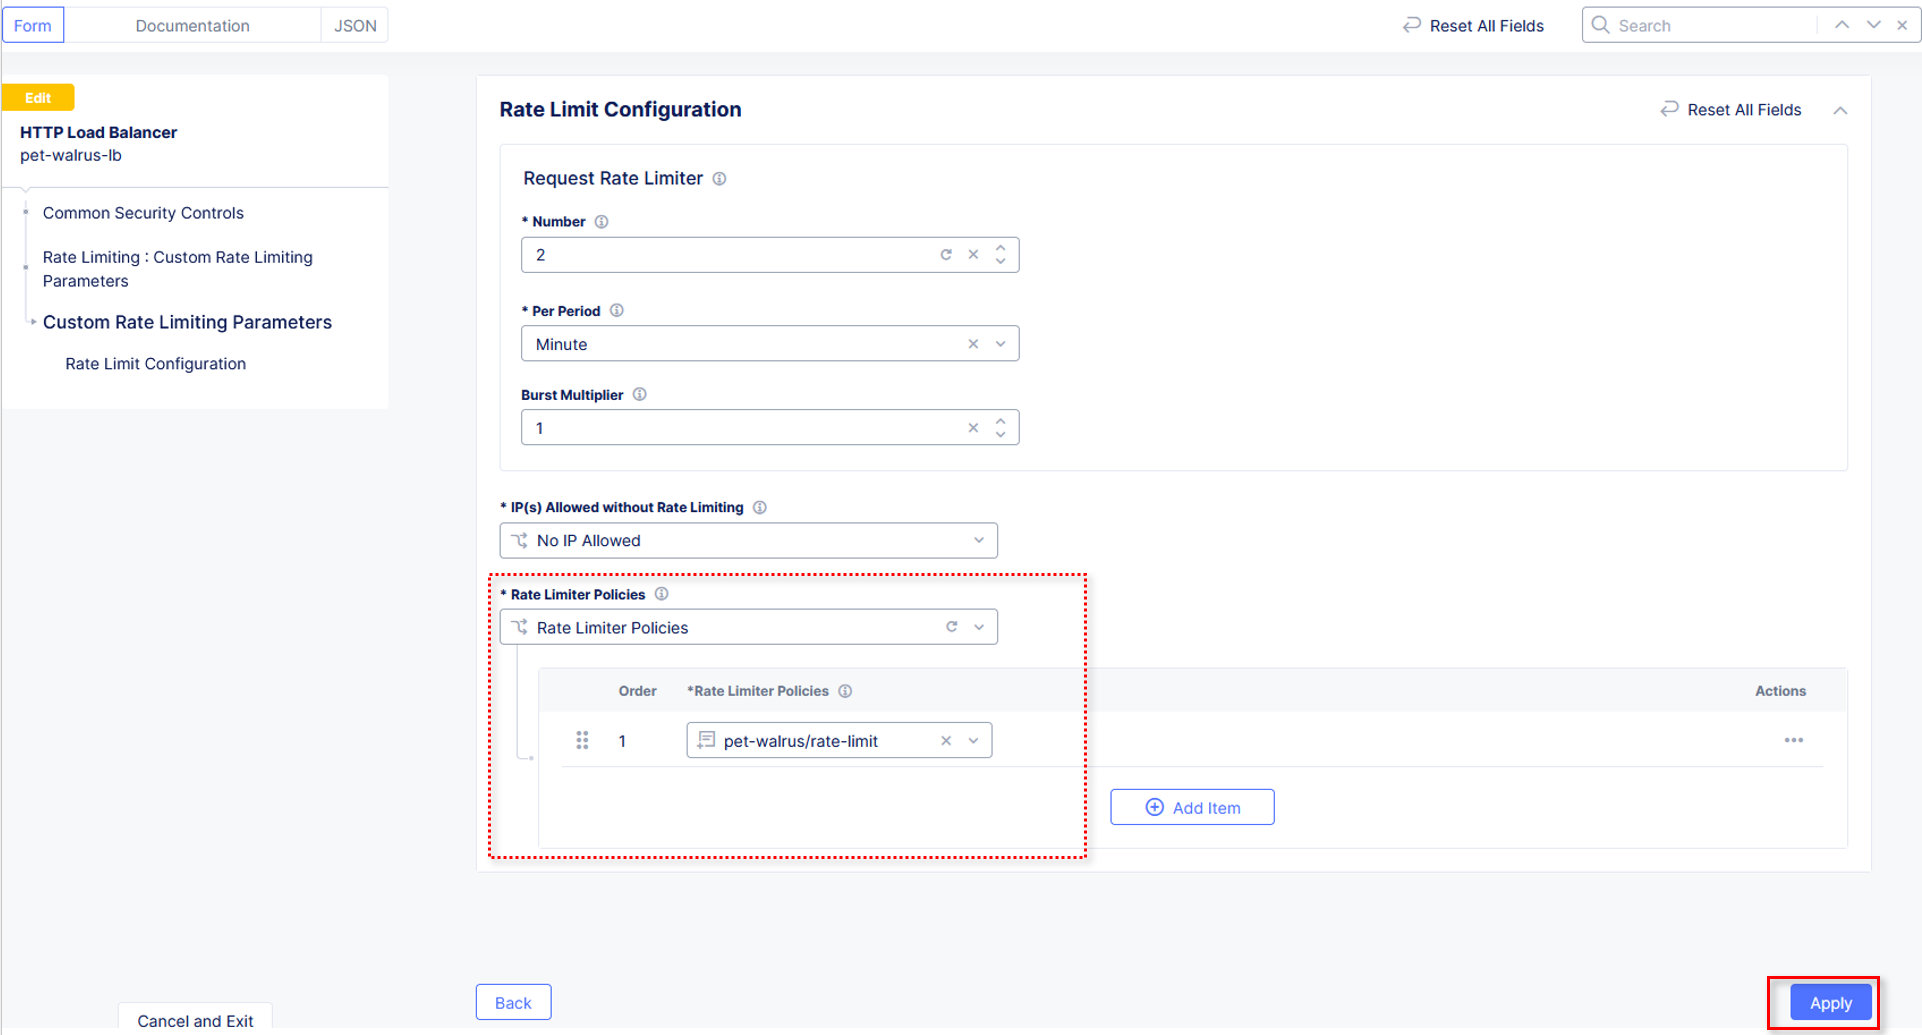
Observe the Request Rate Limiter options for number of requests, the Per Period
interval and the Burst Multiplier.
Also observe that IPs can be allowed without Rate Limiting policies being applied Click Apply to add the Rate Limit Configuration to the application Load Balancer.
Note
Although only one policy is being added, multiple Rate Limit policies can be attached.
|
|
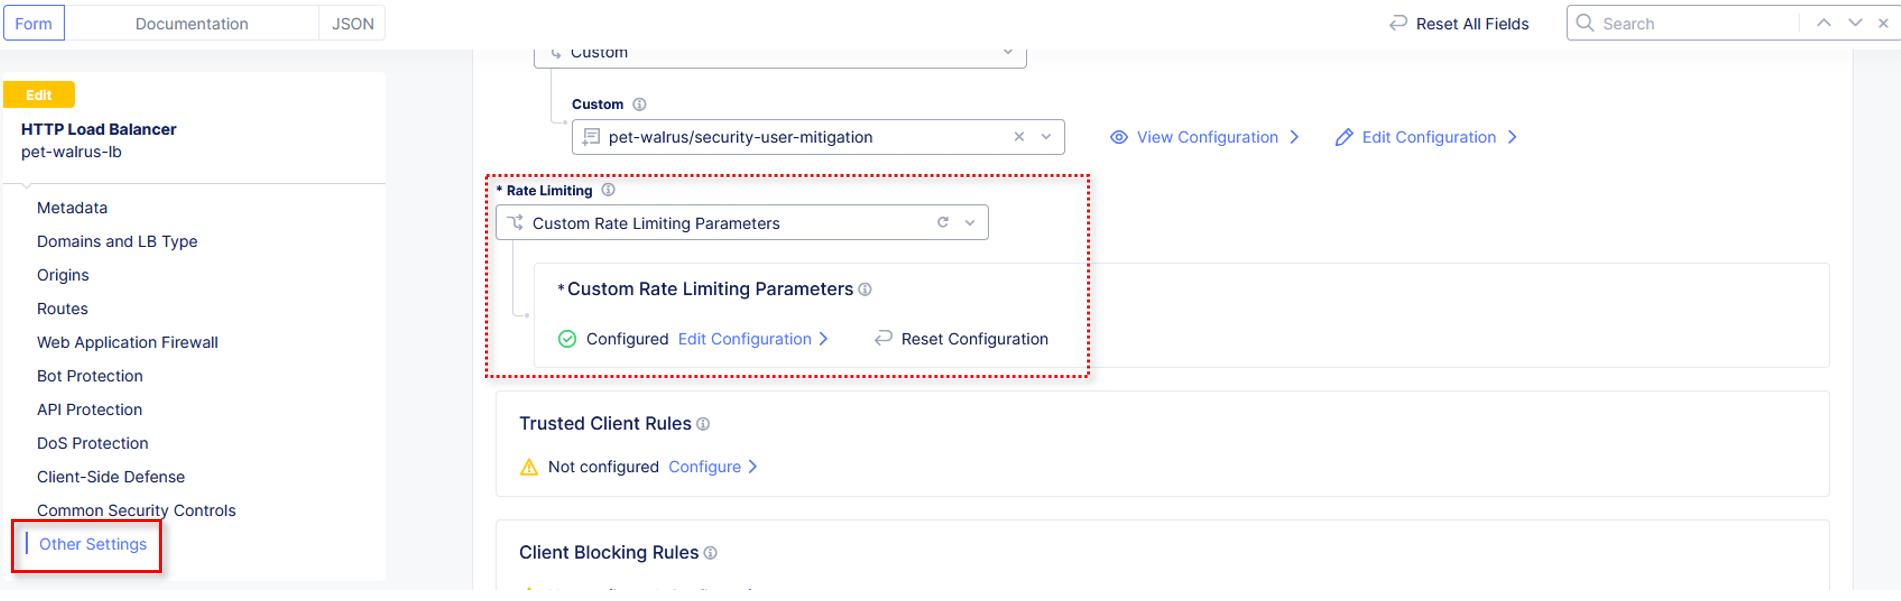
Observe that the Custom Rate Limiting Parameters now show Configured and then
click on Other Settings in the left-hand navigation.
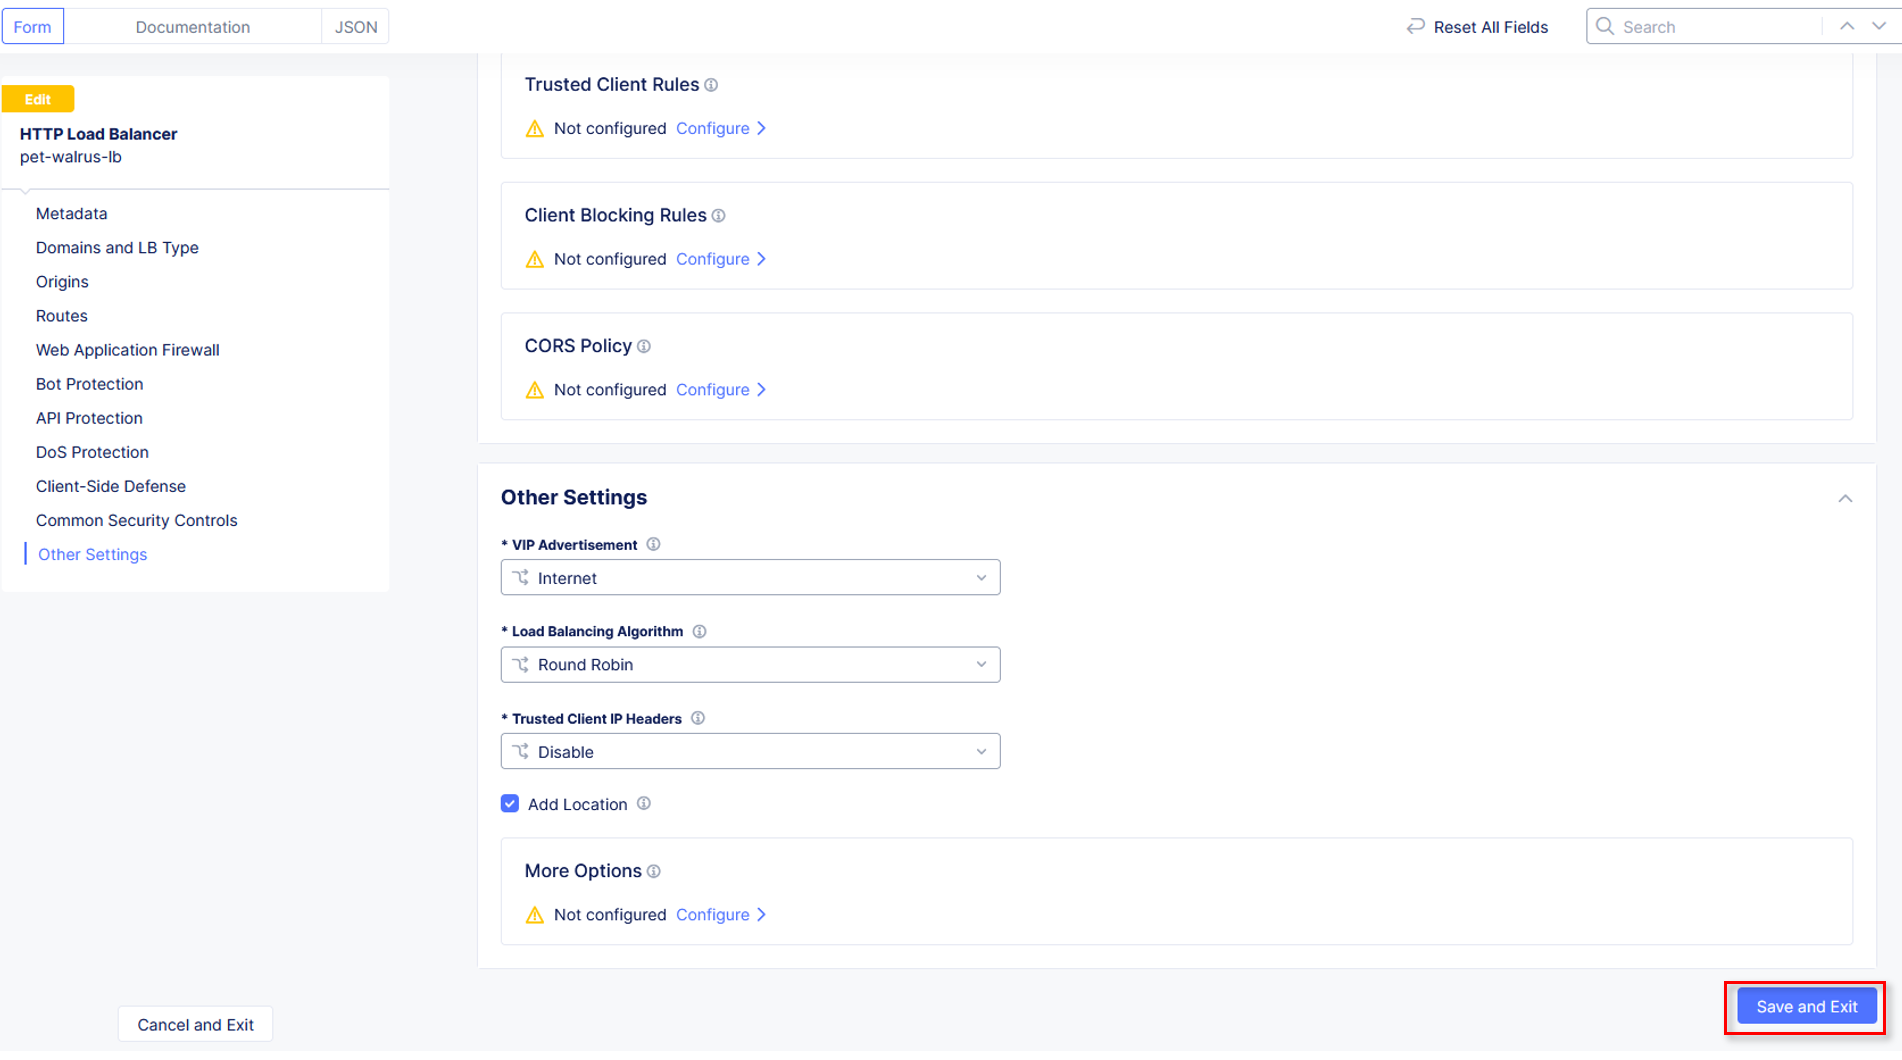
Once at the bottom of the HTTP Load Balancer configuration, click Save and Exit.
|
|
Task 3: Testing Rate Limiting
Now we will retest access to our website and see if our experience has indeed changed.
In your local web browser access the following link, replacing namespace with your own:
http://<namespace>.lab-sec.f5demos.com/ratelimit.php
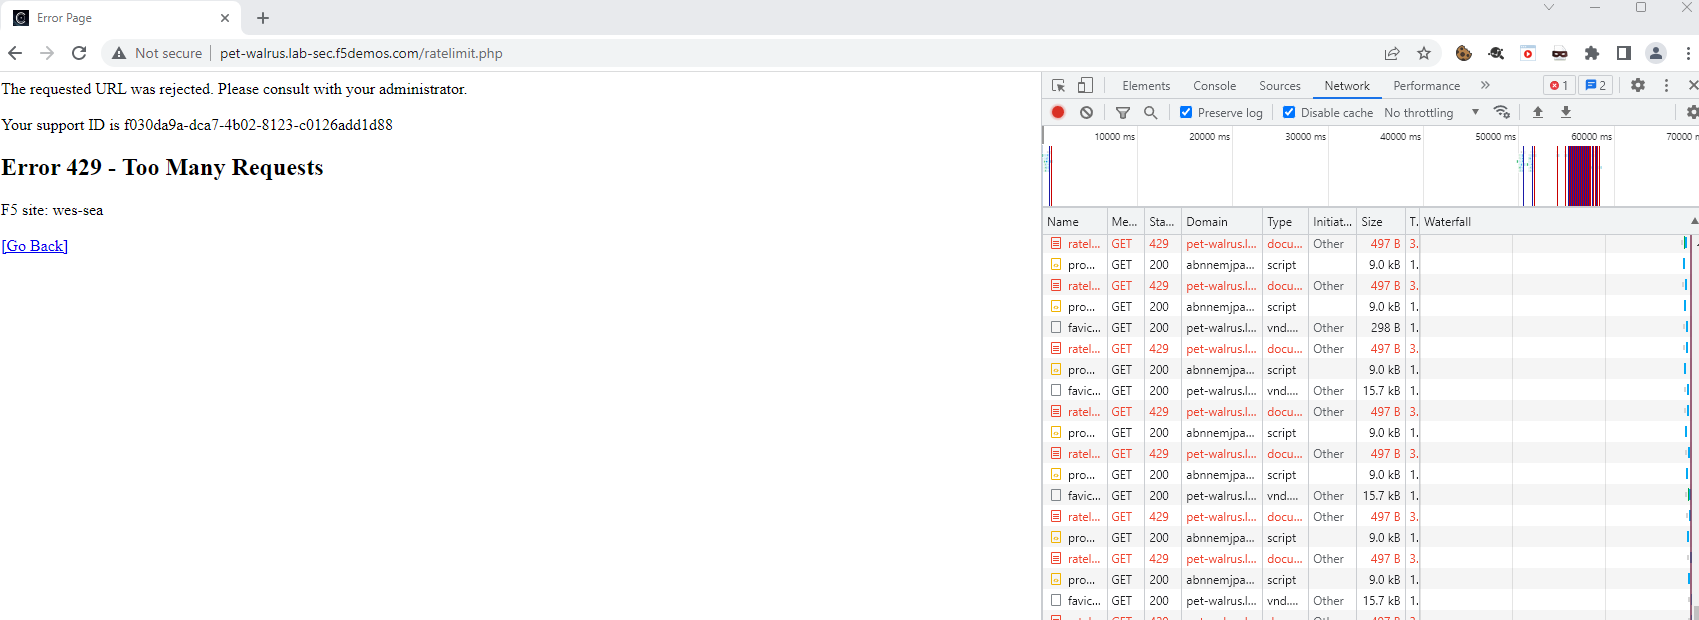
Refresh the page multiple times and quickly… did you experience a different result?
Rate Limited responses receive 429 response codes and block pages as shown in the
image below.
|
|
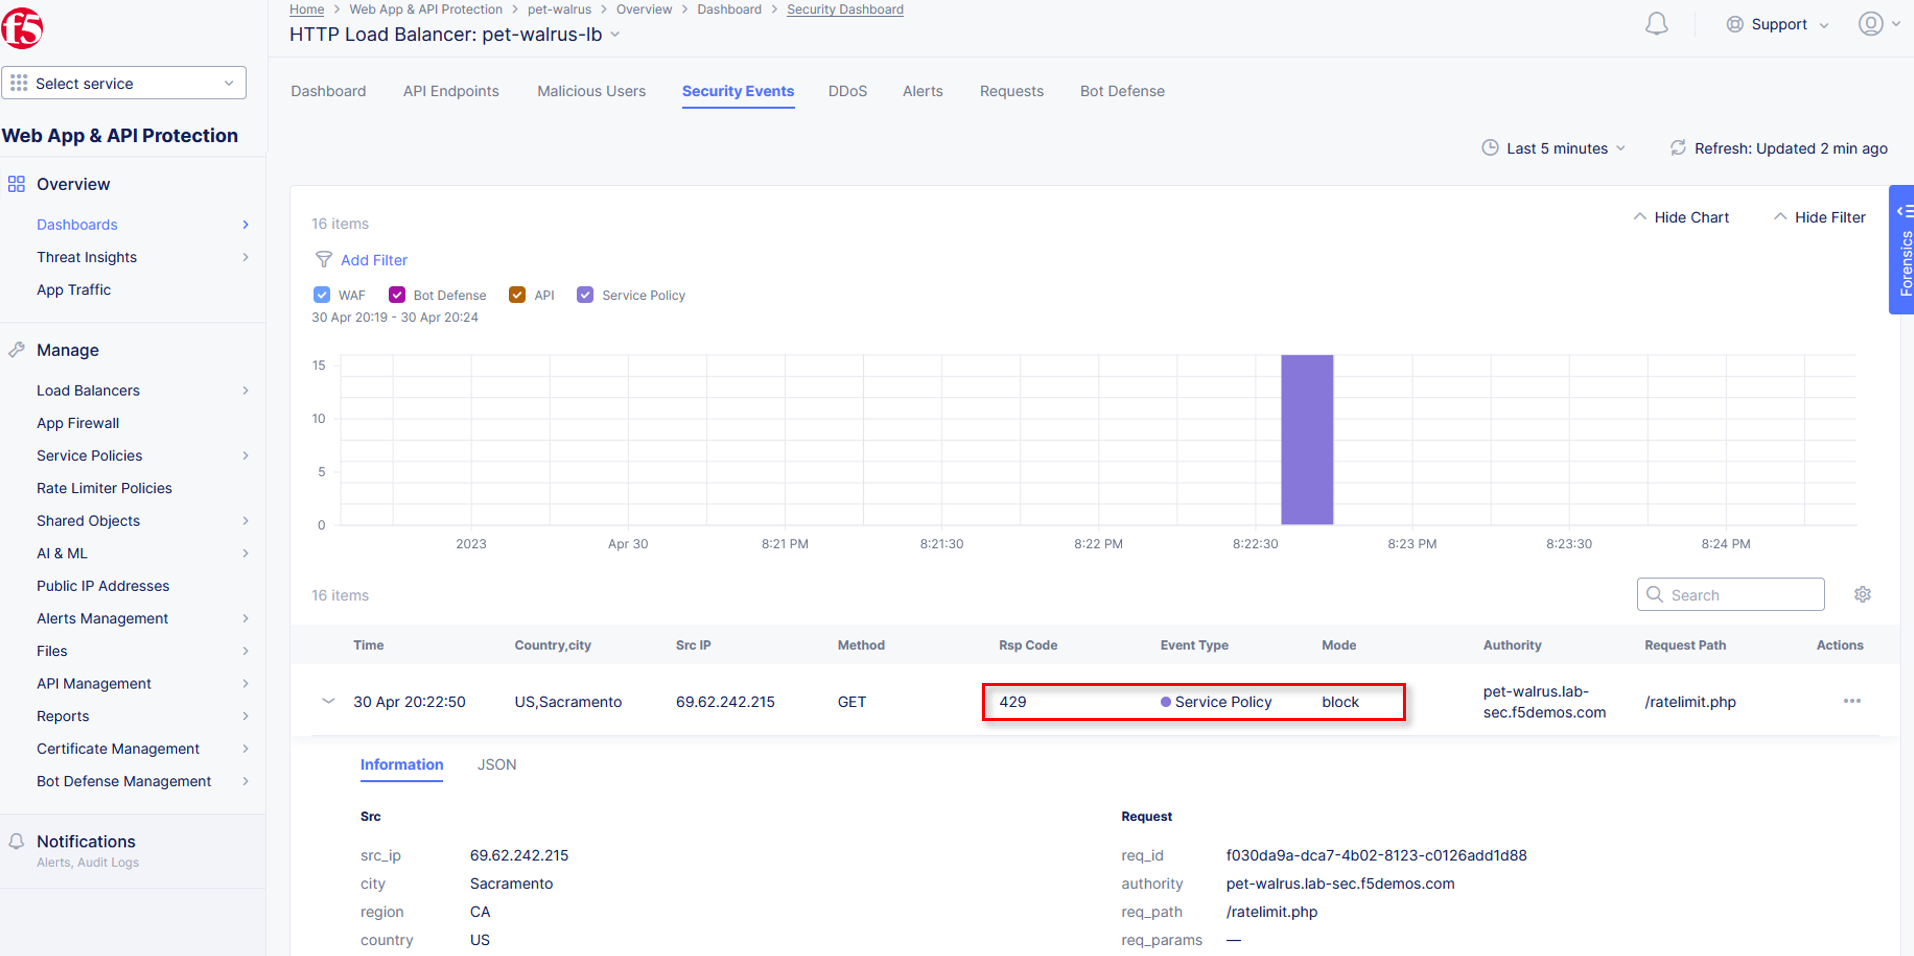
Rate Limited requests can also be seen in Security Events as Service Policy blocks. Review your Security Events by navigating back to the Security Dashboard to see the 429
blocks.
Note
Review Lab2/Task4 to find Security Events. You can copy you support ID to search with!
|

|
Task 4: Observing Route Configurations
The following steps will enable you to attach Service Policies to your configured Load Balancer.
It will also help you understand additional approaches for Service Policies.
Within Web App & API Protection in the F5 Distributed Cloud Console, Manage >
Load Balancer > HTTP Load Balancers and use the Action Dots and click Manage
Configuration.
Click Edit Configuration in the top right-hand corner.
|
|
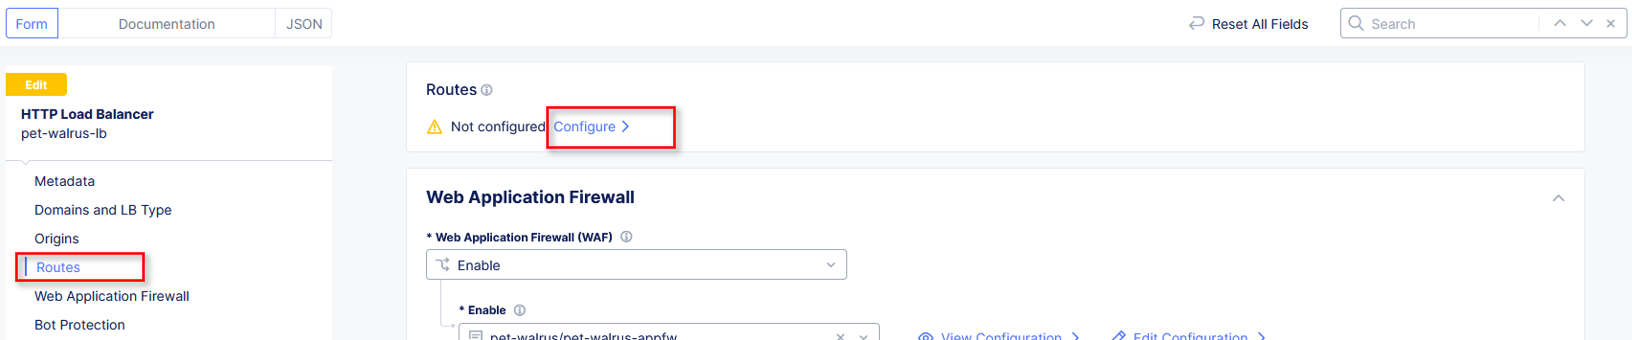
Click Routes in the left-hand navigation and the click Configure as shown. In Routes window, click the Add Item link.
|

|
End of Lab 3: This concludes Lab 3, feel free to review and test the configuration.
A Q&A session will begin shortly to conclude the overall lab.
|

|