NGINX Modern Apps > Class 9: Access on NGINX Plus - Authentication for Web Access Source | Edit on
Installing Prerequisites:
This exercise will cover installing the Nginx JavaScript Module (njs) which is required for handling the interaction between NGINX Plus and the OpenID Connect identity provider (IdP).
Install NGINX Plus njs module
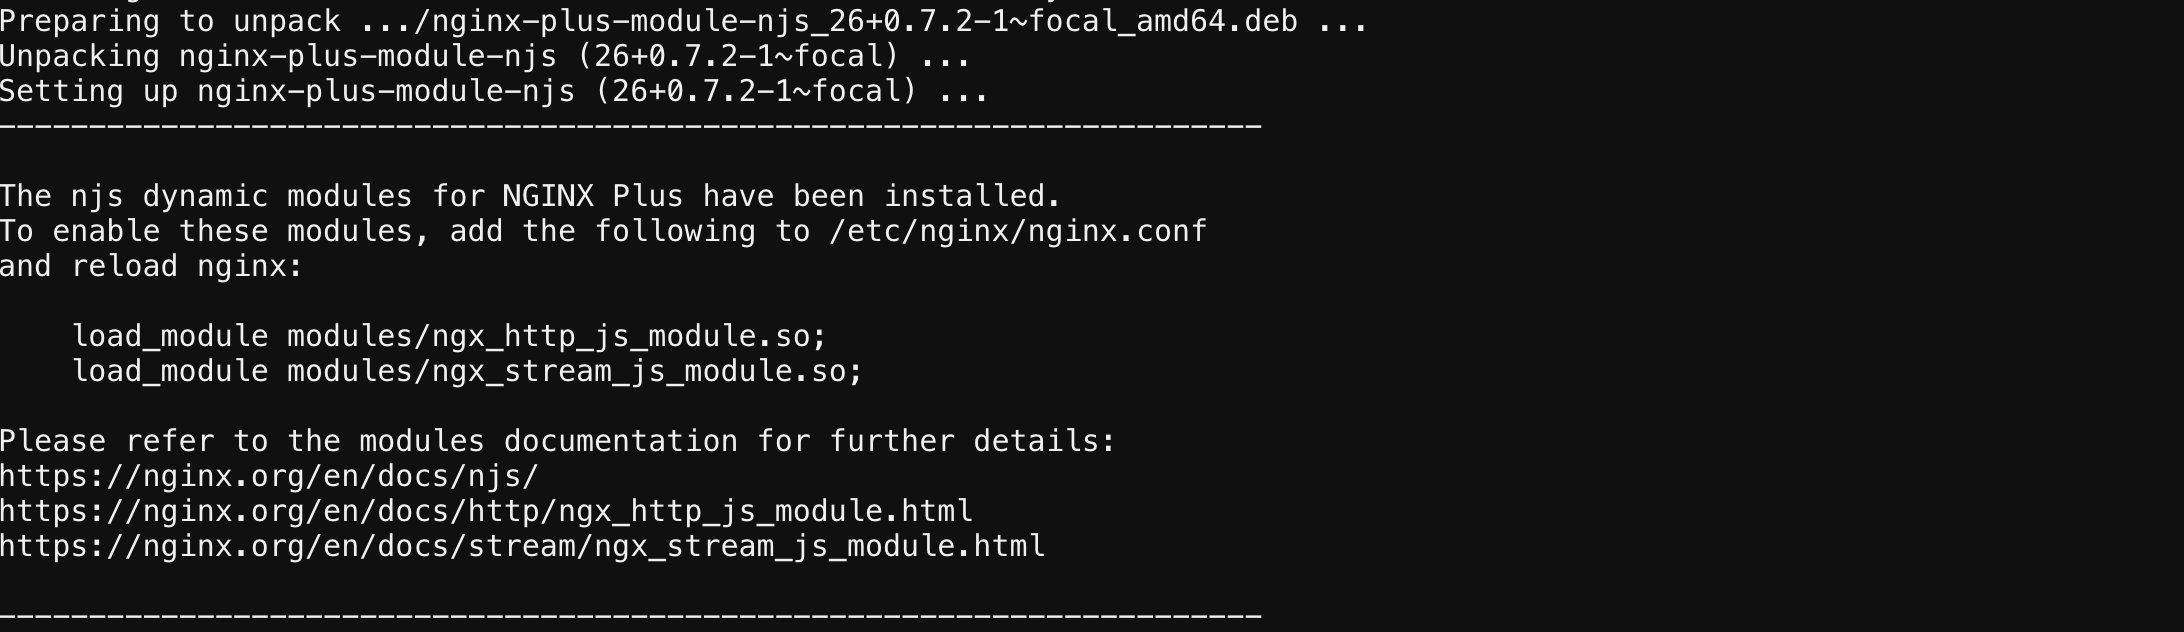
Copy and paste below command into the NGINX 1 webshell (Use Ctrl/Shift+V to paste).
sudo apt install nginx-plus-module-njs
Note
The njs module has already been installed on NGINX 2 and NGINX 3 for this lab exercise
screenshot of expected output
Verify that the modules are loaded into NGINX Plus with the below command (Use Ctrl/Shift+V to paste again).
sudo ls /etc/nginx/modules
screenshot of expected output

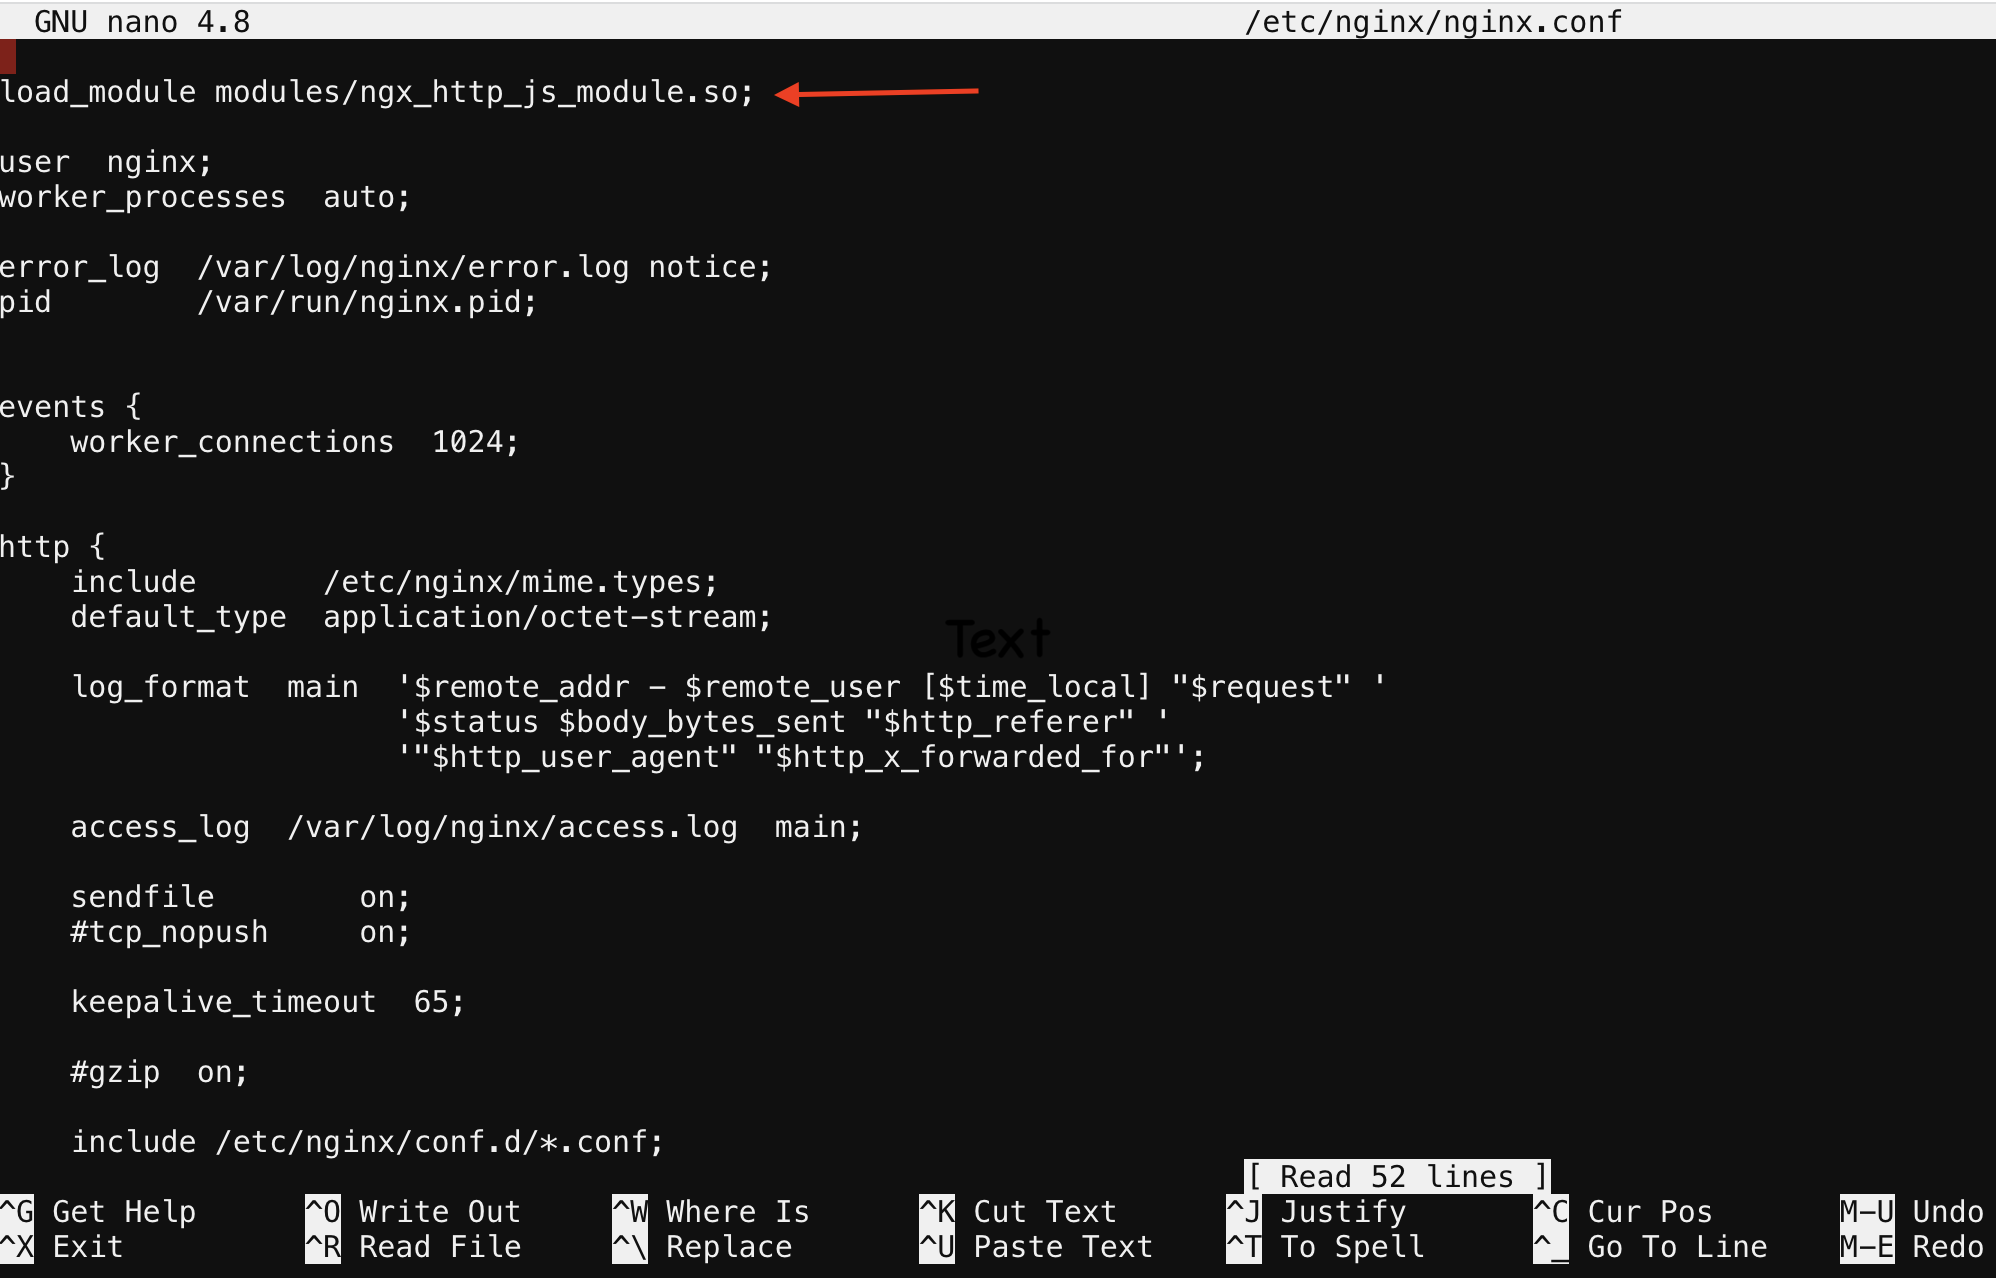
Now you will need to load the module into nginx.conf.
The following directive needs to be included in the top-level (“main”) configuration context in /etc/nginx/nginx.conf, to load the NGINX JavaScript module.
Copy and run below command on the NGINX 1 server to open the nano editor and select the main nginx configuration file
nano /etc/nginx/nginx.conf
Below is the line of code that needs to be copied into /etc/nginx/nginx.conf file
load_module modules/ngx_http_js_module.so;
screenshot of where to place line of code
Note
To quit nano, use the Ctrl+X key combination. If the file you are working on has been modified since the last time you saved it, you will be prompted to save the file first. Type ‘y’ to save the file then press enter to confirm
Save and exit the file
- Verify nginx config is good and reload.
verify configuration is good
nginx -t
reload the nginx config
nginx -s reload
Create a clone of the nginx-openid-connect GitHub repository
- Clone the branch in your home directory with the command below.
cd /home/ubuntu && git clone https://github.com/nginxinc/nginx-openid-connect.git
- Verify the clone has completed by running the following command.
ls | grep nginx-openid-connect
screenshot of output

Attention
Please do not close the UDF Shell browser tab!
Configuring the IdP Keycloak
Note
These next steps will guide you through creating a keycloak client for NGINX Plus in the Keycloak GUI
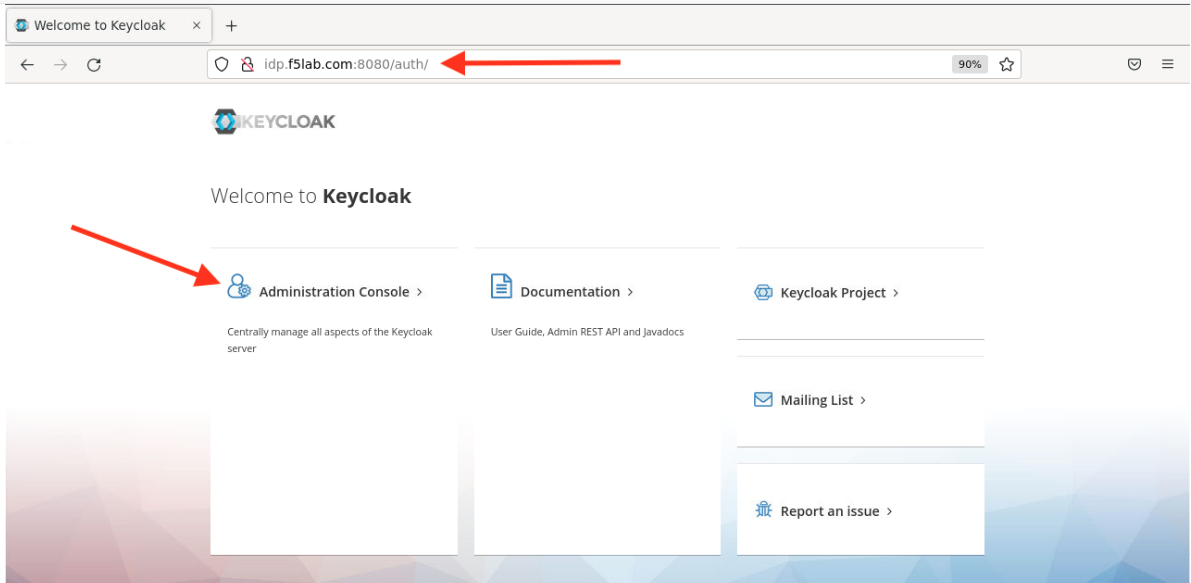
- Open your browser tab with the Firefox container from the ‘Getting Started’ lab section.
- Login to keycloak (you will need to type the URL below in to the Firefox container).
URL: http://idp.f5lab.com:8080
- Click on Administration Console.
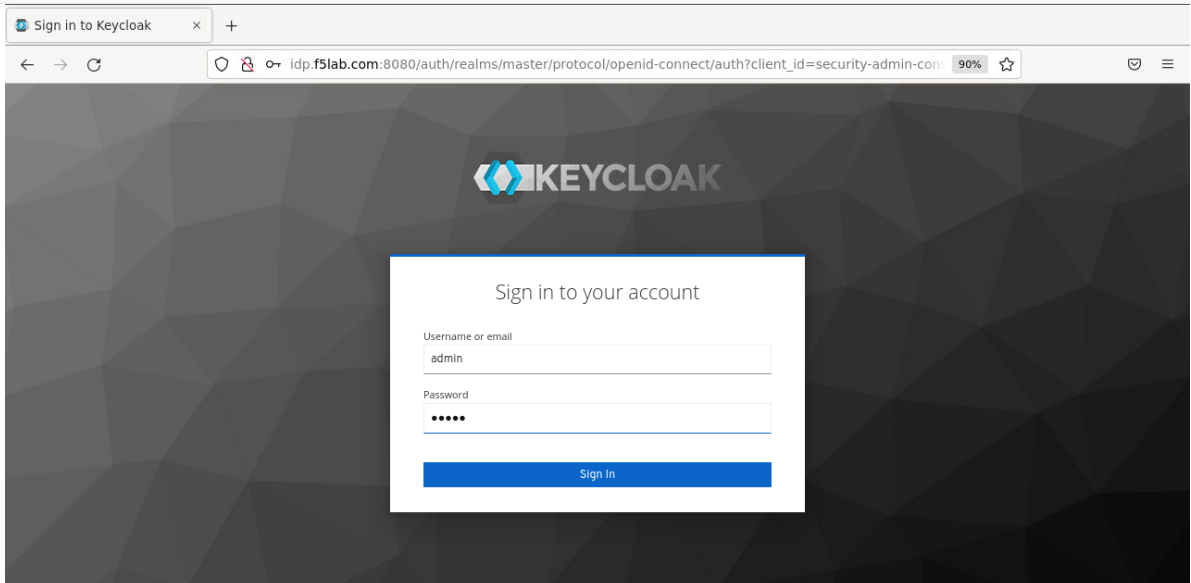
- Now enter credentials provided below and sign in (if prompted, don’t save the password).
Note
Username: admin
Password: admin
Create a Keycloak client for NGINX Plus in the Keycloak GUI:
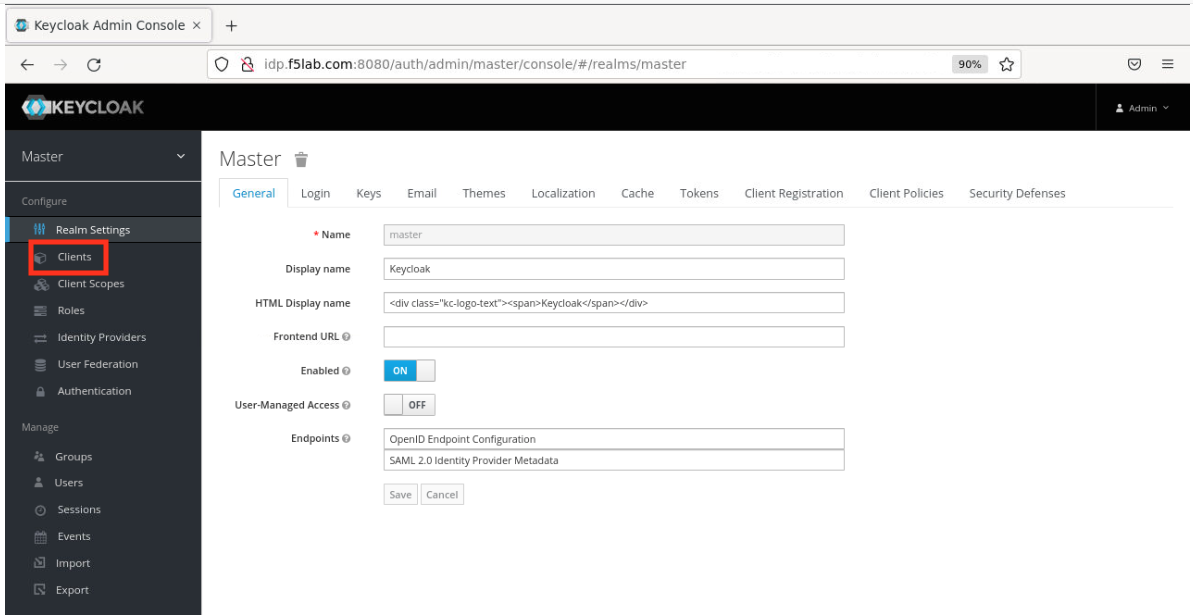
- In the left navigation column, click ‘Clients’.
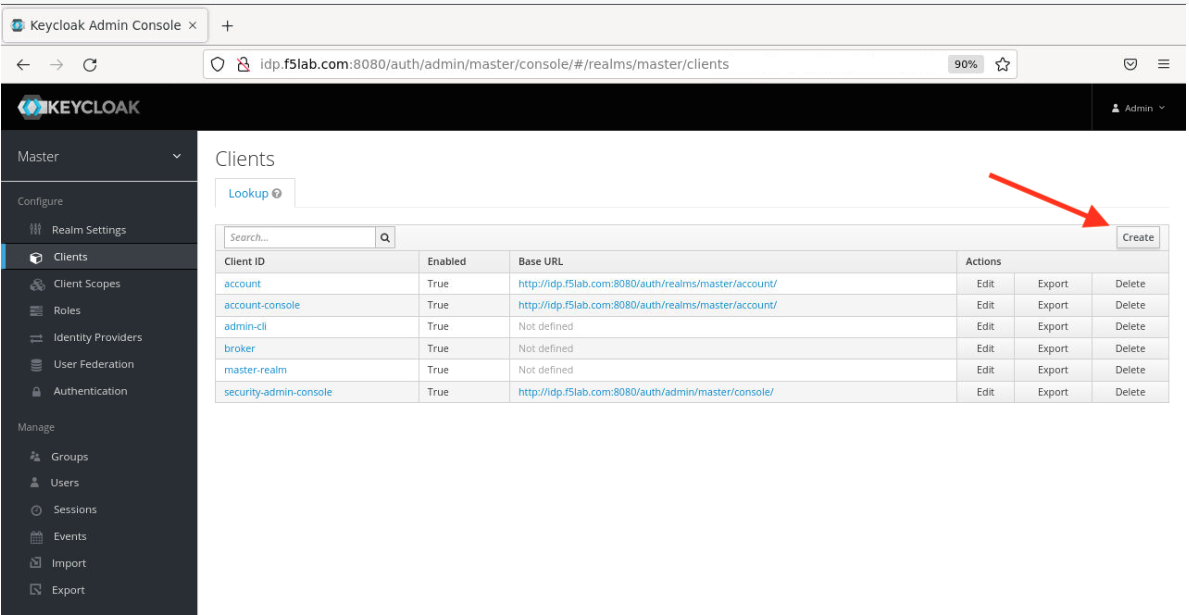
- On the Clients page that opens, click the ‘Create’ button in the upper right corner.
- On the Add Client page that opens enter the below values then click the ‘Save’ button.
Client ID – appworld2024
Client Protocol – openid-connect

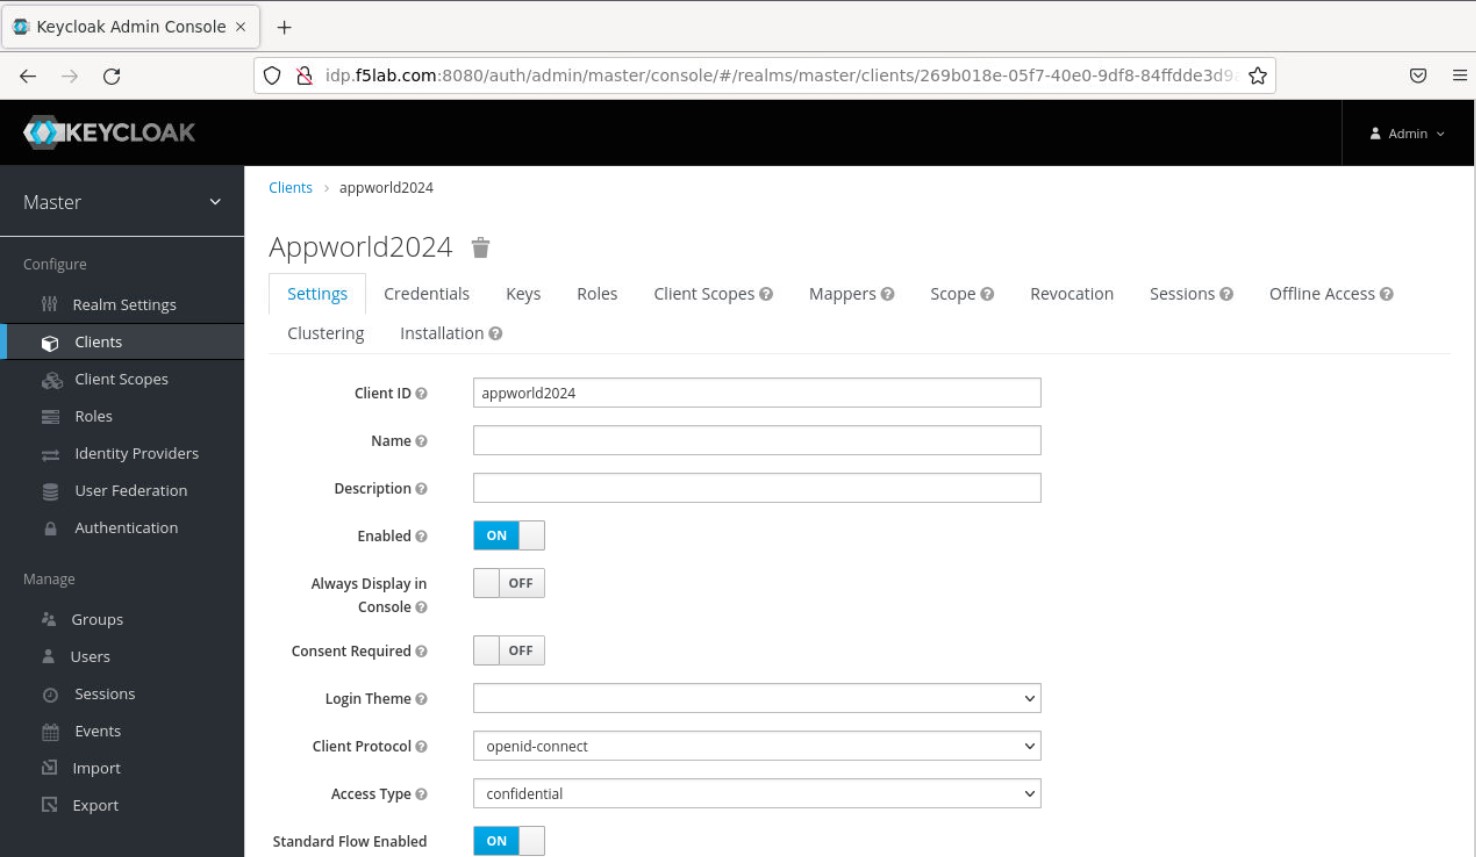
- On the appworld2024 clients page that opens, enter or select the values below on the Settings tab, then scroll down and click ‘Save’:
Attention
You will need to carefully type in the URI below, as it’s not possible to paste into the Firefox container Also, note that there is an underscore before ‘codexch’ in the path
Client ID - appworld2024
Access Type – confidential
Valid Redirect URIs - http://nginxdemo.f5lab.com:8010/_codexch
Note
For production, we strongly recommend that you use SSL/TLS (port 443). The port number is mandatory even when you’re using the default port for HTTP (80) or HTTPS (443) Valid Redirect URIs – This is the URI of the NGINX Plus origin web server instance, including the port number, and ending in /_codexch
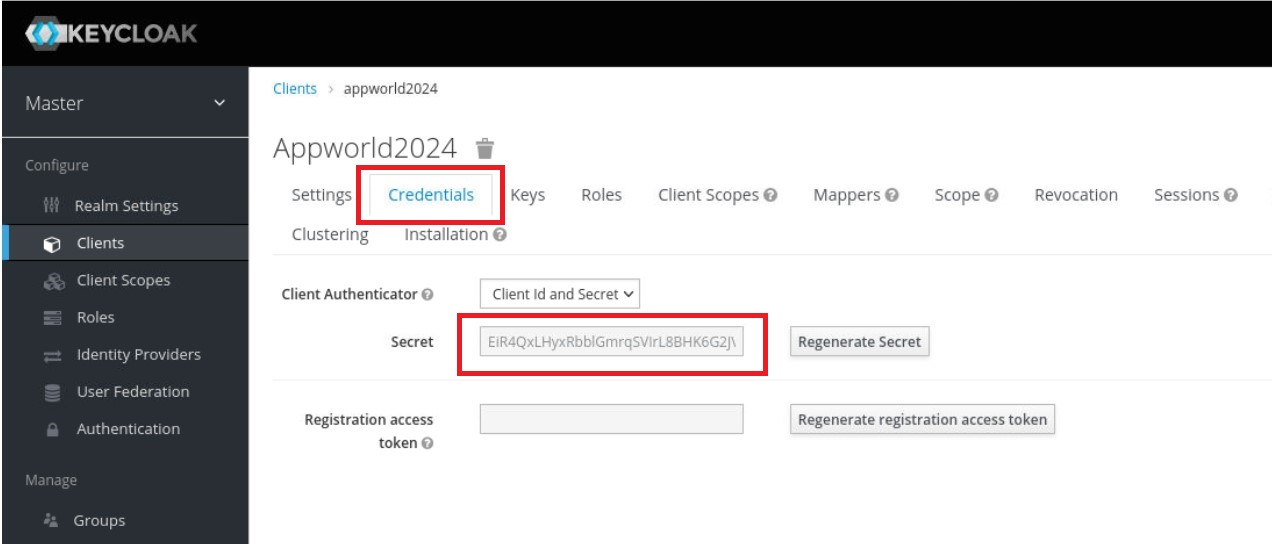
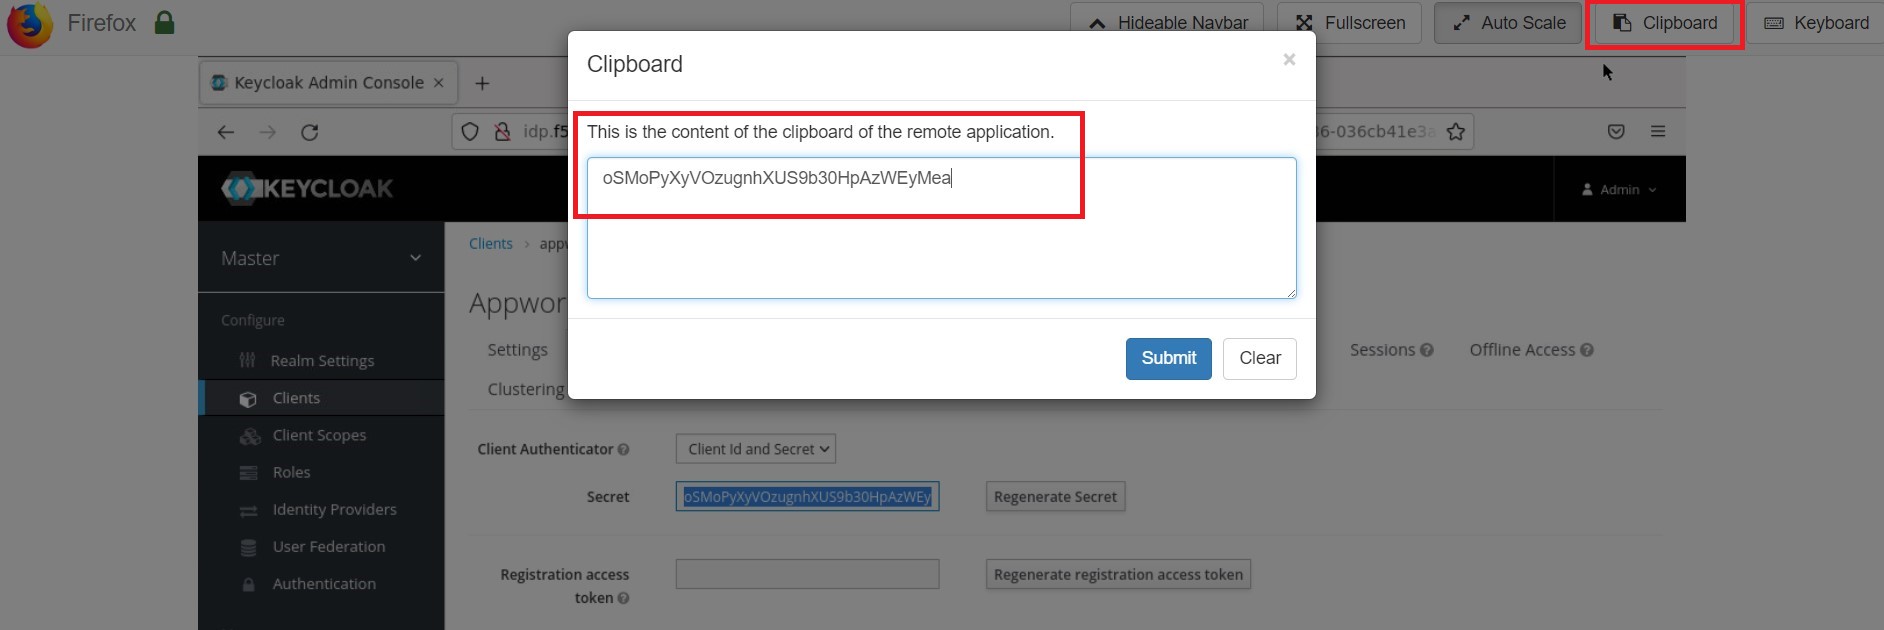
- Scroll back up and click the ‘Credentials’ tab, then copy the value (Ctrl-C) in the ‘Secret’ field to the Firefox ‘Clipboard’. Next, make a note of it on your local machine (e.g., in notepad) by opening the Firefox ‘Clipboard’ and copy/pasting the value. You will need this for the NGINX Plus configuration later.
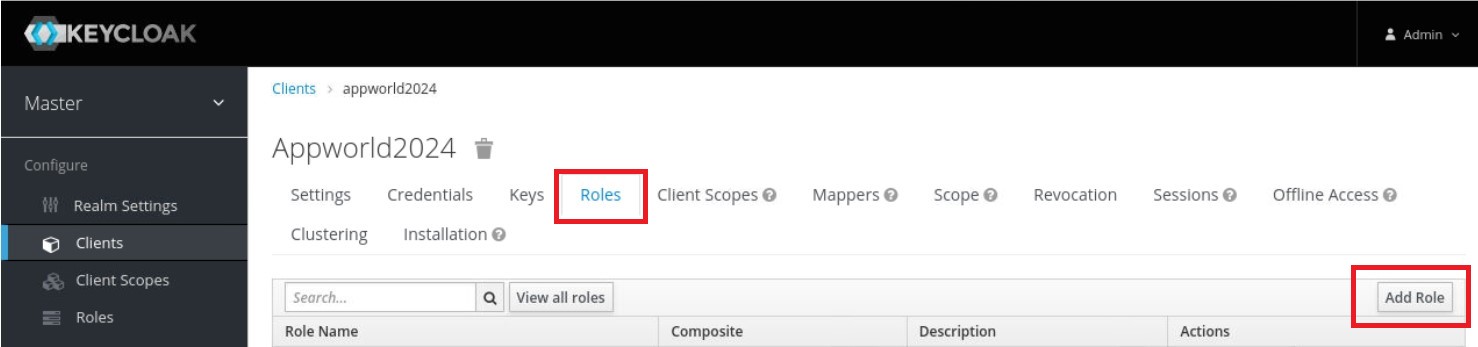
10. While still under the appworld2024 Clients page, click the ‘Roles’ tab, then click the ‘Add Role’ button in the upper right corner of the page that opens.
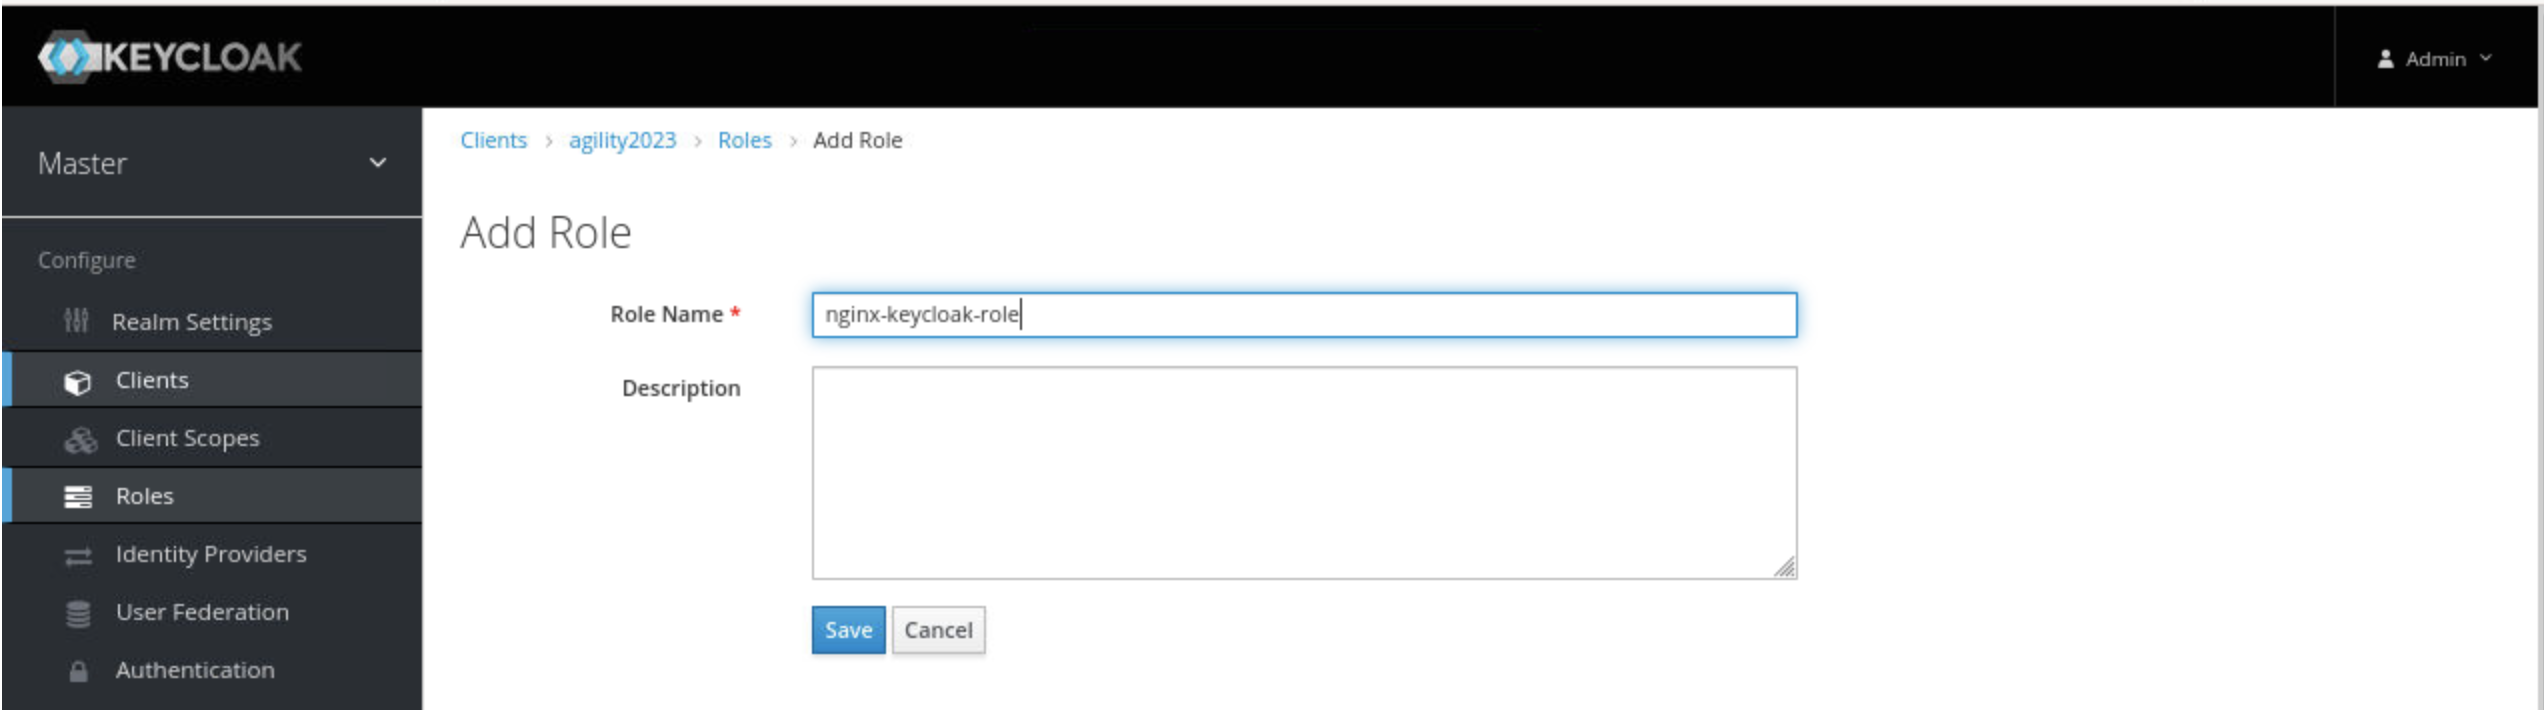
- On the ‘Add Role’ page that opens, type a value in the ‘Role Name’ field (here it is: nginx-keycloak-role) and click the ‘Save’ button.
Creating a user in keycloak
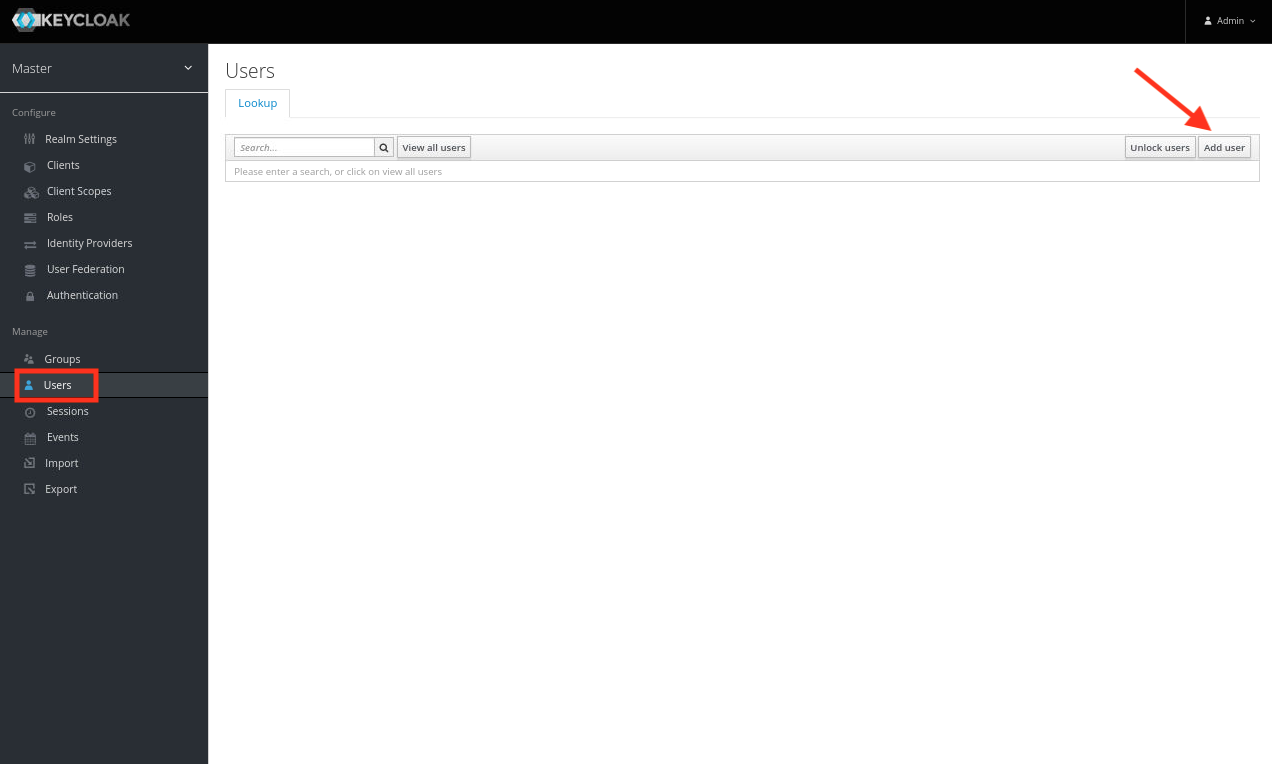
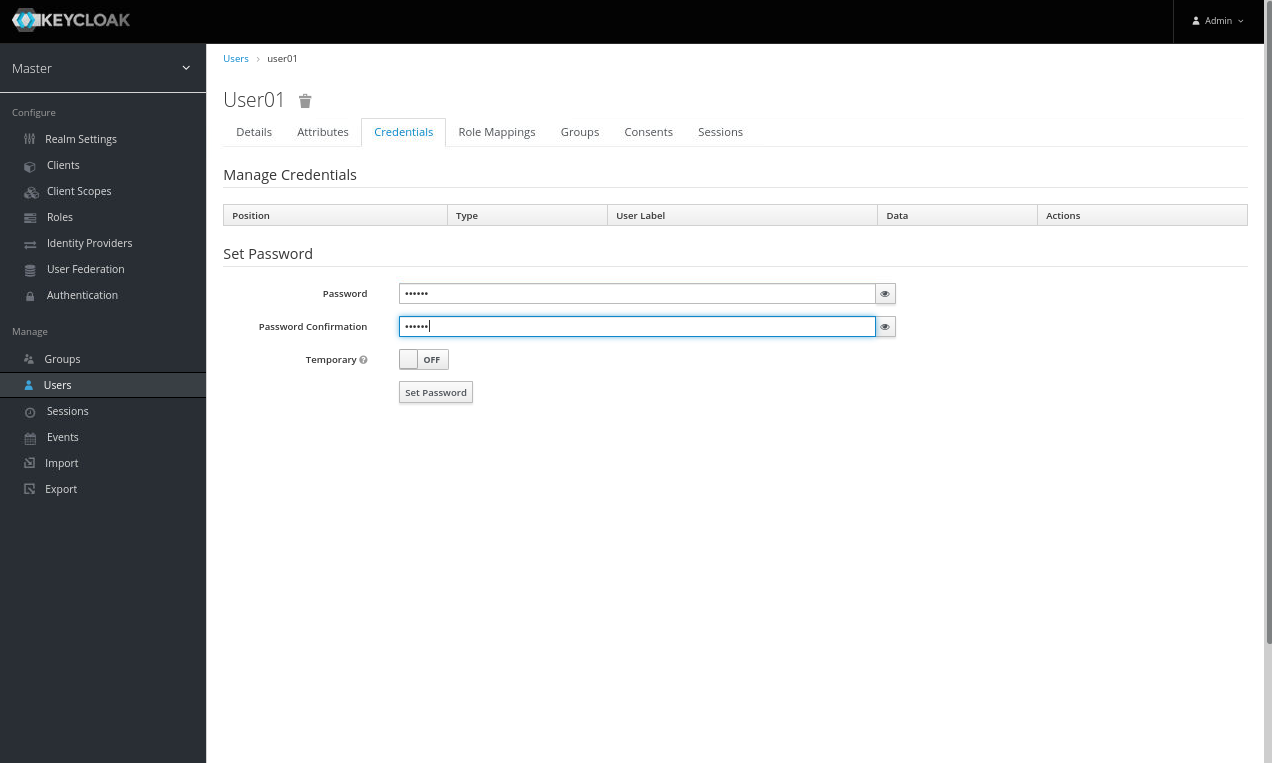
- In the left navigation column, click ‘Users’. On the Users page that opens, click the ‘Add User’ button in the upper right corner to create a new user with the Username “user01” (no quotes), then click ‘Save’.
- Once the user is created, click on the ‘Credentials’ tab at the top of the screen.
- Enter the Password appworld2024 and Confirm.
- Toggle Temporary to OFF, and click ‘Set Password’ (click yes, you’re sure).
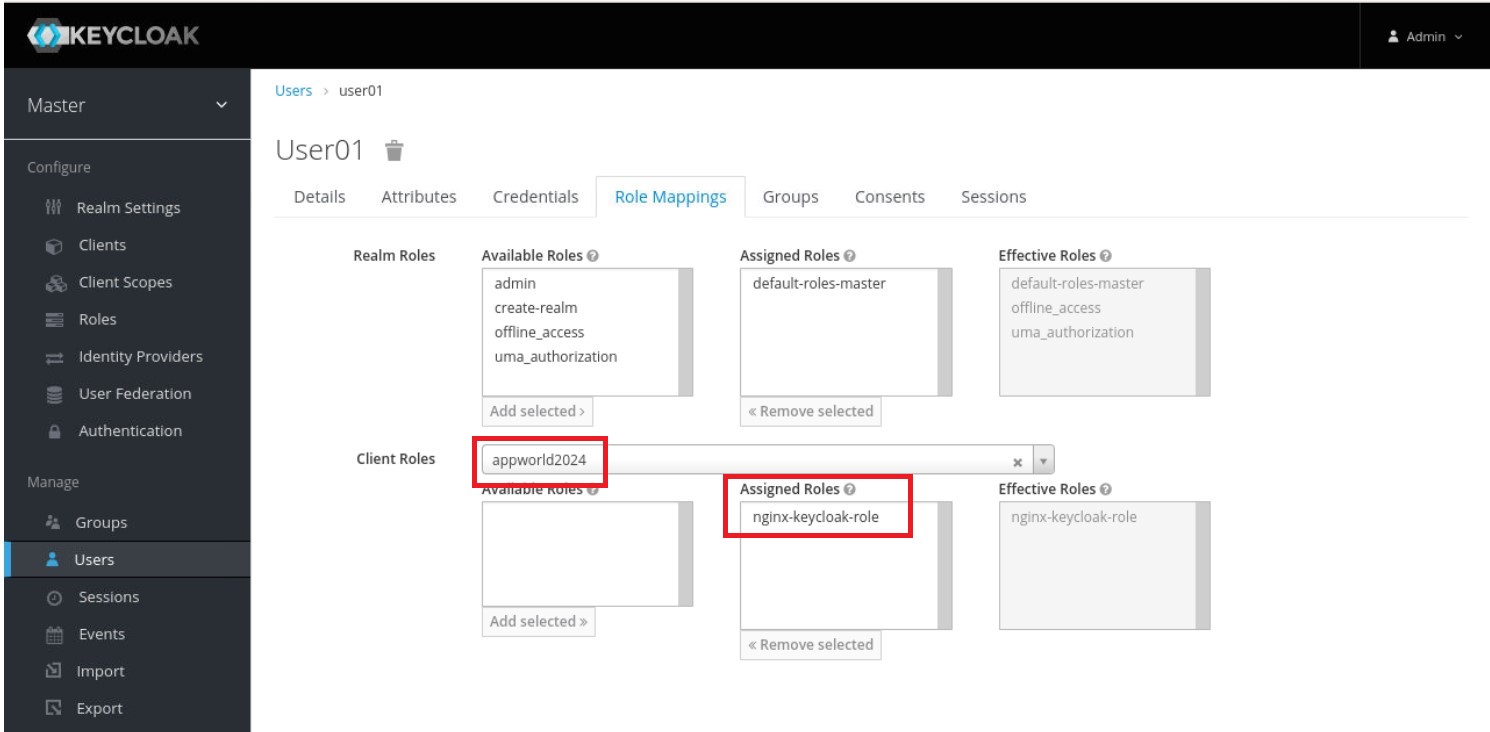
5. On the management page for the user (here, user01), click the ‘Role Mappings’ tab. On the page that opens, select appworld2024 on the ‘Client Roles’ drop‑down menu. Click ‘nginx-keycloak-role’ in the ‘Available Roles’ box, then click the ‘Add selected’ button below the box. The role then appears in the ‘Assigned Roles’ and ‘Effective Roles’ boxes, as shown in the screenshot.
Configure NGINX Plus as the OpenID Connect relying party
- Now go back to the NGINX 1 UDF Shell browser tab that you have open. You are going to run a configuration script.
Please copy and paste the below command into the webshell DON’T FORGET TO REPLACE THE CLIENT SECRET FOR THE CODE BELOW (use the ‘Client Secret’ note that you made earlier to help build the correct command syntax).
./nginx-openid-connect/configure.sh -h nginxdemo.f5lab.com -k request -i appworld2024 -s YOURCLIENTSECRET -x http://idp.f5lab.com:8080/auth/realms/master/.well-known/openid-configuration
screenshot of output

Note
Information on switches being used in script:
echo ” -h | –host <server_name> # Configure for specific host (server FQDN)”
echo ” -k | –auth_jwt_key <file|request> # Use auth_jwt_key_file (default) or auth_jwt_key_request”
echo ” -i | –client_id <id> # Client ID as obtained from OpenID Connect Provider”
echo ” -s | –client_secret <secret> # Client secret as obtained from OpenID Connect Provider”
echo ” -p | –pkce_enable # Enable PKCE for this client”
echo ” -x | –insecure # Do not verify IdP’s SSL certificate”
- Change Directory.
cd ./nginx-openid-connect/
- Now that you are in the nginx-openid-connect directory, use the provided command to copy the below files.
frontend.conf openid_connect.js openid_connect.server_conf openid_connect_configuration.conf
cp frontend.conf openid_connect.js openid_connect.server_conf openid_connect_configuration.conf /etc/nginx/conf.d/
- After copying files change directory to ‘/etc/nginx/conf.d/’.
cd /etc/nginx/conf.d/
- Using Nano edit the ‘frontend.conf’ file.
nano frontend.conf
- Update the server to 10.1.1.4:8081 (this is our origin server).
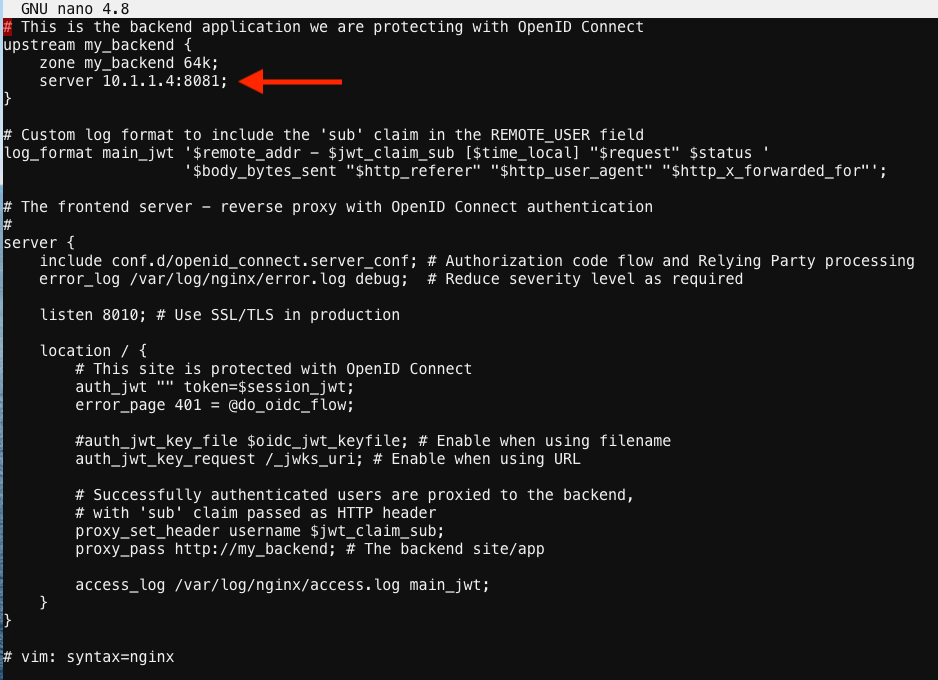
save file and close
- Using Nano edit the ‘openid_connect.server_conf’ file.
nano openid_connect.server_conf
- Update the resolver to use local host file as shown below.
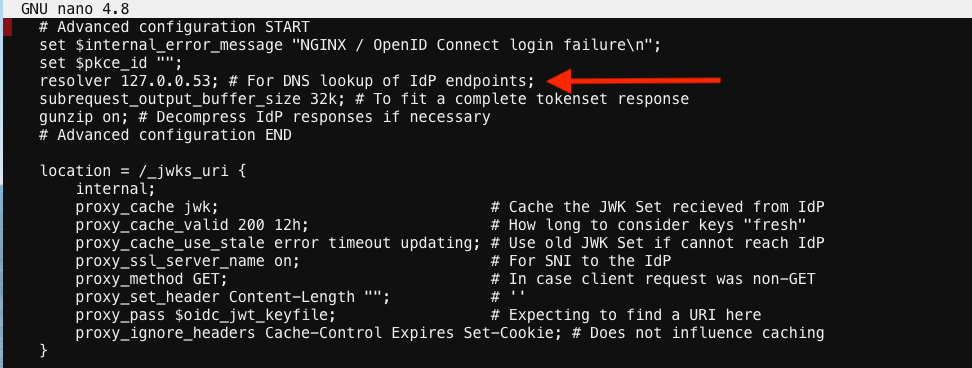
save and close file
Note
We are using the host file because this is a lab, so make sure to put in the LDNS server for the resolver
- Using Nano edit the openid_connect_configuration.conf.
nano openid_connect_configuration.conf
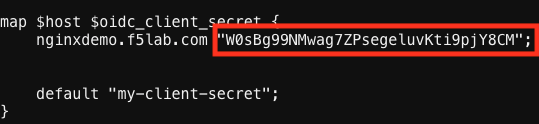
- Scroll down and modify the $oidc_client_secret from 0 to “yourclientsecret” from the earlier step, to look like the example below. Do not forget to add the quotation marks!
screenshot of output
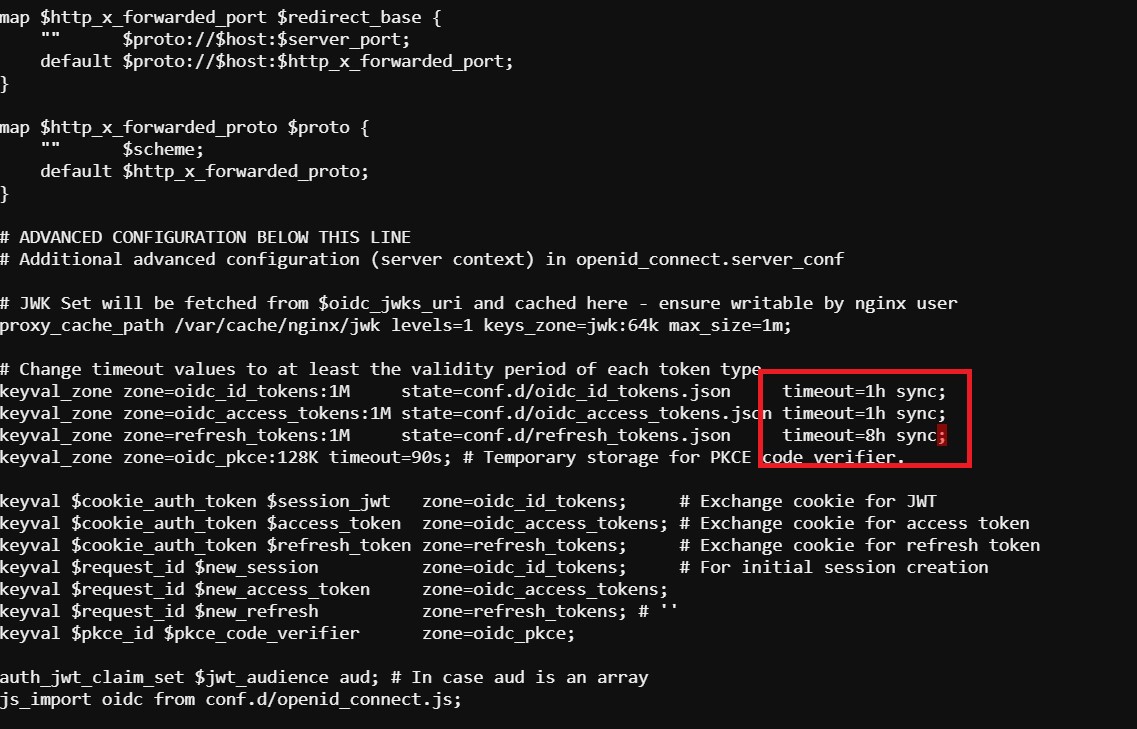
Then scroll down further and add the keyword “sync” to the first three ‘keyval_zone’ variables at the bottom of the file, so that it looks like below.
screenshot of output
save and close file
- Reload Nginx.
nginx -s reload
Note
Please leave the NGINX 1 server webshell connection open!
Testing the config
Now that everything is done lets test the config! Please go back to the Firefox tab on your local browser.
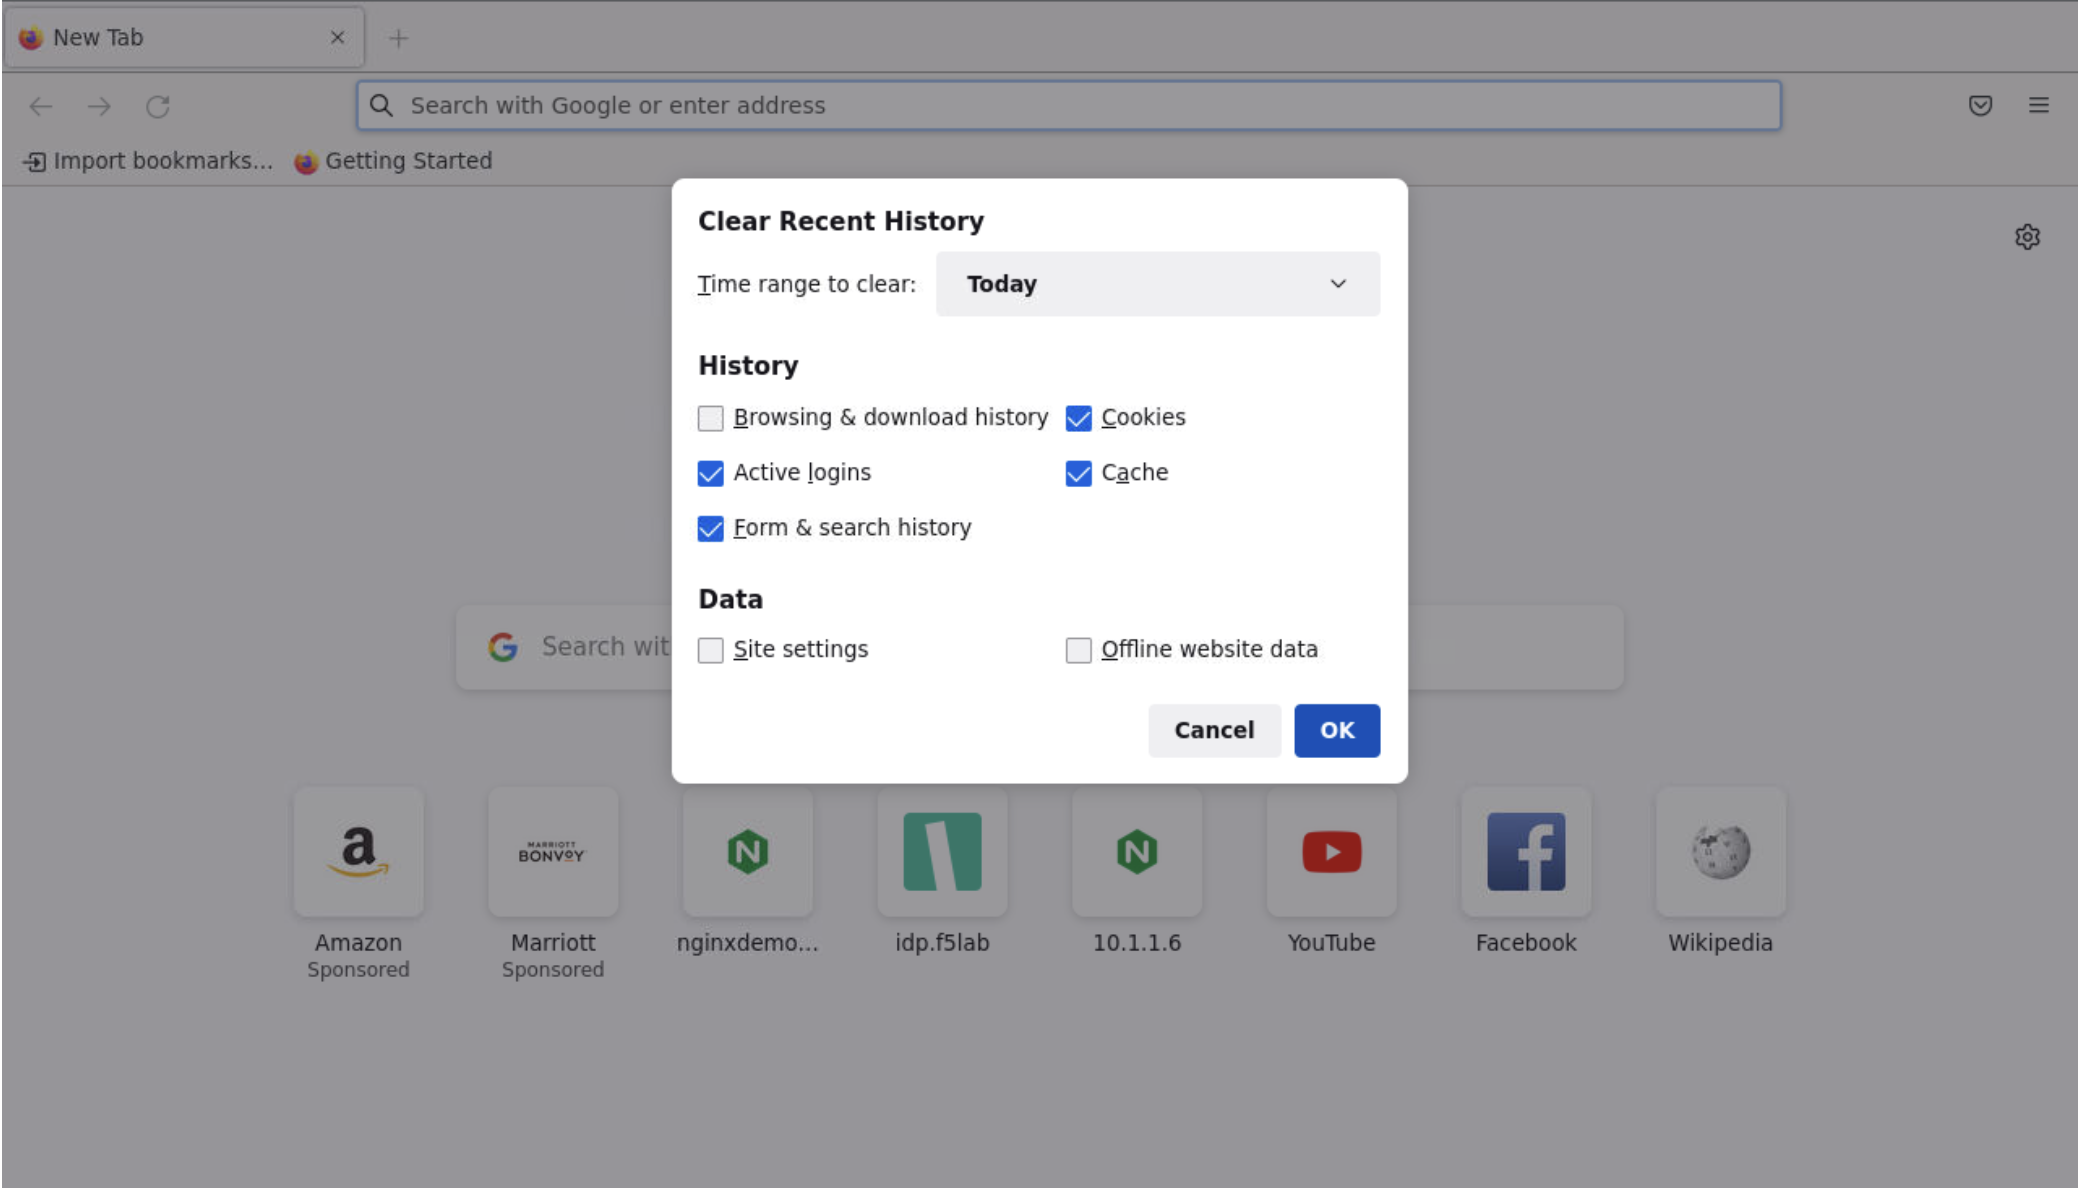
- Clear recent history and cookies from the browser (under Privacy & Security on the Firefox Settings tab).
- While still in Firefox, open a new tab and type http://nginxdemo.f5lab.com:8010 into the browser and launch the page.

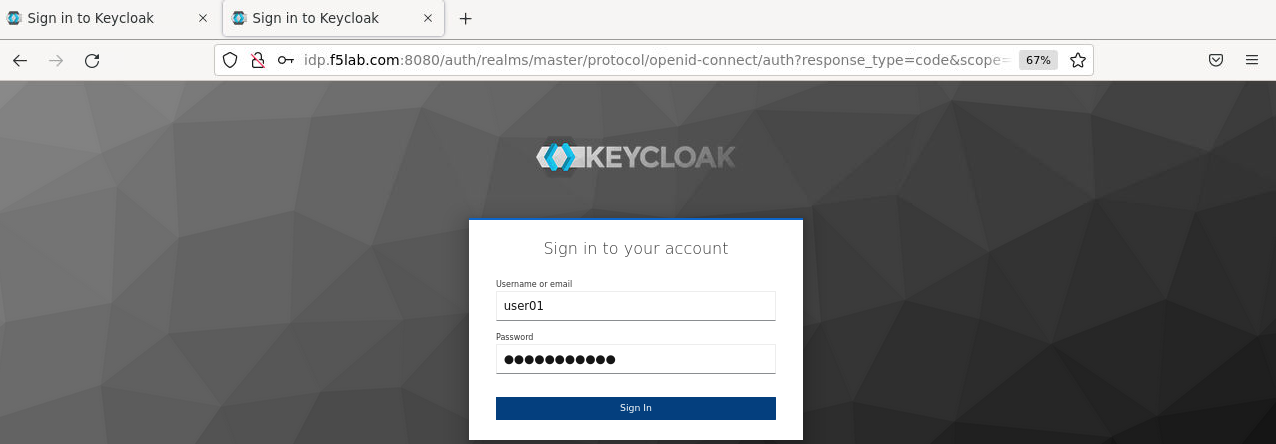
Notice you’ll be redirected to the IdP for login.
- Once on the IdP page put in the credentials for the user you created. user01 with password appworld2024 (do not save the credentials, if prompted).
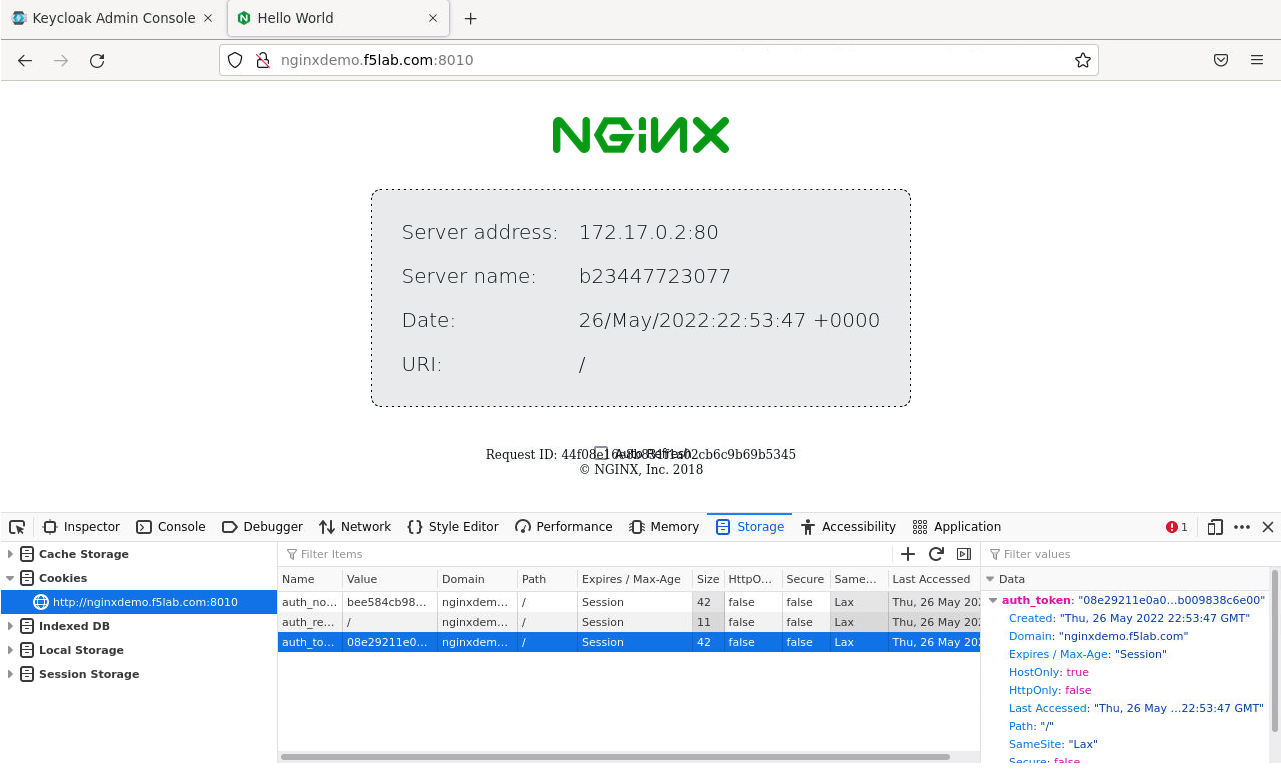
You should now see the webservice! You’ve been logged in and the browser has been issued a JWT Token establishing identity! You can view the token by clicking ‘More tools’ and ‘Web Developer Tools’ in the Firefox Settings menu, then selecting the ‘Storage’ tab and highlighting “auth_token”.
Manage NGINX Plus with Instance Manager
The OIDC authentication is working correctly. Now we will manage our NGINX Plus deployment with Instance Manager.
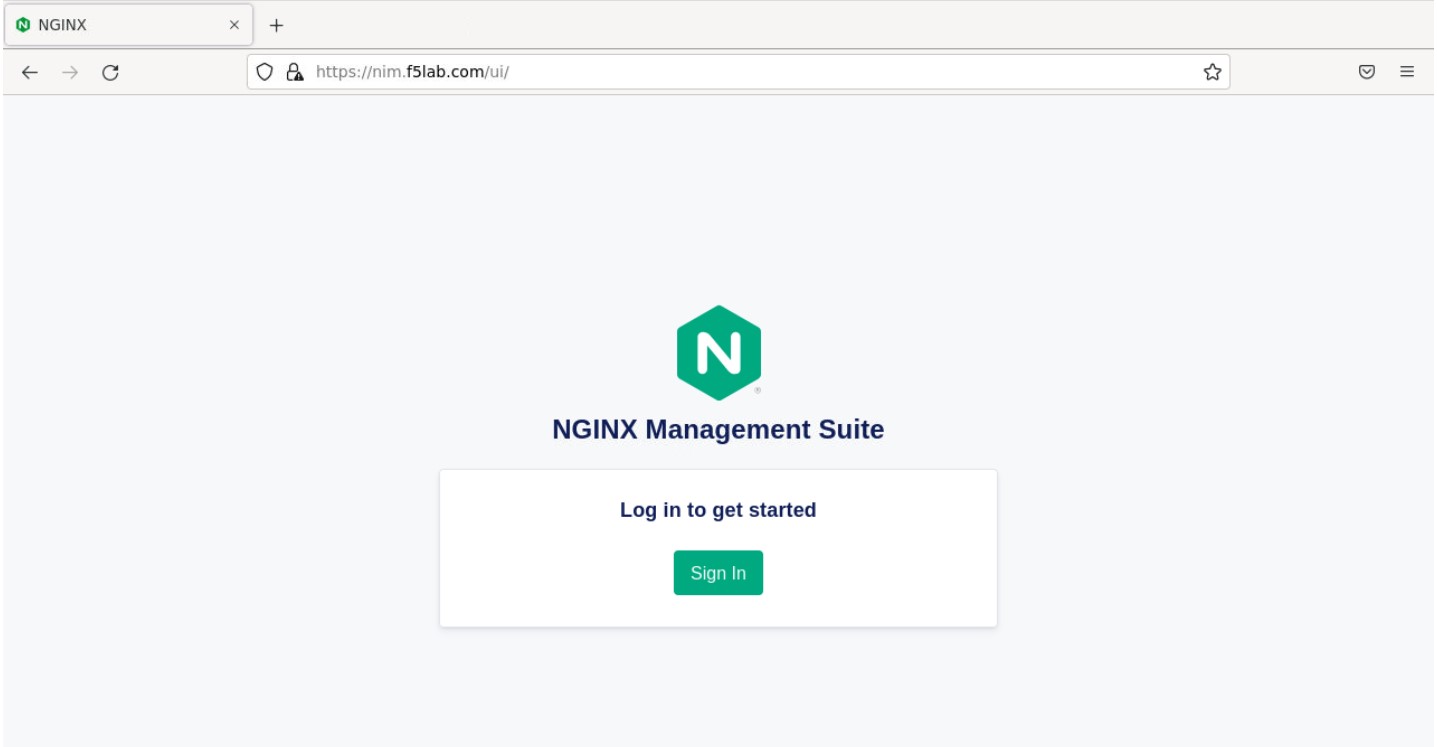
- Open a new tab in Firefox and put https://nim.f5lab.com into the browser url field and launch the page (accept the risk and continue).
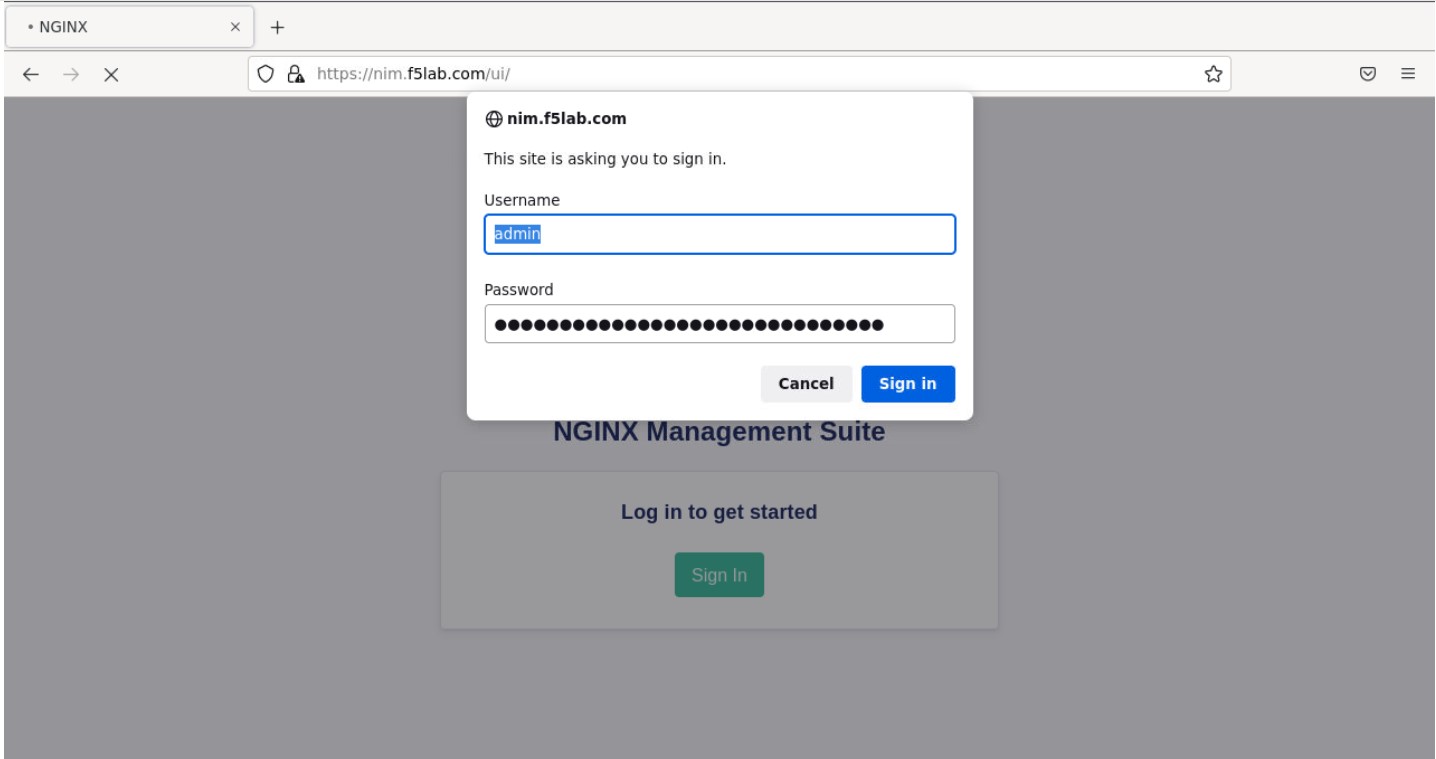
- Sign into Instance Manager as admin. The username/password are saved in the browser so the fields should autopopulate.
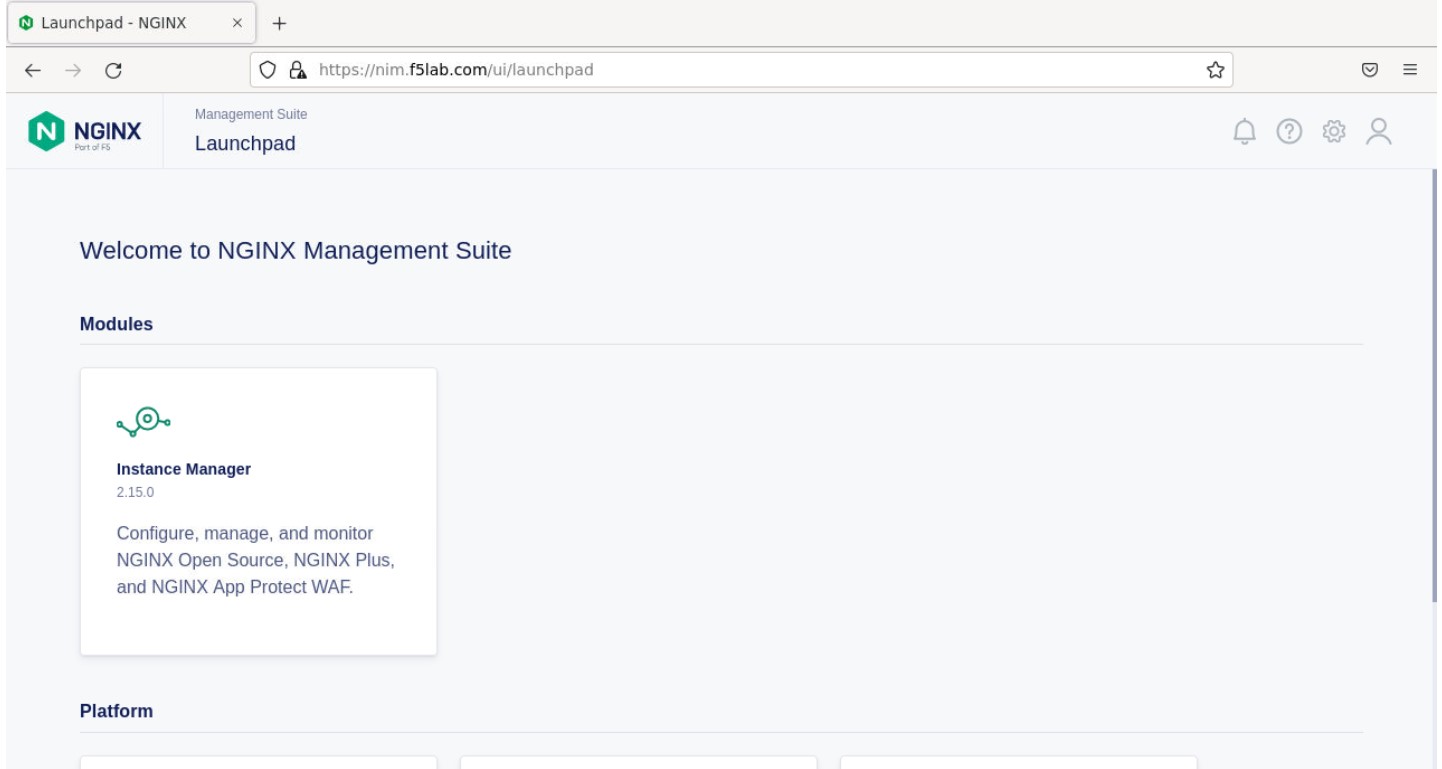
- Once you are signed in, click on the ‘Instance Manager’ module.
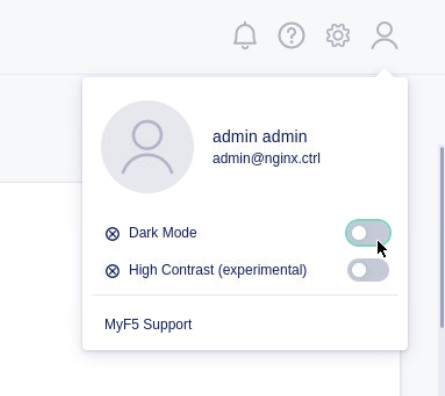
Note
If you prefer the ‘Dark Mode’ interface, select it from the ‘Account’ menu in the upper right corner of the page
- Once directed to main console page of NGINX Instance Manager, click on ‘Instances’ and you will see the instructions on how to add NGINX instances to Instance Manager.
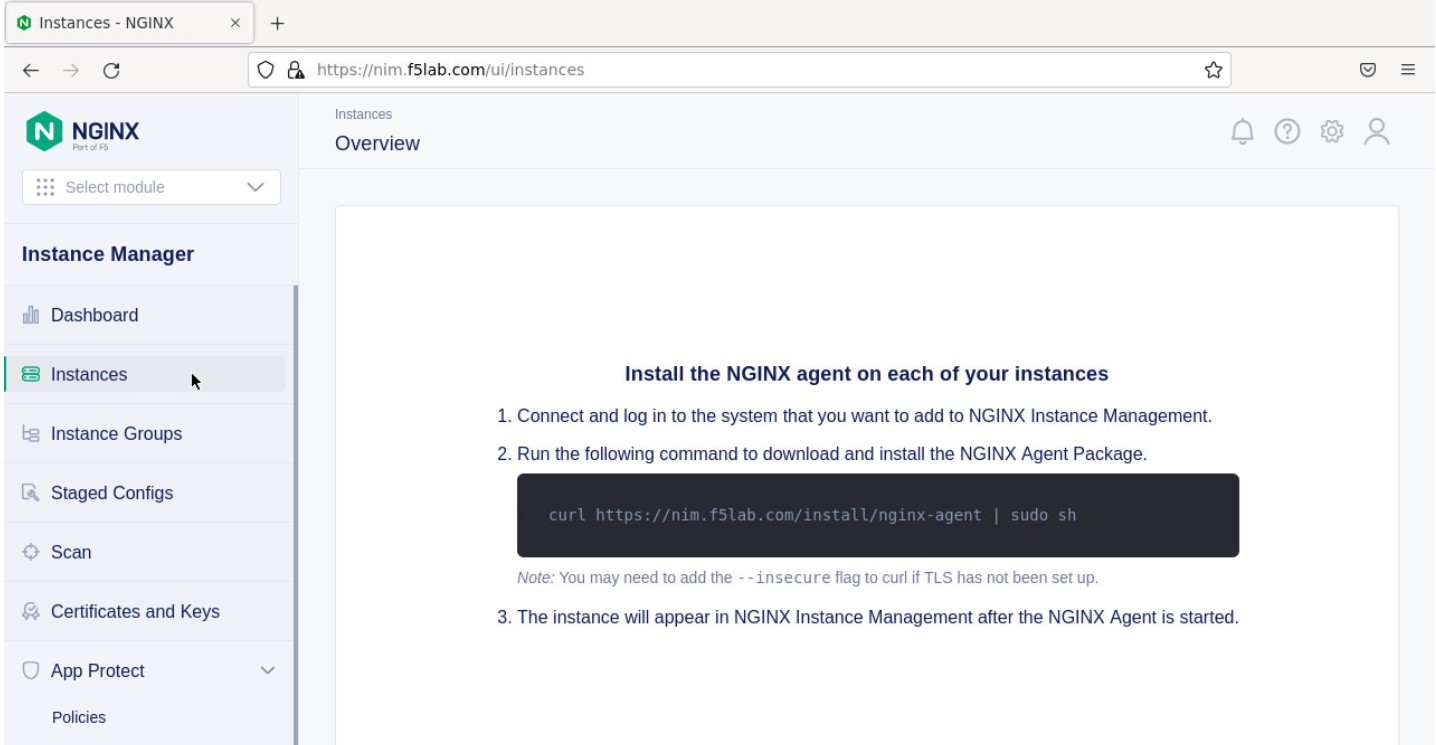
- Copy and run the below command on the NGINX 1 server to install the agent.
curl -k https://nim.f5lab.com/install/nginx-agent | sudo sh
- Once the installation is complete, start the nginx agent.
sudo systemctl start nginx-agent
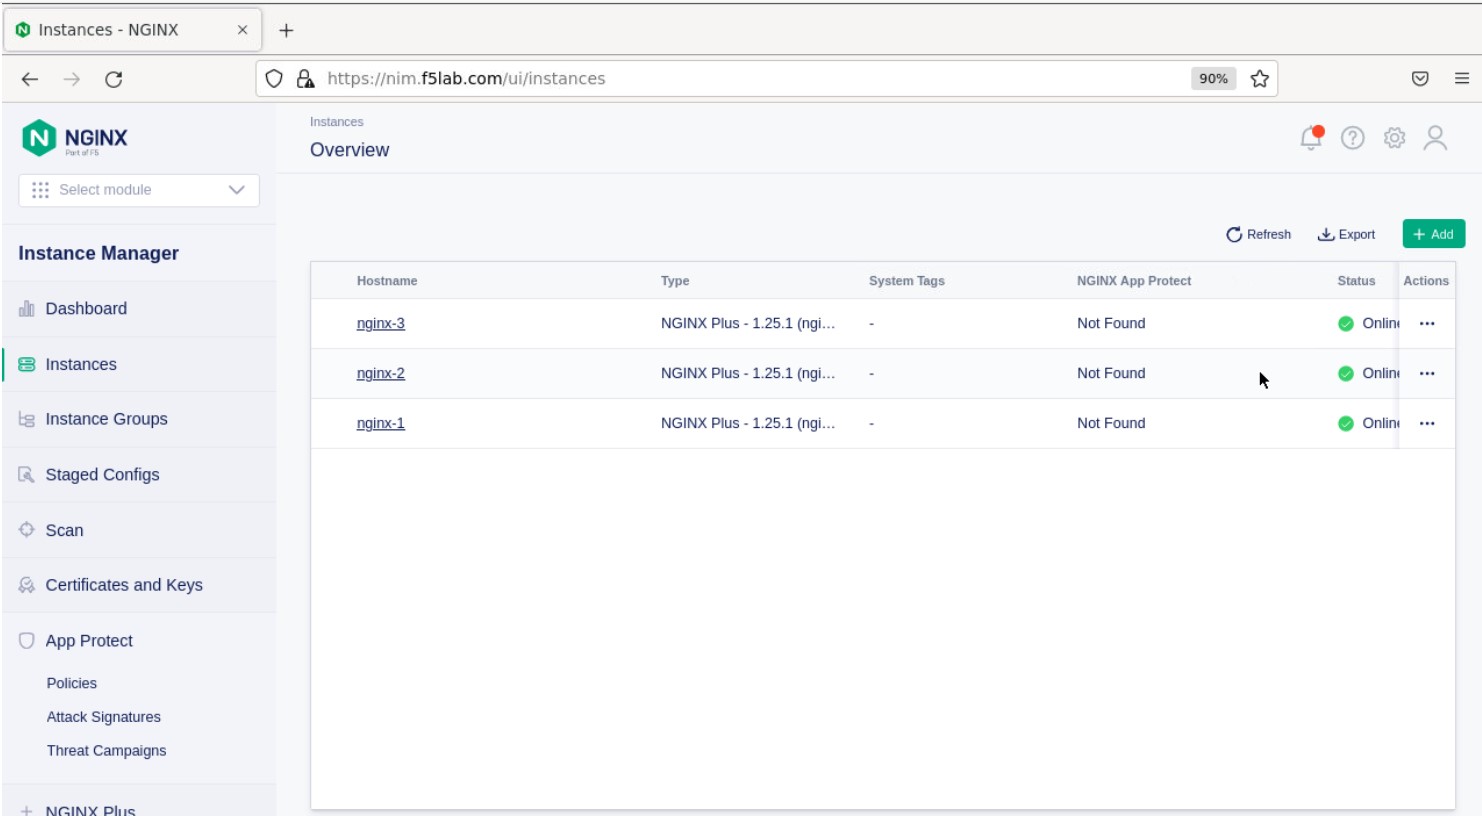
- Now let’s refresh the Instance Manager page. We should see the instance under the ‘Instances’ tab.
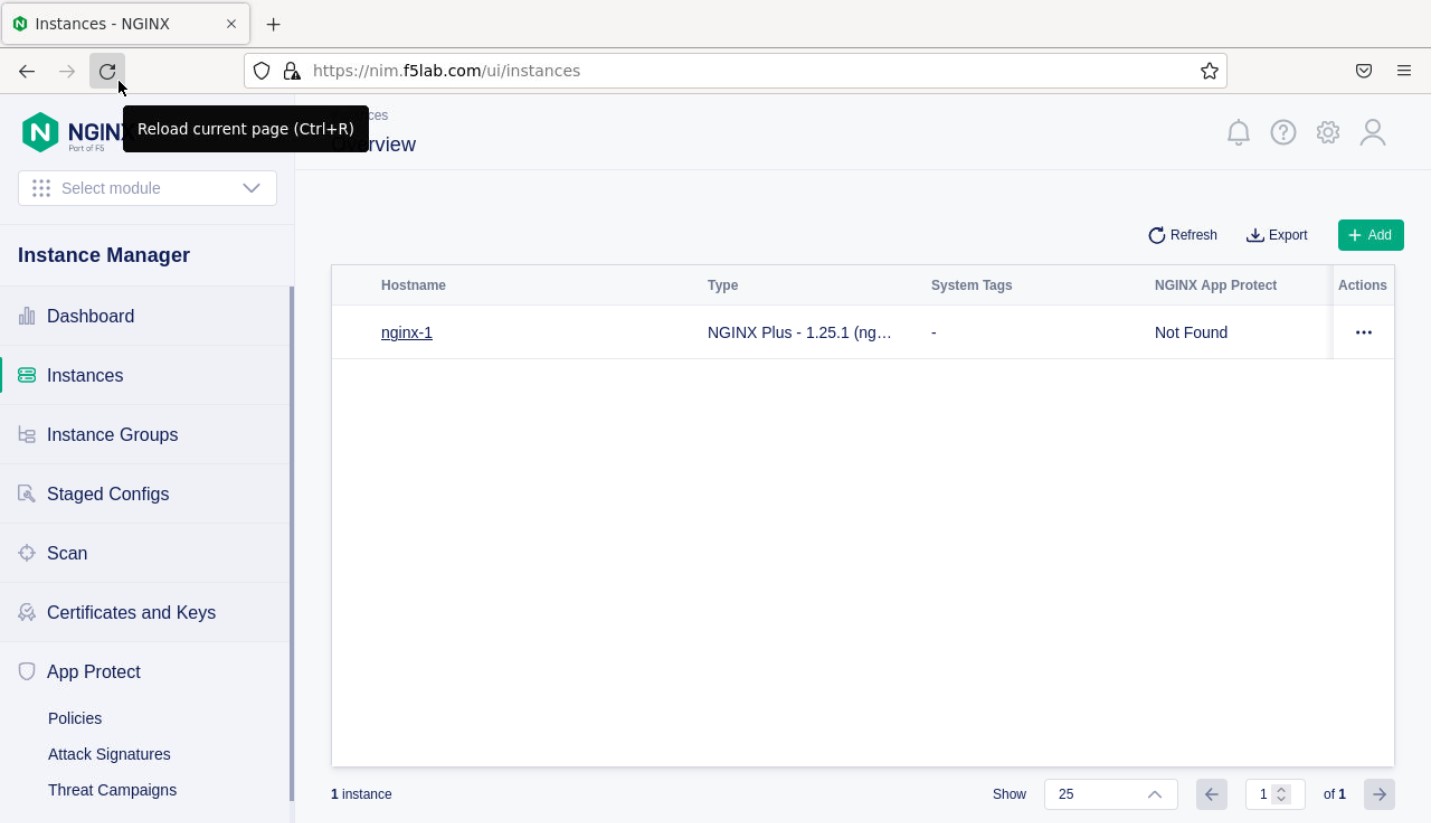
- Clicking on the instance will show installation details and metrics (these may take a few minutes to correlate).

Create the Nginx Plus Cluster in Instance Manager
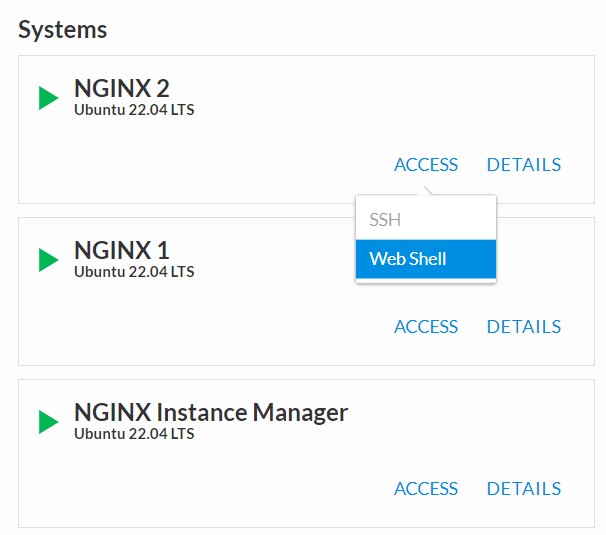
- To begin, we need to install the same agent on the new NGINX servers. First open a webshell connection to NGINX 2 and then do the same for NGINX 3 (at this point, you should have all three NGINX servers open in UDF Webshell tabs).
Copy and run the below command on -both- the NGINX 2 and NGINX 3 servers to install the agent.
curl -k https://nim.f5lab.com/install/nginx-agent | sudo sh
- Once the installation is complete, start the nginx agent on -both- servers.
sudo systemctl start nginx-agent
Note
Please leave all of the NGINX server webshell connections open!
- Go back to the Instances Overview in Instance Manager and you should see the new servers.
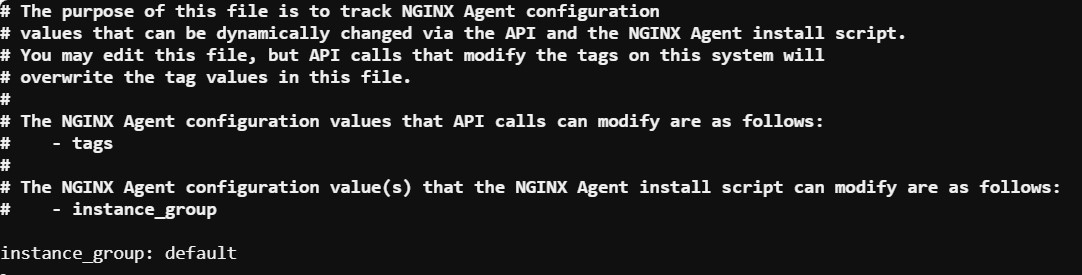
- Now we’ll go back to -all three- NGINX server’s webshell connections and create the Instance Group (if the webshell is currently closed for NGINX 1, please reopen it). To create the Instance Group, we need to edit the agent-dynamic.conf file and add an instance_group following the steps below for each of the three NGINX servers.
Open the file for editing in nano:
nano /var/lib/nginx-agent/agent-dynamic.conf

…add the following to the bottom of the file on each server and Save:
instance_group: default
screenshot of output
…and then restart the agent on each of the three servers.
sudo systemctl restart nginx-agent

In order to make sure our new cluster is performant, we need to sync the authentication tokens between the instances.
- First, open nginx.conf on -all three- NGINX servers using the command below.
nano /etc/nginx/nginx.conf
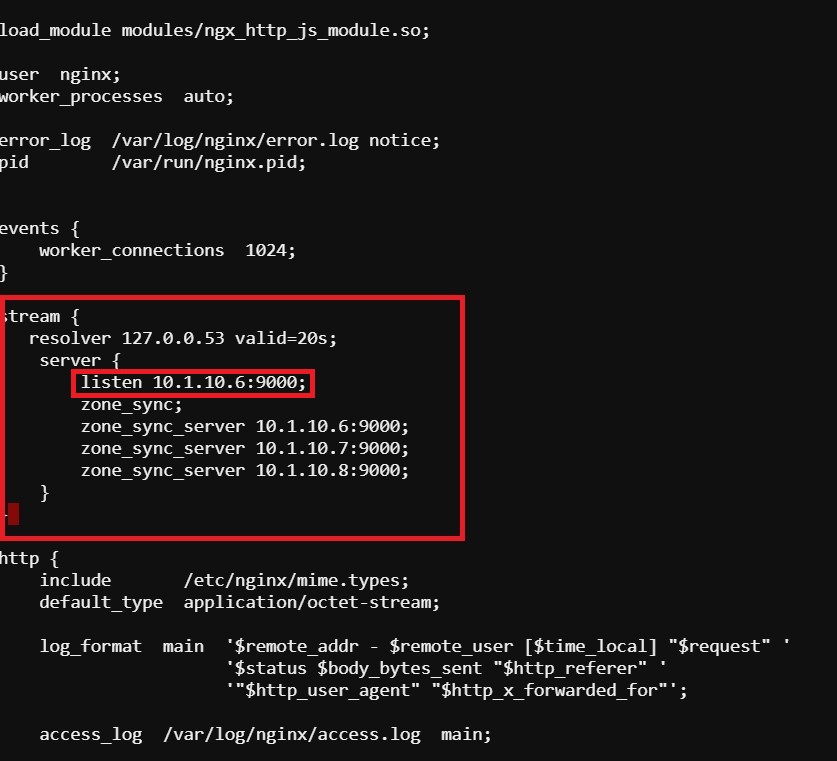
- Then add the ‘stream’ block below to the configuration, just before the ‘http’ block.
Attention
The server ‘listen’ directive needs to match the IP address of each server. The example below shows 10.1.10.6, which is correct for NGINX 1. For NGINX 2, change this to 10.1.10.7 and for NGINX 3, change it to 10.1.10.8.
stream {
resolver 127.0.0.53 valid=20s;
 server {
     listen 10.1.10.6:9000;
     zone_sync;
     zone_sync_server 10.1.10.6:9000;
     zone_sync_server 10.1.10.7:9000;
     zone_sync_server 10.1.10.8:9000;
   }
}
screenshot of output
save and close file
- Reload NGINX on -all three- servers.
nginx -s reload
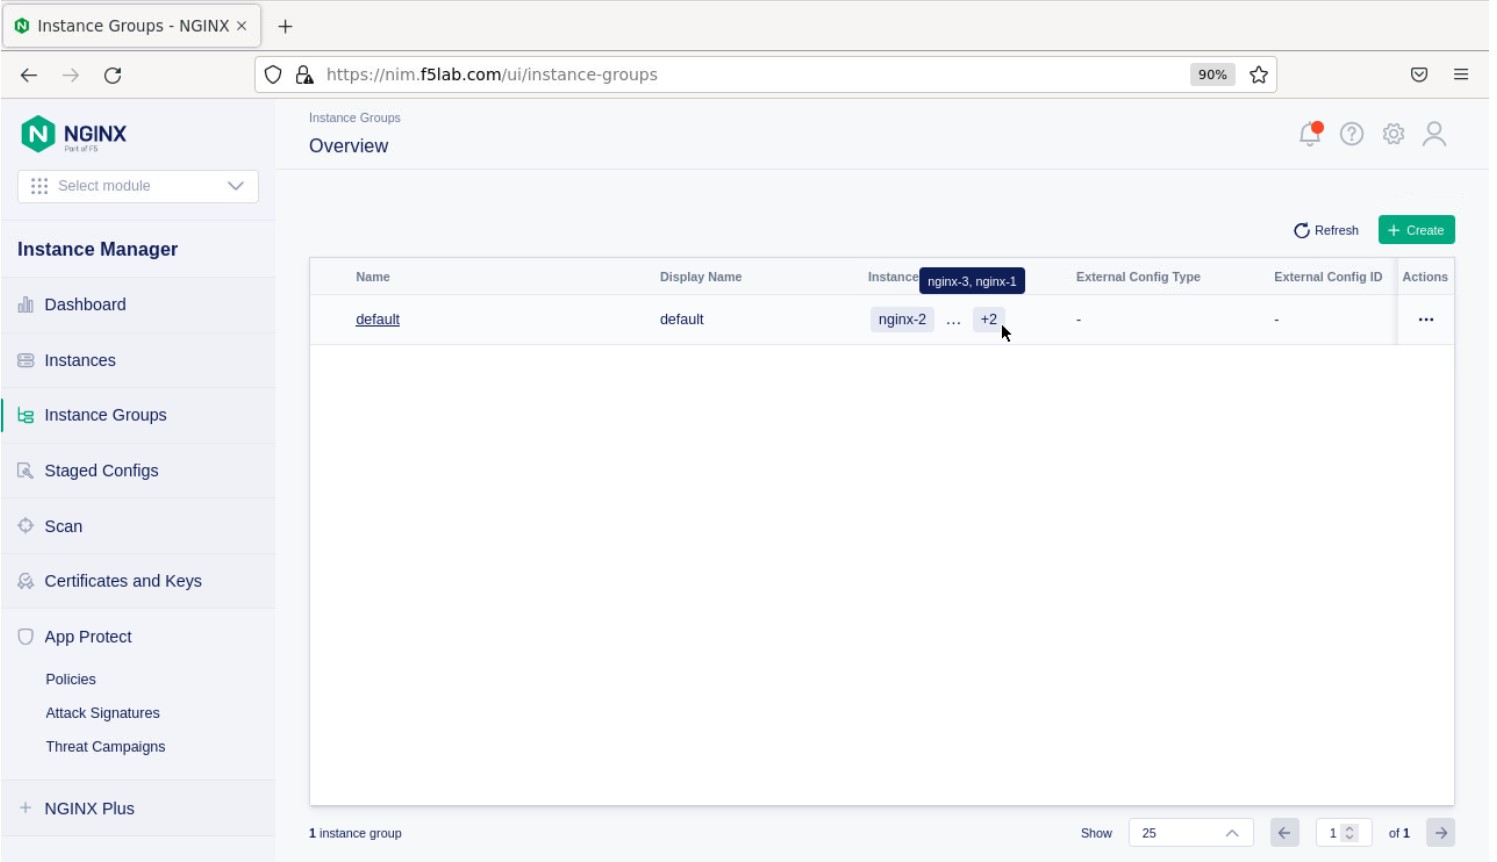
You should now see an Instance Group named ‘default’ in the Instance Manager.
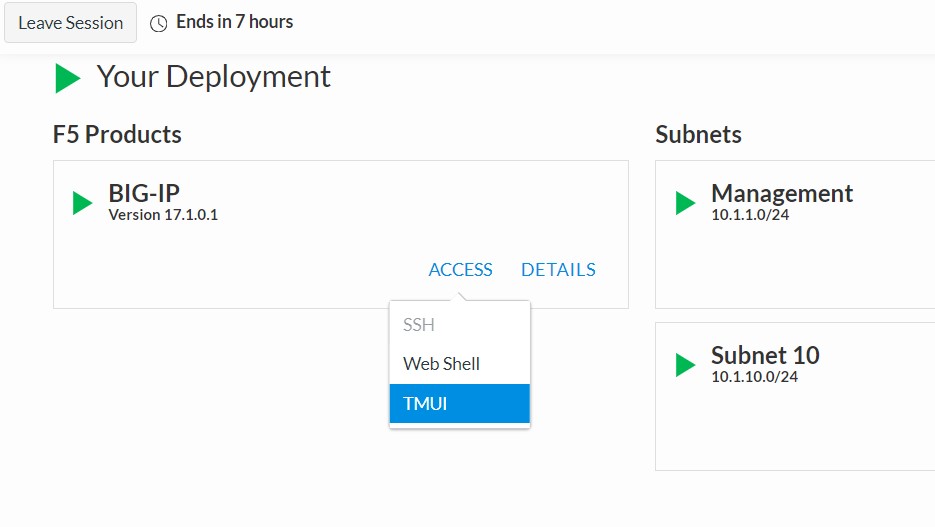
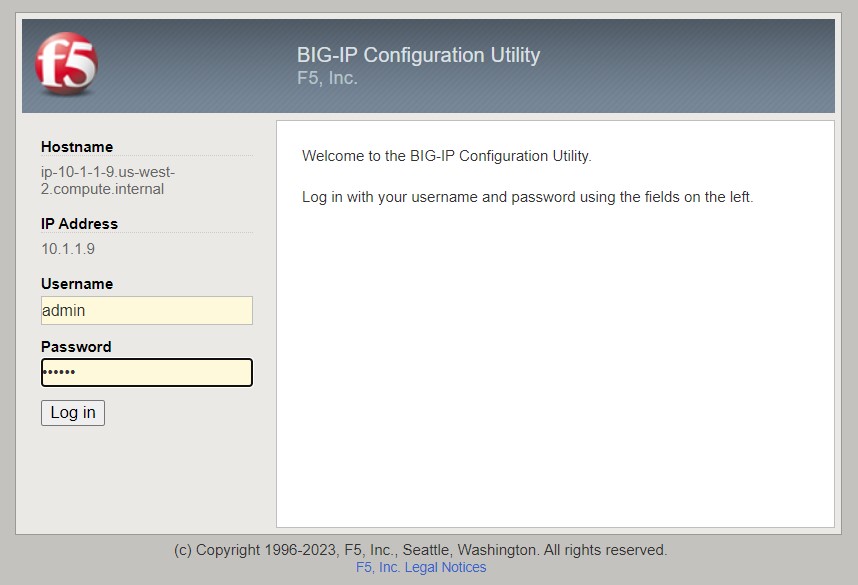
- Now we will go back to UDF and select ‘Access’ –> ‘TMUI’ to log on to the BIG-IP (admin:f5r0x!) in order to test and validate the configuration.
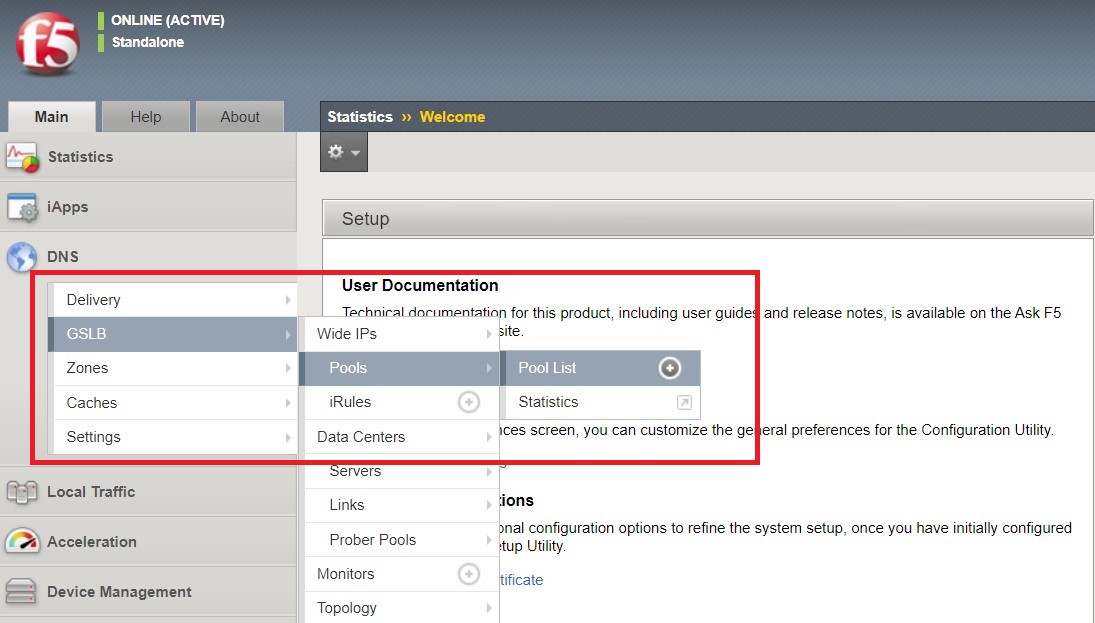
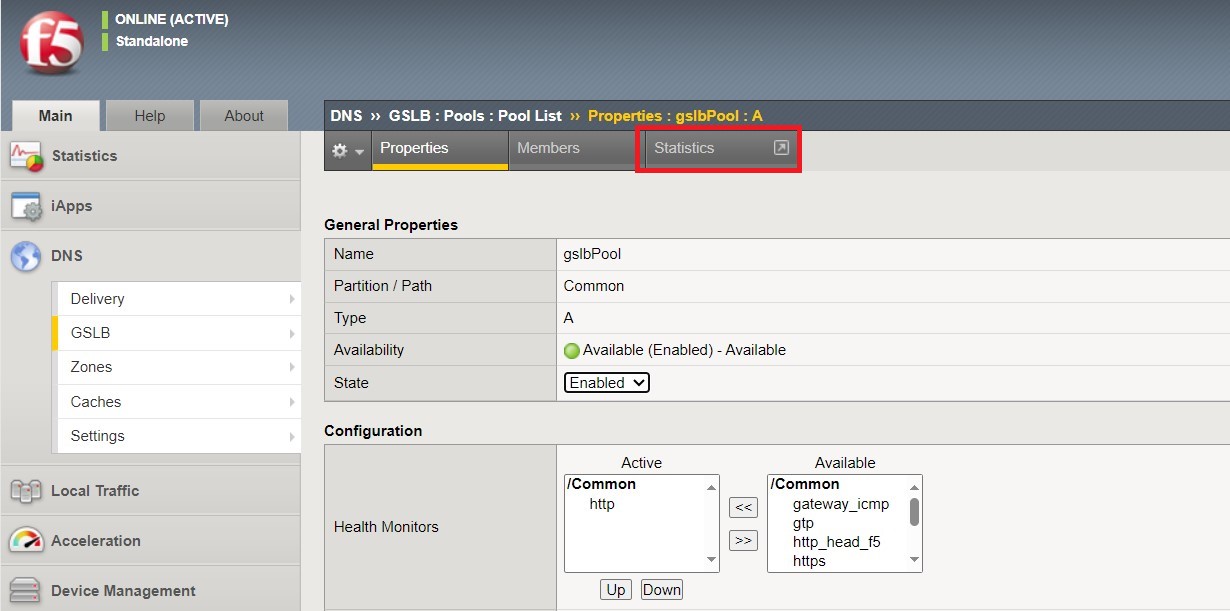
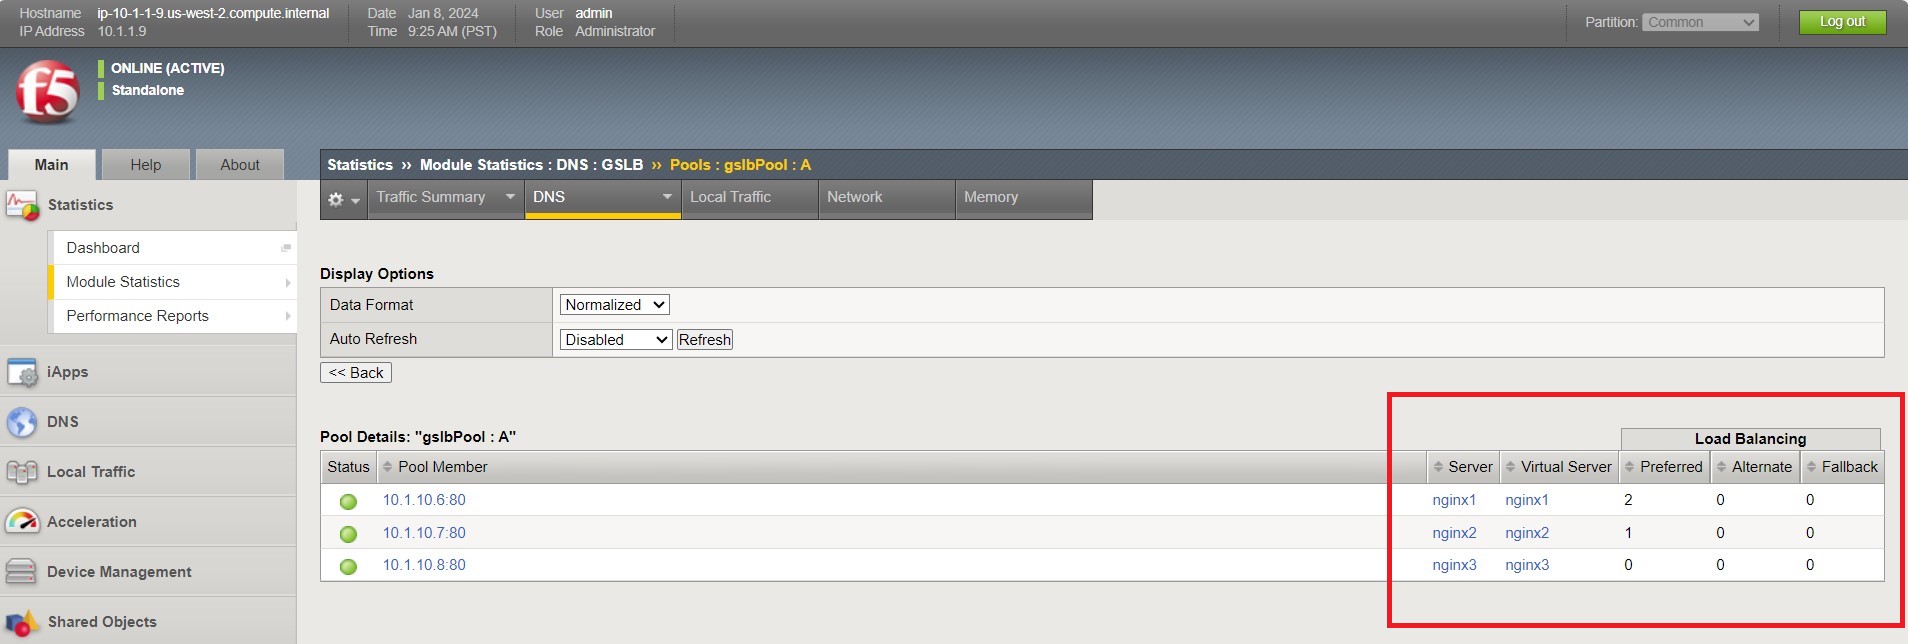
Navigate to DNS > GSLB > Pools > Pool List and select ‘gslbPool’.
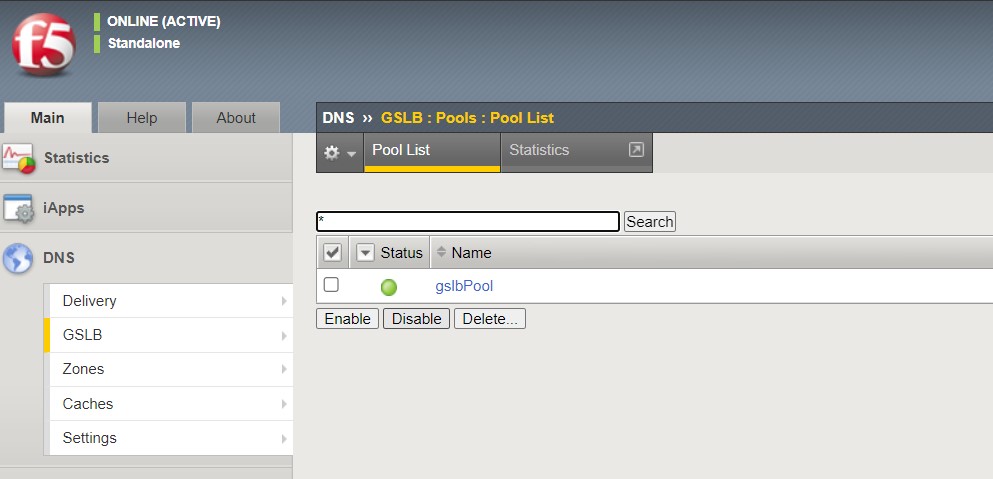
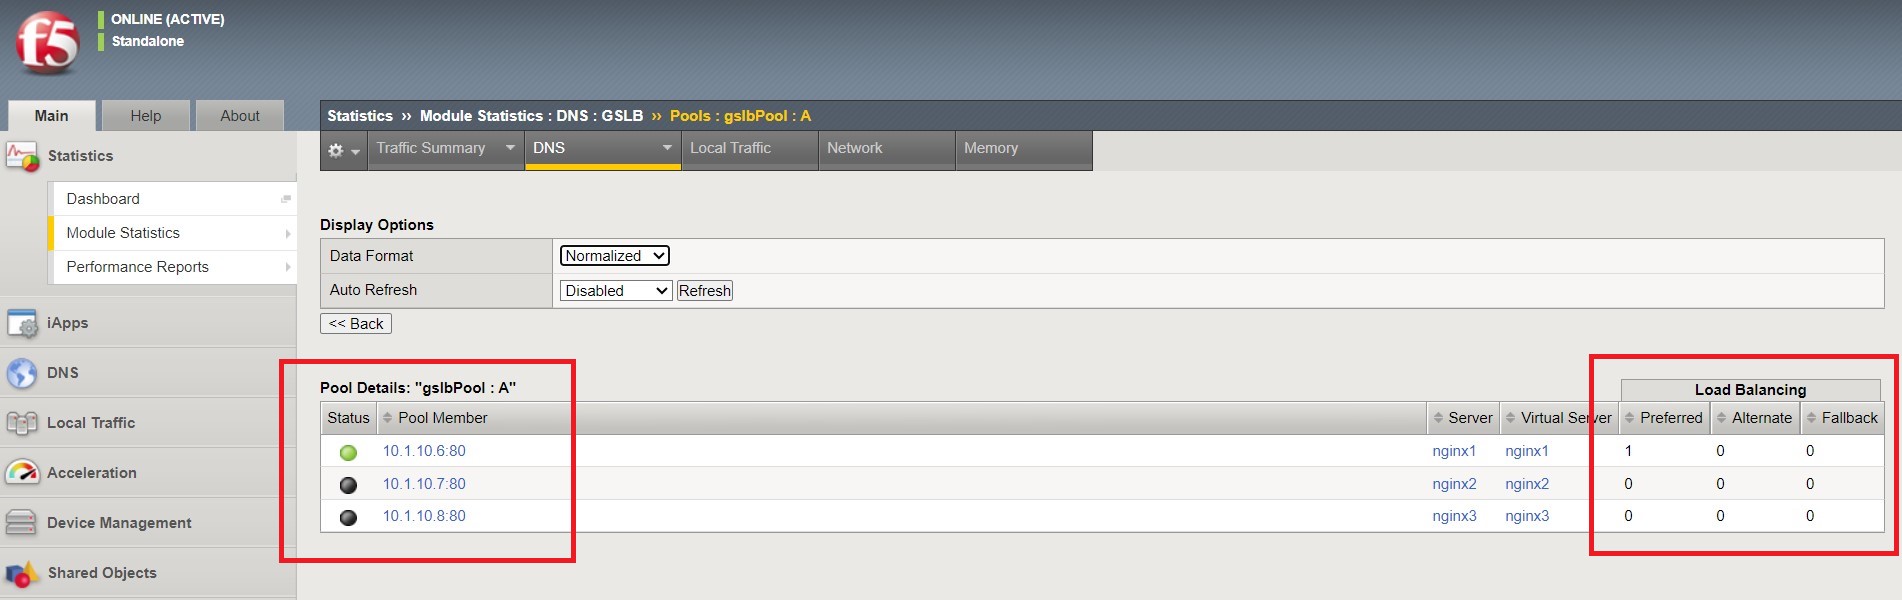
Click the ‘Statistics’ tab and you’ll see that only ‘nginx1’ is currently enabled and has ‘Preferred’ resolutions listed under ‘Load Balancing’.
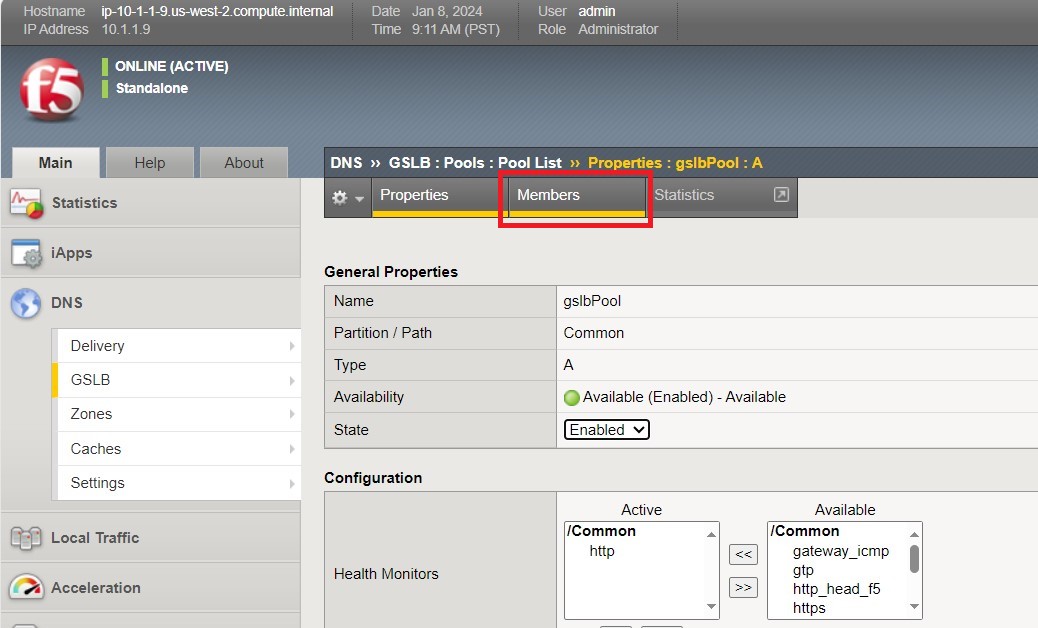
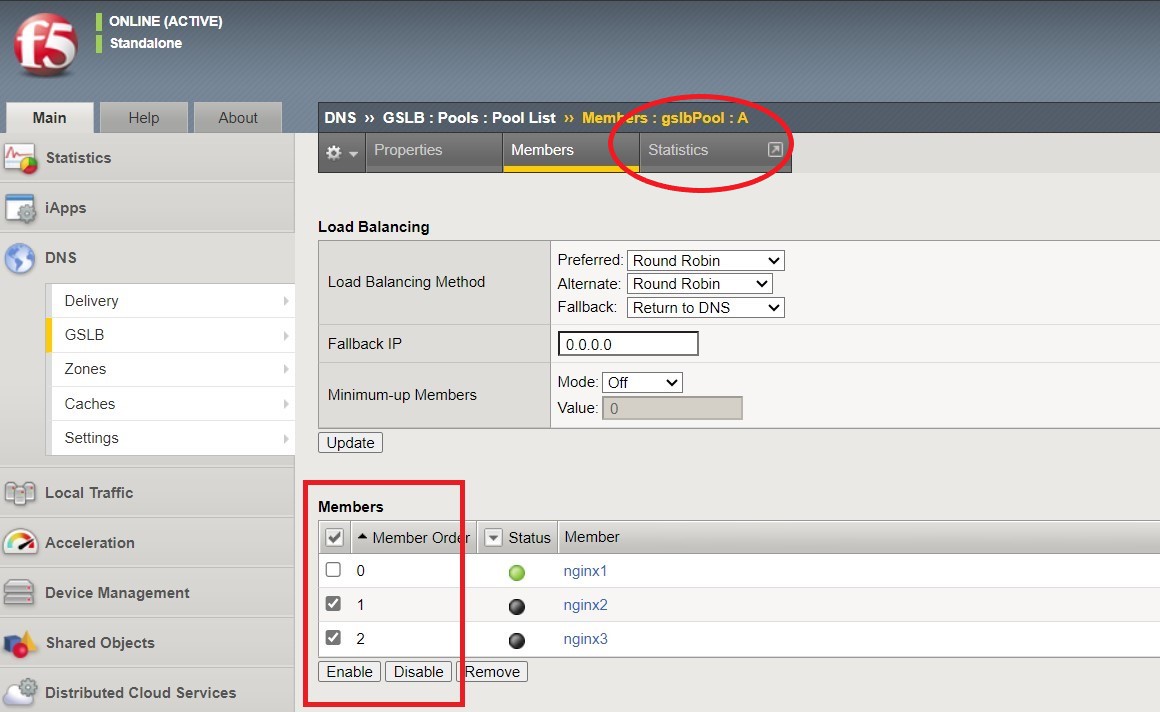
- Click the ‘back’ button on your web browser to get back to the ‘gslbPool. This time select the ‘Members’ tab.
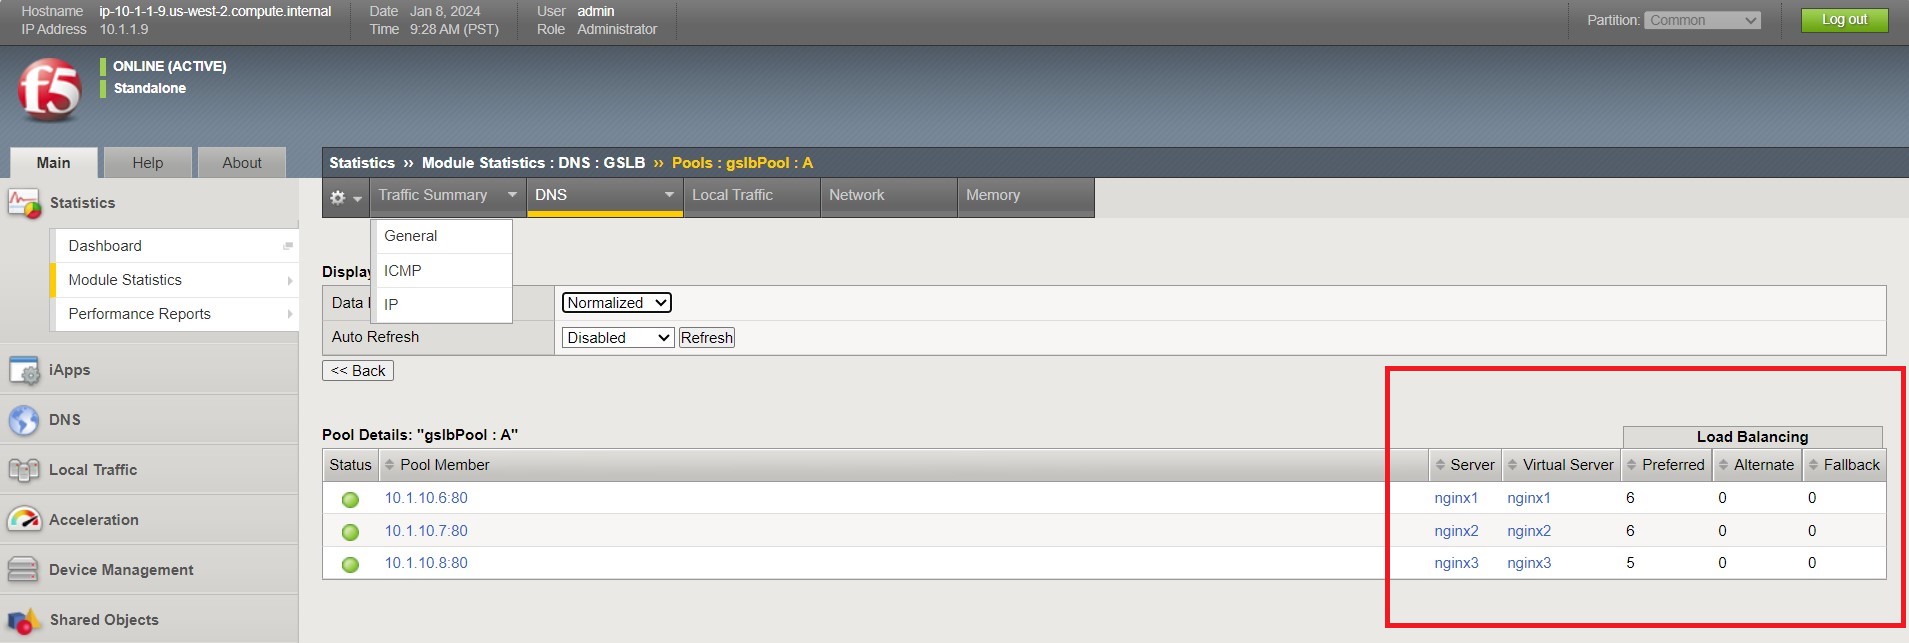
- Here we will check the boxes next to ‘nginx2’ and ‘nginx3’ and click ‘Enable’ to add them in to the load balancing pool. Refresh the page by clicking the ‘Members’ tab again and you will see the new members become active (it may take several seconds). Now click the ‘Statistics’ tab again and we are ready to test the configuation.
- Go back to Firefox, open a new tab, and navigate to http://nginxdemo.f5lab.com:8010 again. Log back in as user01 with password: appworld2024, as needed.

- Go back to the BIG-IP and refresh the page (Ctrl-F5) to verify that the successful login was performed by one of the other NGINX servers, in this case, nginx2.
- Refresh the page in Firefox several times (Ctrl-R) and then refresh the BIG-IP Statistics again (Ctrl-F5) to confirm that the load balancing is leveraging each of the NGINX servers.
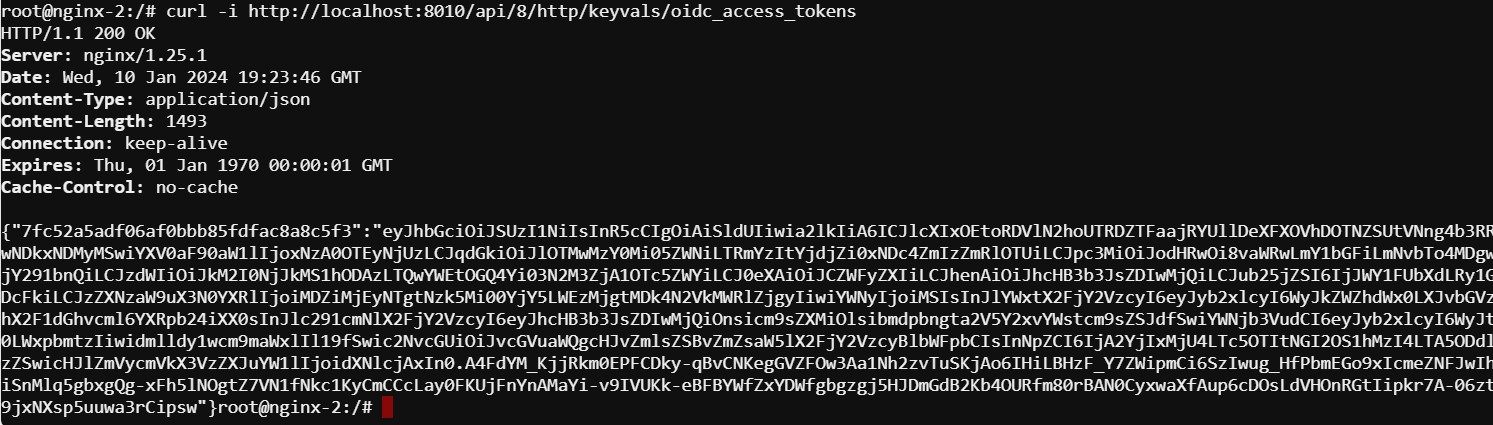
- Finally, validate the configuration by running the command below on -each of the three- NGINX Plus servers to confirm that the access token has synchronized.
curl -i http://localhost:8010/api/8/http/keyvals/oidc_access_tokens
For example, below we see the access token on nginx-2. Run the same command on nginx-1 and nginx-3 and you should see the same token.
Congratulations, you have successfully completed the lab!