F5 BIG-IP Next WAF Labs > (OPTIONAL) Module 6: Labs for use case specific capabilities Source |
(OPTIONAL) Lab 6 - Additional labs on further use cases and capabilities
So far, you have explored some of the new UI workflows and mitigation capabilities of BIG-IP Next WAF. In this lab, we will cover more use cases and how to customise WAF security policies accordingly. You will cover the configuration of:
- Data Guard
- Mask sensitive data in Event Logs
- Brute Force
- Cross-Site Request Forgery (CSRF)
Lab 6.1 - Data Guard
A response in a web applications might contain sensitive user information i.e. credit card numbers or U.S. social security numbers. Data Guard can prevent responses from revealing sensitive information by masking the data - also known as response scrubbing. Data Guard scans the responses for the types of sensitive information i.e. U.S. social security numbers you specified.
Enable Data Guard to protect sensitive user information
- Ensure that you are logged into the BIG-IP Next Central Manager via the Windows Jump Host Desktop.
- Within BIG-IP Next CM navigate to Security -> WAF -> Policies and select the policy custom_lab_policy.
- Navigate to Data Guard and enable Data Guard.

Note: In addition of masking credit card or U.S. social security numbers, Data Guard allows you to configure custom patterns using Perl-compatible regular expressions - PCREs - to protect sensitive information and to specify exception patterns that should not be considered sensitive.
- For our demo, we enter an U.S. social security number into the application and only want to expose the last 4 digits of the number. To do this, check Detect for U.S. social security numbers and leave the rest of the settings within the Data Guard menu unchanged.

- We also want to protect against data leakage. Please make sure that within the Data Guard Violations the Information Leakage Detected action is set to Alarm.


- Save & Deploy the configuration changes.
Test Data Guard
- Open a new browsing window in chrome and connect to https://juice.example.com.
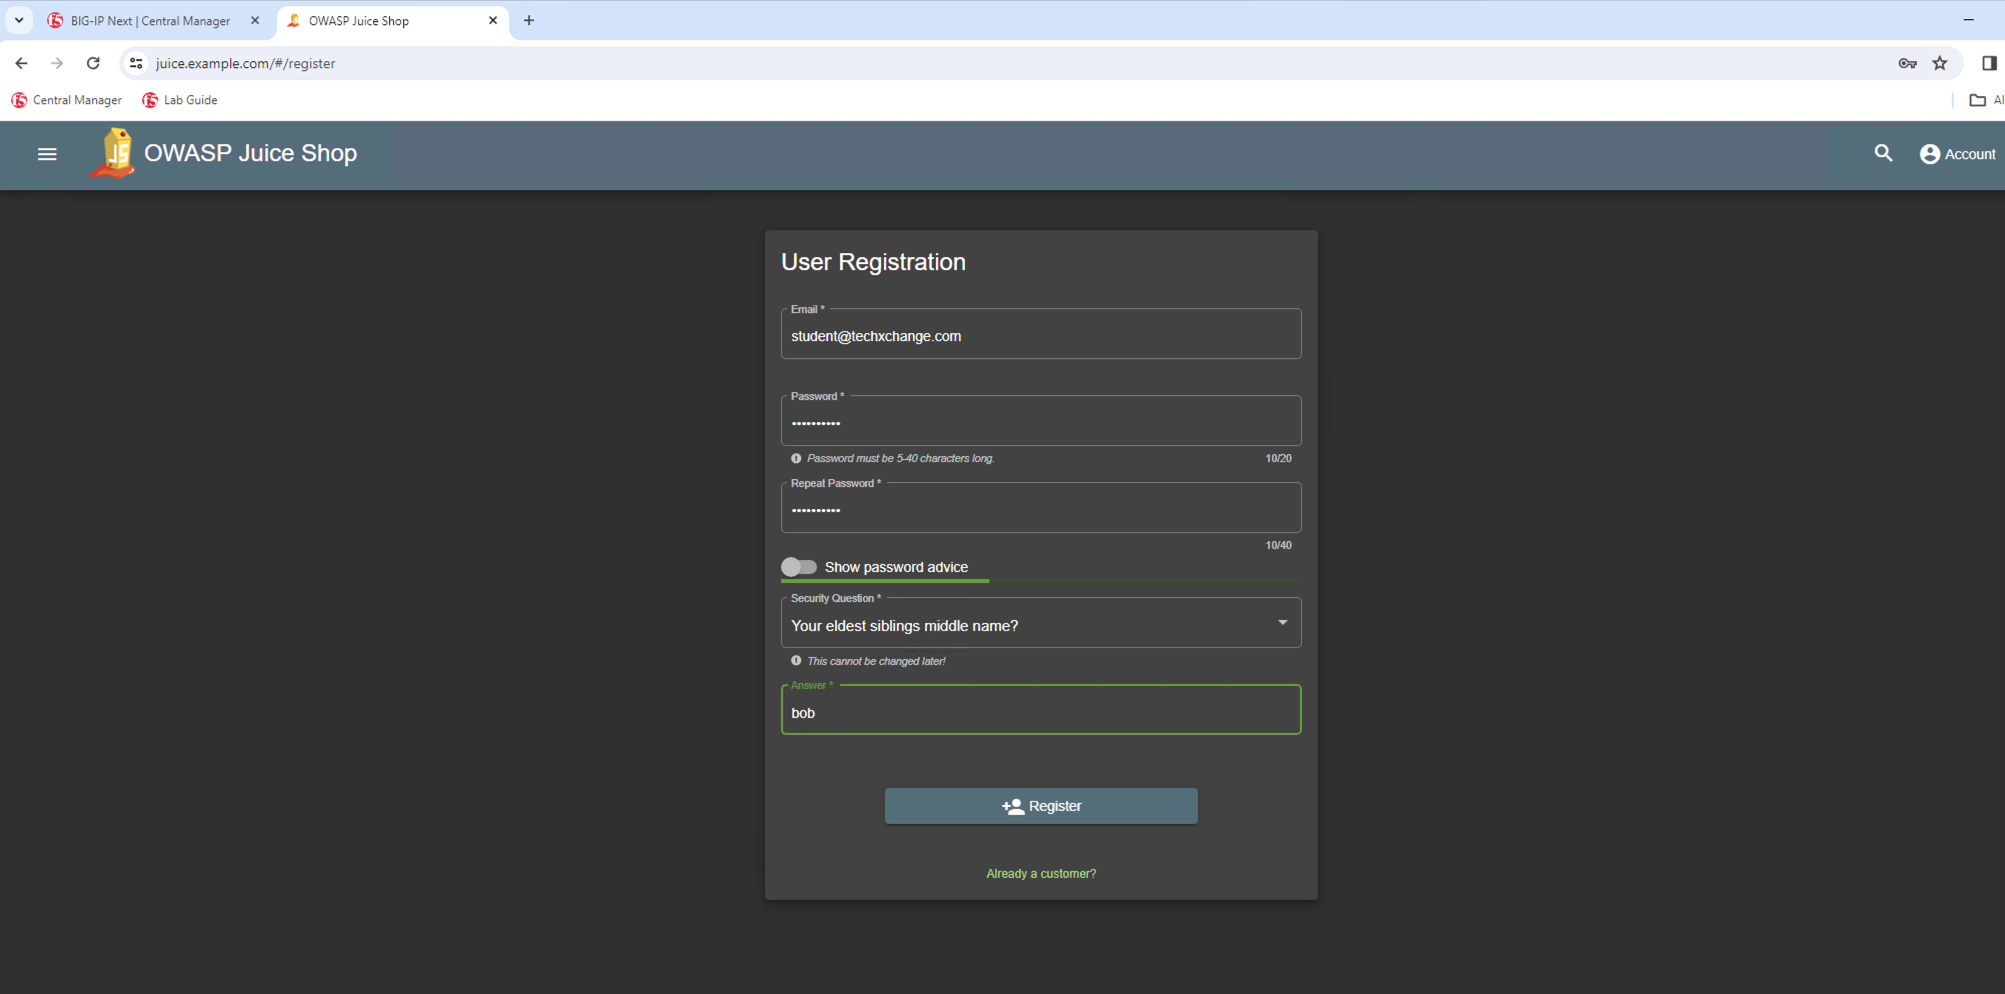
- Inside our juice lab, click on Account and then select Not yet a Customer.
- Register a new user and remember the username and password you created. In our example username is student@techxchange.com and password is mypassword. Choose a creative answer for the Security Question.
- Now login to app juice lab with your new created credentials.
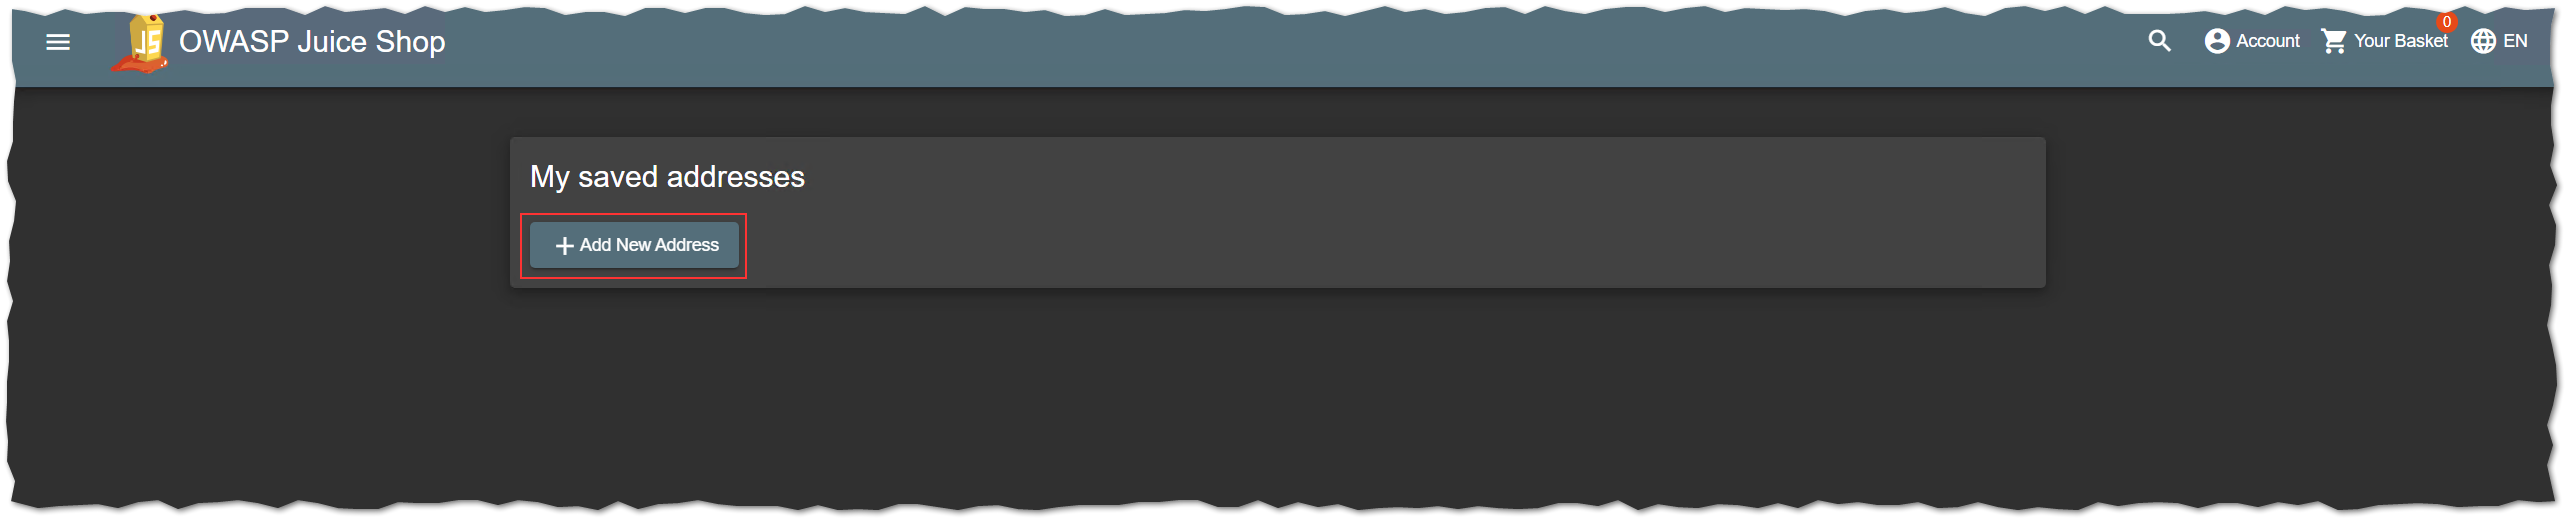
- Navigate to Account > Ordering & Payment > My Saved Addresses.

- Now add a new address by pressing + Add New Address.
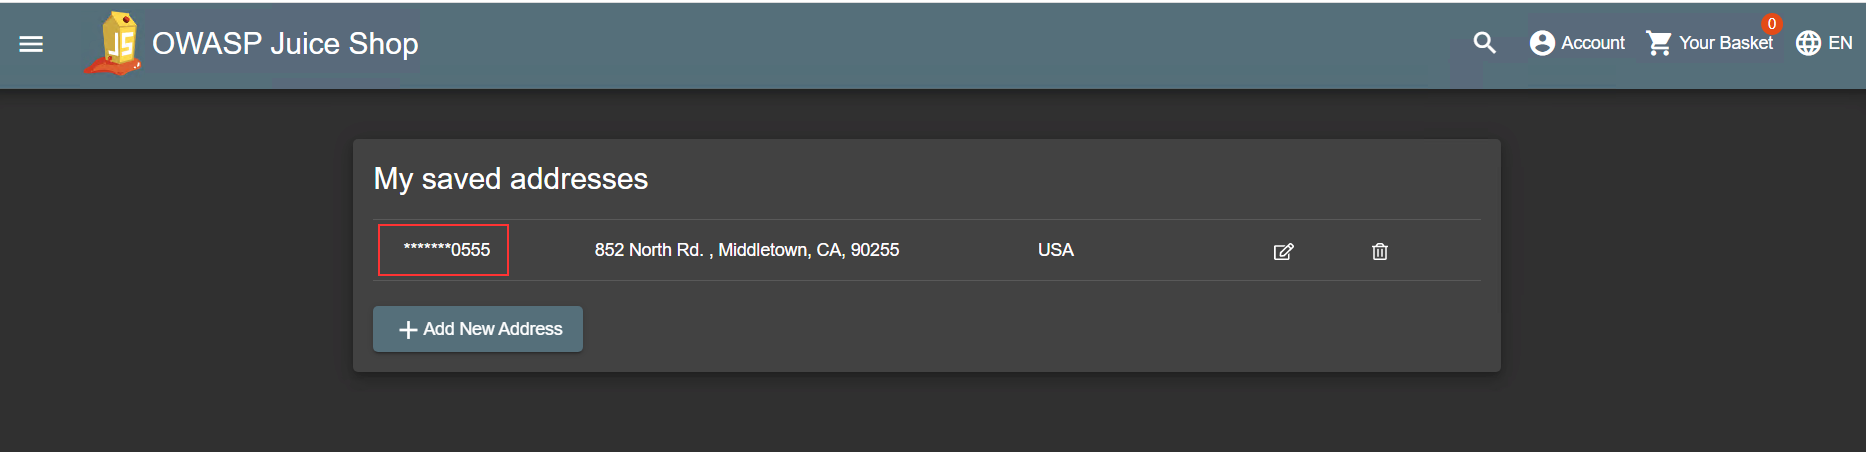
- Complete the form with country, zip code, city and address information of your choice, but for field Name insert a value looks like a U.S. social security number. The U.S. social security number is a nine-digit number in the format “AAA-GG-SSSS”. Example: 044-99-0555.

- Press Submit to save your changes. As a result the value of the name field except the last 4 digits are replaced with ****
- Within BIG-IP Next CM navigate to Security -> Event Logs and search for /api/address to analyze the Event Log which has been created for the specific reqeuest:
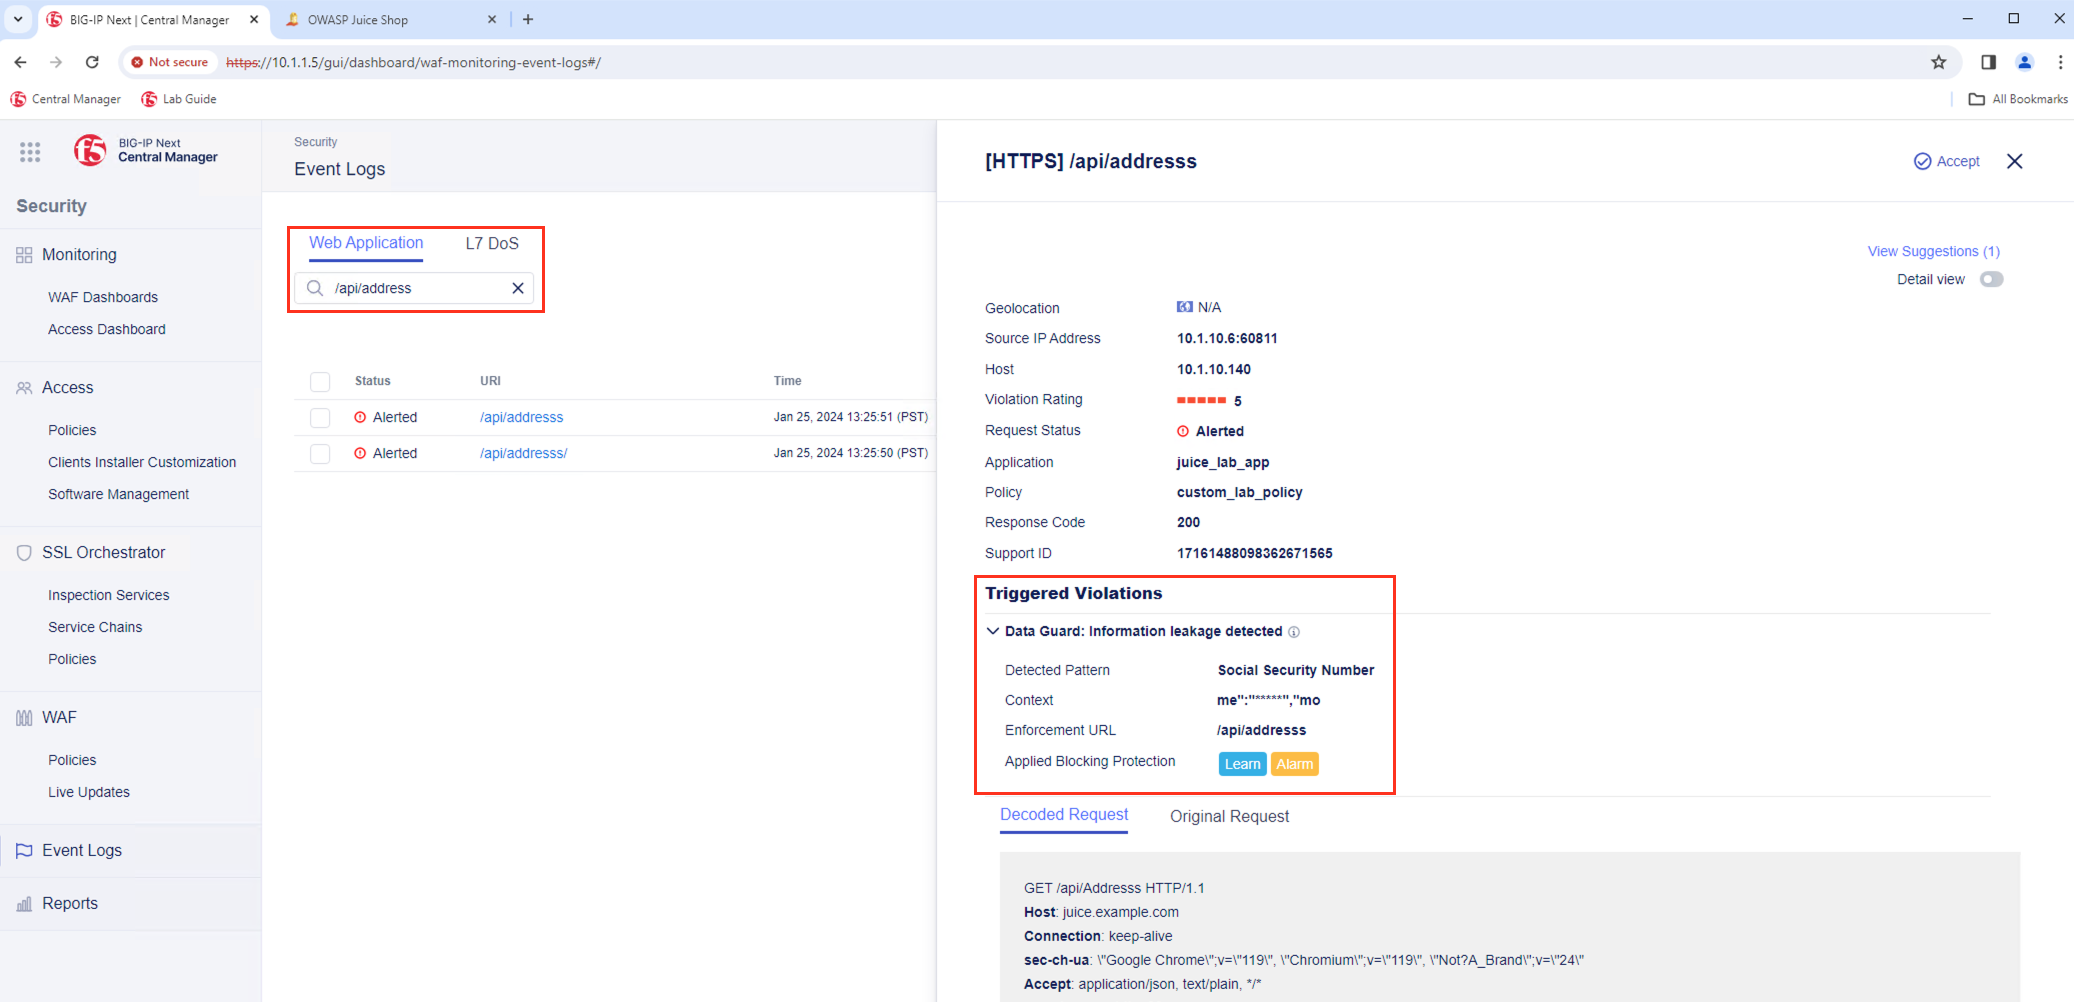
- You finished the configuration of Data Guard and will continue with masking sensitive data in Event Logs.
Lab 6.2 - Mask Sensitive Data in Event Logs
By default, the BIG-IP Next WAF logs incoming request information in clear text within the Event Logs. You may want to mask request information in the logs because some requests contain sensitive information, such as authorisation credentials or credit card information. By selecting the option Mask value in logs in the security policy, the system replaces the sensitive data by asterisks. The masked data is not visible to the administrator. K52154401 provide an overview which Data to mask are available today in BIG-IP AWF.
BIG-IP Next WAF currently support the following Data to mask:
- Parameter
- HTTP Header
- Cookies
Within the Lab we will provide you an example on how you can mask a specific Parameter.
- The expected parameters for logging into the OWASP Juice Shop app are:
- email for the user.
- password for the password.
- In the example below, we have used student@techxchange.com as the username and mypassword as the password.
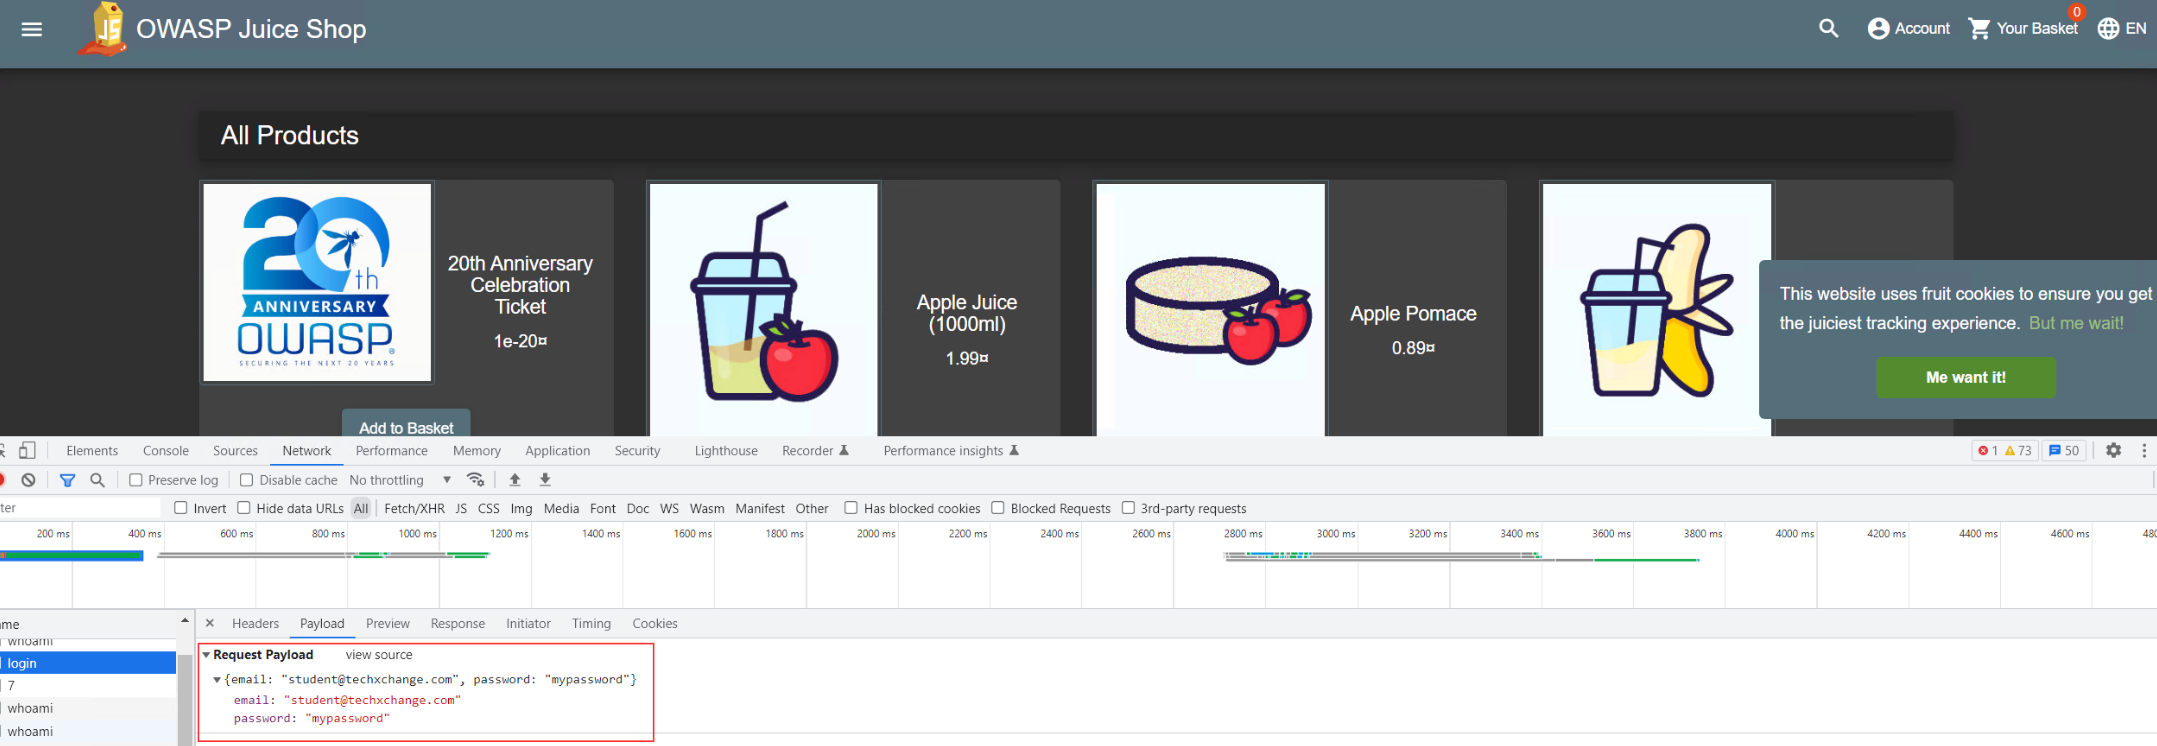
- If you navigate to Security -> Event Logs within the custom_lab_policy security policy and filter for /rest/user/login you will find logs which will show:
- The parameter value for parameter email not masked.
- The parameter value for parameter password masked. Masking a sensitive parameter shuch as password is a default behaviour of the secuirty policy.

Note: Even though we used incorrect credentials to log into the OWASP Juice Shop application, this request is a legitimate request. The custom_lab_policy security policy log settings were set to log only Illegal events. Note Please change the security policy log settings to Log Events All and Save & Deploy the changes.

Mask parameter value for email parameter
- Within BIG-IP Next CM navigate to Security -> WAF -> Policies and select Policy named custom_lab_policy.
- Within the WEB PROTECTION Menu navigate to Application Elements and select Parameters.

- Press +Create to access the Parameter Proerties.
- Name of parameter is email.
- Parameter Type is Explicit.
- For Mask Value in Logs, enable Mask Value in Logs toggle.
- Save and Deploy the changes.
- Try to login to the Juice Shop app with student@techxchange.com as the username and mypassword as the password.
- Verify within the Security -> Event Logs that the parameter value for parameter email has been masked.

- You finished the the lab Mask sensitive data in logs and will continue with the configuration to mitigate Brute Force Attacks .
Lab 6.3 - Mitigating Brute Force Attacks
Brute force attacks are attempts to break into secure areas of a web application by exhaustively and systematically trying username/password combinations to discover legitimate authentication credentials. To prevent brute force attacks, BIG-IP Next WAF tracks the number of failed attempts to reach the configured login URLs. The system will consider it an attack if the failed login rate increases at a very high rate, or if failed logins reach a certain number.
Note: The goal of this lab is to show the easy workflow to protect against brute force attacks.
Configure Brute Force Attack Prevention
- Within BIG-IP Next CM navigate to Security -> WAF -> Policies and select the security policy named custom_lab_policy.
- Under the WEB PROTECTION Menu navigate to Brute Force Protection and create a new brute force protection policy.
Note: The system detects brute force attacks based on failed login rates. Therefore, the security policy needs to have login pages for the web applications you want to protect. Login pages specify a login URL that presents a site that users must pass through to gain access to the web application.
- As there is no Login Page configured, first task is to create a Login Page. Within this Lab we protect the OWASP Juice Shop App against brute force attacks.
Note: The request url for Login will be rest/user/login and HTTP Method will be POST.
- Once the Login Page has been configured, please adjust the Authentication Type and Login Conditions so that these settings meet the requirements of the application.
- For Authentication Type - Juice Shop App is a Single Page Application - please select AJAX/JSON for Authentication Type.
- Please set Username Parameter to email and Password Parameter to password.
- As Login Conditions please set the Expected Response Status Code to 200.
- Save the modifications.
- The Brute Force Protection Properties menu allows you to configure the threshold at which Brute Force Protection classifies login attempts as brute force attacks.
- For our lab, we set the value of Maximum failed login attempts to 5 on IP address. We also disable detection of brute force attacks based on username for this lab.
- The final step is to deploy the configuration changes so that they go live.
Configure Response Page
- As the Juice Shop App is a Single Page Application and we used AJAX/JSON for Authentication Type in the previous configuration steps, we now need to configure an appropriate Response and Blocking Page.
- Within the custom_lab_policy security policy, Response Pages and choose AJAX Blocking Page. Enable the AJAX Blocking Page and leave the Response Page Action to deafult.
- Now test your new configured brute force configuration by using Chrome Browser and choose the Bookmark named Juice Shop - WAF.
- Within the Juice Shop App navigate to Account and try to login with invalid credentials.
- You should be prompted with a Response Page after the 6th failed login.
- You finished the configuration of Brute Force Attack Prevention and will continue with the configuration of Cross-site Request Forgery attack protection.
Lab 6.4 - Cross-site Request Forgery - CSRF
Next you configure BIG-IP Next WAF to protect against Cross-site Request Forgery - CSRF - attacks. K11930 explain in details what a Cross-site Request Forgery - CSRF attack is.
- Under the WEB PROTECTION Menu of security policy custom_lab_policy navigate to CSRF and enable CSRF for the policy.
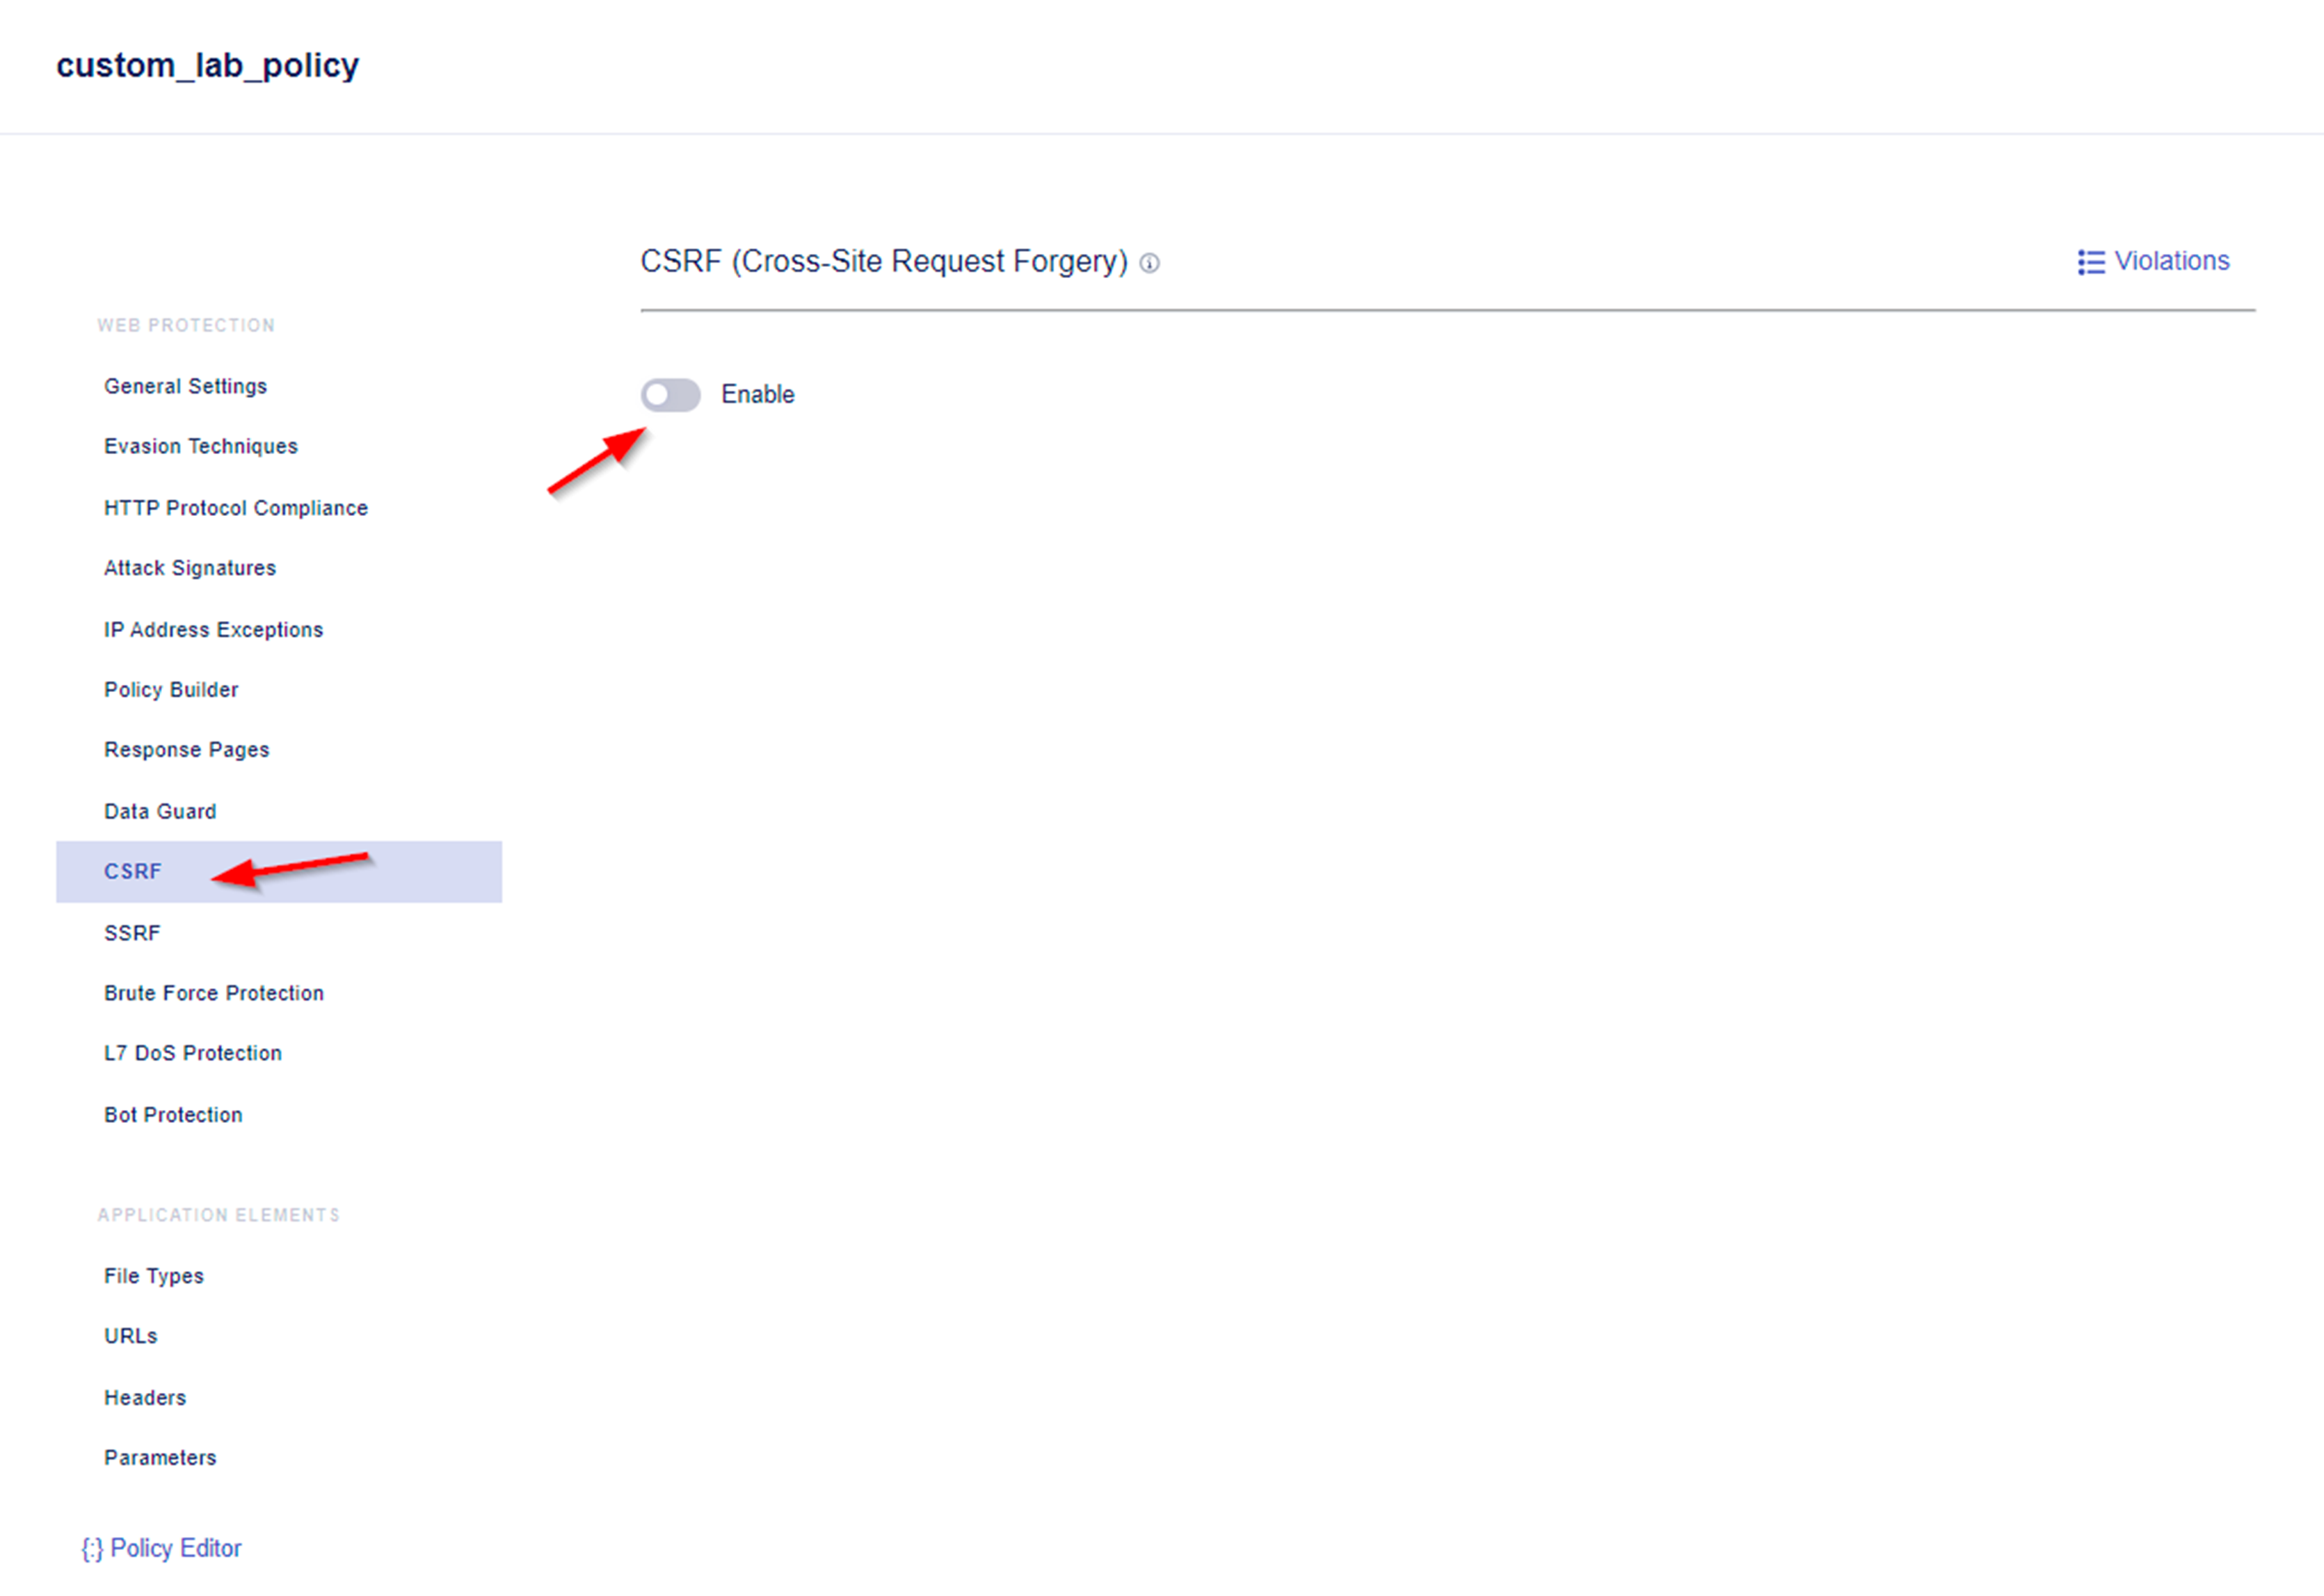
Note: By default, the policy contains a wildcard URL that allows protection against all URLs. You can choose to configure a different and more specific URL. The Create URL menu also allows you to configure an exception by selecting None as the Enforcement Action.

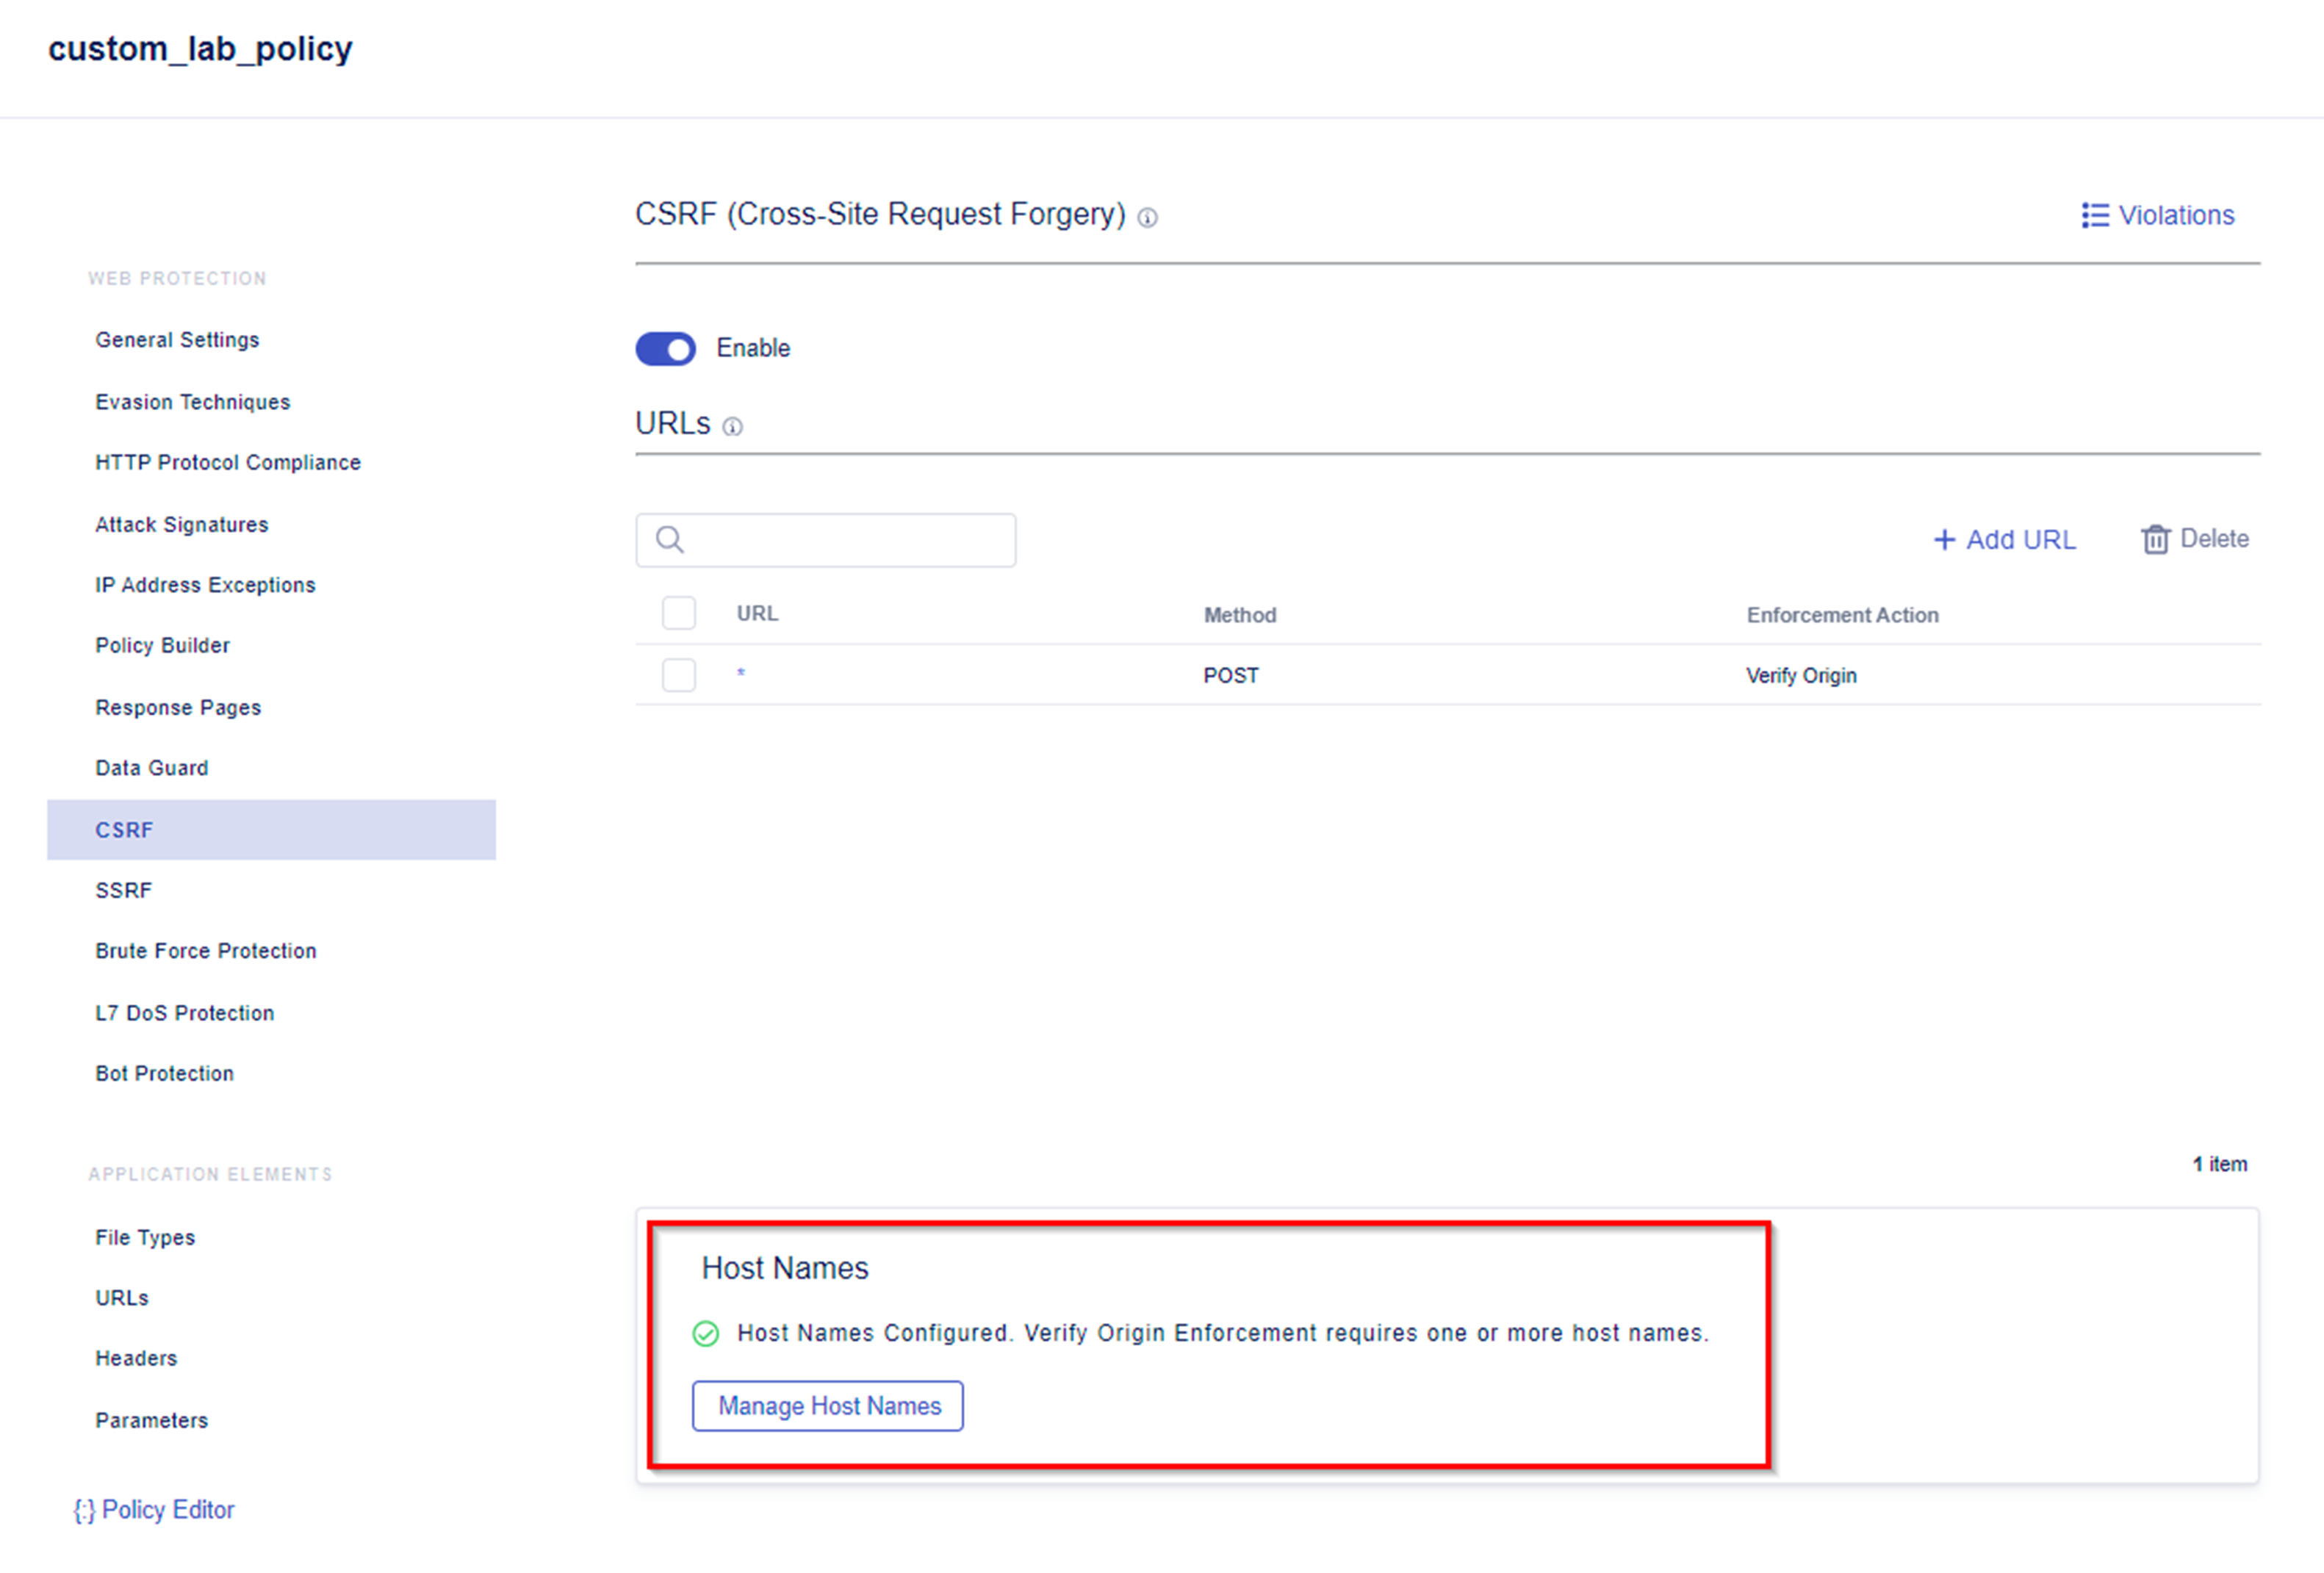
- At the bottom of the CSRF configuration menu you will see a WARNING. For CSRF to work, a host name must be configured. There is currently no host name configured.

- Add the hostname you want to protect by:
- Access the Add Host Name Menu.
- As Name add e.g. juice.example.com
- Save the changes.

- When saving is completed, you will no longer see a warning for the to be configured Host Names.
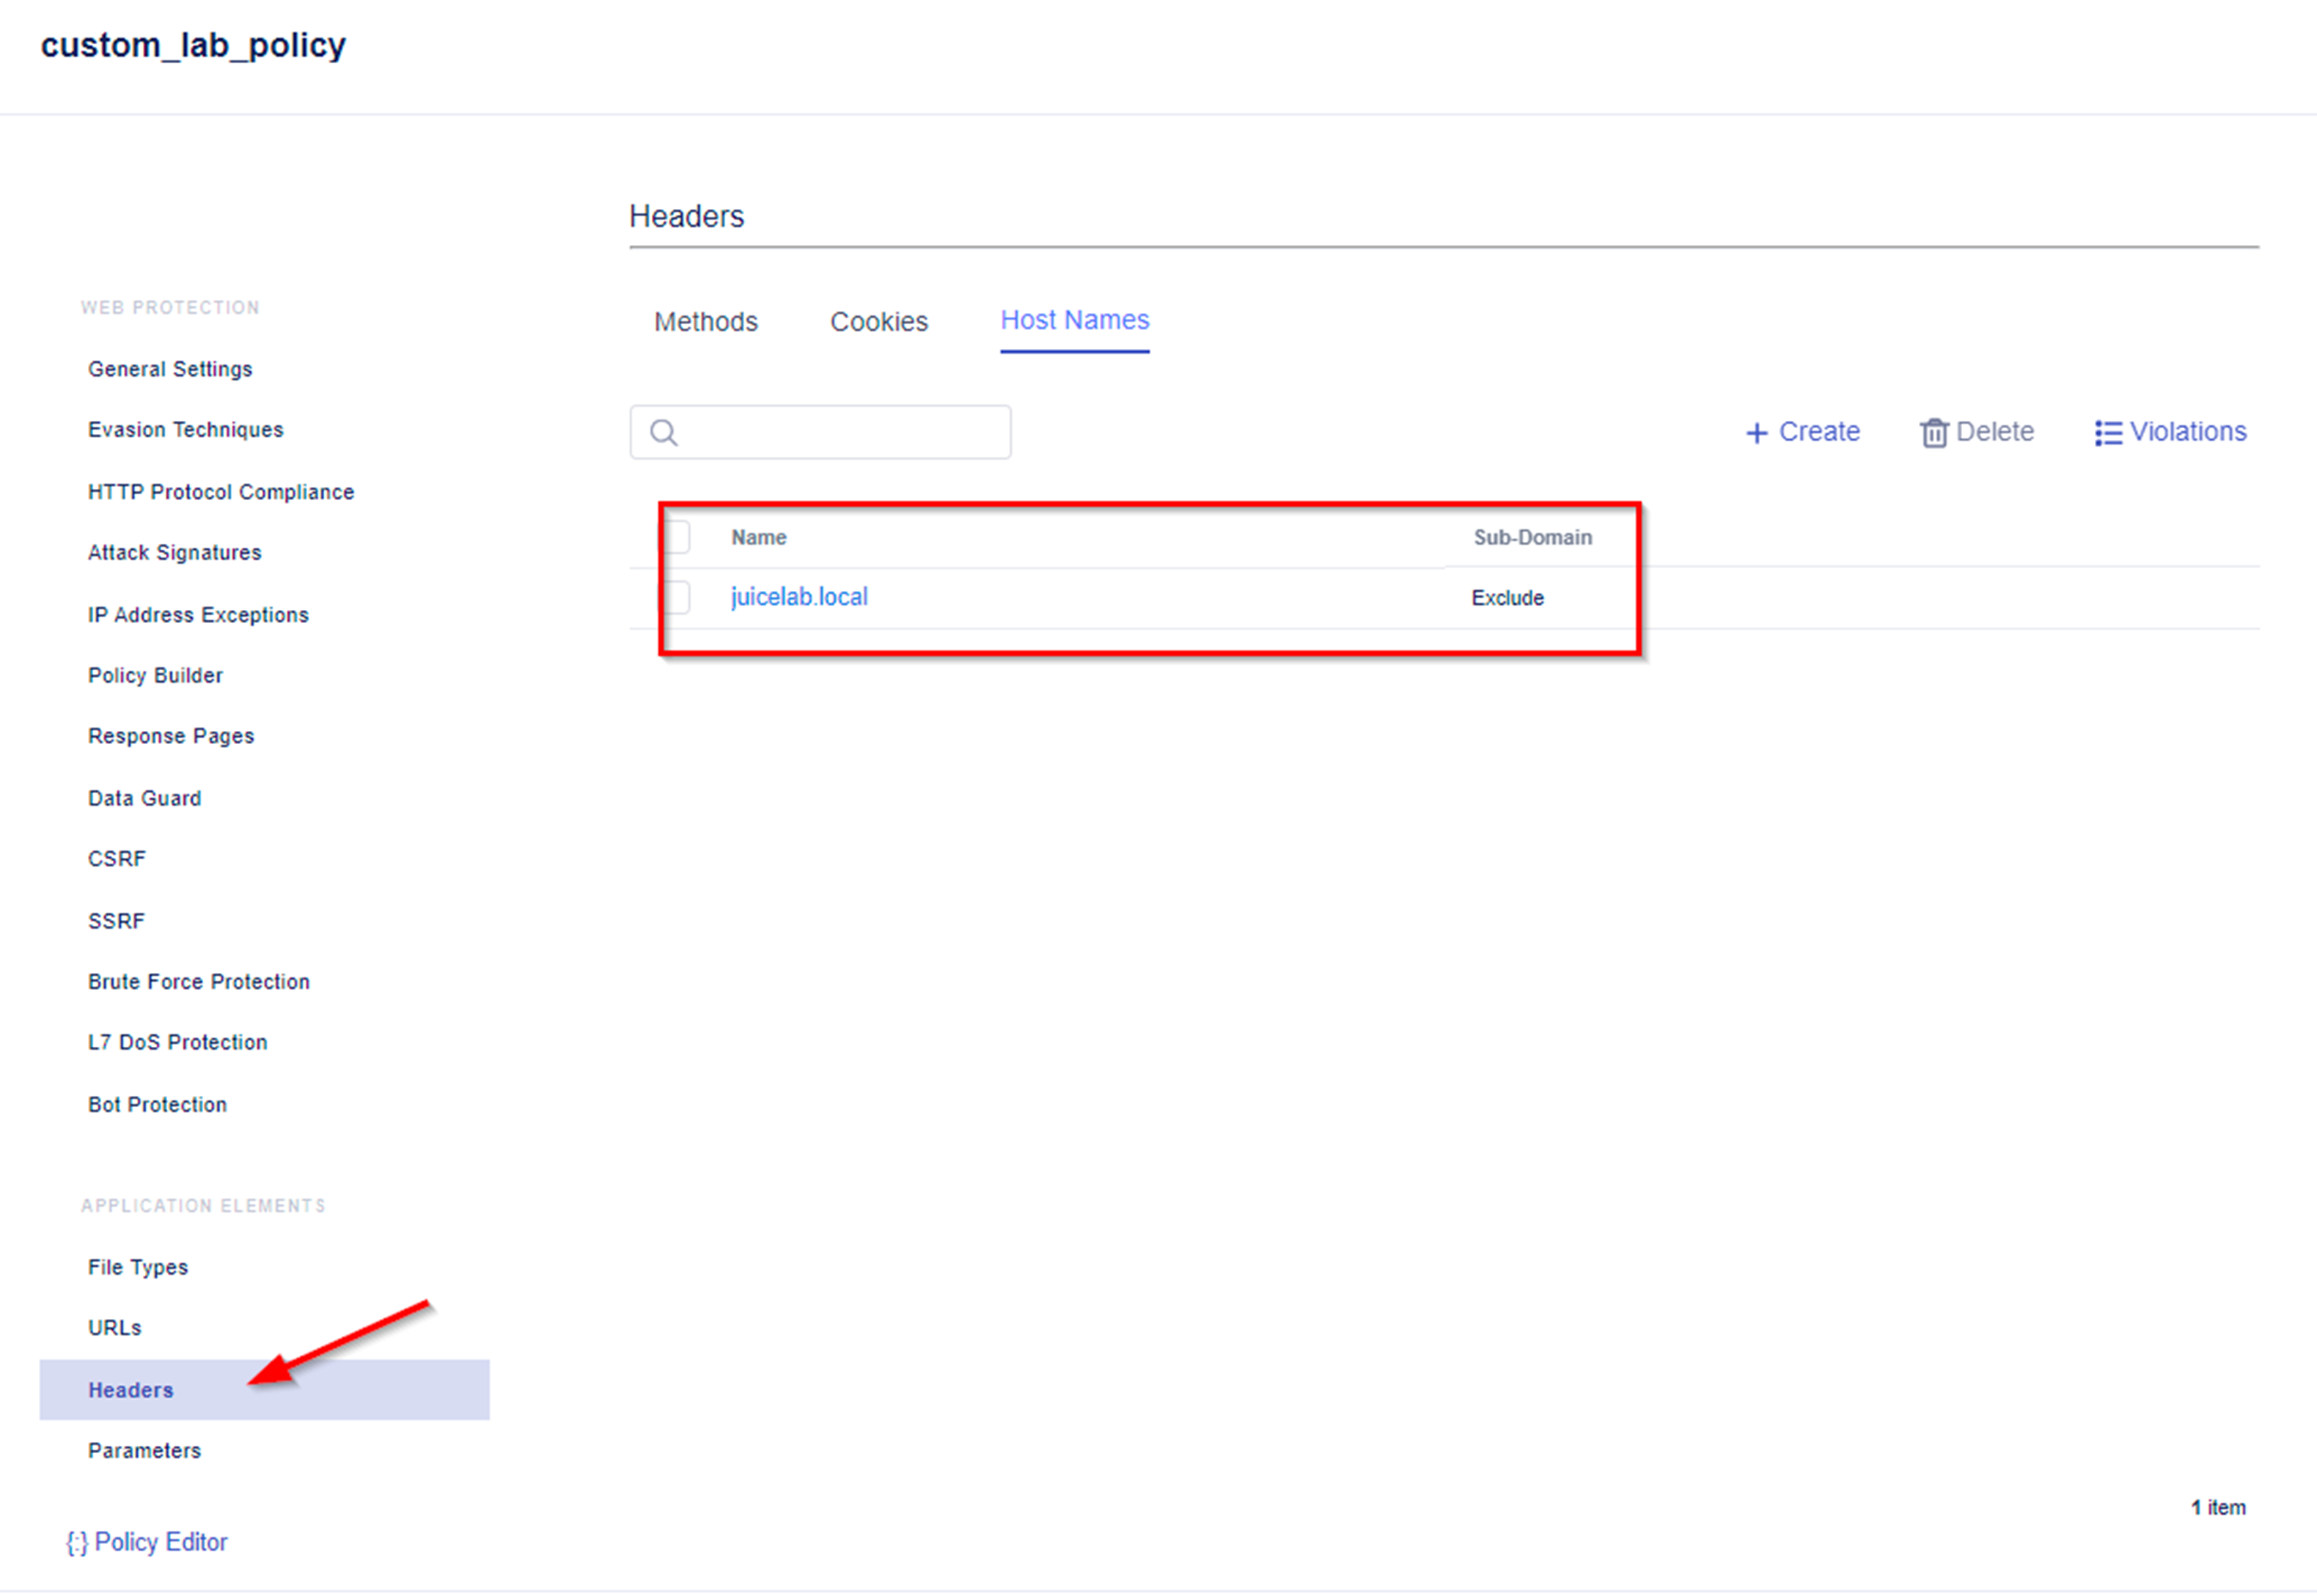
Note: An alternative way of configuring a specific host name is to configure Header -> Host Name in the Application Elements configuration menu. Please configure the hostname accordingly to your environment, e.g. we used juice.example.com.
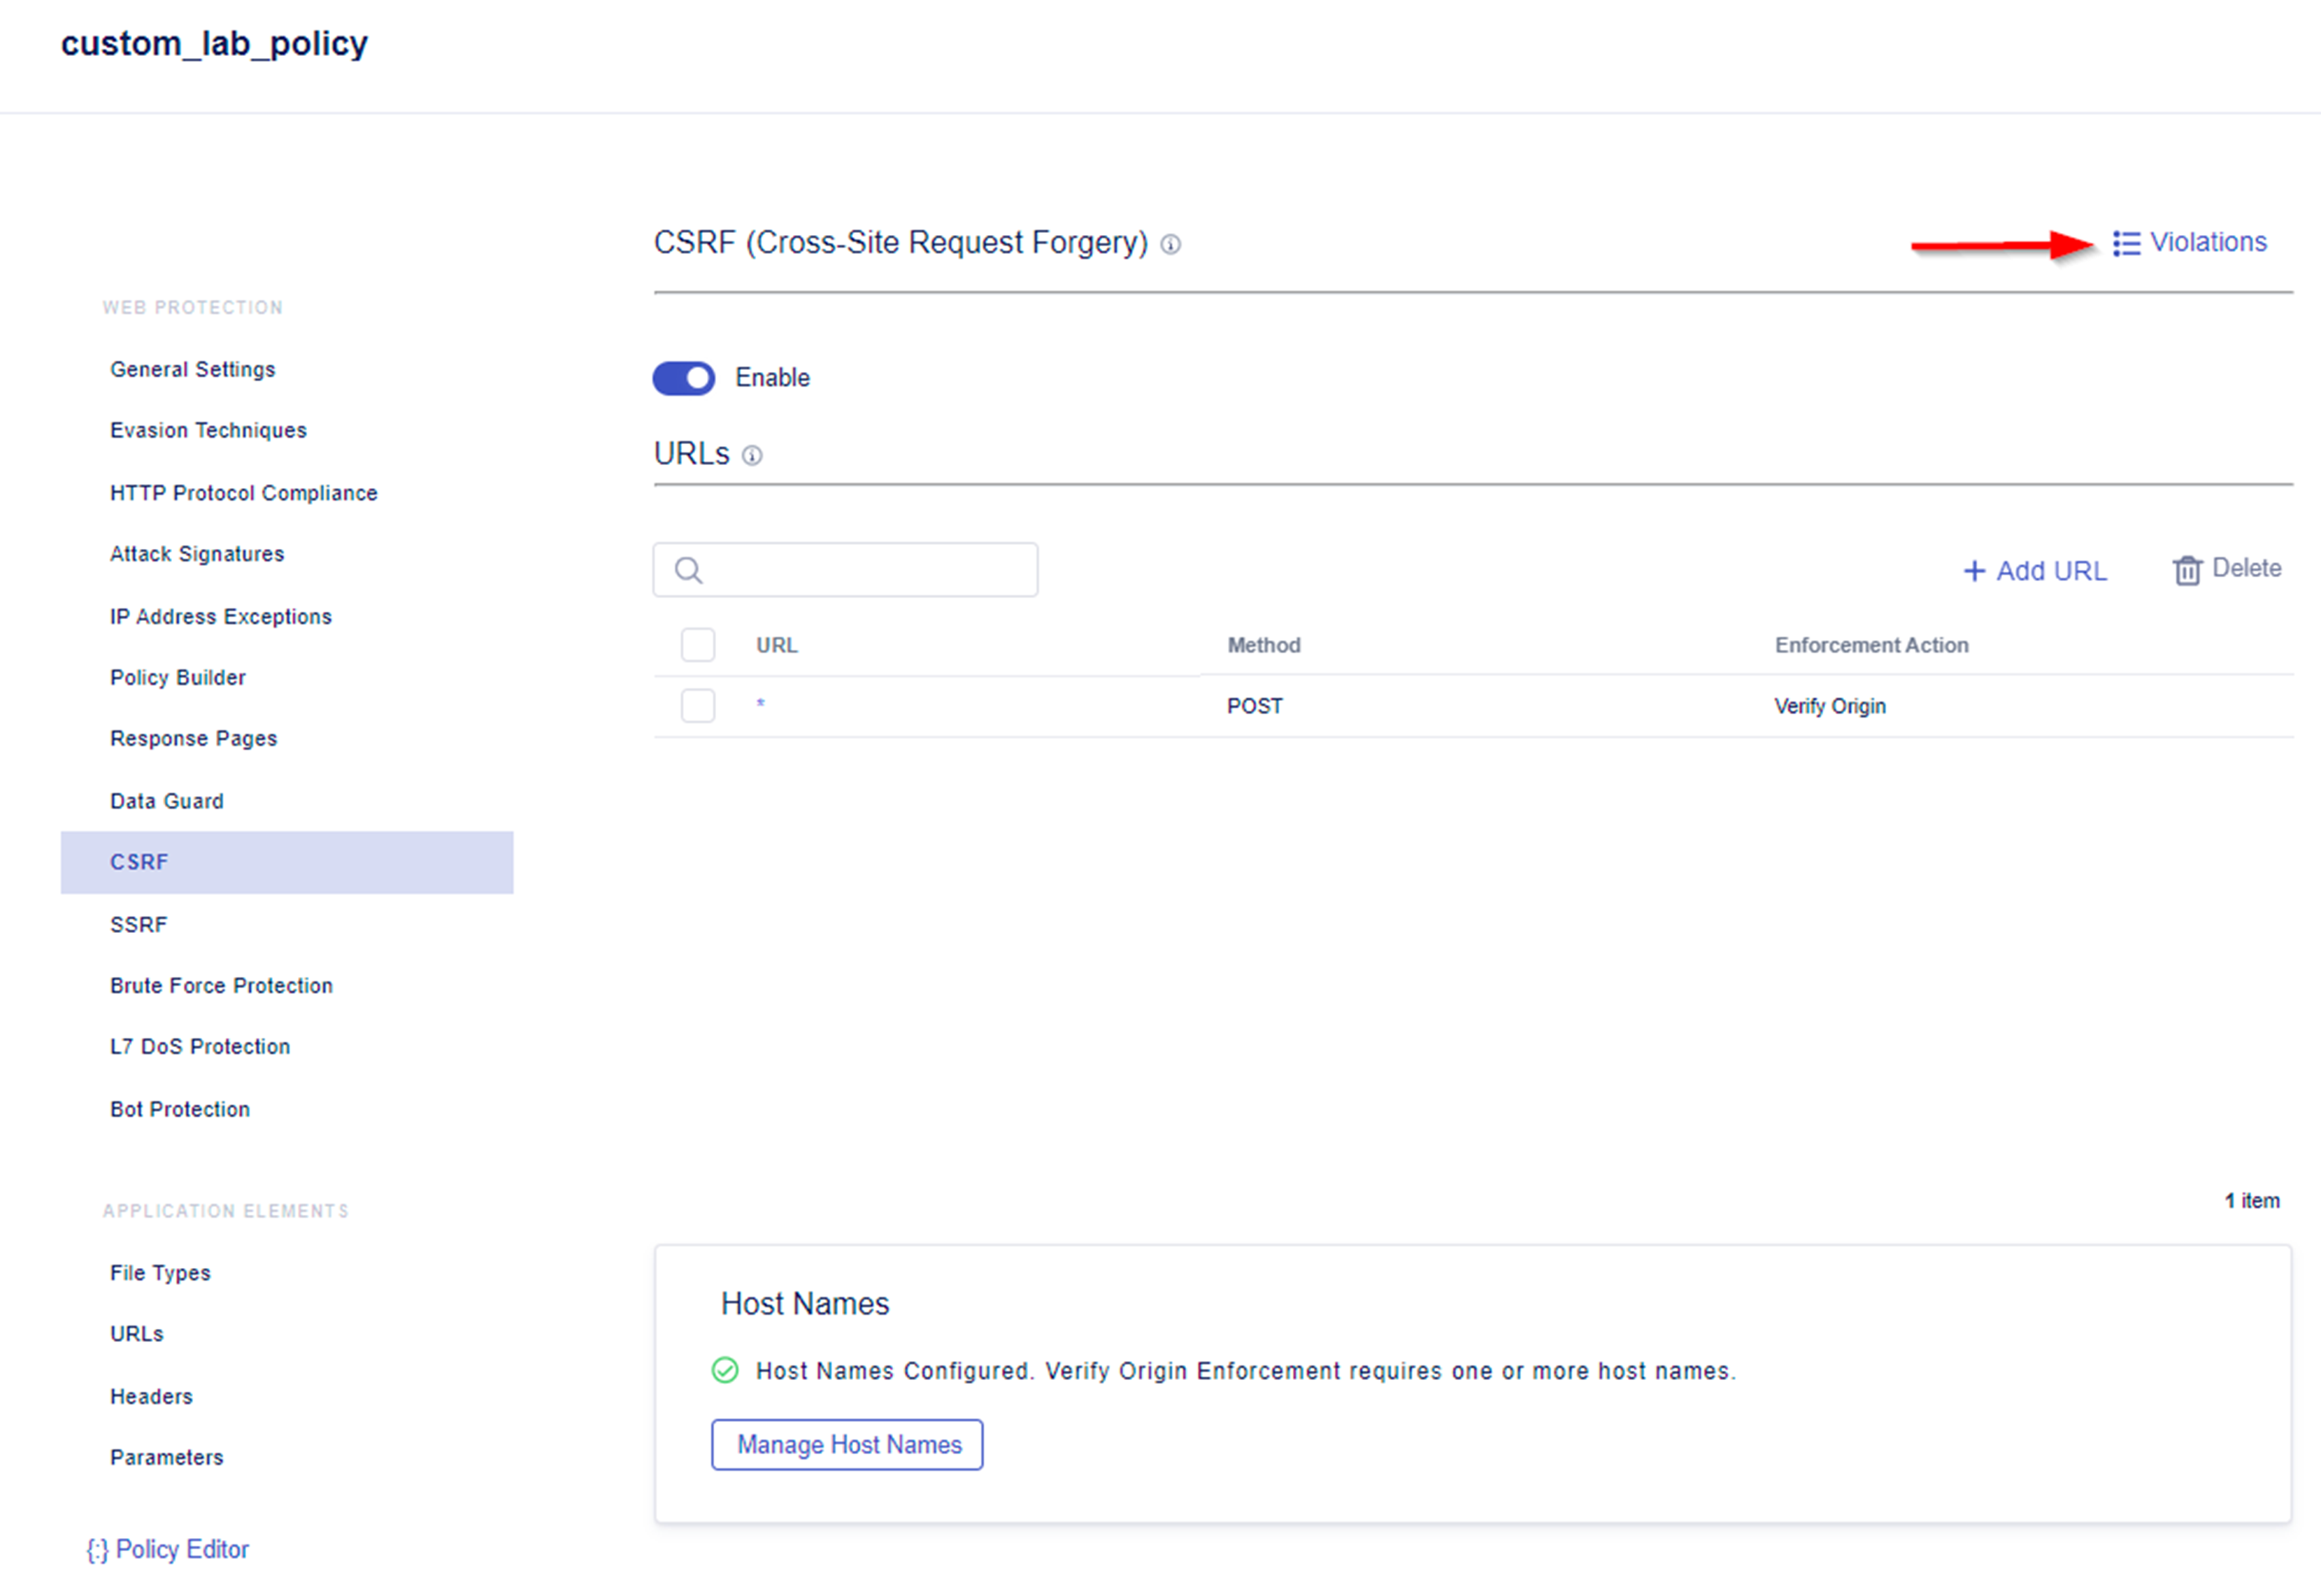
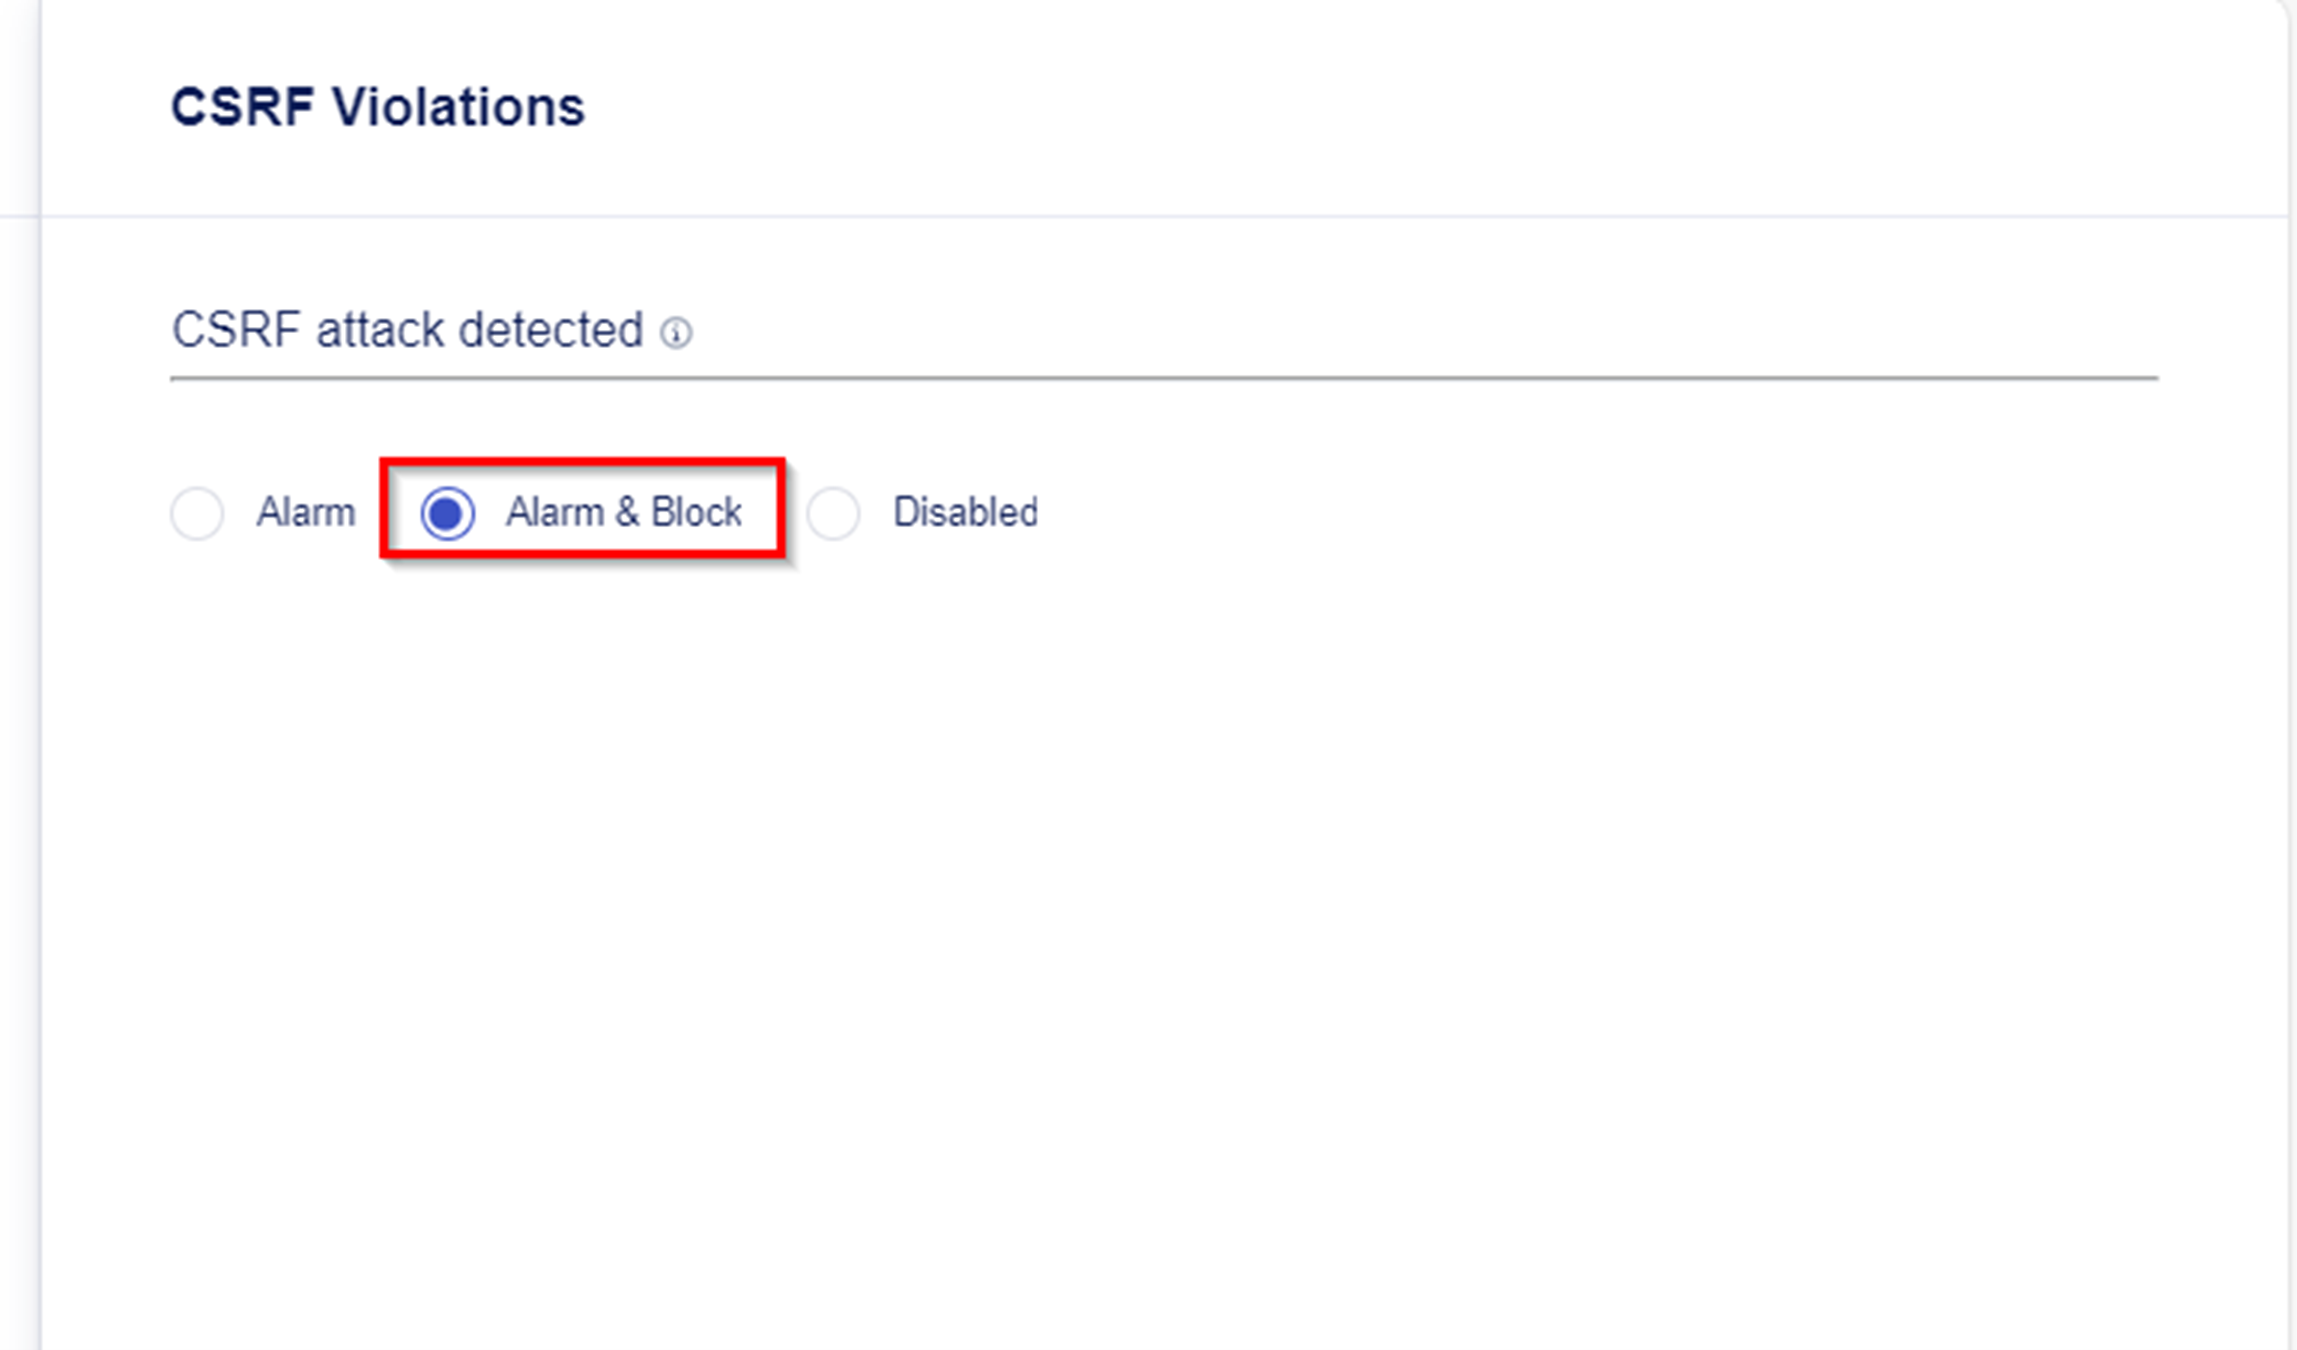
- Explore the Violations Menu. Within here you define the action when a CSRF attack is detected. Alarm & Block is set as default when a CSRF attack is detected.
- From the Desktop of the Windows Jump Host Desktop open Postman.

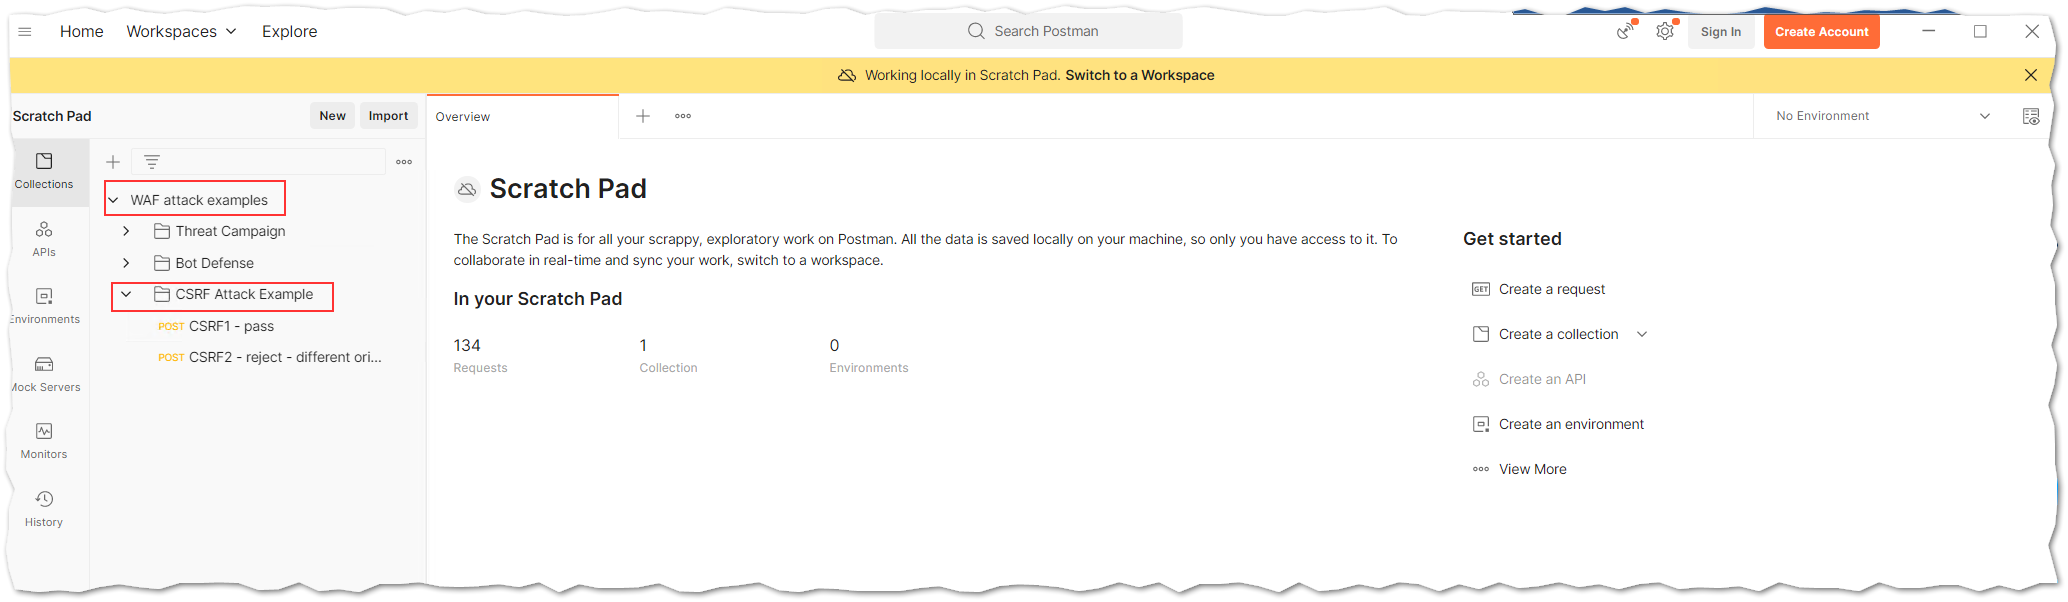
- Within the WAF attack examples Postman collection you will find a few CSRF examples inside the folder CSRF Attack Example.
- CSRF1 - pass -> This request will not trigger a violation as Host Header and Origin Header match the CSRF configuration of our security policy.
- CSRF2 - reject - different origin -> This request will trigger a violation as Origin Header does not match the CSRF configuration of our security policy.
- Run both of the above listed examples and explorer the output of the response in the Postman as well as within the Event Logs of BIG-IP Next WAF.
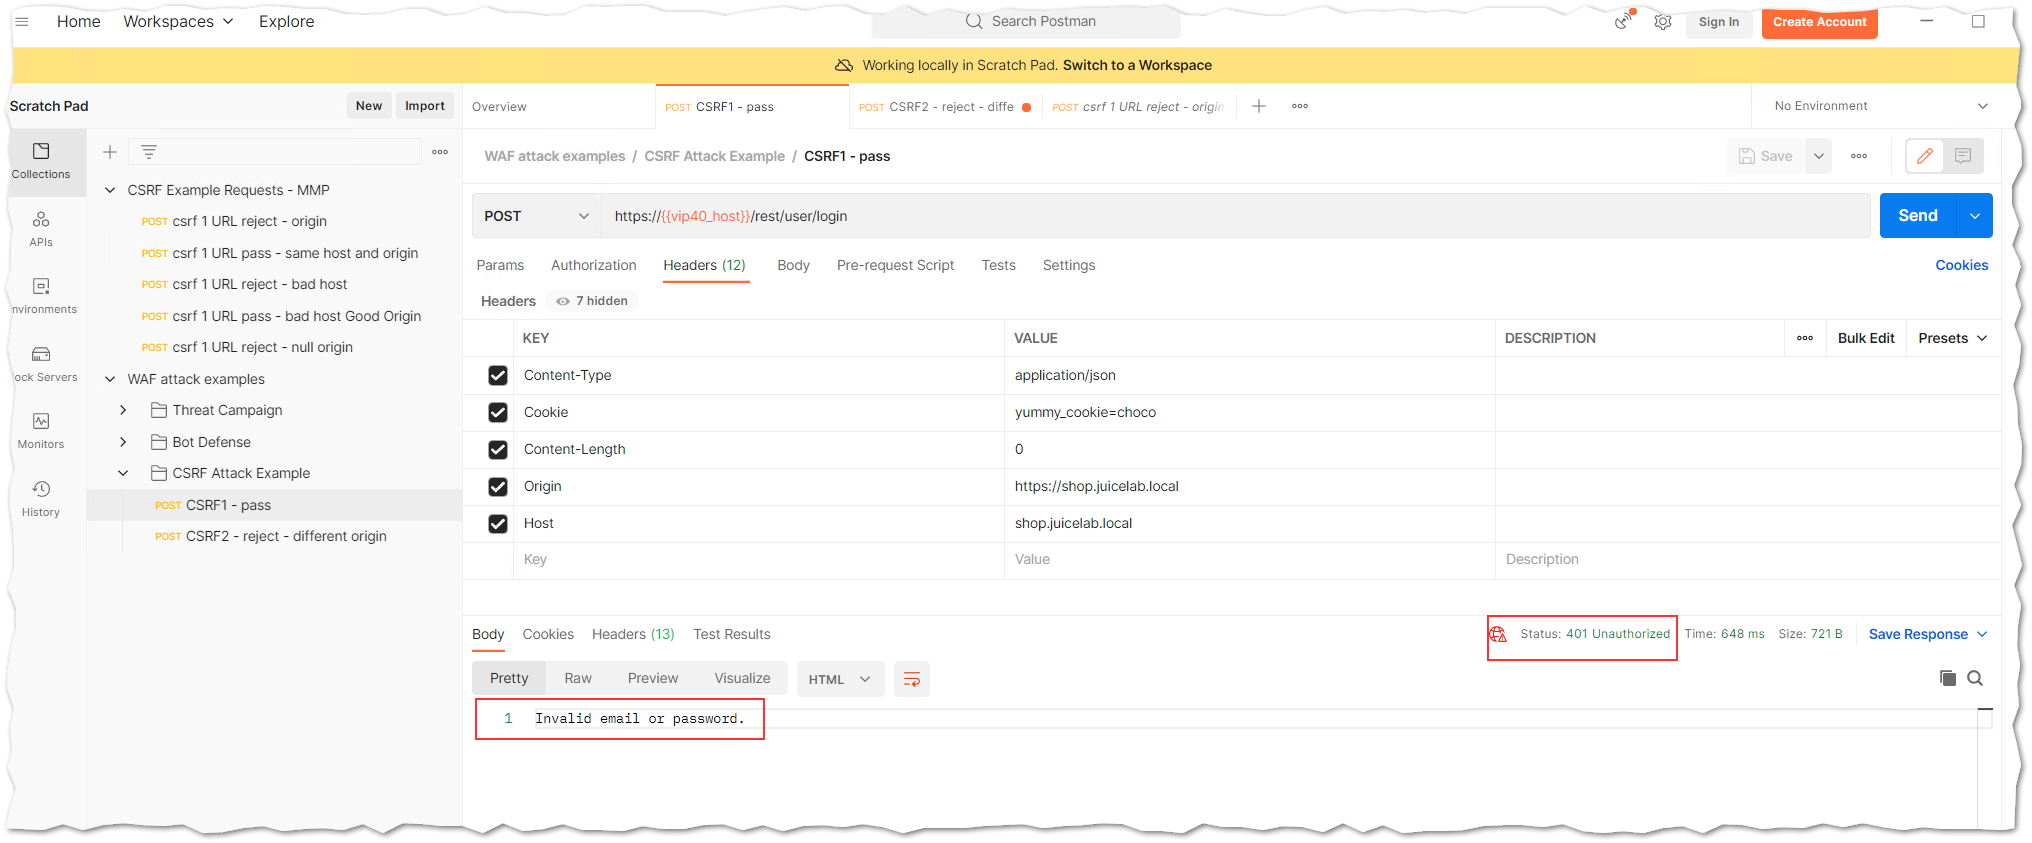
8.1 The Postman response for request called CSRF1 - pass looks similar to the below one. You will see that the Origin Server respond with a Status 401 Unauthorized and Invalid email or password.
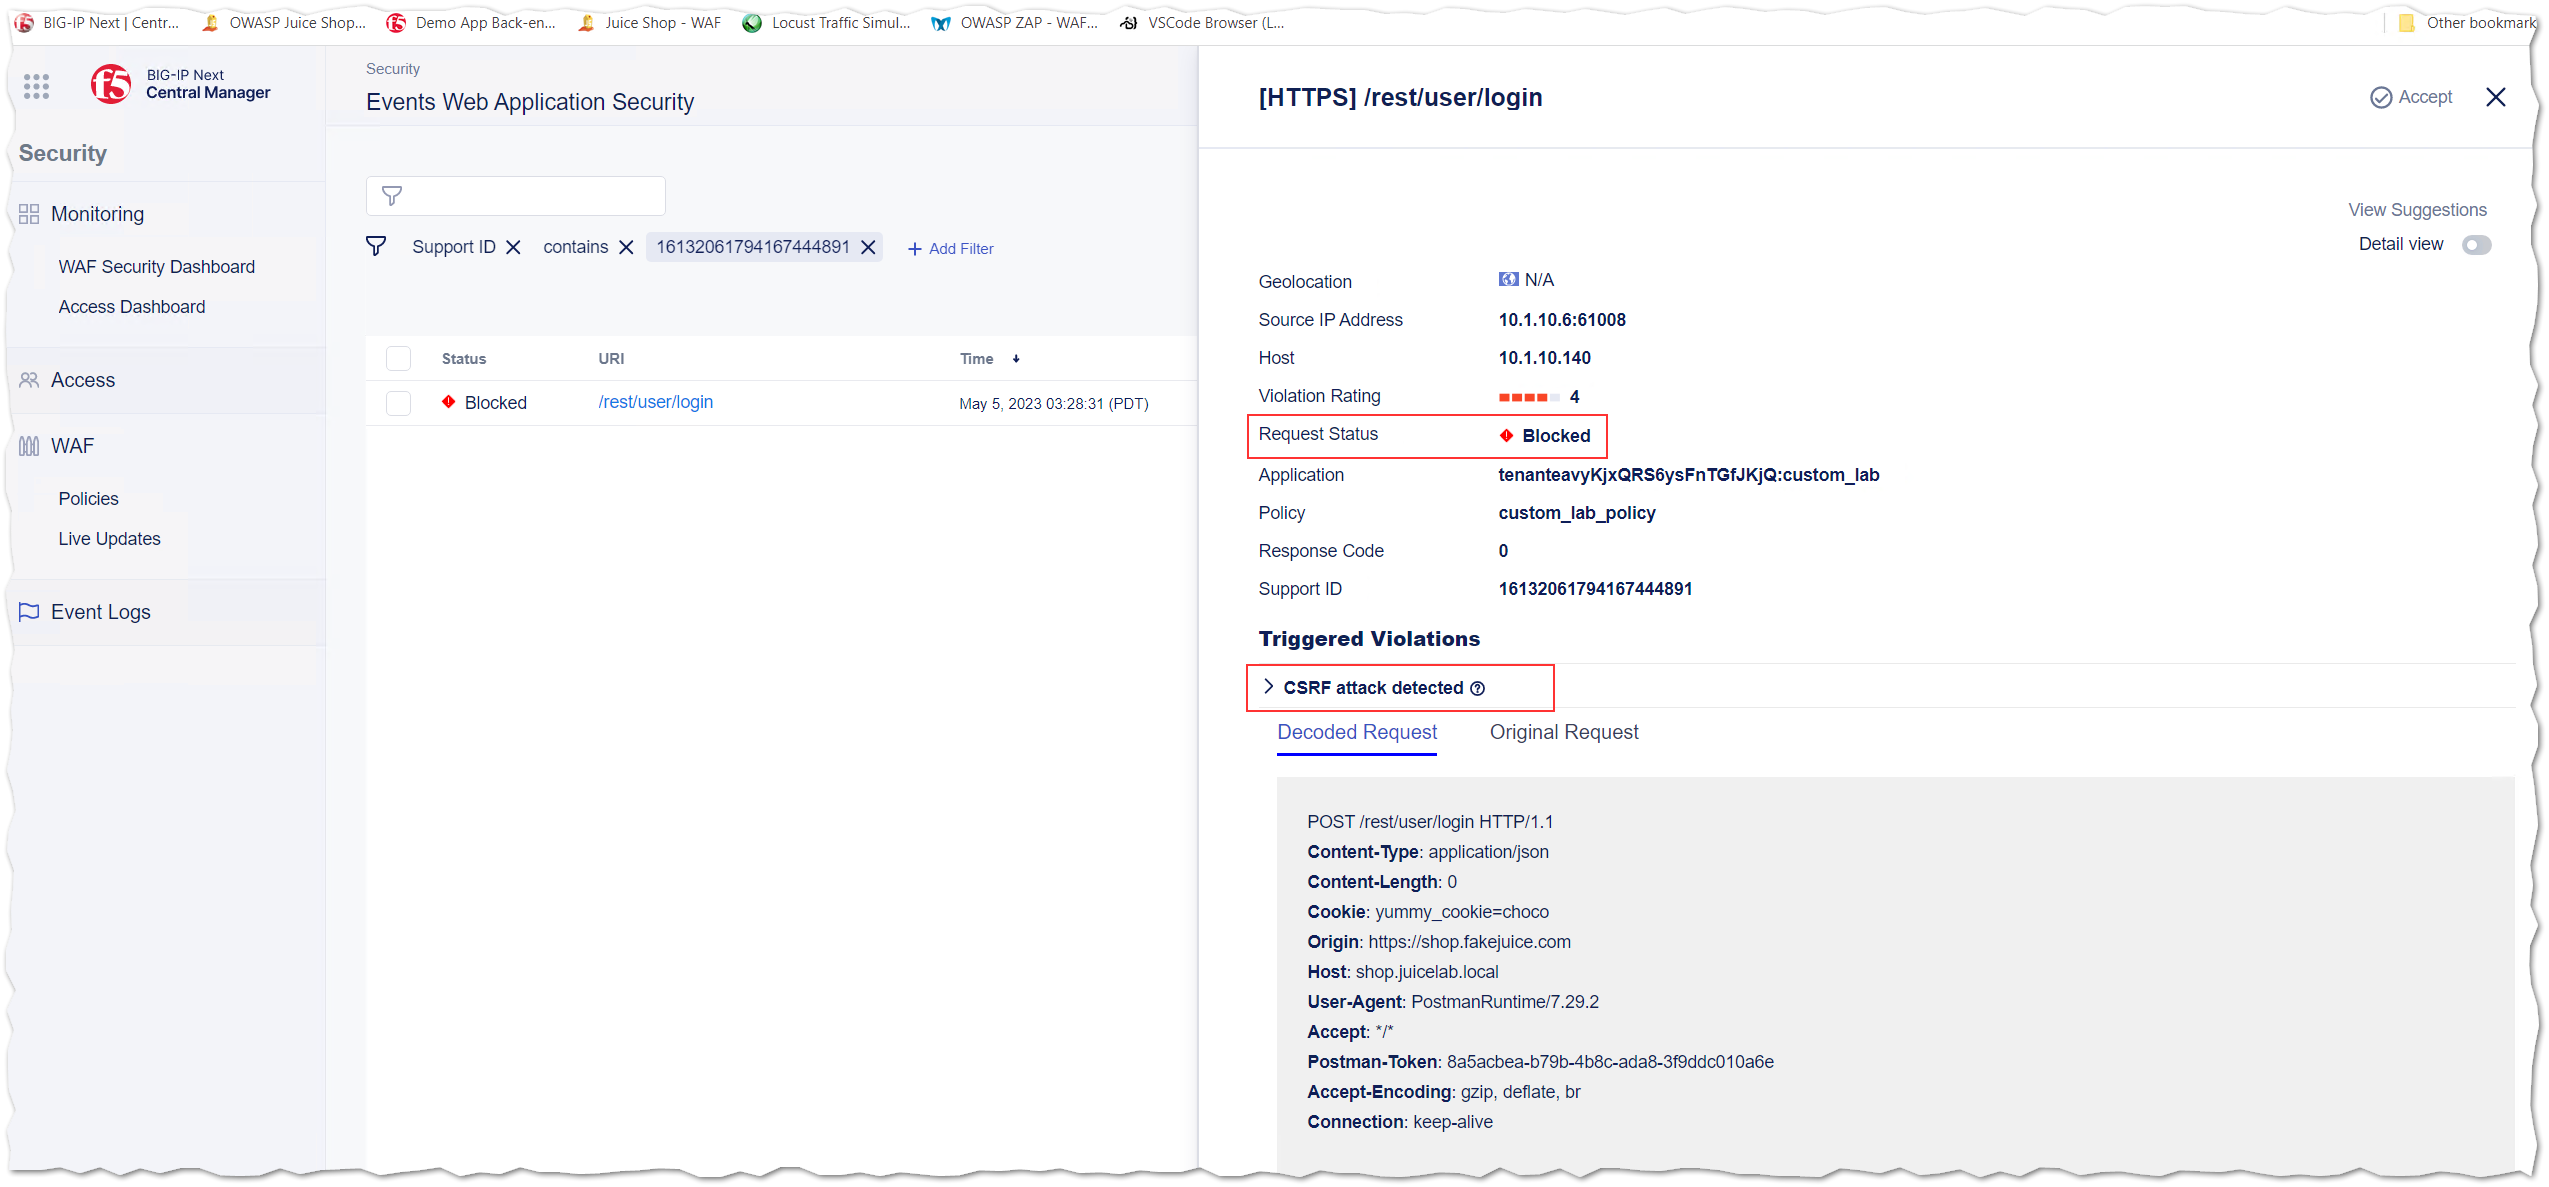
8.2 The Postman response for request called CSRF2 - reject - different origin looks smilar to:
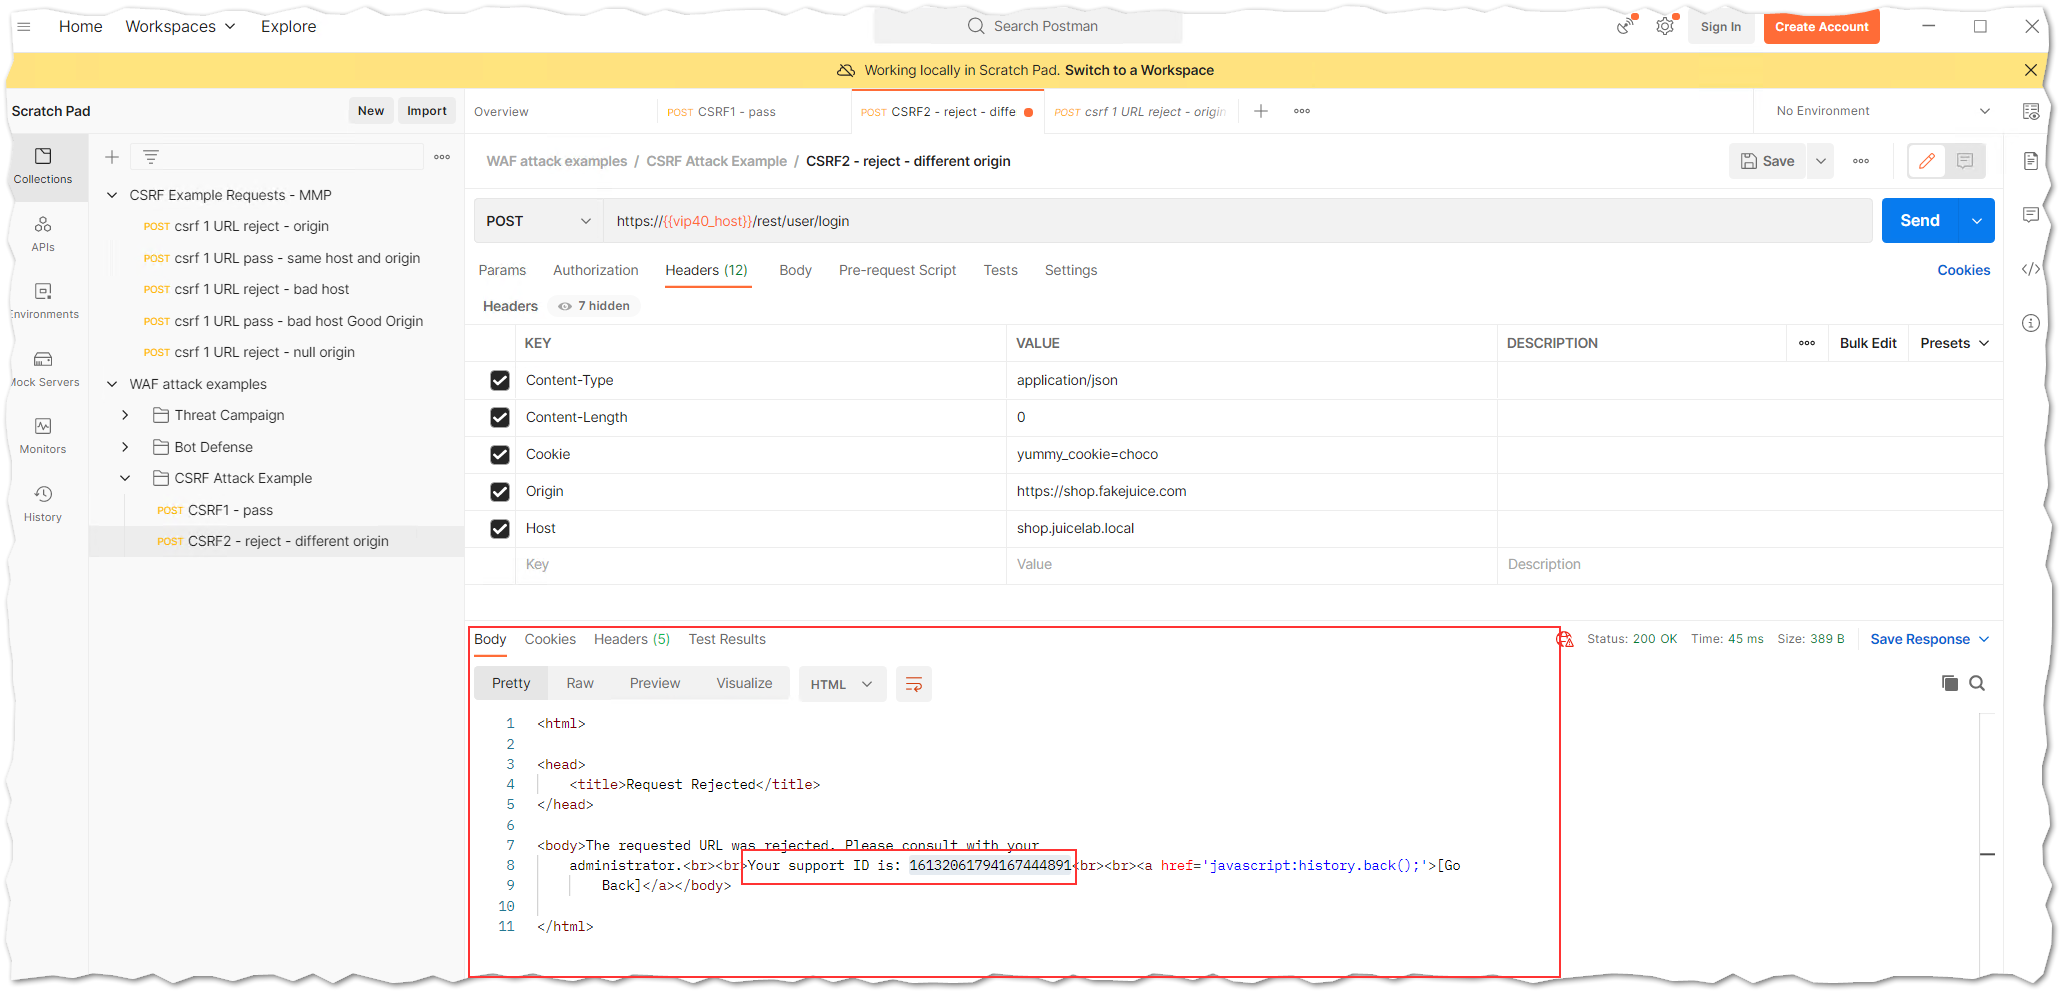
8.3 Below you will see an example of the BIG-IP Next WAF Event Logs for request named CSRF2 - reject - different origin. The request triggered a “CSRF attack detected” violation and was blocked.
- You finished the configuration of Cross-site Request Forgery protection.