F5 BIG-IP Next > Class 1: Introduction to BIG-IP Next > Module 5: Modify Templates to Add Security Policy Source | Edit on
Lab 5.1 - Add Security Policy to Application (Basic WAF Lab)
Note
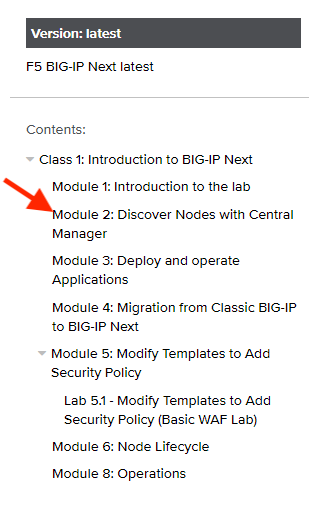
This is the start of part 2 of the lab. If you have not previously completed part 1 of the lab with your current deployment, please click on the Module 2 link on the left hand side of the page and complete discovery of big-ip-next-01.example.com as it is required to complete module 5.
Deploy an Application with a WAF Policy Using a FAST Template
This part of the lab covers how to create and deploy an application and protect it with a WAF policy using the FAST template and the WAF violation rating based template, with the focus on ease of use.
Note
The violation rating based template follows the same concept as you may know already from NGINX App Protect, which is low false positives with little policy maintenance and therefore the Policy Builder is not supported with the violation rating based template.
Backend web apps available on the internal network running on the Ubuntu Jump Host:
- OWASP Juice Shop:
- 10.1.20.100:3000
- 10.1.20.101:3000
- 10.1.20.102:3000
- 10.1.20.103:3000
- Simple F5 demo web app:
- 10.1.20.100:8080
- 10.1.20.101:8080
- 10.1.20.102:8080
- 10.1.20.103:8080
Deploy an HTTPS Load Balancer with a WAF Policy
- Log in to BIG-IP Next Central Manager in UDF
Navigate to your UDF deployment and select the GUI Access method for BIG-IP Next Central Manager and log in with the username/password provided within Details.
- From My Apps click on + Add Application”
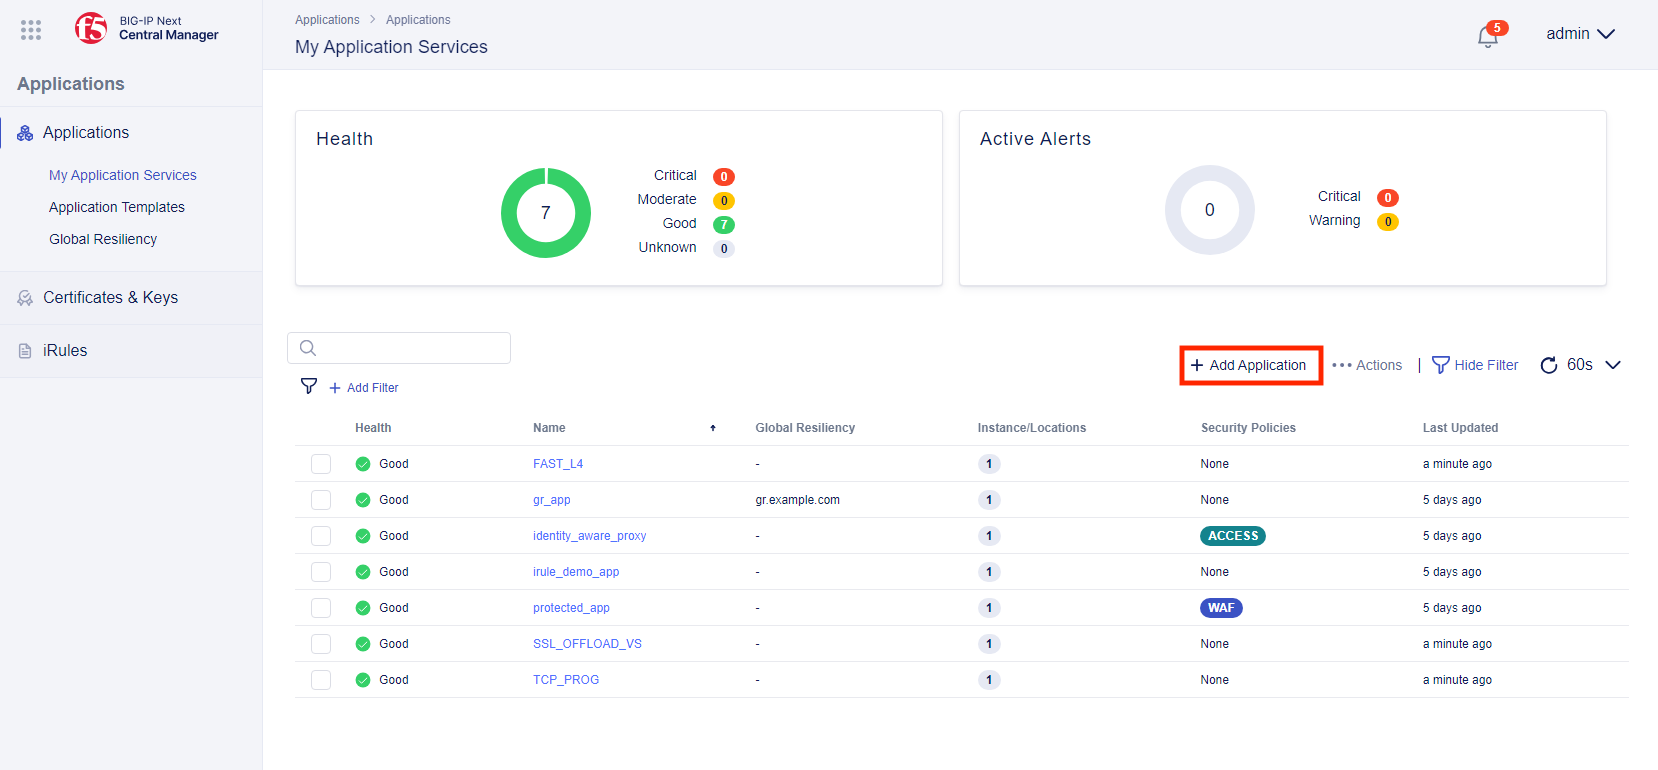
- Provide an Application Service Name of “waf-app”. Select Standard and then click on Start Creating.
Note
The Standard template is a unified template that allows you to enable/disable capabilities
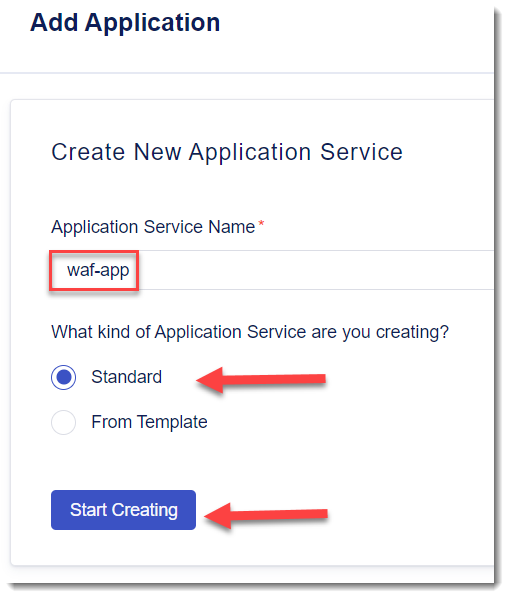
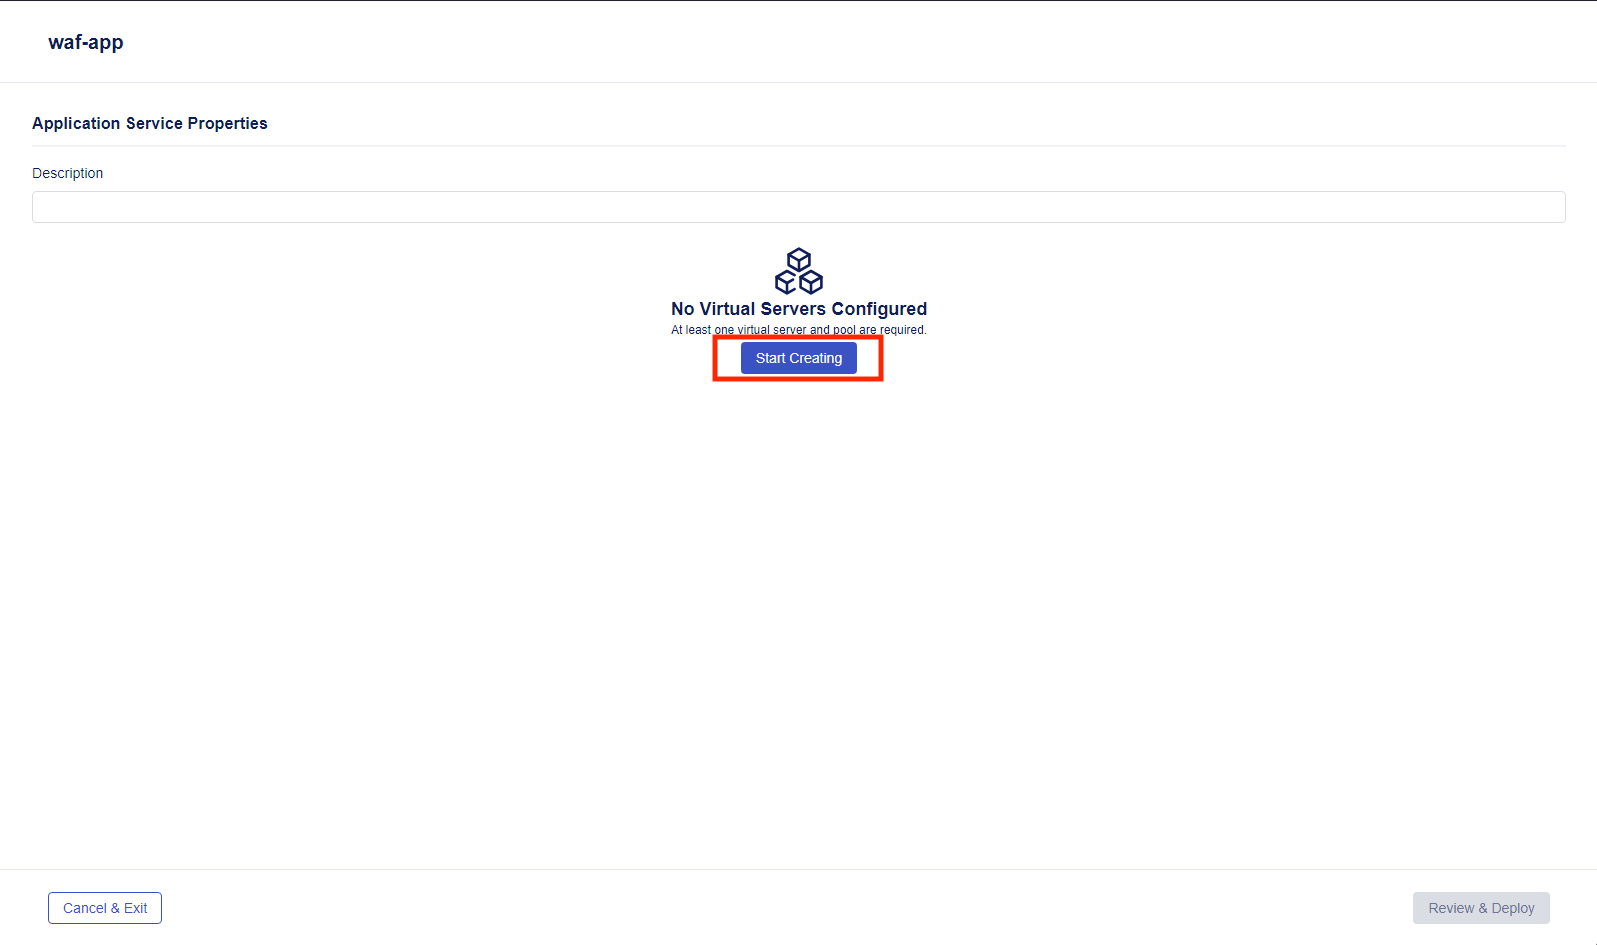
- Then select “Start Creating” under the “No Virtual Servers Configured” to start creating a new virtual server.
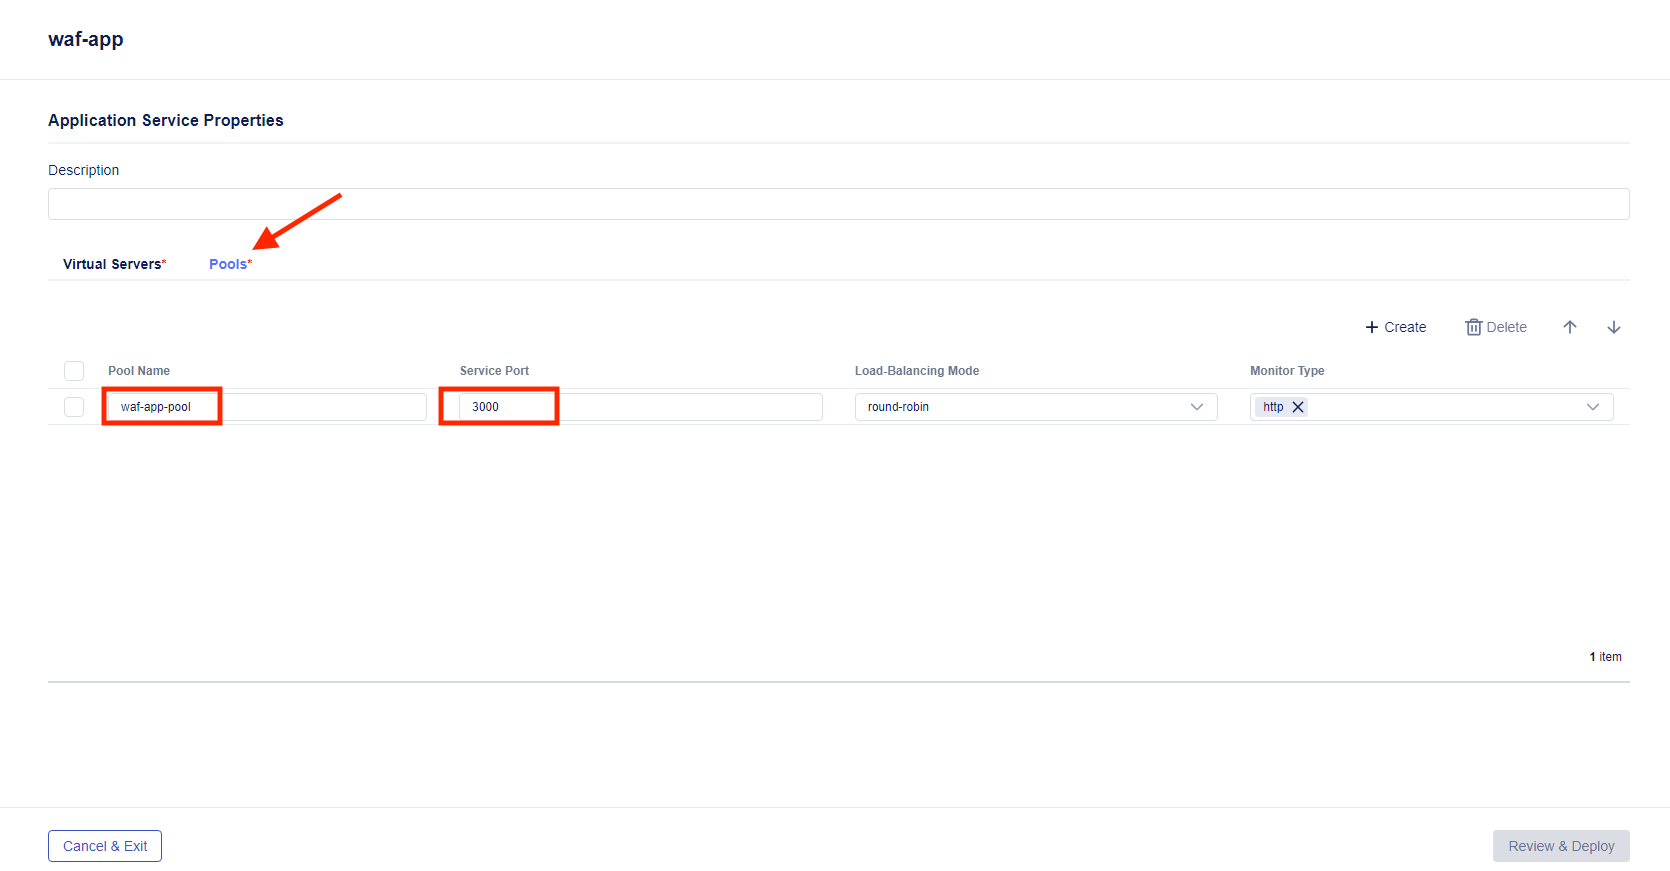
From within the “waf-app” application service, click the Pools tab, then click + Create, and enter the following values in the template wizard as shown in the picture below:
Pool Name:
waf-app-poolService Port:
3000Leave other options as is
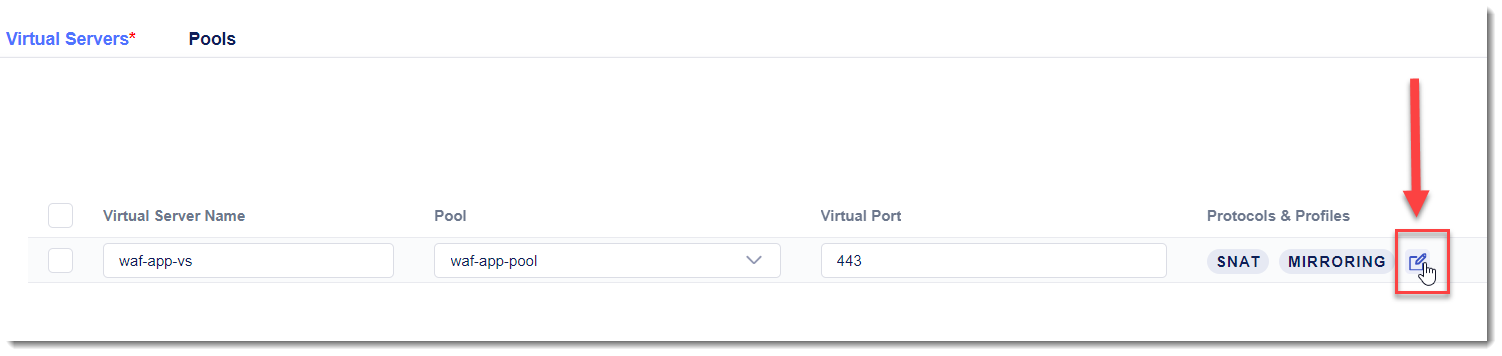
Navigate back to the Virtual Servers tab and enter the following values in the template wizard for Properties as shown in the picture below, then select Next
Virtual Server Name:
waf-app-vsPool:
waf-app-poolPort:
443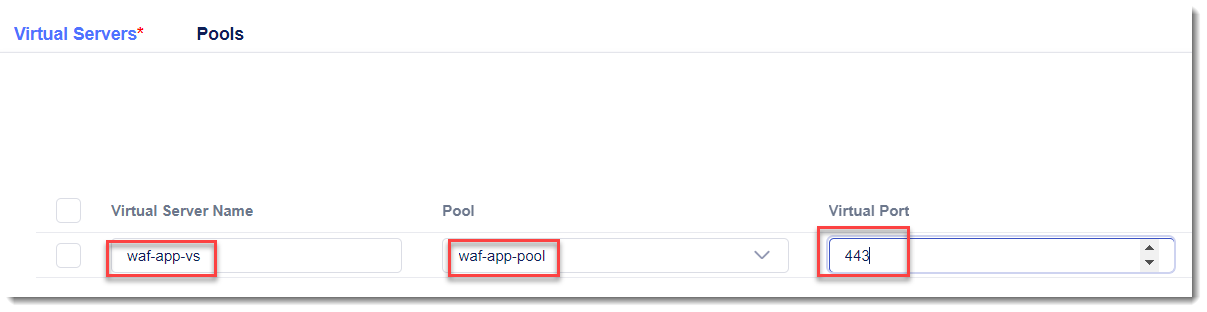
Select the edit button under the “Protocols and Profiles” column (adjacent to “SNAT” and “MIRRORING”).
This is a new dialog for adding a TLS certificate to a virtual server. Click on Enable HTTPS (Client-Side TLS). Below click on “Add” under the “No Client-Side TLS” text.
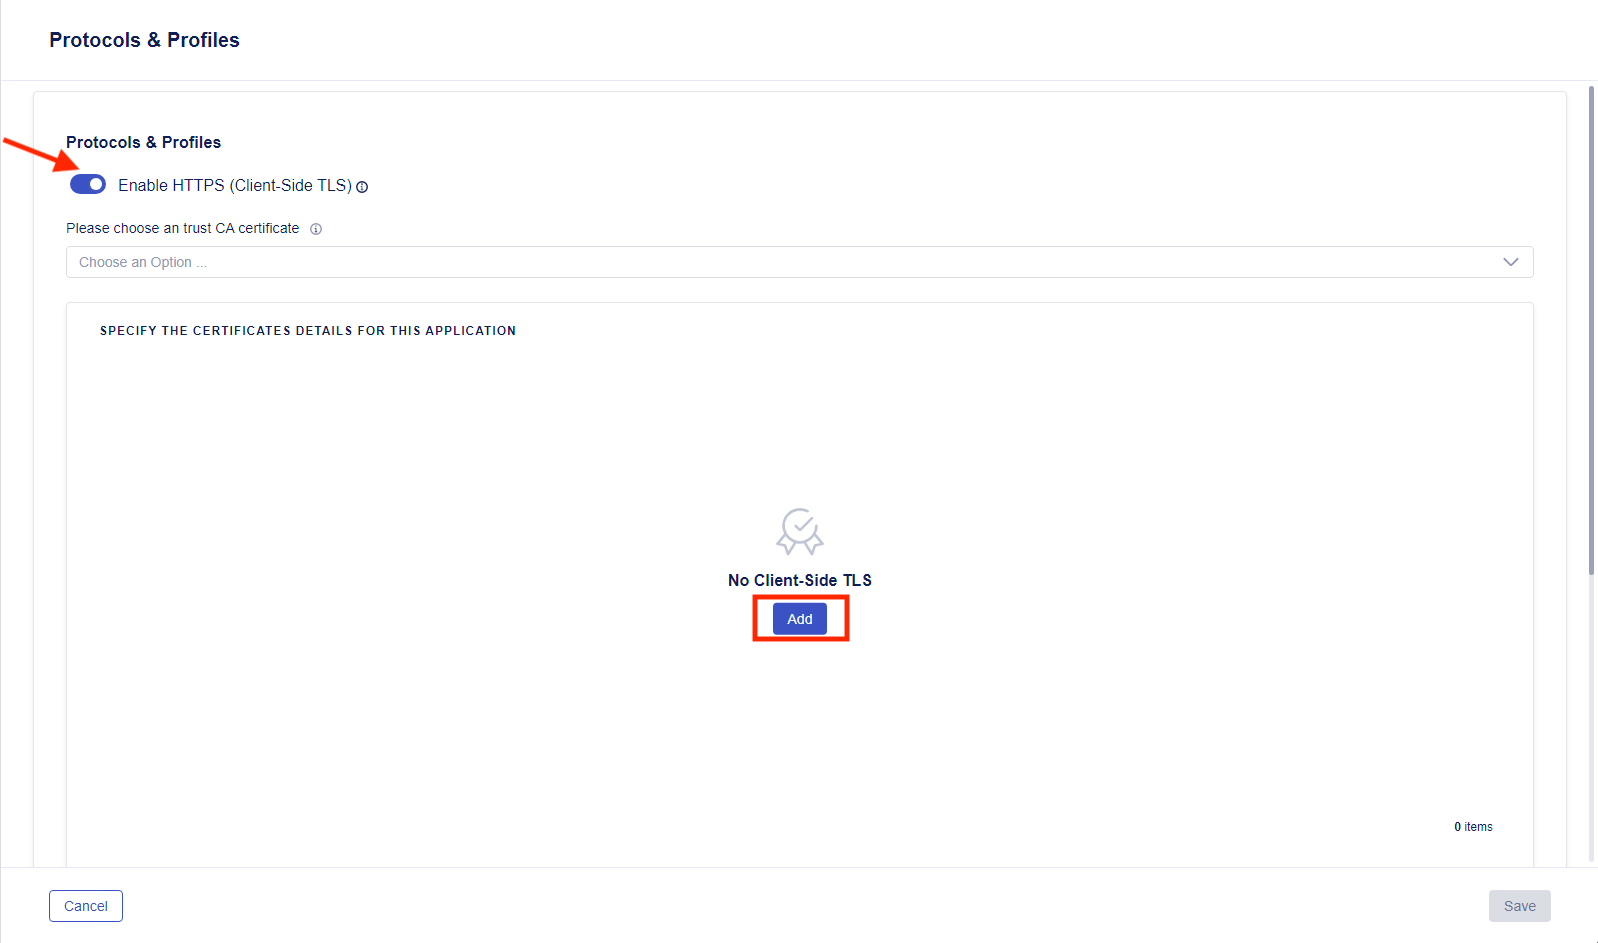
- For the name of the Client-Side TLS, name is “waf-app.example.com” and under the RSA Certificate, choose the “wildcard.example.com” certificate. Leave “Use Default Server” under TLS Servers and then push “Save”

- Select the edit button under Security Policies. Next, select Use a WAF Policy. Click on + Create. Provide a name of “waf-policy”, leave all other items as default, click Save, and then Save again.
- Clicking Review and Deploy will take you to the Deploy page. Select Start Adding, then select “big-ip-next-01.example.com” as the instance for deployment and click + Add to List
Note
The Deploy stage is the first place you’ll actually define a virtual server. The process leading up to deployment involved defining things like virtual server and pool names, which will be consistent as you deploy across infrastructure.
Imagine a globally-deployed app and you add a new site. The application service definition will already be in Central Manager and all you will need to define is a small subset of data (IP and pool members) in order to have a functional application that matches exactly the rest of your infrastructure.

- Add the IP of “10.1.10.203” to the Virtual Address box, then click the down arrow and select + Pool Members.
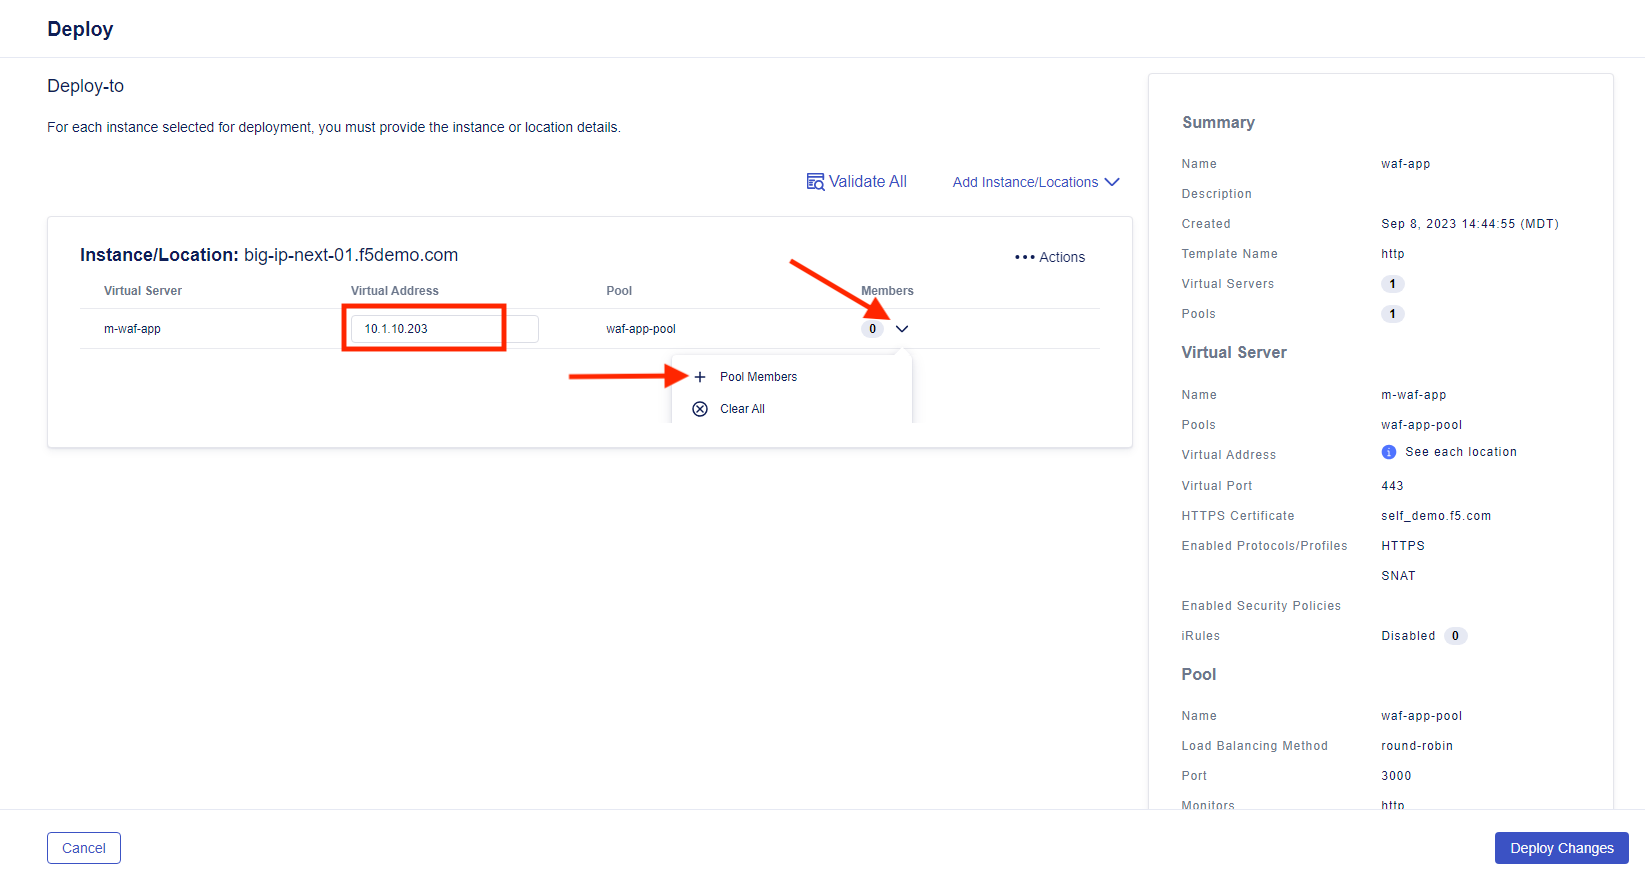
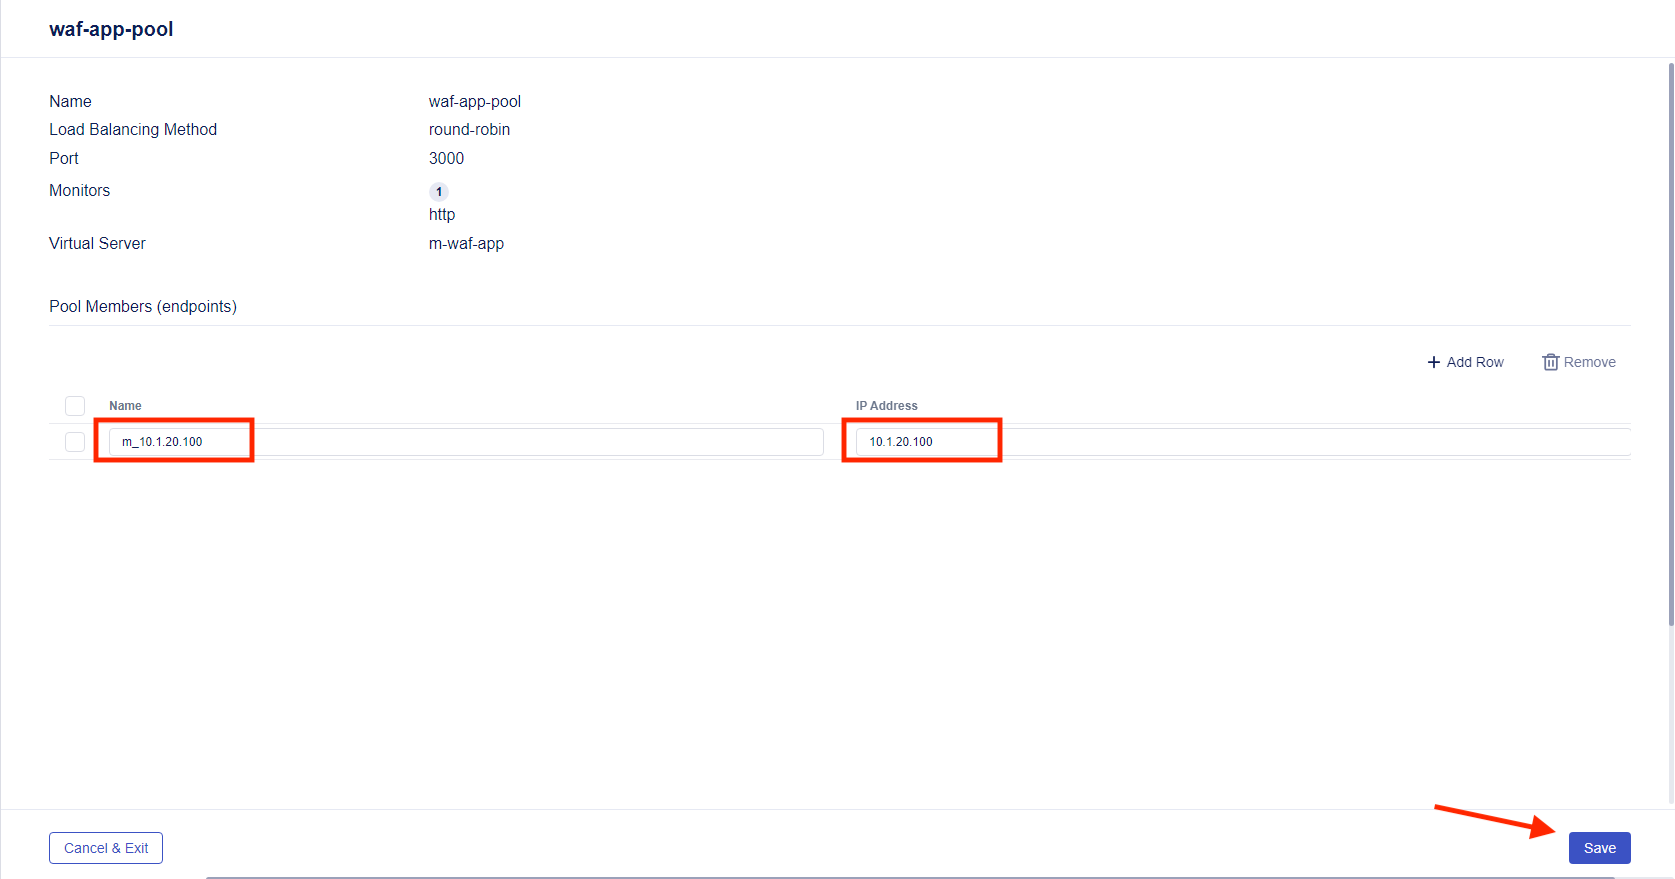
- Click on + Add Row and fill in “m_10.1.20.100” for the Name and “10.1.20.100” for the IP Address. Select Save.
- Click on Validate All to run the deployment validation. When the validation is complete, you will see an icon and status next to the deployment, such as the green icon and “Validated” in the picture below
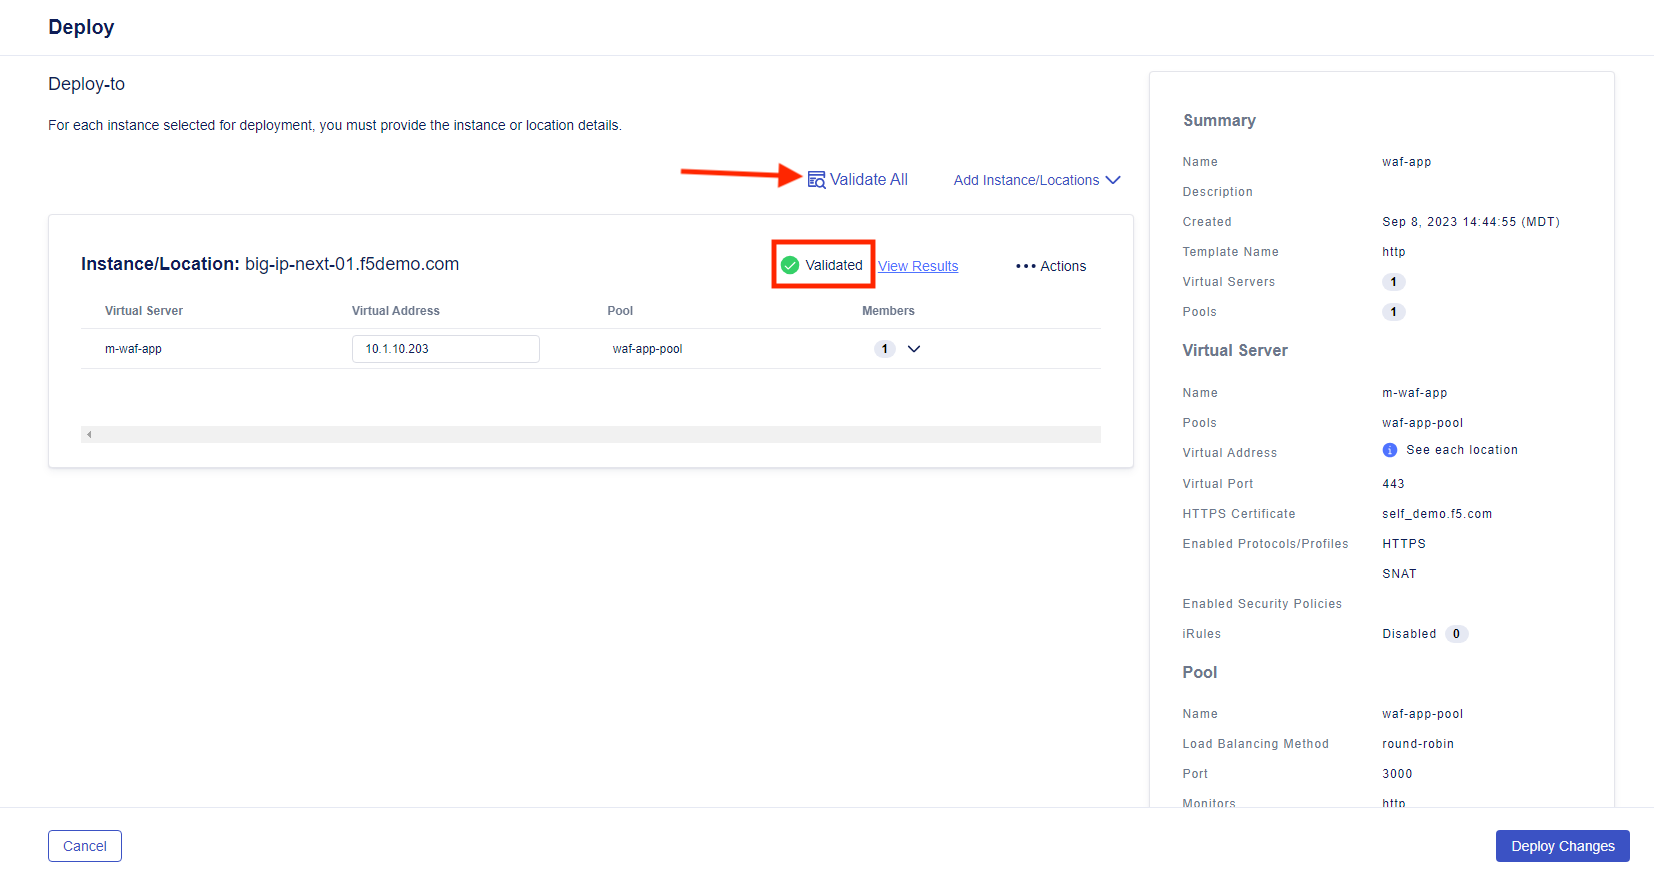
- Click on View Results to show the declaration

Select “Exit” to go back to the previous screen.
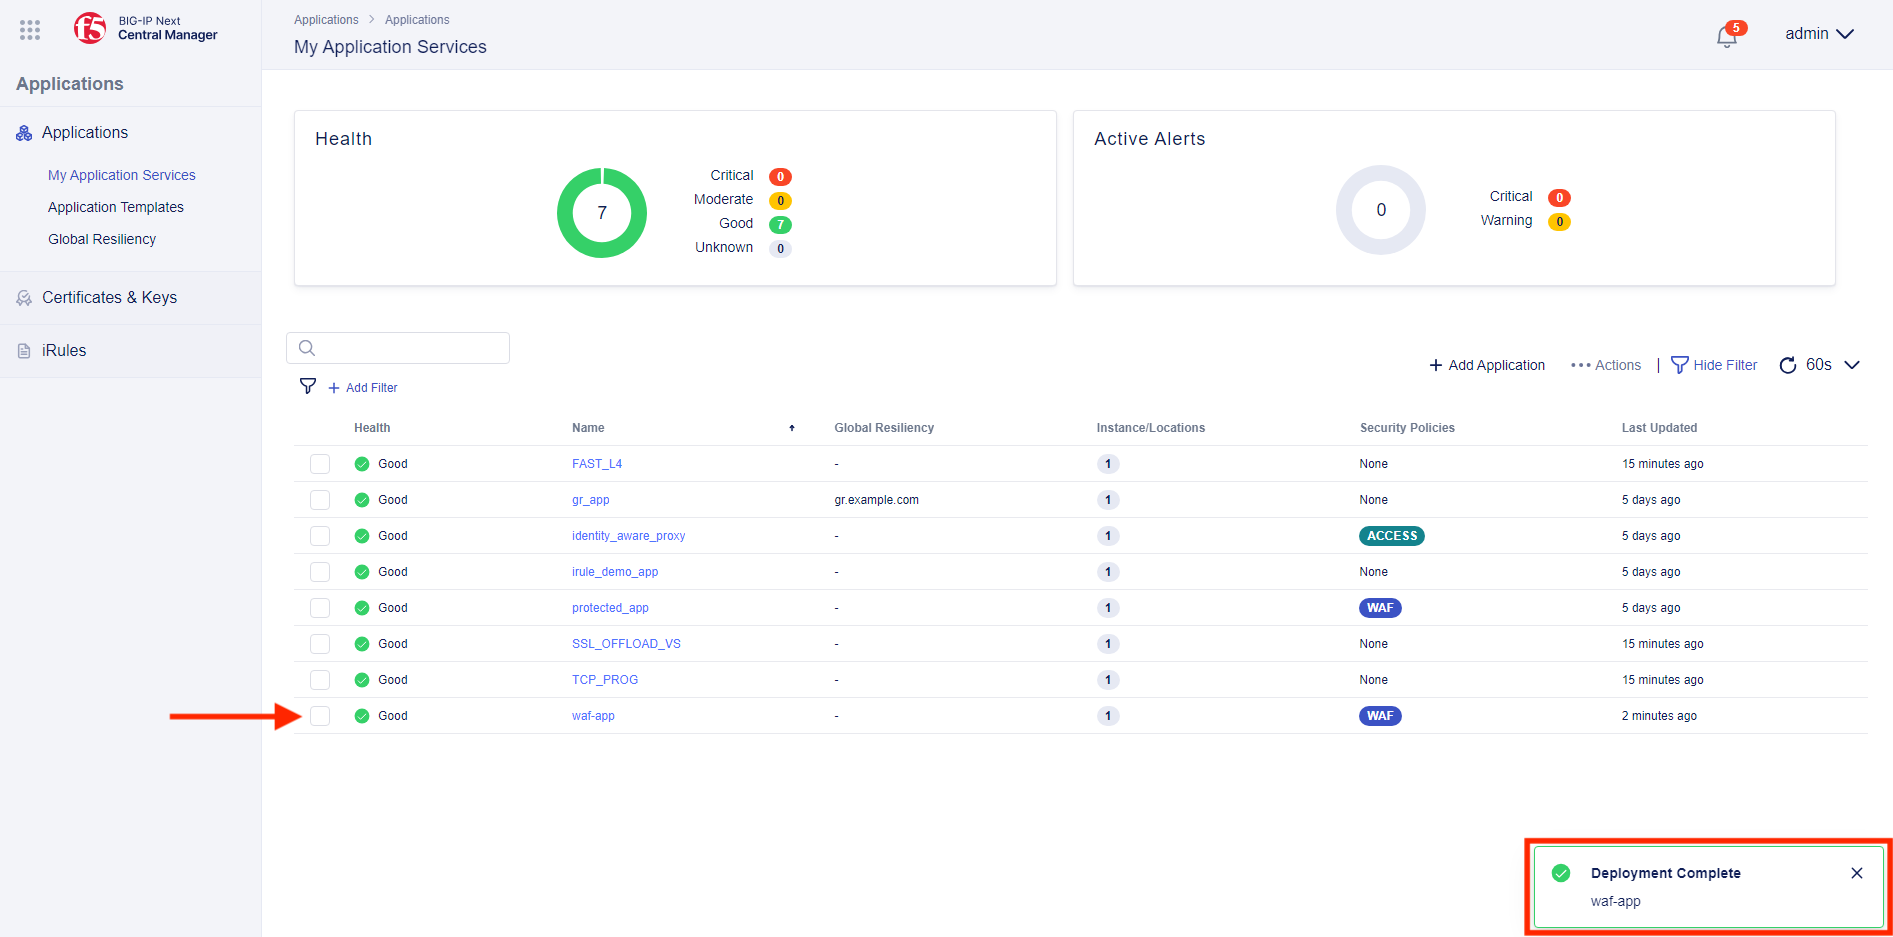
- Finally, click on Deploy Changes, after which you will be prompted to confirm or cancel the deployment. Select Yes, Deploy and you should see the application and the WAF policy deployed.
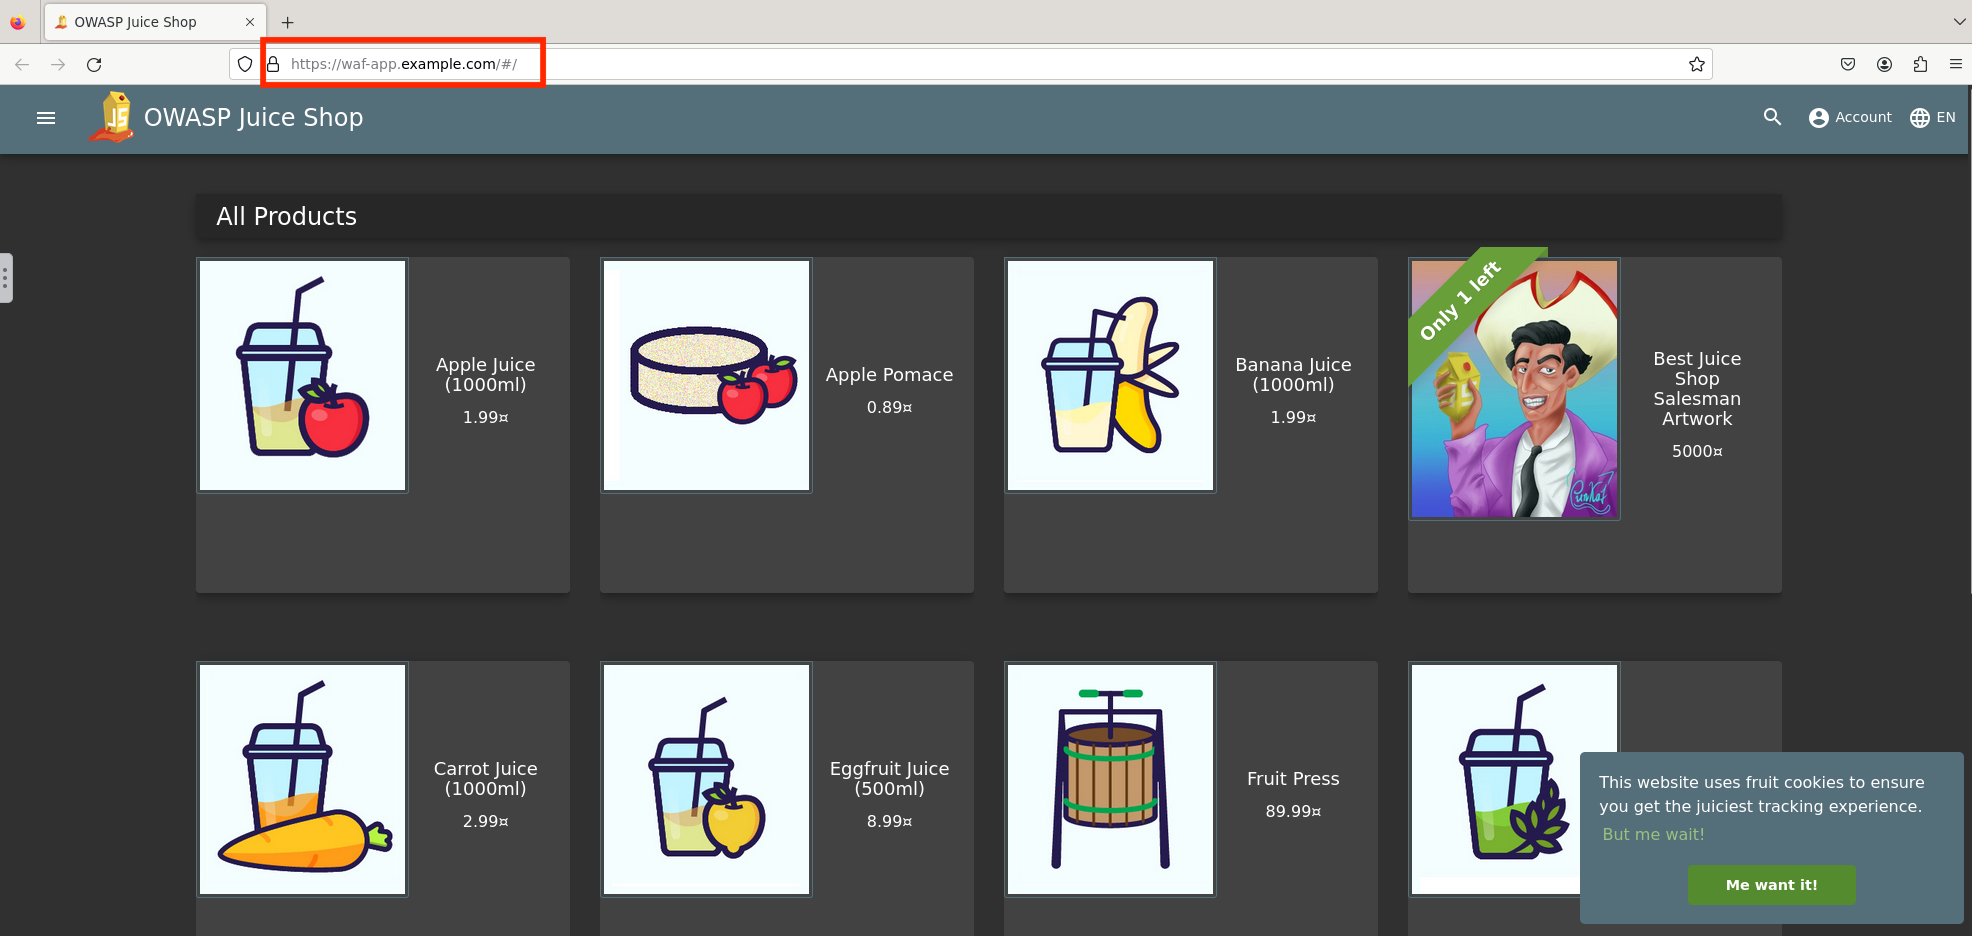
- Let’s validate the application through Firefox in UDF. From within the UDF lab components, select Access under the Ubuntu Jump Host and then Firefox. Within this proxied Firefox browser, go to https://waf-app.example.com and you should see the Juice Shop app.
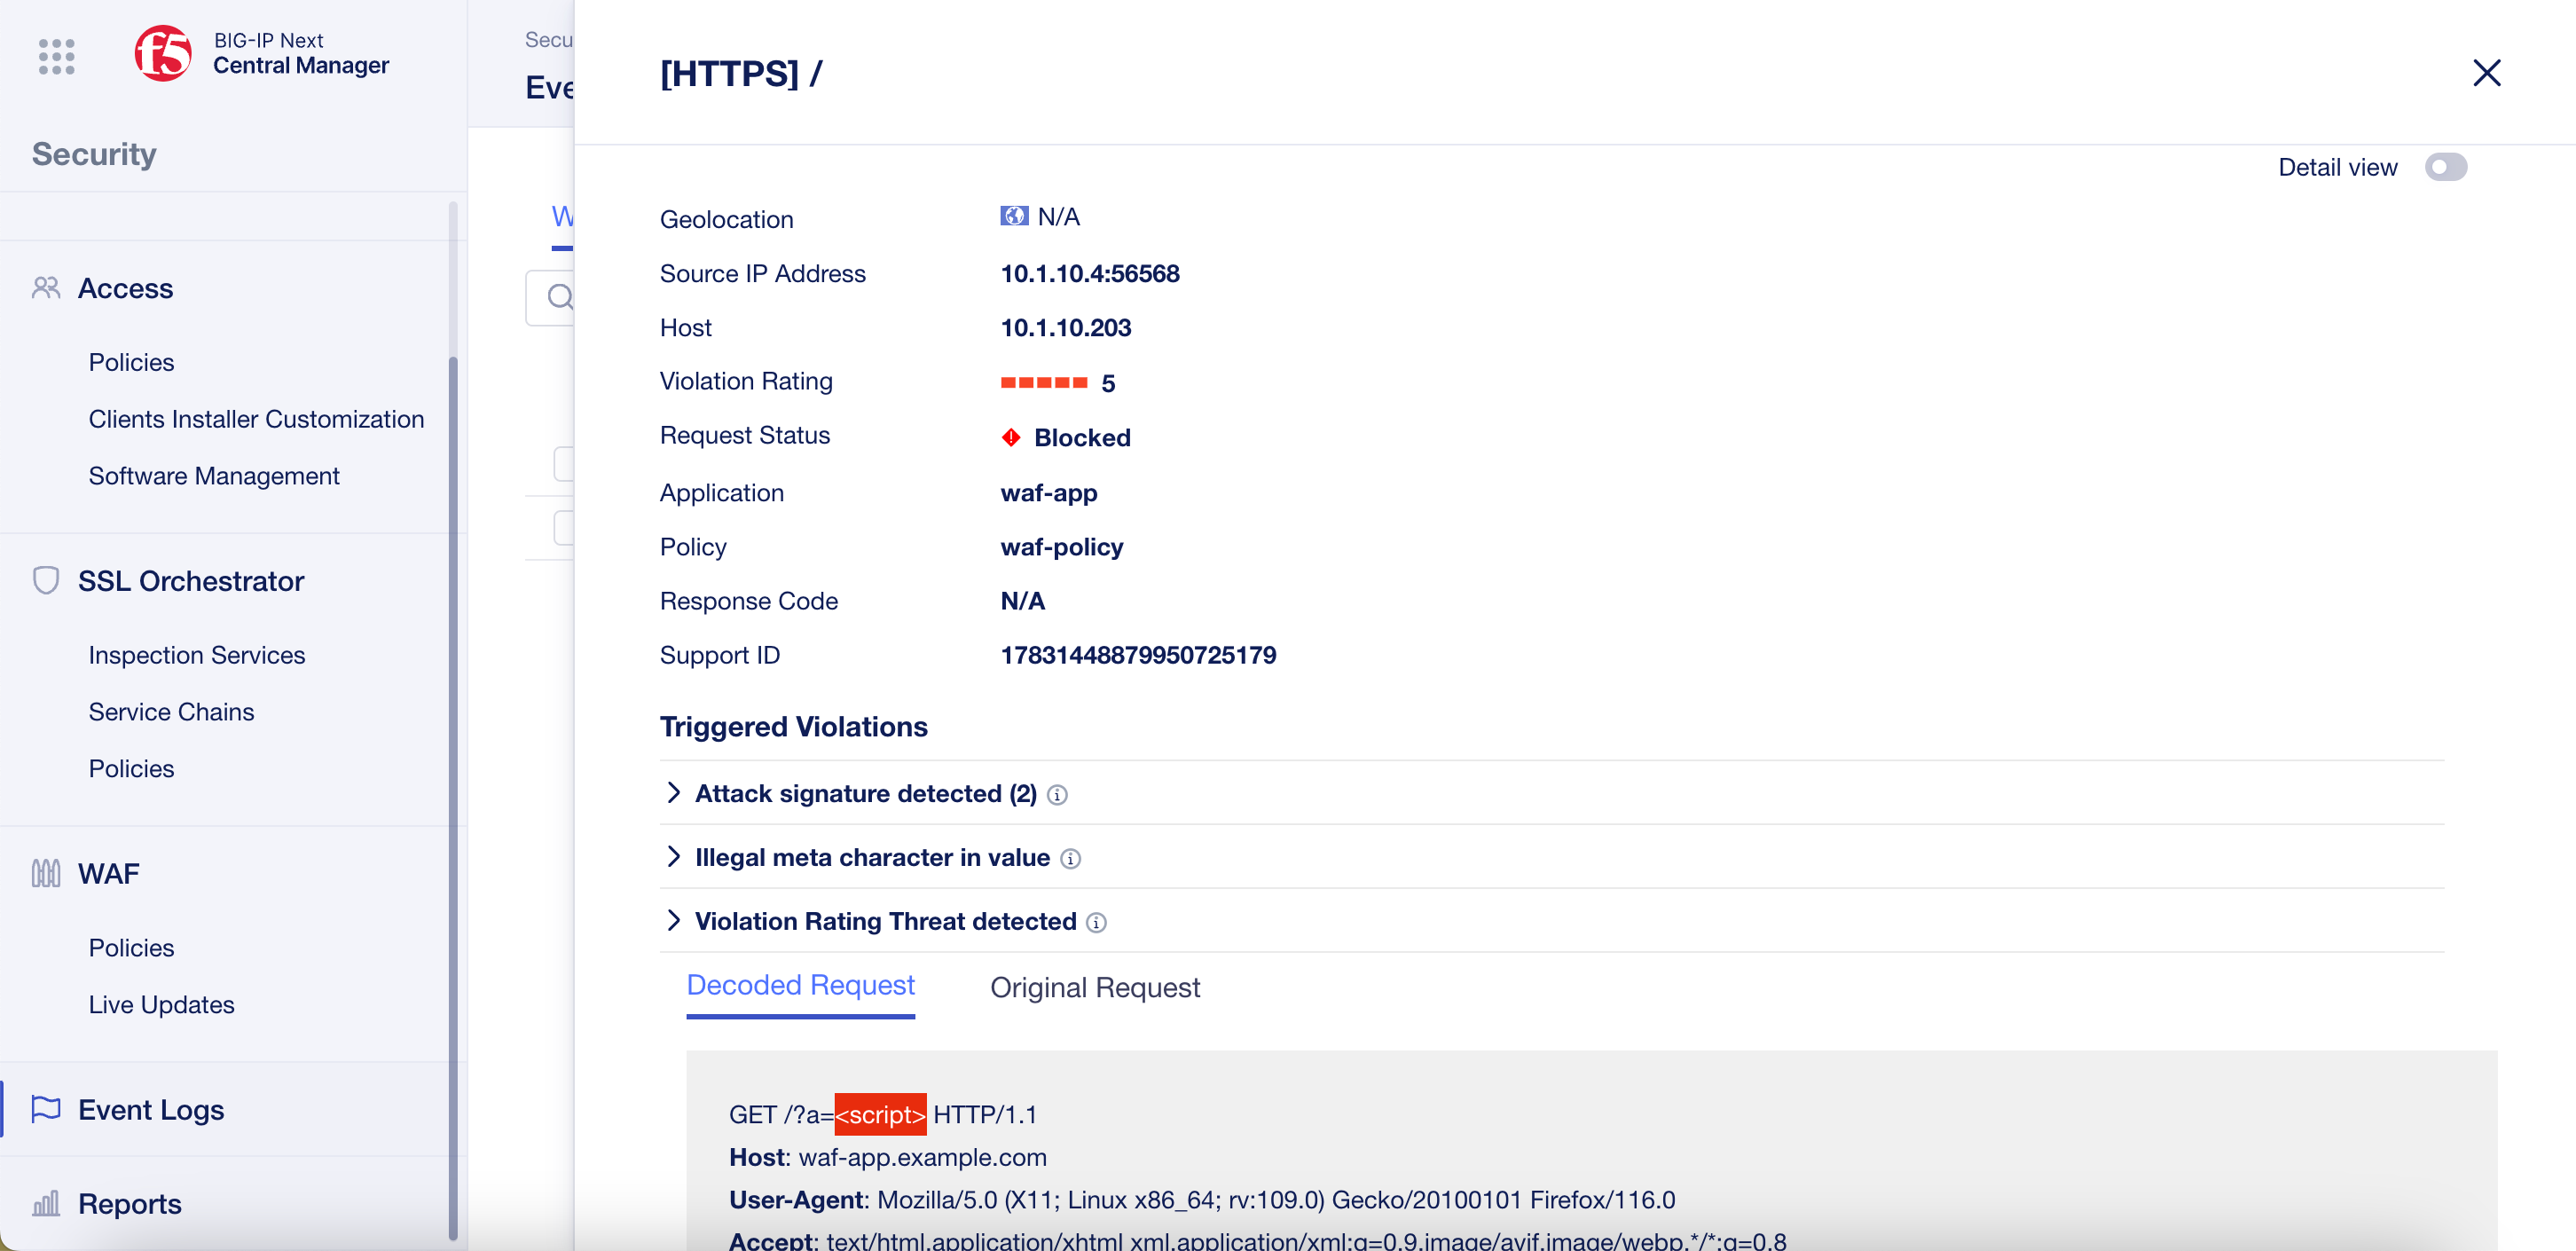
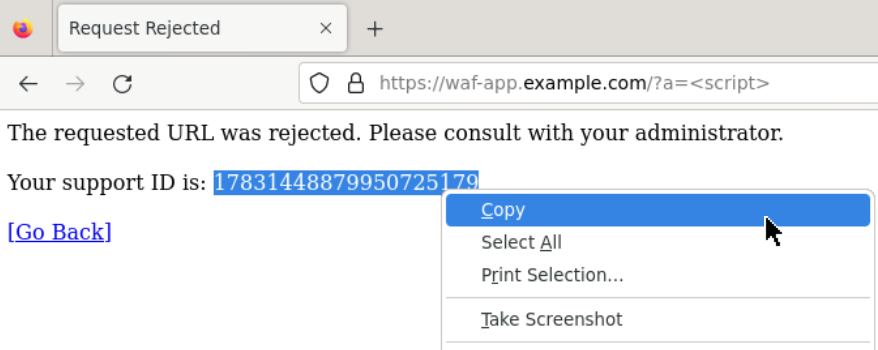
Browse to the URL shown below and you should see the blocking page.
URL:
https://waf-app.example.com/a=<script>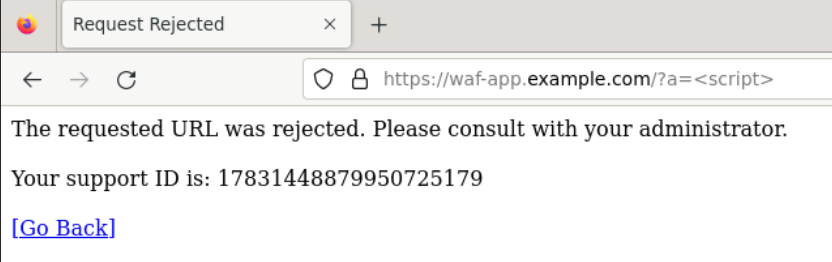
- You can see your block requested by visiting the WAF dashboard. From Central Manager, click on the top left menu to select the Security menu. Then click WAF Dashboards under Monitoring in the Security menu on the right.

From the WAF Dashboard under the Policies box, click on the three dots next to “waf-policy” and select Filter by Policy Name.
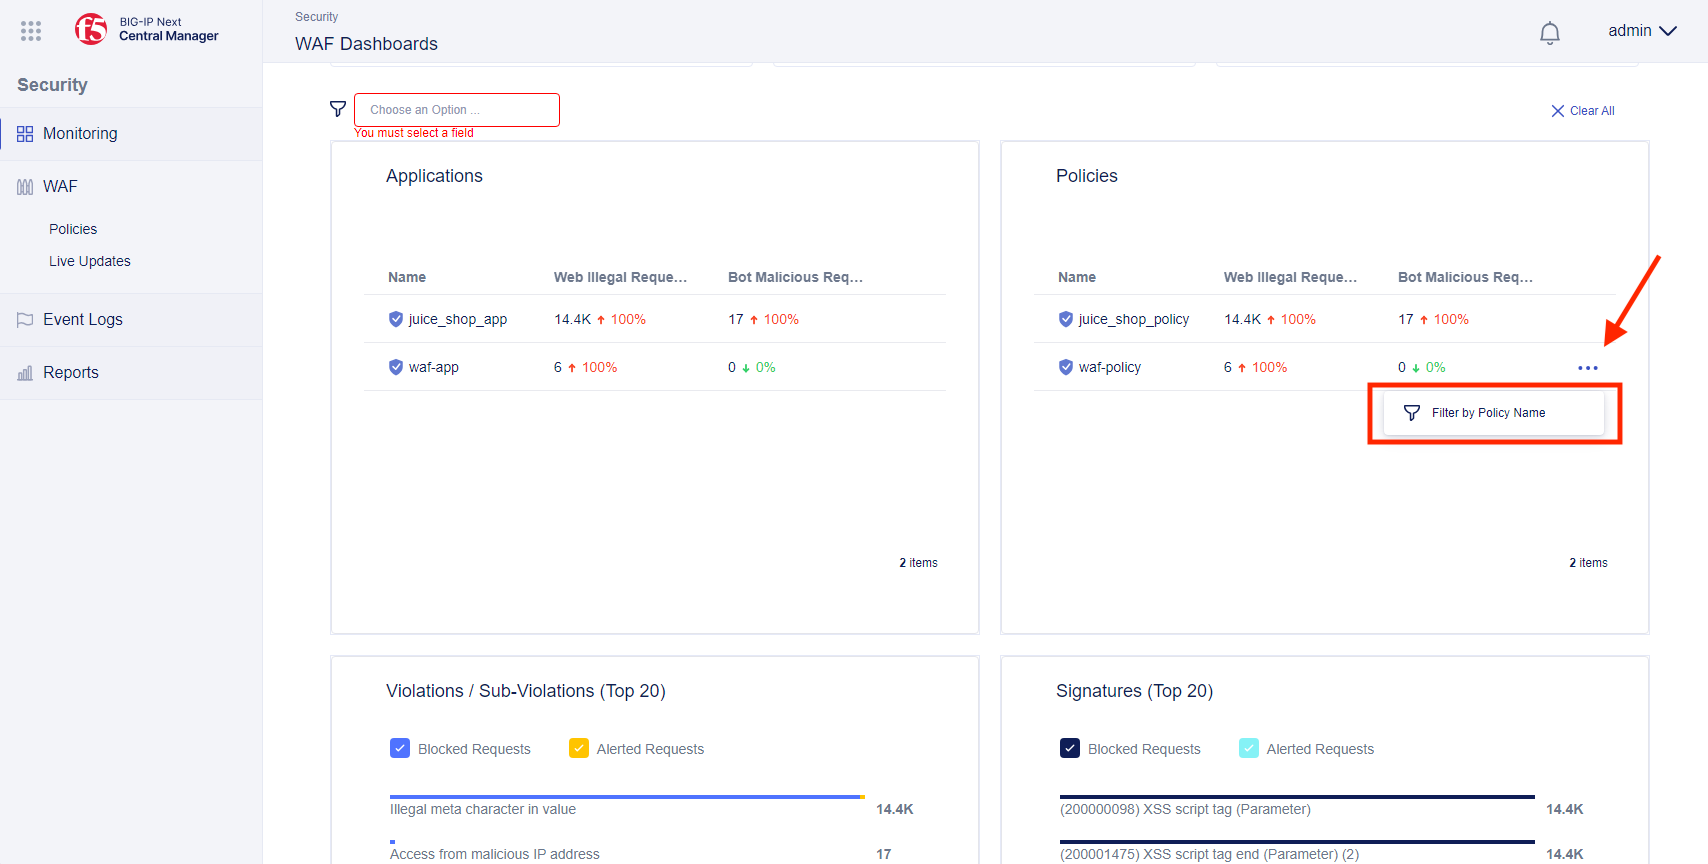
You can now view your “good” and “bad” requests
Note
The “Lab Progress” app will also make “bad” requests in the background
- (Optional) WAF Event Logs
Note
This next exercise is optional (if you are doing this as part of internal F5 training and are part of the “Security” track, please skip in favor of your dedicated “Security” lab)
The Firefox copy and paste function doesn’t often work, so remember the first few digits of the blocking “Support ID” when you triggered a WAF block or use the built-in Firefox copy to clipboard option.
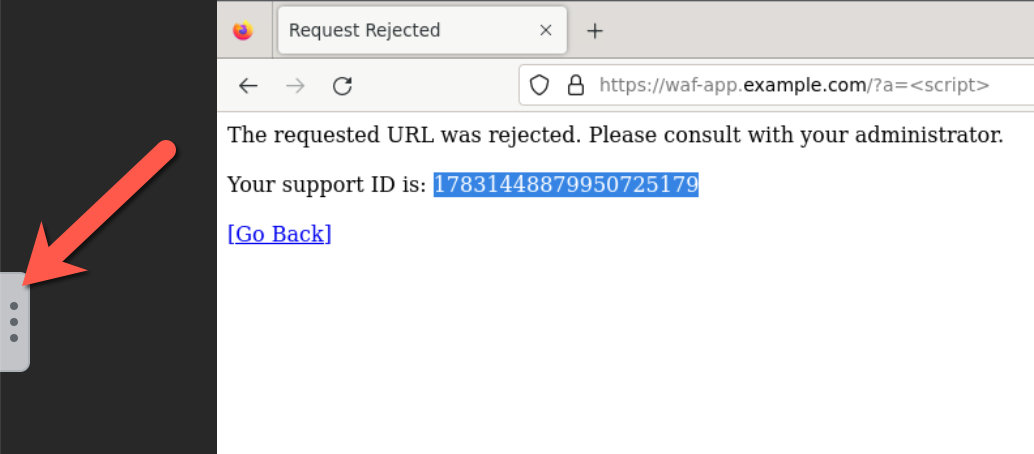
Next you will need to expand the built-in “copy to clipboard” feature by clicking on the 3 dots to the left.
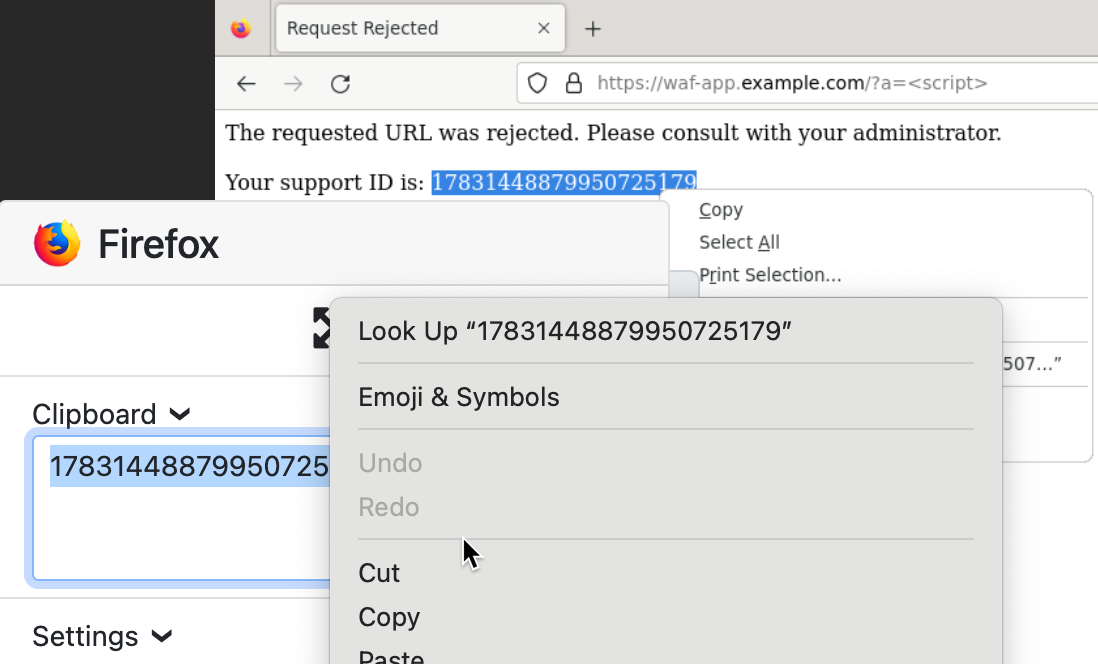
You will then be able to copy the support ID into your browser.
Next click Event Logs and enter the Support ID into the filter text box.
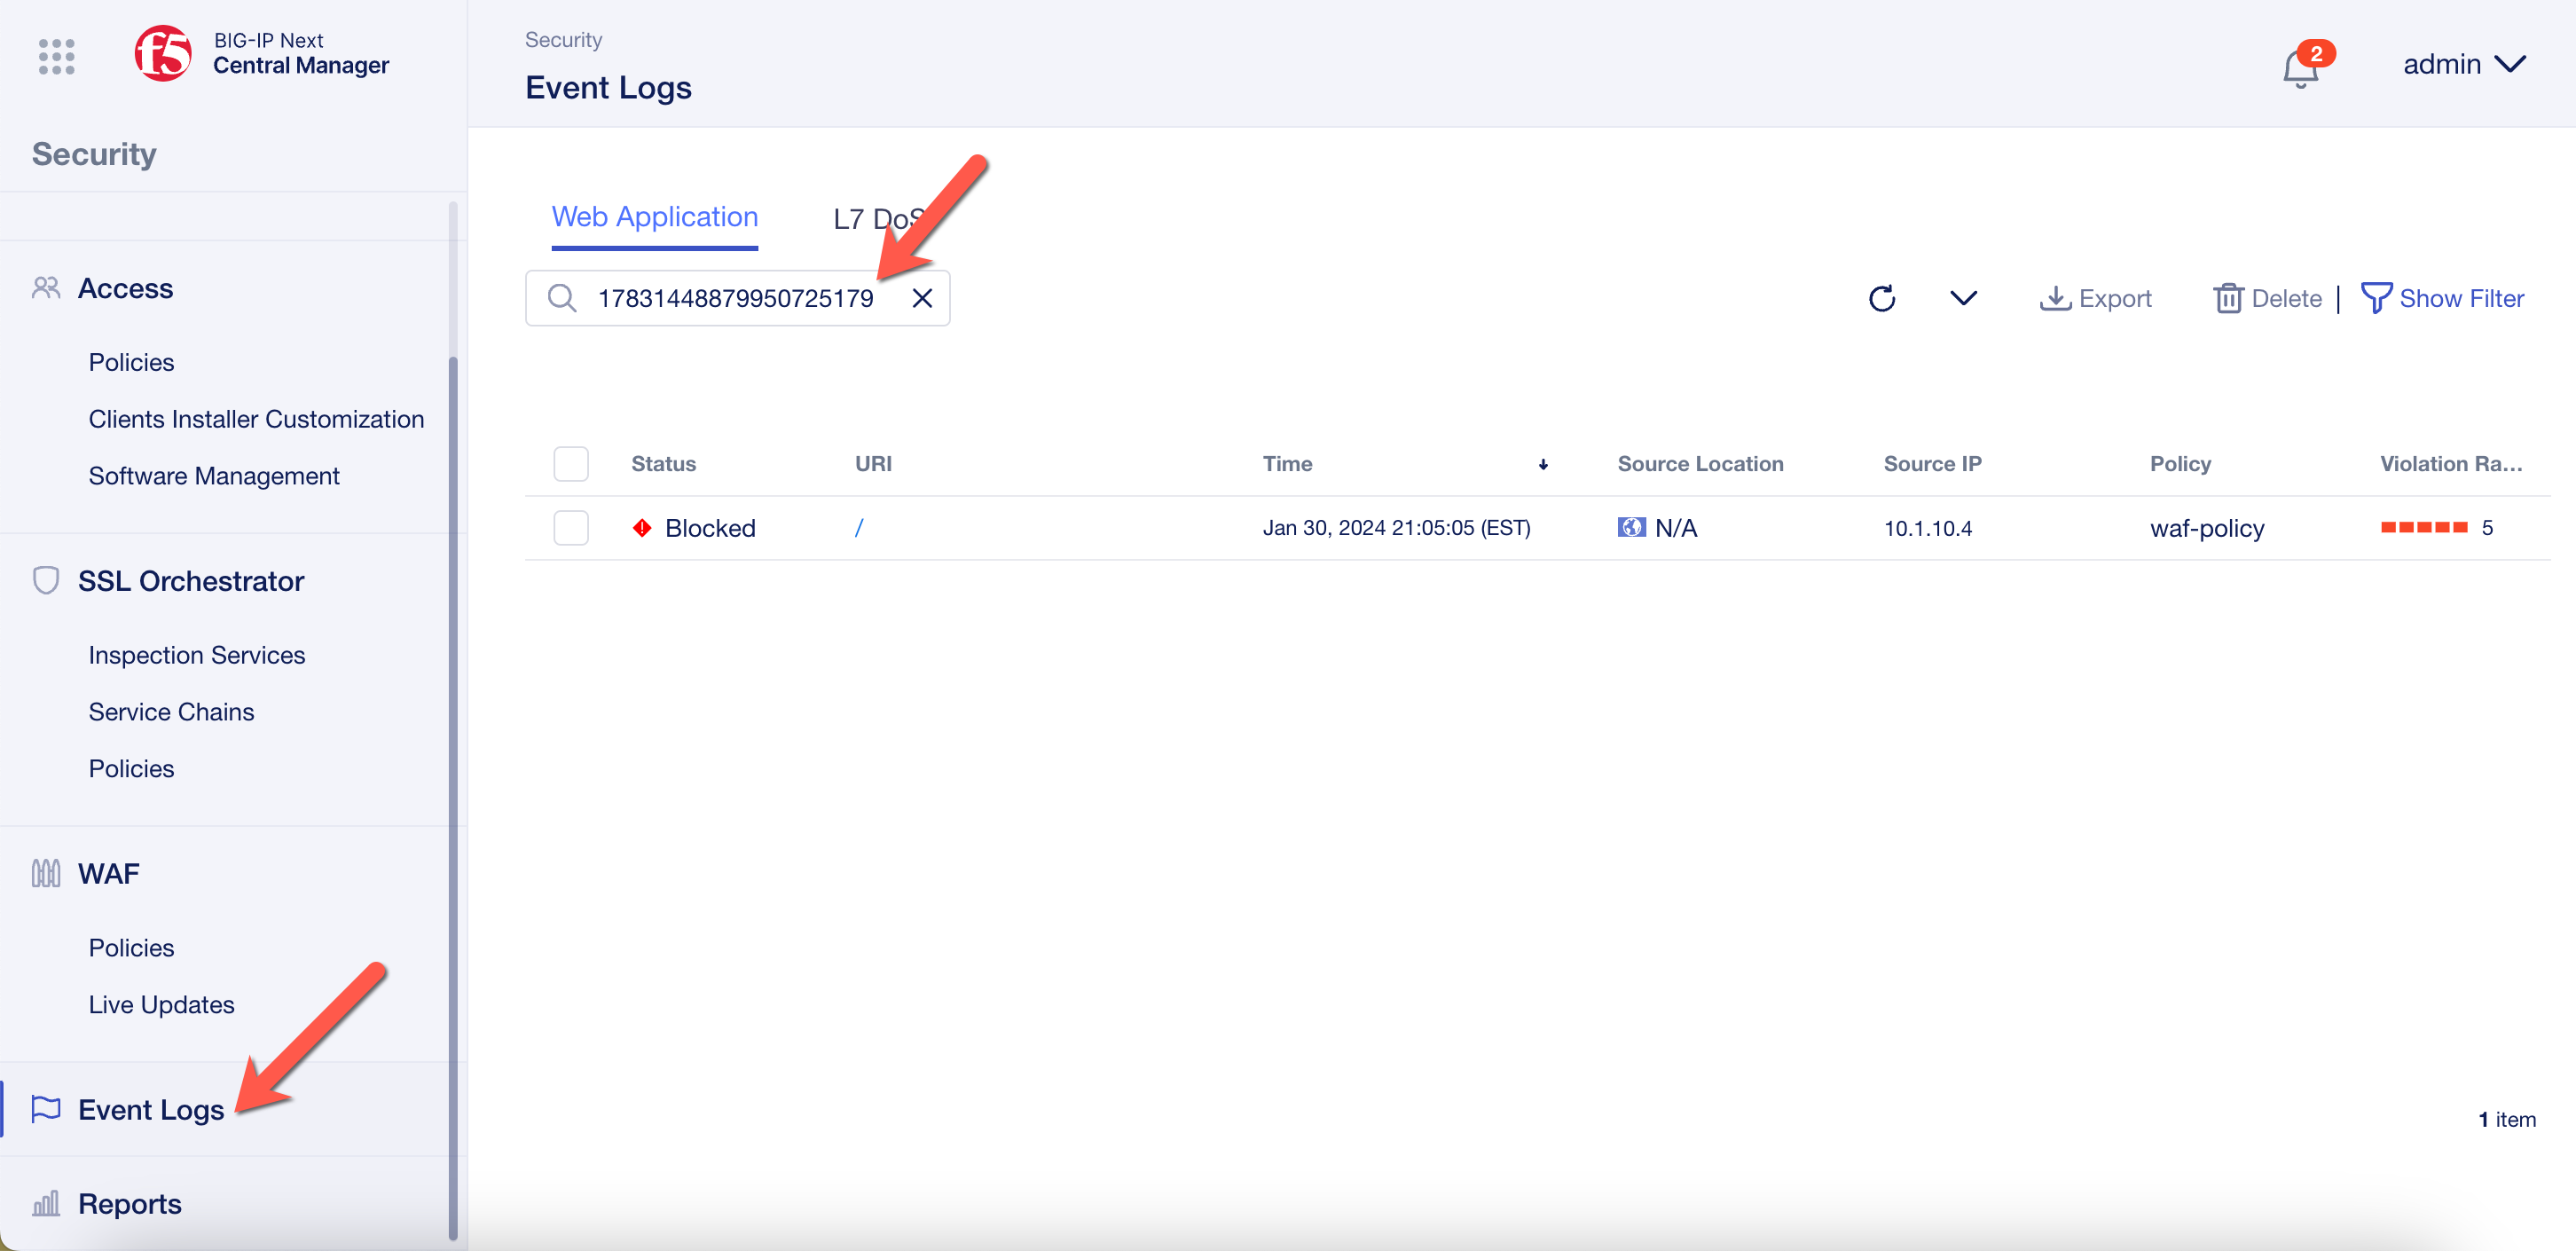
You can then click on the URI to view more details.