Advanced Multi-layer Firewall Protection > AFM DDos and DNS DoS Protections Source | Edit on
Configuring a DoS Logging Profile
We’ll create a DoS logging profile so that we can see event logs in the BIG-IP UI during attack mitigation.
- On the BIG-IP web UI, navigate to Security > Event Logs > Logging Profiles and create a new profile with the following values, leaving unspecified attributes at their default value:
- Profile Name: dns-dos-profile-logging
- DoS Protection: Enabled
- DNS DoS Protection Publisher: local-db-publisher
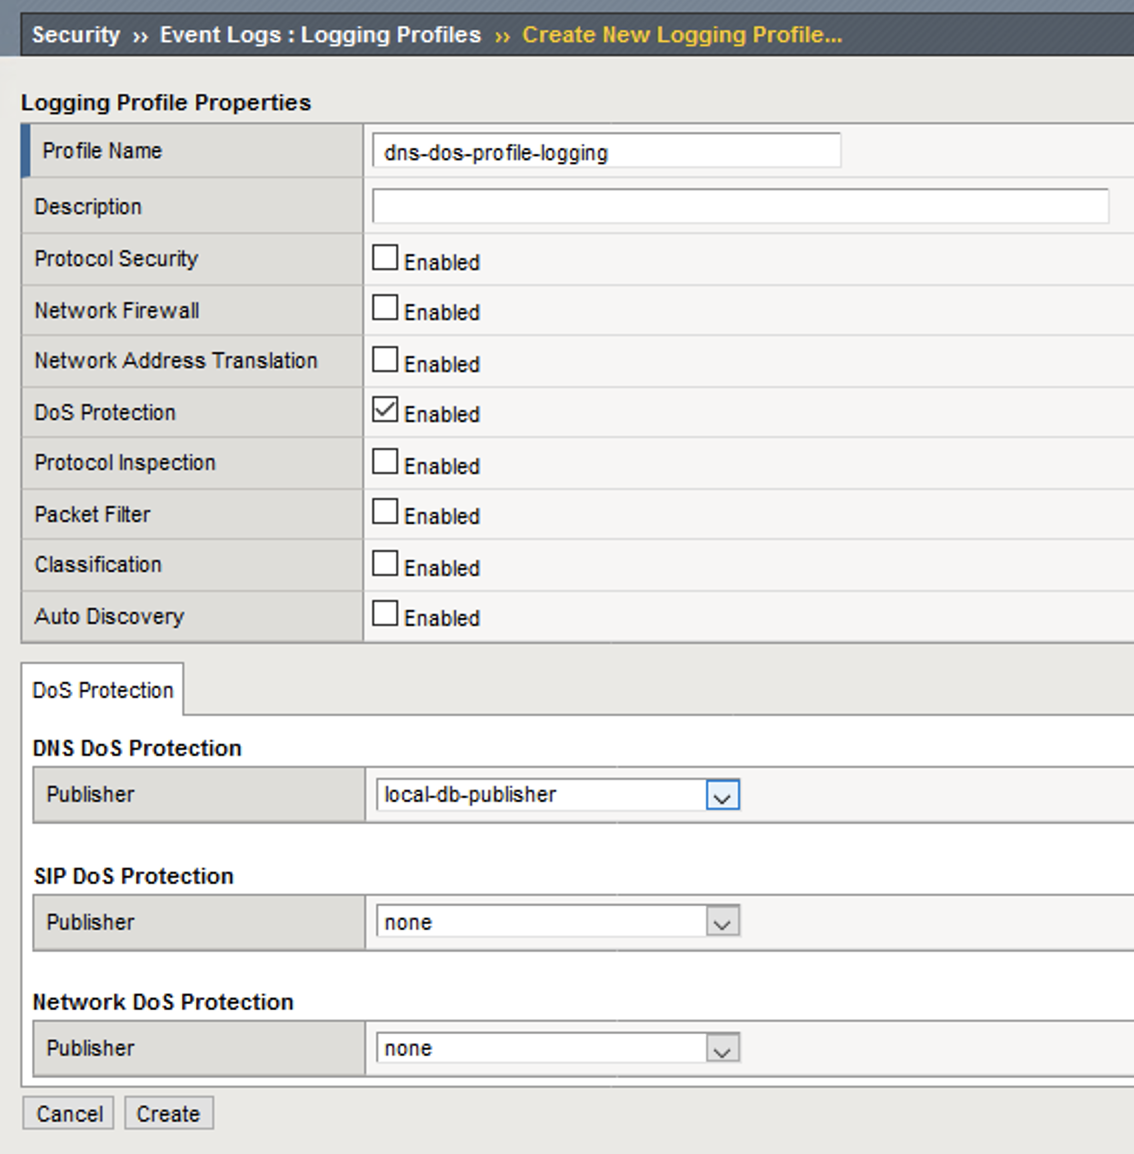
- Click Create to finish the configuration.
About profiles for DoS and protocol service attacks
On the BIG-IP® system, you can use different types of profiles to detect and protect against system DoS attacks, to rate limit possible attacks, and to automatically blacklist IP addresses when identified as Bad Actors. You can configure settings for specific protocol attacks for DNS, and other network attacks.
With AFM, you can also configure manual responses to DoS vectors. For non-error packets, you can specify absolute packet-per-second limits for attack detection (reporting and logging), percentage increase thresholds for detection, and absolute rate limits on a wide variety of packets that attackers can leverage as attack vectors.
Configuring a DoS Profile
We’ll now create a DoS profile with manually configured thresholds to limit the attack’s effect on our server.
- Navigate to Security > DoS Protection > Protection Profiles.

- Click Create to create a new profile.
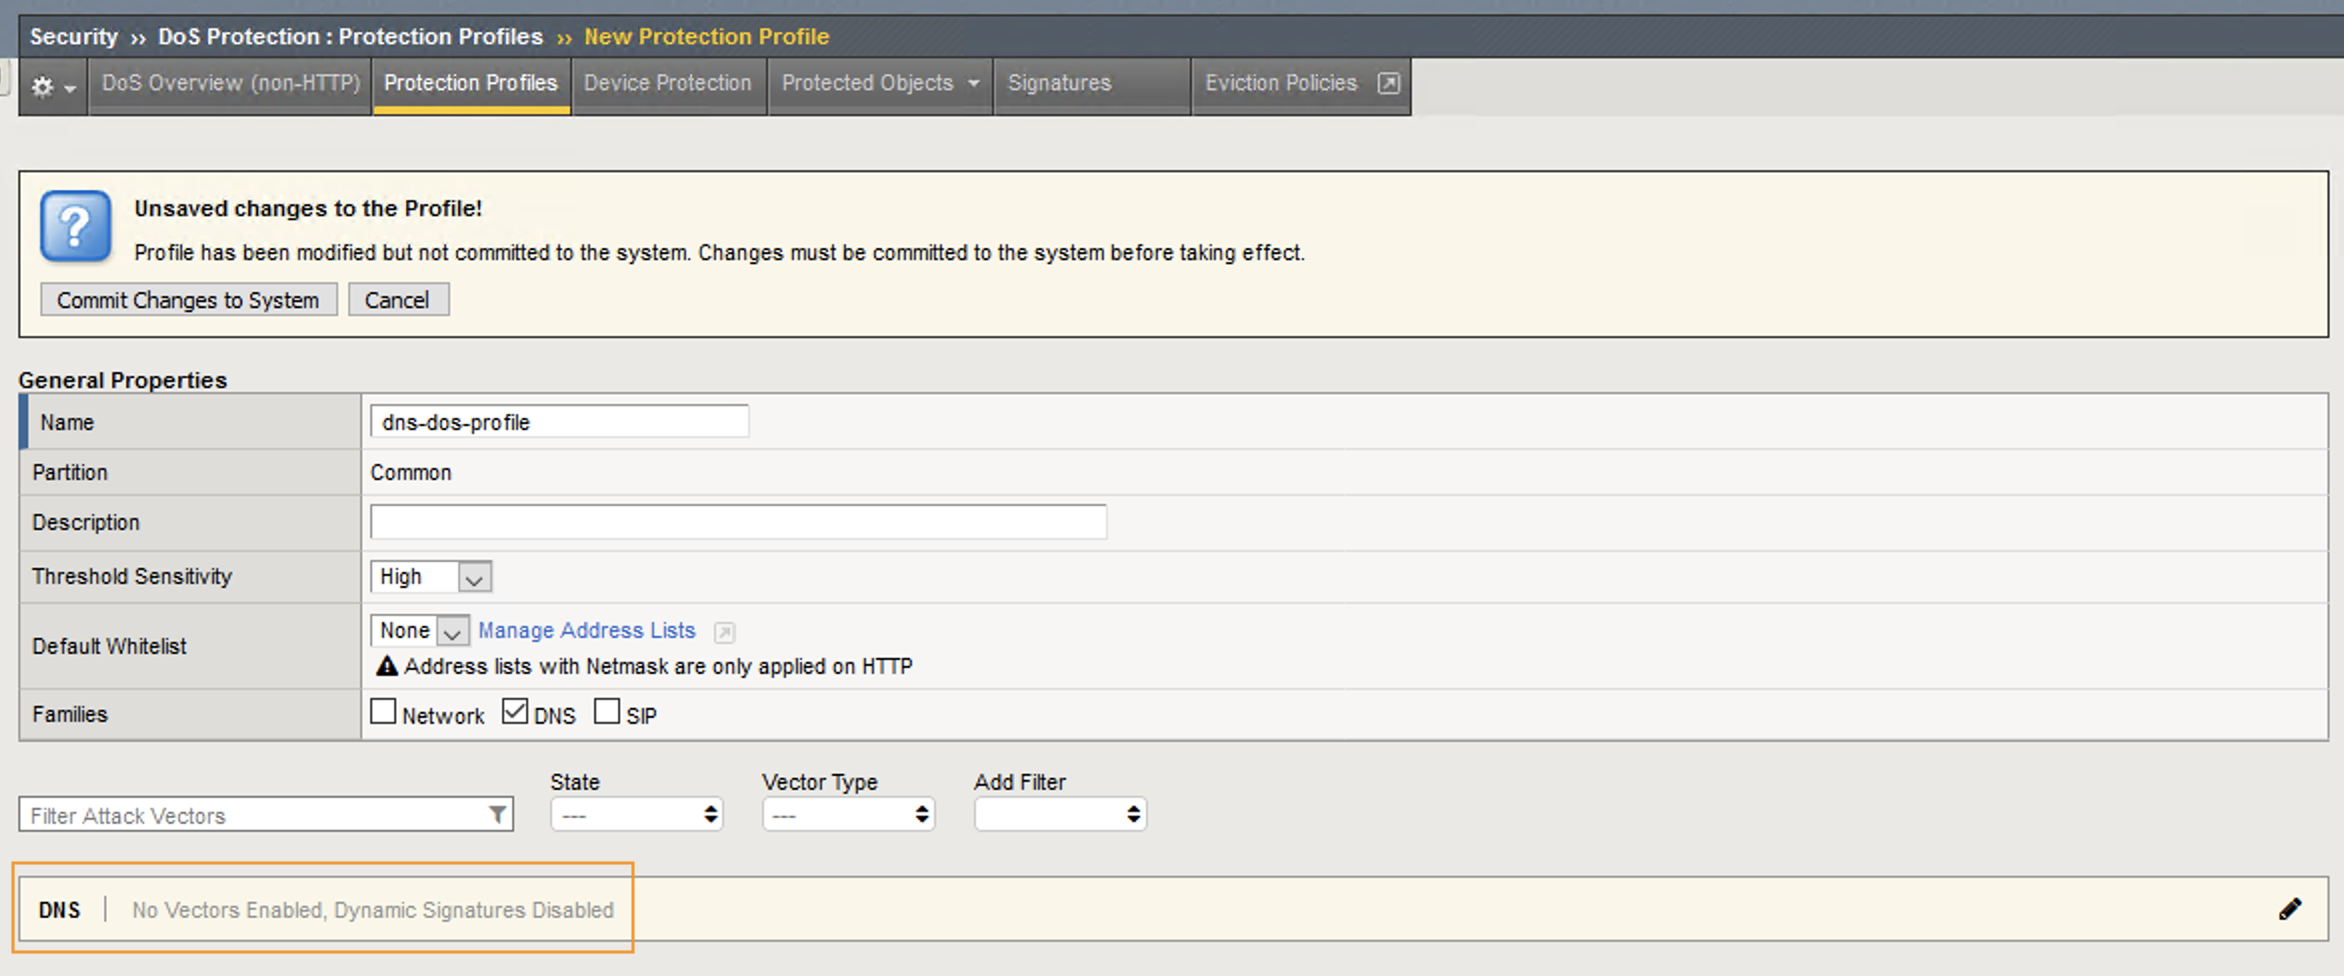
- Enter the name dns-dos-profile into the form. Set the Threshold Sensitivity to high and check the box next to DNS.
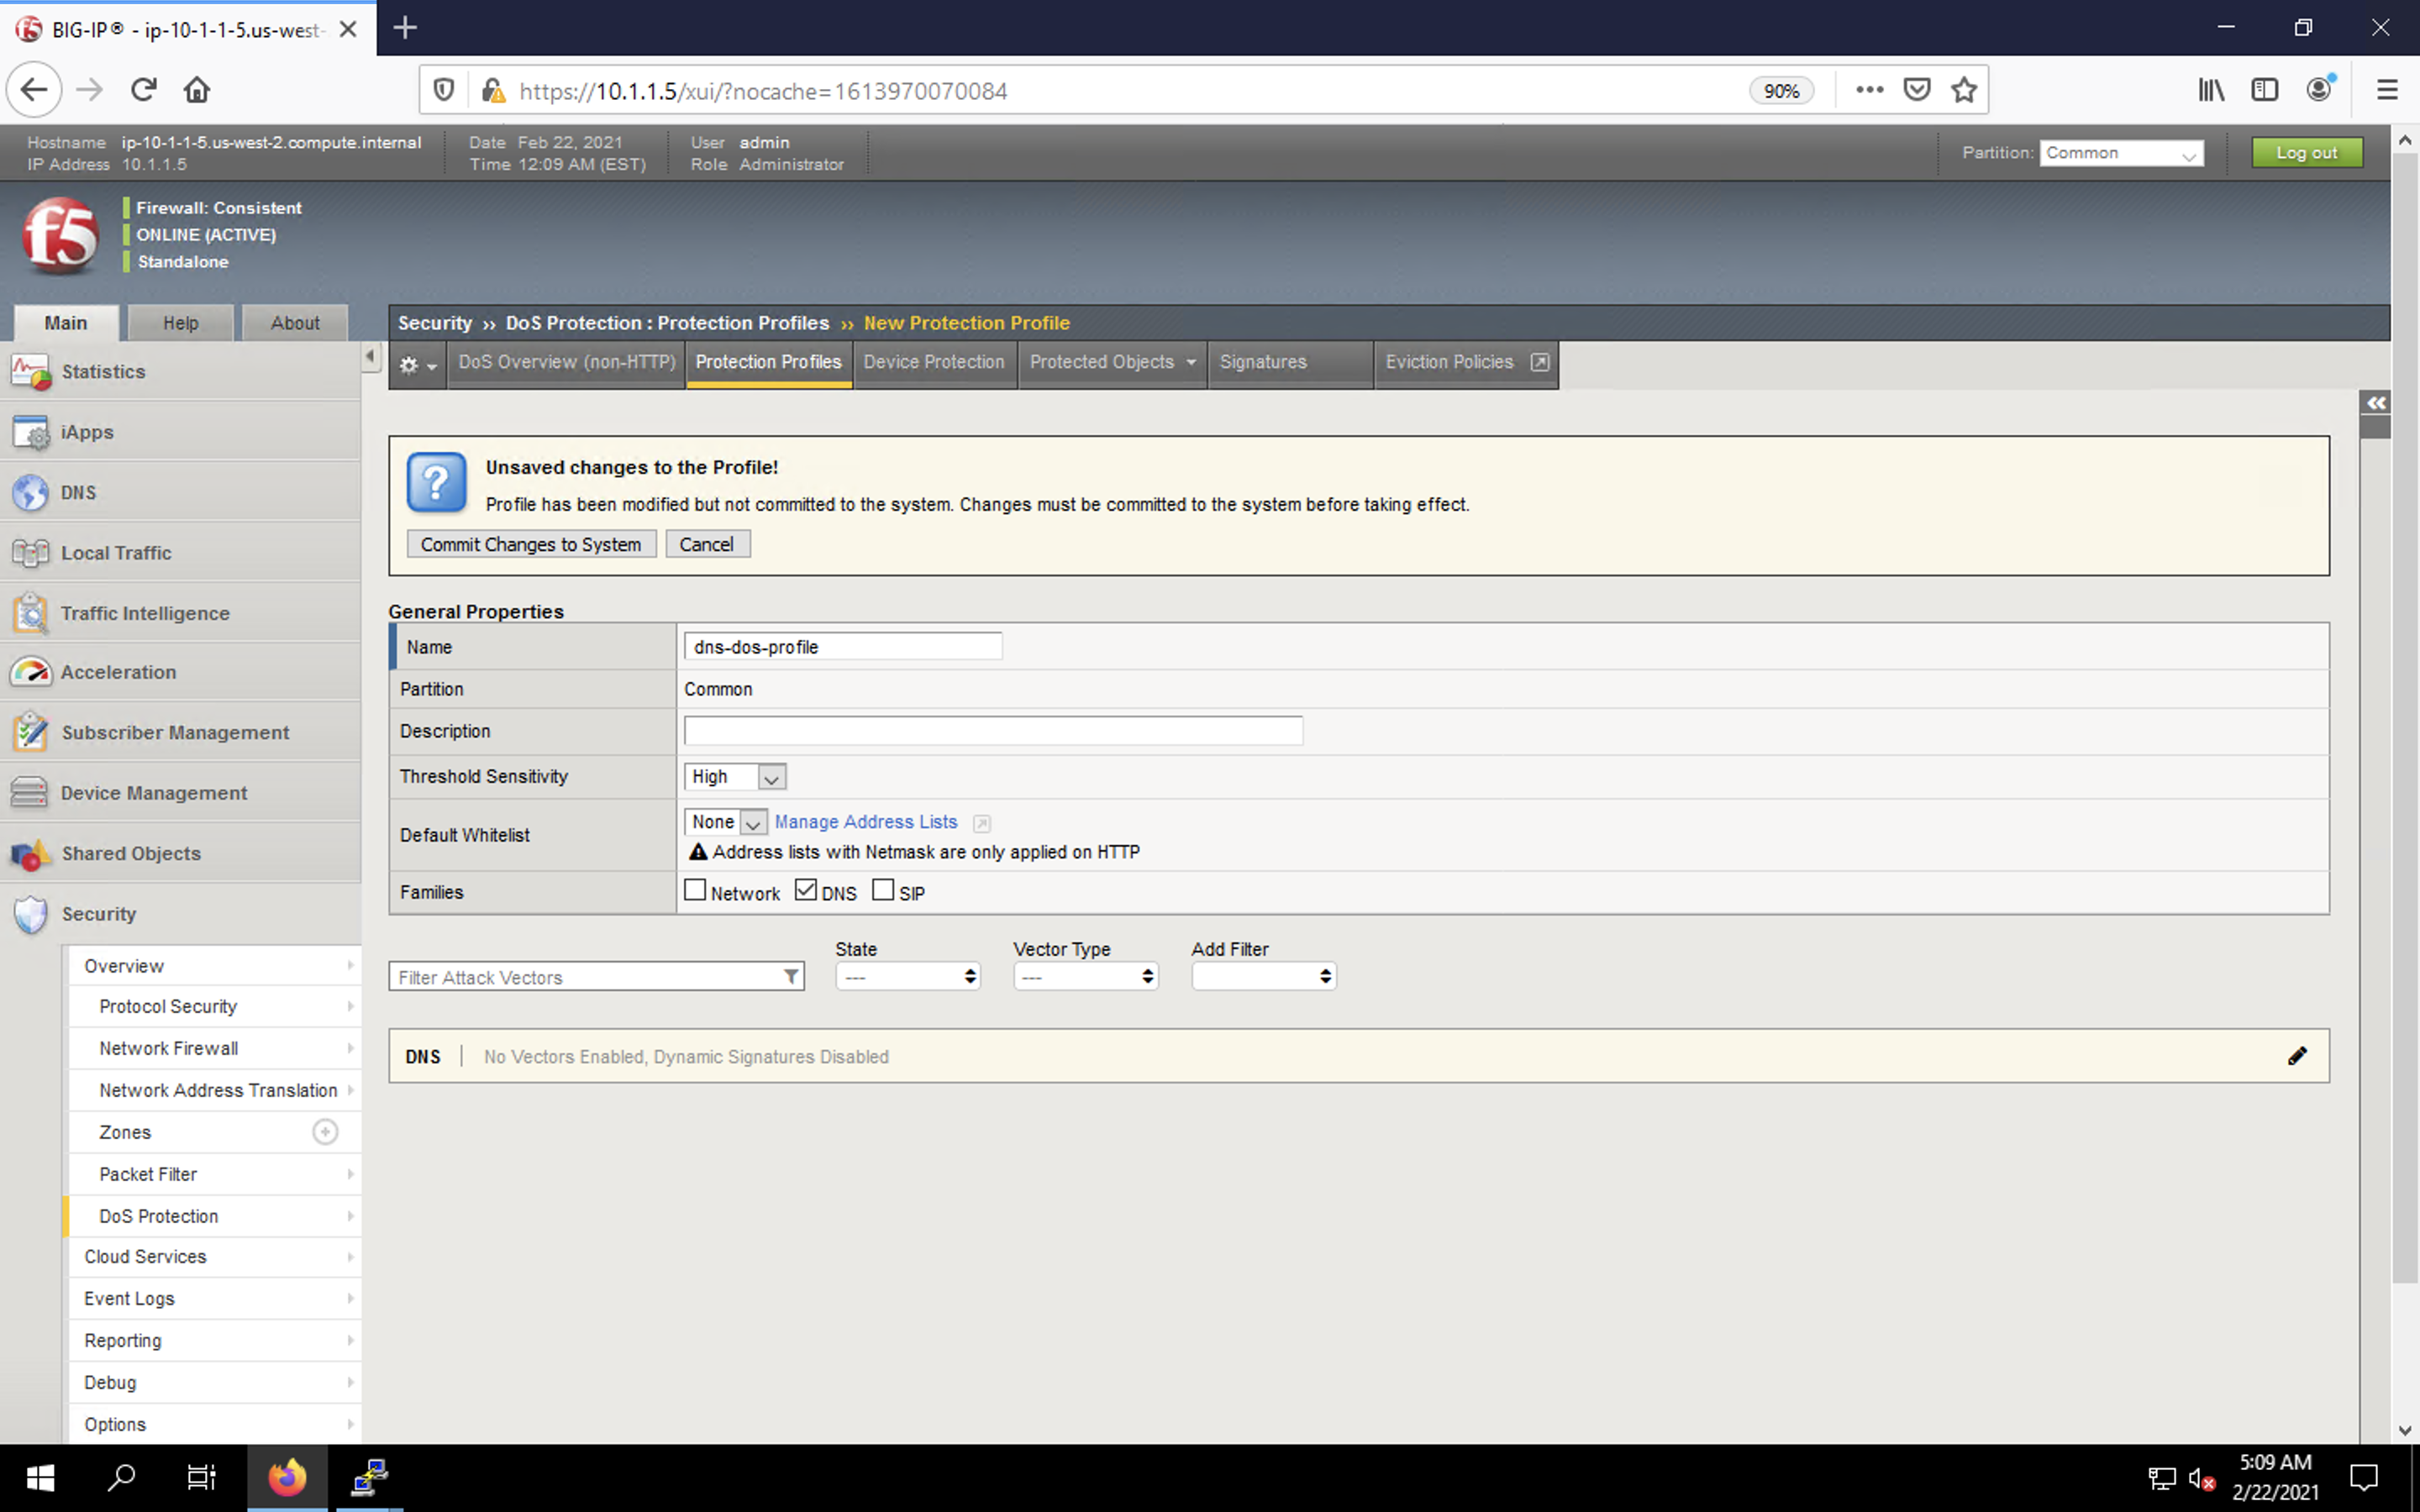
- Click on the DNS section title in the vector list at the bottom of the screen as shown below.
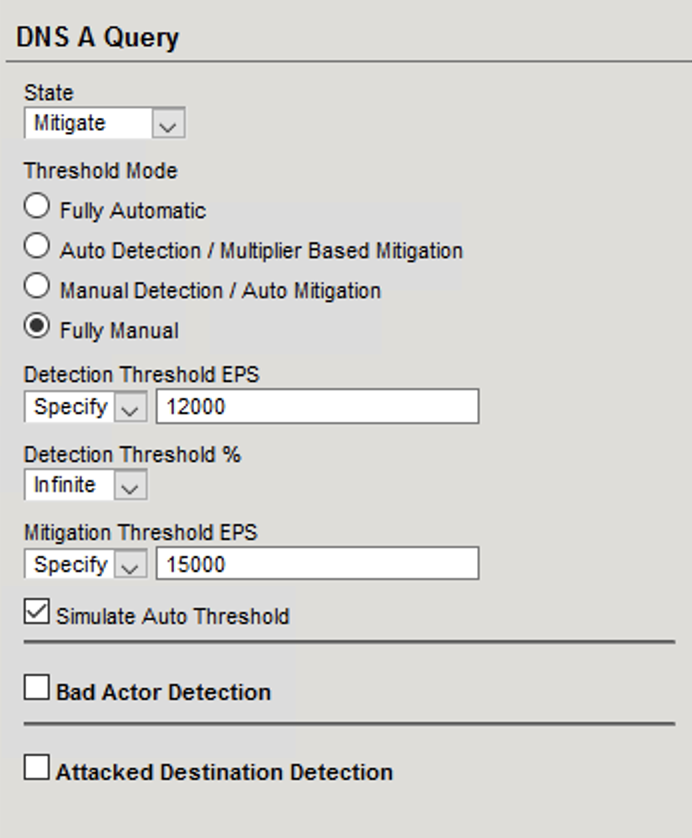
- In this list, check the DNS A Query vector in the list to open the vector configuration menu.
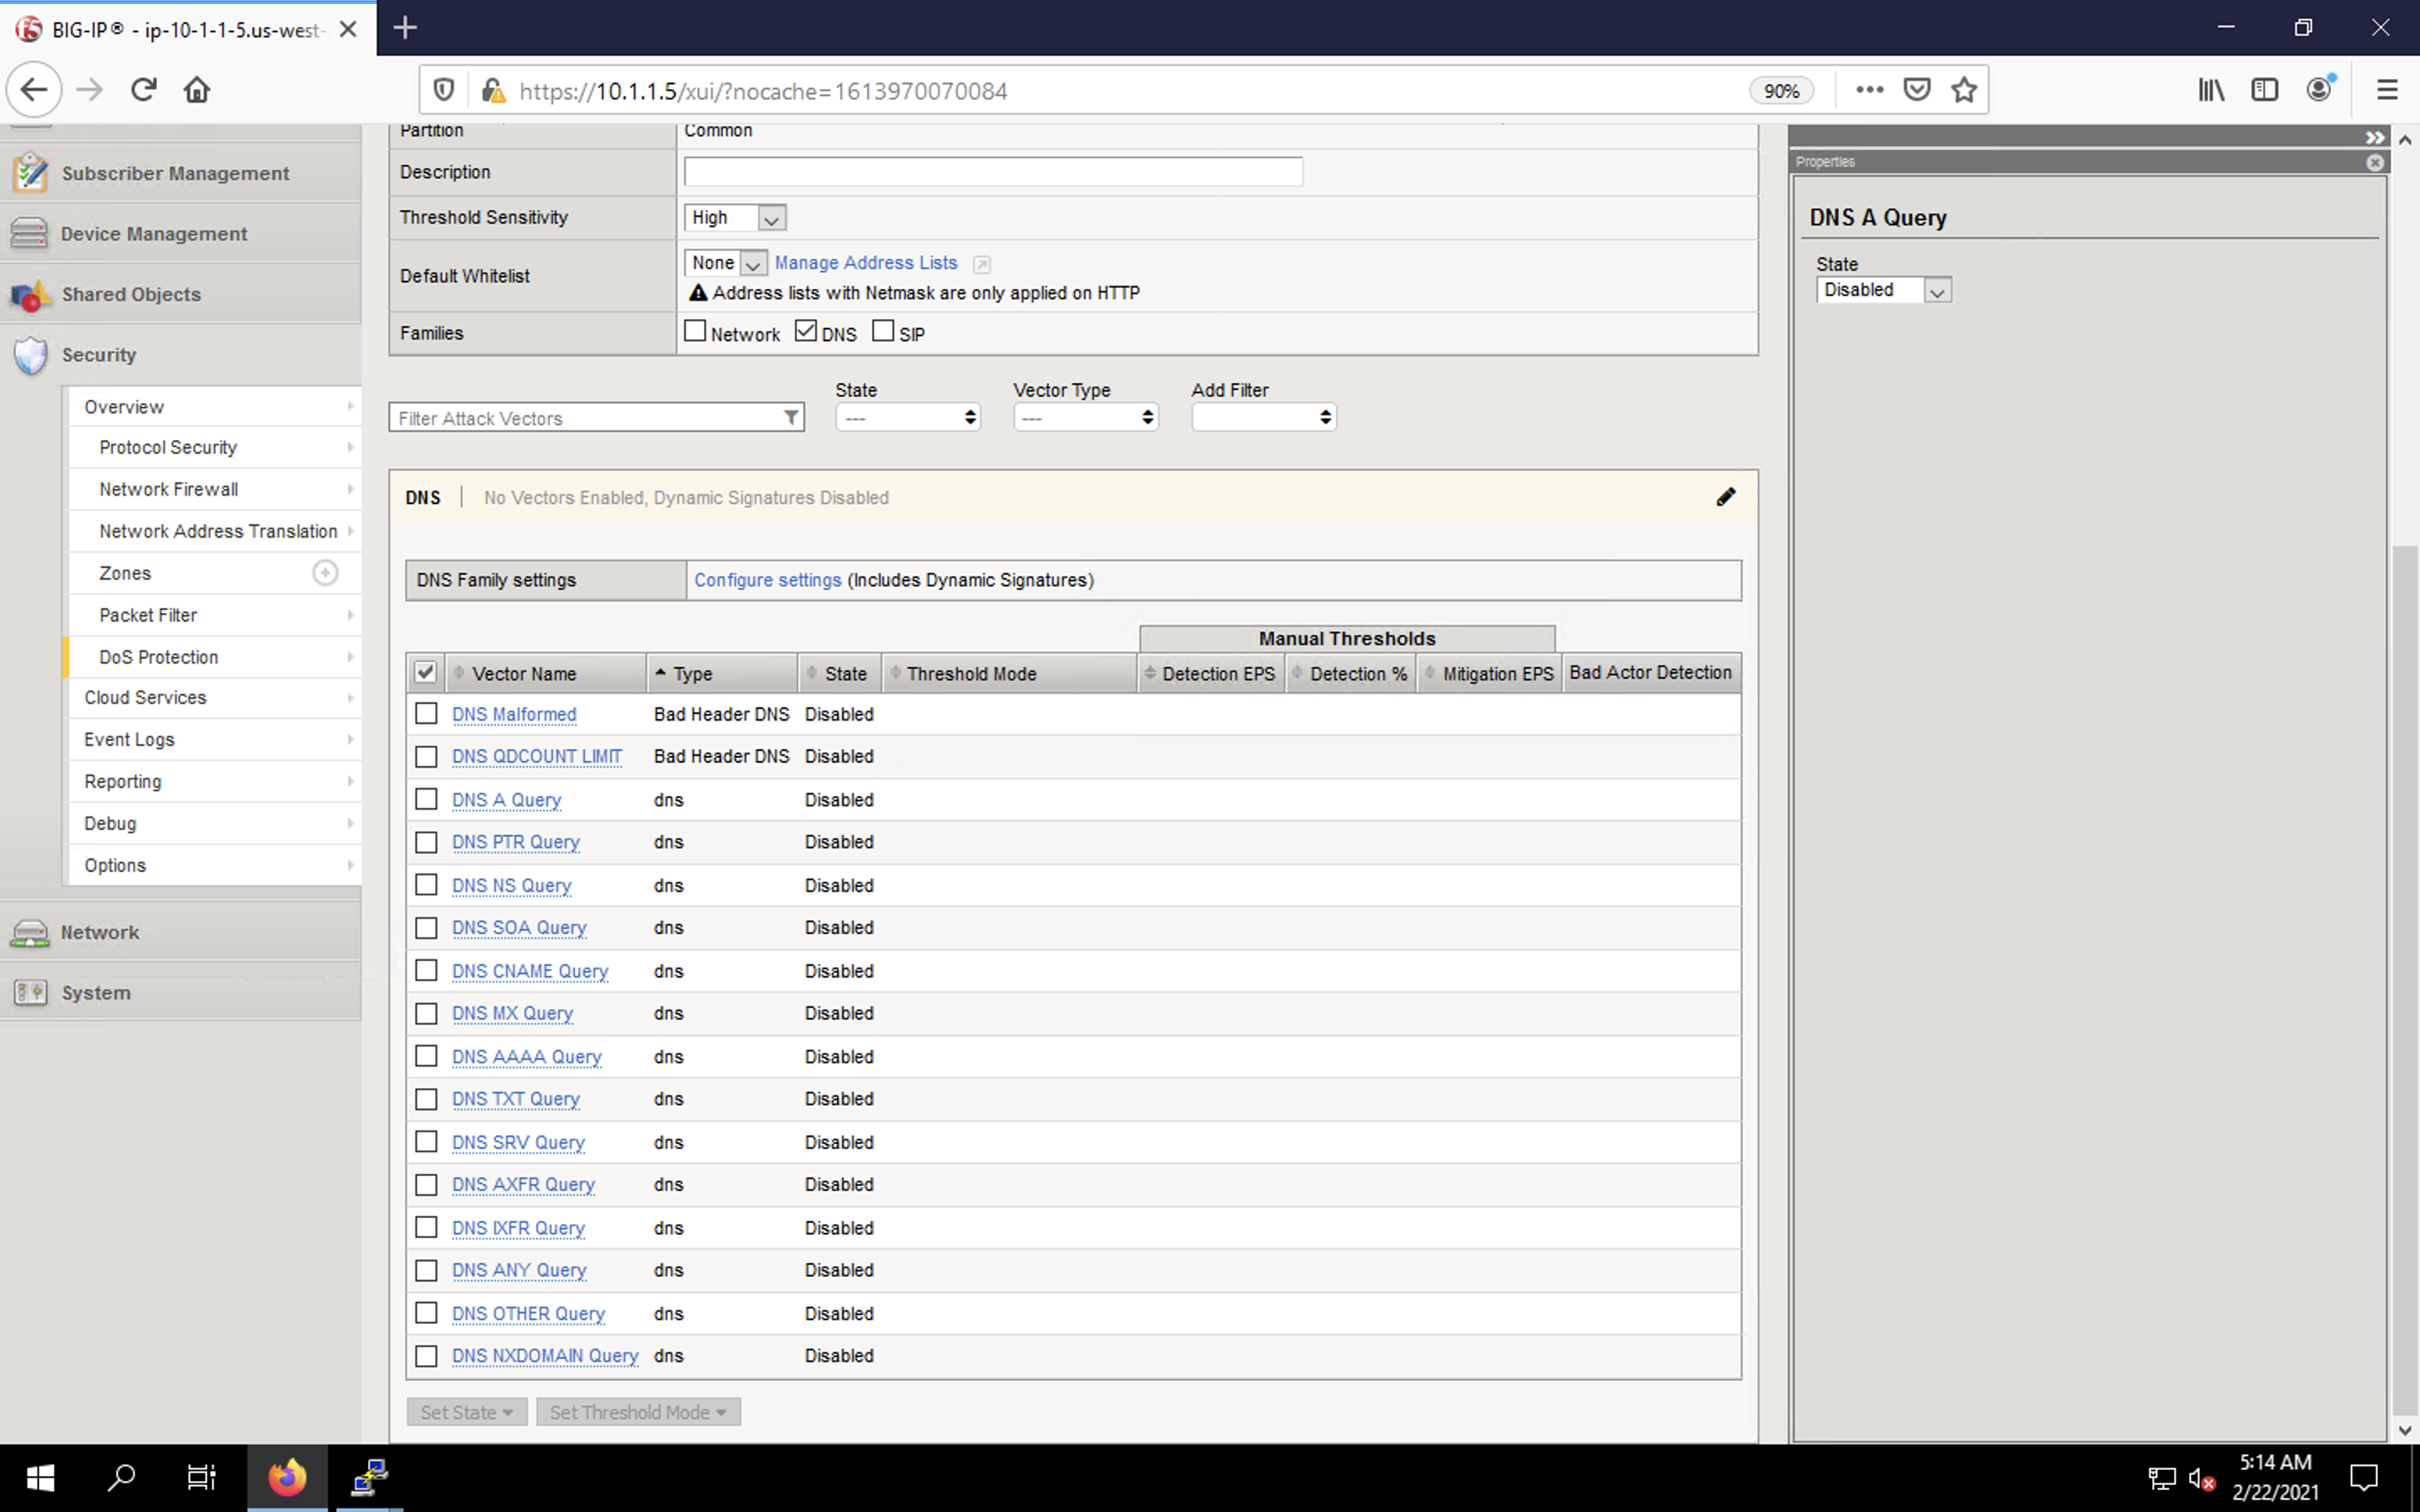
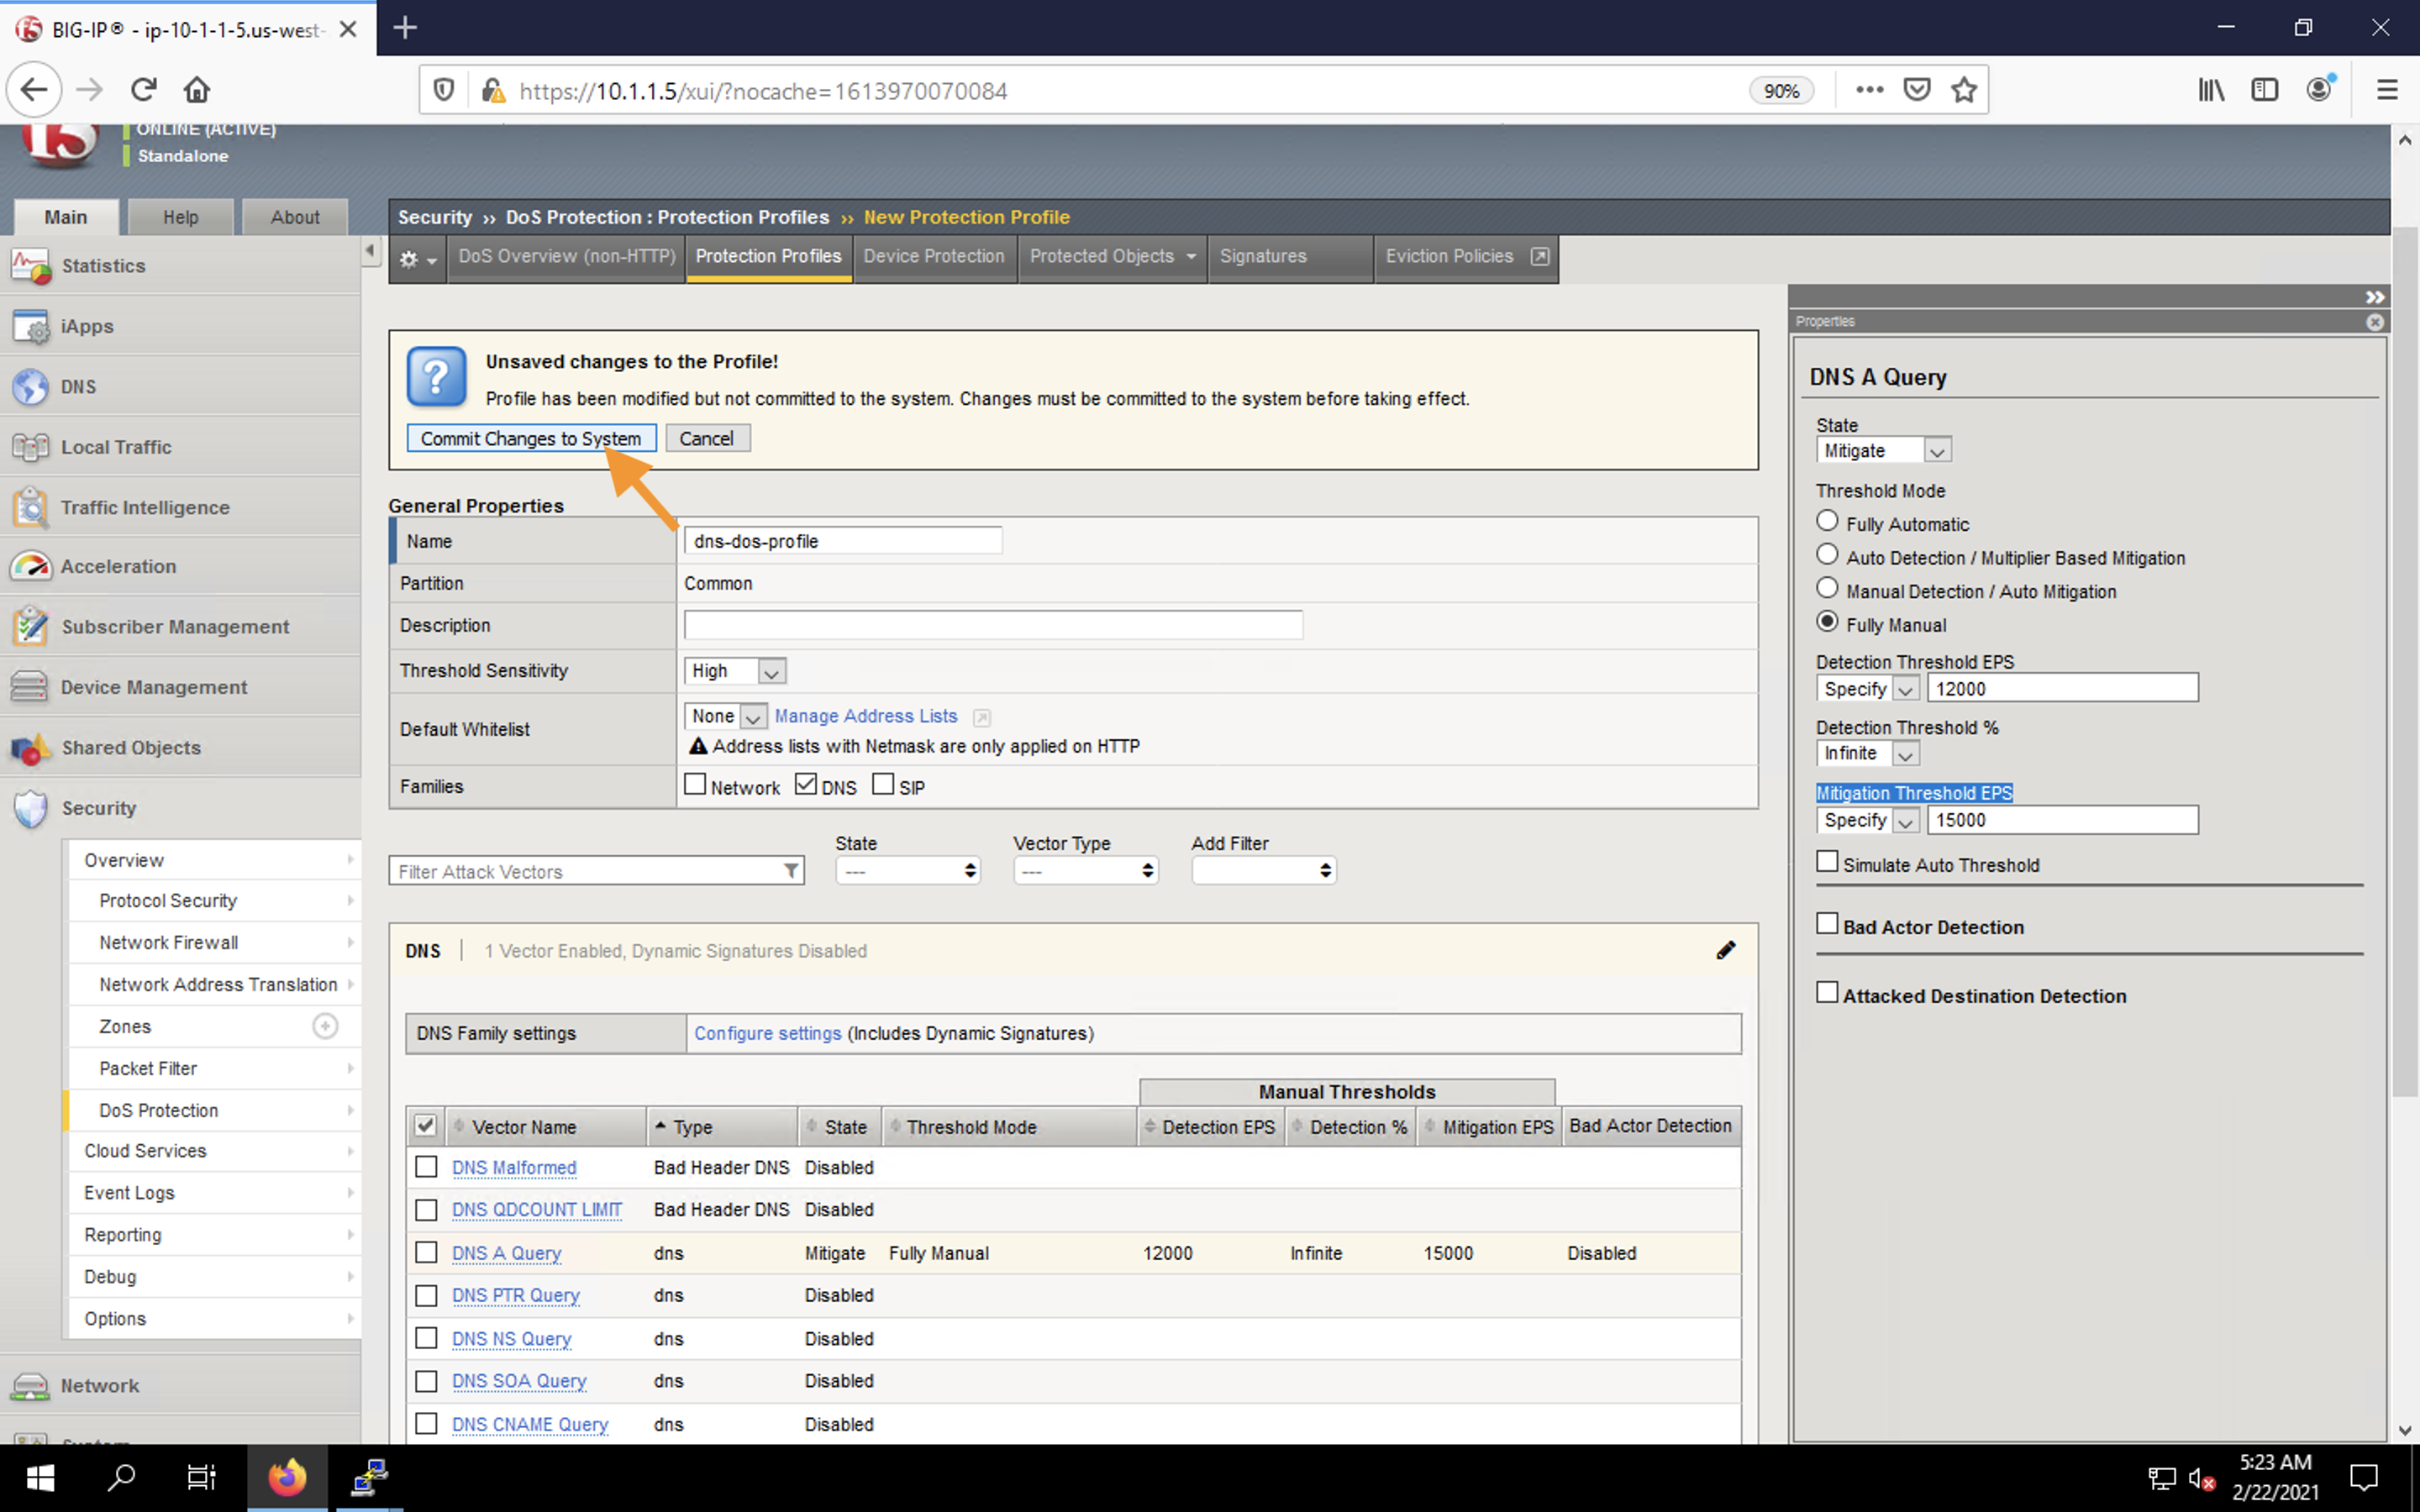
- Set the State to Mitigate. Choose Fully Manual as the Threshold Mode. Set the Detection Threshold EPS to 80%-ish of the safe QPS value you determined earlier in the lab. Set the Detection Threshold % to Infinite. Set the Mitigation Threshold EPS to the safe QPS value. Check the box for Simulate Auto Threshold.
- Scroll to the top of the screen and click Commit Changes to System.
Attaching a DoS Profile
We’ll attach the DoS profile to the virtual server that we configured to manage DNS traffic.
- Navigate to Security > DoS Protection > Protected Objects > Protected Objects List.

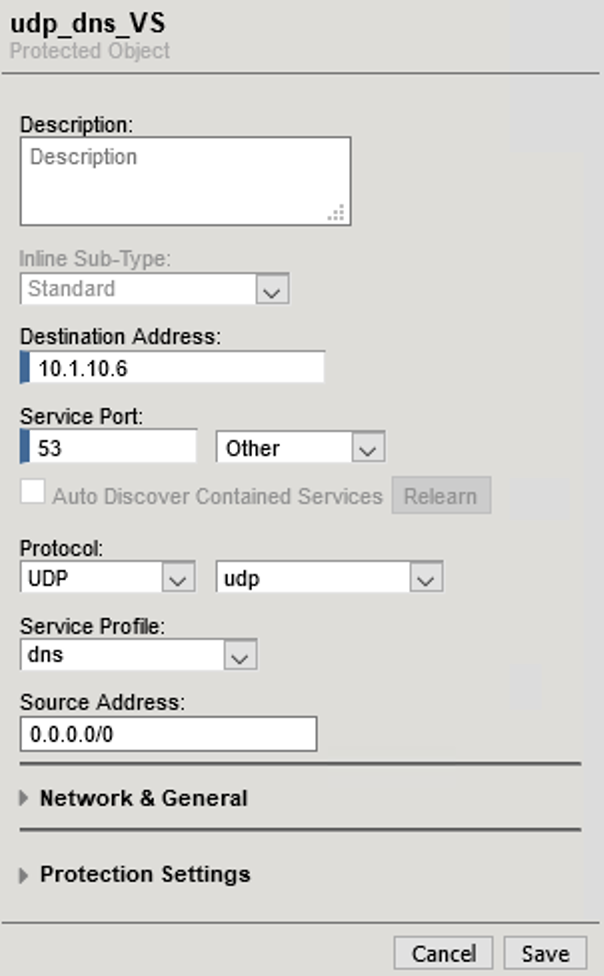
- Click on the udp_dns_VS virtual server name. The properties configuration menu should appear on the right. If the statistics dashboard appears below, click again directly on the object name in the menu.

- Change the Service Profile to dns.
- Expand Network & General and add the dns-dos-logging-profile logging profile from the Available to Selected column.

- Expand Protection Settings and set the Protection Profile to dns-dos-profile.
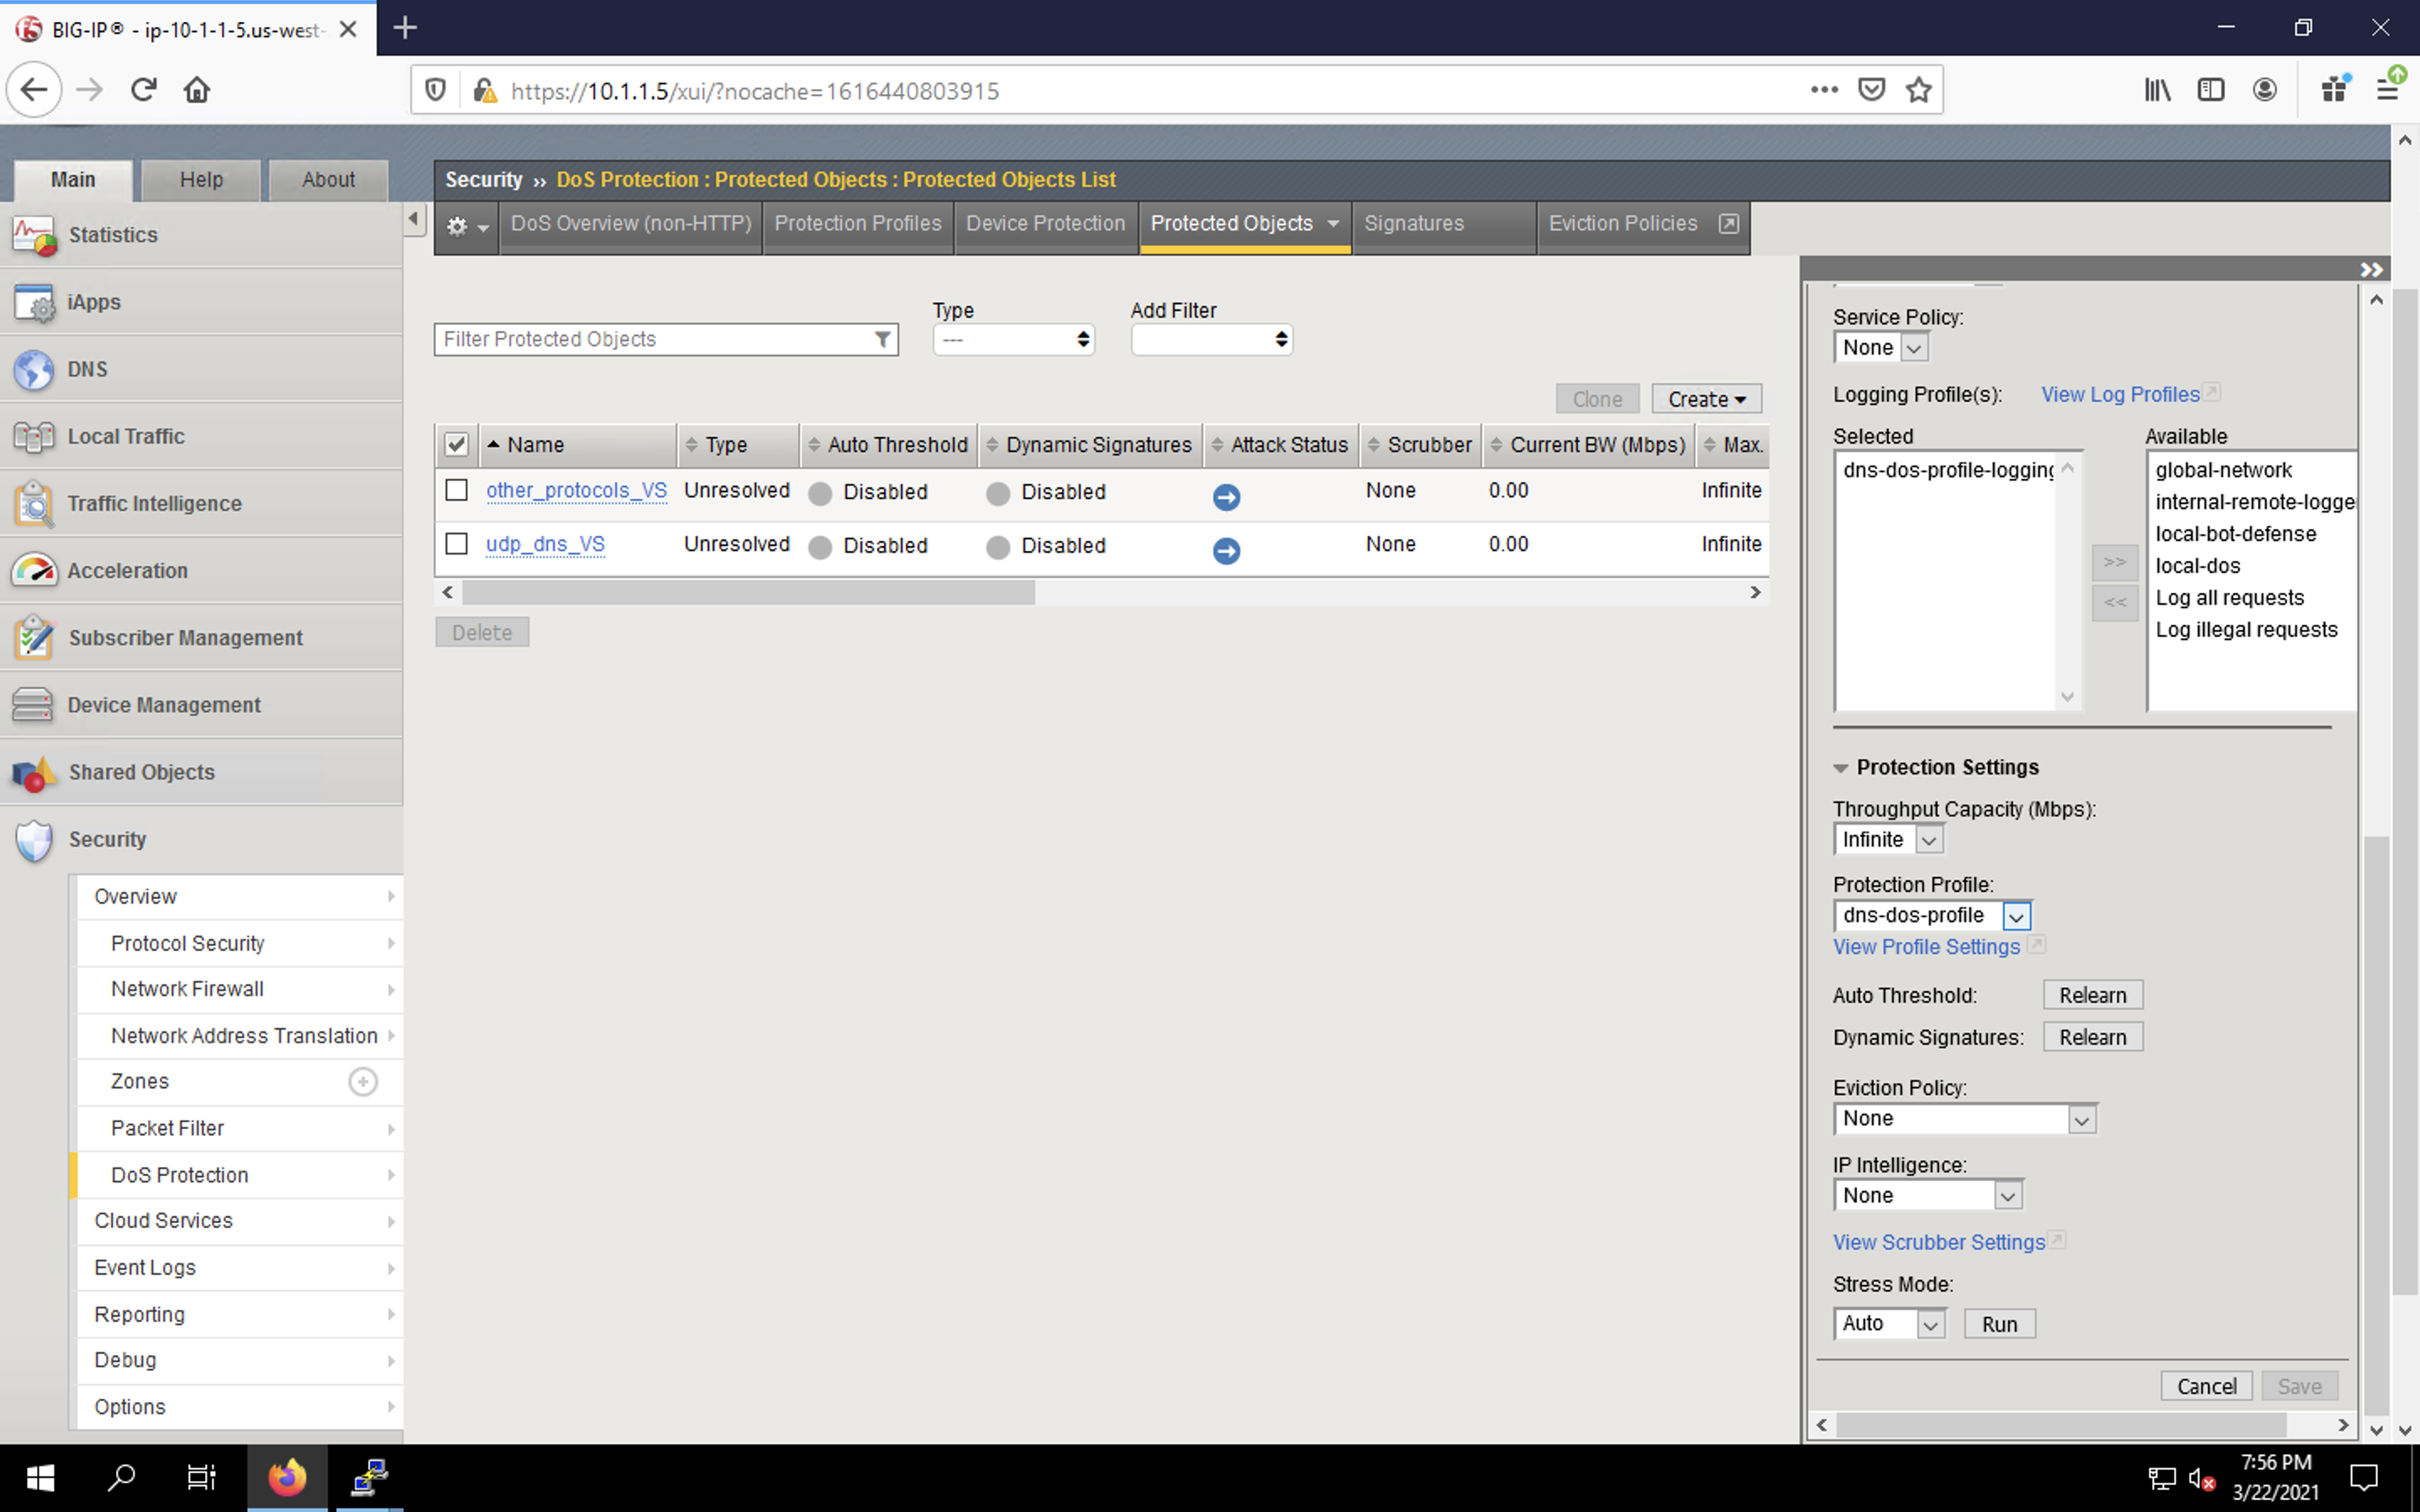
- Click Save.