Advanced Multi-layer Firewall Protection > AFM DDos and DNS DoS Protections Source | Edit on
DNS DDoS Mitigations for Continued Service
At this point, you’ve successfully configured the BIG-IP to limit the amount of DNS queries permitted to the back end server. Unfortunately, even valid DNS requests can be caught in the mitigation we’ve configured. There are further steps that can be taken to mitigate the attack that will allow non-malicious DNS queries.
You can also enable Bad Actor detection on a per-vector basis to identify IP addresses that engage in attacks where one IP address is targeting many destinations; the system can automatically blacklist Bad Actor IP addresses with specific thresholds and time limits. In addition, you can use Attacked Destination Detection to determine IP addresses that are being attacked from many sources (many to one attacks). The attacked addresses are added to a list and packets are rate limited to that attacked address.
Bad Actor Detection
Bad actor detection allows us to completely block communications from malicious hosts at the BIG-IP, completely preventing those hosts from reaching the back-end servers. To demonstrate:
- Navigate to Security > DoS Protection > Protection Profiles. Click on the dns-dos-profile profile name.
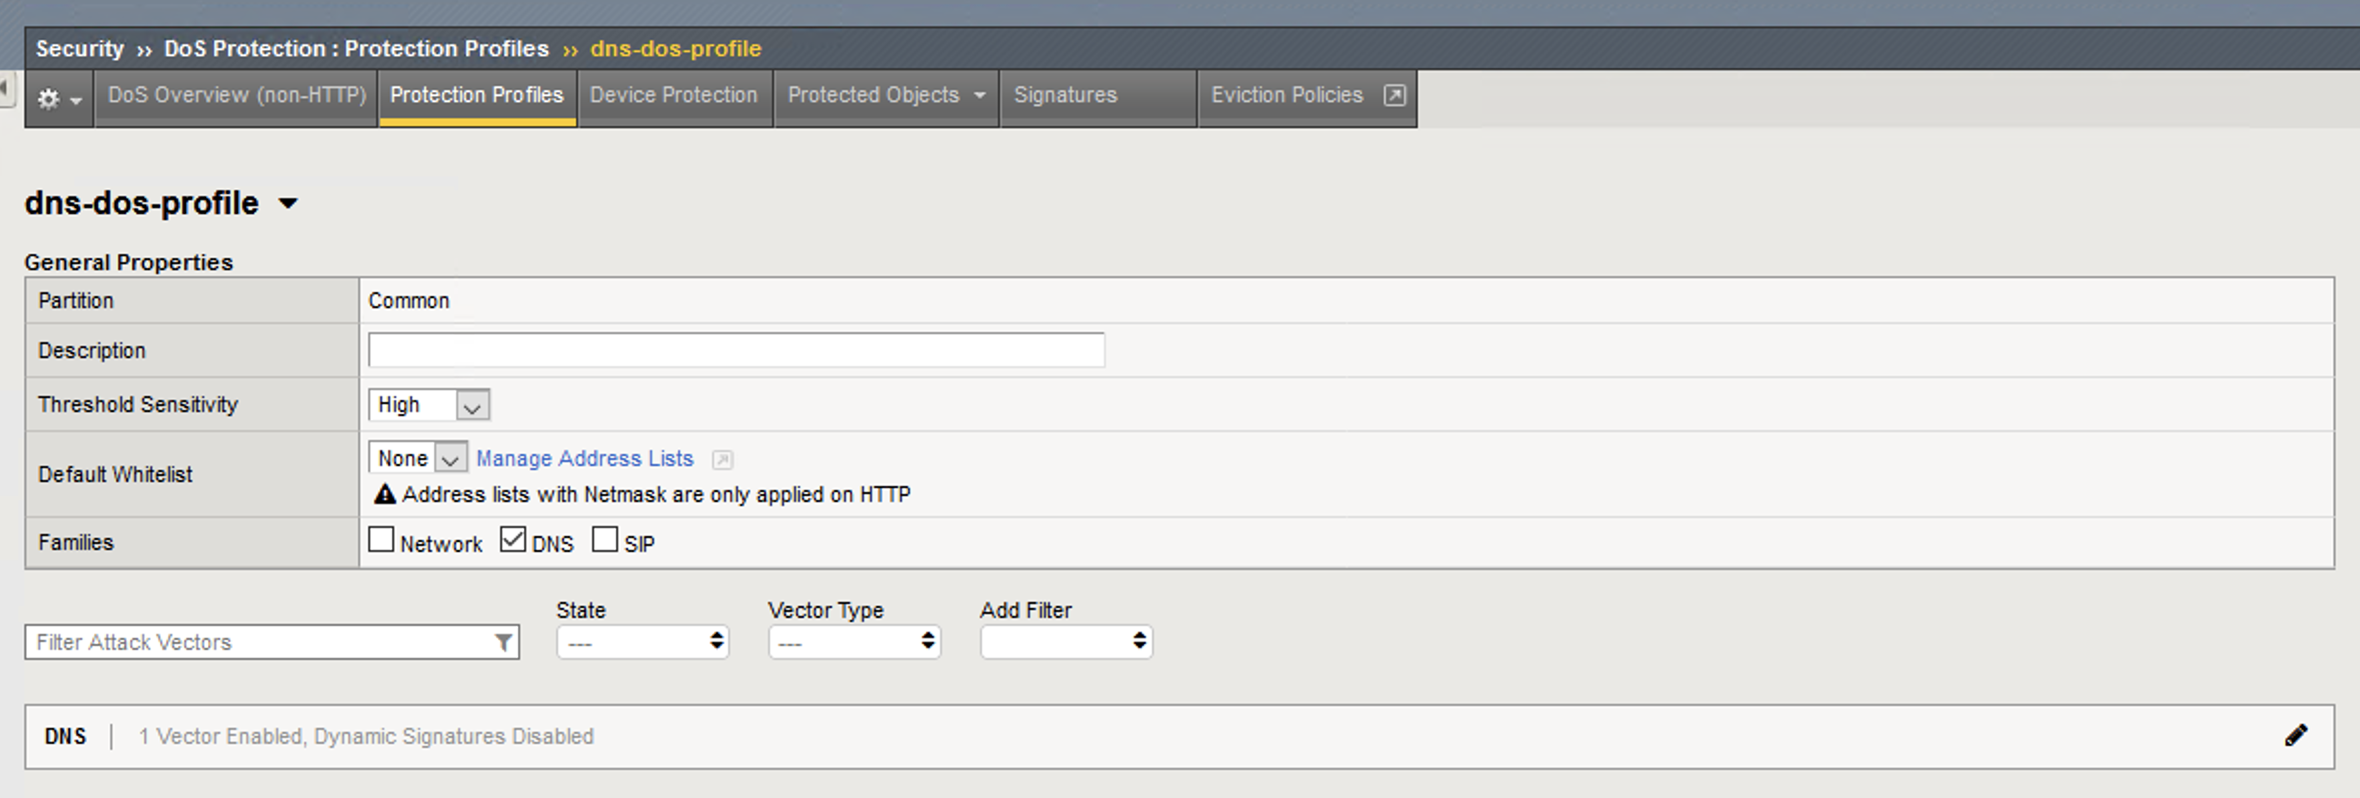
- Expand the DNS Family Settings vector list.
- Click on the DNS A Query attack type name.
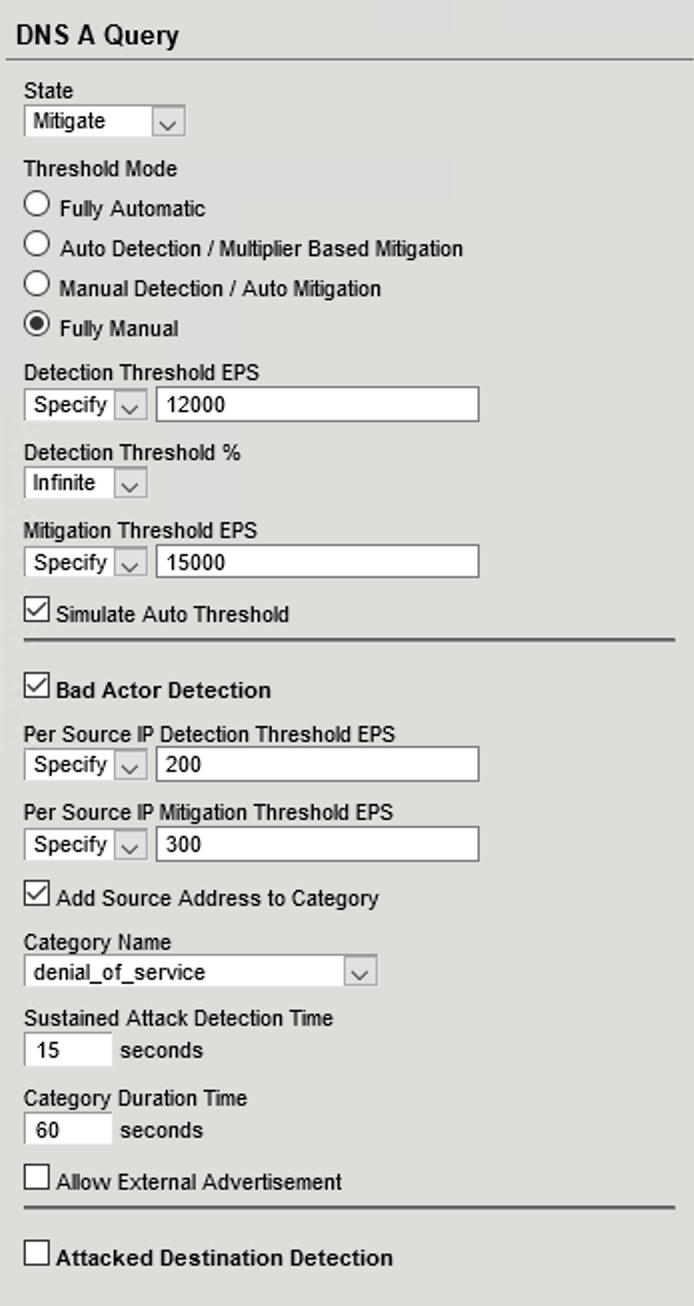
- Modify the vector as follows:
- Bad Actor Detection: Checked
- Per Source IP Detection Threshold EPS: 200
- Per Source IP Mitigation Threshold EPS: 300
- Add Source Address to Category: Checked
- Category Name: denial_of_service
- Sustained Attack Detection Time: 15 seconds
- Category Duration Time: 60 seconds
- Scroll to the top of the page and click Commit Changes to System to save your changes.
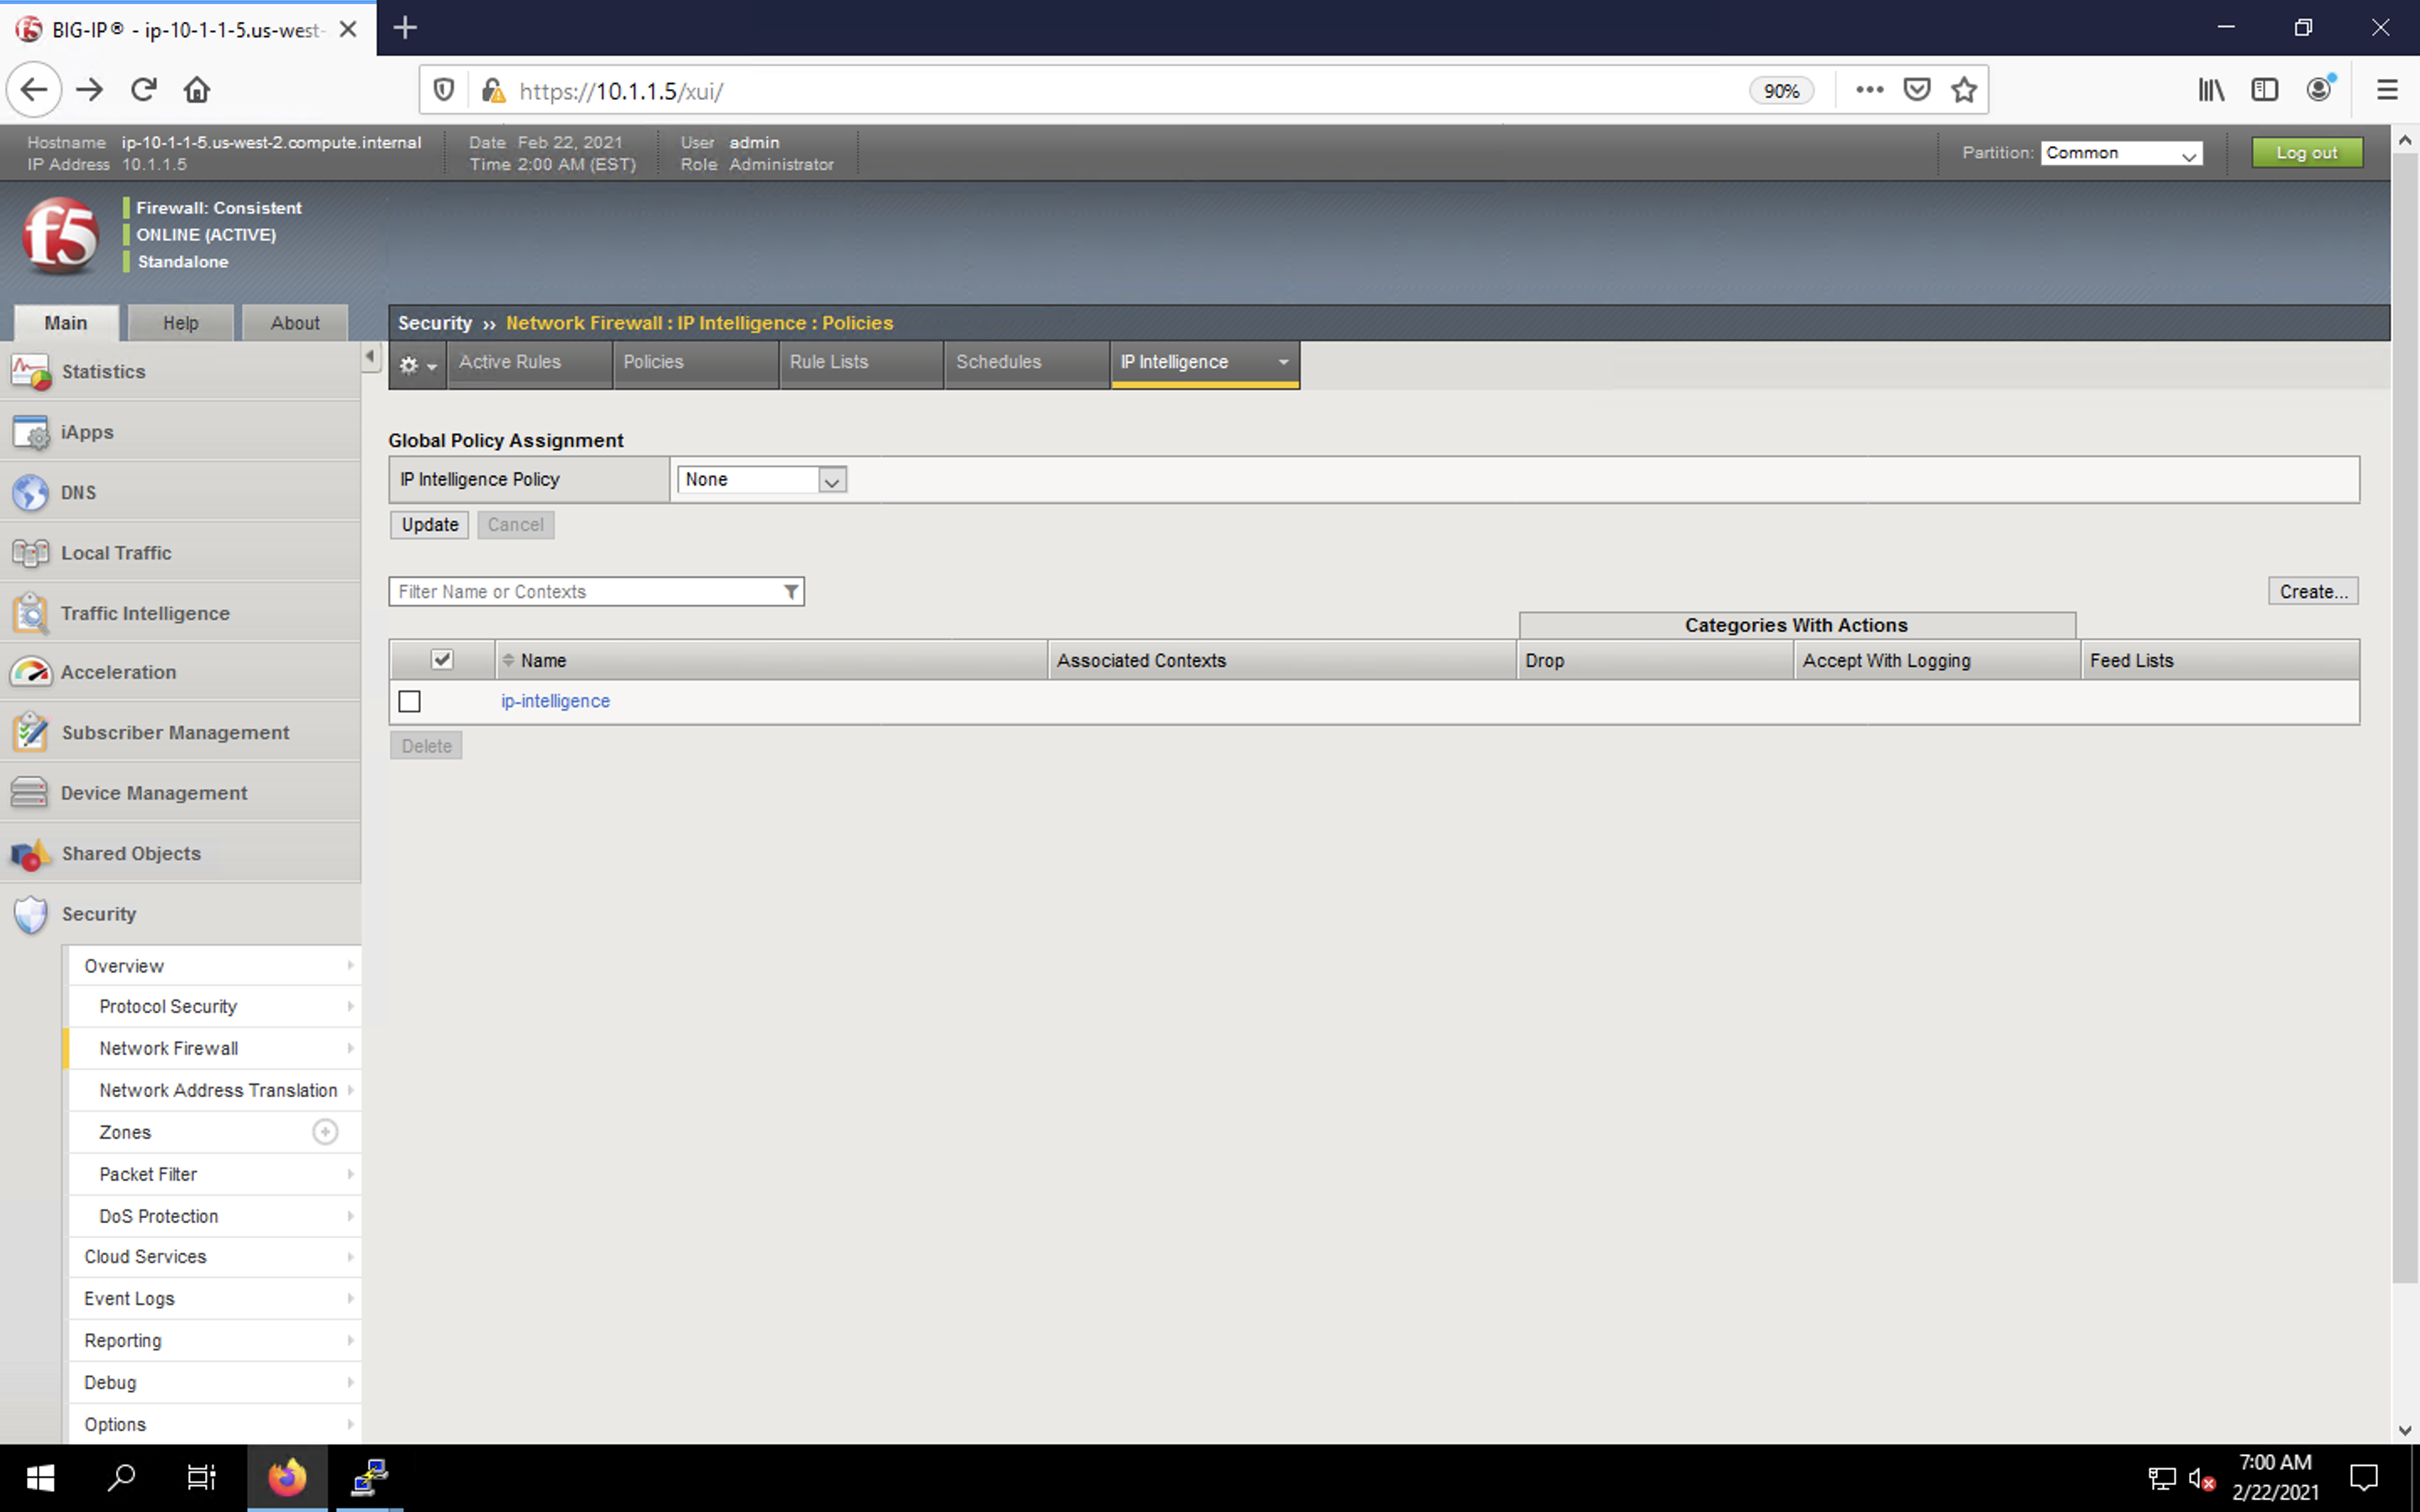
- Navigate to Security > Network Firewall > IP Intelligence > Policies.
- Create a new IP Intelligence policy with the following values, leaving unspecified attributes at their default values:
Name: dns-bad-actor-blocking
Default Action: Accept
Log Category Matches: Yes
Categories > Click Add.
- Select the denial_of_service Category and change the Action to drop.
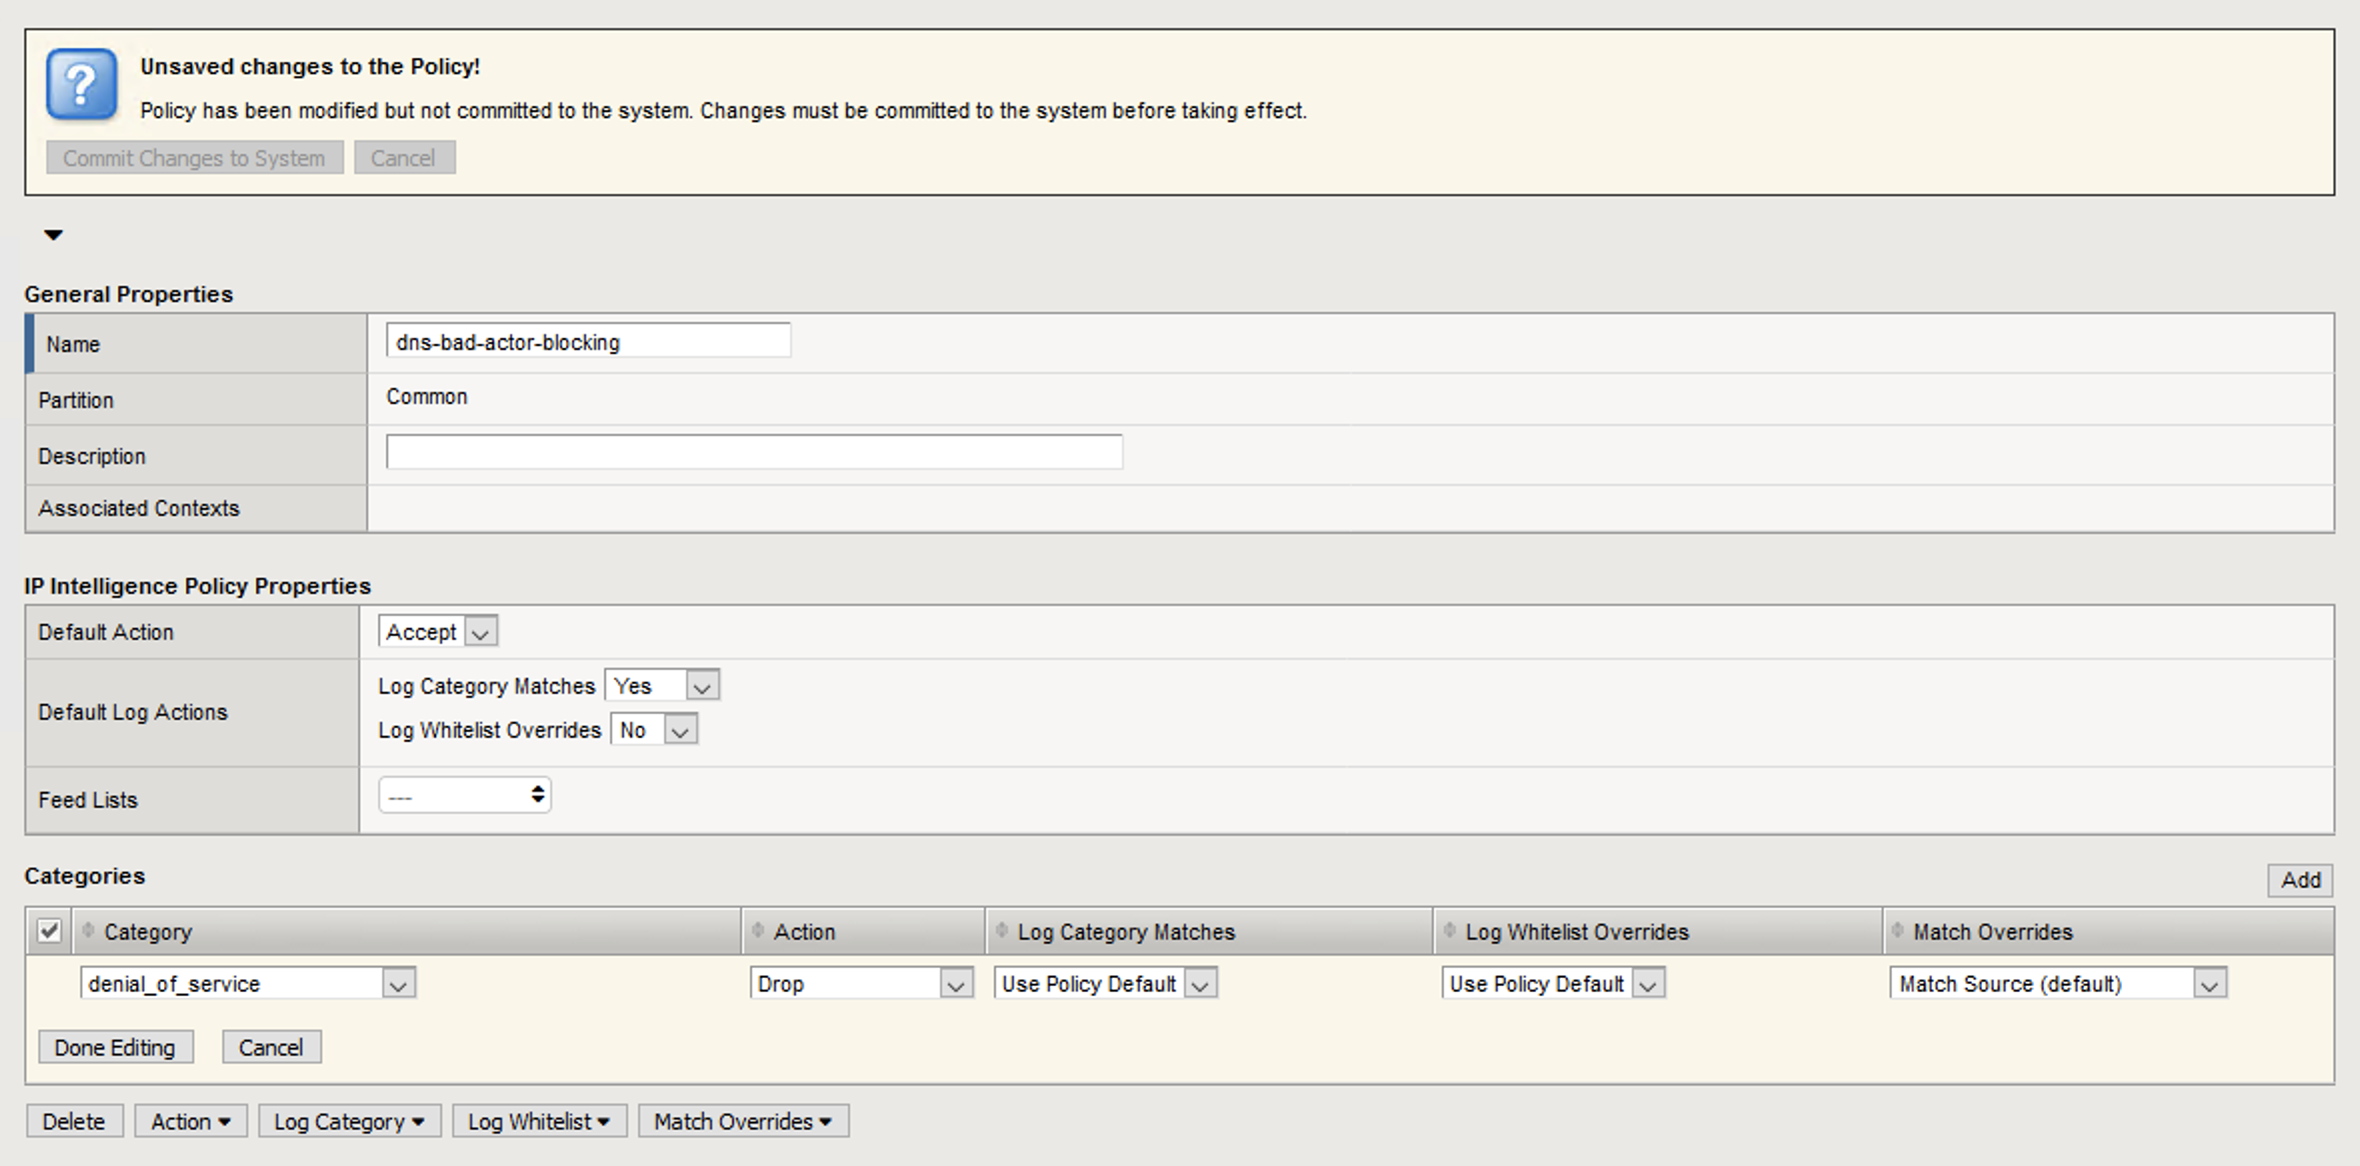
- Click Done Editing.

Click Commit Changes to System.
Navigate to Local Traffic > Virtual Servers > Virtual Server List.
Click on the udp_dns_VS virtual server name.
Click on the Security tab and select Policies.
Enable IP Intelligence and choose the dns-bad-actor-blocking policy.
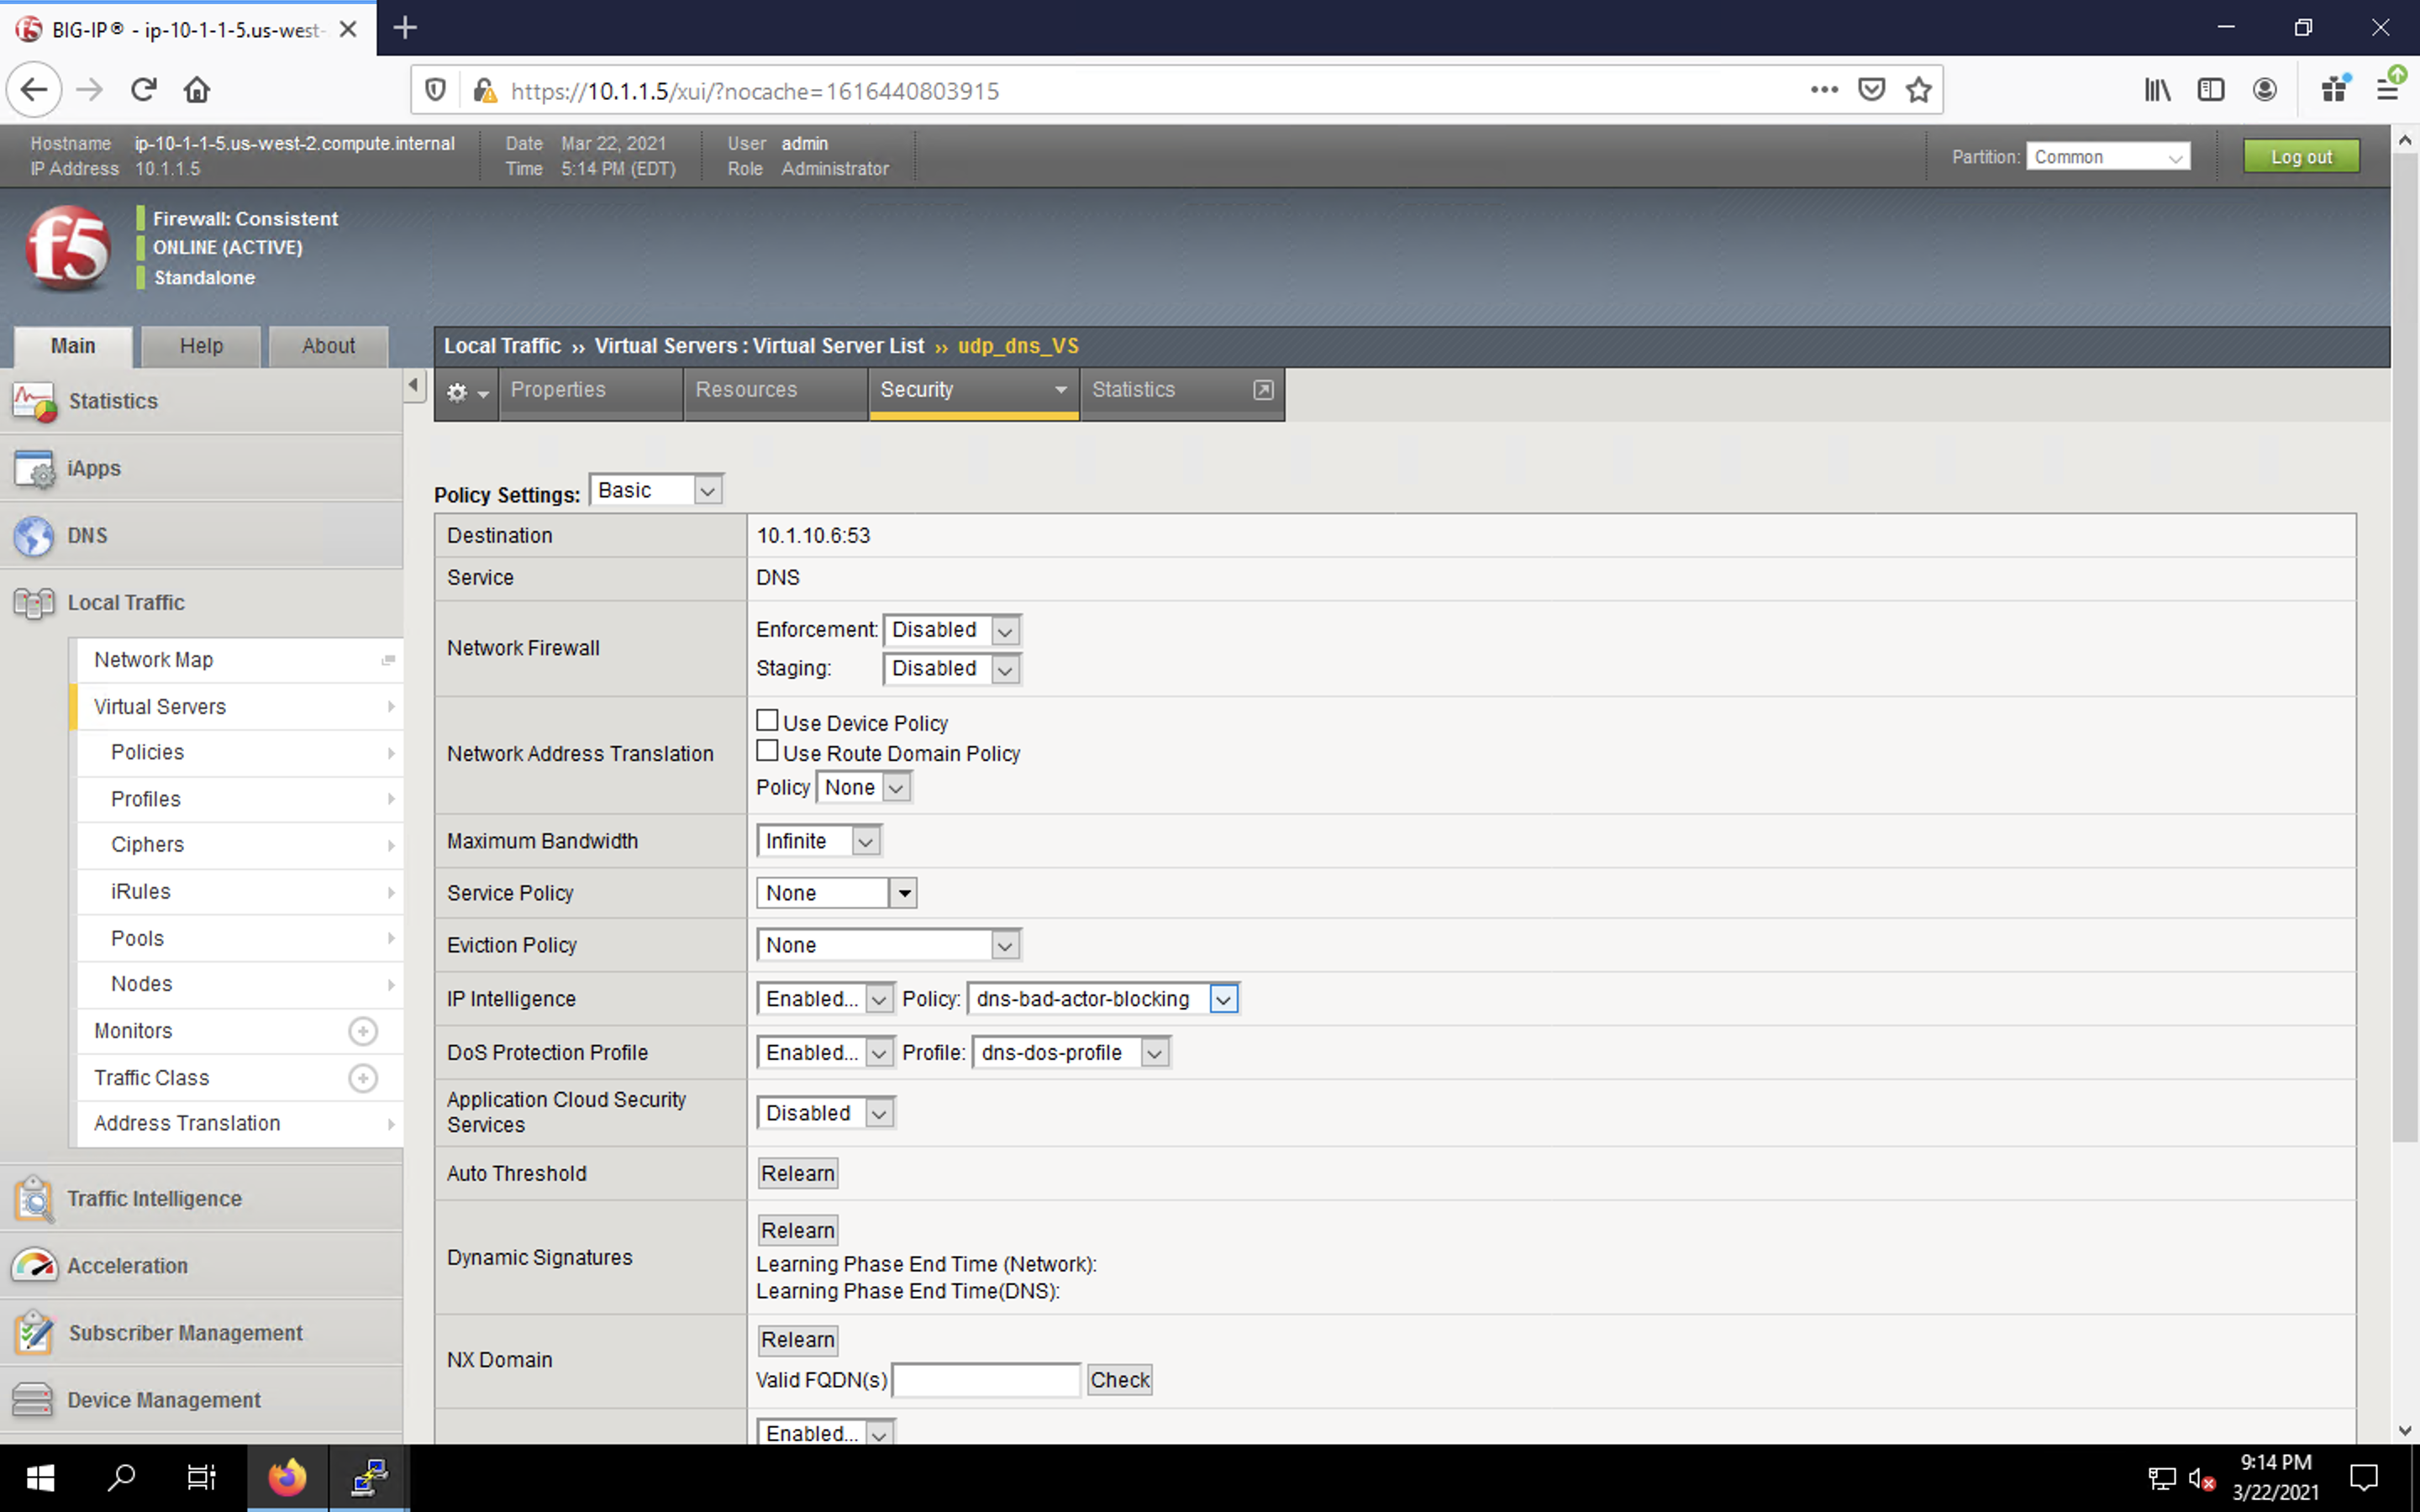
- Make sure you click Update to save your changes.
- Navigate to Security > Event Logs > Logging Profiles.
- Click the global_network logging profile name. We can only log shun events in the global profile.
- Under the Network Firewall tab, set the IP Intelligence Publisher to local-db-publisher and check Log Shun Events.
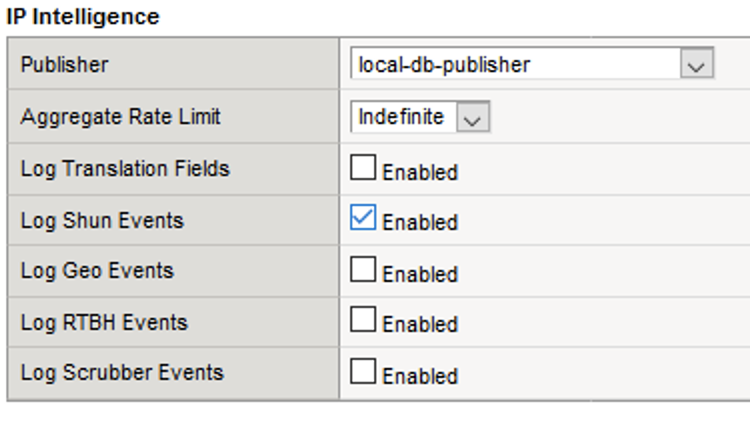
- Click Update to save your changes.
- Click the dns-dos-profile-logging logging profile name.
- Check Enabled next to Network Firewall.
- Under the Network Firewall tab, change the Network Firewall and IP Intelligence Publisher to local-db-publisher and click Update.
- Bring into view the Victim Server SSH session running the top utility to monitor CPU utilization.
- On the Attack Server host, launch the DNS attack once again using the following syntax:
-
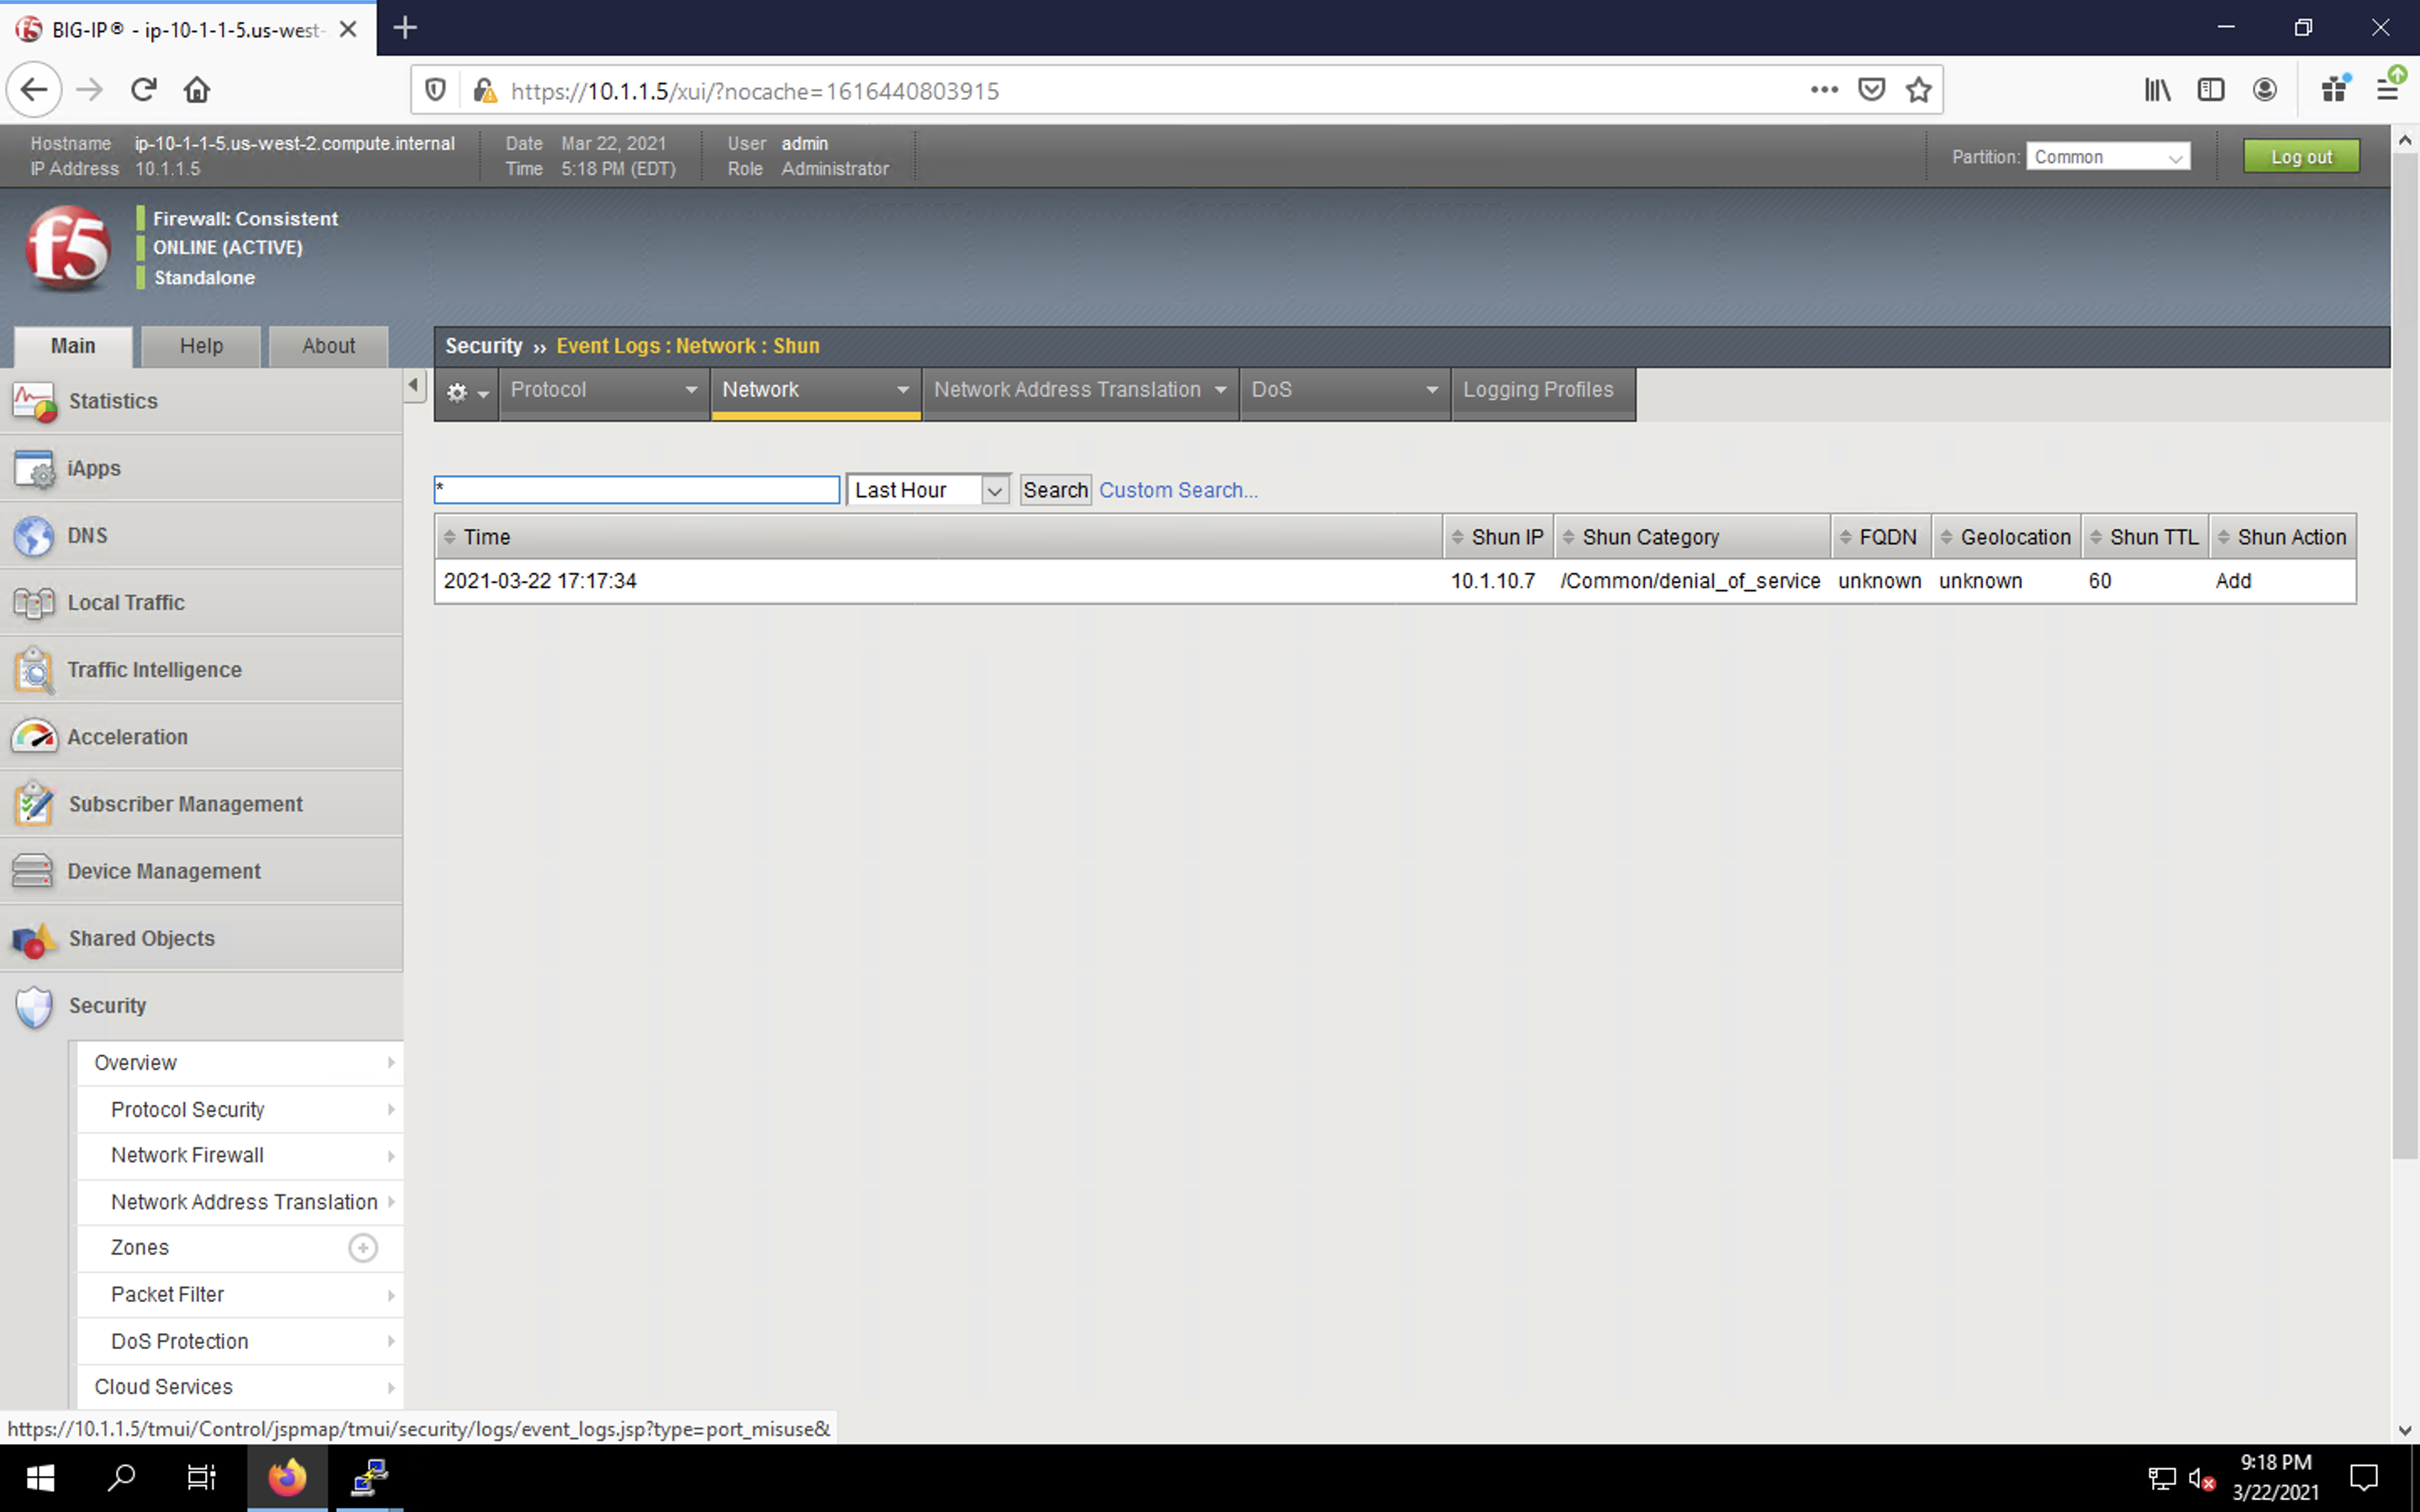
dnsperf -s 10.1.10.6 -d queryfile-example-current -b 8192000 -c 60 -t 30 -T 20 -l 90 -q 1000000 -Q 1500000 - You’ll notice CPU utilization on the victim server begin to climb, but after a short time, drop to non-traffic levels. The attack host will show that queries are timing out as shown below. This is due to the BIG-IP blacklisting the bad actor.
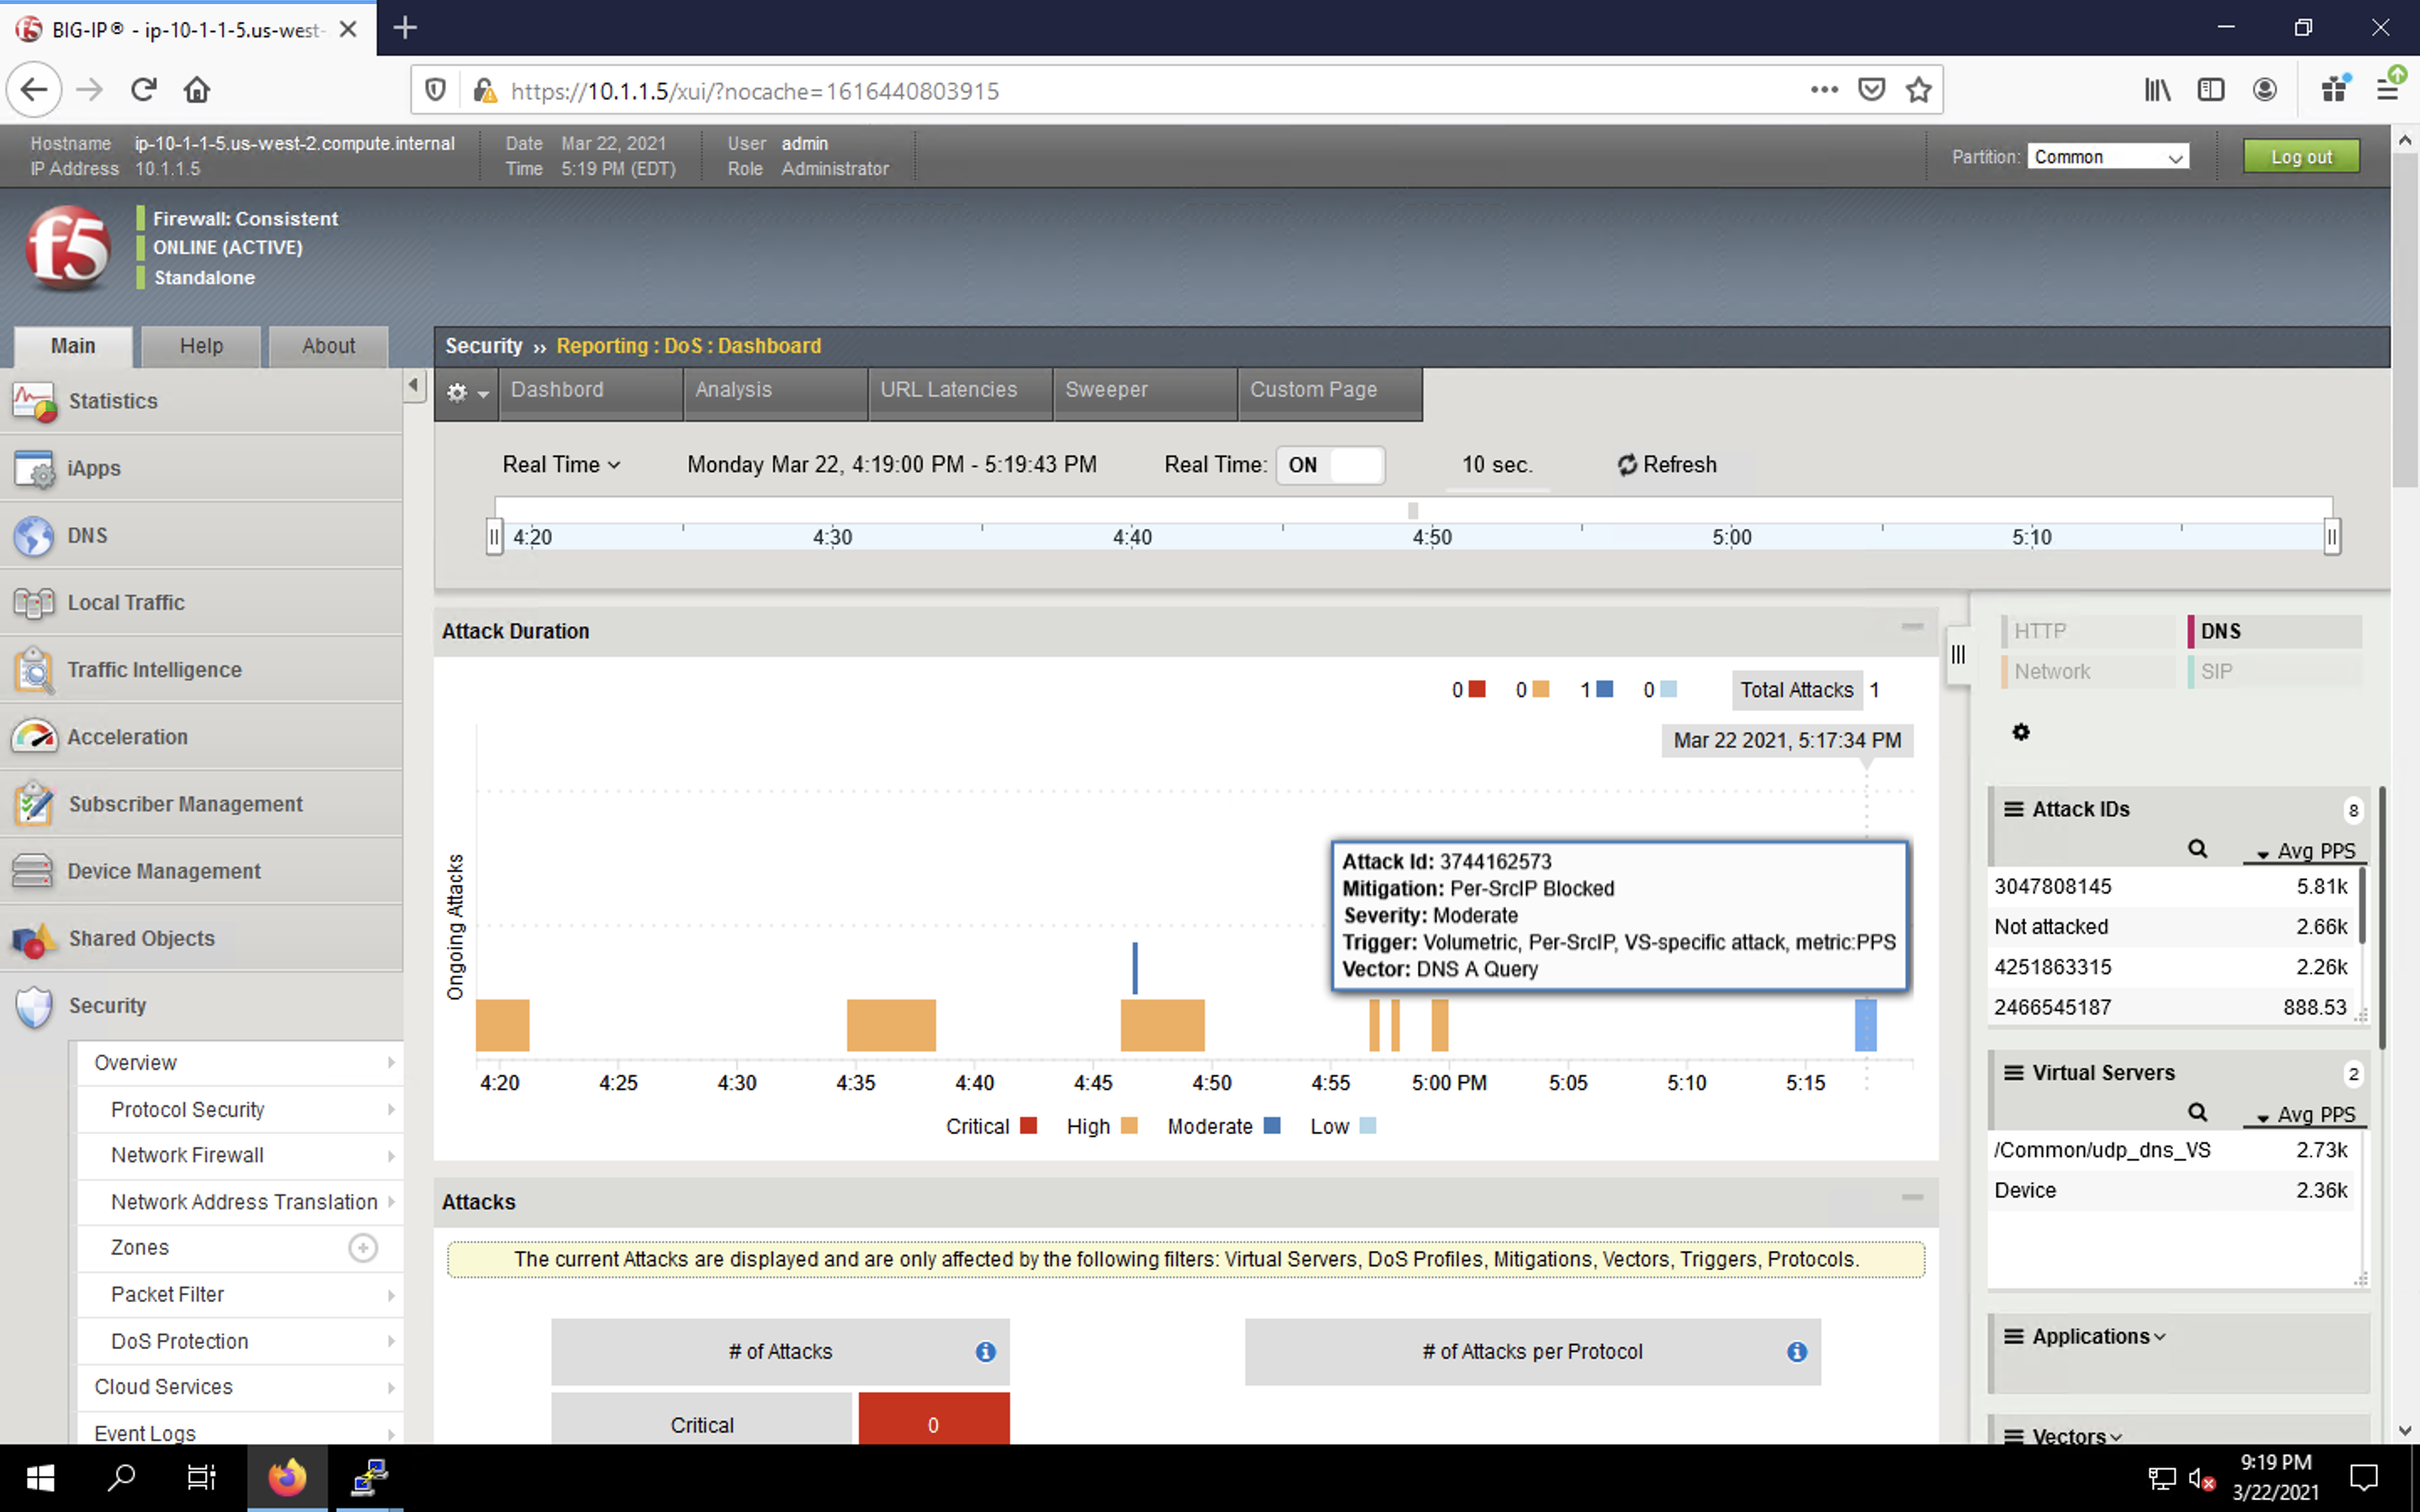
- Navigate to Security > Event Logs > Network > Shun. This screen shows the bad actor being added to (and later deleted from) the shun category.
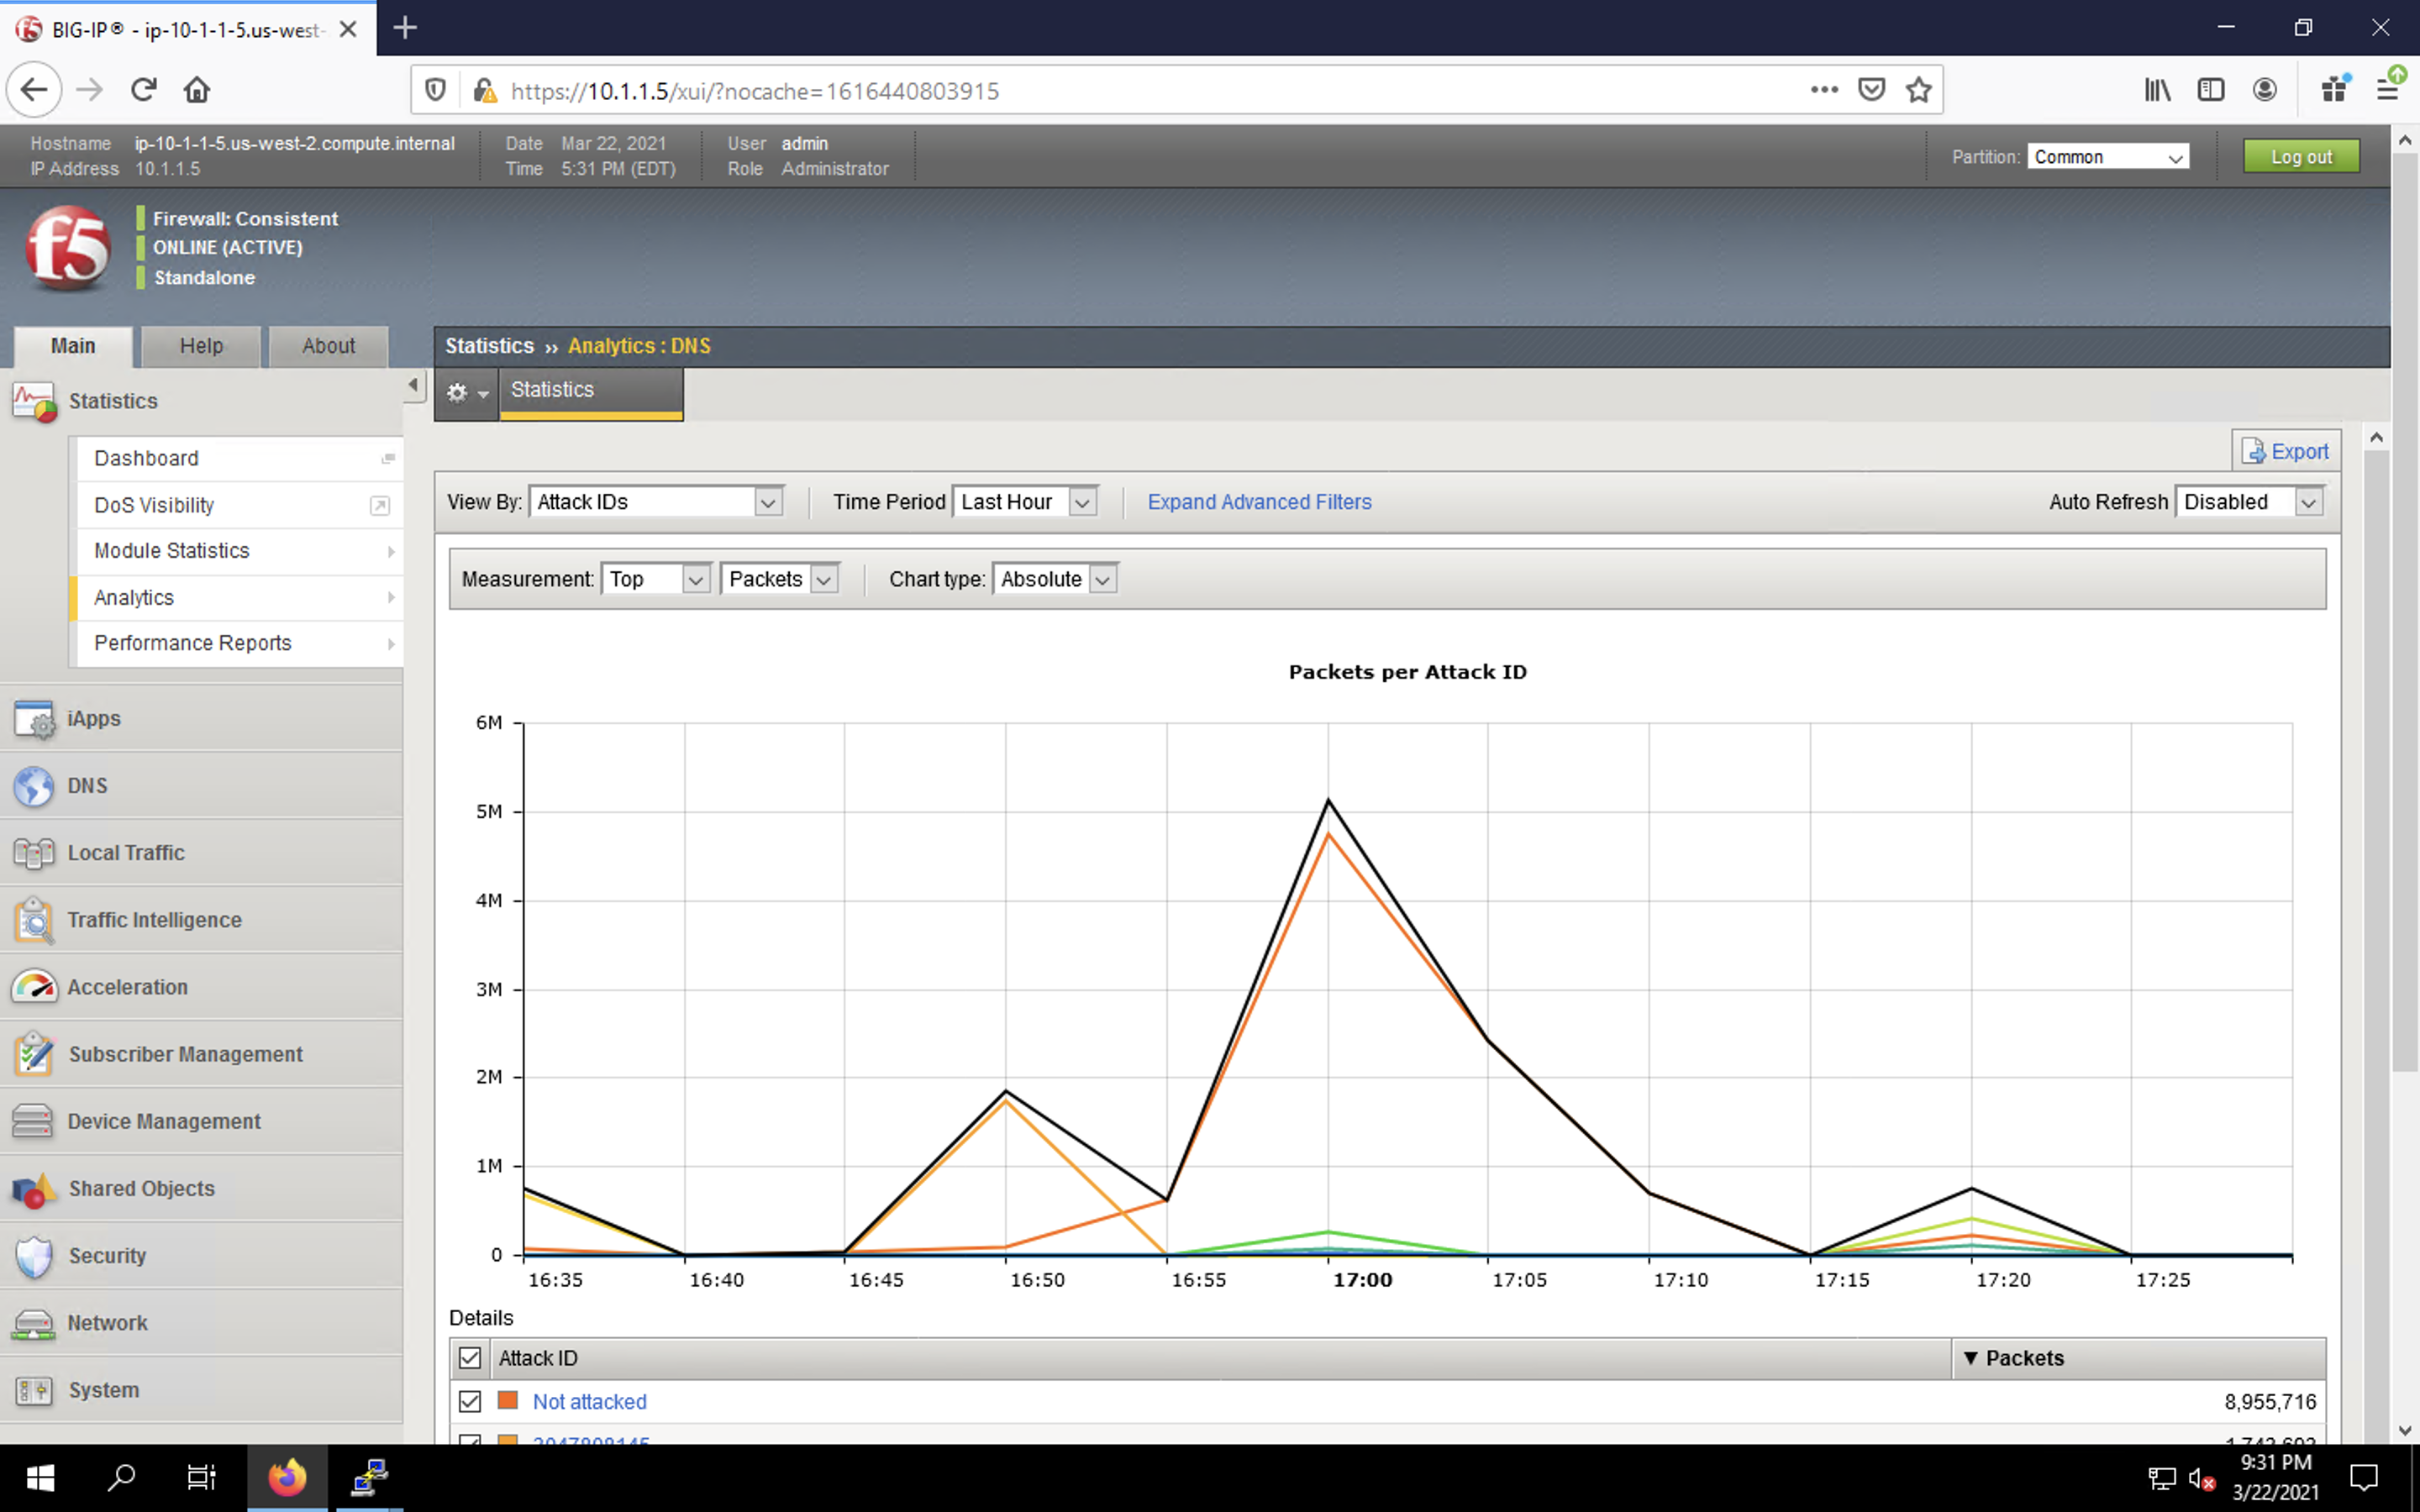
- Navigate to Security > Reporting > Protocol > DNS. Change the View By drop-down to view various statistics around the DNS traffic and attacks.
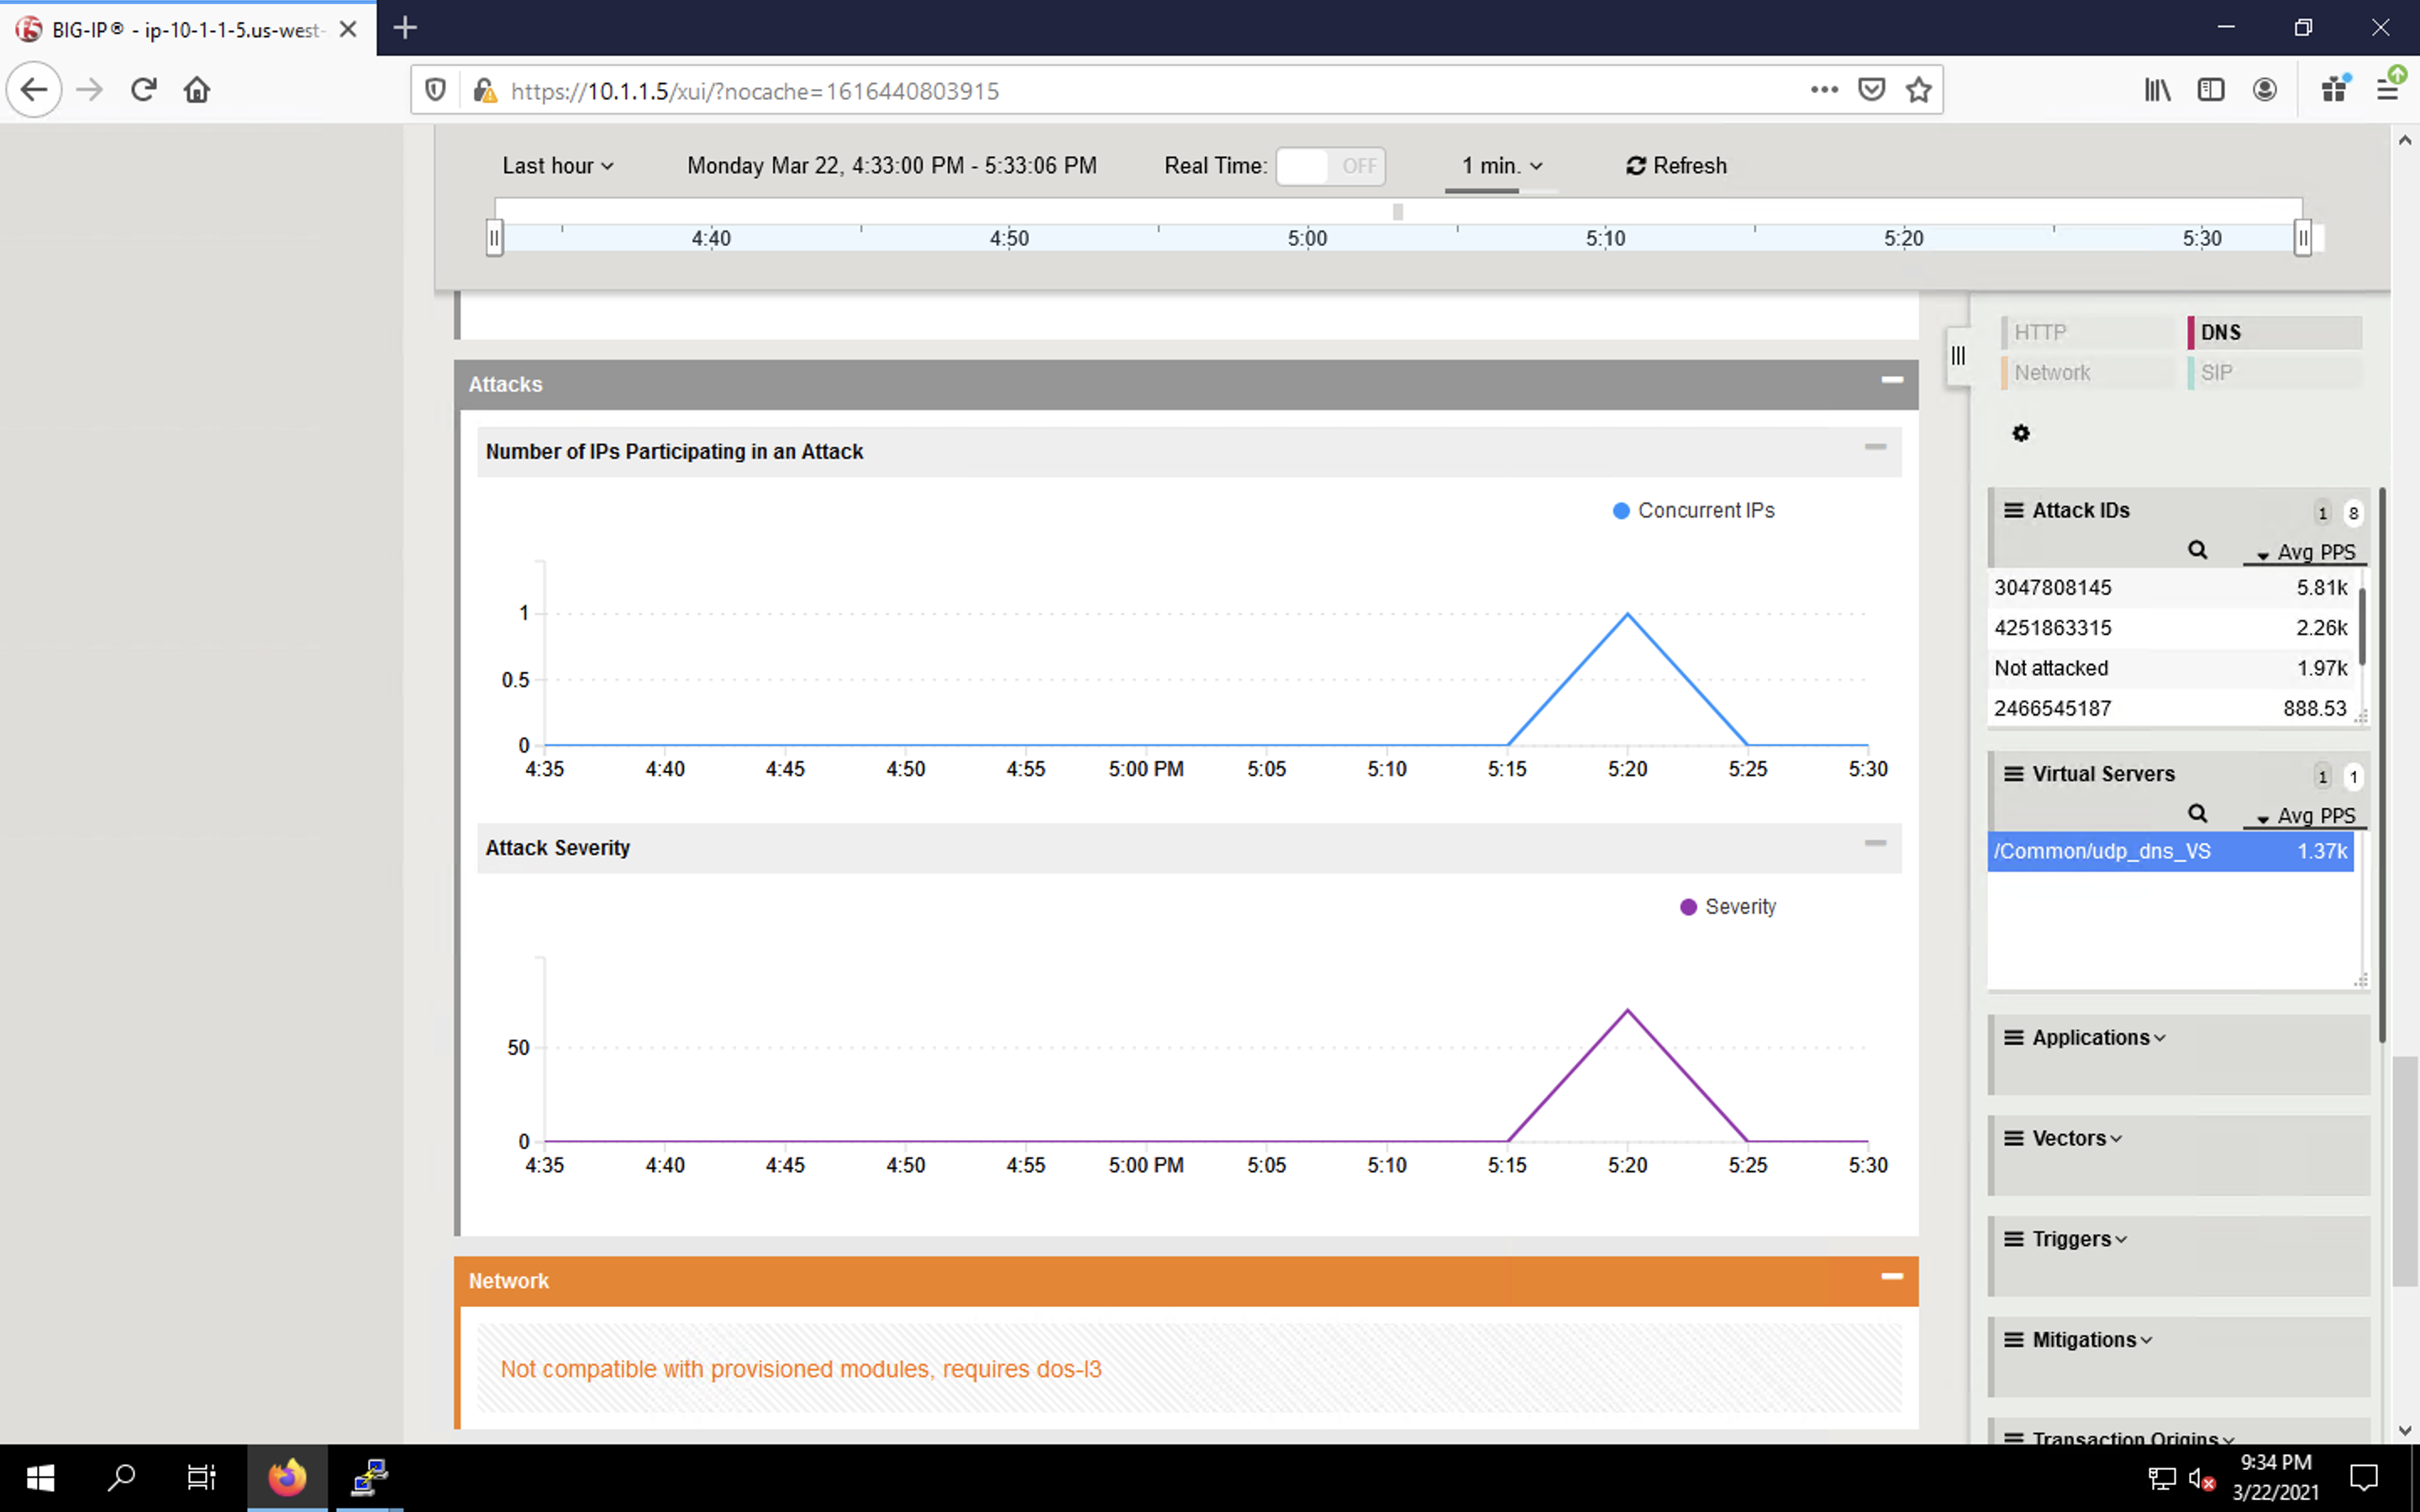
- Navigate to Security > Reporting > DoS > Dashboard to view an overview of the DoS attacks and timeline. You can select filters in the filter pane to highlight specific attacks.
- Finally, navigate to Security > Reporting > DoS > Analysis. View detailed statistics around each attack.
Click Next to continue.