Advanced Multi-layer Firewall Protection > AFM DDos and DNS DoS Protections Source | Edit on
Filtering specific DNS operations
Protocol exploits
Attackers can send DNS requests using unusual DNS query types or OpCodes. The BIG-IP system can be configured to allow or deny certain DNS query types, and to deny specific DNS OpCodes. When you configure the system to deny such protocol exploits, the system tracks these events as attacks. This configuration is set in the DNS Security profile.
To demonstrate, we will block MX queries from reaching our DNS server.
- Open the SSH session to the attack host.
- Perform an MX record lookup by issuing the following command:
dig @10.1.10.6 MX example.com
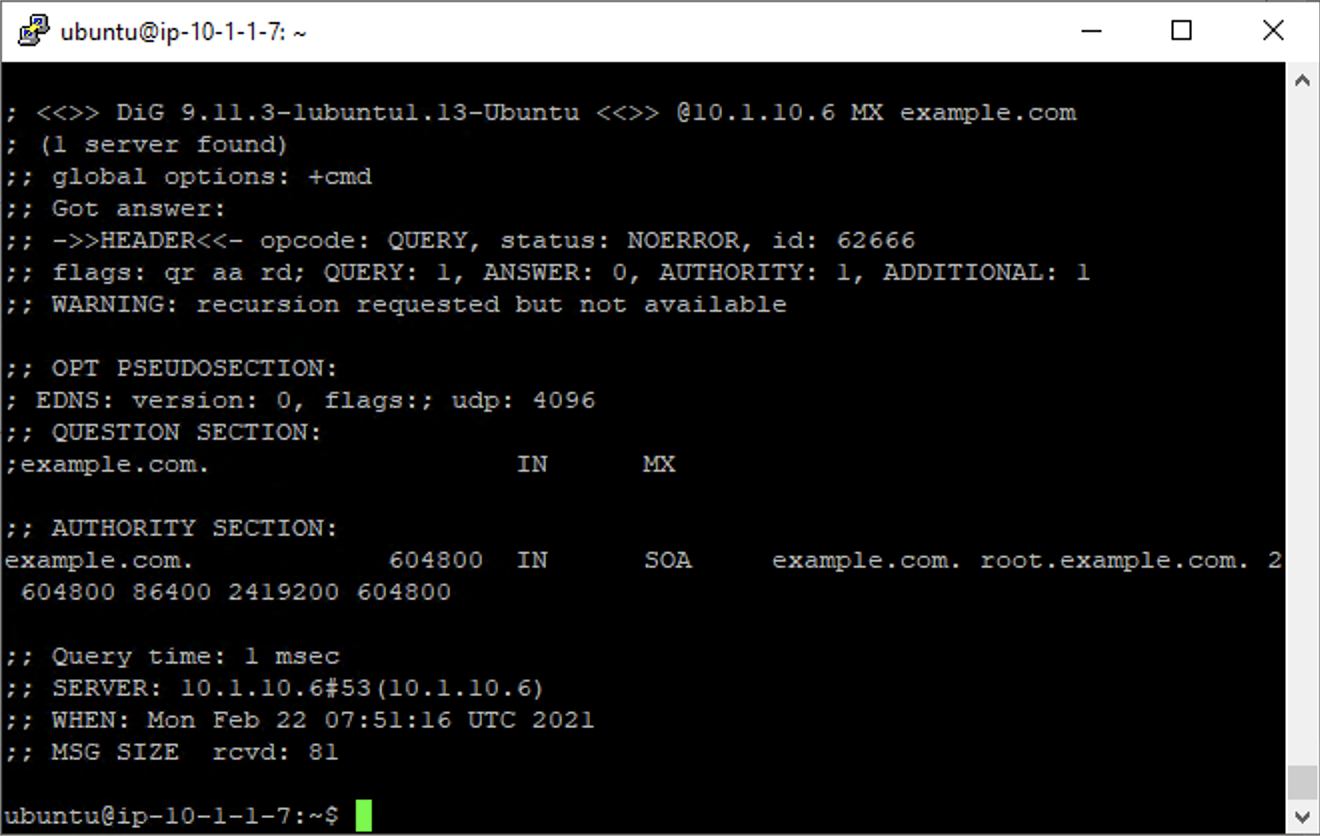
The server doesn’t have a record for this domain. This server doesn’t have MX records, so those requests should be filtered.
- Navigate to Security > Protocol Security > Security Profiles > DNS and create a new DNS security profile with the following values, leaving unspecified attributes at their default value:
- Name: dns-block-mx-query
- Query Type Filter: move mx from Available to Active
- Click Save, then navigate to Local Traffic > Profiles > Services > DNS.
Note
If you are mousing over the services, DNS may not show up on the list. Select Services and then use the pulldown menu on services to select DNS.
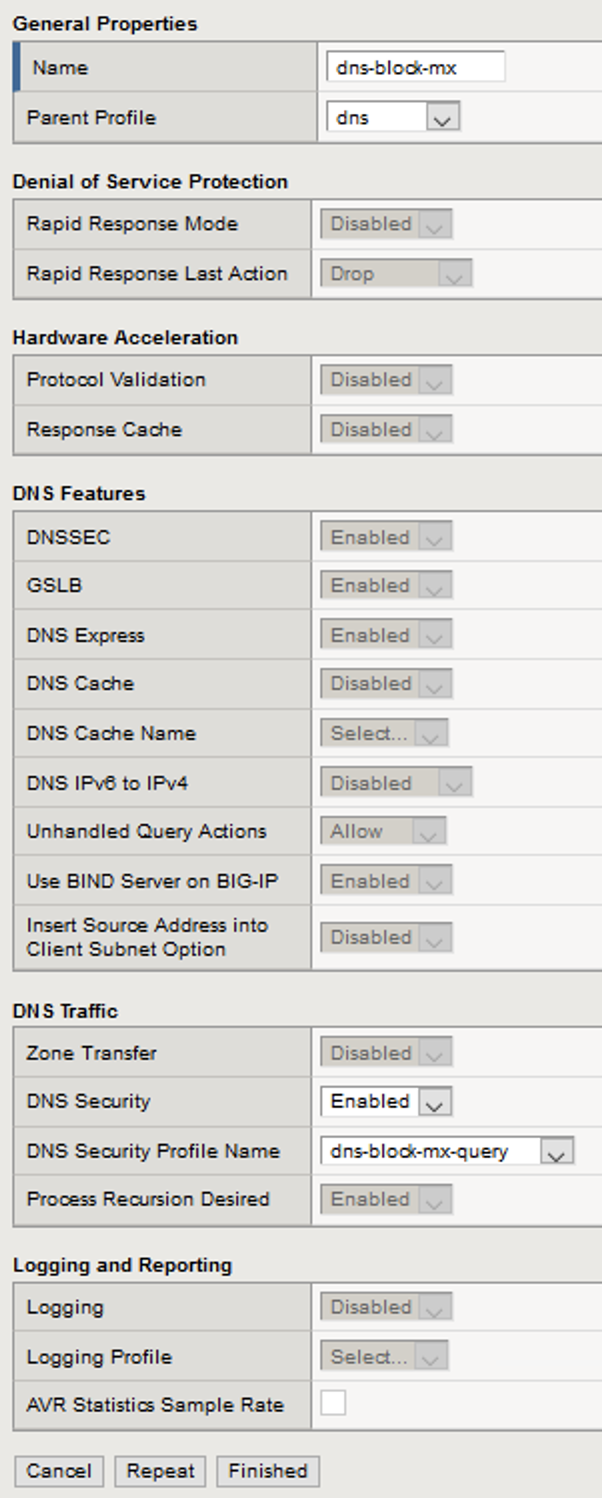
- Create a new DNS services profile with the following values, leaving unspecified values at their default values:
- Name: dns-block-mx
- Under the DNS Traffic section**DNS Security**: Enabled
- DNS Security Profile Name: dns-block-mx-query
- Click Save, then navigate to Local Traffic > Virtual Servers > Virtual Server List.
- Click on the udp_dns_VS virtual server name.
- In the Configuration section, change the view to Advanced.
- Set the DNS Profile to dns-block-mx, then click Finished.

- Navigate to the Security > Policies section of the virtual server configuration and remove the IP Intelligence and DoS Protection Profile profiles.
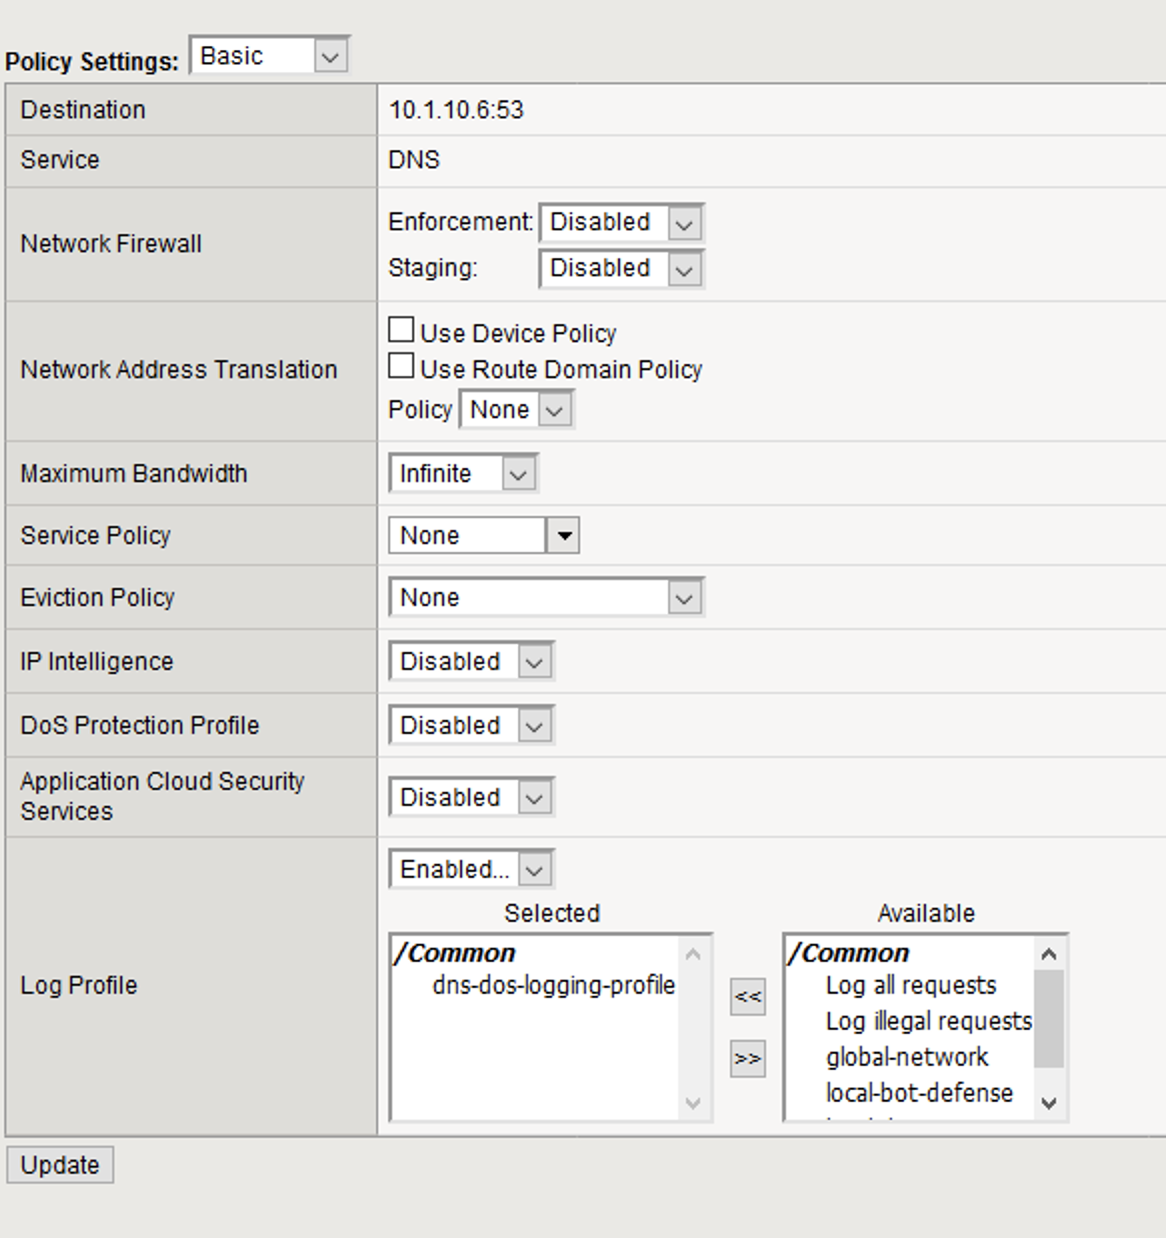
- Click Update to save your settings.
- Navigate to Security > Event Logs > Logging Profiles.
- Click on the dns-dos-profile-logging logging profile name.
- Check Enabled next to Protocol Security.
- In the Protocol Security tab, set the DNS Security Publisher to local-db-publisher and check all five of the request log types.
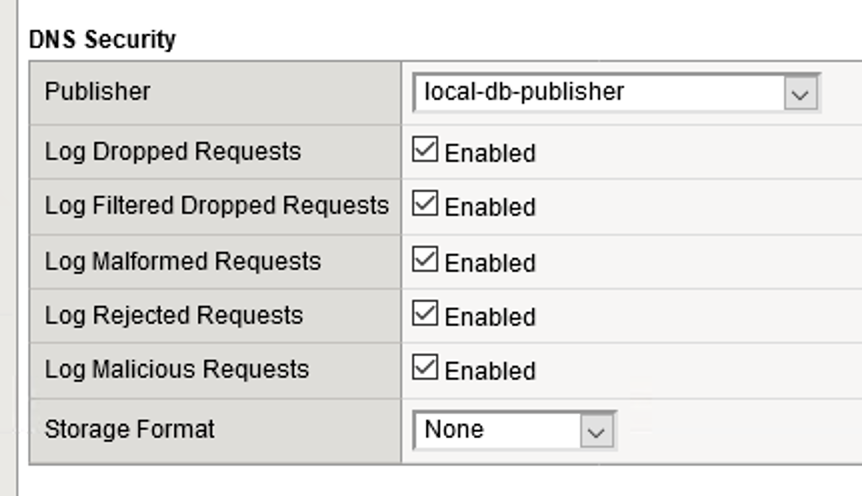
- Make sure that you click Update to save your settings.
- Return to the Attack Server SSH session and re-issue the MX query command:
dig @10.1.10.6 MX example.com
- The query hangs as the BIG-IP is blocking the MX lookup.
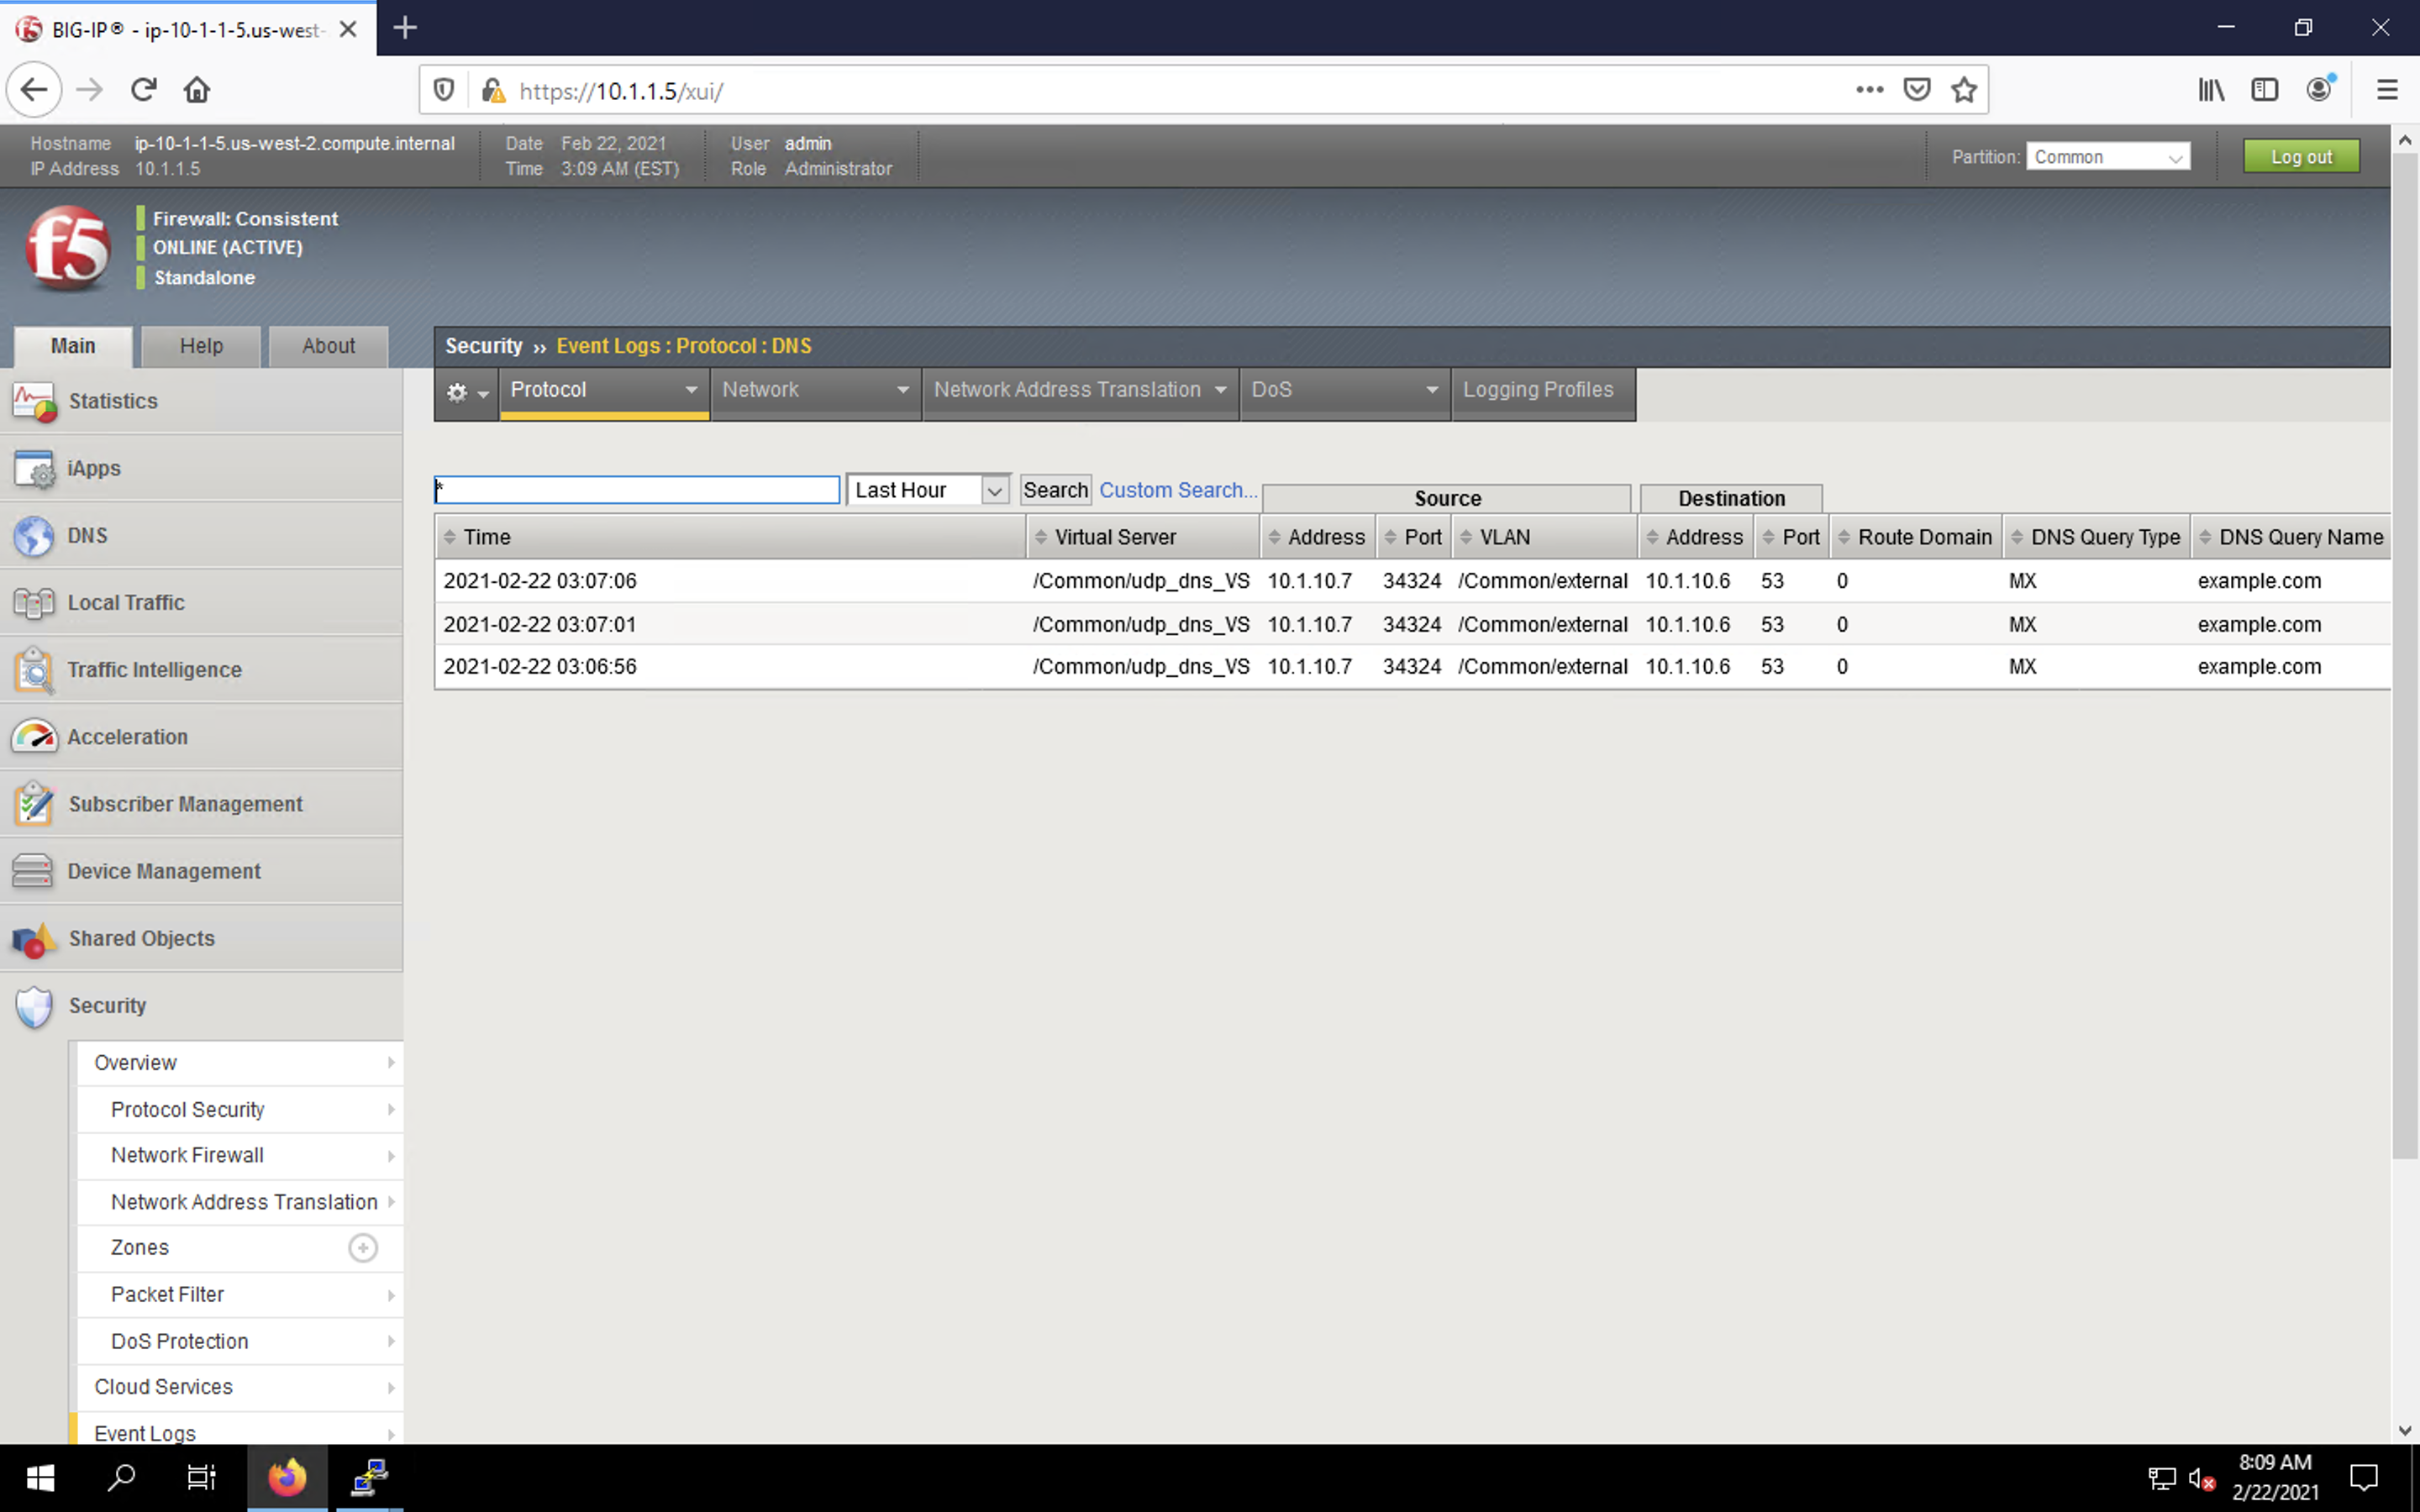
- Navigate to Security > Event Logs > Protocol > DNS. Observe the MX query drops.
This concludes the DNS portion of the lab. On the victim server, stop the top utility by pressing CTRL + C.