F5 BIG-IP Virtual Edition Without AWS Marketplace Access
If you are in a region that does not have a marketplace, you can download a F5 BIG-IP Virtual Edition (VE) image and use it to create an AWS machine image (AMI) of BIG-IP VE. You can do the following manual process or to help automate the image creation process, use the F5 BIG-IP Image Generator tool to create BIG-IP images for AWS cloud using a Docker container.
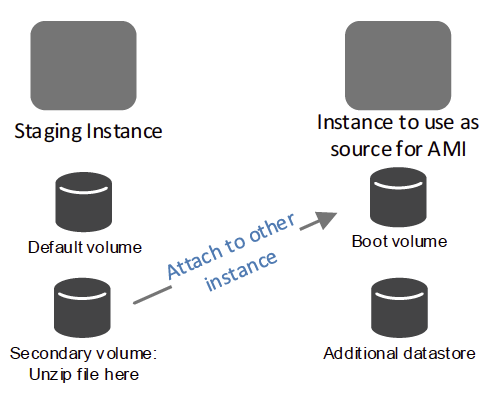
Create a staging Linux instance, copy a tar file to the default volume, and unzip the files to the secondary volume. Then you will attach that volume to a second Linux instance, where it will be used as the boot volume. You create an AMI from this second instance.
This process includes the following steps:
- Step 1: Create a Linux instance and copy the tar file to the default volume
- Step 2: Create an empty volume, attach it to the Linux instance
- Step 3: Create a Linux instance and attach the volume
- Step 4: Create a secondary volume as an additional datastore
- Step 5: Create the Amazon Machine Image (AMI) and deploy
Step 1: Create a Linux instance and copy the tar file to the default volume
Download the AWS BIG-IP VE tar file, which can be as many as 5 GB compressed. The tar file includes the version number as part of the name, for example: AWS-F5_Networks-BIGIP-VERSION-Best-size_126GB.tar.gz
Log in to the AWS Management Console and launch a new Linux instance (for example, the Amazon Linux AMI https://aws.amazon.com/amazon-linux-ami):
- The instance’s storage must have enough free space to contain the downloaded BIG-IP image. An i3.xlarge or larger is recommended.
- To get the best performance, during configuration, choose Size: 32 GiB, Volume Type: Provisioned IOPS SSD (1), and IOPS: 1600.
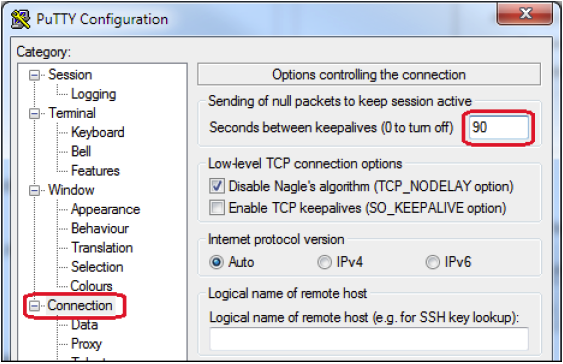
In SSH, modify the connection to prevent timeouts. Some of the following steps are run in SSH sessions and will need a long time to complete.
Use SSH to connect to the Linux instance. If you are using the Amazon Linux AMI, the username is ec2-user.
Use the ssh secure copy (SCP) command to copy the tar file to the default volume. For example: scp -i <path_to_instance_ssh_key> <path_to_bigip_tar_file> ec2-user@staging_instance_ip:/tmp.
Note: You may want to use the GNU Screen utility so you can resume your SSH connection if it disconnects.
When the command finishes, in the AWS Console, stop the instance.
Important! Do NOT stop the instance from SSH. STOP the instance from the AWS Management Console.
Step 2: Create an empty volume, attach it to the Linux instance
In the AWS Console, create a volume that is large enough to store the content. Note the following:
- The better performance the storage has (provisioned IOPs, for example), the quicker the image deployment process. Consider using Volume Type: Provisioned IOPS SSD (1) and setting the IOPS value as high as possible.
- Sizes are gibibytes (GiB), not gigabytes (GB). You may need to convert these units to size your storage properly. For example:
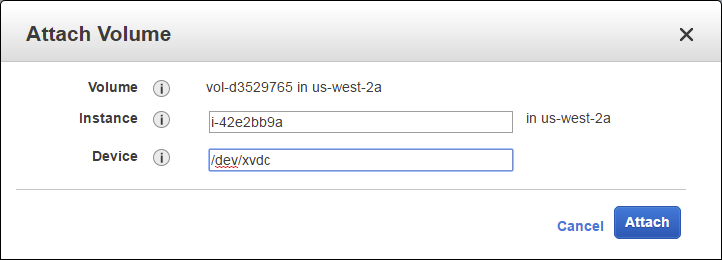
Version SKU Boot Size (GiB) 13.1.0.2 GOOD 39 13.1.0.2 BETTER & BEST 129 12.1.2 GOOD 42 12.1.2 BETTER & BEST 142 12.1.1 GOOD 37 12.1.1 BETTER & BEST 126 12.1.0 GOOD 37 12.1.0 BETTER & BEST 139 12.0.0 GOOD 37 12.0.0 BETTER & BEST 139 11.6.0 GOOD 35 11.6.0 BETTER & BEST 125 Attach the empty volume to the Linux instance as /dev/xvdc.
Start the instance.
Use SSH to connect and run this bash command to copy the files to the new volume:
- If you have the pv utility installed:
tar -zxOf AWS-Big-IP-ami-af8945c2.tar.gz | pv -bt | sudo dd bs=1M of=/dev/xvdc - If you do not have the pv utility installed:
tar -zxOf AWS-Big-IP-ami-af8945c2.tar.gz | sudo dd bs=1M of=/dev/xvdc
Note: This process can take several minutes.
- If you have the pv utility installed:
When the command finishes, in the AWS Console, stop the instance using the AWS Management Console.
Important! Do NOT stop the instance from SSH. STOP the instance from the AWS Management Console.
Detach the volume and terminate the instance.
Important! Terminate the instance to avoid unexpected costs.
Step 3: Create a Linux instance and attach the volume
In AWS, launch a new Linux instance (HVM) with at least 4 vCPUs and 8 GiB of RAM.
When the instance is ready, stop the instance.
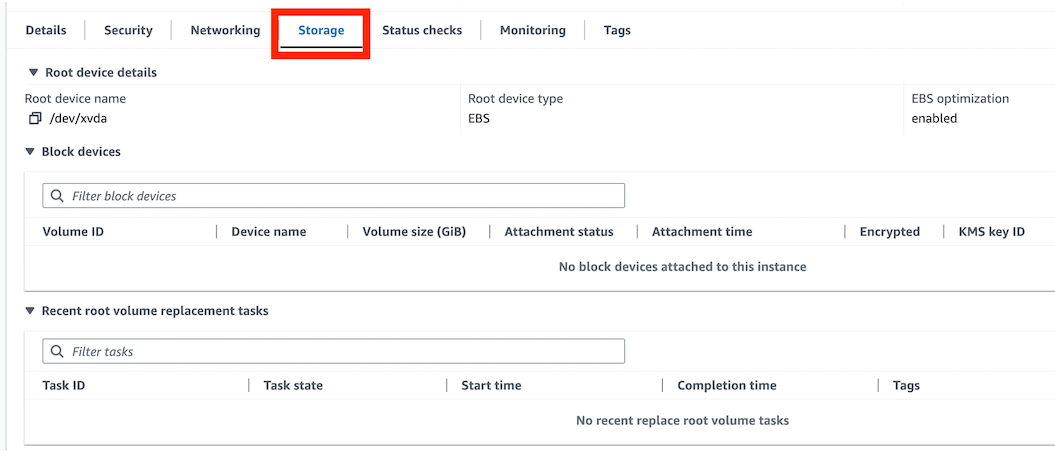
Detach the root volume from the instance. This removes the OS boot volume; the instance should have no volumes available. To verify, click the Storage tab:
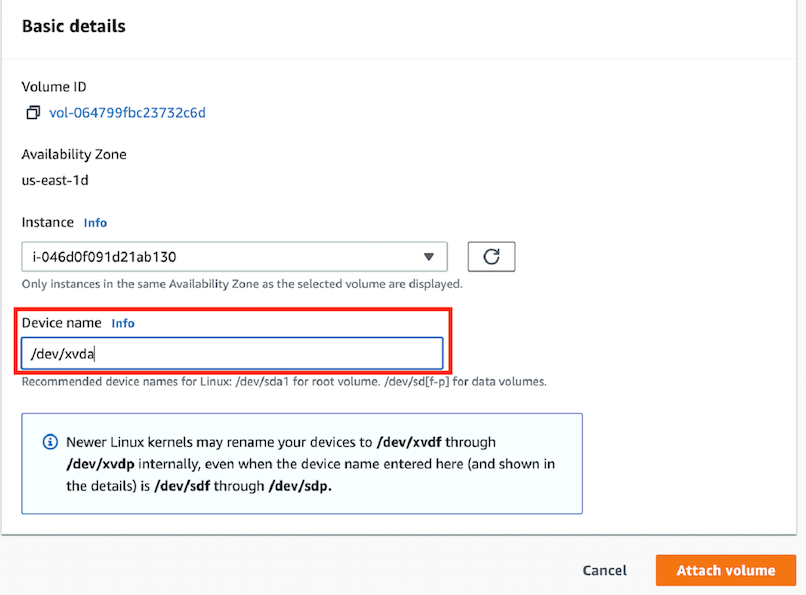
Attach the secondary volume of the staging instances as /dev/xvda to the new linux instance.
Step 4: Create a secondary volume as an additional datastore
For BETTER and BEST, create a 20 GiB secondary volume for the BIG-IP VE instance.
Attach the volume to the BIG-IP VE instance as
/dev/xvdb.Important! DO NOT START THE INSTANCE.
Step 5: Create the Amazon Machine Image (AMI) and deploy
In the AWS Console, create an image. (Under the Instances section, right-click the instance and choose )
Change the Volume Type to General Purpose SSD (GP2 or GP3) for ALL volumes. This will set the default volume type to GP2(or GP3) for future instances launched from the AMI.
This process can take 2-3 hours to complete.
To avoid unexpected costs, terminate the instance and delete all previously-created volumes, including the volume created for step 2.
You can now deploy instances from the image. To log in to BIG-IP VE:
- For versions 11.6.0 and later, use
admin. - For earlier versions, use
root.
Important
There are no default passwords. To set the password, you must assign a SSH Key pair to the instance at deploy time and login using SSH Private Key and/or use Cloud-init (consult AWS authentication considerations for more information).
- For versions 11.6.0 and later, use