Create an AWS IAM policy and role for HA
For HA to work, AWS must communicate with BIG-IP VE. To enable this communication, create a role and assign it to BIG-IP VE instances.
First, create a policy to assign to the role. In the AWS Management Console, from the Services menu at the top of the screen, select IAM.
In the Navigation pane, under Details, select Policies.
Click Create Policy.
By Create Your Own Policy, click Select.
Enter this text in the Policy Document field.
{
  "Version": "2012-10-17",
  "Statement": [
      {
          "Effect": "Allow",
          "Action": [
          "ec2:describeinstancestatus",
          "ec2:describenetworkinterfaces",
          "ec2:assignprivateipaddresses"
          ],
          "Resource": "*"
      }
          ]
}
Click Create Policy.
Now, create a role and assign the policy to it. In the Navigation pane, under Details, select Roles.
Click Create New Role.
Type a name and click Next Step.
Under AWS Service Roles, next to Amazon EC2, click Select.
Select the policy you created and click Next Step.
Click Create Role.
Assign the role to the instance. From the Services menu, click EC2.
Click Running Instances.
Right-click the BIG-IP VE instance and choose Instance Settings > Attach/Replace IAM Role.
Repeat step 15 for the other BIG-IP VE instance.
Use an IAM user instead of an IAM role
For BIG-IP VE and AWS to communicate, an IAM user or role with sufficient permission must exist in AWS. If you used an IAM role, you assigned it when you deployed BIG-IP VE. If you prefer, you can use an IAM user instead.
Create an AWS IAM policy.
In the AWS Management Console, from the Services menu at the top of the screen, select IAM.
In the Navigation pane, under Details, select Policies.
Click Create Policy.
By Create Your Own Policy, click Select.
Enter this text in the Policy Document field.
{ "Version": "2012-10-17", "Statement": [ { "Effect": "Allow", "Action": [ "ec2:describeinstancestatus", "ec2:describenetworkinterfaces", "ec2:assignprivateipaddresses" ], "Resource": "*" } ] }Click Create Policy.
Now assign the policies to an IAM user.
In the Navigation pane, under Details, select Users.
Click Create New Users.
Type a user name, select Generate an access key for each user and then click Create.
Click Download Credentials.
An access key ID and a secret access key are in a file named credentials.csv.
Important: AWS downloads these credentials only once, so keep track of them.
Click Close.
In the list of users, click the row for the user.
On the Permissions tab, click Attach Policy.
Select the check box for the policy you created previously.
Click Attach Policy.
Finally, enter the user’s keys into BIG-IP VE.
Log in to the BIG-IP Configuration utility.
On the Main tab, click .
In the Access Key field, type the access key.
In the Secret Key field, type the secret key.
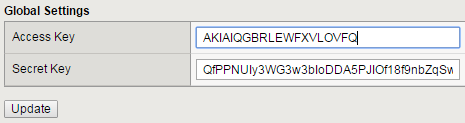
Click Update.
The IAM user can now communicate between BIG-IP VE and AWS.
Check the metadata service for IAM role
There are two options for setting the metadata service in the AWS launch instance wizard:
- Instance Metadata Service Version 1 (IMDSv1) – a request/response method
- Instance Metadata Service Version 2 (IMDSv2) – a session-oriented method (supported in BIG-IP VE 16.1.2.1+, 15.1.5.1+, and 14.1.4.5+ only.)
By default, you can use either IMDSv1 or IMDSv2, or both. For complete descriptions of these metadata service options, consult AWS documentation.
Metadata Service Version 1 (IMDSv1) – If using the Metadata Service Version 1 (IMDSv1), then use BIG-IP Bash Shell to help check metadata service on both BIG-IP instances, so you can apply the IAM role to the instance. For example:
[admin@ip-10-0-11-72:Active:In Sync] ~ # curl http://169.254.169.254/latest/meta-data/iam/info
  {
    "Code" : "Success",
    "LastUpdated" : "2019-10-02T17:54:43Z",
    "InstanceProfileArn" : "arn:aws:iam::XXXXXXXX:instance-profile/my-ha-role",
    "InstanceProfileId" : "AIPA5XXXXXXXXXXXXXXX"
  }
Metadata Service Version 2 (IMDSv2) – If using the Metadata Service Version 2 (IMDSv2) or both options, you require a token.
You must use the following two-call curl command to check the metadata service. The ttl-seconds value is a
range of time the token is “live” in seconds (ranges between 1-21,600 seconds).
{
 TOKEN=`curl -X PUT “http://169.254.169.254/latest/api/token” -H “X-aws-ec2-metadata-token-ttl-seconds: 21600”`
 curl -H “X-aws-ec2-metadata-token: $TOKEN” -v http://169.254.169.254/latest/meta-data/iam/info
}
 # Or combine the two calls into one command:
{
 TOKEN=`curl -X PUT "http://169.254.169.254/latest/api/token" -H "X-aws-ec2-metadata-token-ttl-seconds: 21600"` \ && curl -H "X-aws-ec2-metadata-token: $TOKEN" -v http://169.254.169.254/latest/meta-data/iam/info
}
Check the AWS API is reachable
Use BIG-IP Bash Shell to check AWS API is reachable on both BIG-IP instances, so a failover can occur.
For example:
[admin@ip-10-0-11-72:Active:In Sync] ~ # curl -sI https://ec2.us-east-1.amazonaws.com | grep Server
Server: AmazonEC2
Replace the ec2.us-east-1 with your region/zone.