BIG-IP VE performance optimization
You will learn tips for performance testing BIG-IP VE in hypervisors and recommendations for optimizing your hardware and hypervisor settings.
Performance testing best practices
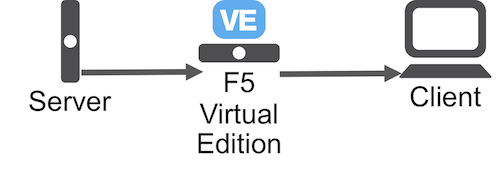
When performance testing BIG-IP VE, use an external iPerf Server and iPerf Client with BIG-IP-VE in the middle.
F5 recommends using iPerf 2.0.5 or iPerf 2.0.8.
Download the appropriate iPerf 2.0.8 - RPM package (or iPerf 2.0.5) at: https://iperf.fr/iperf-download.php#fedora.
Use Secure Copy Protocol (SCP) to get the file onto the machine:
sudo yum install iperf-2.0.8-2.fc23.x86_64.rpm -yOn the server, run the following command (inserting your port used):
iperf -s -p [port]Example:
iperf -s -p 5213On the client run the following command (inserting your server IP address and port used):
iperf -t 30 -i 10 -c [server_ip] -P 16 -p [port] -w [payload_size]Example:
iperf -t 30 -i 10 -c 10.75.0.213 -P 16 -p 5213 -w 128MBThis test will run for 30 seconds with 16 sessions, and a 128M payload.
You can run both iPerf3 and iPerf2 on the same system, but the client/server must be compatible.
So, and .
For CLI:
To execute iPerf3, you can use
iperf3 -s -pTo execute iPerf2, you can use
iperf -s -pTip
Notice that the command for iPerf2 is just
iperfand NOT iperf2.
Consult the iPerf web site for changes between iPerf 2.0 and iPerf 3.0/iPerf 3.1.
Optimize hardware BIOS
This topic discusses commercial off-the-shelf (COTS) hardware and software performance optimizations that you can do for BIG-IP VE running in on-prem hypervisors.
COTS servers come optimized for energy efficiency by default. However, when emulating F5 appliances on virtual platforms, these default settings are detrimental to performance. Change the following settings in the individual servers’ BIOS, manually or for Redfish-compliant servers, you can push these BIOS changes using an API. The following procedures use the Redfish-compliant HPE DL 380 Gen 10 server as an example.
Note
Applying these changes can increase the power consumption at baseline idle; however, the average power usage over time typically remains within 20% of stock settings. At scale these settings will usually reduce the global power usage and HVAC thermal load, because you will require less servers and waste less power. For example, one server takes 200-Watts to run at idle. This is considered “wasted power” lost to heat. In the case of ten servers, a 30% reduction produces a 600-Watt reduction of net power consumption, and a more consistent BTU output from the remaining servers.
The following diagram illustrates a graph of power usage utilizing a high-powered SmartNIC.
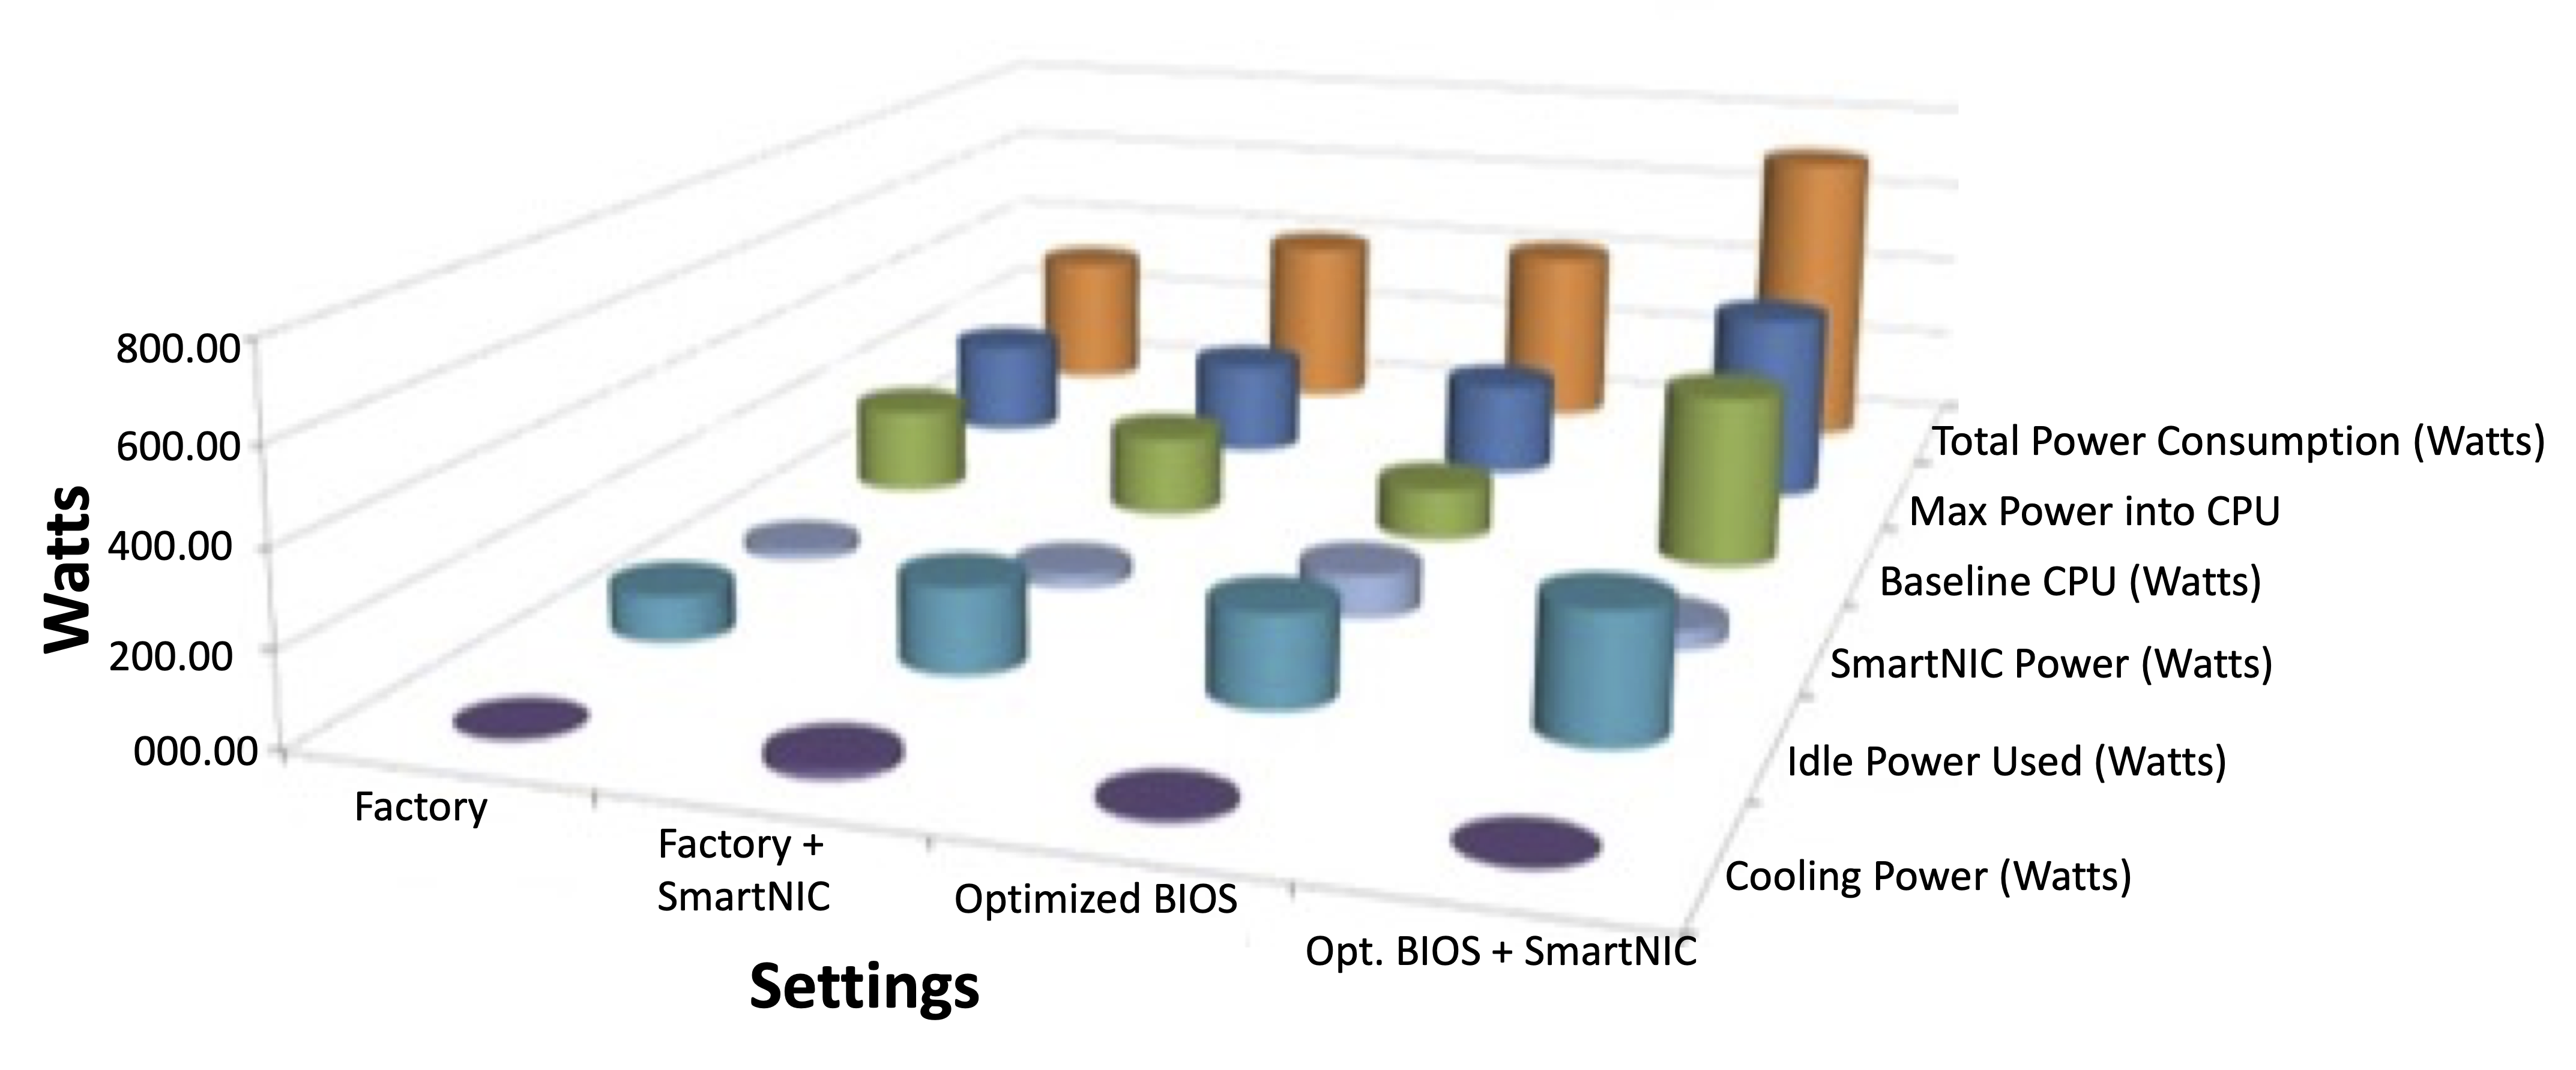
The Optimized BIOS section of the graph shows an example running a typical low power NIC, such as the Mellanox CX4 or CX5. You will notice the increase in the Cooling Power as we adjust the fan speed to maximum and uncap the Baseline CPU frequency, which enables the CPU to run at a faster rate. Also, turning off the Speed Stepping negates a response lag.
- Adjusting the fan speed enables the CPUs to run at a higher base frequency rate, normally limited by thermal throttling and power management.
- Raising the upper power limit that you can apply to the CPUs, also increases the available compute power without increasing the Idle Power used, because the power required to increase the fan speed is minimal.
The following screenshot displays a non-optimized system.

The following screenshot displays an optimized system with no CPU cap.

A typical energy efficient capped CPU only provides 60 Watts to the CPUs, whereas an uncapped system can supply up to the Thermal Design Power (TPD) limit. The optimized system shows 155 Watts supplied to the CPUs instead of 60 Watts, which represents a significant increase in compute power. The average power used over time averaged 2 Watts less (296 Watts versus 294 Watts) on the optimized system.
Use Redfish API to push BIOS setting changes
This example uses the HPE DL 380 Gen 10 server.
Load the HPE RESTful Interface Tool on a Windows workstation that has access to the HPE server iLO management interface: https://support.hpe.com/hpsc/swd/public/detail?swItemId=MTX_d1c19551ffbb4b1b8f94587e22.
Copy the
HPE_DL380G10_Perf.jsonfile to a local workstation directory.Run the HPE RESTful Interface tool.
Change directories to the .json file.
Back up the existing BIOS settings, use:
ilorest save --selector=Bios. -f HPE_DL380G10_Perf.json --url <iLO IP> -u <iLO username> -p <iLO pw>For example:
ilorest save --selector=Bios. -f HPE_DL380G10_Perf.json --url 10.10.195.230 -u admin -p adminRun the following command to push the new configuration:
ilorest load -f HPE_DL380G10_Perf.json --url <iLO IP> -u <iLO username> -p <iLO pw>For example:
ilorest load -f HPE_DL380G10_Perf.json --url 10.10.195.230 -u admin -p admin
Manually change BIOS settings
This example uses the HPE 380 Gen 10 server.
To open the BIOS settings, press the F9 key at post (see the HPE ProLiant Gen9 and Gen10 Servers - How to Enter System Utilities (BIOS) topic for complete details).
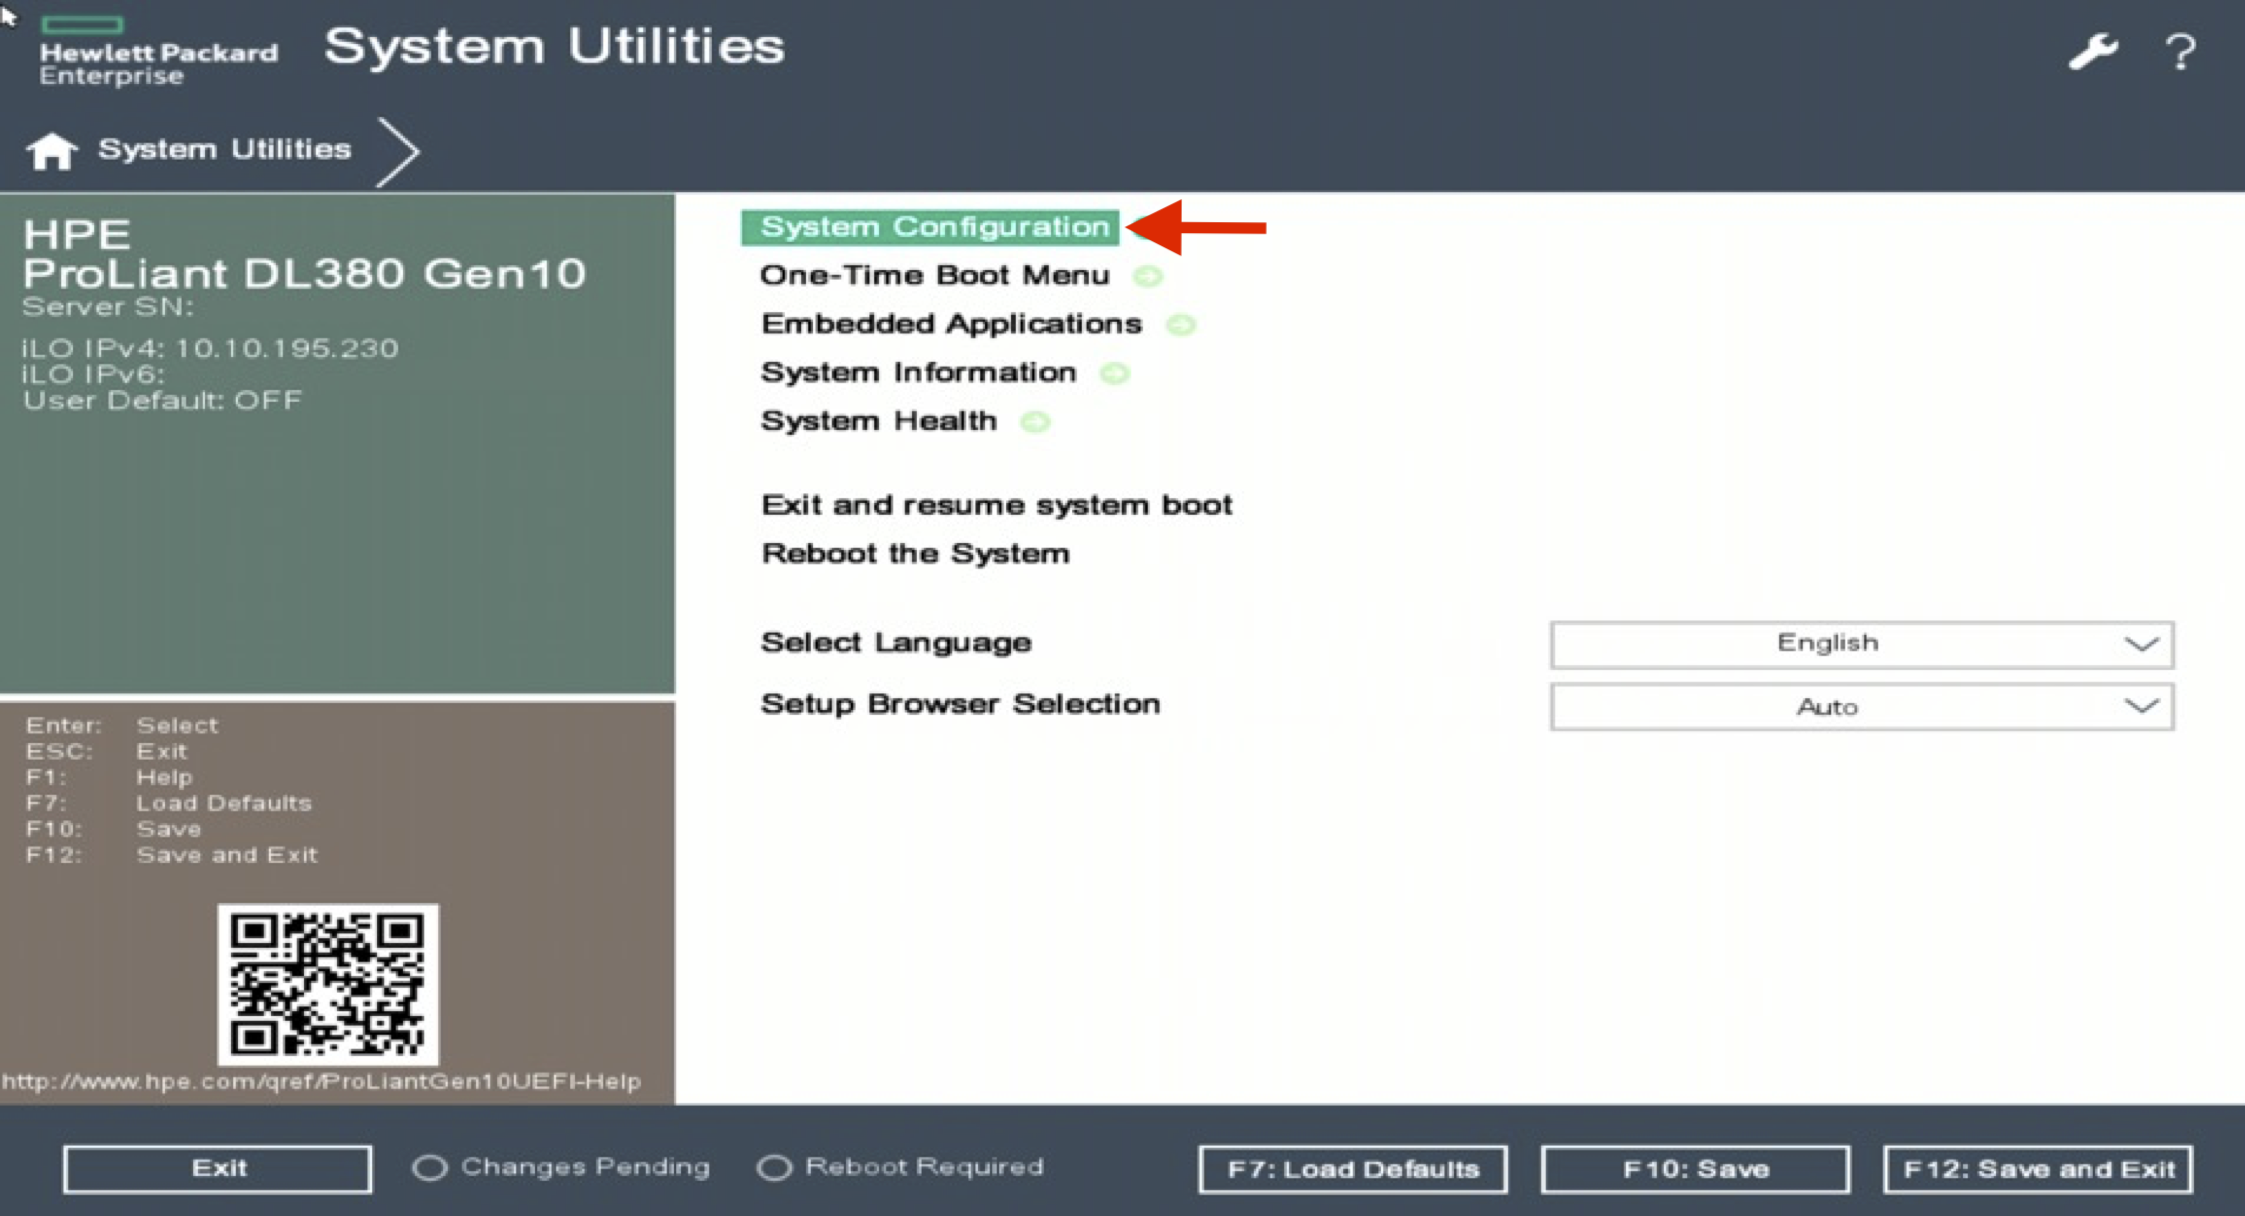
Select System Configuration:
Select BIOS/Platform Configuration (RBSU):
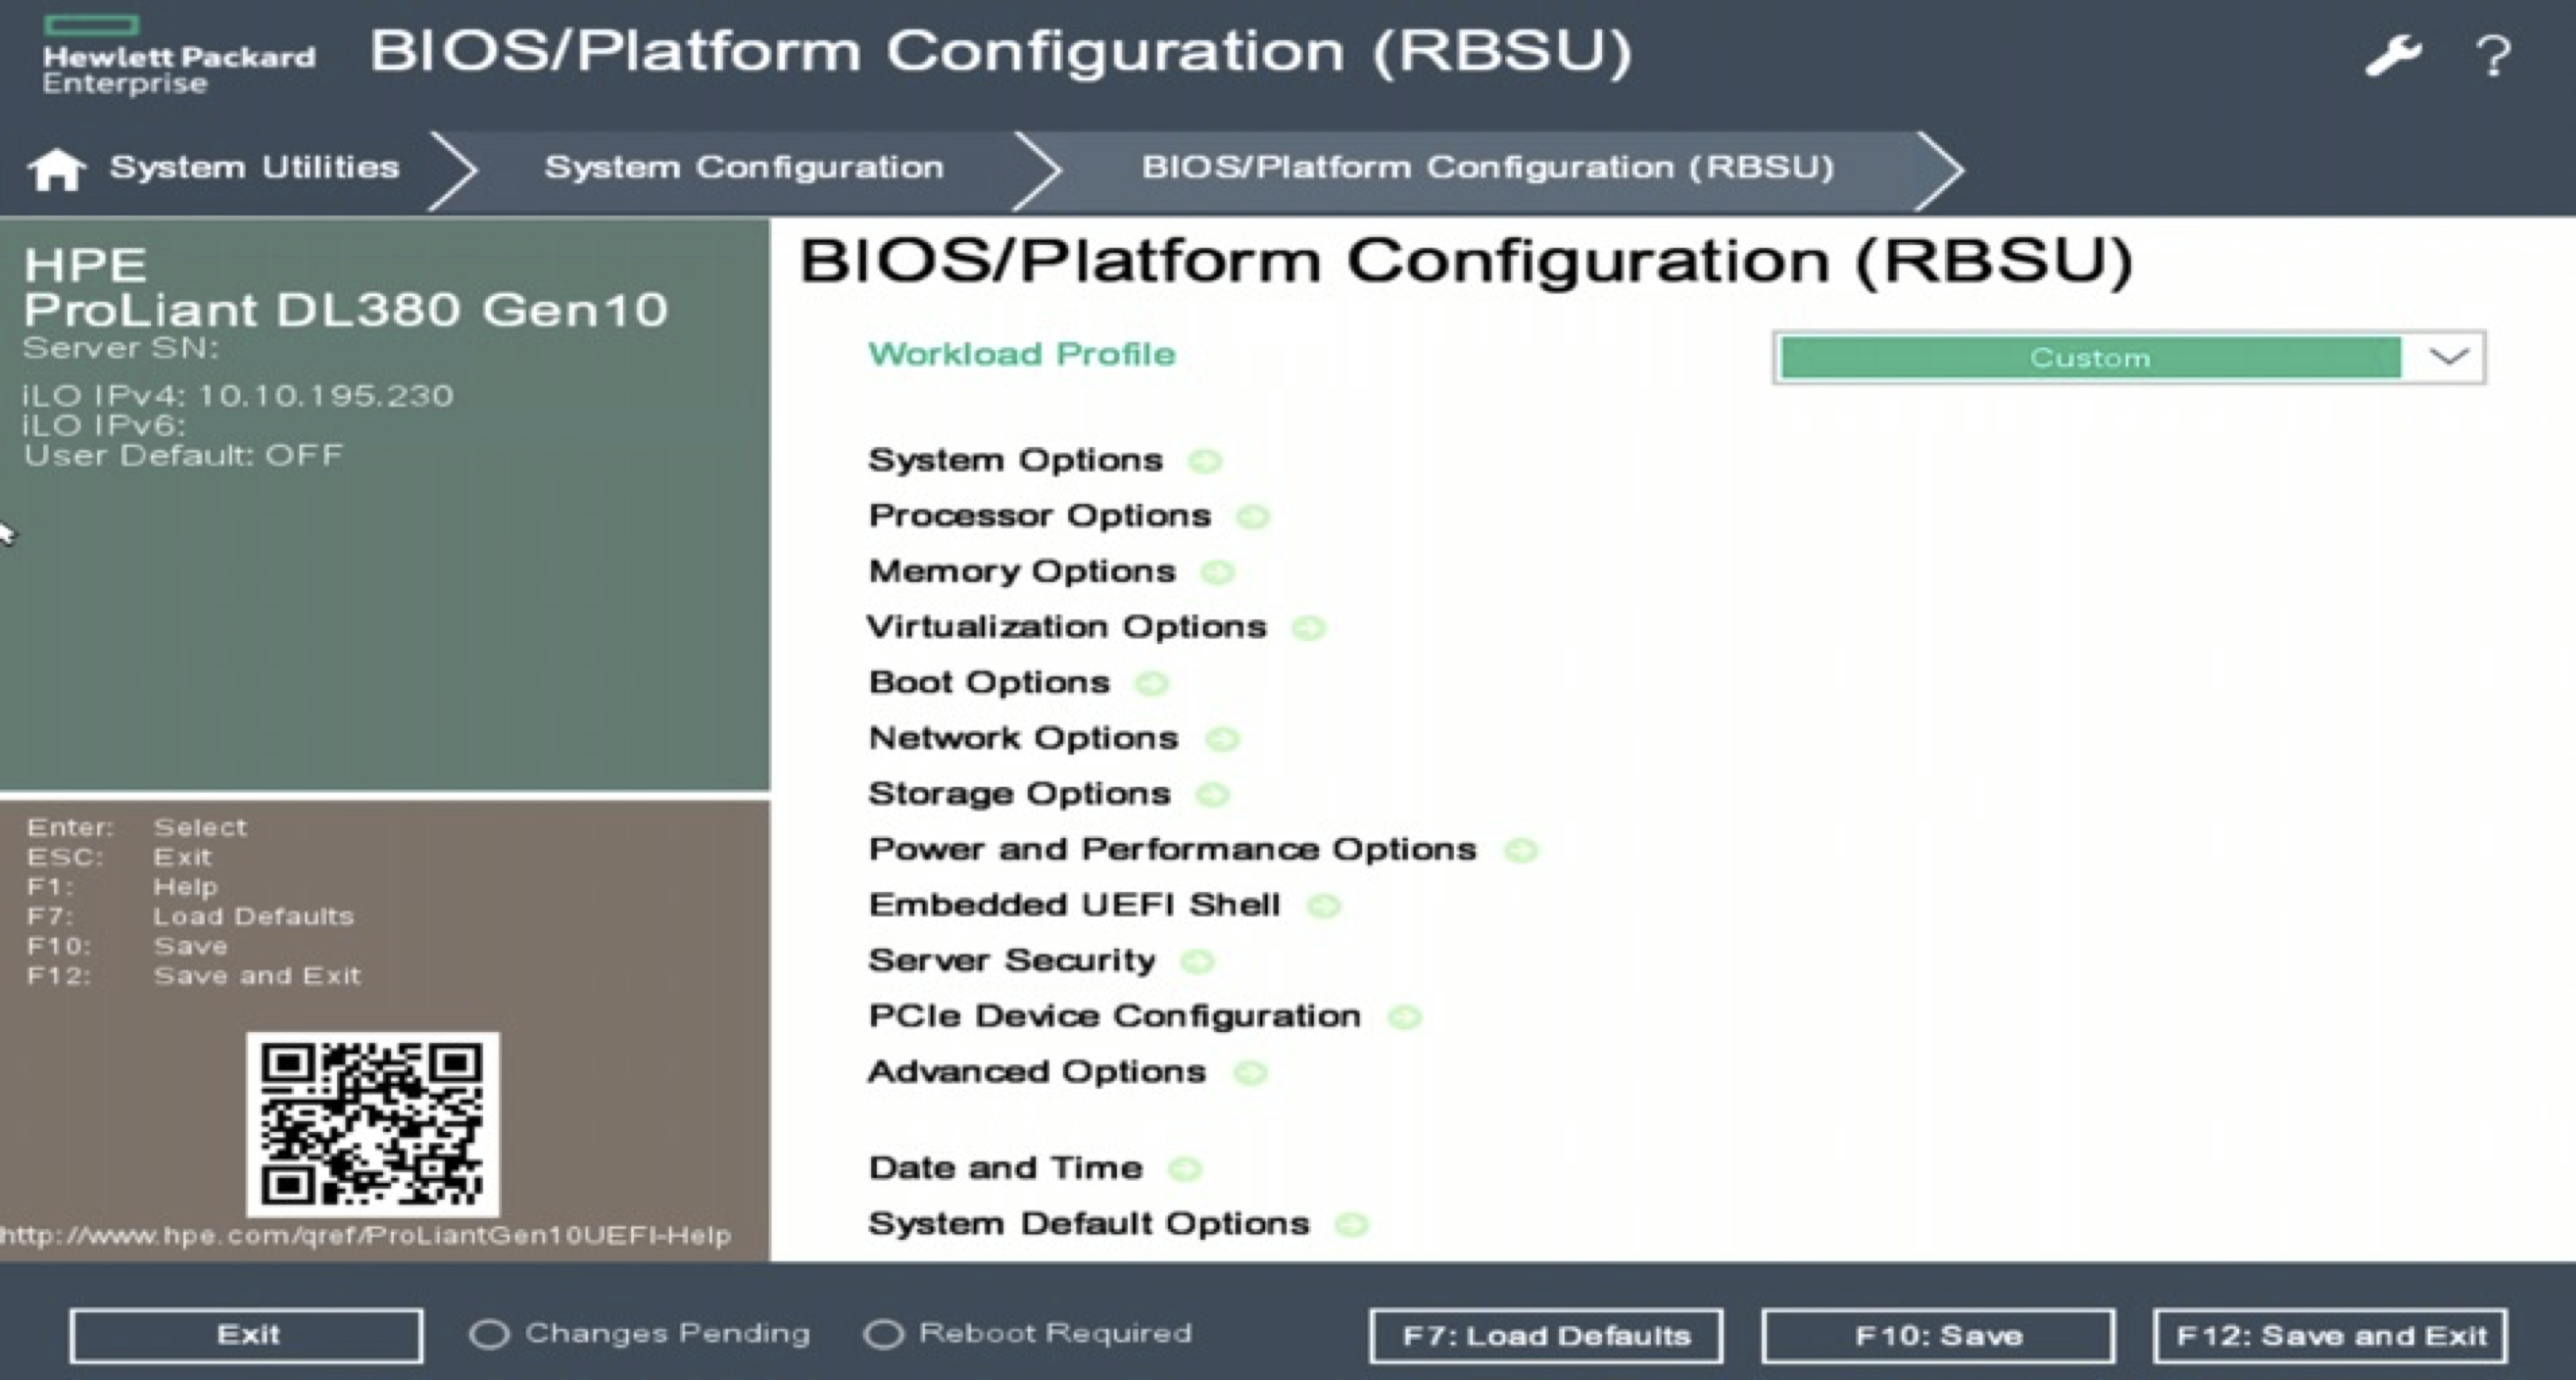
In the Processor Options menu, set Hyperthreading to Disabled.
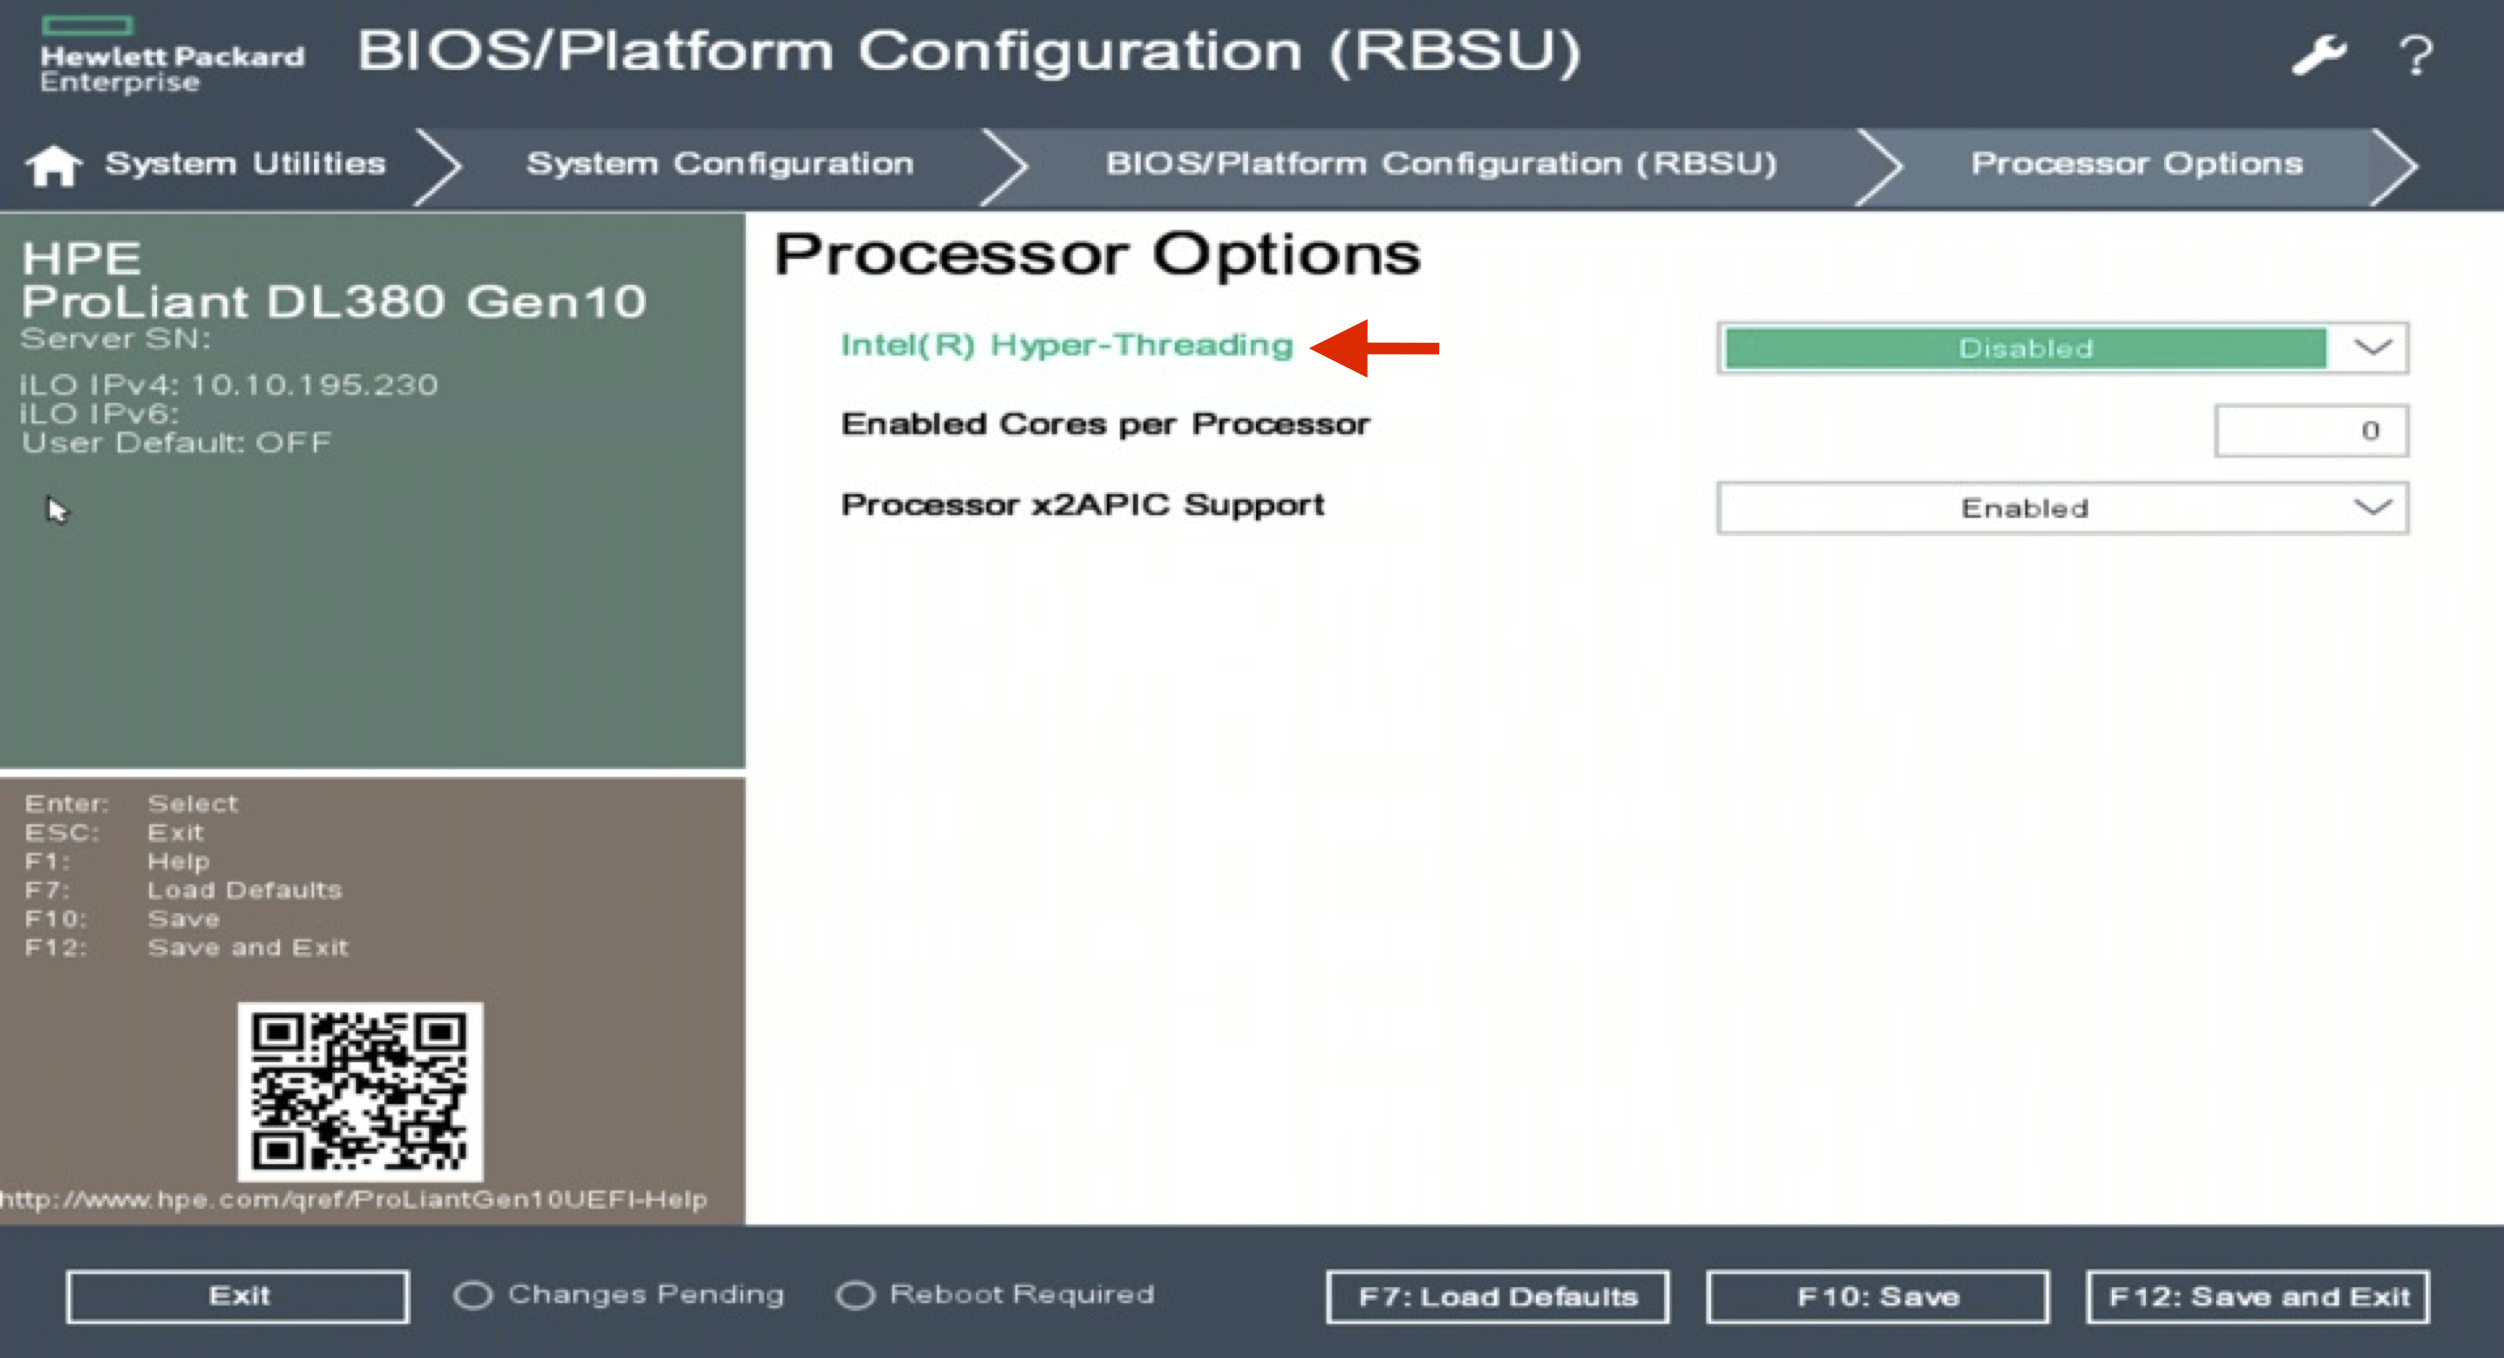
Note
This will reduce the available thread count (vCPUs) in half, but will save 5%-15% overhead and simplify core pinning in the hypervisor.
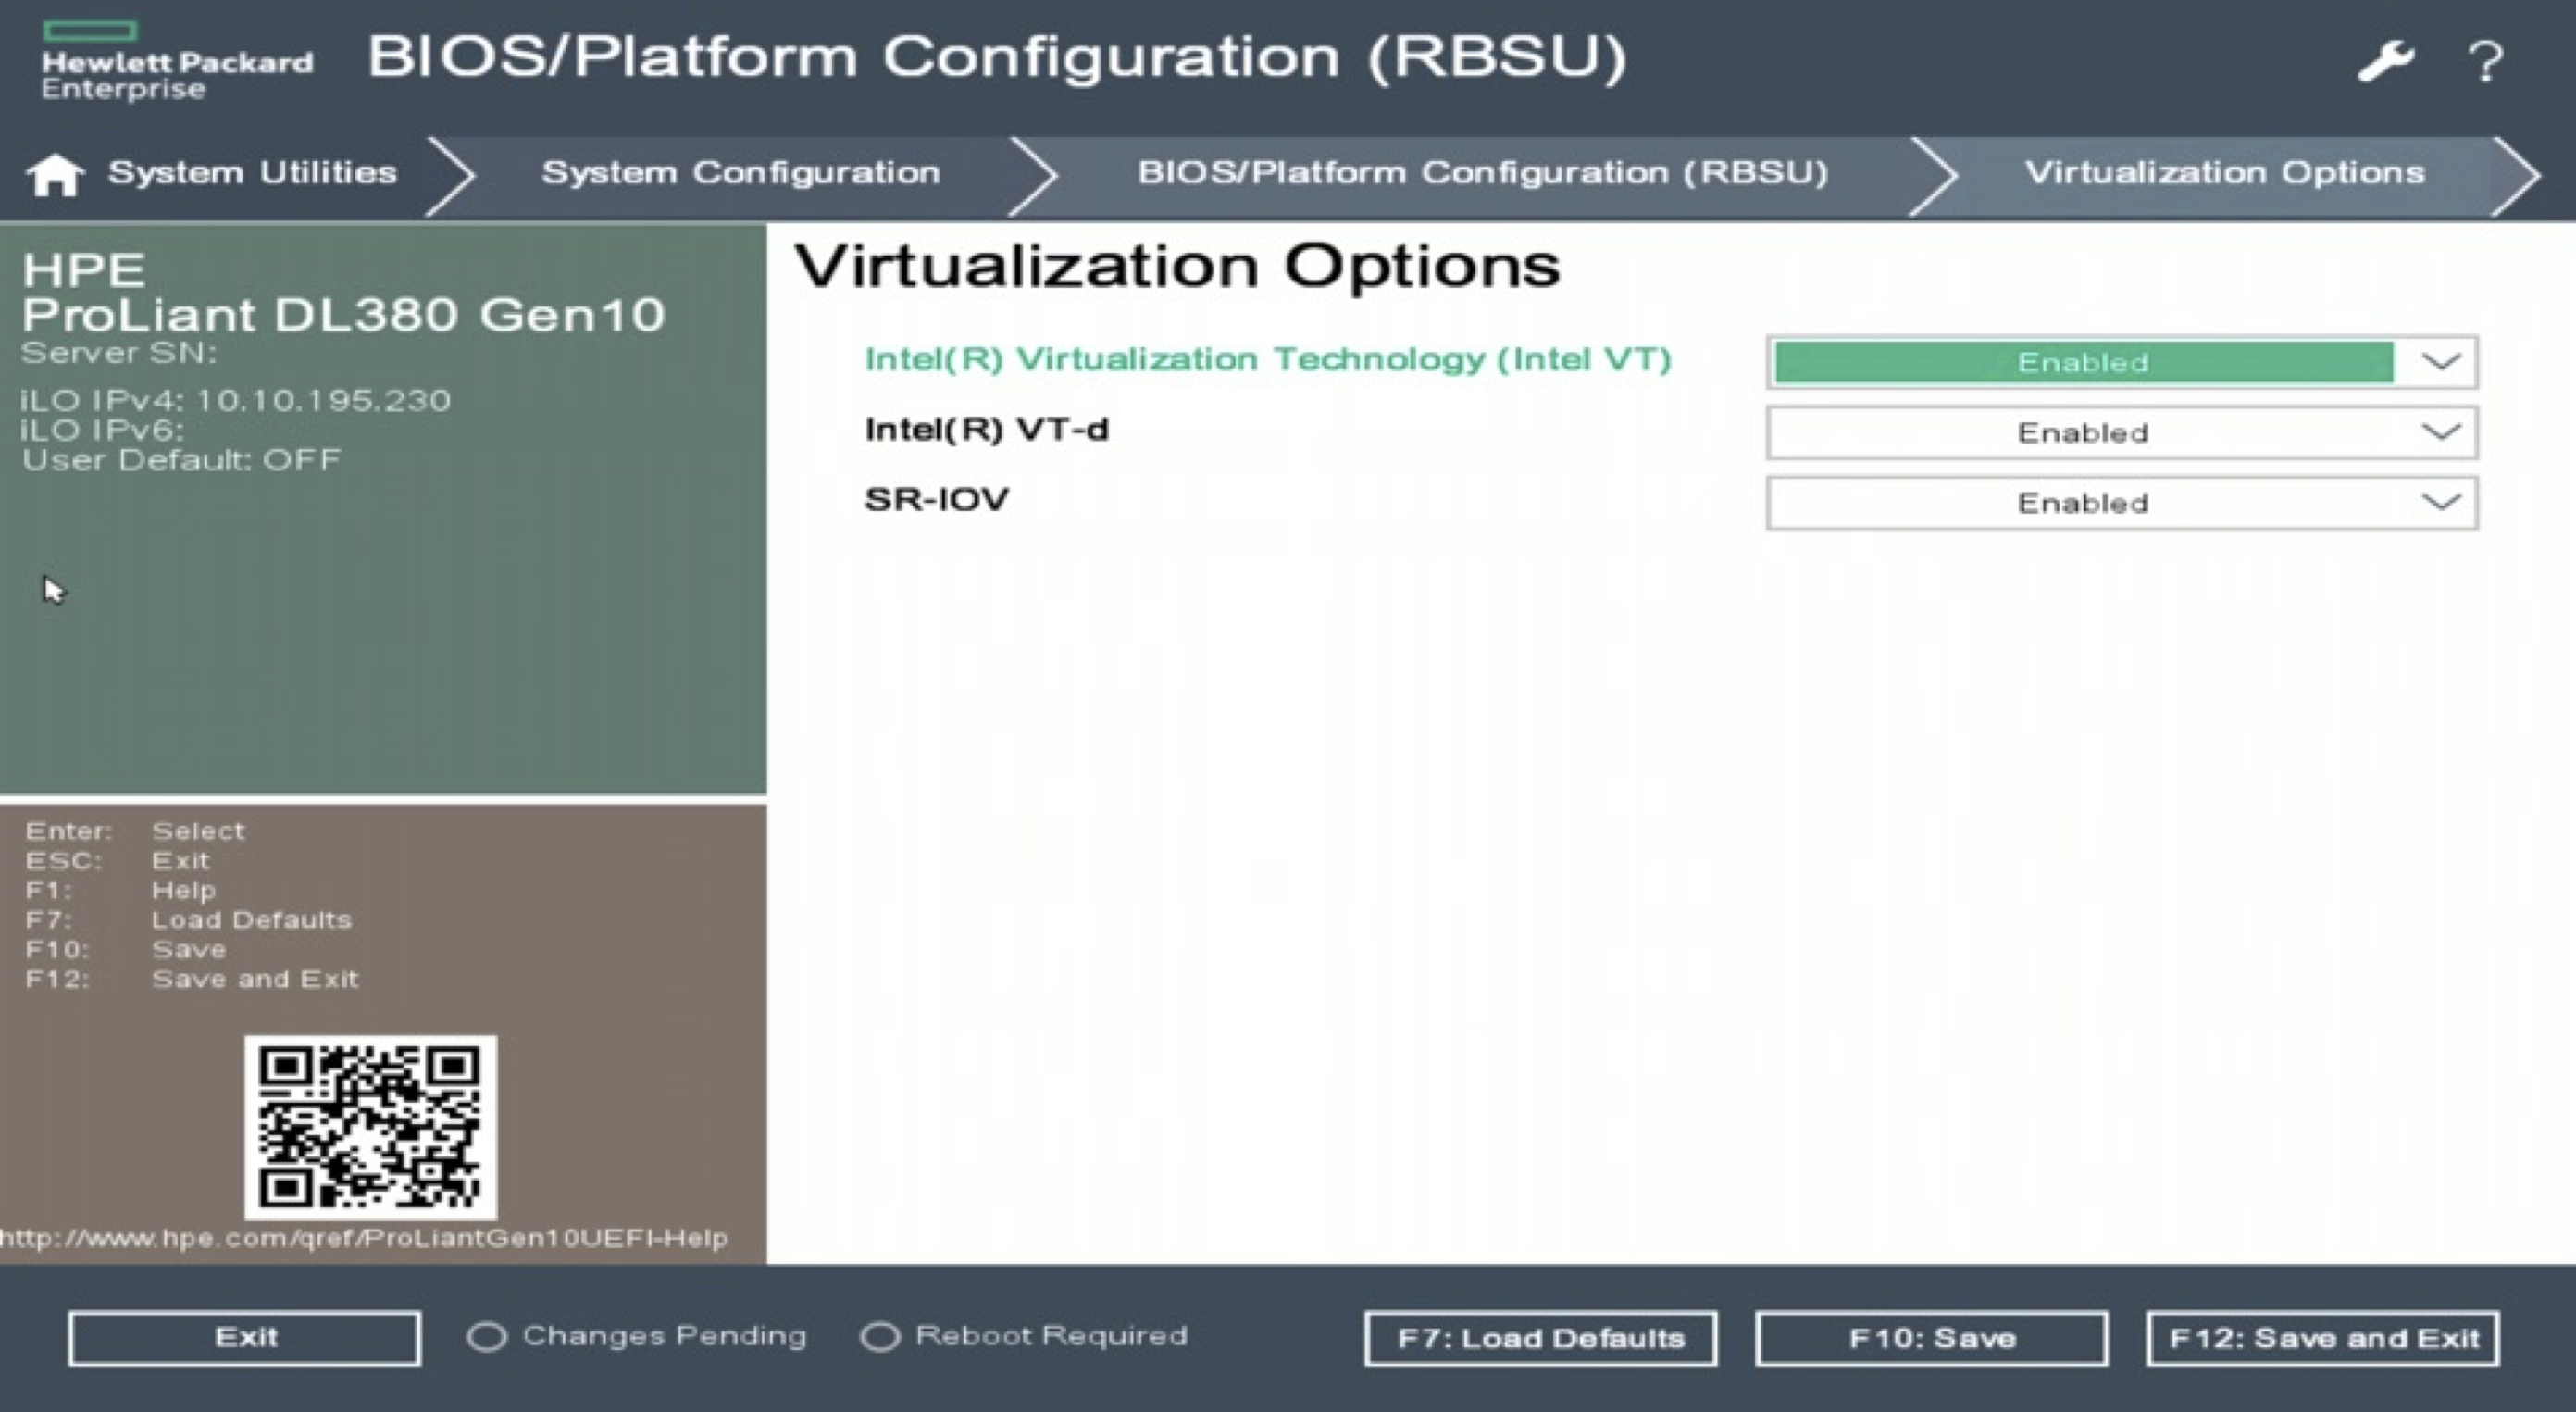
In the Virtualization Options menu, select Enabled for all Intel Virtul Technology, Intel VT-d , and :guilabel:`SR-IOV options.
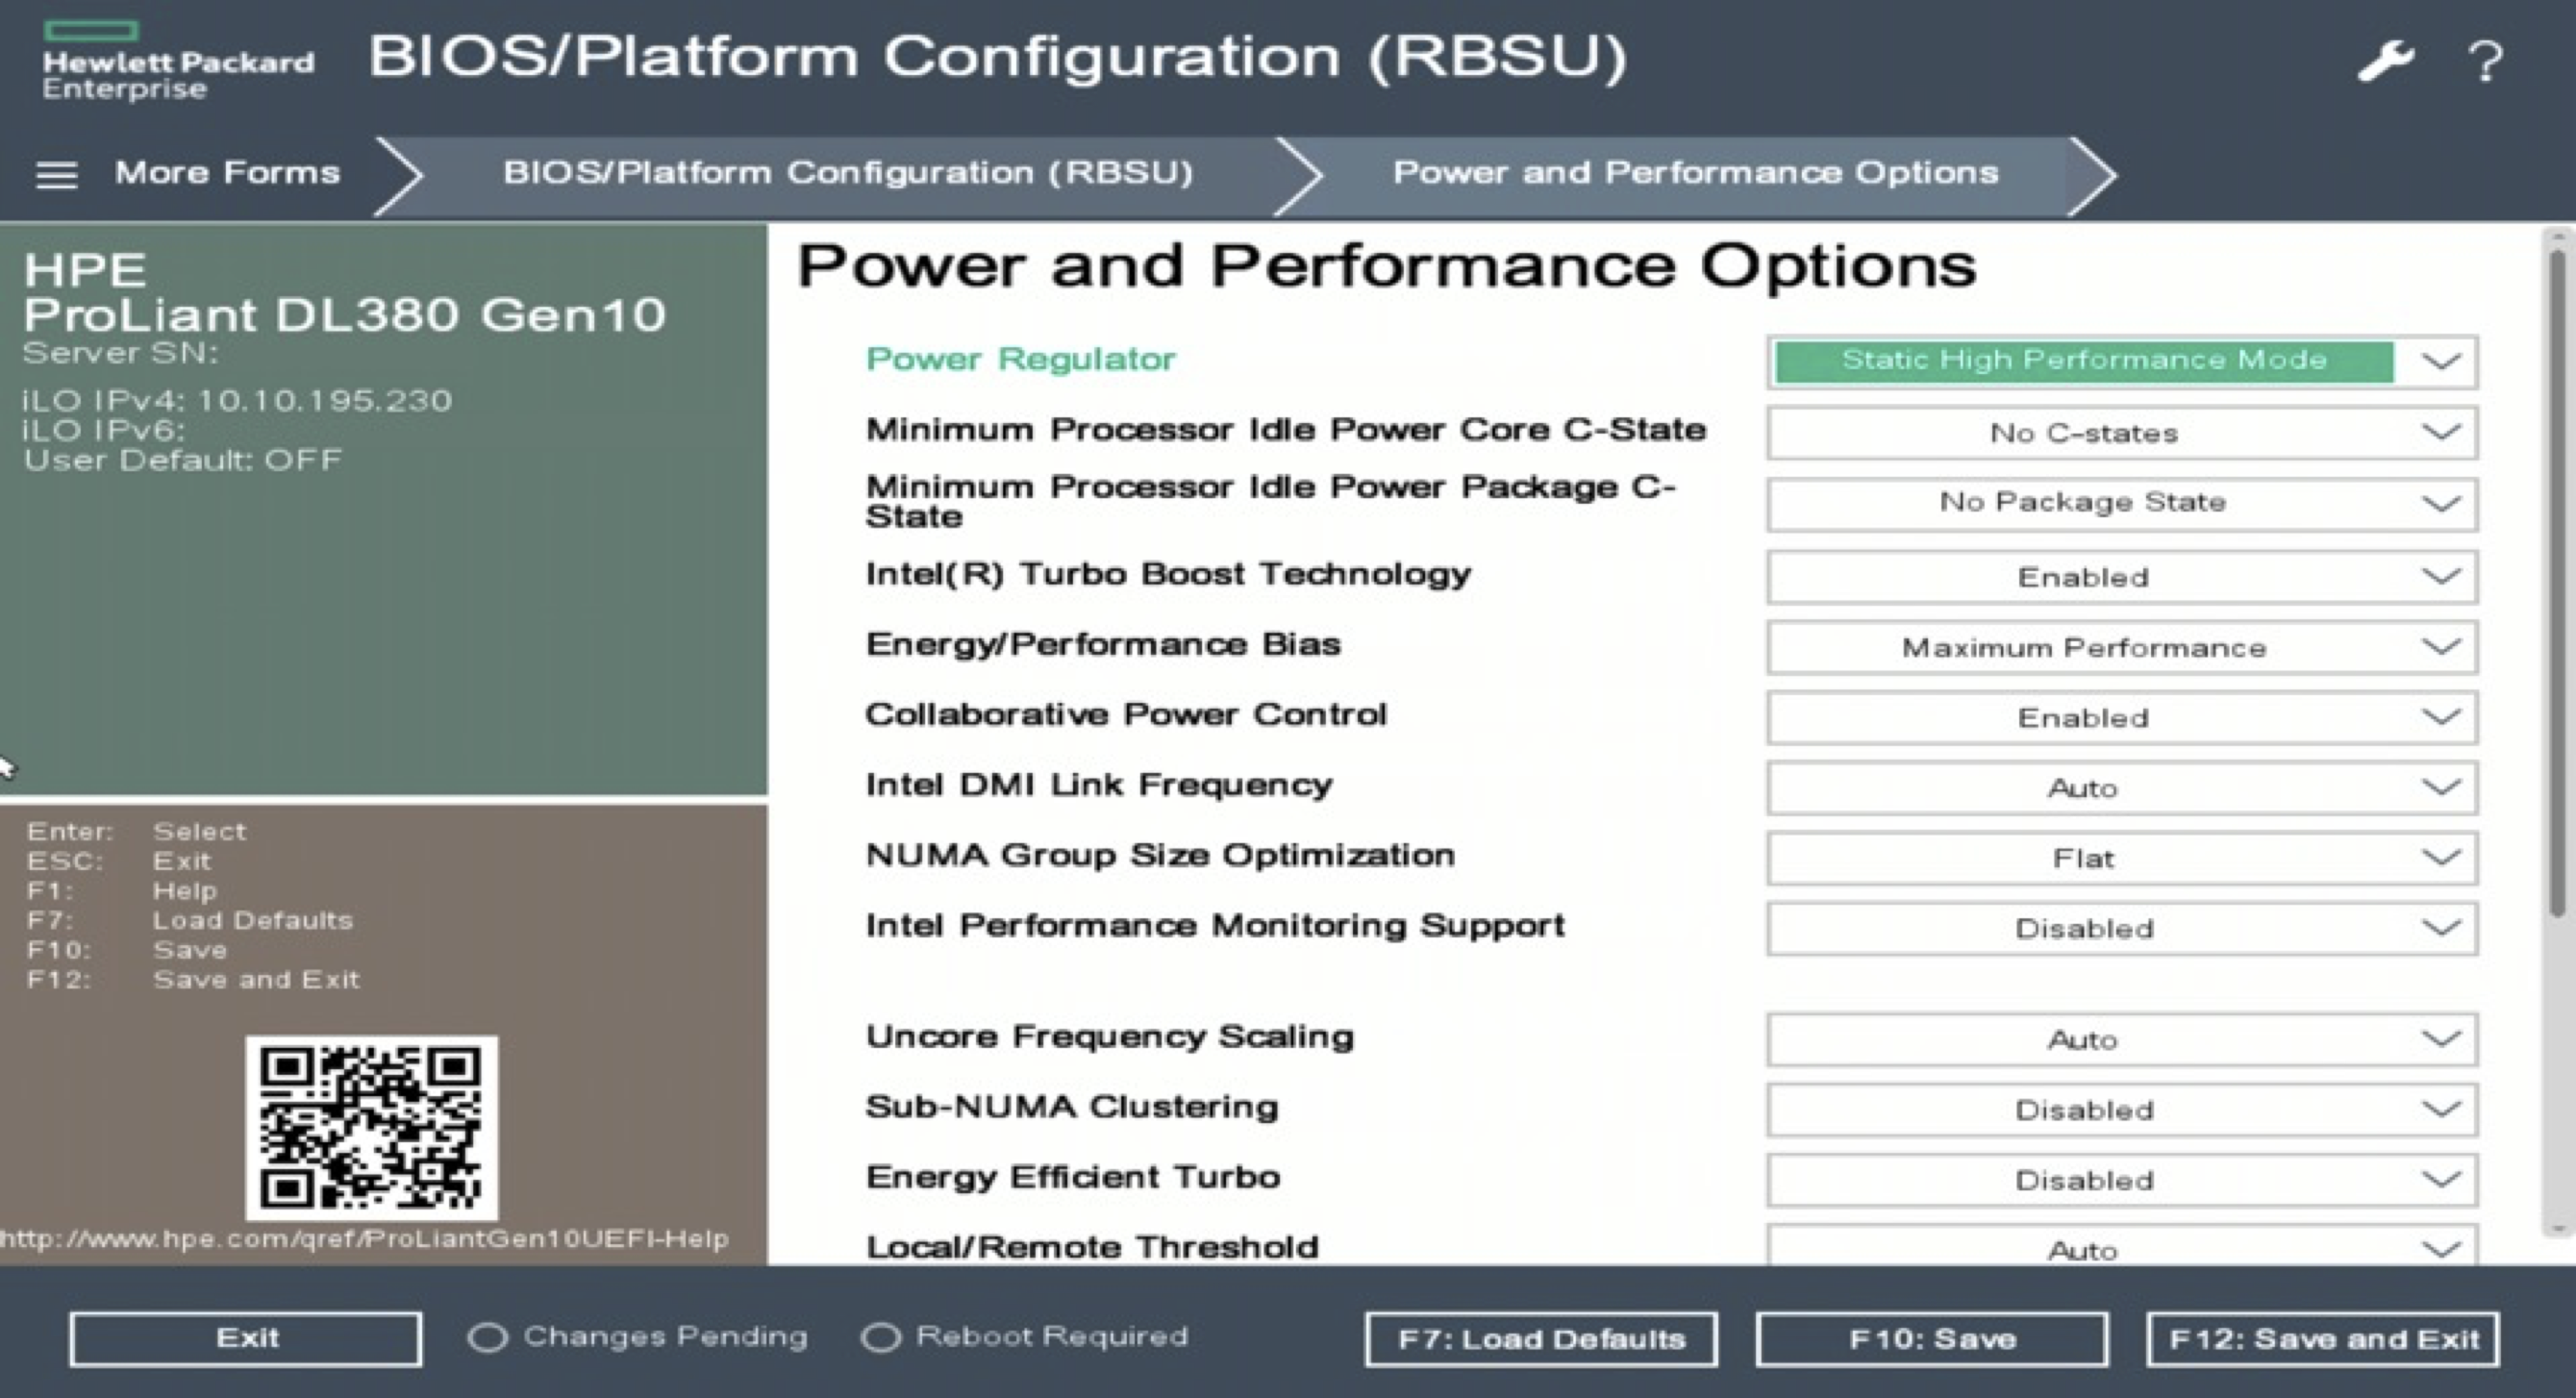
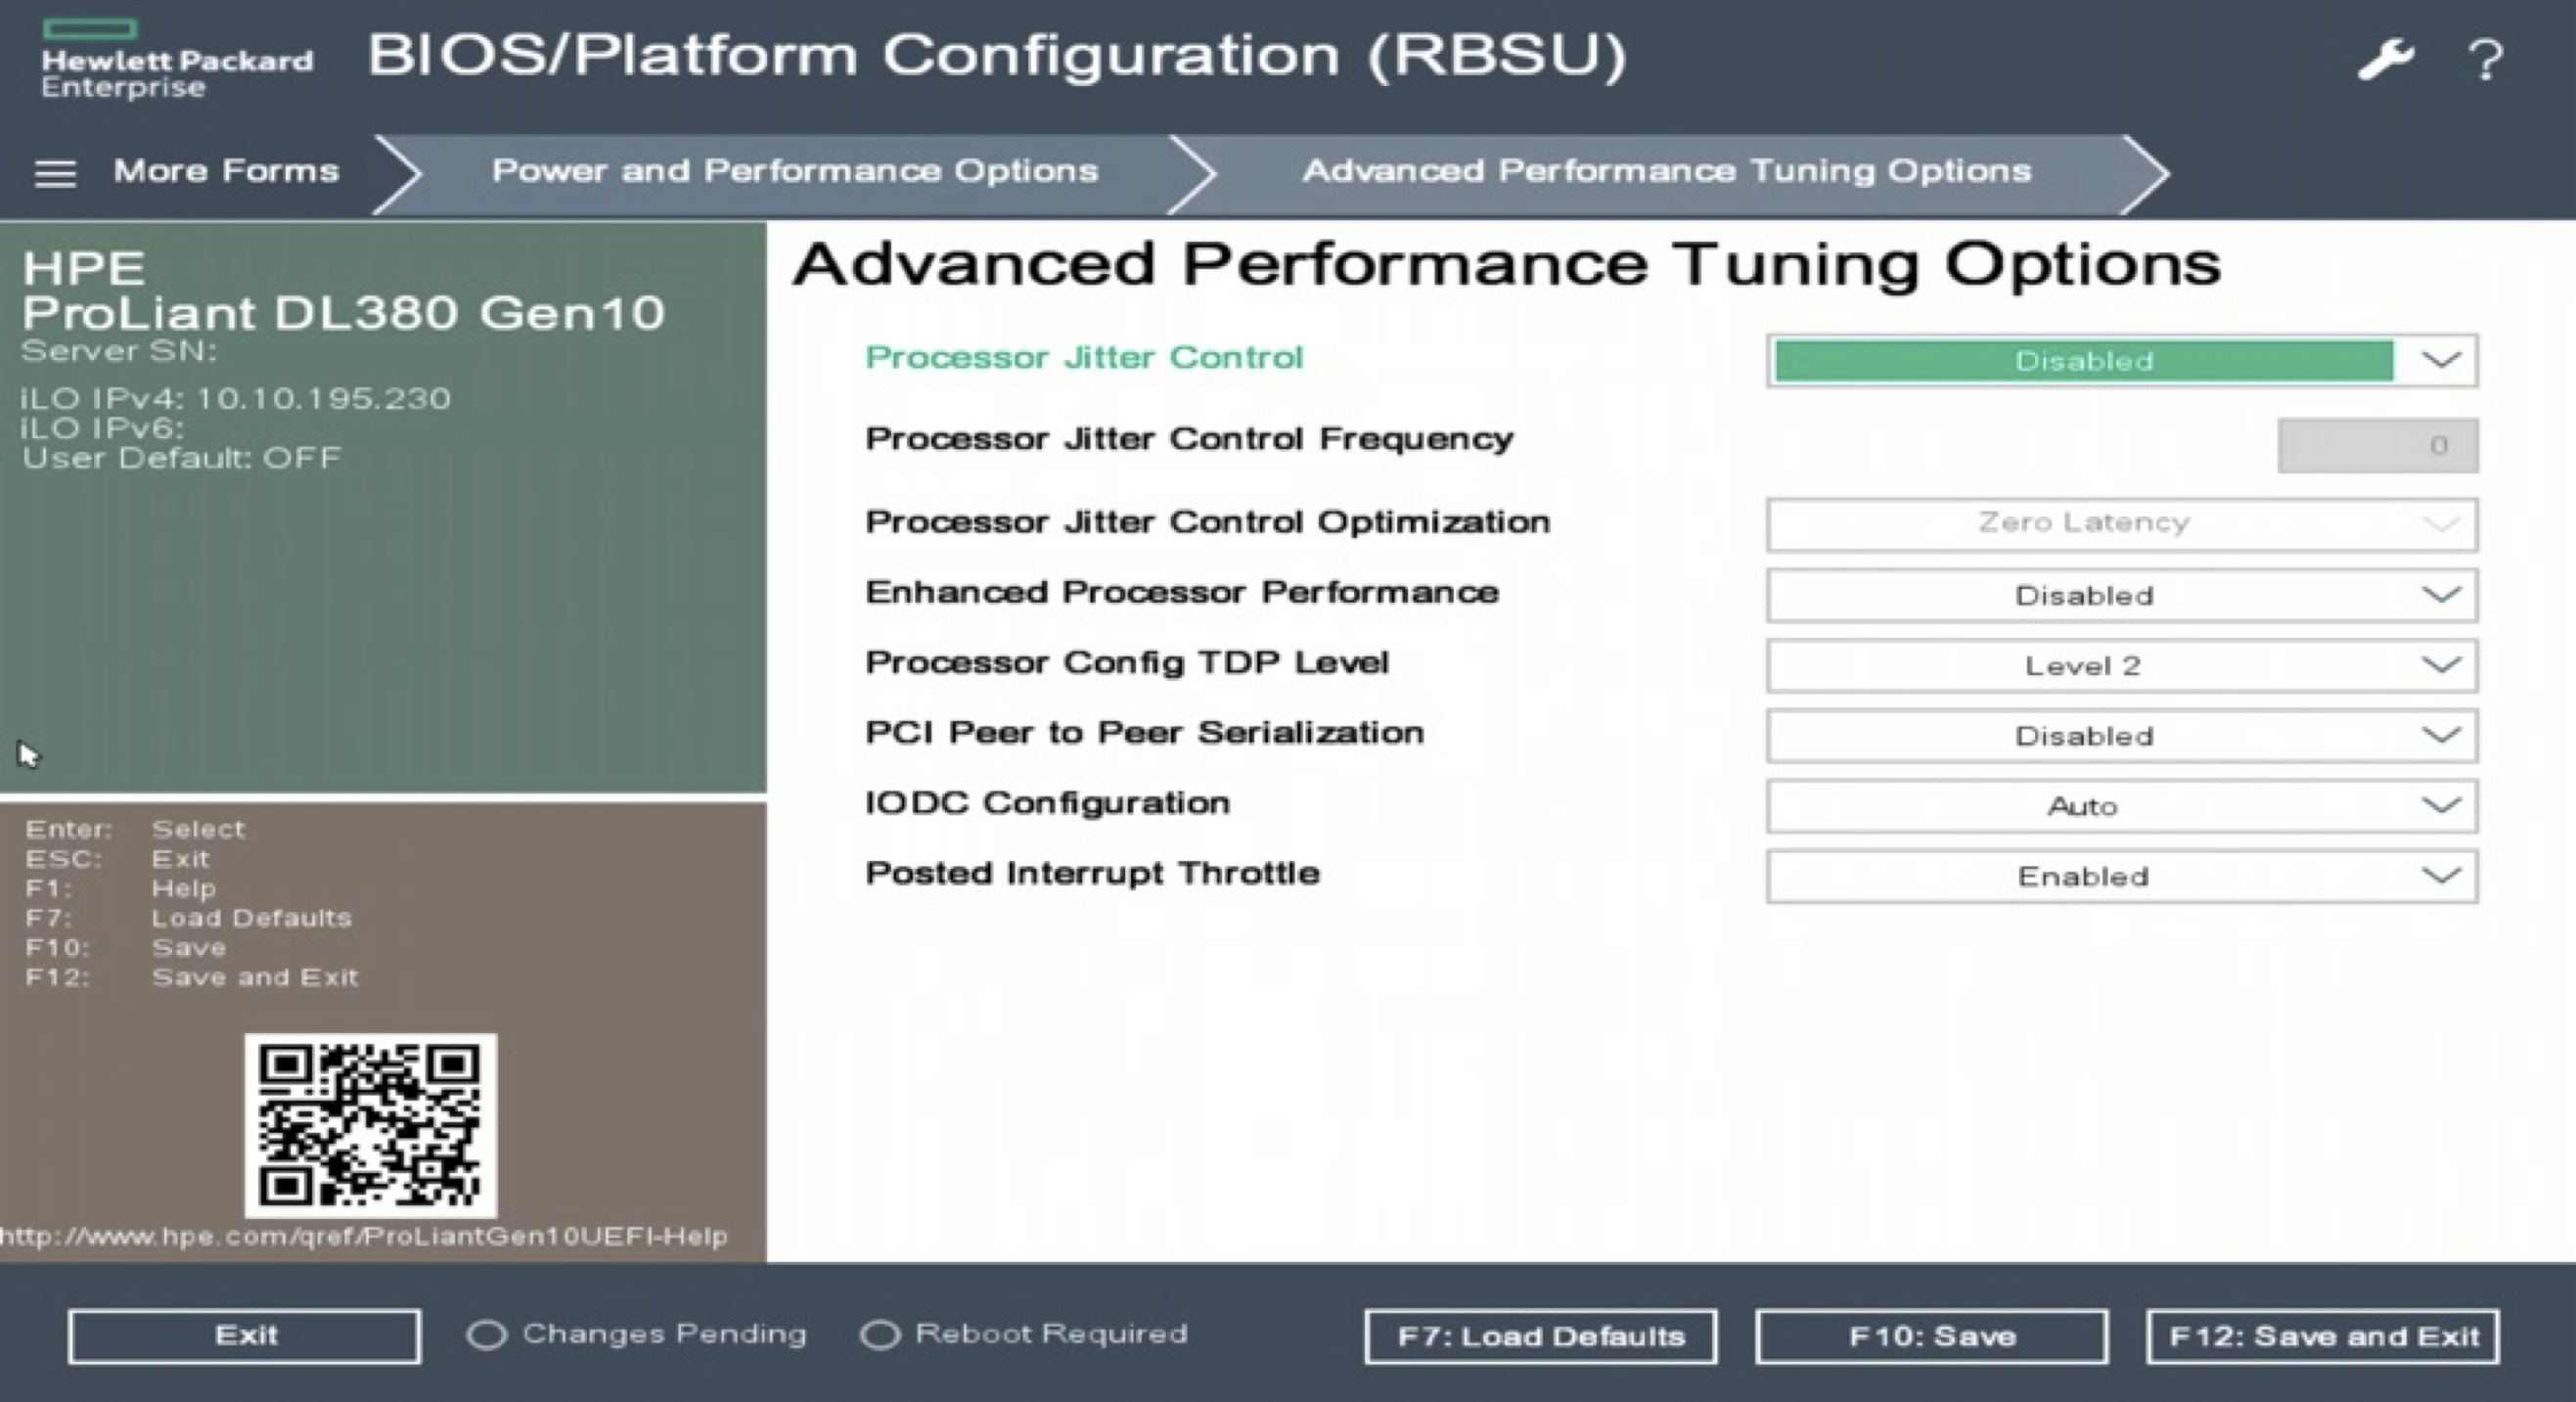
Under Power and Performance Options change the setting(s) to match the following:
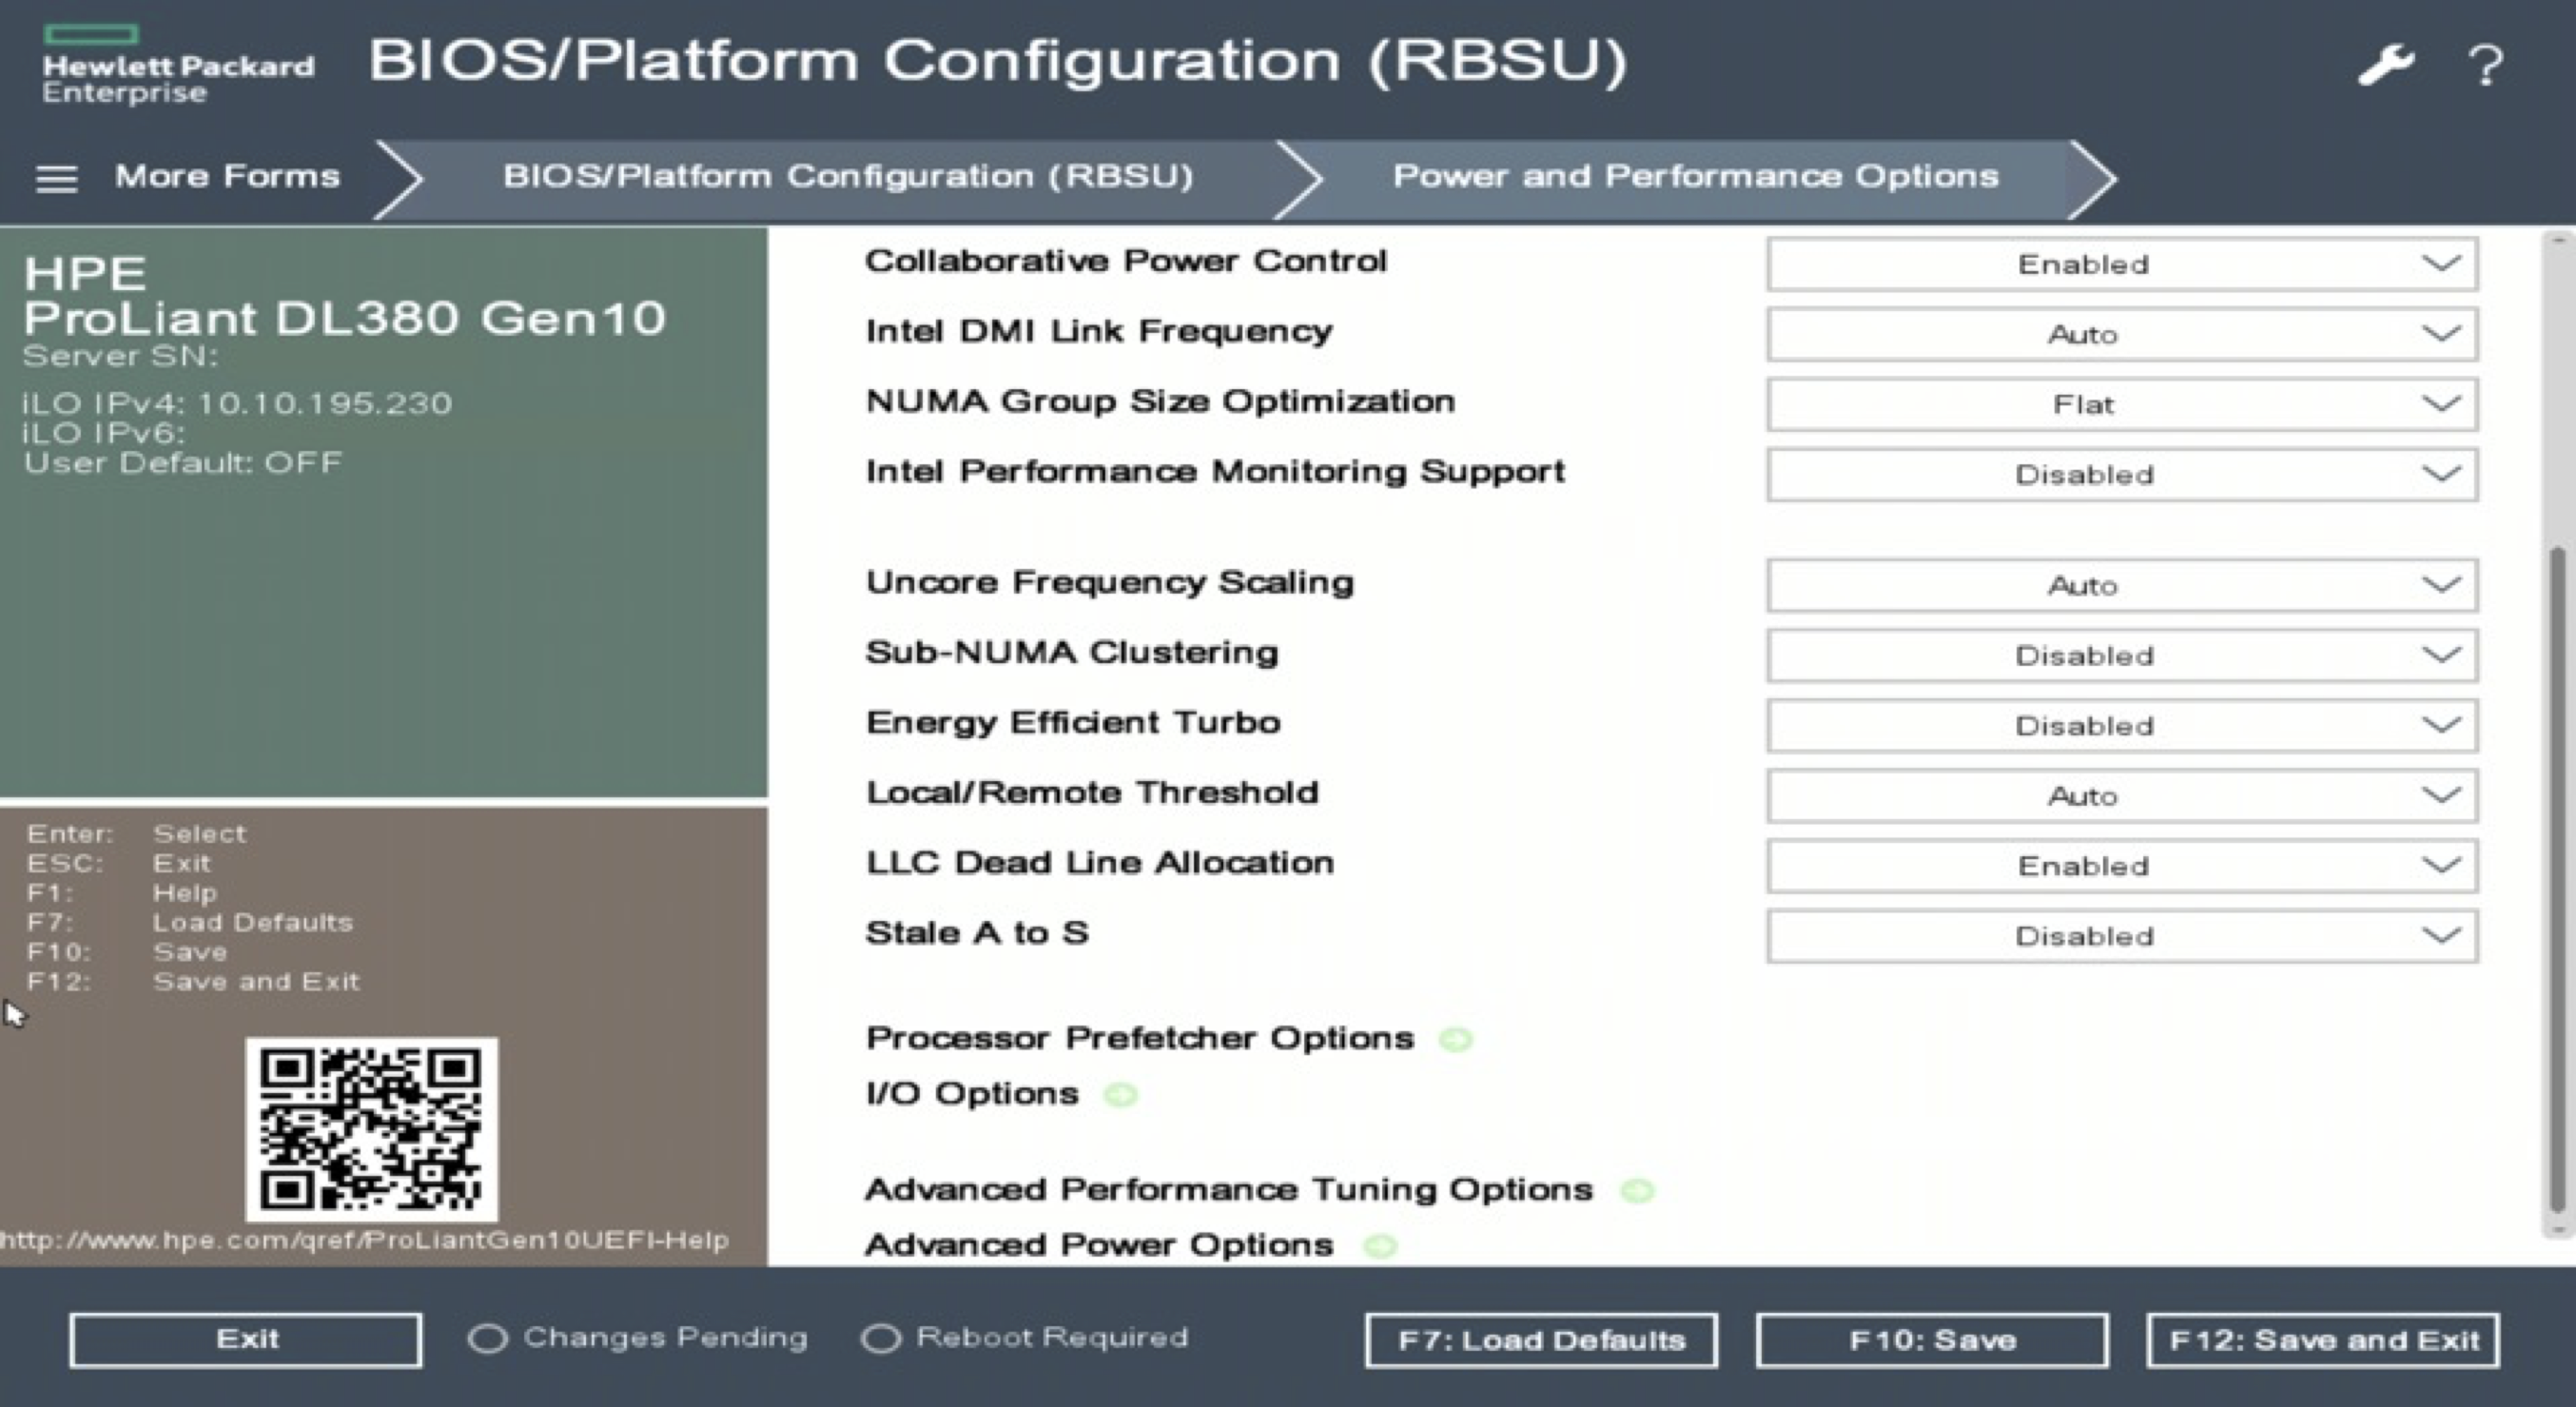
Select the Advanced Performance Tuning Options subsection, and then under Power and Performance, change the settings to match the following:
Select the BIOS/Platform Configuration menu again, and then select Advanced.
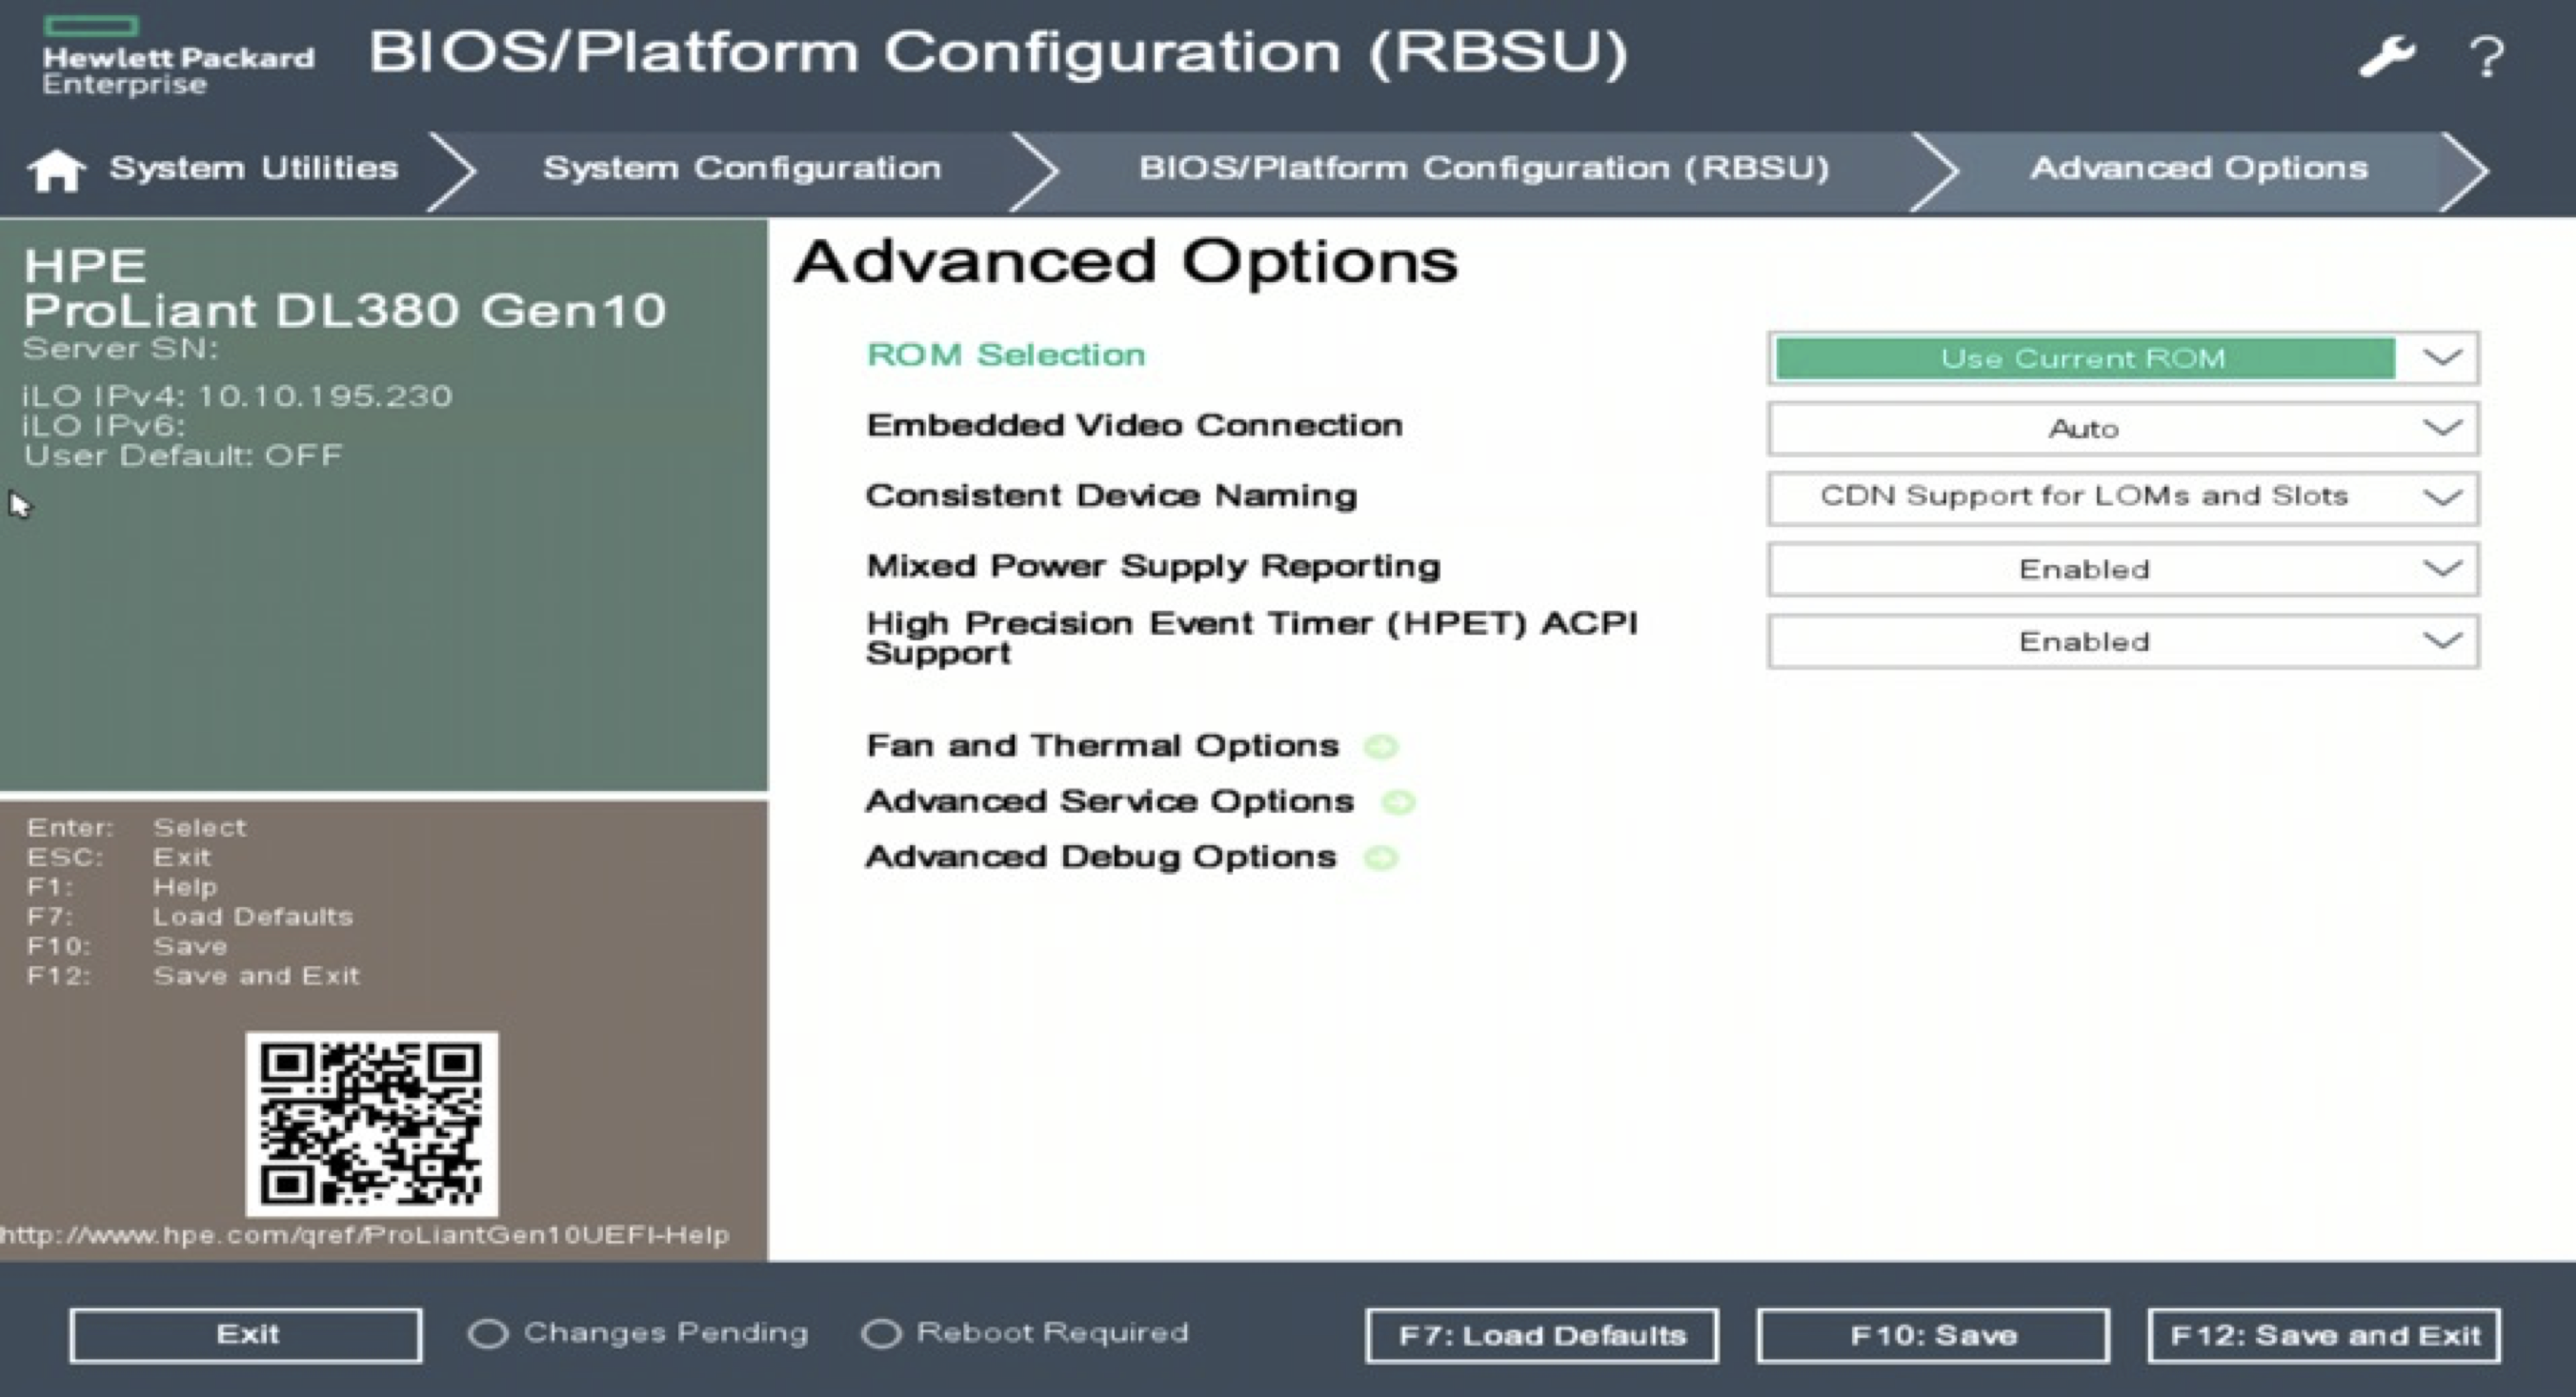
Select Fan and Thermal Options menu, and choose the Maximum Cooling profile:
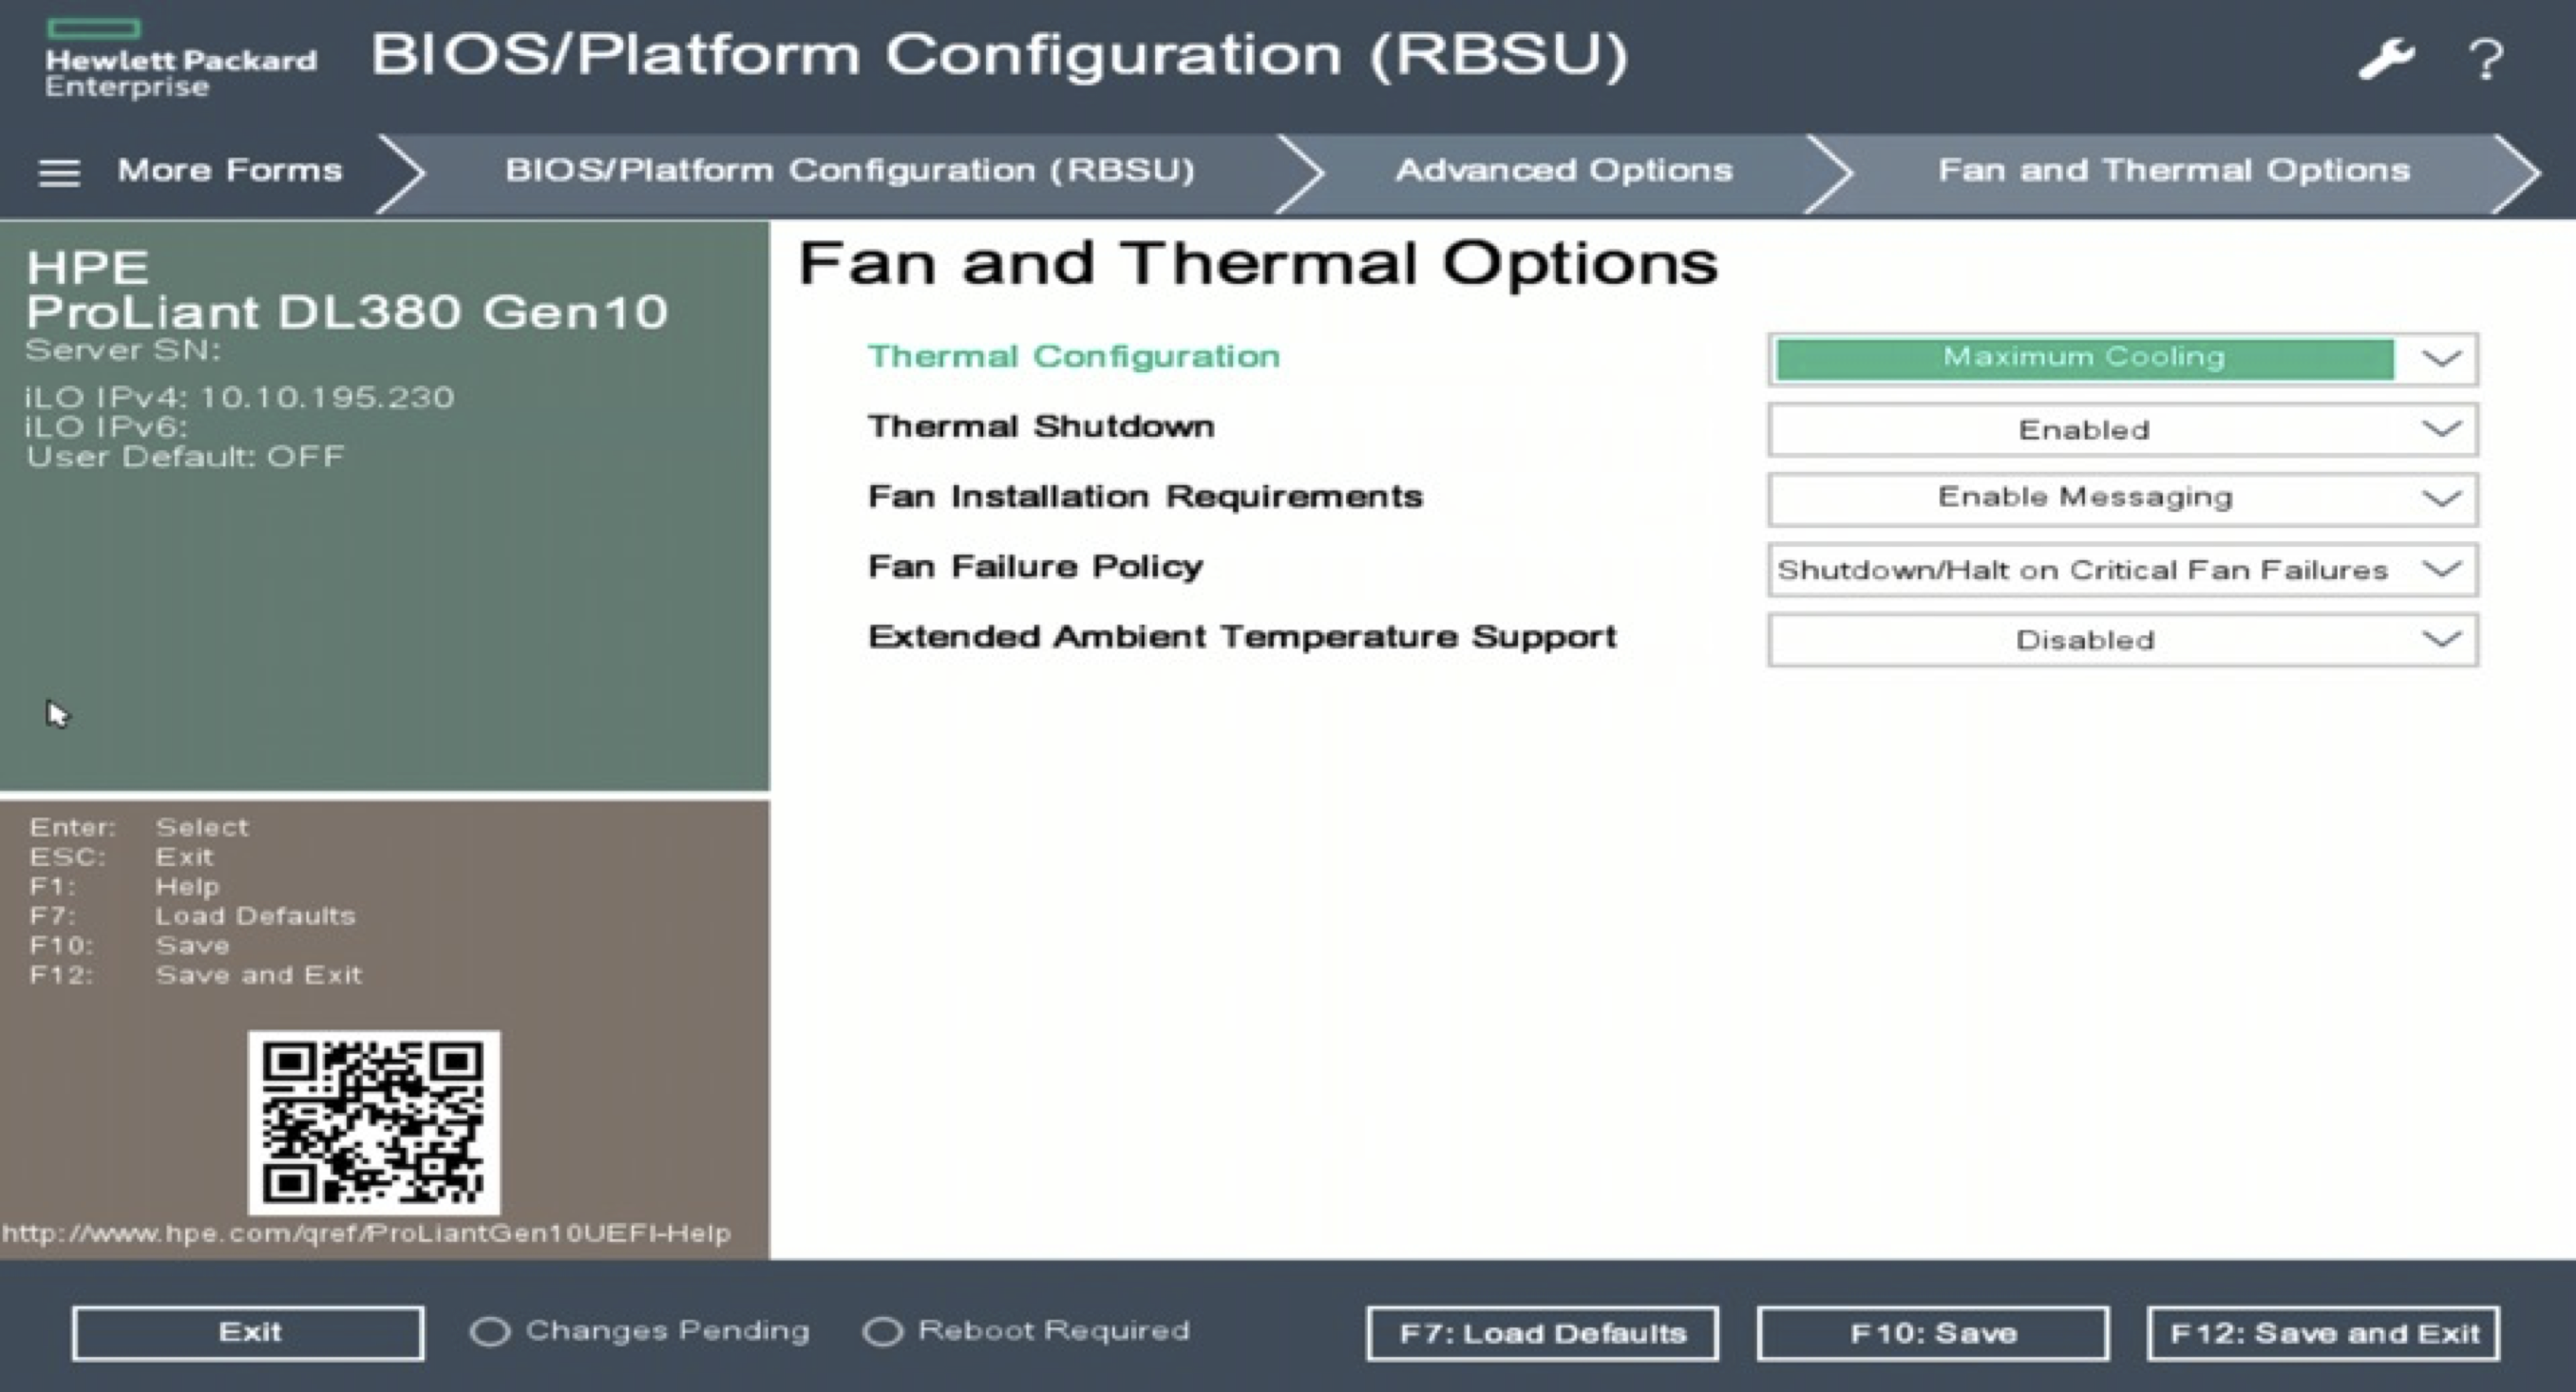
Select Save and Exit. The system is now optimized.