F5 Application Delivery Controller Solutions > BIG-IP® Local Traffic Manager (LTM) - Getting Started Source | Edit on
Lab 5: SSL Offload and Security
In this Lab we will configure client-side SSL processing on the BIG-IP
Objective:
- Create a self-signed certificate
- Create a client SSL profile
- Modify your HTTP virtual server to use HTTPS
- Add additional security to your HTTPS web server using the HTTP profile
We will create a self-signed certificate and key for a client SSL profile to attach to our virtual server
Creating a Self-signed certificate and key
Go to System >> Certificate Management >> Traffic Certificate Management >> SSL Certificate List and select Create
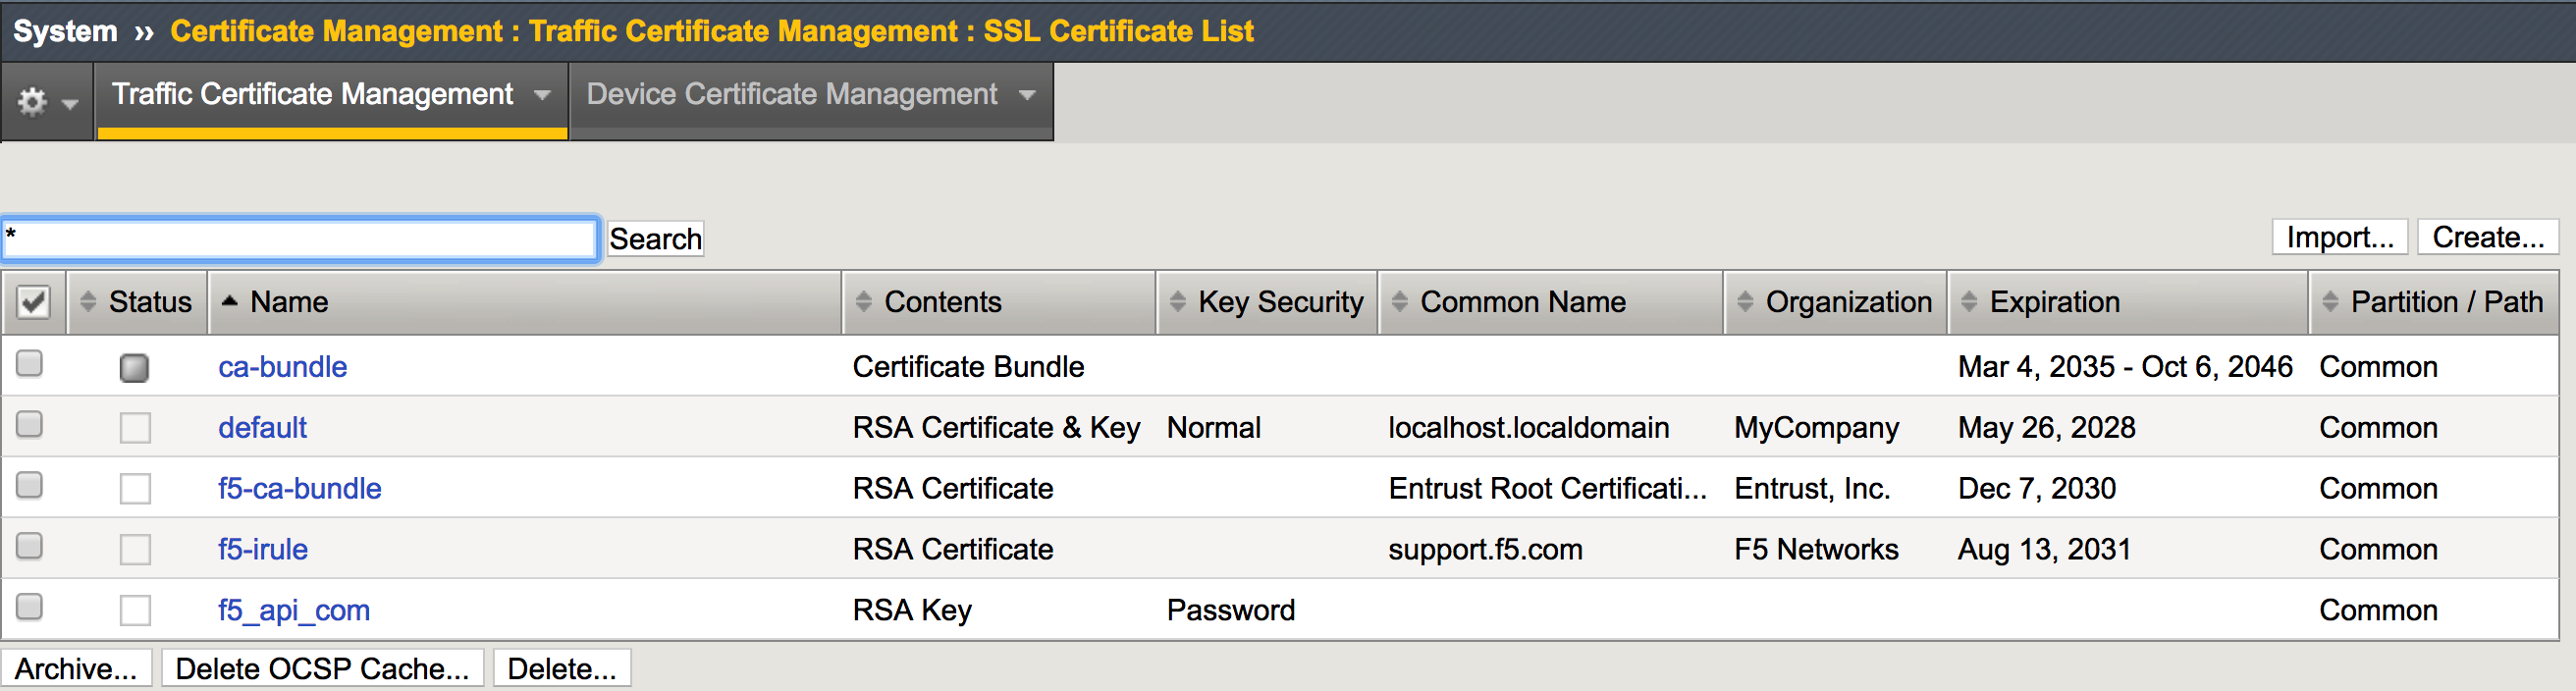
Note
The default key size is 2048. You can save SSL resources on the server-side by lowering this key size
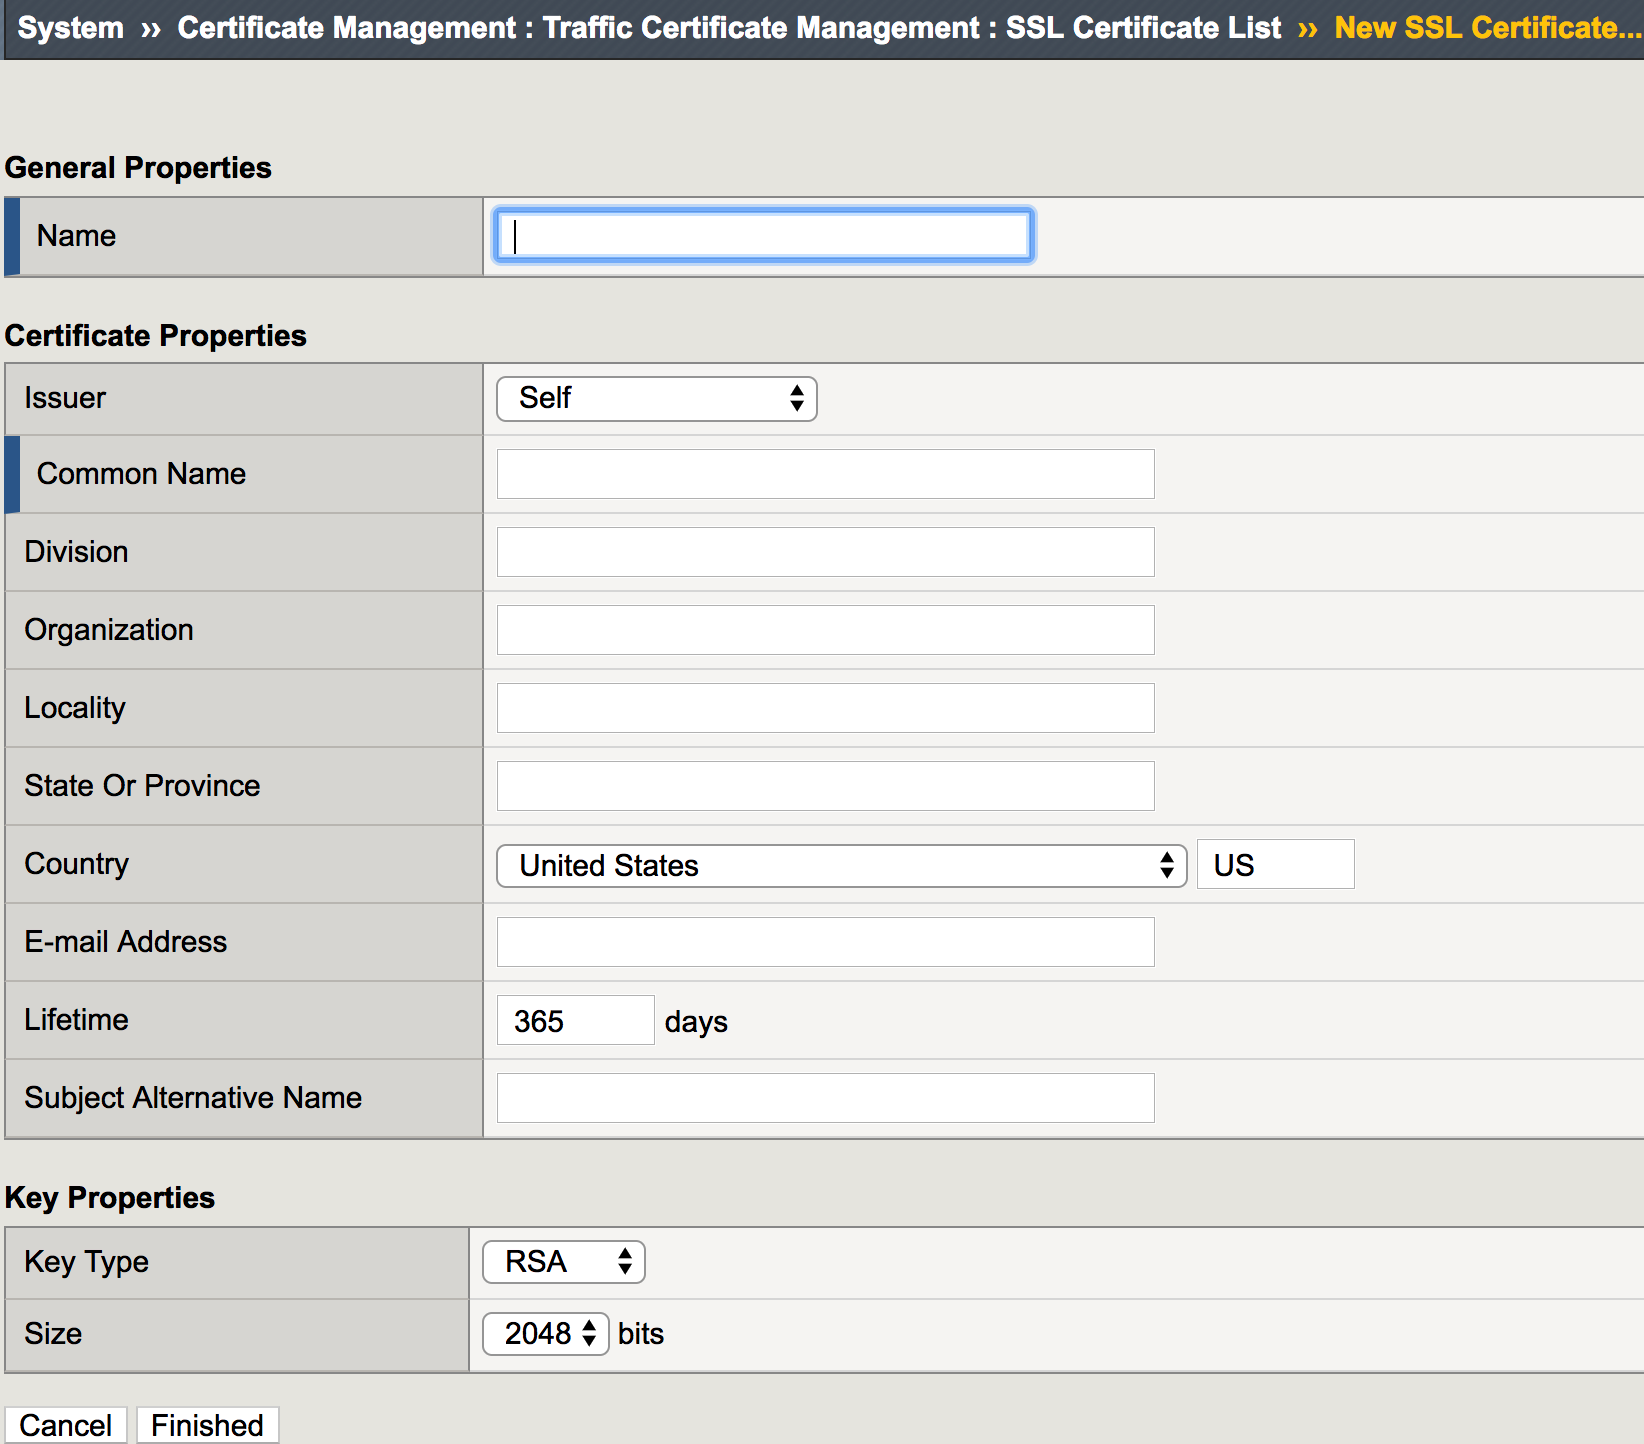
- Enter:
- Name: my-selfsigned-cert
- Issuer: Self
- Common Name: www.f5demo.com
- Fill out the rest any way you would like
- Enter:
Creating SSL Client Profile
Go to Local Traffic >> Profiles >> SSL >> Client menu and select Create
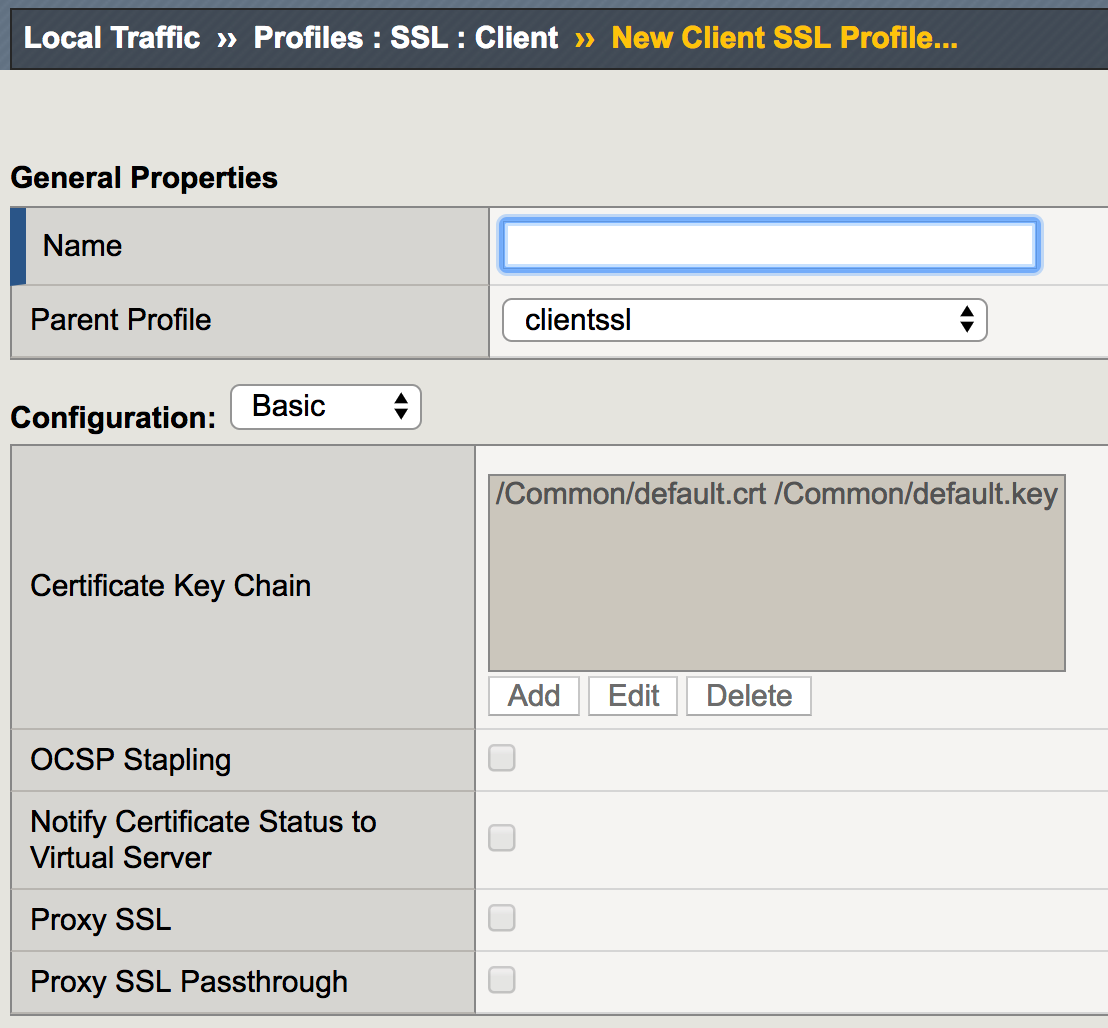
Under General Properties
- Name: my_clientssl_profile
Under Configuration in the Certificate Key Chain section, select the Custom box and hit Add
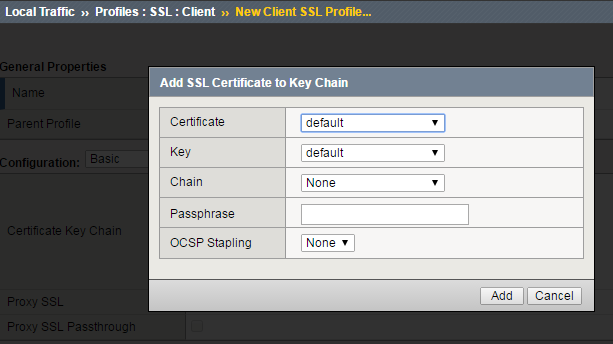
In the Add SSL Certificate to Key Chain pop-up select:
- Certificate: my-selfsigned-cert
- Key: my-selfsigned-cert
Select Add
Hit Finished.
Building our New Secure Virtual Server
- Go to Local Traffic >> Virtual Servers and hit the Create button or hit the “+” next to Virtual Servers
- Name: secure_vs
- Destination Address/Mask: 10.1.10.105
- Port: 443 or HTTPS
- SSL Profile (Client): my_clientssl_profile (the profile you just created)
- Source Address Translation: Auto Map (remember why we need this?)
- Default Pool: www_pool
- Default all other settings. (Notice you did not require an HTTP profile)
- Finish
- Test our secure server. Go to you secure_vs at
https://10.1.10.105
- If you want to watch member traffic, go to the www_pool and reset the statistics
- Browse to your secure virtual server
- What port did your pool members see traffic on?
Securing Web Applications with the HTTP profile
Let’s begin by creating a custom HTTP profile
Go to Local Traffic >> Profiles >> Services, select HTTP and create a new profile
Under General Properties
- Name: secure-my-website
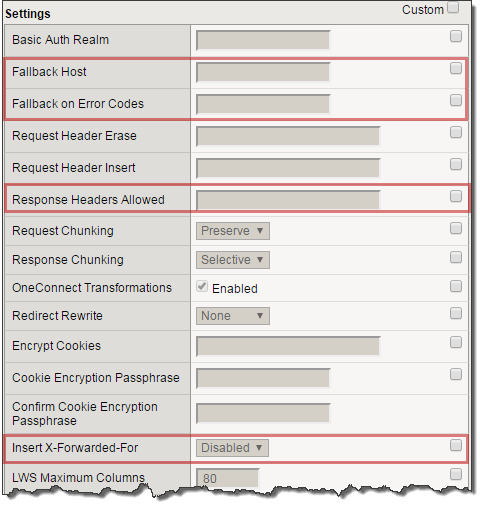
Under Settings:
Set the Fallback Host: http://10.1.1.252 (this will take you an internal site)
Fallback on Error Codes: 404 (fallback site if a 404 error is received)
Response Headers Allowed: Content-Type Set-Cookie Location
Insert XForwarded For: Enabled (because we talked about it earlier)
Attach your new HTTP Profile to your secure (HTTPS) virtual server
Browse to your secure virtual server.
- Do web pages appear normal?
- Now browse to a bad page
- For example,
- What is the result?
- For example,
- Go to the Request and Response Headers page. You should see a sanitized server response at the bottom of the web page and the original client IP address
- You can compare the headers by accessing your HTTP virtual server at http://10.1.10.100
- While you are looking at the headers, check for the X-Forwarded-For header received by the server
Note
Even though the data is encrypted between your browser and the virtual server, the LTM can still modify the data (i.e. resource cloaking) because the data is unencrypted and decompressed within TMOS
Archive your work in a file called: lab5_security