F5 Application Study Tool Labs > Class 1: Introduction to F5 Application Study Tool > Module 2: Installing, Configuring, Updating, and Accessing the F5 AST Source | Edit on
Lab 3 - Reviewing, Updating, and Accessing the Pre-Installed F5 AST Instance
Attention
Some platforms may require the Shift key in conjunction with standard copy/paste key combinations when interacting with the Web Shell
For example, use Shift + Ctrl + v to paste instead of Ctrl + v
Environment Variables
Navigate to the Application Study Tool component with the UDF lab, then select Access and Web Shell.
Change over to the
application-study-toolrepo’s root directory:cd /home/ubuntu/pre-built/application-study-toolInspect the F5 AST environment variables by running the following commands:
more .envmore .env.device-secrets
Note
The environment and configuration files contain documentation tidbits to aid the setup and tuning process
F5 AST Configuration Setting Files
Browse the F5 AST default configuration by running the following command:
more config/ast_defaults.yamlHere’s an excerpt from the
ast_defaults.yamlfile:# These configs are applied to each entry in the bigip_receivers file # where they don't contain an equivalent / overriding entry. bigip_receiver_defaults: # The time to wait between metric collection runs collection_interval: 60s # The username to login to the device with username: admin # The password (not recommended) or a reference to an env variable (recommended, shown) # Below tells the collector to look for an environment variable named BIGIP_PASSWORD_1 password: "${env:BIGIP_PASSWORD_1}" # The timeout field can be used to adjust the maximum amount of time the collector will wait for a response # to BigIP iControl Rest requests. Larger boxes with more complex config may require setting this value # higher. # This value should be less than or equal to the collection_interval. Any requests that haven't completed # before this timer expires (starting at the beginning of the collection interval) will be cancelled. # You can set this for individual devices in bigip_receivers.yaml. timeout: 60s # The data_types that should be enabled or disabled. Default-disabled module users can enable those modules # by setting the below to true. These will apply to all devices and may be better specified on the # per-reciever settings file. data_types: f5.apm: enabled: false f5.cgnat: enabled: false f5.dns: enabled: false f5.dos: enabled: false f5.firewall: enabled: false f5.gtm: enabled: false # The TLS settings to use. Either a CA file must be specified or insecure_skip_verify # set to true (not recommended) tls: insecure_skip_verify: false ca_file: "" # Set to true to enable periodic metric export to F5 DataFabric. # Requires adding your Sensor ID and secret token to the container environment (see .env-example). # Contact your F5 sales rep to obtain the ID / secret token. f5_data_export: falseThis file contains configuration parameters for both the F5 AST itself and the devices subject to data collection. As the name implies, default settings for device collection can be set here.
Take a look at the value for
password. It’s referencing an environment variable – one which has been defined in the.env.device-secretswe reviewed in the previous step.Note
Default device settings can be overridden by individual device configurations in the
config/bigip_receivers.yamlfile.As mentioned at the end of Lab 1 - Accessing and Using the GitHub Repository, we need to add a new BIG-IP instance for data scraping:
West Region - bigip-01 (10.1.1.7).First, inspect the
config/bigip_receivers.yamlfile with the following command:more config/bigip_receivers.yamlHere’s the configuration for
Central Region - bigip-01 (10.1.1.5):# Your bigip targets # Values not explicitly configured here inherit values in # the ast_defaults.yaml bigip_receiver_defaults section. # Each entry must have a unique name, starting with bigip/ # (e.g. bigip/1, bigip/2) bigip/1: # Endpoint must be specified for each device # Set this to the management IP for the device. This must be # reachable from the Application Study Tool host (port 443). endpoint: https://10.1.1.5 ## Uncommenting any of the following lines will override the defaults in ## ast_defaults.yaml bigip_receiver_defaults section. # username: SOME_OVERRIDE_ACCOUNT_NAME # password: "${SOME_OTHER_ENV_VAR_WITH_ANOTHER_PASSWORD}" # collection_interval: 30s # timeout: 20s data_types: f5.apm: enabled: true f5.cgnat: enabled: true f5.dns: enabled: true f5.dos: enabled: true f5.firewall: enabled: true f5.gtm: enabled: true f5.policy.api_protection: enabled: false f5.policy.asm: enabled: true f5.policy.firewall: enabled: false f5.policy.ip_intelligence: enabled: false f5.policy.nat: enabled: false f5.profile.dos: enabled: false tls: insecure_skip_verify: true # ca_file:
Notice how the configuration for this BIG-IP consists of the endpoint (management) IP address and the data_types (modules) enabled/disabled for collection. Its authentication settings are inherited from the
ast_defaults.yamlfile.Upon further examination of the default configuration, the inline documentation makes understanding the settings and options an achievable task.
Now that we’ve become familiar with the configuration settings, it’s time to add a new BIG-IP section to the yaml file.
Open
bigip_receivers.yamlfor editing usingvim(or another editor of your choosing):sudo vim config/bigip_receivers.yamlIn order to preserve the formatting of multi-line copy/paste with vim, we need to set paste by copy/pasting the following into vim and pressing
return.:set pasteNote
It will appear as though nothing has occurred. This is expected behavior.
While in vim, press
Shift+Gto take your cursor to the bottom line. Next, typeoto create a new line and enter insert mode.Now, copy the following and paste it into the editor:
bigip/3:
  endpoint: https://10.1.1.7
  data_types:
    f5.apm:
      enabled: true
    f5.cgnat:
      enabled: true
    f5.dns:
      enabled: true
    f5.dos:
      enabled: true
    f5.firewall:
      enabled: true
    f5.gtm:
      enabled: true
    f5.policy.api_protection:
      enabled: false
    f5.policy.asm:
      enabled: false
    f5.policy.firewall:
      enabled: false
    f5.policy.ip_intelligence:
      enabled: false
    f5.policy.nat:
      enabled: false
    f5.profile.dos:
      enabled: false
  tls:
    insecure_skip_verify: true
    # ca_file:
To save your changes, press
escape, then type:wqandreturn. You should see a message similar to the following upon successful save:"config/bigip_receivers.yaml" 37L, 768B written
F5 AST Configuration Helper
Once the bigip_receivers.yaml file has been updated, you must run the configuration helper script. This processes the changes made and updates the OTel collector’s embedded yaml configuration files, as we will soon see.
The following command must be run from the f5-application-study repo root directory,
/home/ubuntu/pre-built/application-study-toolsudo docker run --rm -it -w /app -v ${PWD}:/app --entrypoint /app/src/bin/init_entrypoint.sh python:3.12.6-slim-bookworm --generate-configOutput ending with the following two lines indicates the configuration was successfully generated.
2025-02-13 00:04:36,530 - INFO - Successfully wrote data to './services/otel_collector/pipelines.yaml'.
2025-02-13 00:04:36,533 - INFO - Successfully wrote data to './services/otel_collector/receivers.yaml'.
Restart the OTel Custom Collector container:
sudo docker-compose restart otel-collector
Updating F5 AST
Let’s check the AST OTel collector version by examining the docker-compose.yaml file, which resides in the repo root directory. The version running in this lab’s corresponding UDF environment may not always be up-to-date, given F5 AST’s rapid, iterative development cycle.
Review the
docker-compose.yamlfile:more docker-compose.yamlPress
spaceuntil the entire file contents are revealed. Notice theotel-collectorsection and theimageproperty therein.otel-collector: image: ghcr.io/f5devcentral/application-study-tool/otel_custom_collector:v0.9.2
This particular output reveals
v0.9.2of the OTel Custom Collector. If that version is lower than what’s listed on the f5devcentral / application-study-tool Releases board, perform the following steps. Otherwise, you’re ready and free to roll on to Accessing Pre-Installed F5 AST.Since local changes have been made to files which are actively tracked for changes in the repo, such as
.env.device-secretsandconfig/bigip_receivers.yaml, we must stash away those changes prior to performing agit pull. Stashing simply sets them aside temporarily. We’ll reincorporate them after pulling the latest code from GitHub.sudo git stashFetch the most up-to-date list of tags from the repo. Without this step, the subsequent
git checkoutcommand in Step 5 will fail.sudo git fetch --tagsPull new code from the GitHub repo:
sudo git pull origin mainSet the git branch to the most recent version:
sudo git checkout tags/v0.9.2Undo the
git stashaction, bringing our local changes back where they need to be:sudo git stash popRun the F5 AST Configuration Helper:
sudo docker run --rm -it -w /app -v ${PWD}:/app --entrypoint /app/src/bin/init_entrypoint.sh python:3.12.6-slim-bookworm --generate-configRestart the OTel Custom Collector container:
sudo docker-compose down && sudo docker-compose up -d
That’s it! The upgrade process should be seamless and good to go.
Accessing Pre-Installed F5 AST
Here’s where our boots hit the ground and the real adventure begins!
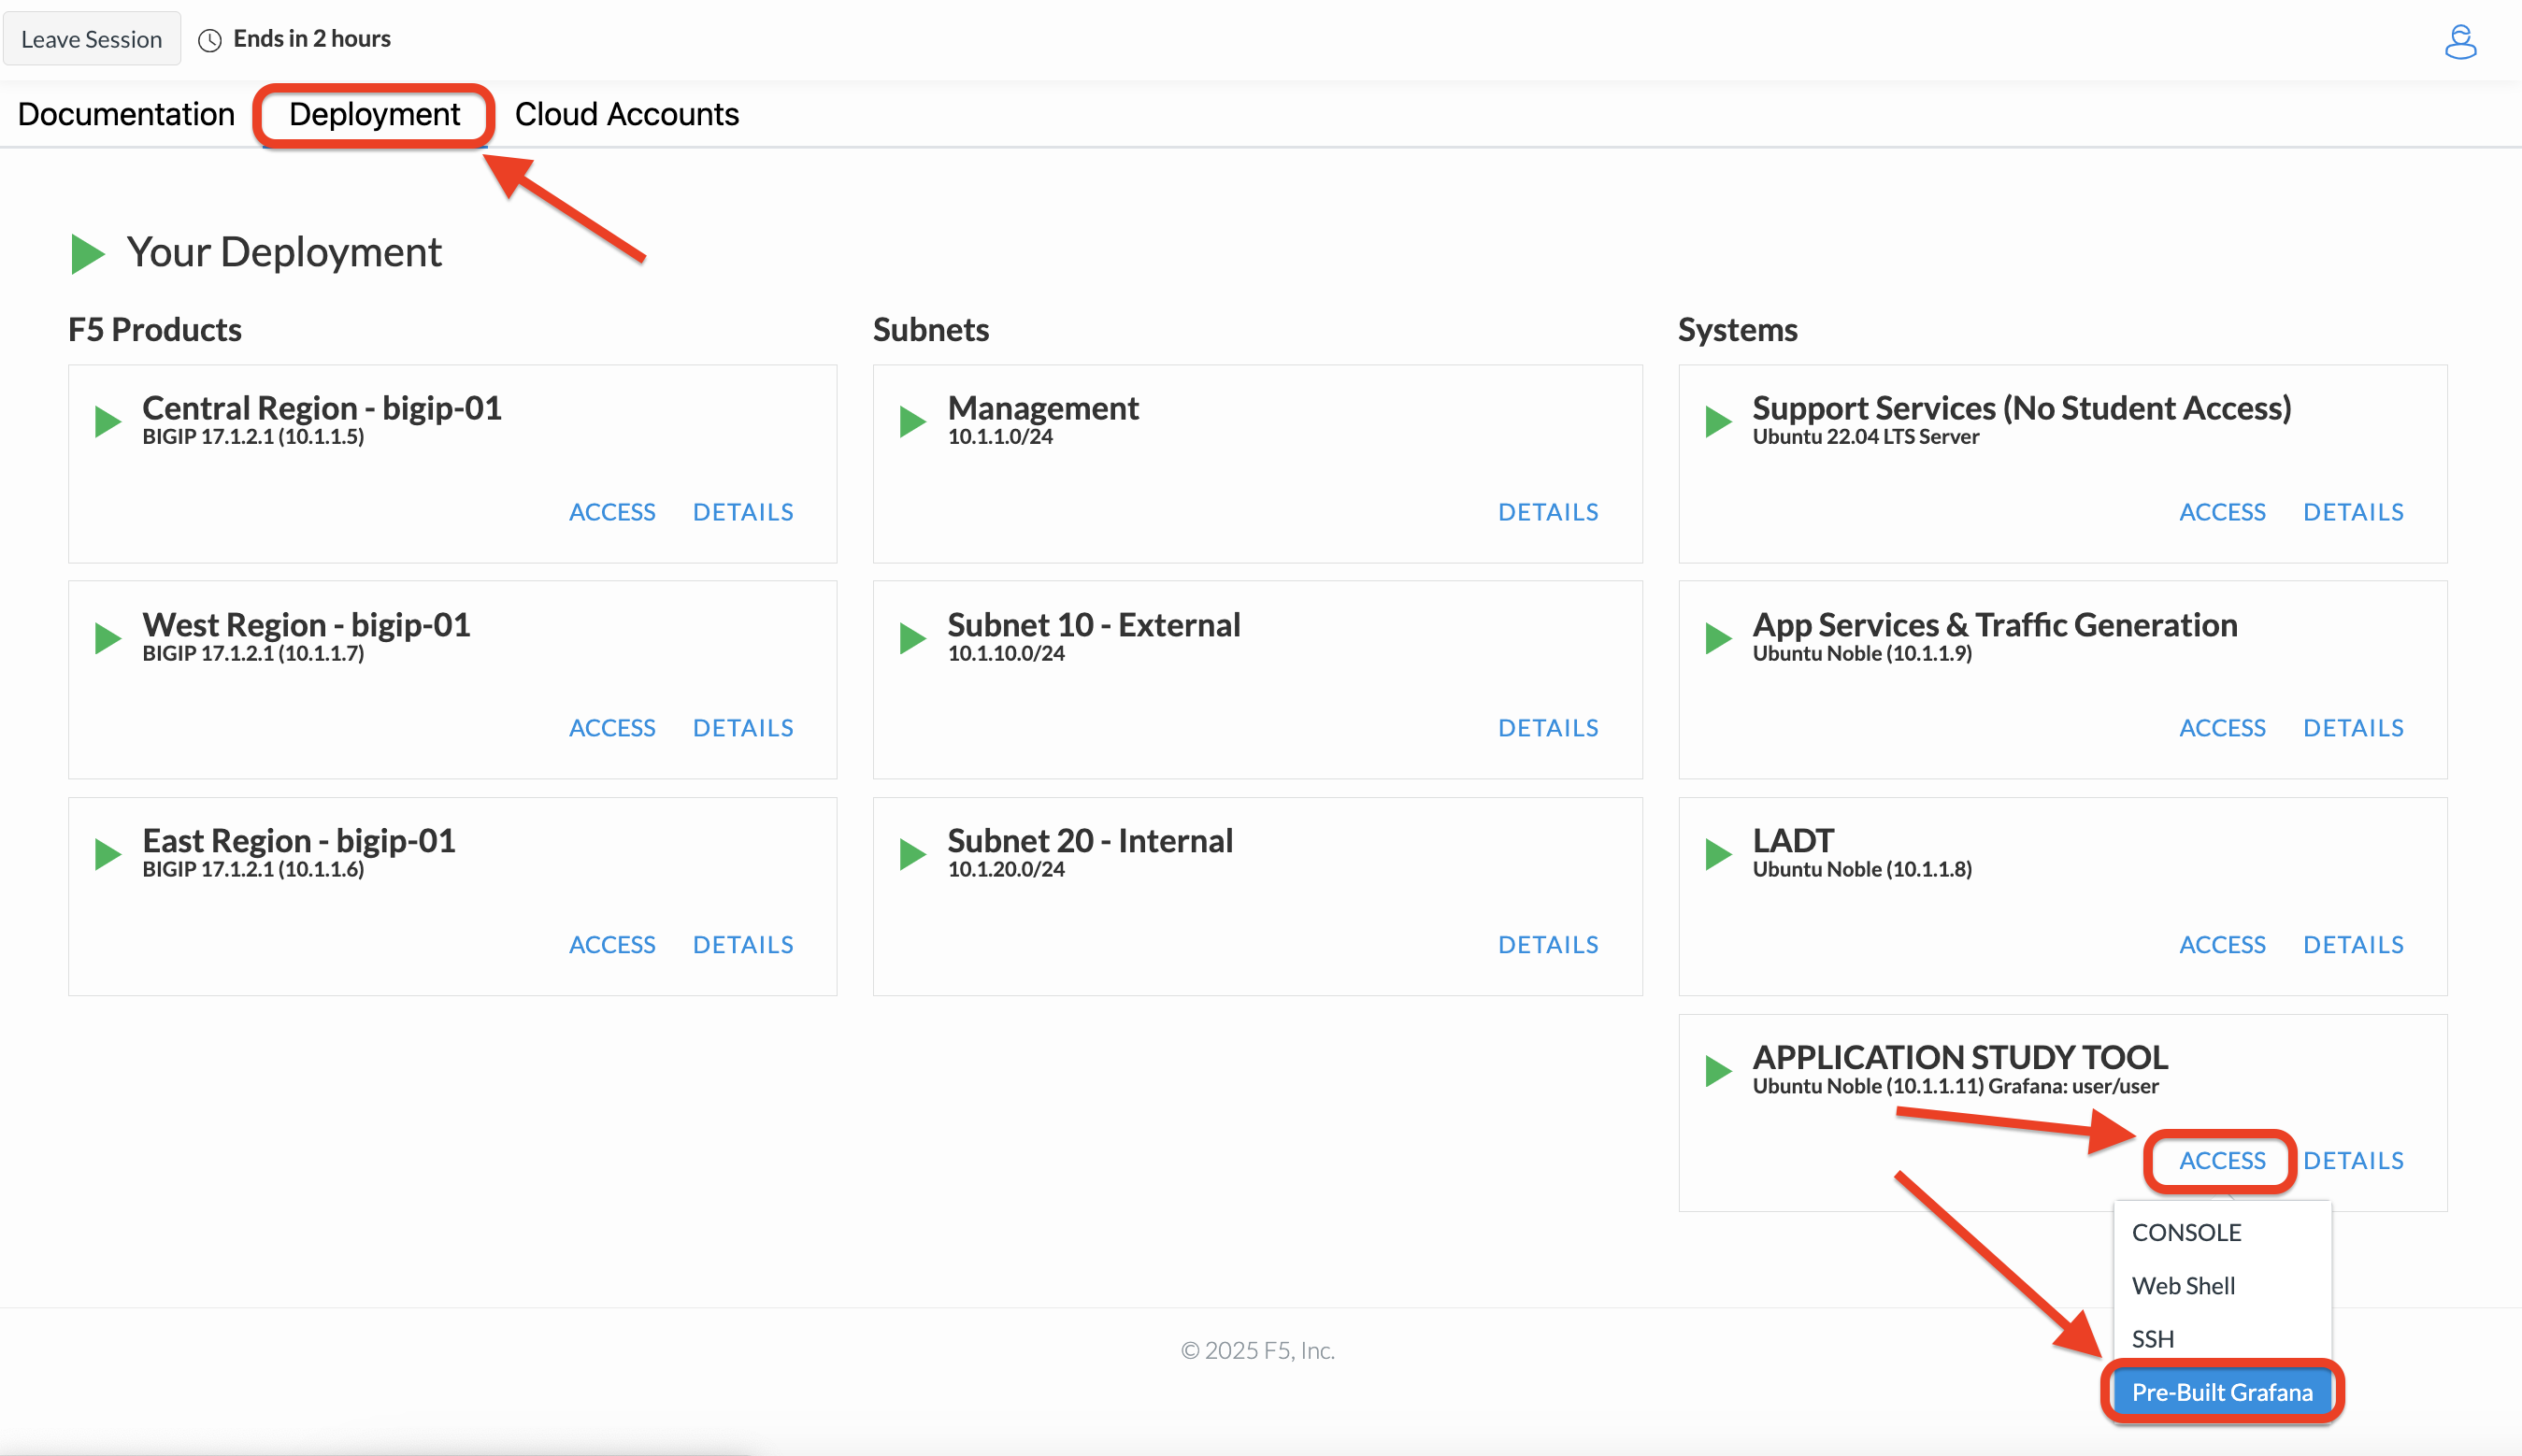
From within the UDF course deployment’s Application Study Tool System, locate and select ACCESS, then Pre-Built Grafana.
Once the new browser tab has loaded, you will be presented with the pre-built AST Grafana login. Enter the following credentials and select Log in.
Username
userPassword
user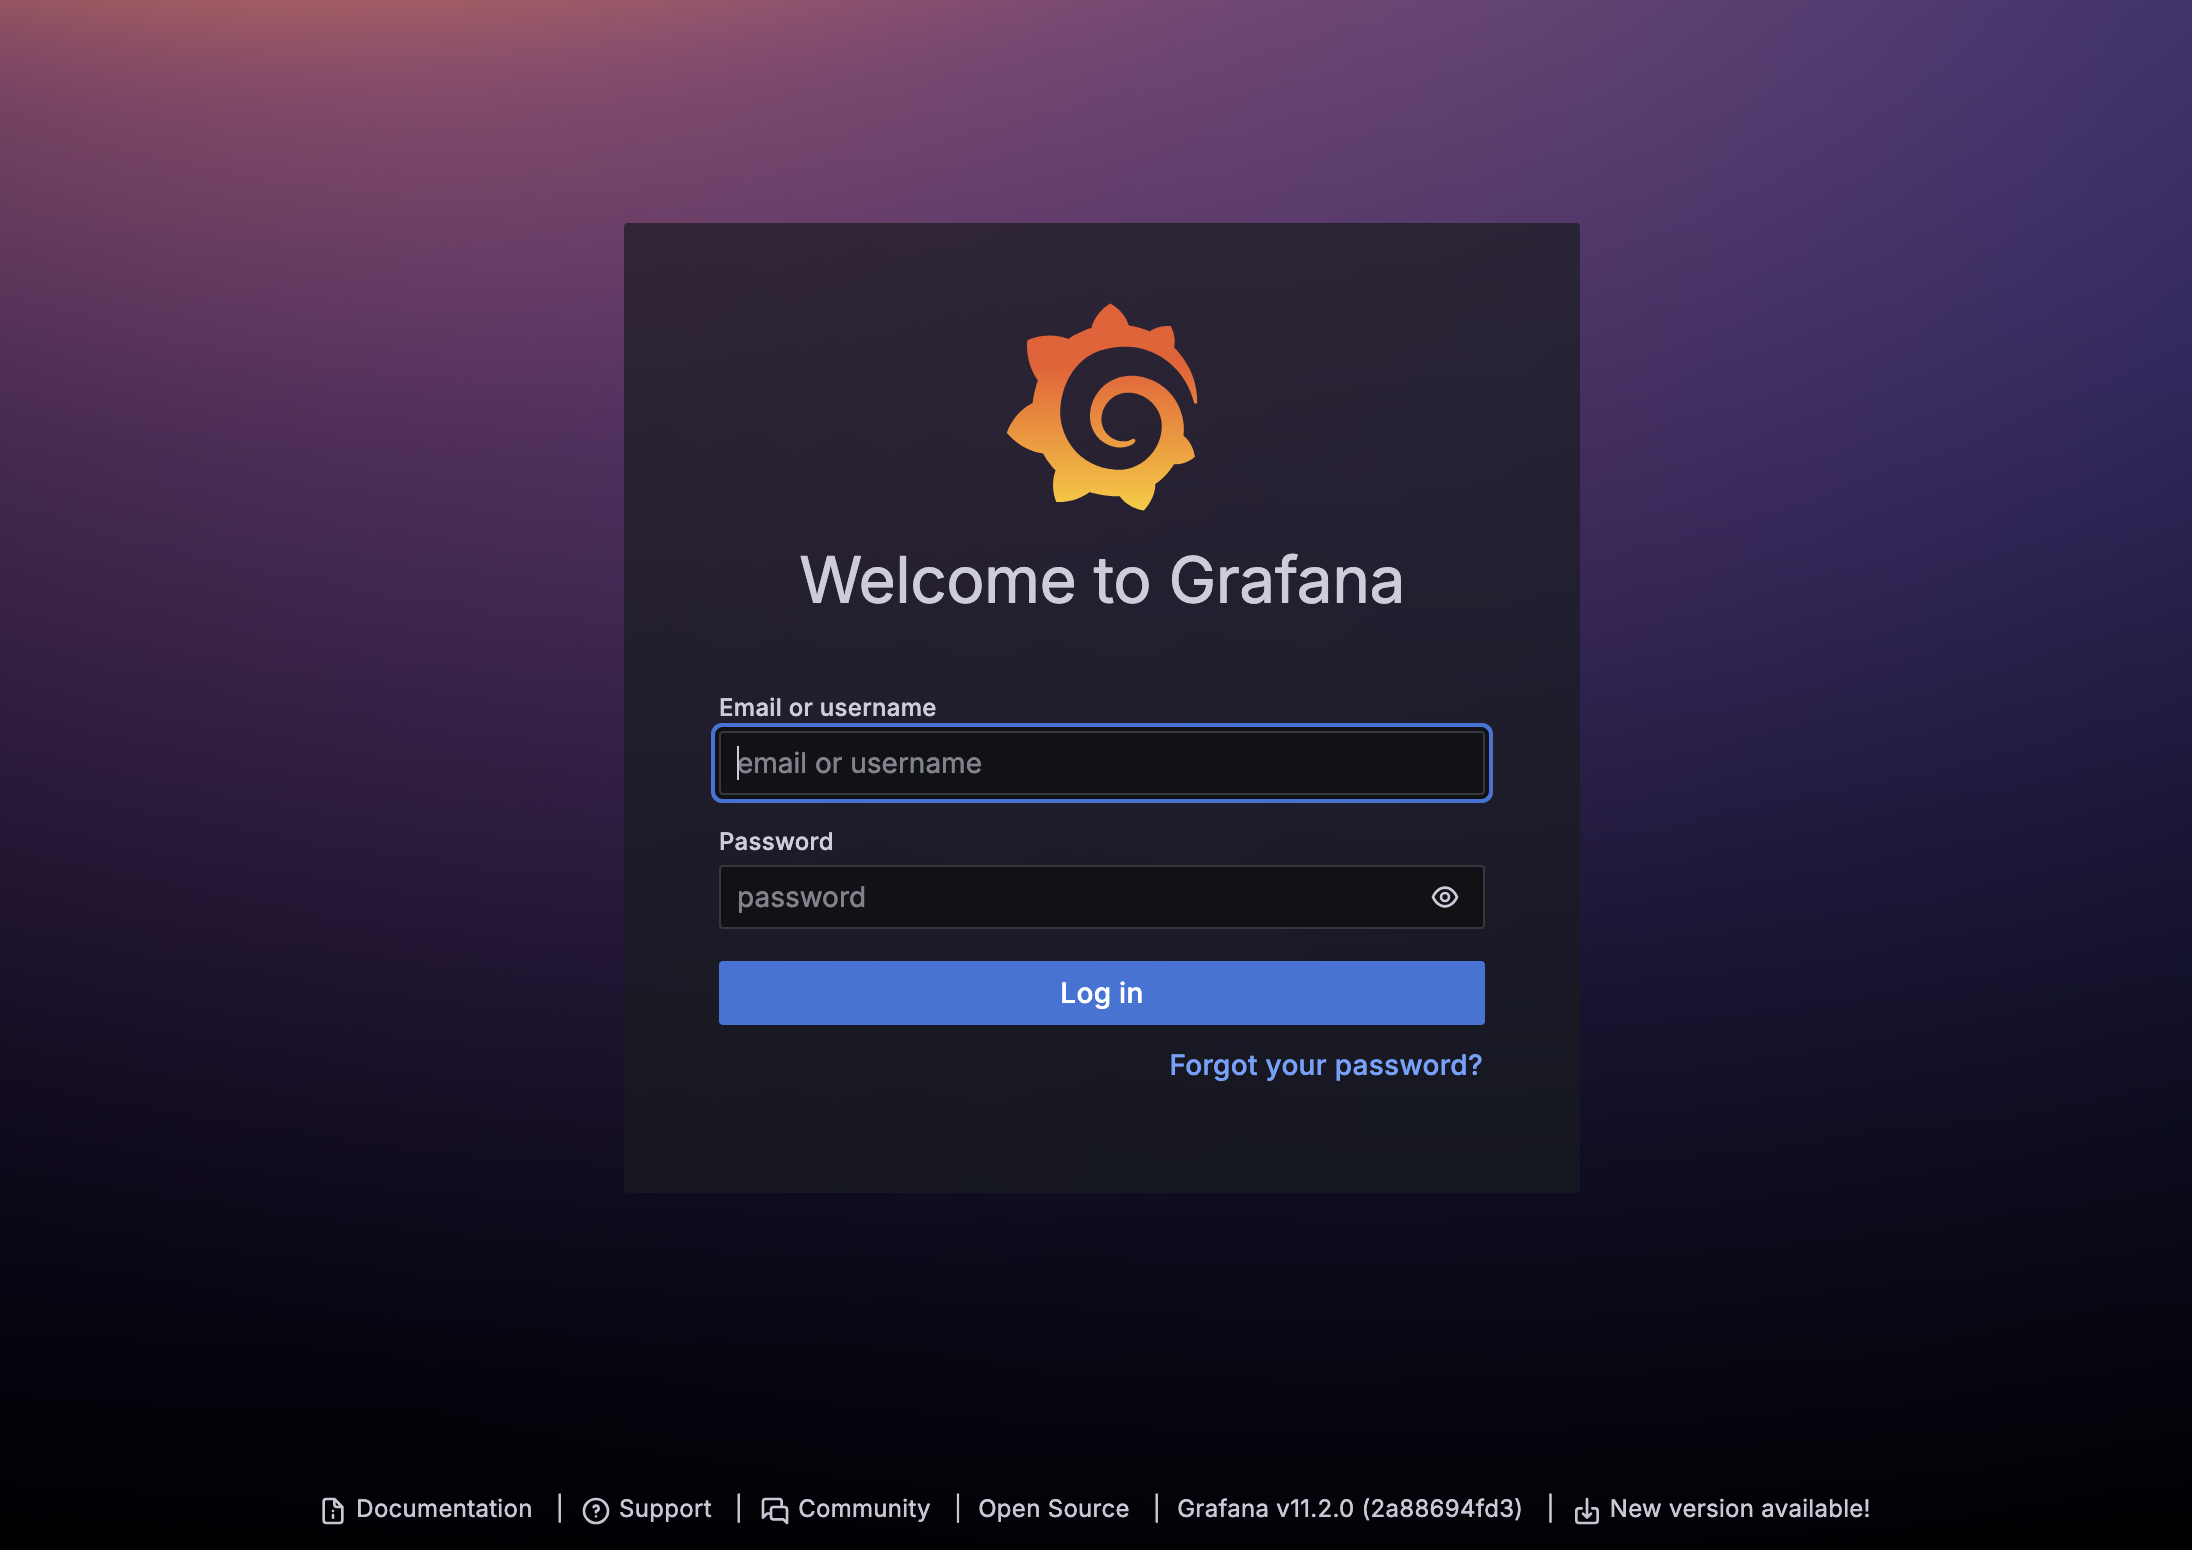
Although you won’t see the internal, local URL, the pre-built F5 AST Grafana dashboard is exposed via:
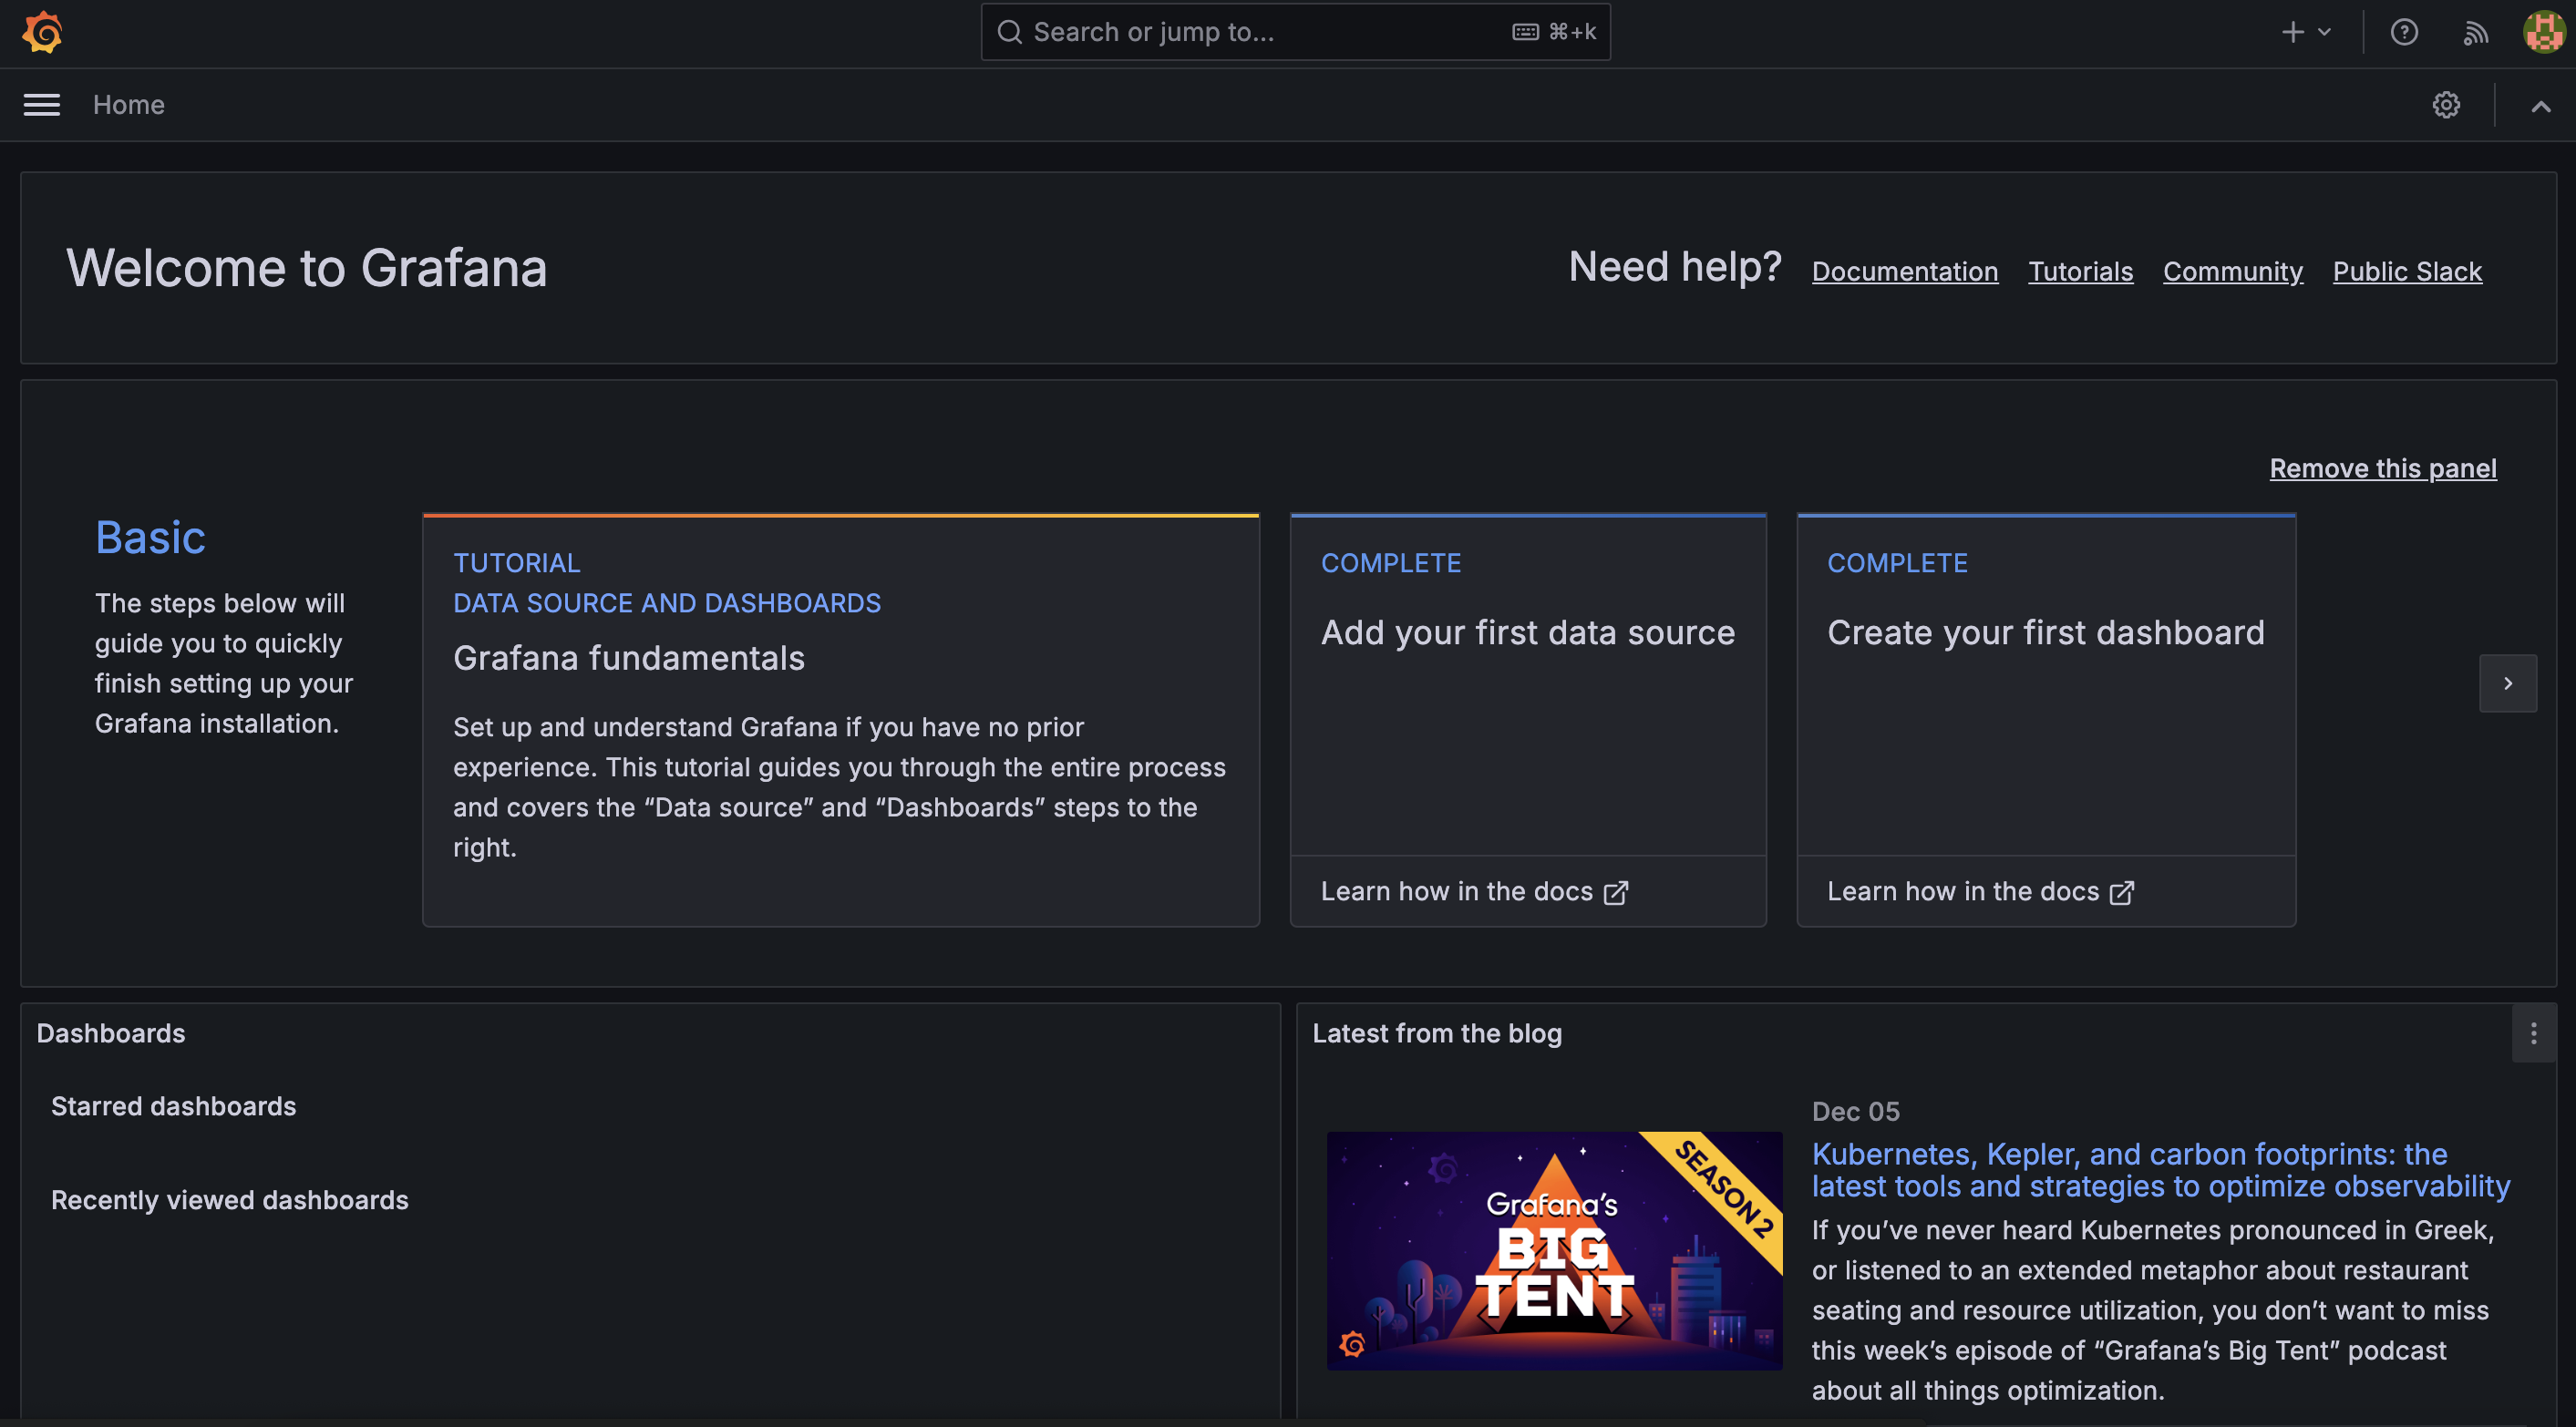
http://10.1.1.11:3000/dashboardsNext, you’ll be presented with the Grafana homepage. From here, select the menu button next to Home, then Dashboards.
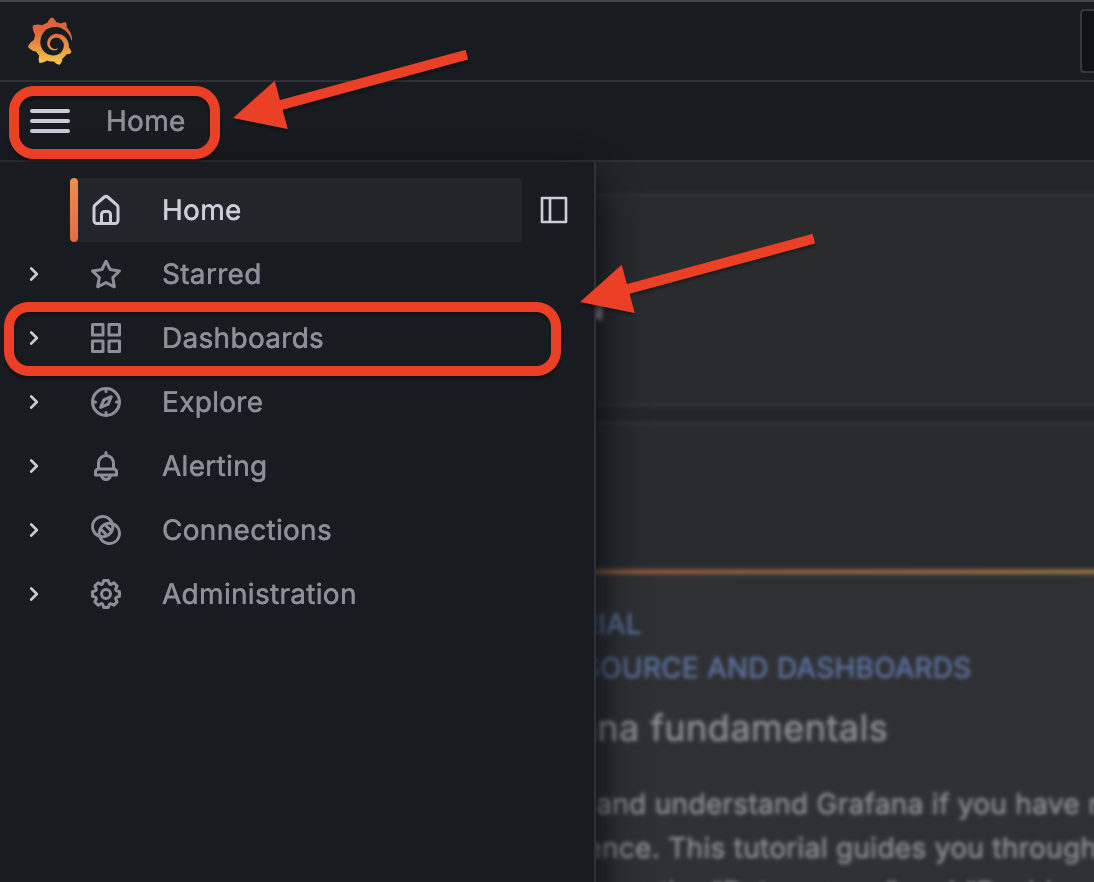
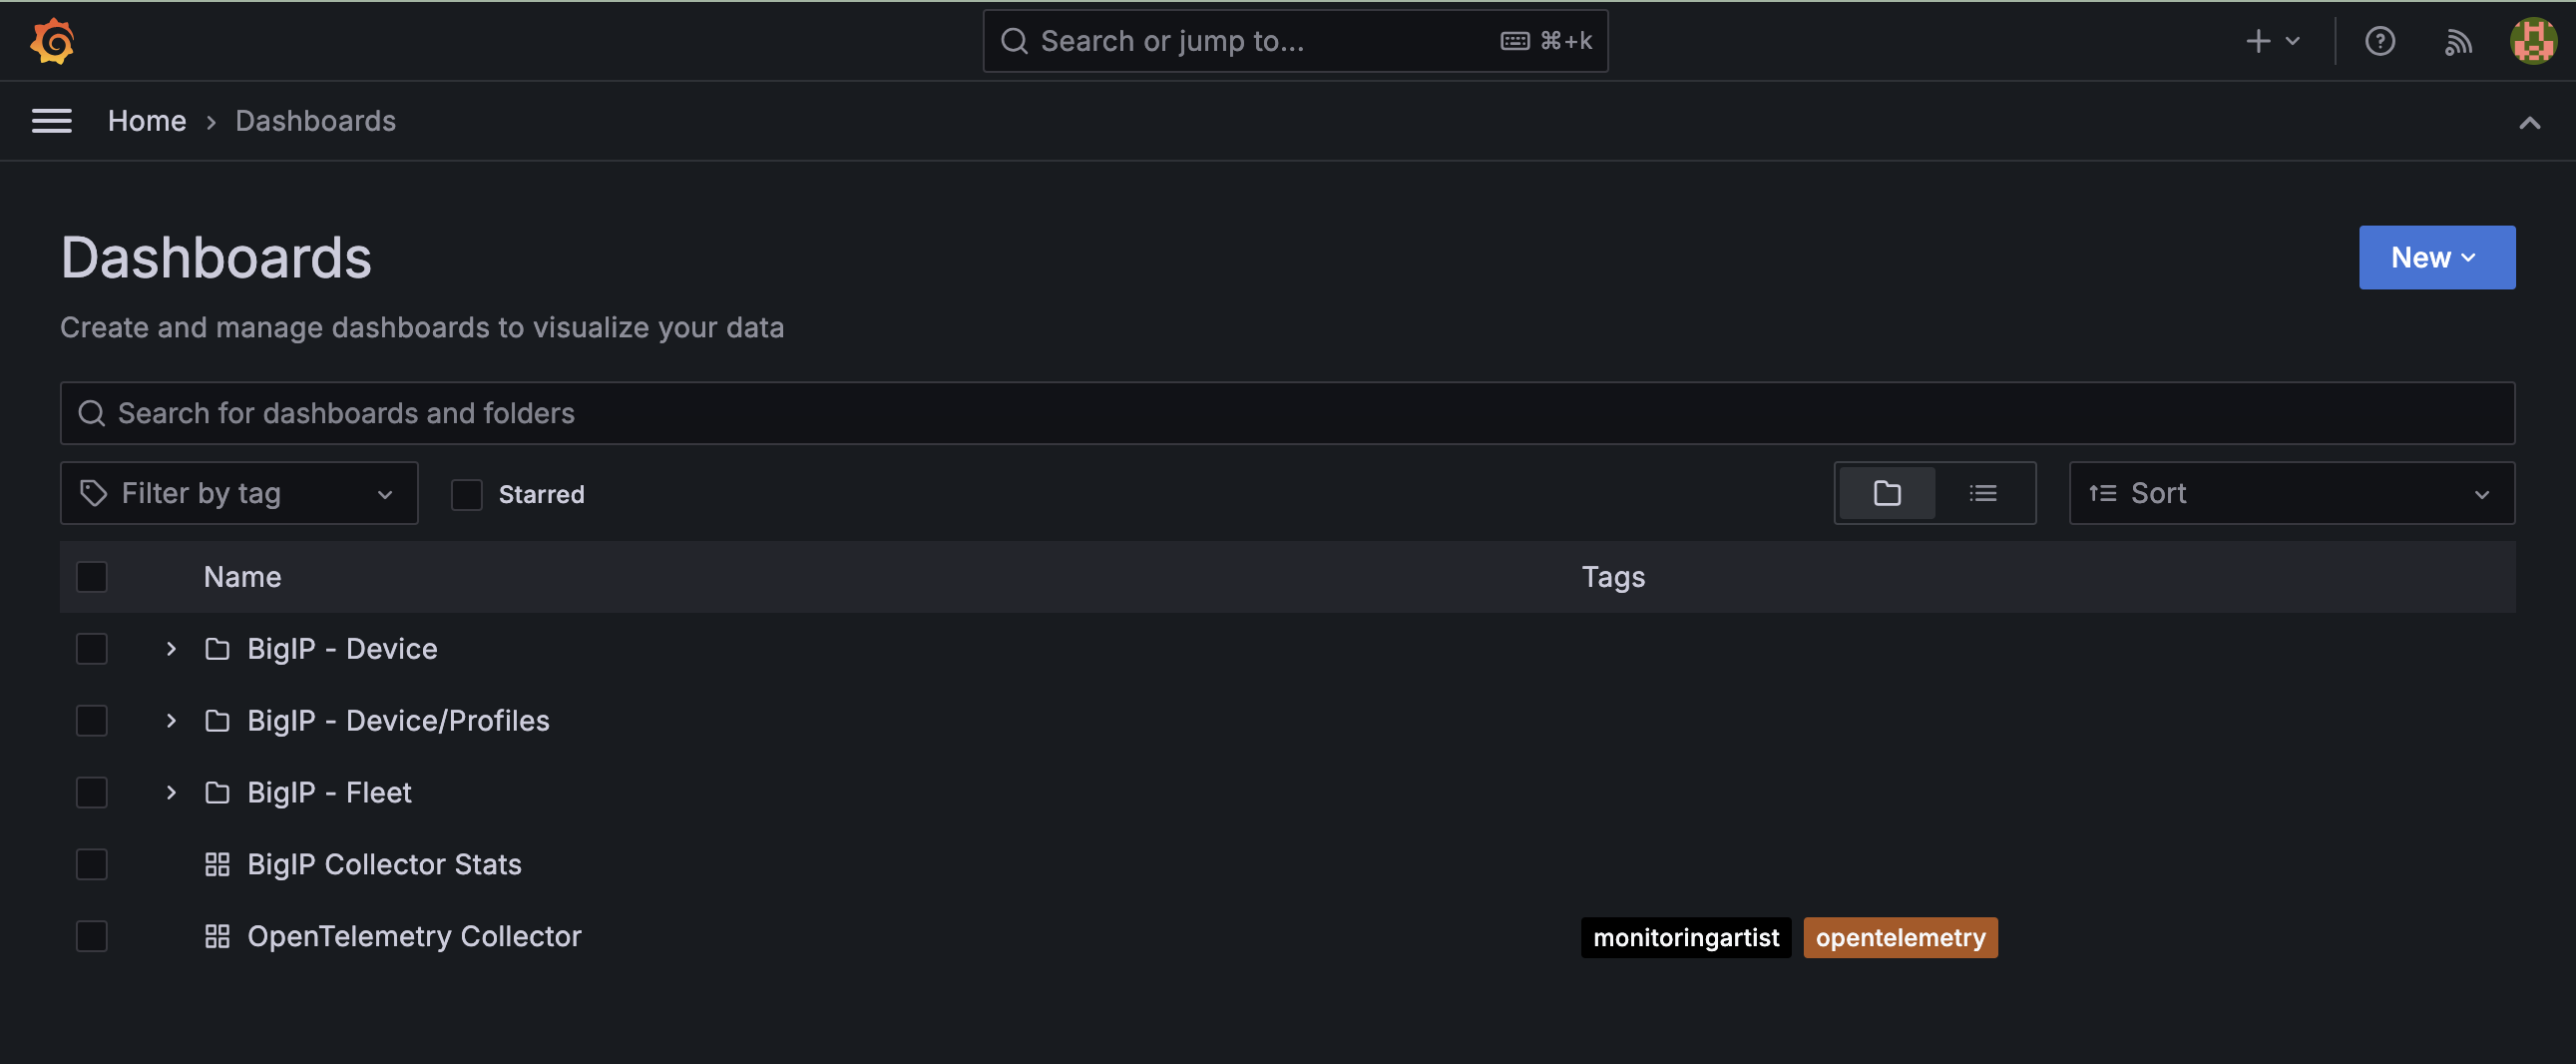
The Dashboards landing page presents users with a couple standalone dashboards and a few collections of dashboards, per the image below.
In the next module you will learn about all of the available pre-packaged dashboards. The door’s open for you to step in and take a look around the F5 Application Study Tool!
Please select Next below and continue on to Module 3: Exploring the F5 AST Dashboards