F5 BIG-IQ Centralized Management Lab > BIG-IQ Test Drive Labs Source | Edit on
Lab 6.2: HTTP Analytics Profile Creation for Legacy Applications
Note
Estimated time to complete: 10 minutes
In this lab, David is going to create an HTTP analytics profile and attach it to the VIP for the legacy application you just created. This will enable the BIG-IP to send HTTP analytics to the BIG-IQ and populate the dashboard.
Lab environment access
If you have not yet visited the page Getting Started, please do so.
Tasks
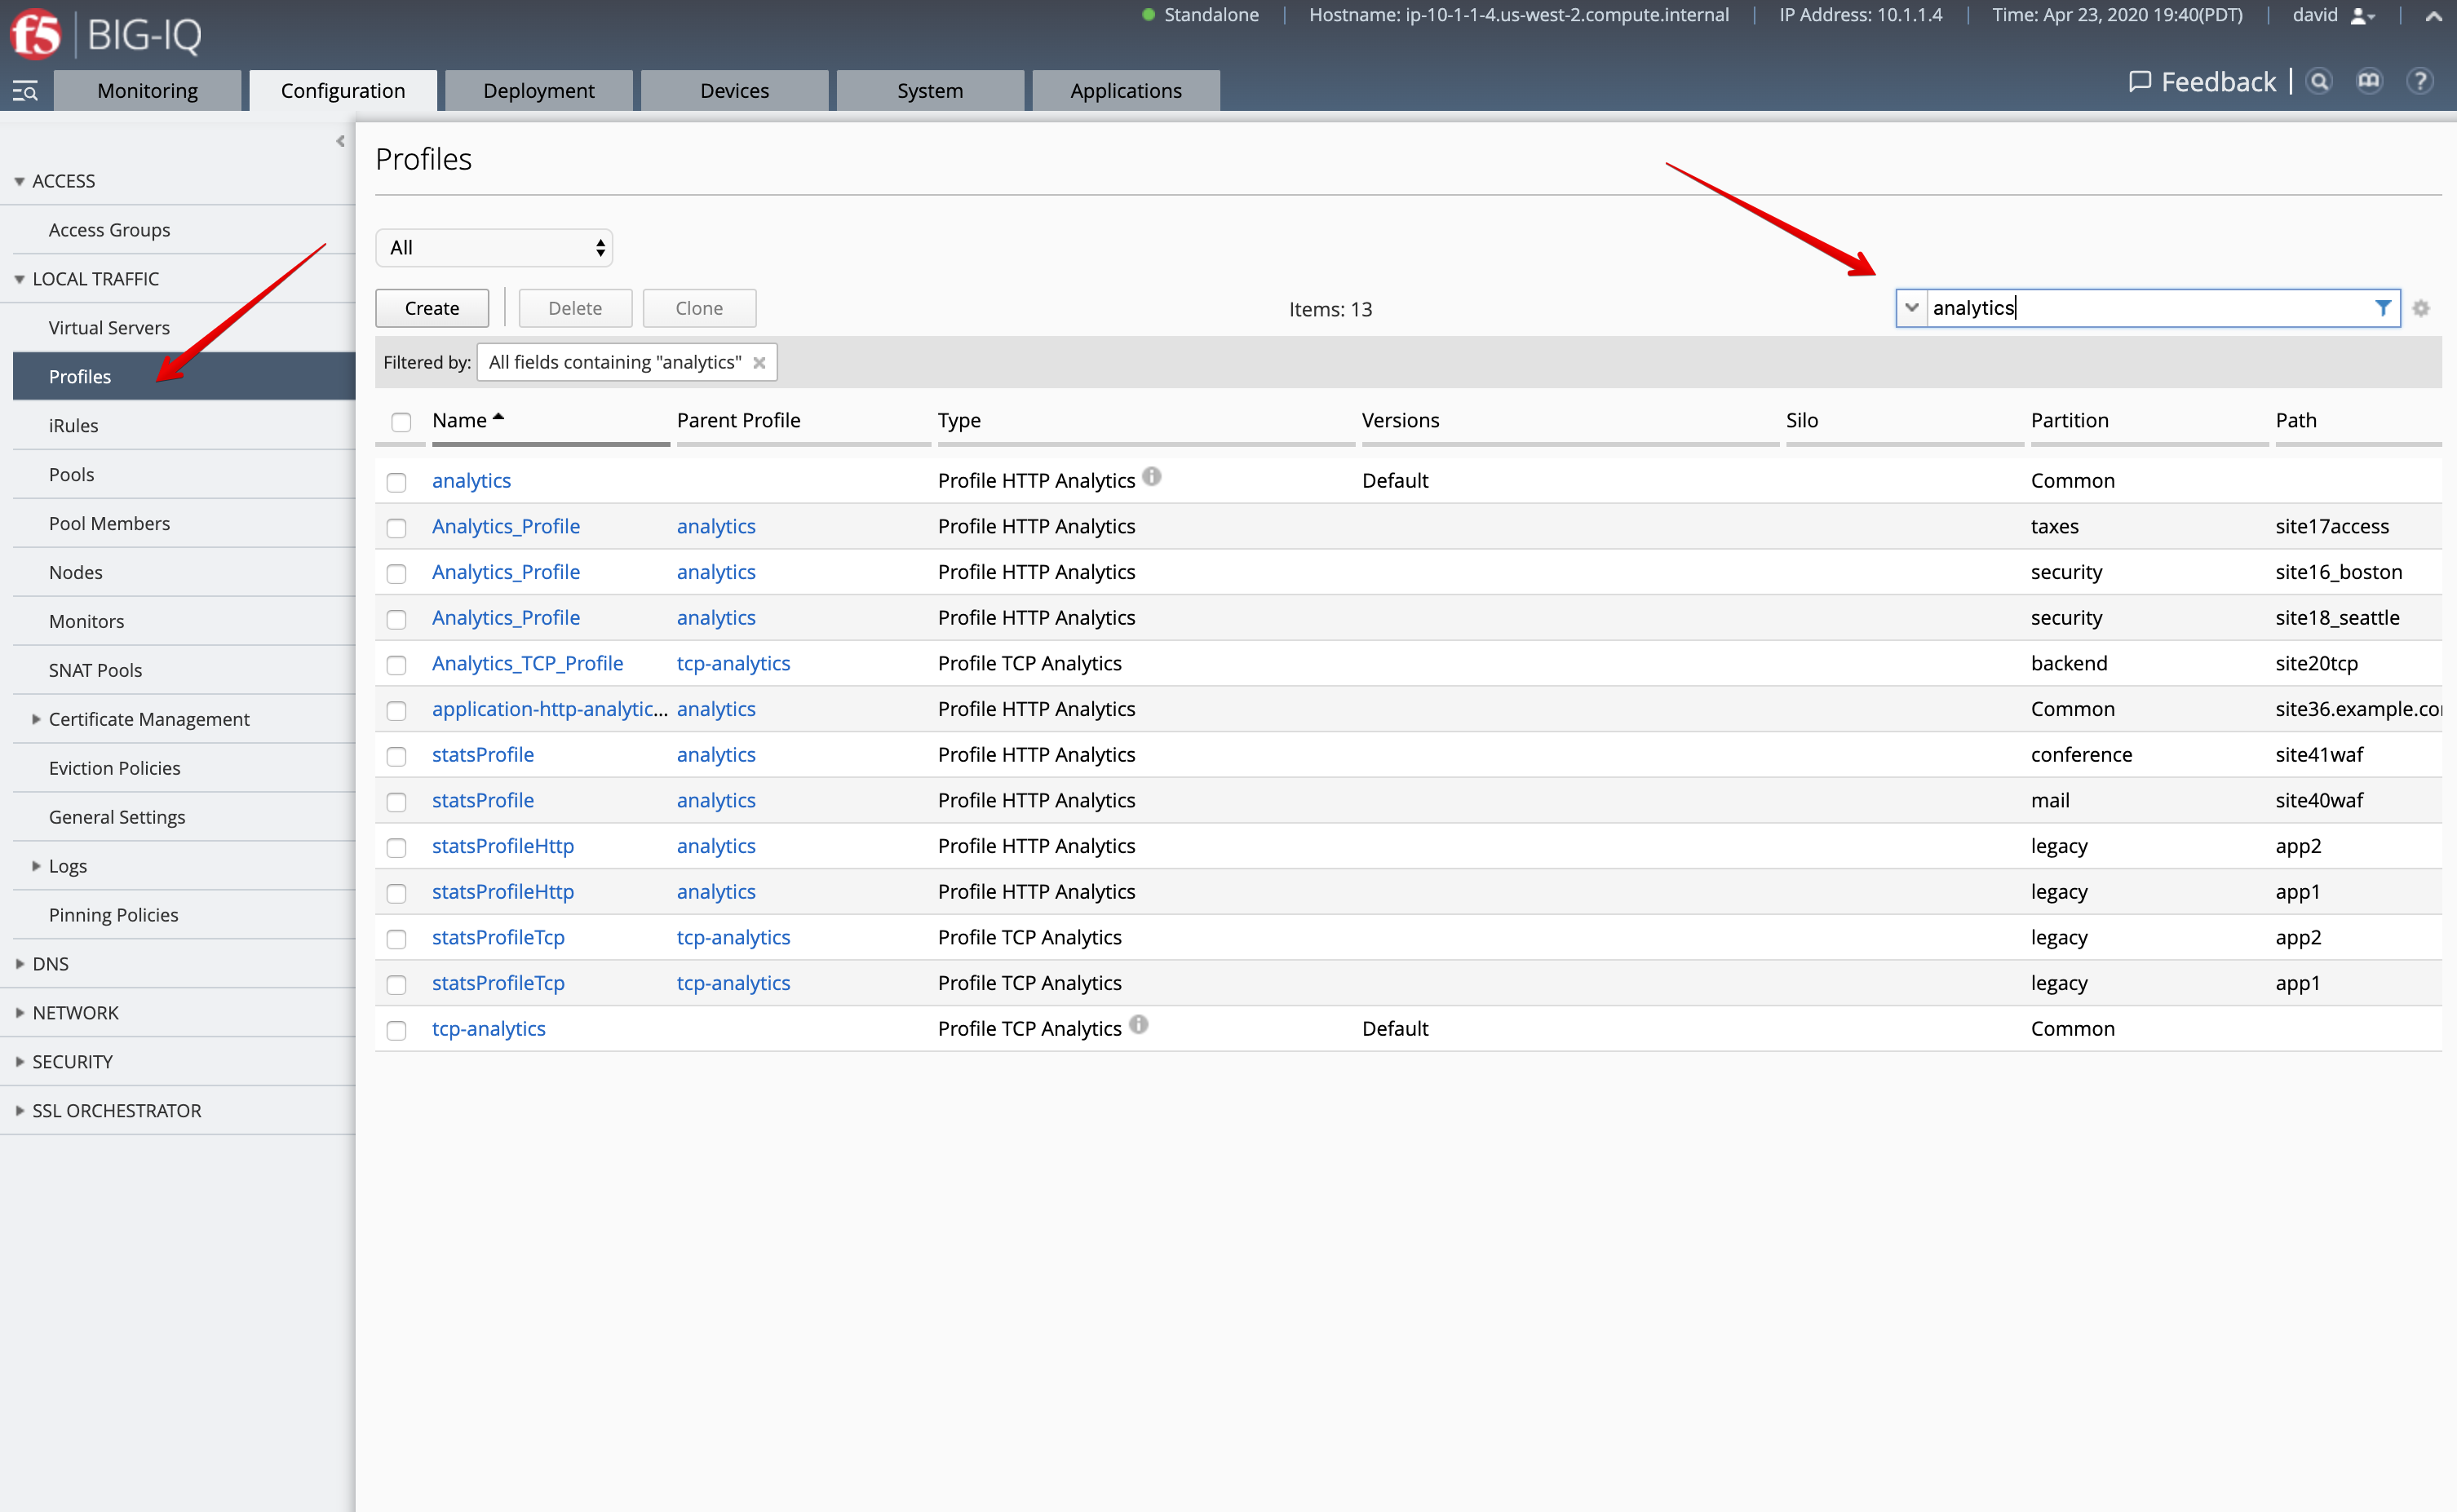
- Go to Configuration > Local Traffic > Profiles and look at all existing analytics profiles available in this BIG-IQ. You can use the filter to look for a specific profile.
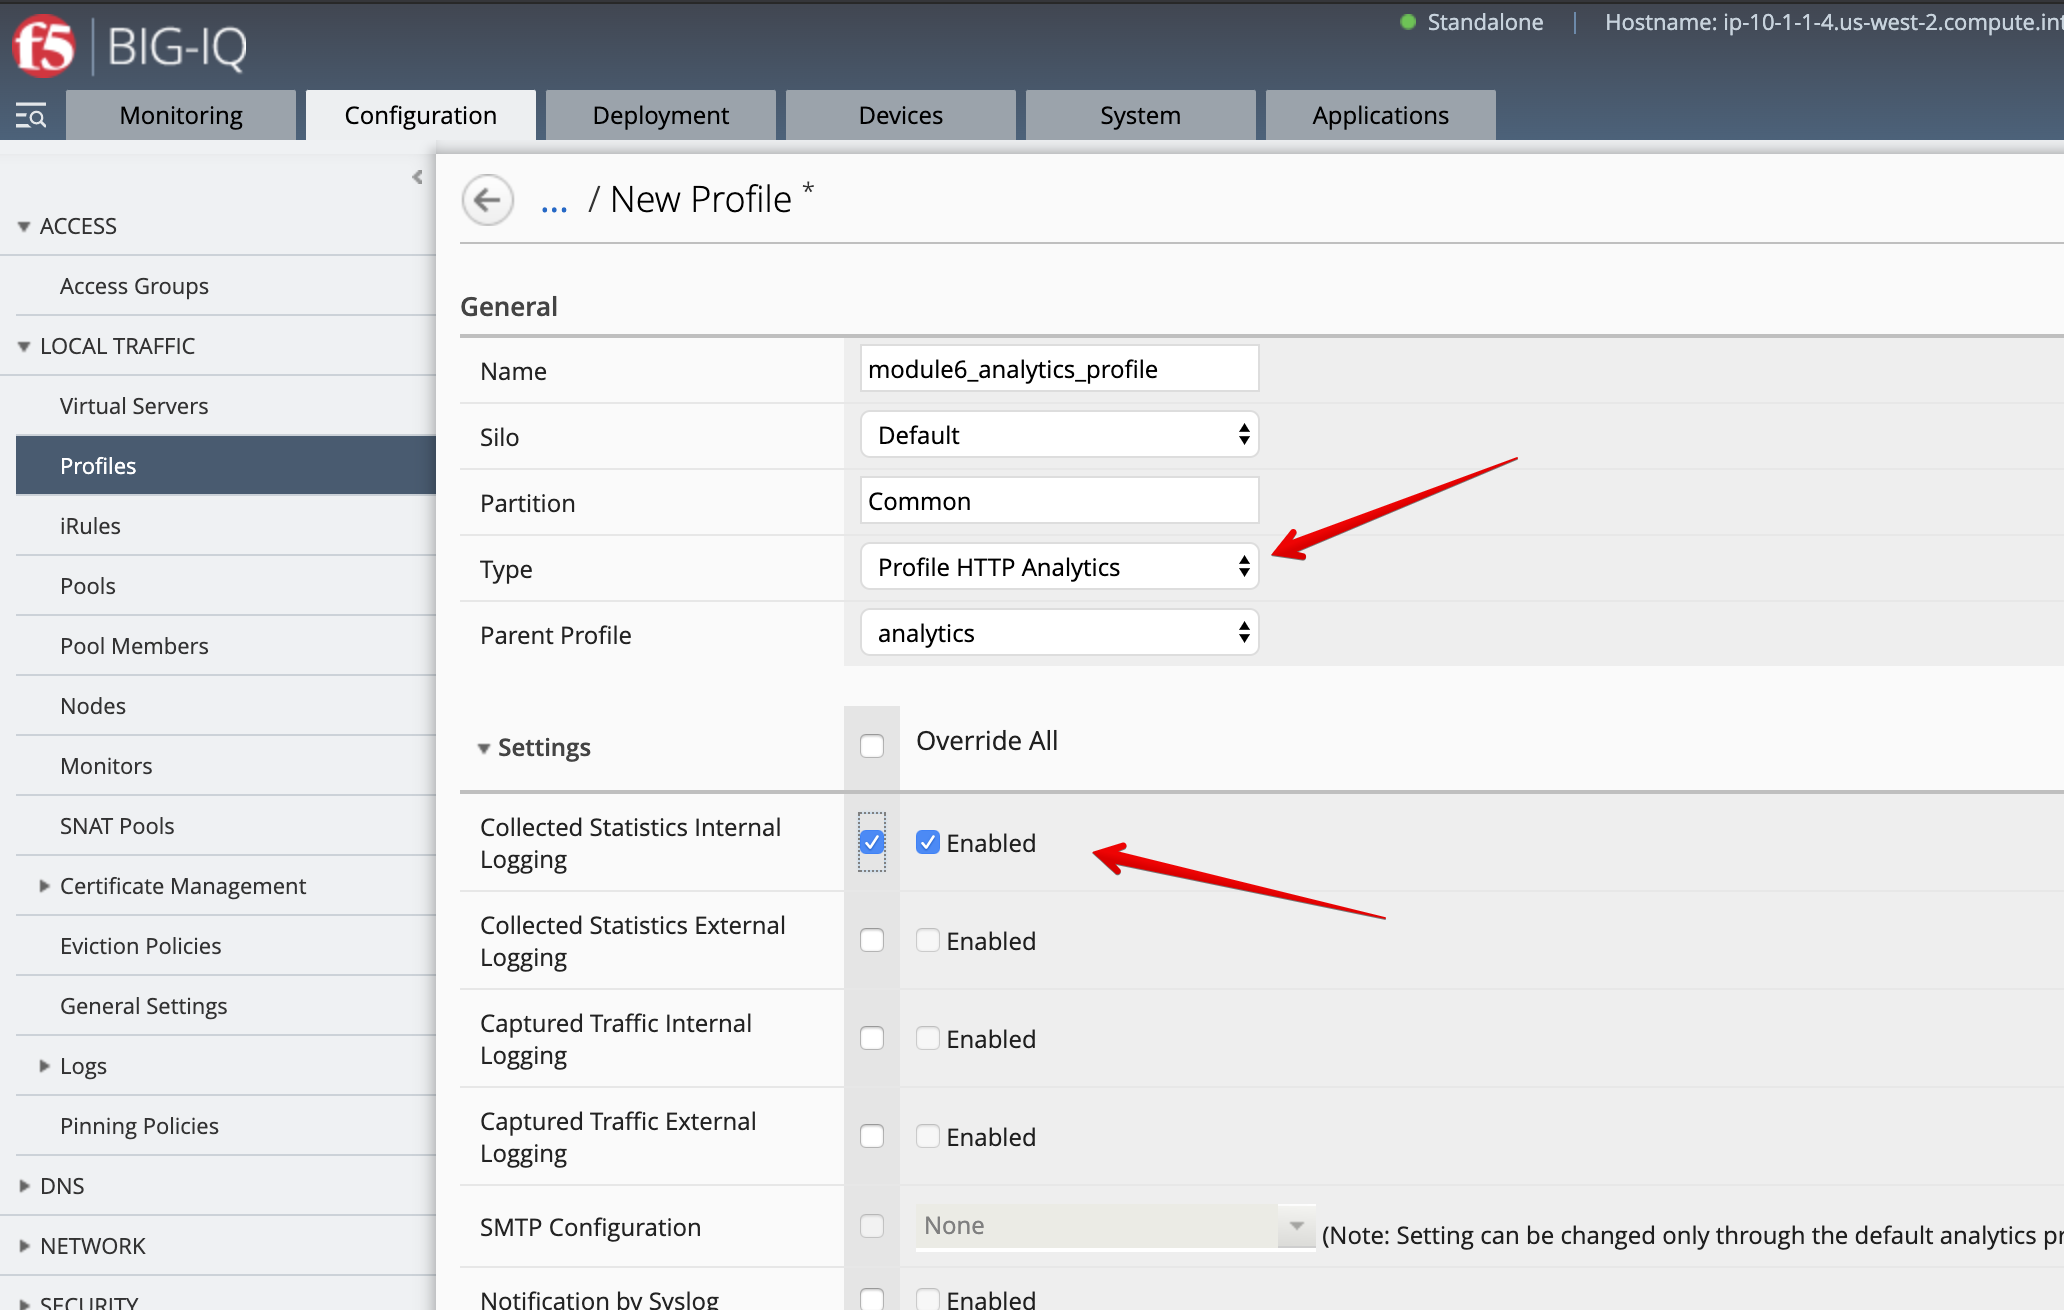
- Let’s create a new HTTP analytics profile. Click Create.
- Name:
module6_analytics_profile - Type:
Profile HTTP Analytics - Collected Statistics Internal Logging:
Enabled
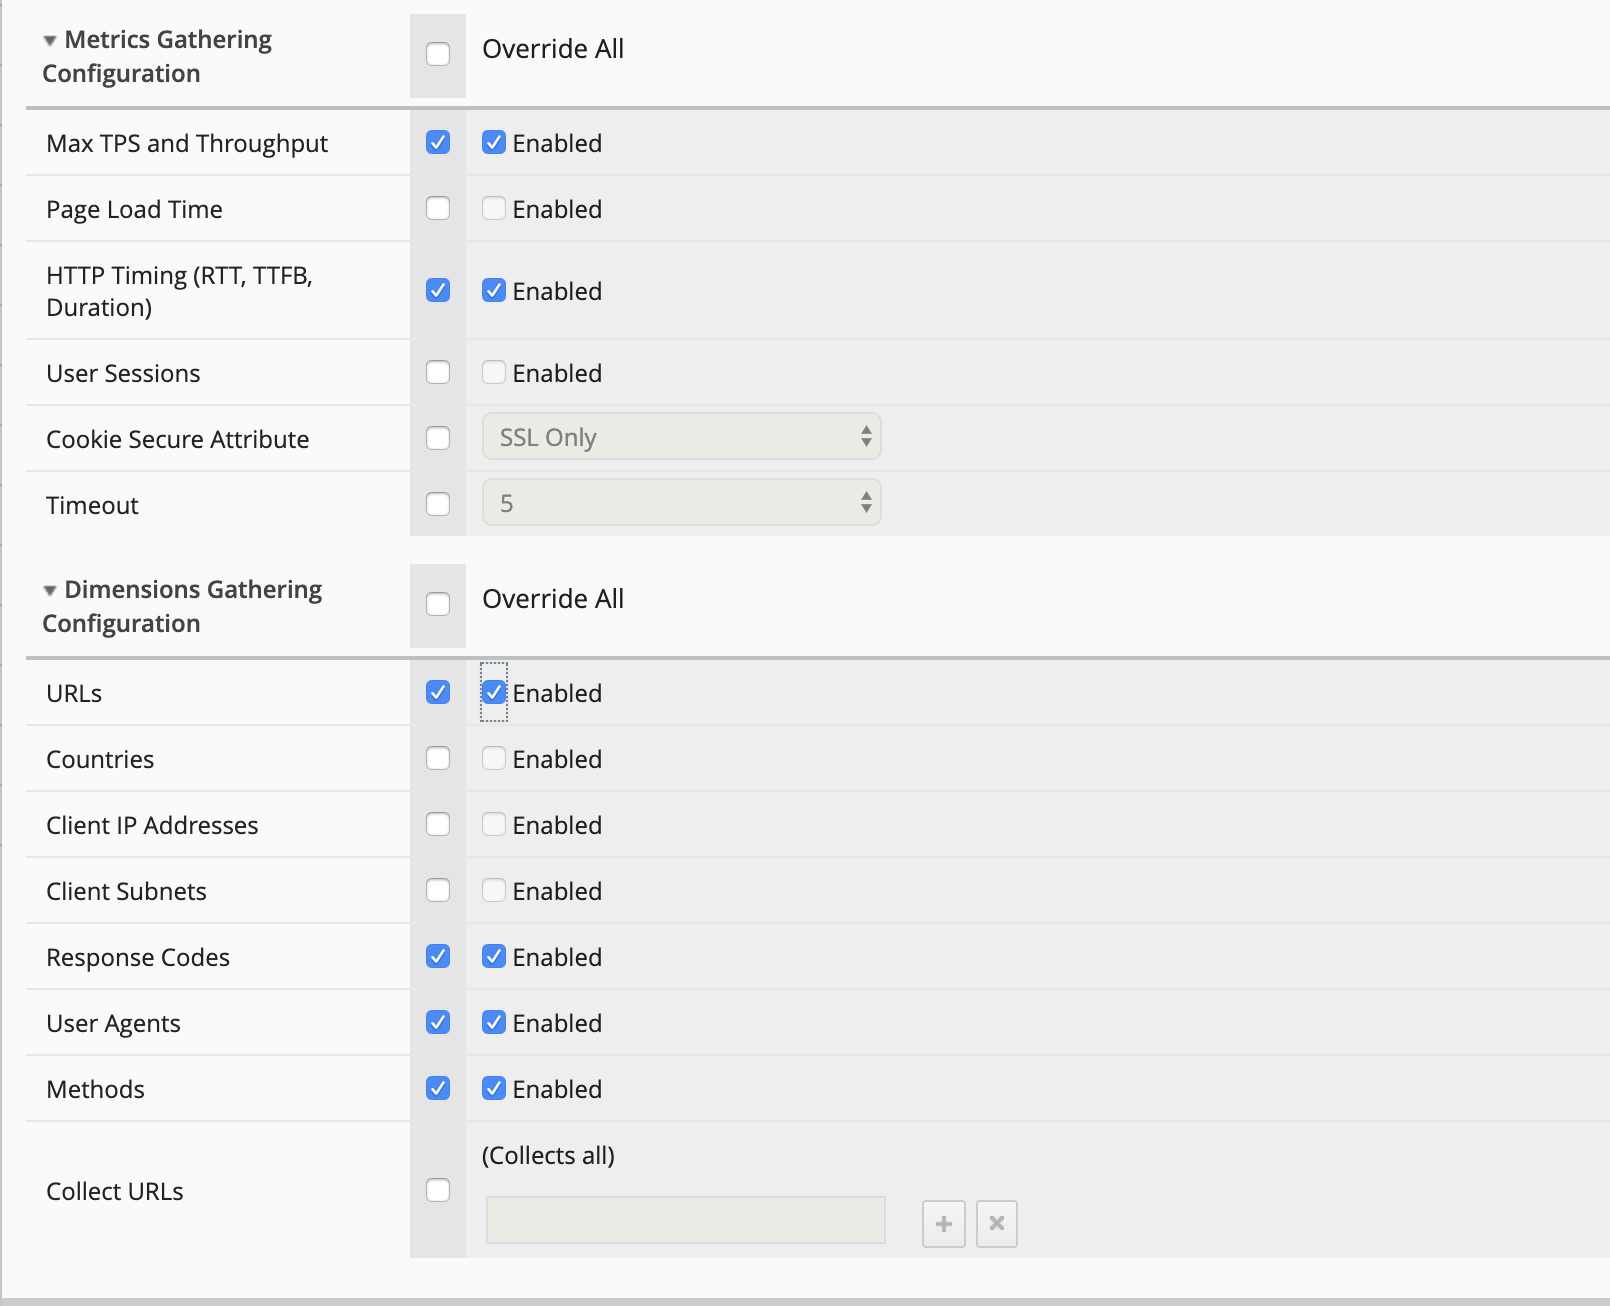
- Max TPS and Throughput:
Enabled - HTTP Timing (RTT, TTFB, Duration):
Enabled - URLs:
Enabled - Response Codes:
Enabled - User Agents:
Enabled - Methods:
Enabled
Save & Close.
- Go to Configuration > Local Traffic > Virtual Servers and filter on
vip134.
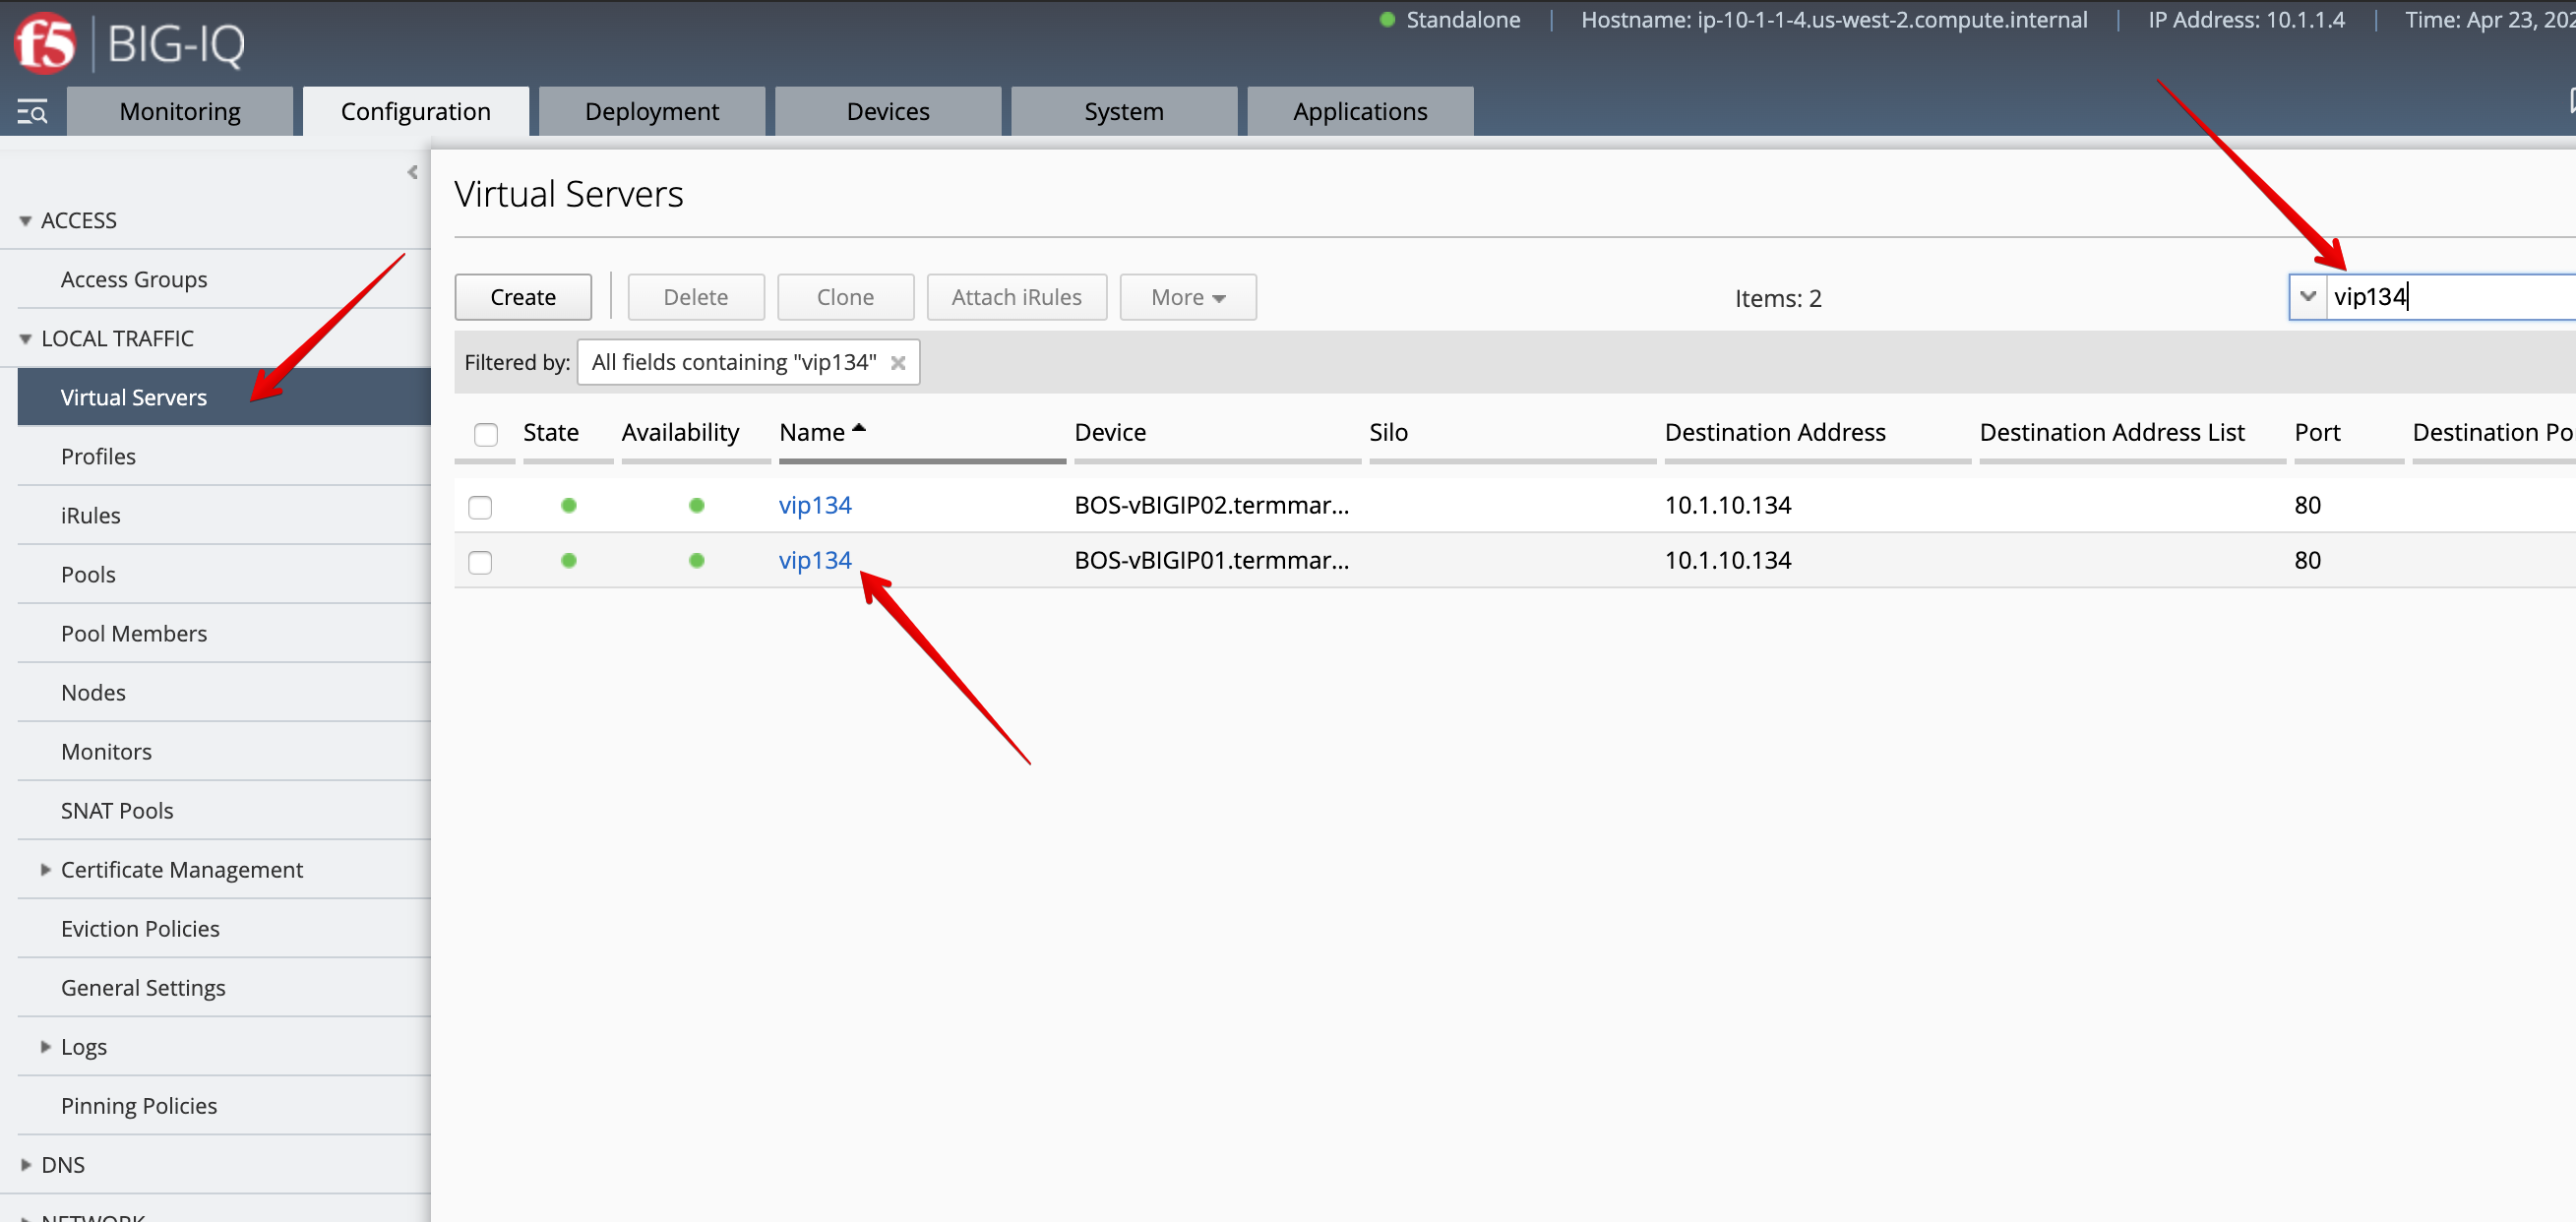
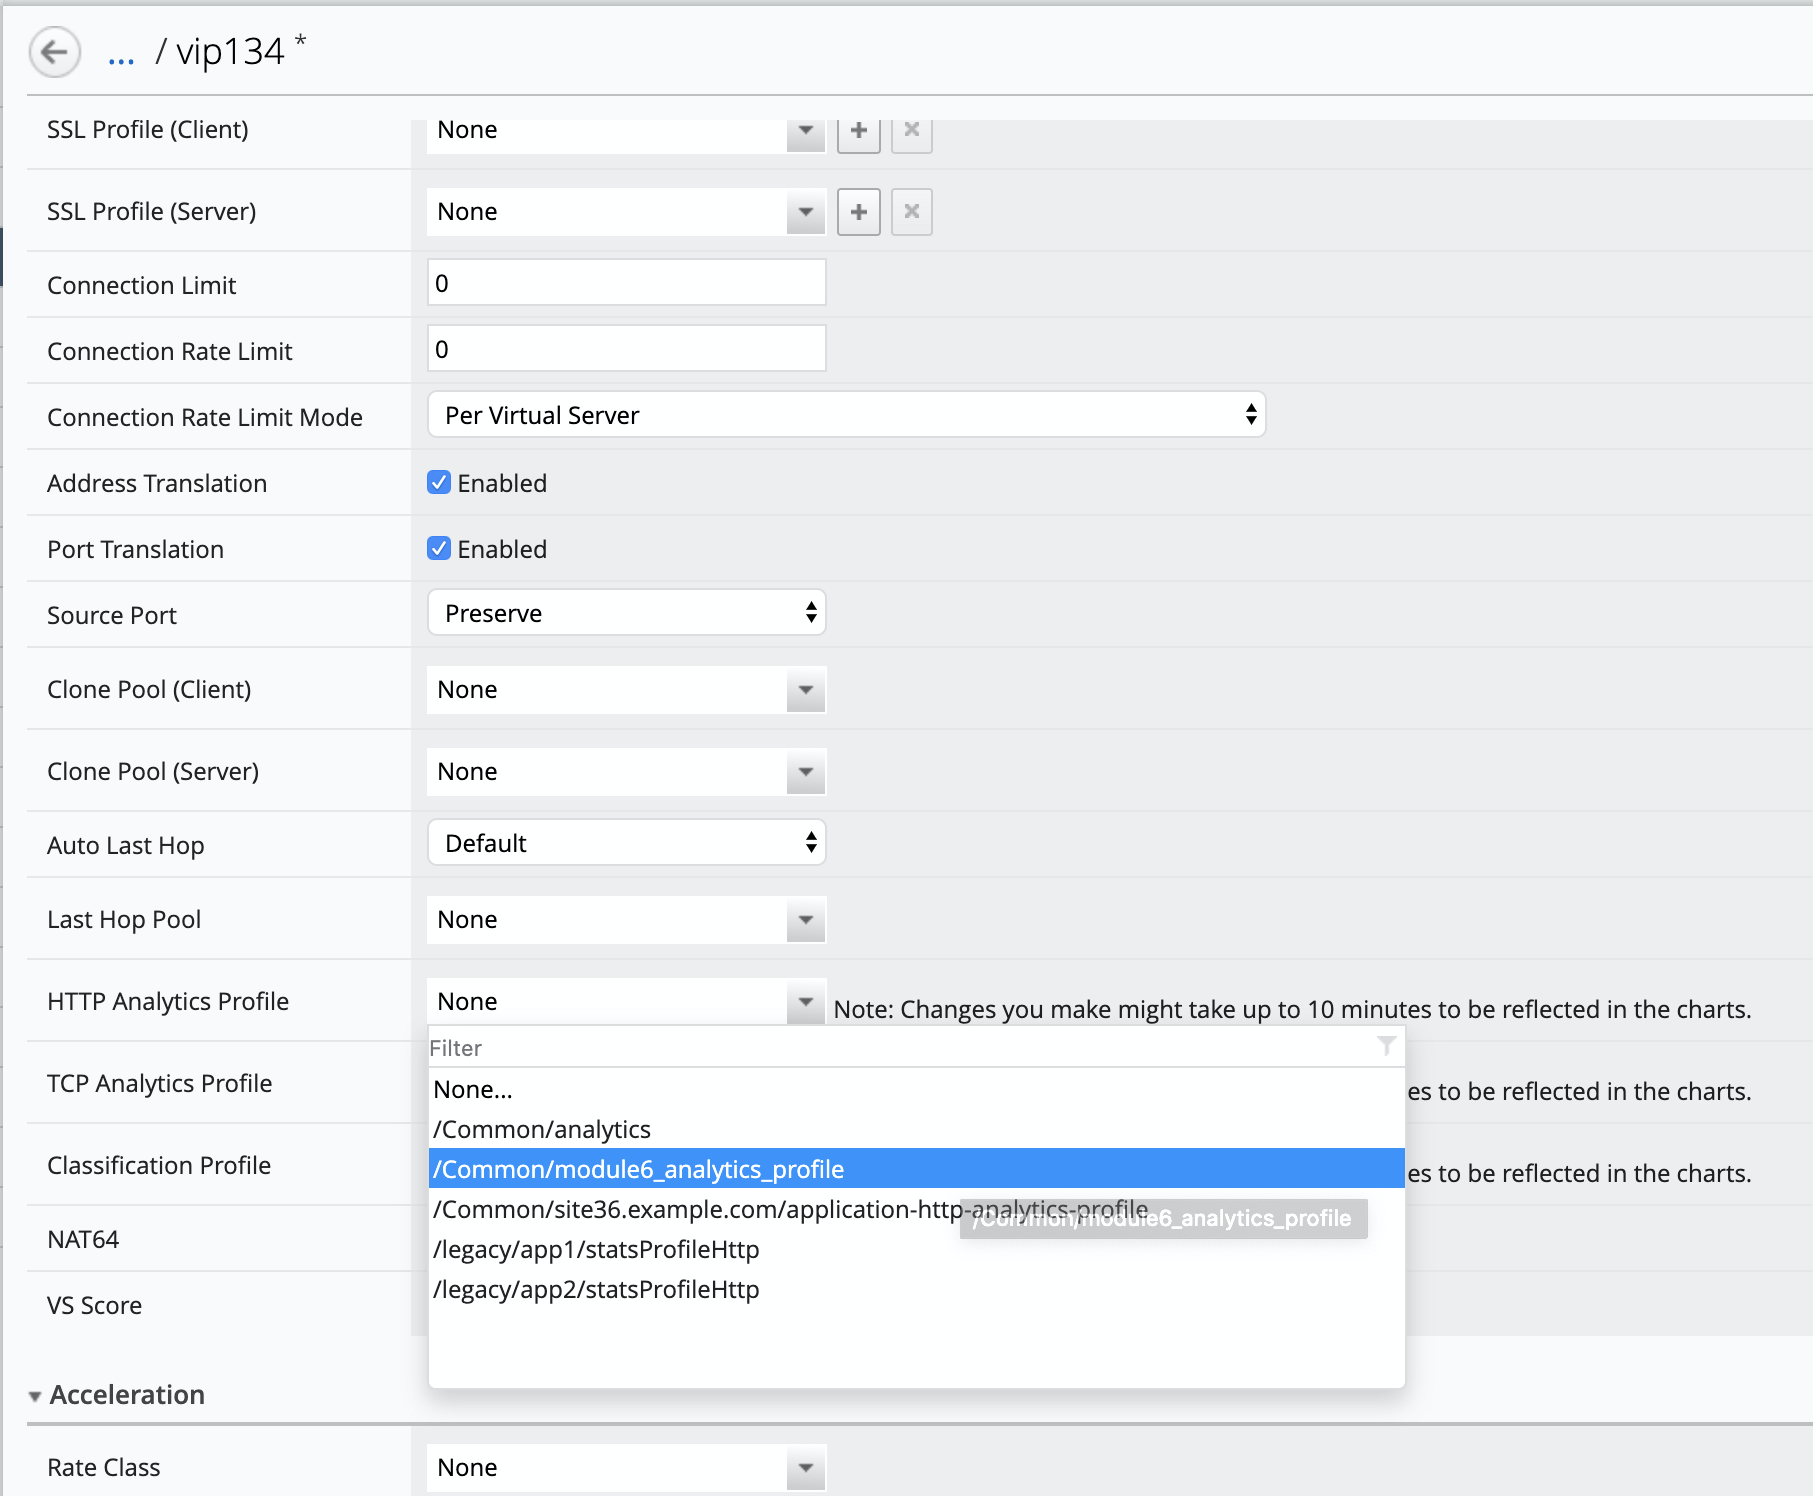
- Edit one of the VIPs and attach the
module6_analytics_profile.
Note
You only need to update one of the 2 VIPs as the VIP is located on a BIG-IP cluster. BIG-IQ will update the other VIPs automatically.
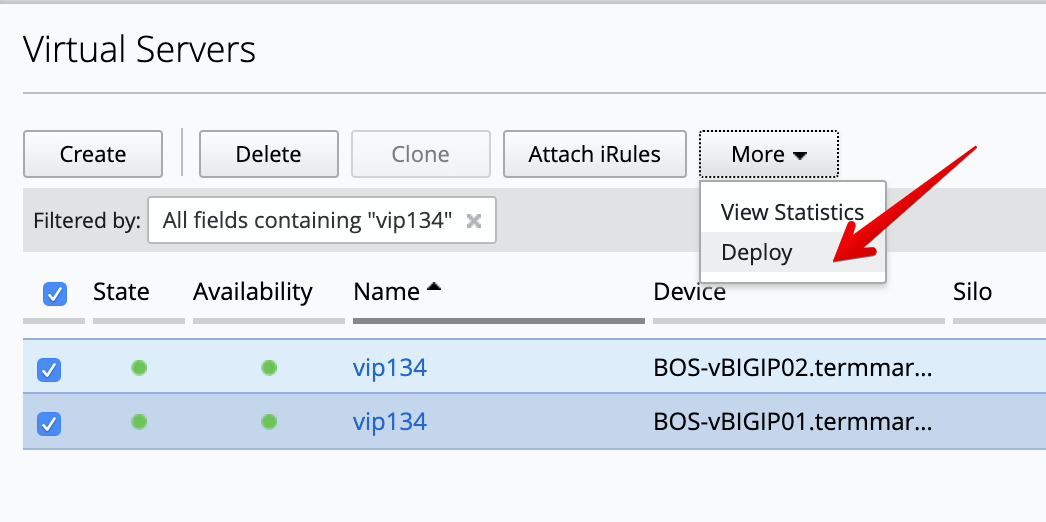
Click Save & Close. Once completed select the 2 VIPS and click on Deploy under the More button. Here you will be deploying the change that attached the new analytics profile to the virtual server. We are deploying to both VS’s, as they are within a cluster.
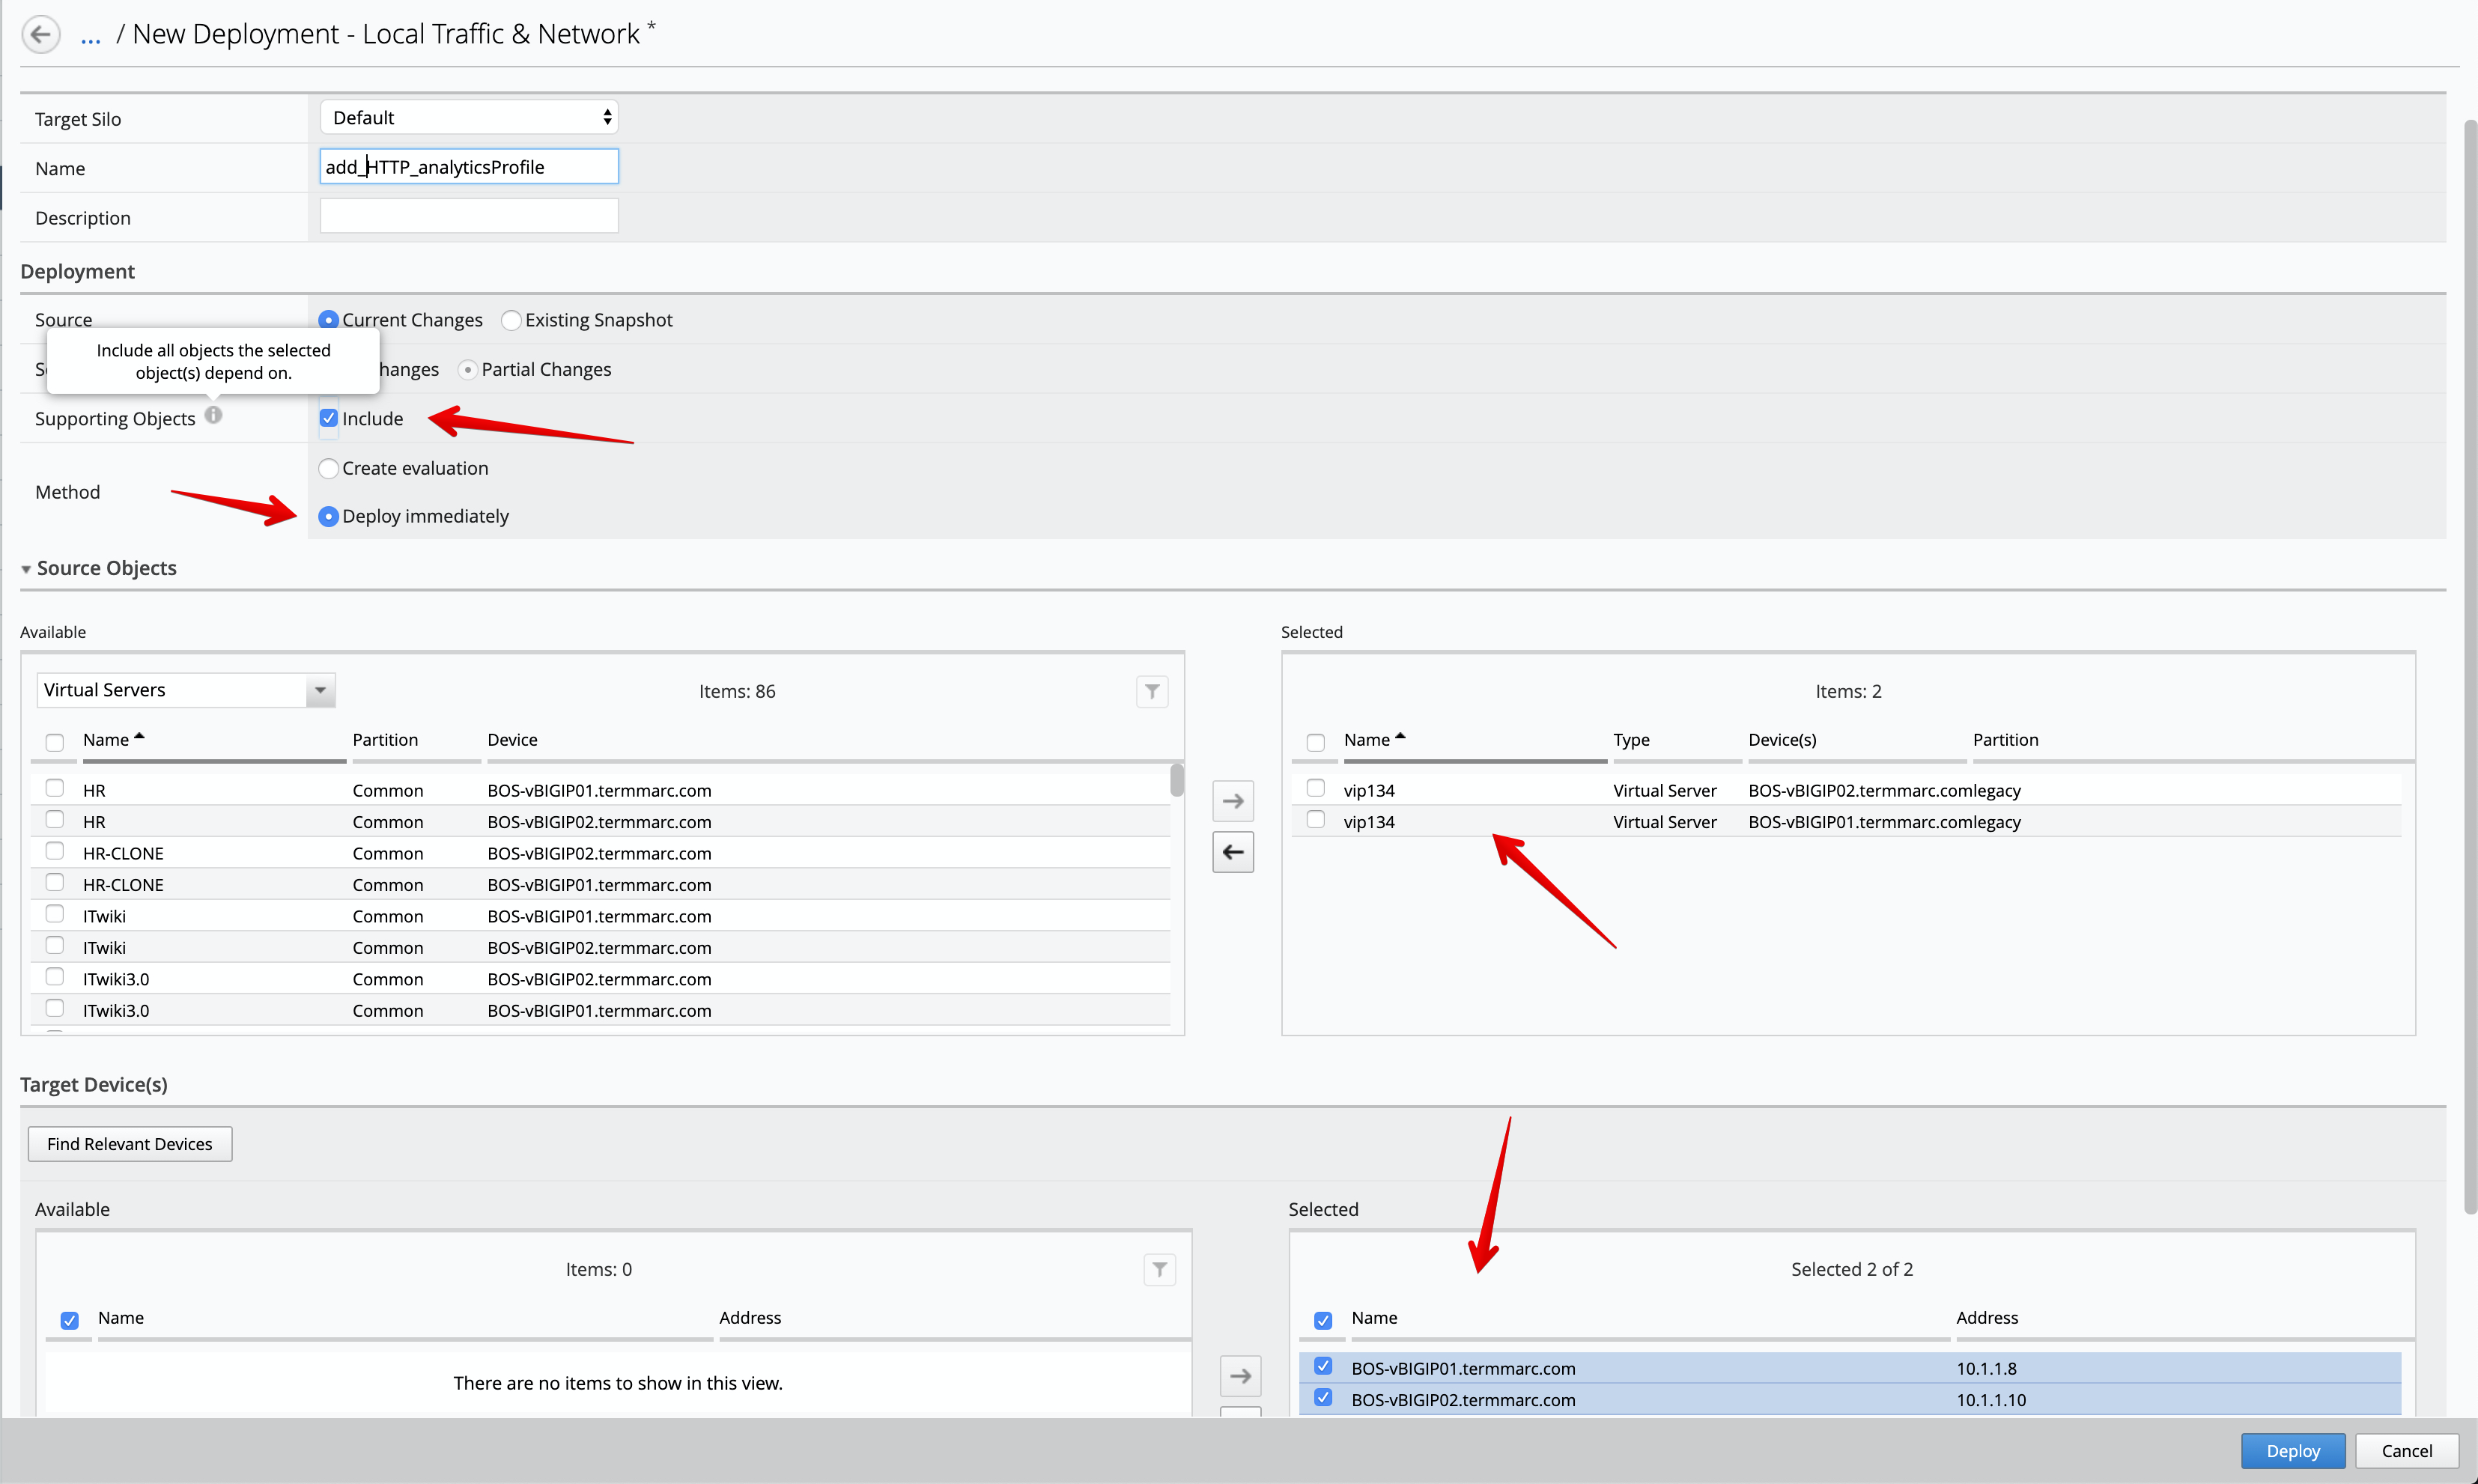
The deployment window opens. Type a name, select Deploy immediately for the Method.
Under the Target Device(s) section, click on Find Relevant Devices
and select the BOS-vBIGIP01.termmarc.com and BOS-vBIGIP02.termmarc.com and move them over to the
section marked Selected. Then, click on Deploy.
Note
Notice you do not need to select the HTTP analytics profile but only the VIP. By having Supporting Objects option enabled, the deployment will include all objects that the selected object depends on.
Click Deploy, and then click Deploy in the Deploy Immediately warning.
Warning
If the deployment fails, you may check if the Boston Cluster is sync correctly.
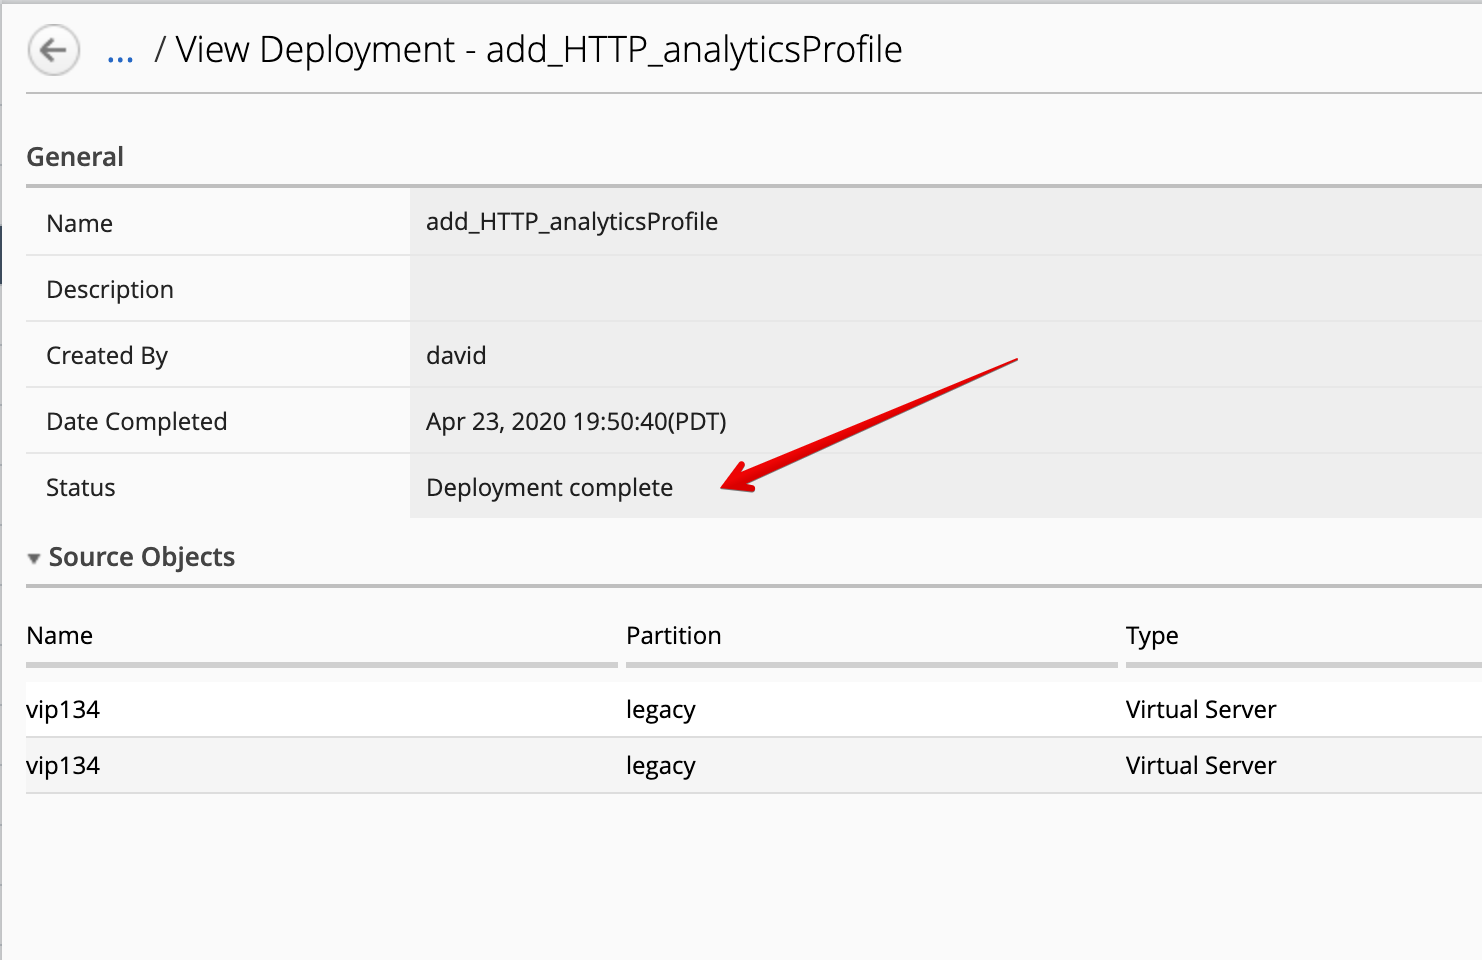
Wait for the deployment to complete.
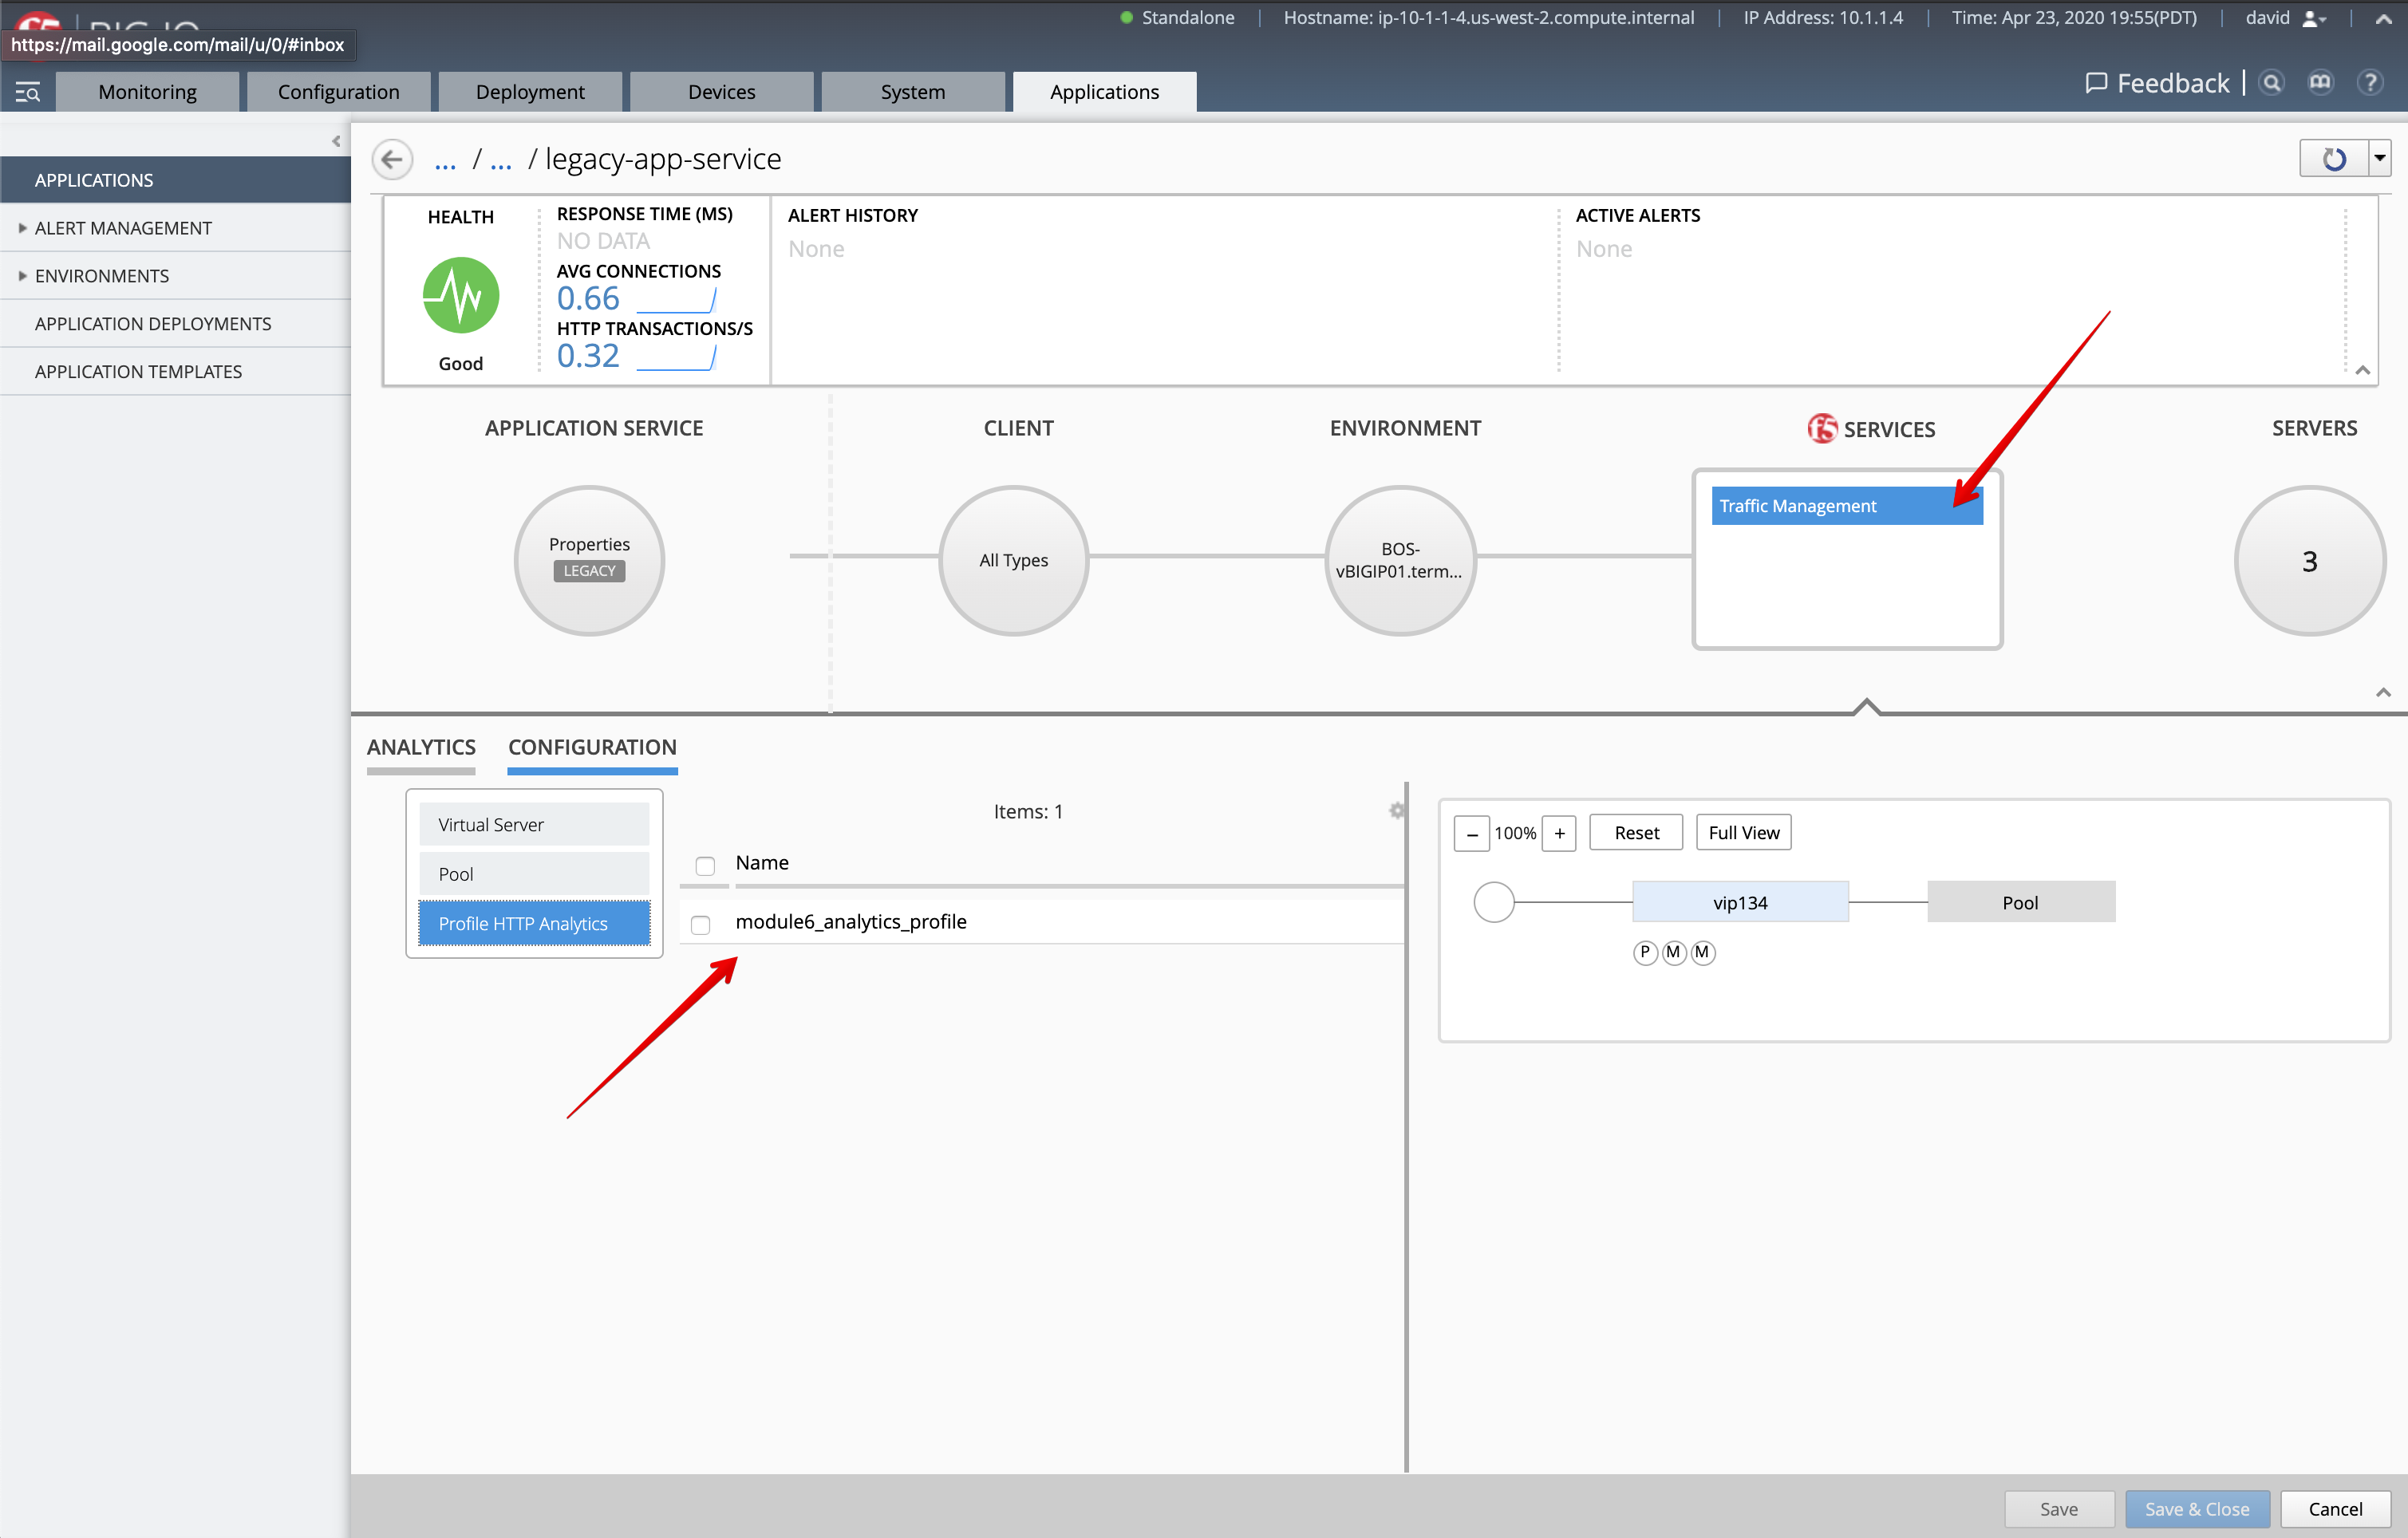
- Back on the Applications tab > Applications, go back to the
legacy-app-service. Under F5 Services, Traffic Management > Configuration > Profile HTTP Analytics, notice the warning disappeared.
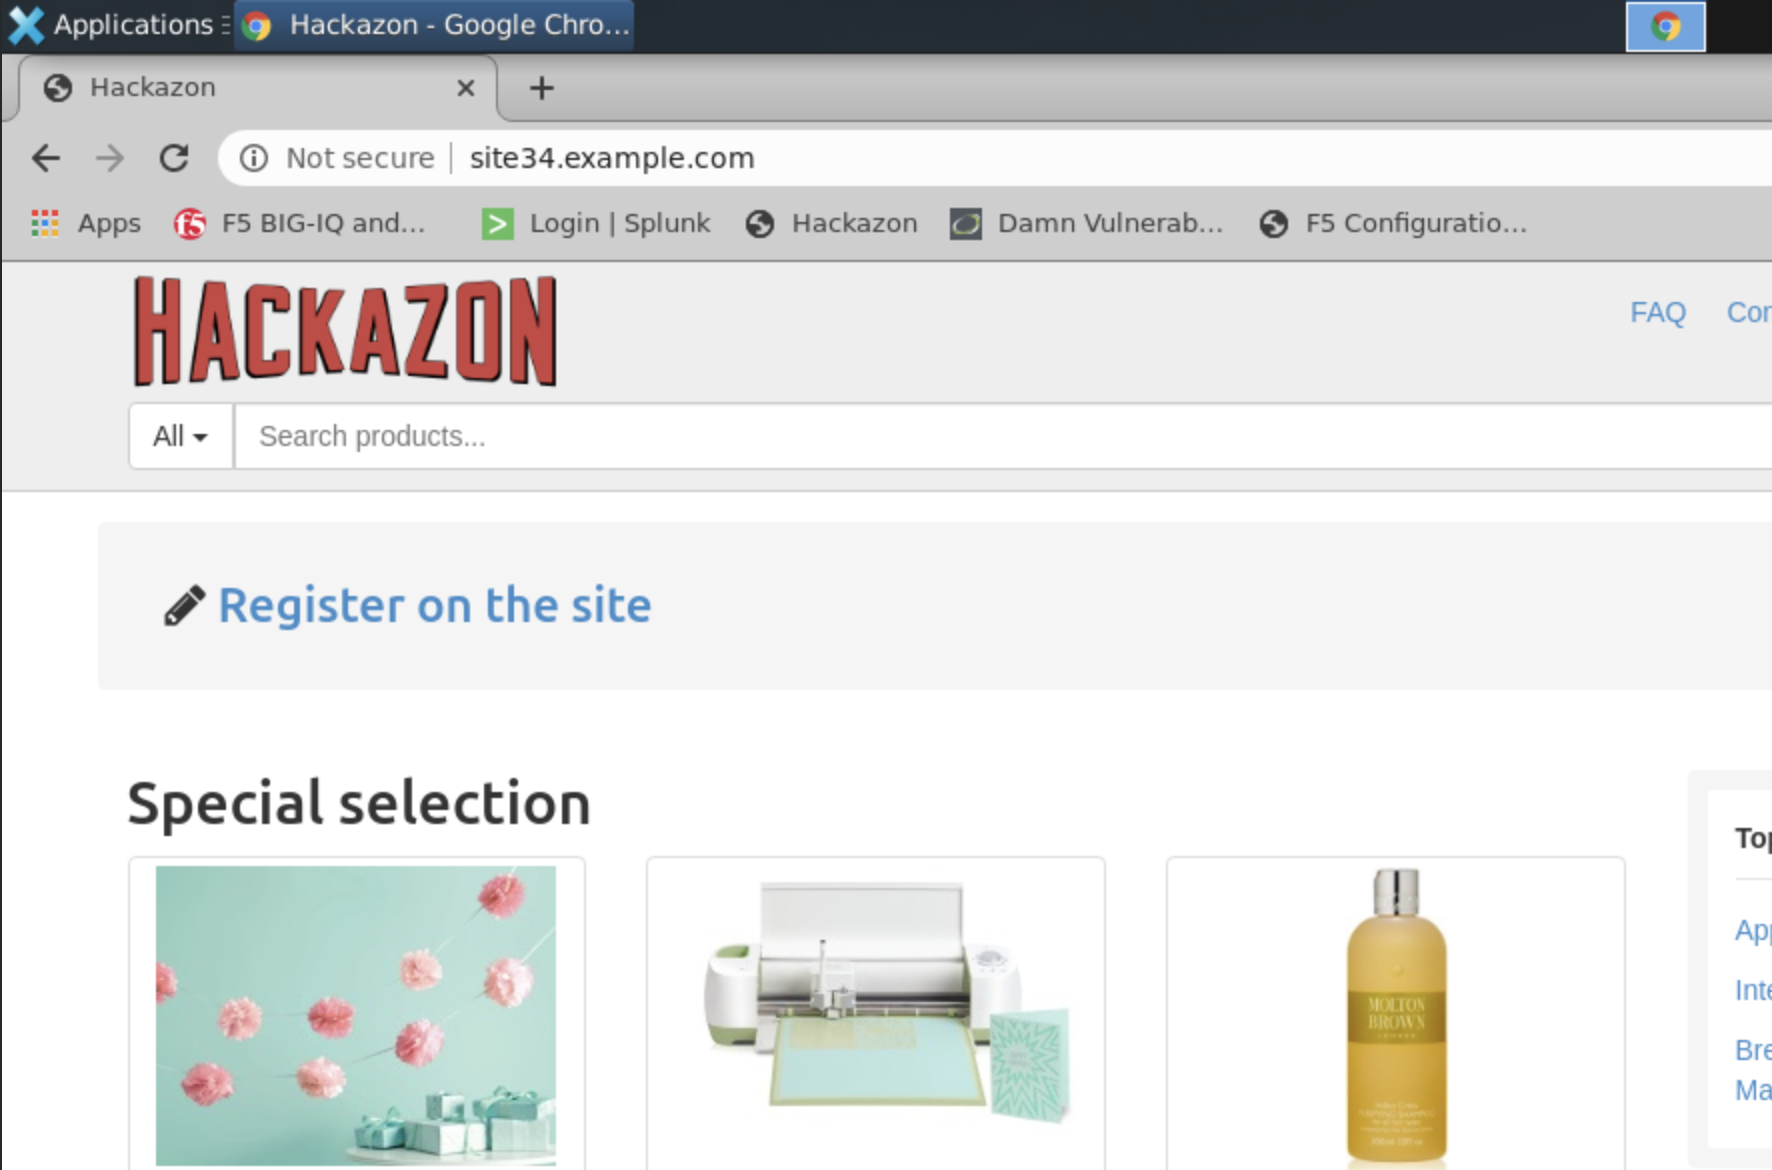
- You can test the HTTP application service by opening Google Chrome browser on the Ubuntu Jumphost.
Navigate on the website http://site34.example.com.
The virtual IP address 10.1.10.134 is configured behind site34.example.com FQDN.
Note
Accept the private certificates.
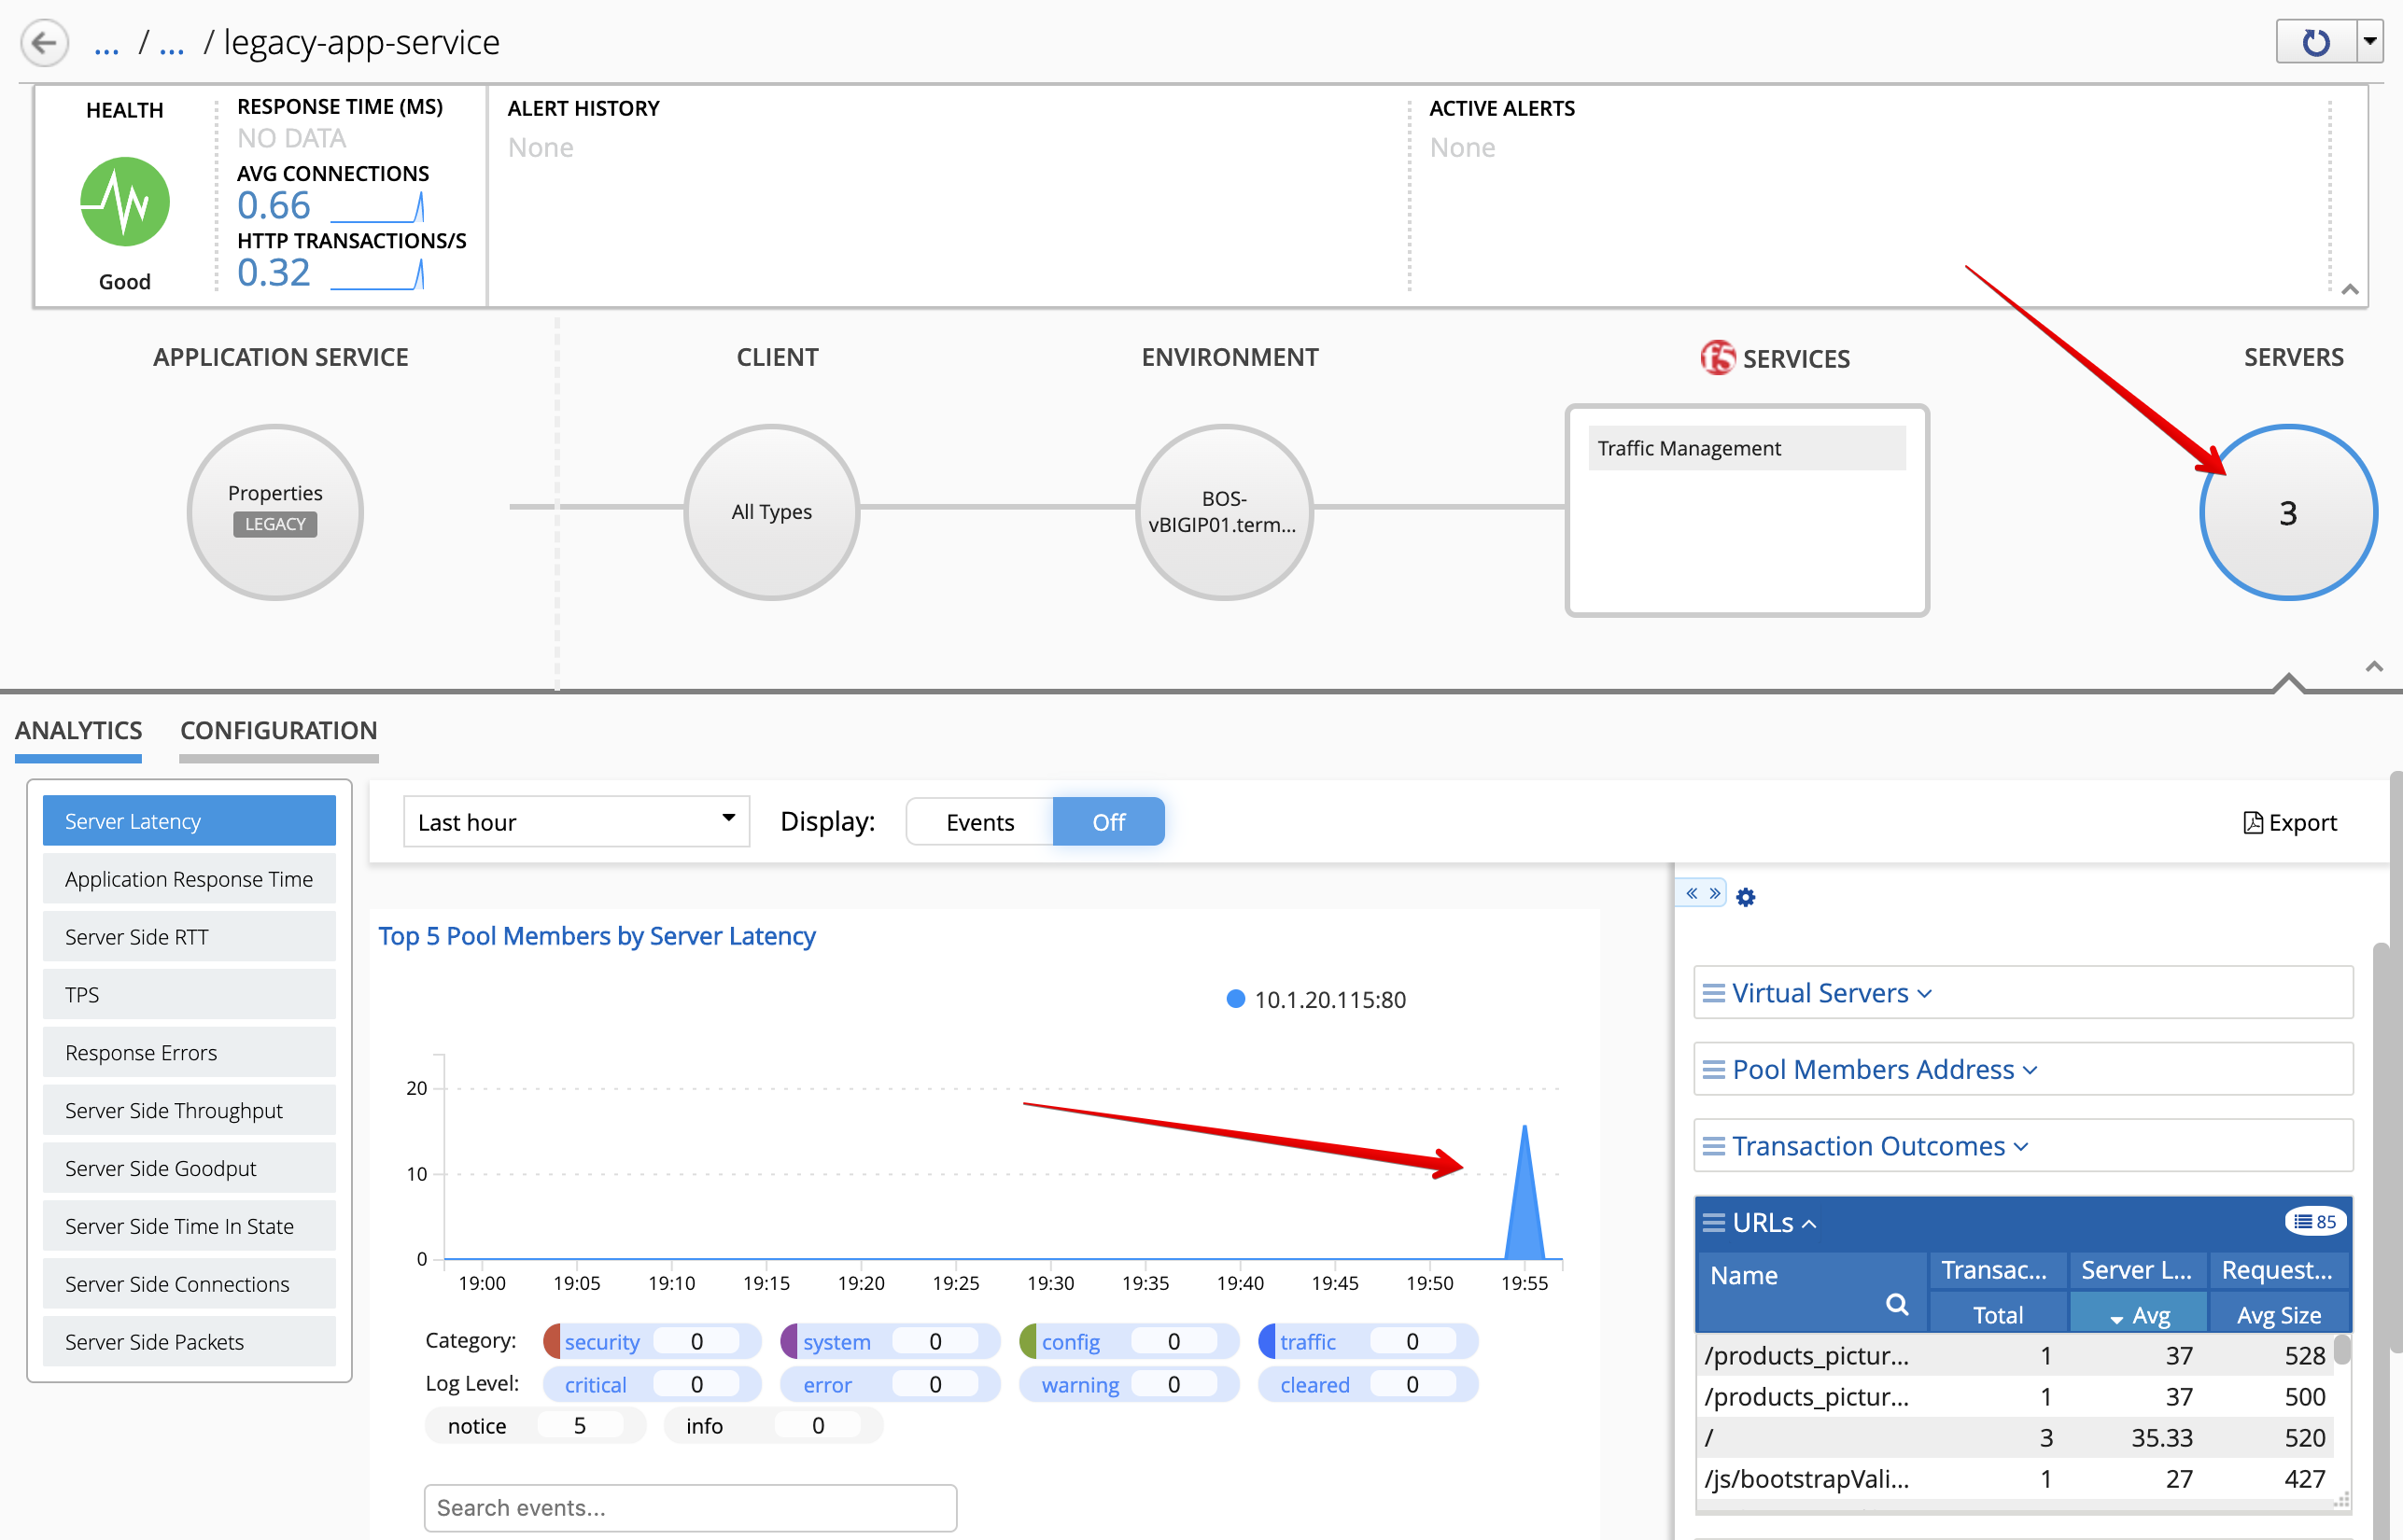
7. Back on the BIG-IQ Application dashboard, notice the HTTP traffic starts to appear. This means you have successfuly attached the HTTP profile to the virtual server. In real-world environments F5 recommends that customers experiment with a small number of legacy applications. BIG-IP resource consumption of memory and CPU should be be monitored both before and after analytics have been enabled. We do not recommend bulk enabling too many applications at once as it may put added burden on BIG-IP or BIG-IQ. Proper sizing should be done ahead of time, and new applications should be enabled carefully.
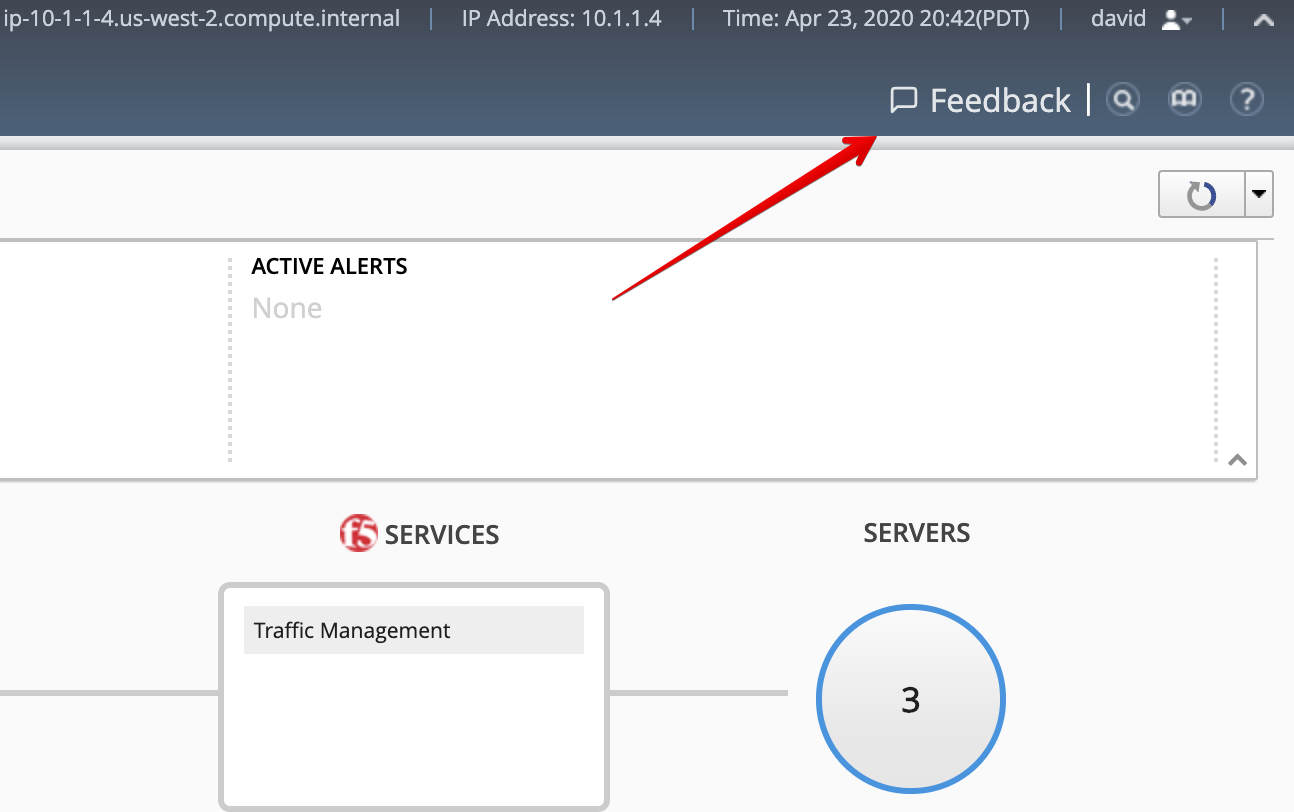
- By the way, did you see the new Feedback link on the top right?
This is not meant as a substitute for a support case. It is intended to give customers a means of providing feedback on workflows and navigation within the UI. It will take them to a brief survey monkey link where they can answer a few questions and provide their feedback. This is one way of capturing customer input directly on how we can improve the product.