F5 BIG-IQ Centralized Management Lab > BIG-IQ All Labs > Class 5: BIG-IQ Device Management > Module 9: Declarative Onboarding and VE Creation on Azure Source | Edit on
Lab 9.1: Prepare your Azure Account
Note
Estimated time to complete: 15 minutes
Lab environment access
If you have not yet visited the page Getting Started, please do so.
Tasks
Warning
If you already created an Azure Application in Class 2 (Azure SSG), you do not need to recreate this item.
Setting up a Service Principal Account
Note
Needs to be done by an admin in the subscription
- Registering an application
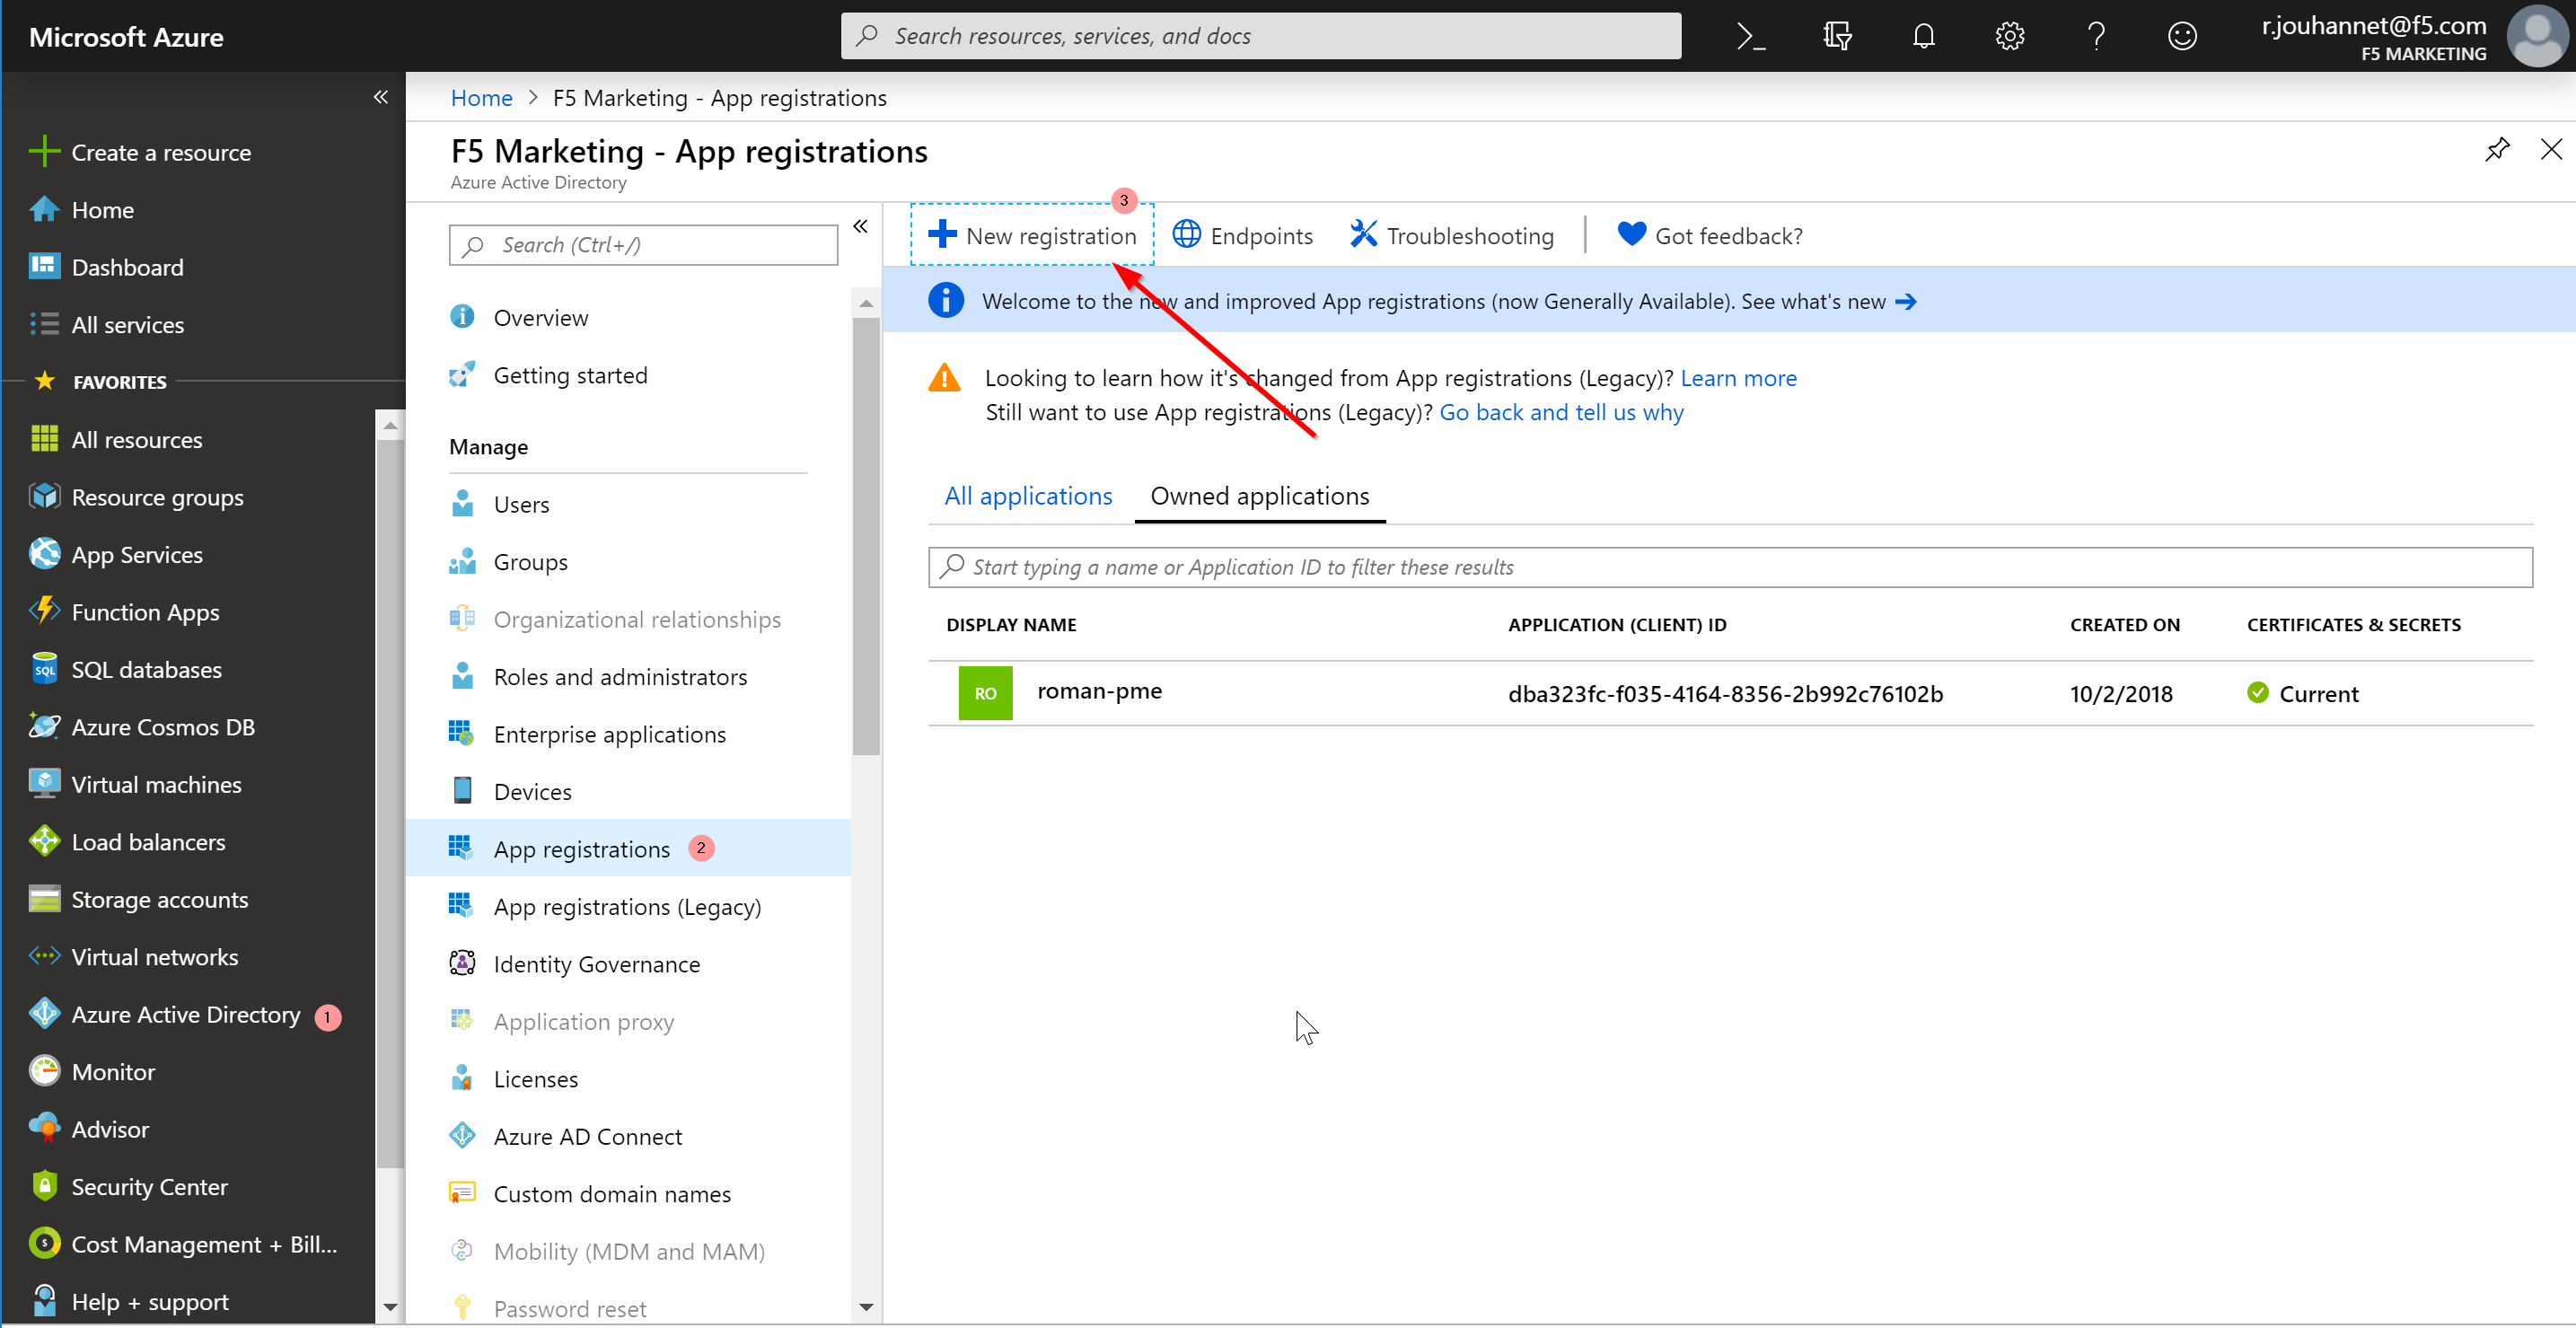
- On the Azure portal, go to Azure Active Directory → App registrations
- Click on “+ New registration”
- Enter the following values Name: <Name of the application>
- Click Create
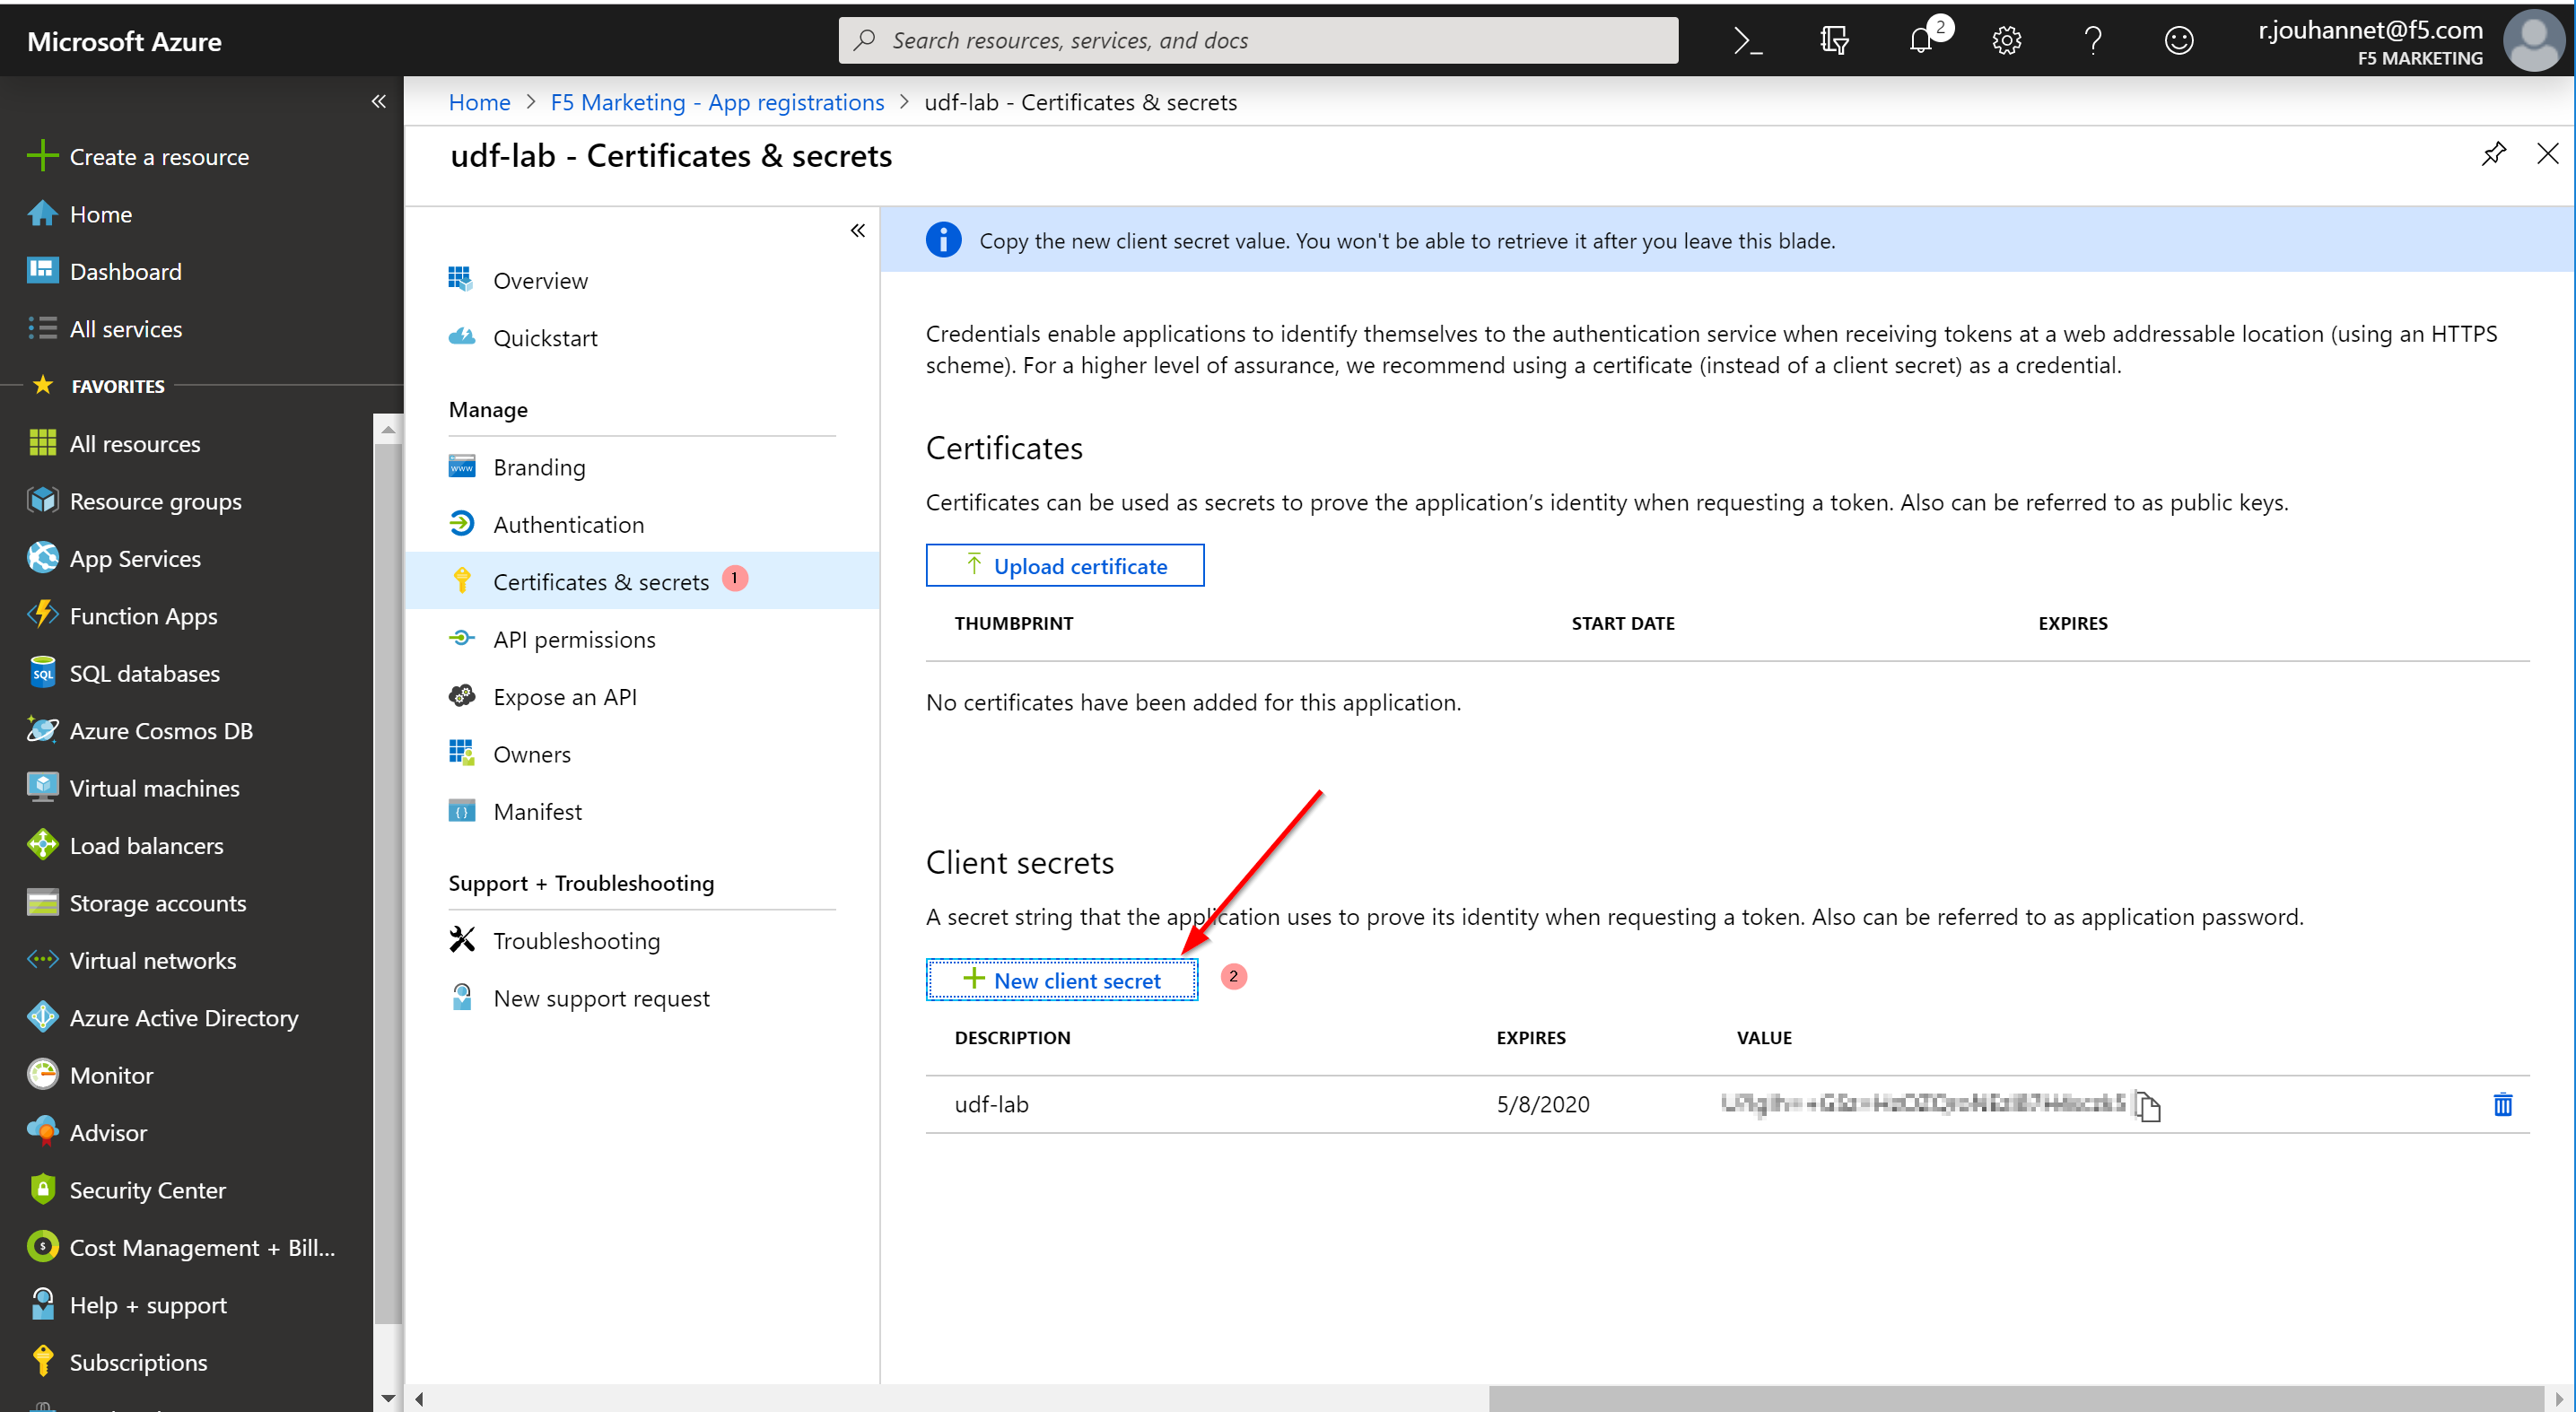
- Click on Certificates & secrets → New client secret
- Enter a Description and select Expiration period.
- Adding additional Application Owners
- On the Azure portal, go to Azure Active Directory → App registrations → <the app you created in Registering an application>
- Click on Settings → Owners → Add owner
- Enter the user’s F5 email address to search
- Select the user and click on Select

- Generating Service Principal Secret
- On the Azure portal, go to Azure Active Directory → App registrations → <the app you created in Registering an application>
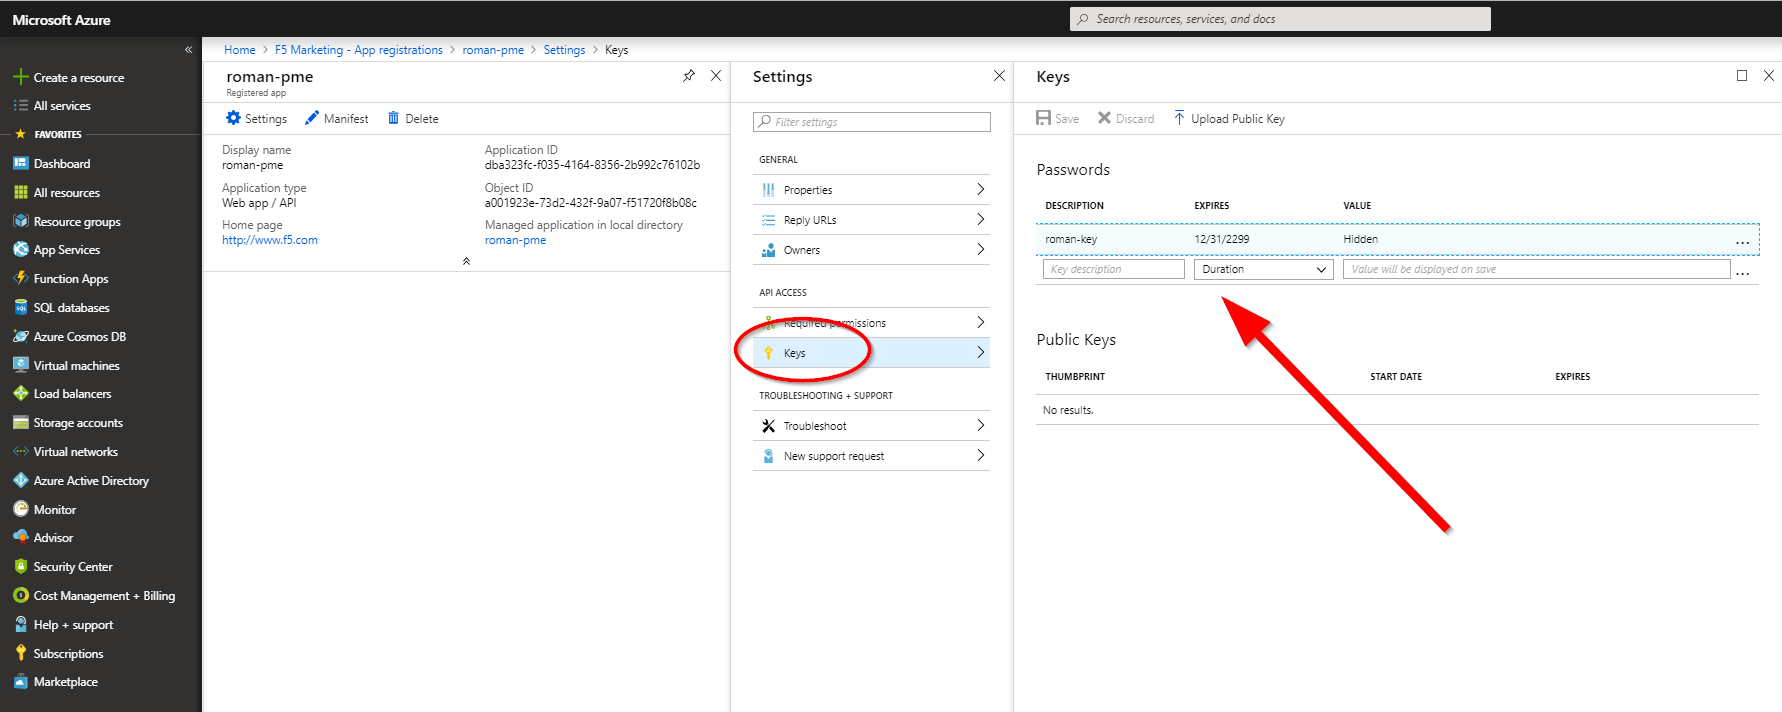
- Click on Settings → Keys
- Enter the user’s name in the Description field and select “Never Expires” for the duration
- Click on Save
- Copy the Value field and save it somewhere. This needs to be provided to the user, to be able to configure an Azure provider in BIG-IQ
- Granting access control to the application
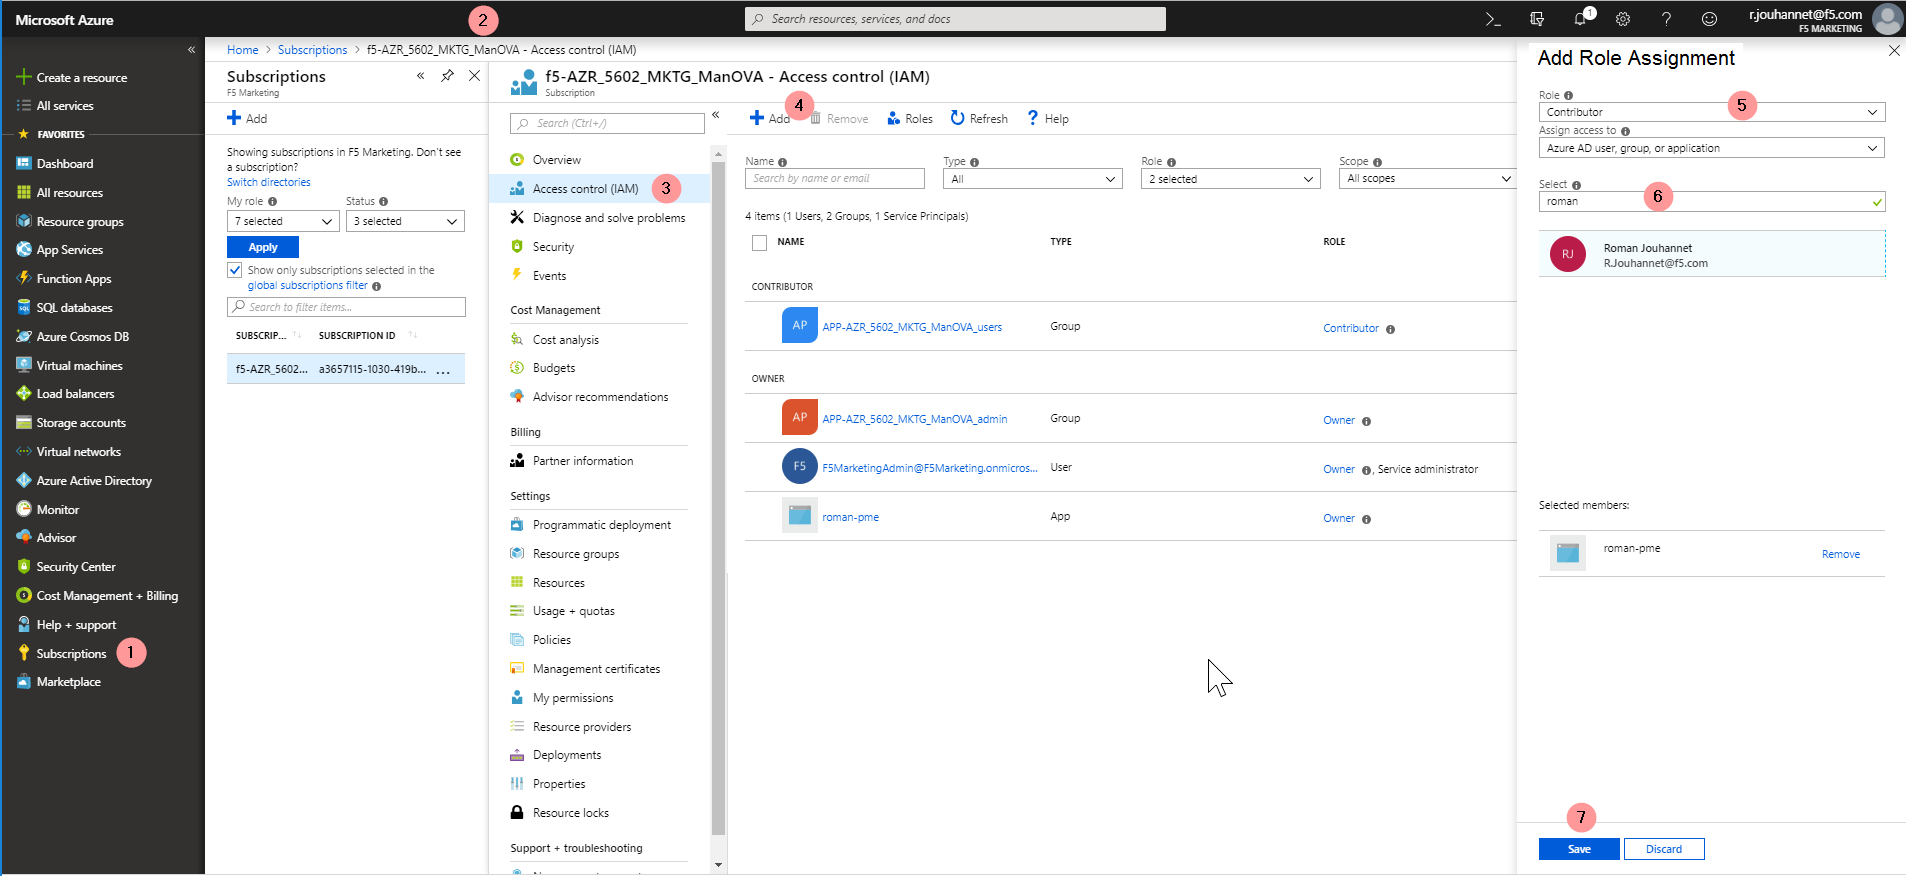
- On the Azure portal, go to Azure Active Directory → All Services
- Click on Subscriptions
- Click on the subscription that you are using for the application
- Click on Access Control (IAM)
- Click on Add
- Select Role Assignment
- Select “Contributor” in the drop-down for the Role
- Type in the Application name created in Step 1.
- Click on Save
- Credentials needed for configuring Azure Provider in BIG-IQ
The following pieces of information are needed to configure an Azure Provider. This information is required to make API call to Azure for resource CRUD operations, either through Java or through Ansible.
- Subscription Id: You can get this by clicking on Subscriptions in Azure portal and copying the
Subscription Id. - Tenant Id: Go to Azure Active Directory → Properties and copy the value of the Directory ID. This is the
Tenant Id. - Client Id: Go to Azure Active Directory → App registrations and copy the value of the Application ID. This is the
Client Id. - Service Principal Secret: Copy the value saved in step 5 of generating
Service Principal Secret.
Warning
we need something unique for the Username since other students do the lab, and you may use the same Azure corporate account.
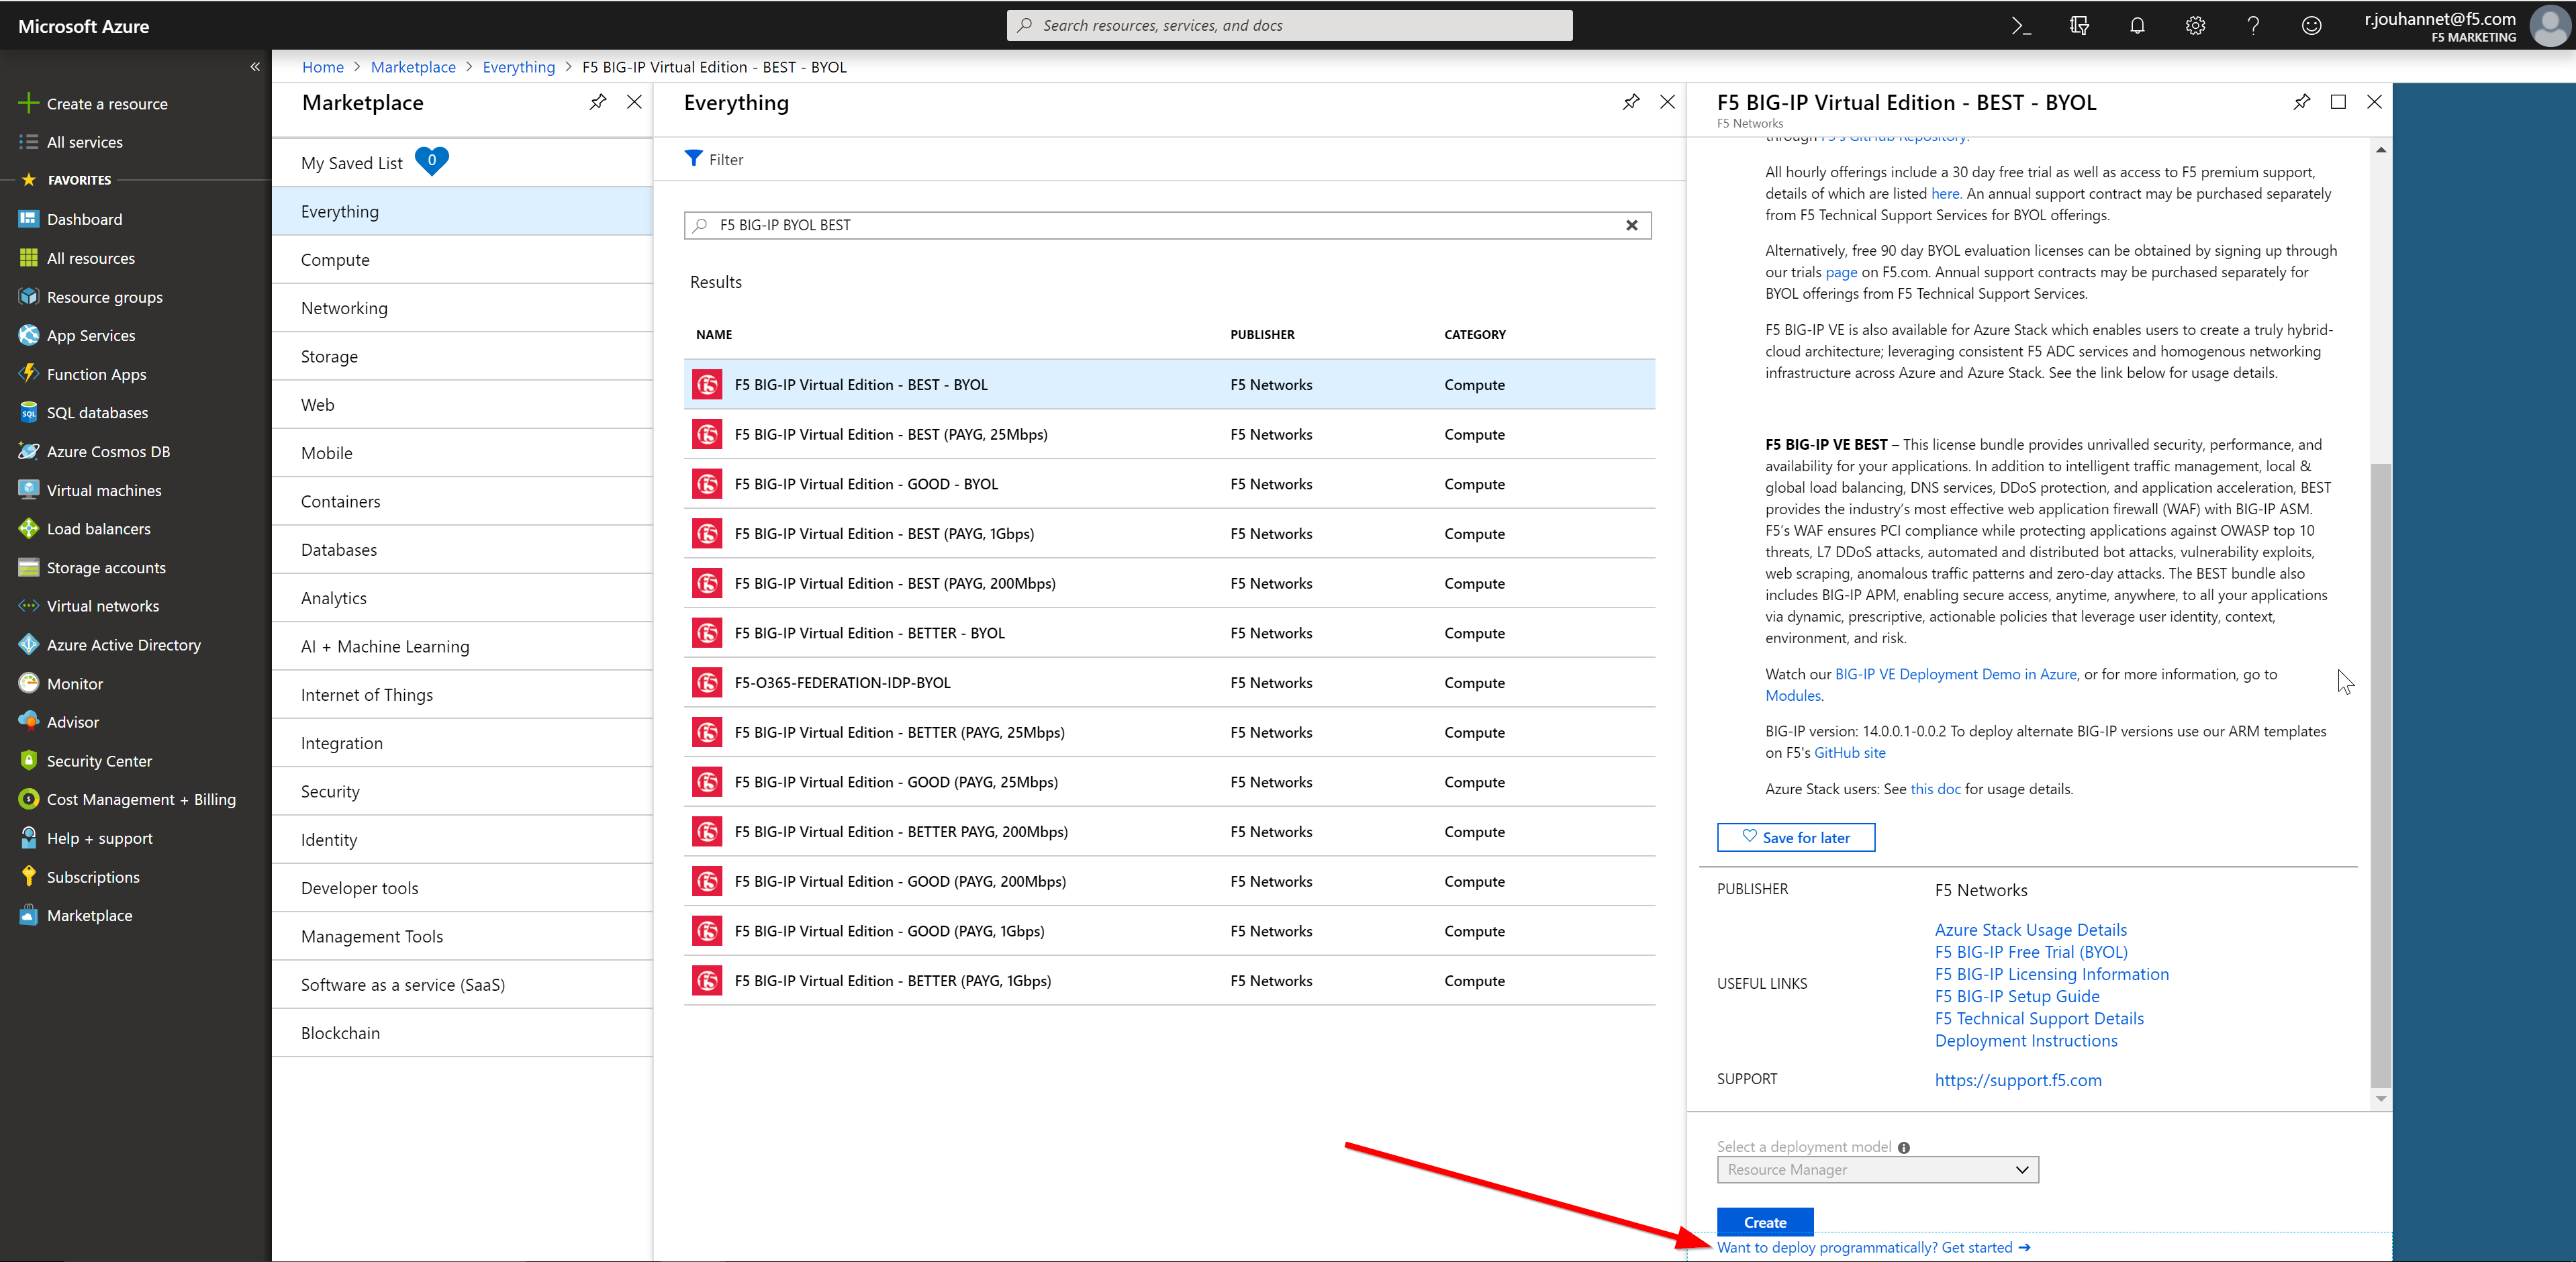
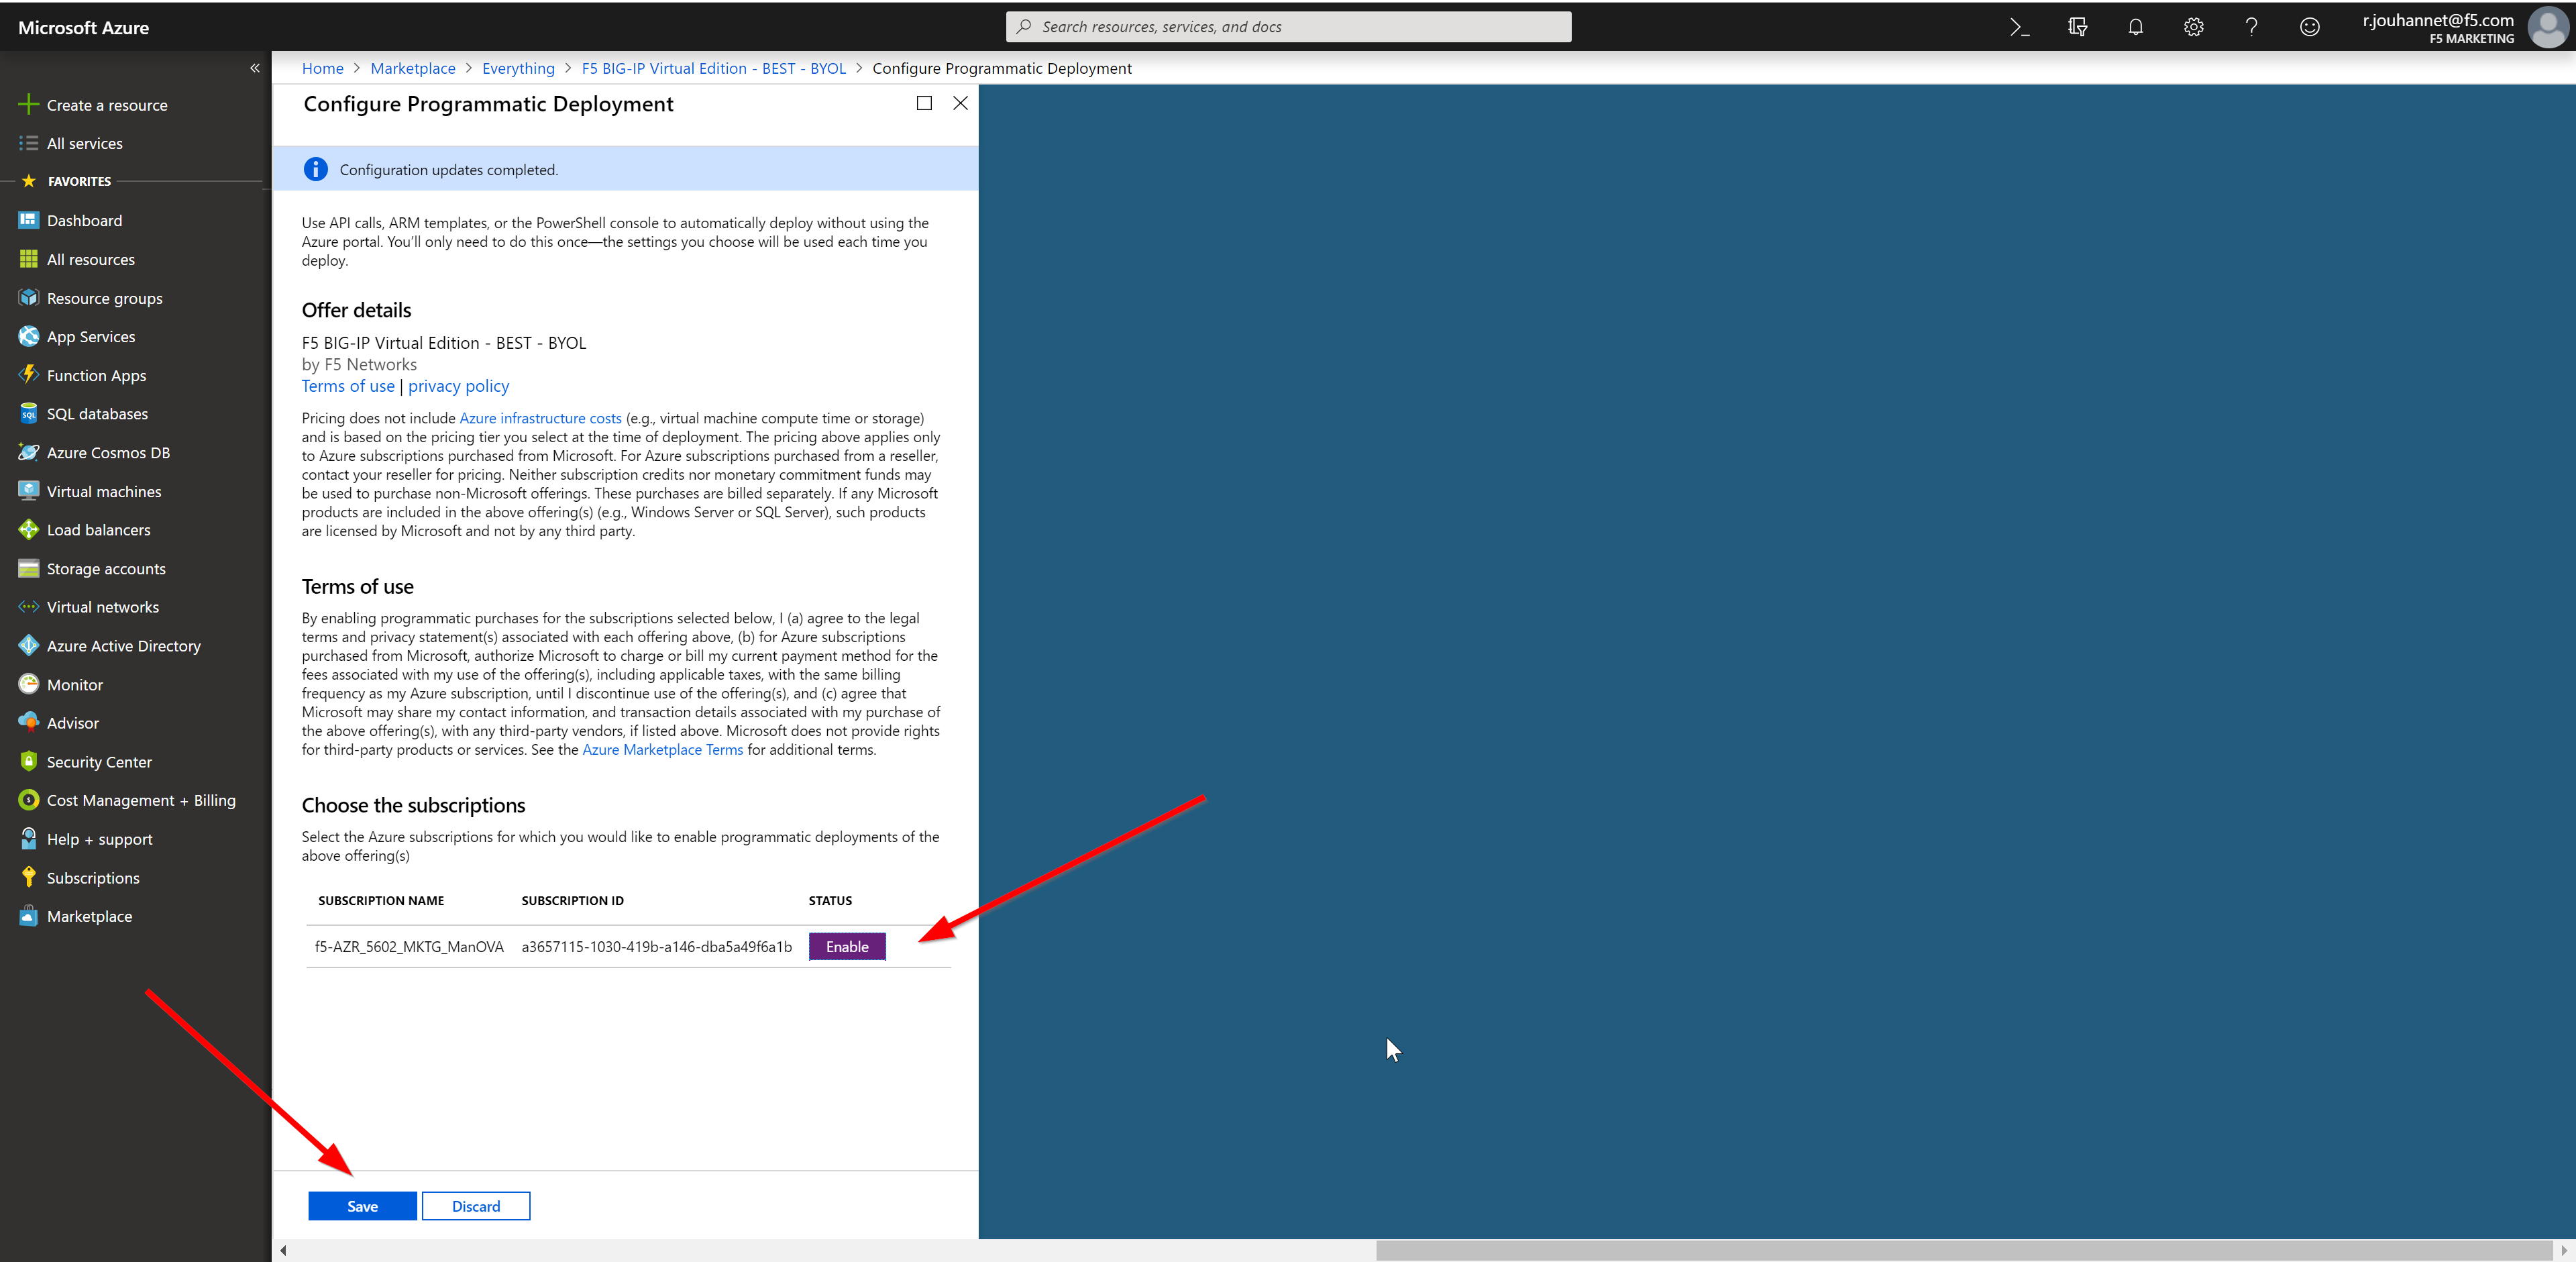
- Subscribe to the BIG-IP instance in the
Azure Marketplace
Before being able to deploy an instance in Azure, you’ll have to subscribe to this license agreement.
Go here to subscribe to the right F5 instance we will use in this lab:
F5 BIG-IP VE – ALL (BYOL, 1 Boot Location)
Once you’ve subscribed, you should see something like this:
- Create the Azure environment and VPN
The below script takes Azure parameters and creates Azure resources. These resources are used in BIG-IQ as a place to our BIG-IP to be deployed and configured.
SSH Ubuntu host in the lab environment.
Navigate to: cd f5-azure-vpn-ssg
Modify the config.yml file: vi config.yml
Modify the following four items to reflect the Azure Application you created above:
- SUBSCRIPTION_ID: <Subscription Id>
- TENANT_ID: <Tenant Id>
- CLIENT_ID: <Client Id>
- SERVICE_PRINCIPAL_SECRET: <Service Principal Secret>
- PREFIX: Specify a prefix that will be used on each object automatically created.
Execute the Ansible scripts to create the Azure resources (including VPN between Azure and the lab), cloud provider and cloud environment.
./000-RUN_ALL.sh ve
Note
The Azure objects can take up to 15 minutes to complete.