F5 Solutions for Containers > Class 1: Kubernetes with F5 Container Ingress Service > Module 3: Expose Service with NGINX Ingress Controller Source | Edit on
Lab 3.2 - Deploy Hello-World (Again)
In the previous modules we deployed f5-hello-world behind CIS using NodePort and ClusterIP modes with Ingress and ConfigMap resources. In this lab we will deploy the f5-hello-world, yet again, but behind the NGINX kubernetes ingress controller using ClusterIP.
App Deployment
As before all the necesary files are on kube-master1 in ~/agilitydocs/docs/class1/kubernetes
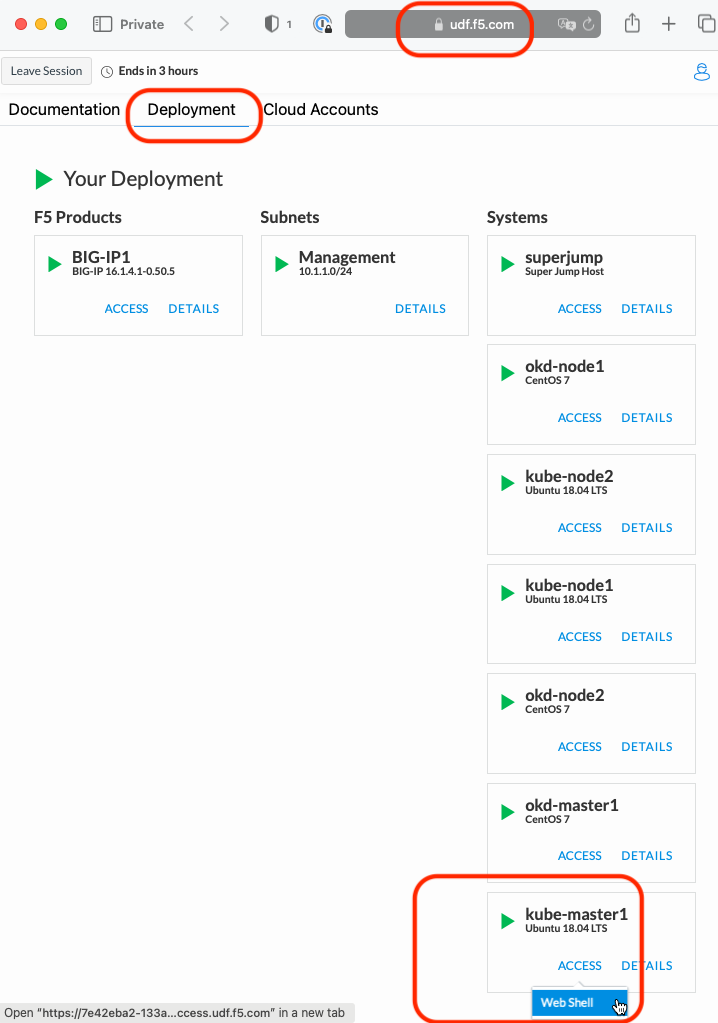
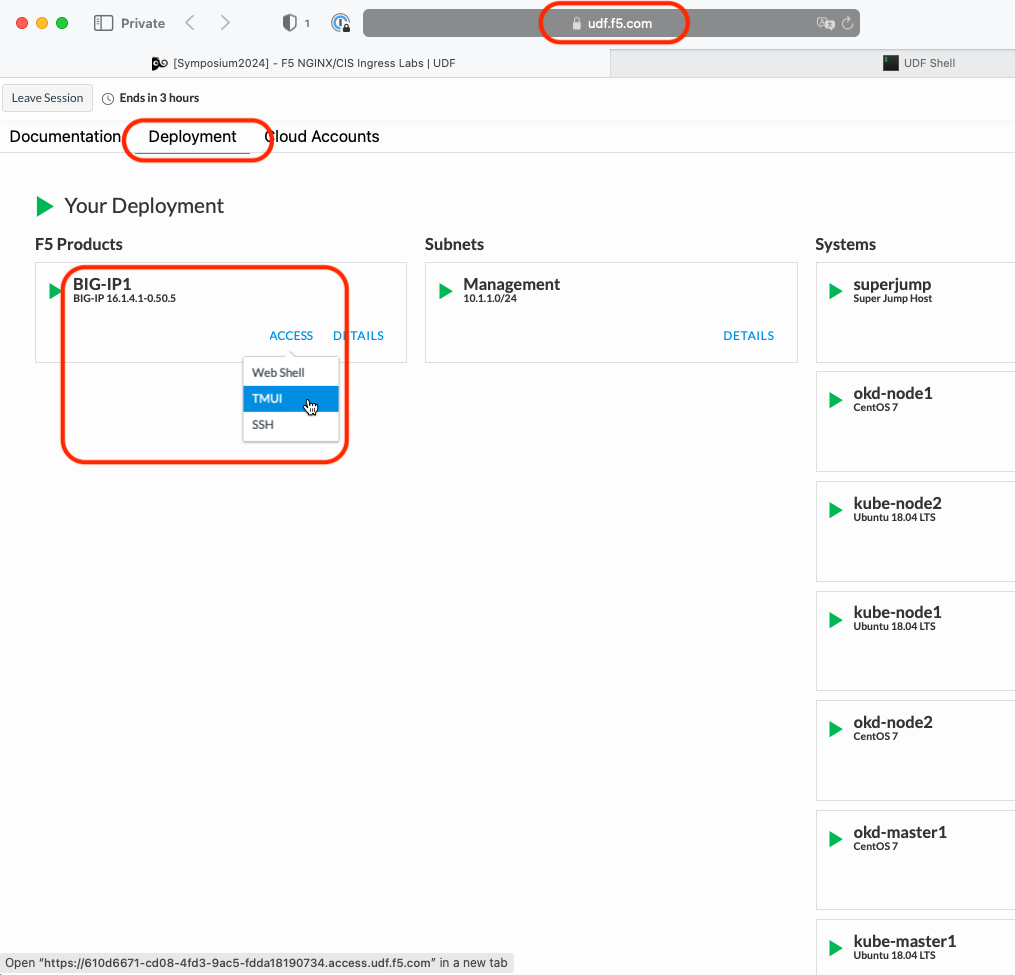
Go back to the Web Shell session you opened in the previous task. If you need to open a new session go back to the Deployment tab of your UDF lab session at https://udf.f5.com to connect to kube-master1 using the Web Shell access method, then switch to the ubuntu user account using the “su” command:
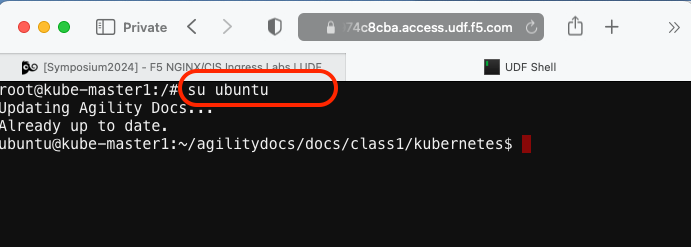
su ubuntuSet the working directy with the yaml file repository with the following “cd” command.
cd ~/agilitydocs/docs/class1/kubernetes
Review hello-world deployment
deployment-hello-world.yamlNote
In all our examples we’ve used the same deployment to create our pods.
deployment-hello-world.yaml¶1apiVersion: apps/v1 2kind: Deployment 3metadata: 4 name: f5-hello-world-web 5 namespace: default 6spec: 7 replicas: 2 8 selector: 9 matchLabels: 10 app: f5-hello-world-web 11 template: 12 metadata: 13 labels: 14 app: f5-hello-world-web 15 spec: 16 containers: 17 - env: 18 - name: service_name 19 value: f5-hello-world-web 20 image: f5devcentral/f5-hello-world:latest 21 imagePullPolicy: IfNotPresent 22 name: f5-hello-world-web 23 ports: 24 - containerPort: 8080 25 protocol: TCP
Review hello-world service
clusterip-service-hello-world.yamlNote
Here we’re not interested in the CIS annotation of the file as before. We’re simply reusing the same service for NGINX Ingress to create the proper endpoints.
clusterip-service-hello-world.yaml¶1apiVersion: v1 2kind: Service 3metadata: 4 name: f5-hello-world-web 5 namespace: default 6 labels: 7 app: f5-hello-world-web 8 cis.f5.com/as3-tenant: AS3 9 cis.f5.com/as3-app: A1 10 cis.f5.com/as3-pool: web_pool 11spec: 12 ports: 13 - name: f5-hello-world-web 14 port: 8080 15 protocol: TCP 16 targetPort: 8080 17 type: ClusterIP 18 selector: 19 app: f5-hello-world-web
Review hello-world NGINX service
nginx-ingress-hello-world.yamlNote
This create’s our app on NGINX. You can see in line 16 and 18 how we reference the previouly created hello-world service by name and port. On line 9 we define the expected host header. Just as before this host is in the local host file (/etc/hosts) and will be needed to access to the app.
nginx-ingress-hello-world.yaml¶1apiVersion: networking.k8s.io/v1 2kind: Ingress 3metadata: 4 name: f5-hello-world-ingress 5 annotations: 6 kubernetes.io/ingress.class: "nginx" 7spec: 8 rules: 9 - host: mysite.f5demo.com 10 http: 11 paths: 12 - path: / 13 pathType: Prefix 14 backend: 15 service: 16 name: f5-hello-world-web 17 port: 18 number: 8080
We can now launch our application:
kubectl create -f deployment-hello-world.yaml
kubectl create -f clusterip-service-hello-world.yaml
kubectl create -f nginx-ingress-hello-world.yaml

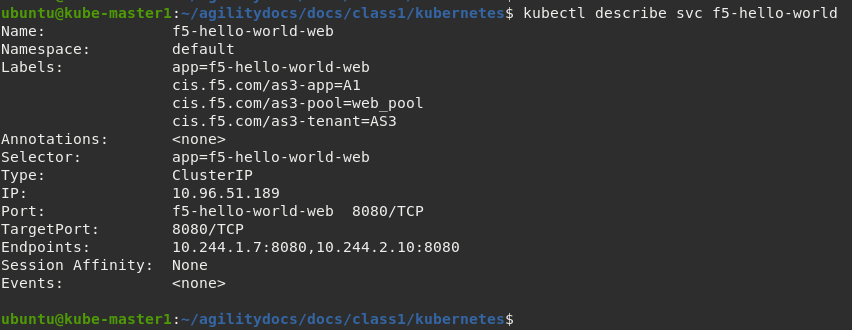
At this point hello-world is not externally accessible but we can check the status of our service.
kubectl describe svc f5-hello-world
CIS Service & Deployment
In order to deploy the virtual service on BIG-IP we need to create and deploy two files, a service and configmap.
Review cis service file
cis-service.yamlNote
In this case the labels are important and must match our configmap declaration.
Important
The namespace of this service and deployment below must match due to changes in CIS v2.1.
Important
Starting with CIS v2.2.2, AS3 ConfigMap expects servicePort to match the port (not the nodeport) exposed in the service definition. See line 13 here and line 39 in the AS3 declaration below.
cis-service.yaml¶1apiVersion: v1 2kind: Service 3metadata: 4 name: nginx-ingress-hello-world 5 namespace: nginx-ingress 6 labels: 7 cis.f5.com/as3-tenant: AS3 8 cis.f5.com/as3-app: A1 9 cis.f5.com/as3-pool: web_pool 10spec: 11 type: NodePort 12 ports: 13 - port: 80 14 targetPort: 80 15 protocol: TCP 16 name: http 17 selector: 18 app: nginx-ingress
Review CIS configmap file
cis-configmap.yamlNote
In this case the labels are important and must match our configmap declaration.
Important
The namespace of this deploymnent and service above must match due to changes in CIS v2.1.
Tip
In all of our AS3 examples you’ll notice the declaration is the same. This make the use of AS3 highly portable.
cis-configmap.yaml¶1apiVersion: v1 2kind: ConfigMap 3metadata: 4 name: f5-as3-declaration 5 namespace: nginx-ingress 6 labels: 7 f5type: virtual-server 8 as3: "true" 9data: 10 template: | 11 { 12 "class": "AS3", 13 "declaration": { 14 "class": "ADC", 15 "schemaVersion": "3.10.0", 16 "id": "urn:uuid:33045210-3ab8-4636-9b2a-c98d22ab915d", 17 "label": "http", 18 "remark": "A1 example", 19 "AS3": { 20 "class": "Tenant", 21 "A1": { 22 "class": "Application", 23 "template": "http", 24 "serviceMain": { 25 "class": "Service_HTTP", 26 "virtualAddresses": [ 27 "10.1.1.4" 28 ], 29 "pool": "web_pool", 30 "virtualPort": 80 31 }, 32 "web_pool": { 33 "class": "Pool", 34 "monitors": [ 35 "http" 36 ], 37 "members": [ 38 { 39 "servicePort": 80, 40 "serverAddresses": [] 41 } 42 ] 43 } 44 } 45 } 46 } 47 }
Create the service and deployment
kubectl create -f cis-service.yaml
kubectl create -f cis-configmap.yaml
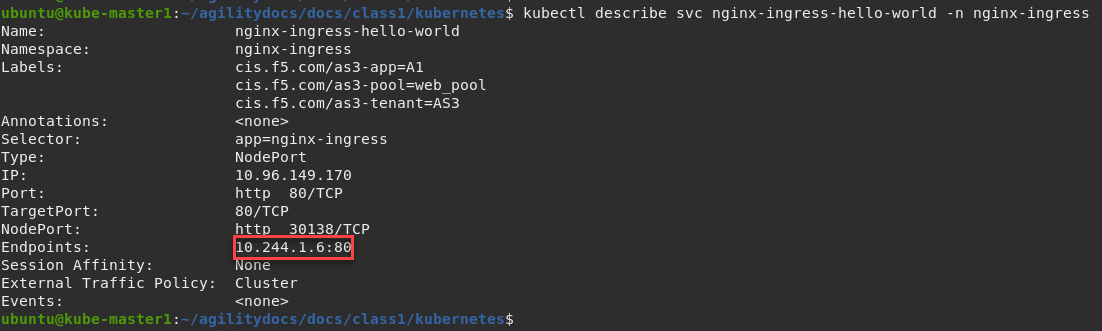
To check the status of our service run the following command:
kubectl describe svc nginx-ingress-hello-world -n nginx-ingress
Attention
As the previous modules pointed out we need to focus on the Endpoints value, this shows our one NGINX instance (defined as replicas in our NGINX deployment file) and the flannel IP assigned to the pod. To confirm the NGINX endpoint IP use the following command:
kubectl get pods -n nginx-ingress -o wide

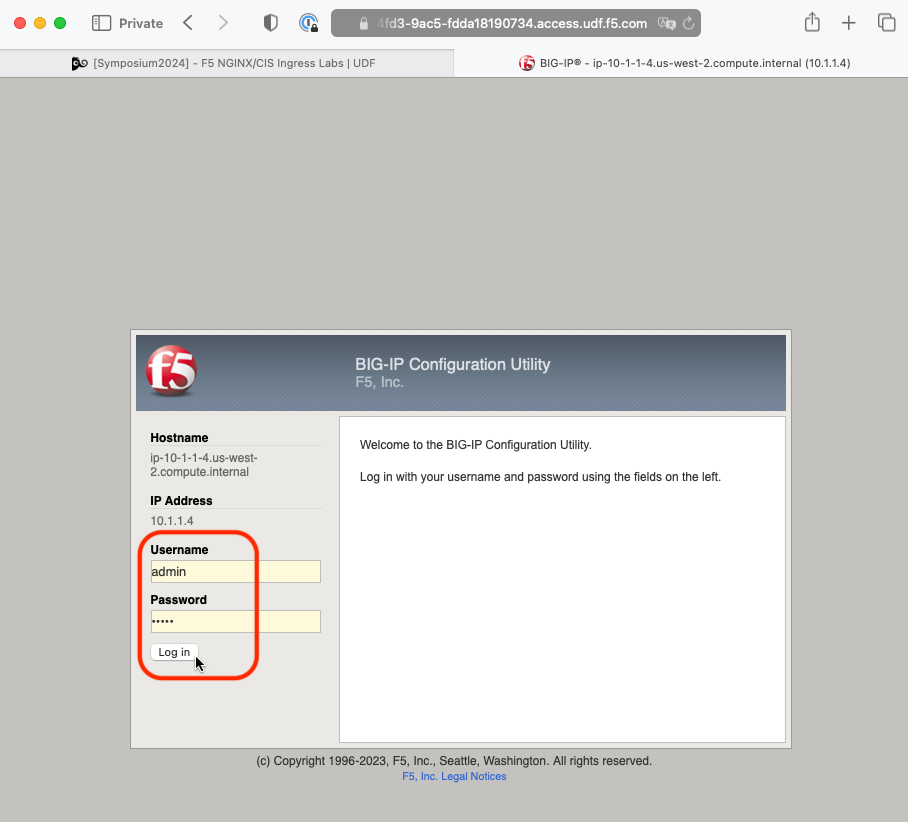
Now that we have deployed our application sucessfully, we can check the configuration on BIG-IP1. Go back to the TMUI session you opened in a previous task. If you need to open a new session go back to the Deployment tab of your UDF lab session at https://udf.f5.com and connect to BIG-IP1 using the TMUI access method (username: admin and password: admin)
Browse to:
Warning
Don’t forget to select the proper partition. In this case we need to look at the “AS3” partition because we’re using AS3. This partition was auto created by AS3 and named after the Tenant which happens to be “AS3”.
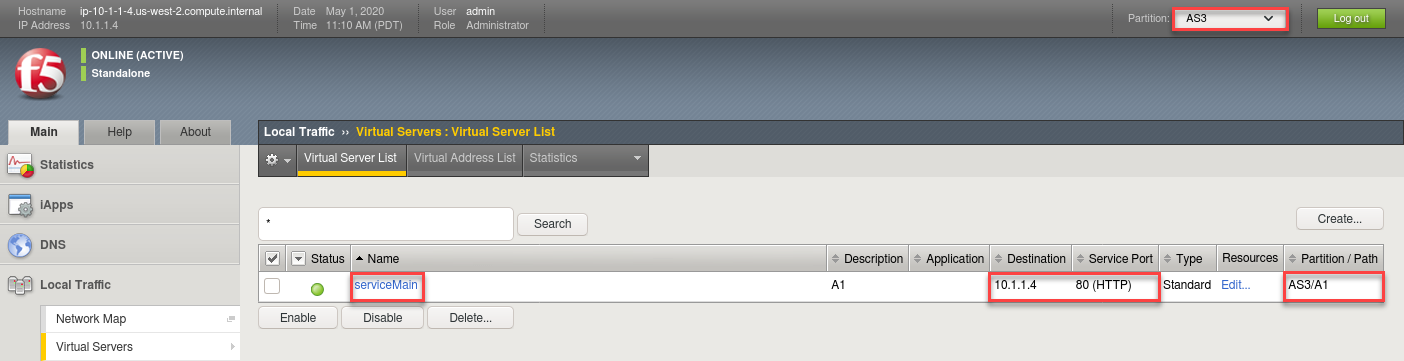
Here you can see a new Virtual Server, “serviceMain” was created, listening on 10.1.1.4:80 in partition “AS3”.
Check the Pools to see a new pool and the associated pool members.
Browse to: and select the “web_pool” pool. Click the Members tab.

Note
You can see that the pool members IP address is the NGINX pod IP.
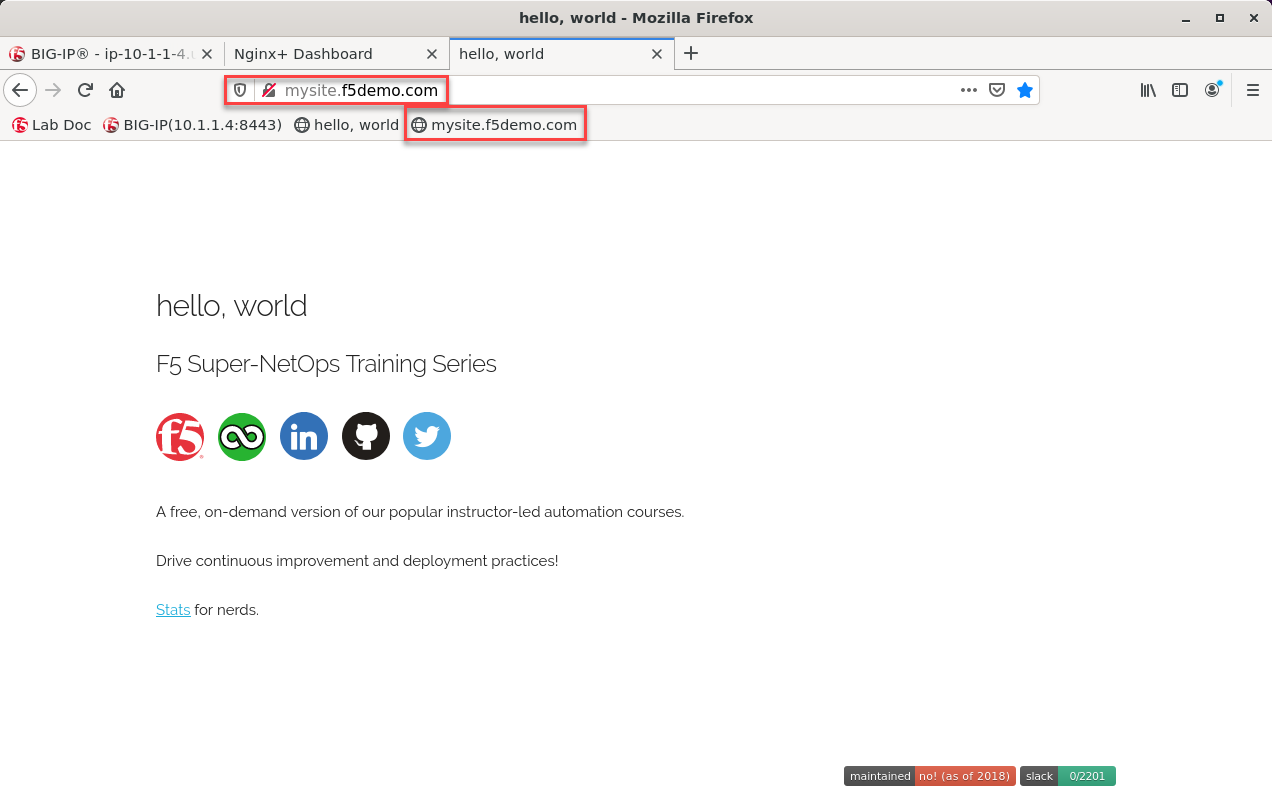
Access your web application via Firefox on the superjump.
Note
Select the “mysite.f5demo.com” shortcut.
Attention
In this case you can’t simply type the IP for the URL. NGINX is looking for a specific HOST header to properly direct the traffic to the right application pod.
Remove Hello-World from BIG-IP.
kubectl delete -f cis-configmap.yaml
kubectl delete -f cis-service.yaml
Note
Be sure to verify the virtual server and “AS3” partition were removed from BIG-IP.
Remove Hello-World from NGINX
kubectl delete -f nginx-ingress-hello-world.yaml
kubectl delete -f clusterip-service-hello-world.yaml
kubectl delete -f deployment-hello-world.yaml
Remove CIS
kubectl delete -f cluster-deployment.yaml
Important
Do not skip these clean-up steps. Instead of reusing these objects, the next lab we will re-deploy them to avoid conflicts and errors.