Advanced Multi-layer Firewall Protection > Advanced Multi-Layer Firewall Protection > Module 1: F5 Multi-layer Firewall Source | Edit on
Lab 6: Configure HTTP security
You can secure HTTP traffic by using a default configuration or by customizing the configuration. You can adjust the following security checks in an HTTP security profile:
- HTTP protocol compliance validation
- Evasion technique detection
- Length checking to help avoid buffer overflow attacks
- HTTP method validation
- Inclusion or exclusion of certain files by type
- Mandatory header enforcement
Warning
HTTP protocol security does not offer the dynamic, constantly-updated security that a web application firewall (WAF) offers. HTTP protocol security in AFM should be complimented by a WAF solution, such as F5’s Advanced WAF, when comprehensive web security is required.
Configure An HTTP Security Profile And Apply It To The External Virtual Server
- Return to the BIG-IP TMUI in Chrome.
- Navigate to Security > Protocol Security > Security Profiles > HTTP.
- Confirm that the Security Profiles tab is selected, then click Create.
| Profile Name | demo_http_security |
|---|---|
| Custom | Checked |
| Profile is case sensitive | Checked |
| HTTP Protocol Checks | Check All |
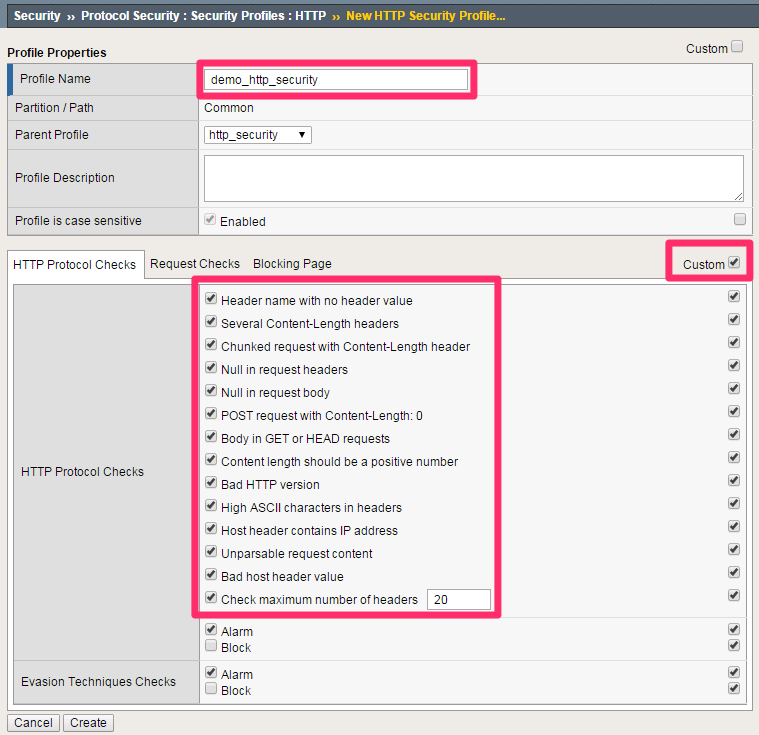
Note
Leave all other fields using the default values.
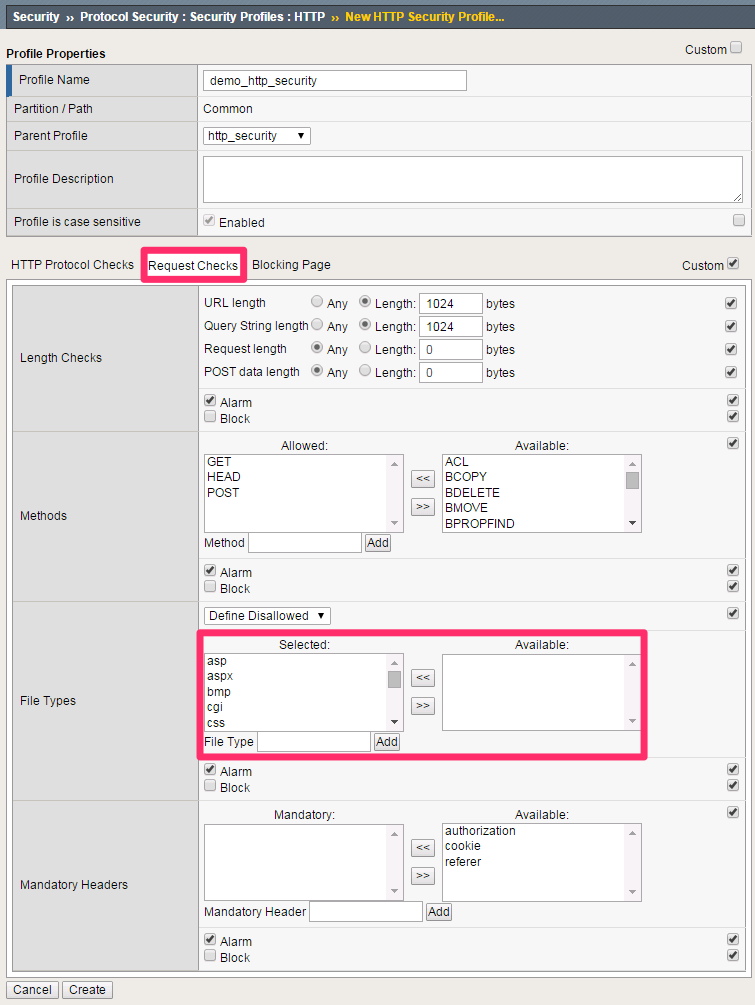
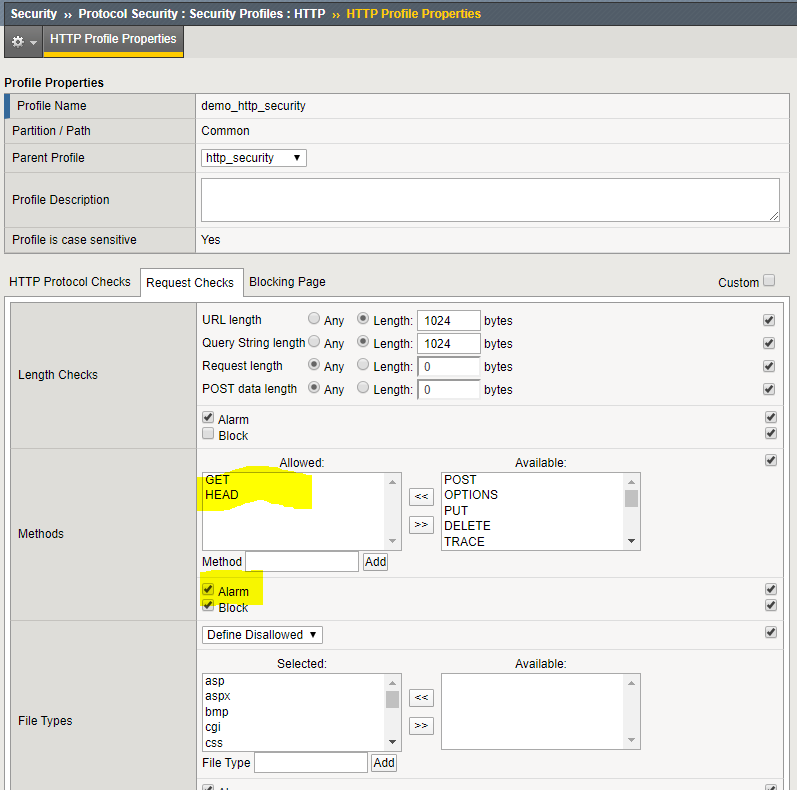
- Click the Request Checks tab.
Tip
We’re going to allow the default HTTP methods. Restricting the methods allowed to reach production servers is a great way to shrink the attack surface.
| File Types | Select All |
- Click the Blocking Page tab. Change the Response Type drop-down to Custom Response.
| Response Type | Custom Response |
|---|---|
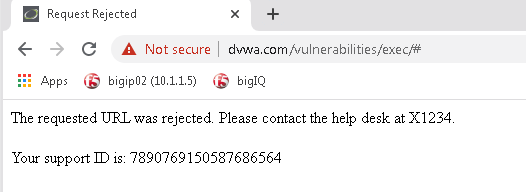
| Response Body | Insert “Please contact the helpdesk at x1234” as noted below |
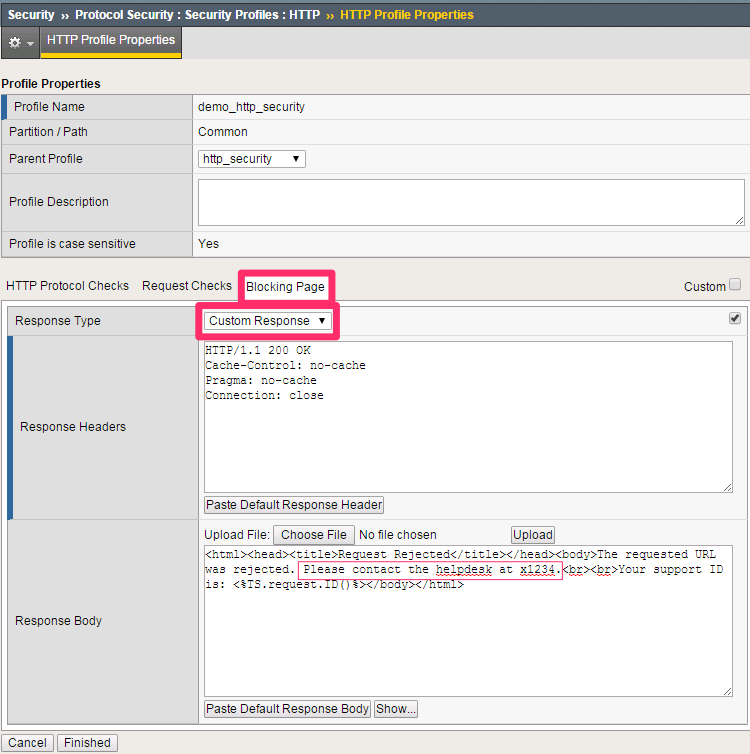
Note
Leave all other fields using the default values.
- Click Create.
Warning
We did not put the policy in Blocking mode. We will do that after we verify functionality.
Now, let’s apply the HTTP security profile to the external virtual server.
- Navigate to Local Traffic > Virtual Servers > Virtual Server List.
- Select EXT_VIP_10.1.10.30, then select the Security drop-down and choose Policies.
| Protocol Security | Enabled | demo_http_security |
| Log Profile | selected | firewall_log_profile |
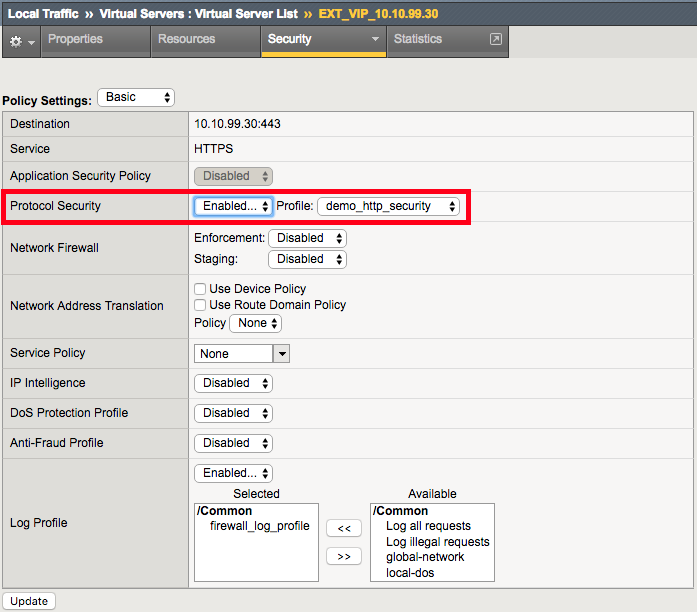
Note
Leave all other fields using the default values.
- Click Update.
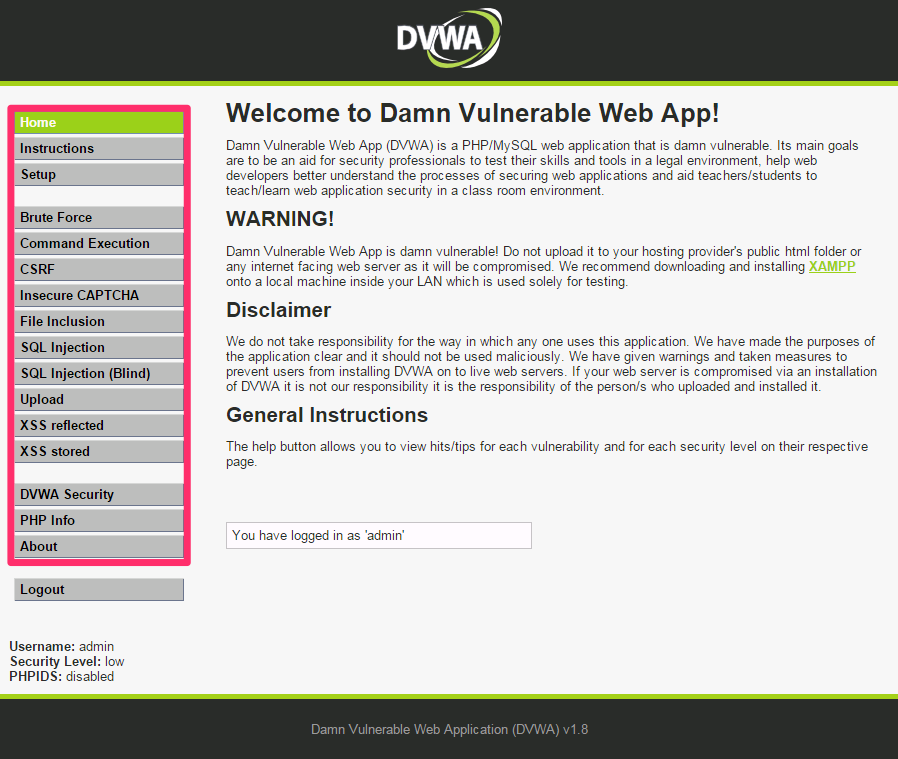
- Return to tab #7 in Chrome and refresh the DVWA app at https://dvwa.com.
Credentials: admin/password
Note
This application is accessible, even though there are policy violations, because the “Block” option in the HTTP security policy is not selected.
- Browse the application clicking on various links on the sidebar.
Warning
If you change the admin password in DVWA, make sure you remember it for later!
Note
This traffic will generate network firewall log entries because the Alarm option in the HTTP security policy is selected.
- On the BIG-IP, review the log entries created in the previous step by navigating to Security > Event Logs > Protocol > HTTP.

Note
Your log entries may be different than the example shown above but the concept should be the same.
- Edit the demo_http_security HTTP security profile by navigating to Security > Protocol Security > Security Profiles > HTTP.
- Select the demo_http_security profile, then select the Request Checks tab.
| Methods | Remove Post From the Allowed Group. Check “Block” |
Note
Leave all other fields using the default values.
- Click Finished.
- On the jump box, Log out of DVWA by selecting Log Out in the menu. Attempt to log back in. This action requires a POST action and will be blocked because this is not allowed.
URL: https://dvwa.com
Credentials: admin/password
- Edit the demo_http_security HTTP security profile at Security > Protocol Security > Security Profiles > HTTP.
- Select the demo_http_security profile, then undo the POST block in the Request Checks tab.
| Methods |
|
This is the end of Module 1 - Lab 6. Click Next to continue.