F5 Identity and Access Management Solutions > Archived Identity & Access Management Labs > 100 Series: Access Foundational Concepts Source | Edit on
Lab 2: Step up Authentication with Per-Request Policies
Objectives
The purpose of this lab is to familiarize the Student with Per Request Policies. The F5 Access Policy Manager (APM) provides two types of policies.
Access Policy - The access policy runs when a client initiates a session. Depending on the actions you include in the access policy, it can authenticate the user and perform group or class queries to populate session variables with data for use throughout the session. We created one of these in the prior lab
Per-Request Policy - After a session starts, a per-request policy runs each time the client makes an HTTP or HTTPS request. A per-request policy can include a subroutine, which starts a sub-session. Multiple sub-sessions can exist at one time. One access policy and one per-request are specified within a virtual server.
It’s important to note that APM first executes a per-session policy when a client attempts to connect to a resource. After the session starts then a per-request policy runs on each HTTP/HTTPS request. Per-Request policies can be utilized in a number of different scenarios; however, in the interest of time this lab will only demonstrate one method of leveraging Per-Request policies for controlling access to specific URI’s and submitting information from Active Directory as a header to the application.
Objective:
- Gain an understanding of Per Request policies
- Gain an understanding of use for Per Request Policy
Lab Requirements:
- All lab requirements will be noted in the tasks that follow
Estimated completion time: 15 minutes
Lab 2 Tasks:
TASK 1: Create Per Session Policy
Refer to the instructions and screen shots below:
Login to your lab provided Virtual Edition BIG-IP
- On your jumphost launch Chrome and click the bigip1 link from the app shortcut menu
- Login with credentials admin/admin
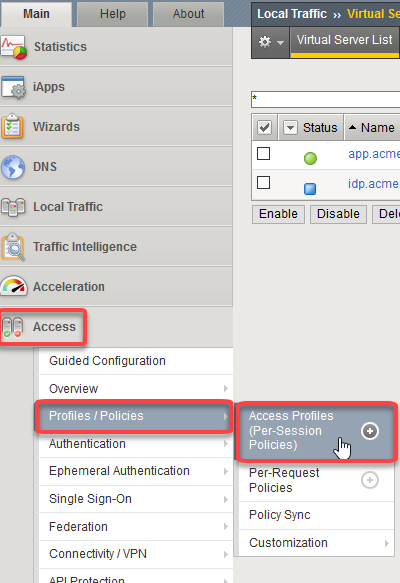
Begin by selecting: Access -> Profiles/Policies -> Per Session Policies ->
Click the + Sign next to Access Profiles (Per-Session Policies)
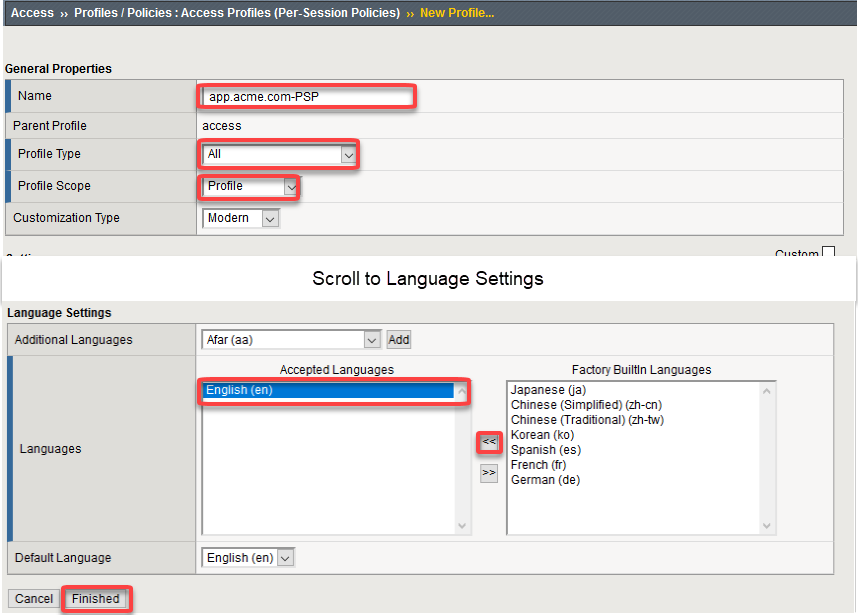
Enter the name of the policy, profile type, and profile scope
Name: app.acme.com-PSP Profile Type: All Profile Scope: Profile Accept Languages: English (en) Note
You will need a per session policy and a per request policy but we will be leaving the per session policy blank and performing our auth in per Request
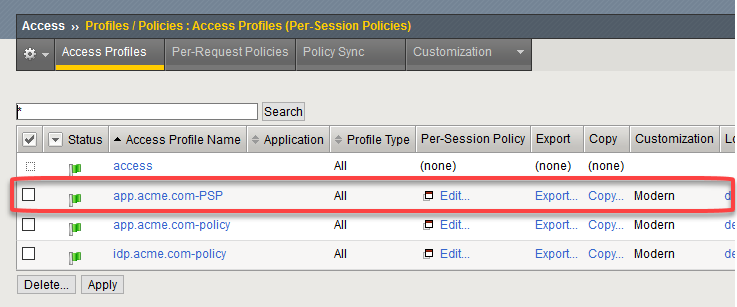
On the app.acme.com-PSP policy click Edit
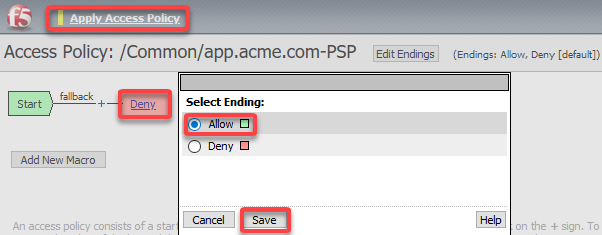
Click on the Deny and change the Select Ending to Allow
Click Save
Click Apply policy
Note
Nothing will be set in this policy we will simply establish a session and manage all the authentication in the Per-Request Policy
Close Visual Policy Editor

Task 2: Step Up Authentication with Per Request Policies
Step-up authentication can be used to protect layers or parts of a web application that manage more sensitive data. It can be used to increase protection by requiring stronger authentication within an already authenticated access to the web application. Step-up authentication can be a part of using the portal access or web application management (reverse proxy) features of Access Policy Manager.
In this example we’re going to use a Per-Request Policy with a subroutine to authenticate user when they access a specific URI, extract information from Active Directory and submit that information as a header
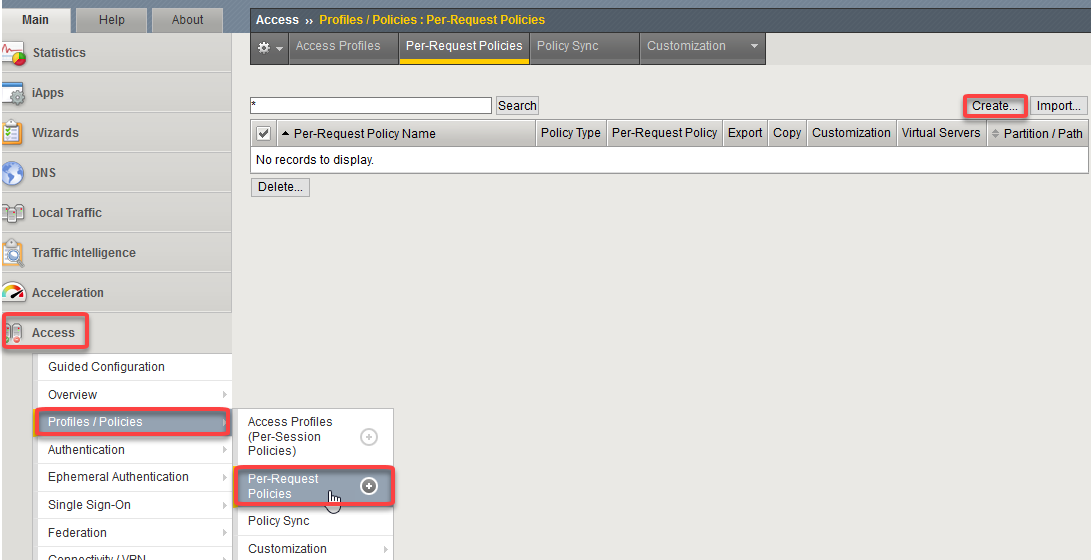
Begin by selecting: Access -> Profiles/Policies -> Per Request Policies ->
Click the Create button (far right)
Give the policy a name and select the Language Settings
Name: app.acme.com-PRP Accept Languages: English (en) 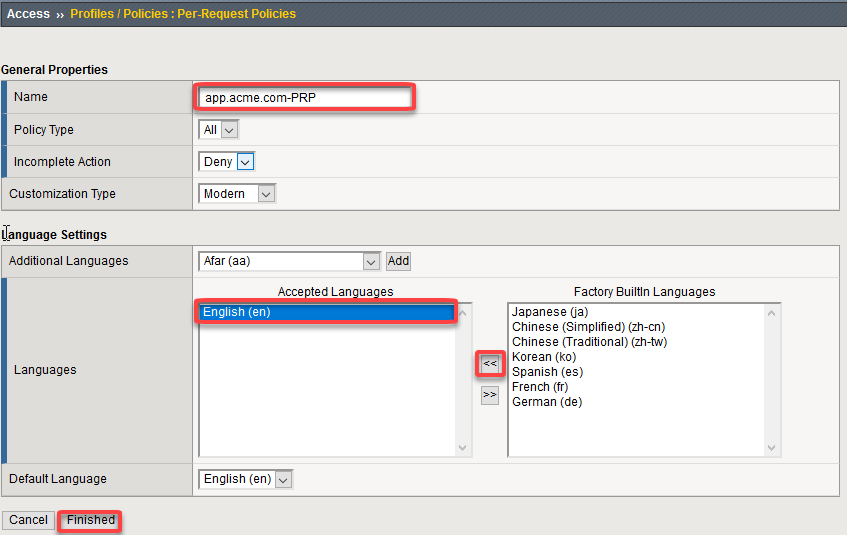
Click Finished
Back in the Access –> Profiles/Policies –> Per-Request Policies screen locate app.acme.com-PRP policy you just created.
Click Edit to the right of the name
Click on Add New Subroutine

Give it a name and Click Save
Name: AD_Subroutine 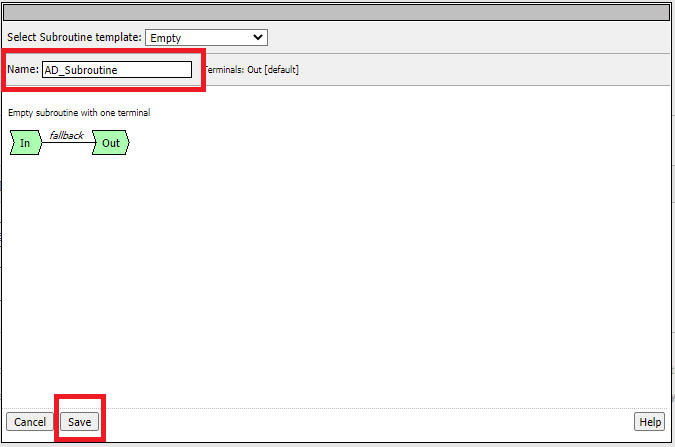
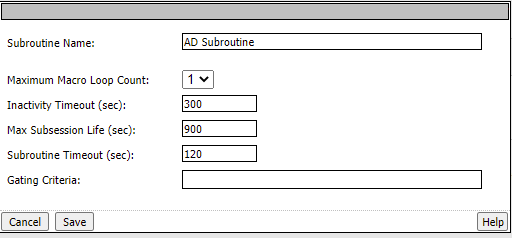
Click the + between In and Out In the subroutine
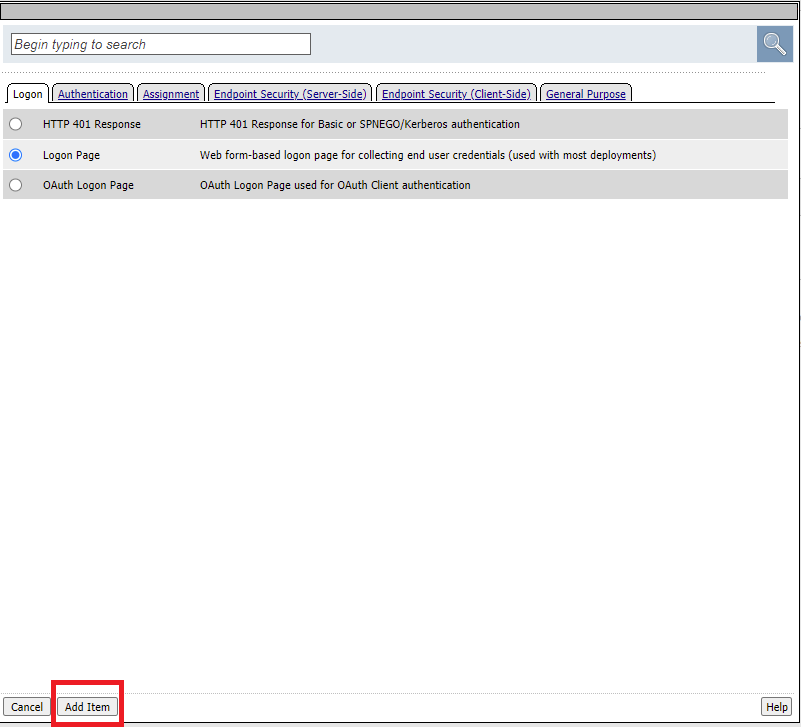
Click the Logon Tab
At the middle of the list choose Logon Page and click Add Item
Select Save at the bottom of the Logon Page dialog box
In the subroutine, between the Logon page and the green out terminal click the + and select the Logon Tab and click the Logon Page radio button
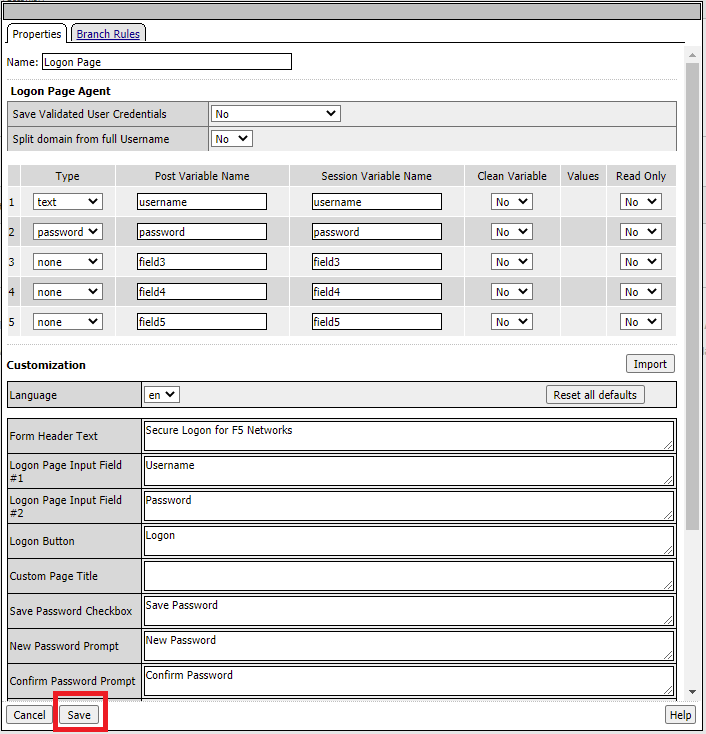
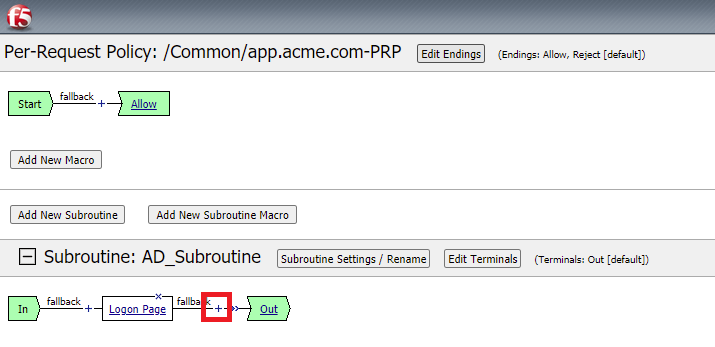
Click the + sign between Logon Page and Out and select the Authentication tab and click the AD Auth radio Button
Select AD Auth and click Add Item at the bottom
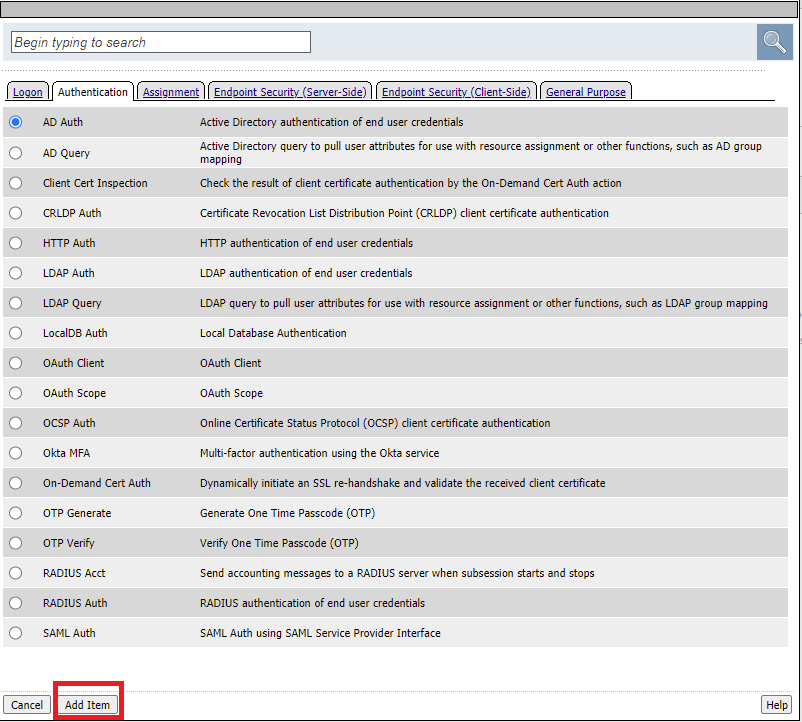
Give the item a name
Name: AD_Auth Select /Common/lab_sso_sd_server for the Server option
Note
The lab_sso_ad_server object was created in Lab 1
Click the Save
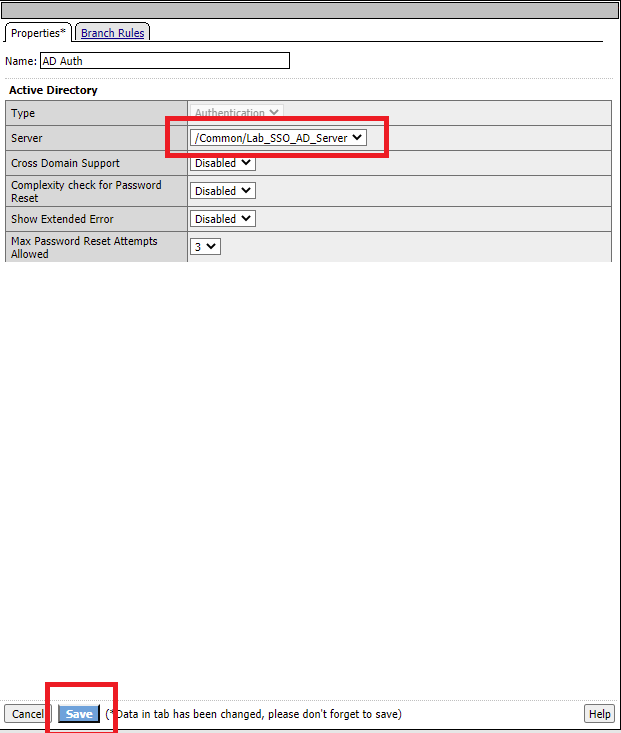
Between AD Auth and the Out endpoint click the + Sign
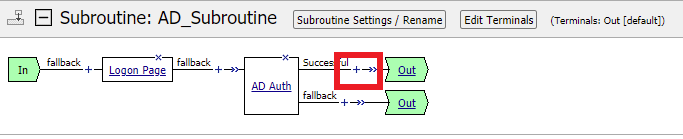
Select Authentication and Select the AD Query radio button and click Add Item
Change the Server option to /Common/lab_sso_ad_server and click Save
Between AD Query and the Out endpoint click the + Sign
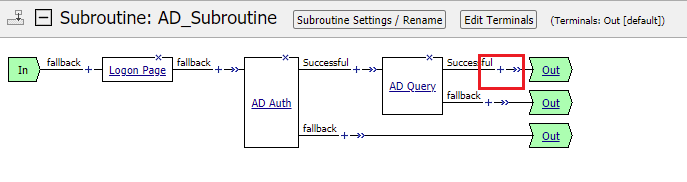
Navigate to the Assignment tab and select Variable Assign and click Add Item
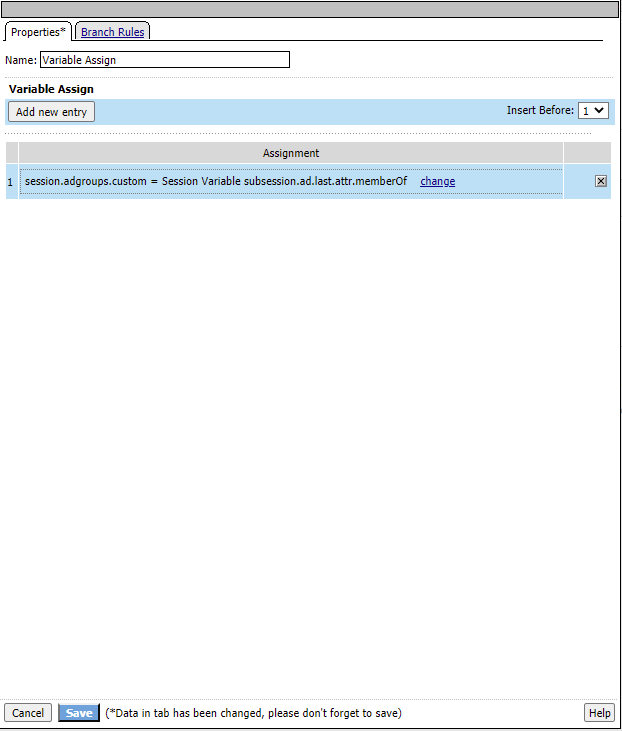
Under Variable Assign click Add New Entry
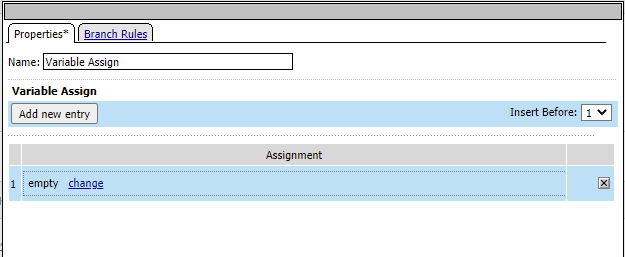
Next to “Empty” click the Change link
Change the drop down on the right hand side to Session Varaible and input the following value
subsession.ad.last.attr.memberOf In the left hand box type the following then click Finished and Save
session.adgroups.custom 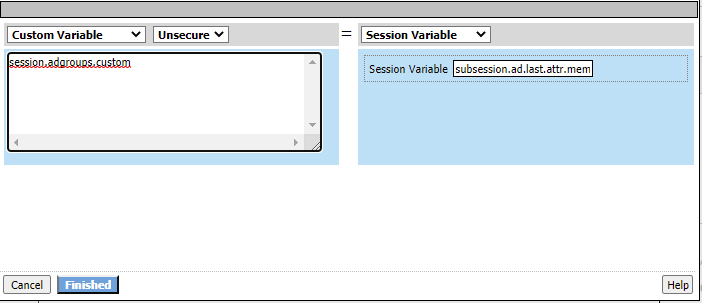
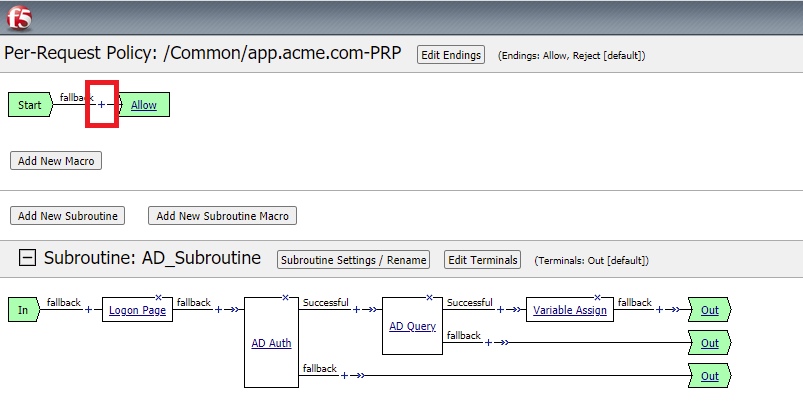
Click the + sign between Start and Allow directly under the Per Request Policy at the top of the page
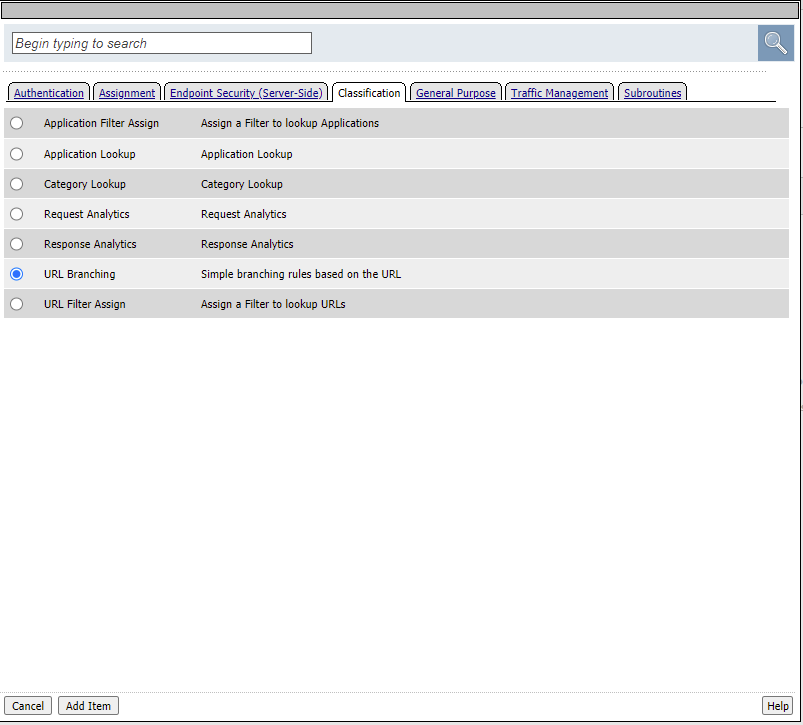
Select the Classification tab, click the URL Branching Radio Button and click Add Item
Click the Branch Rules tab and then click the change hyperlink
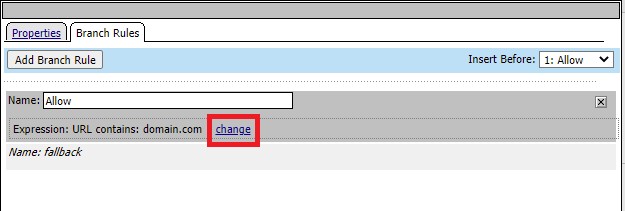
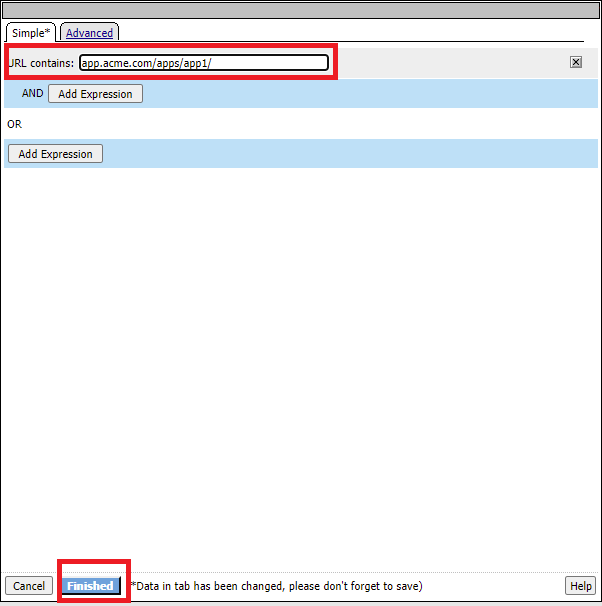
Change the value domain.com to app.acme.com/apps/app1/ and click finished
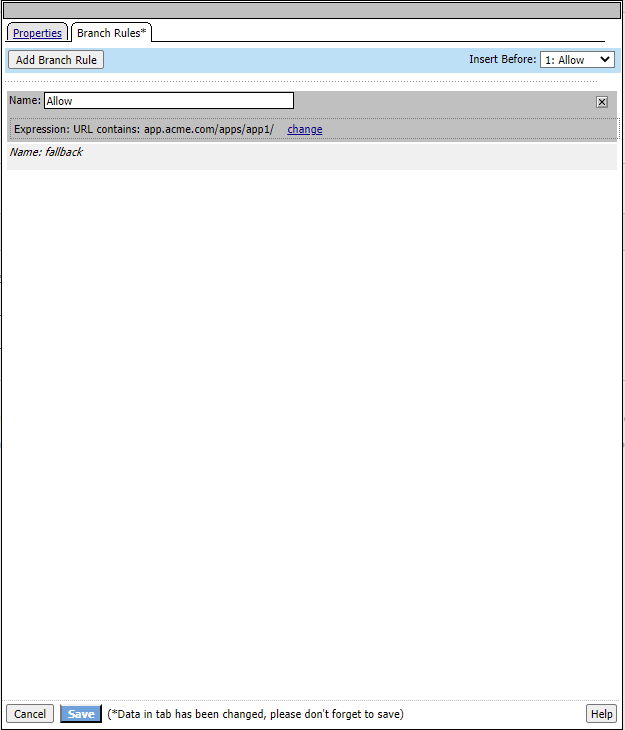
Change the name from Allow to /apps/app1/ and then click Save
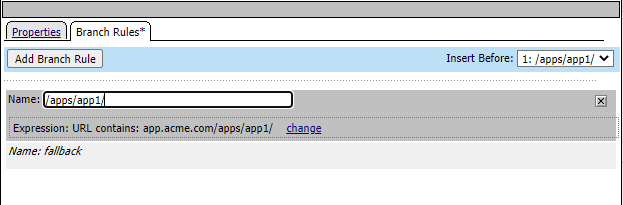
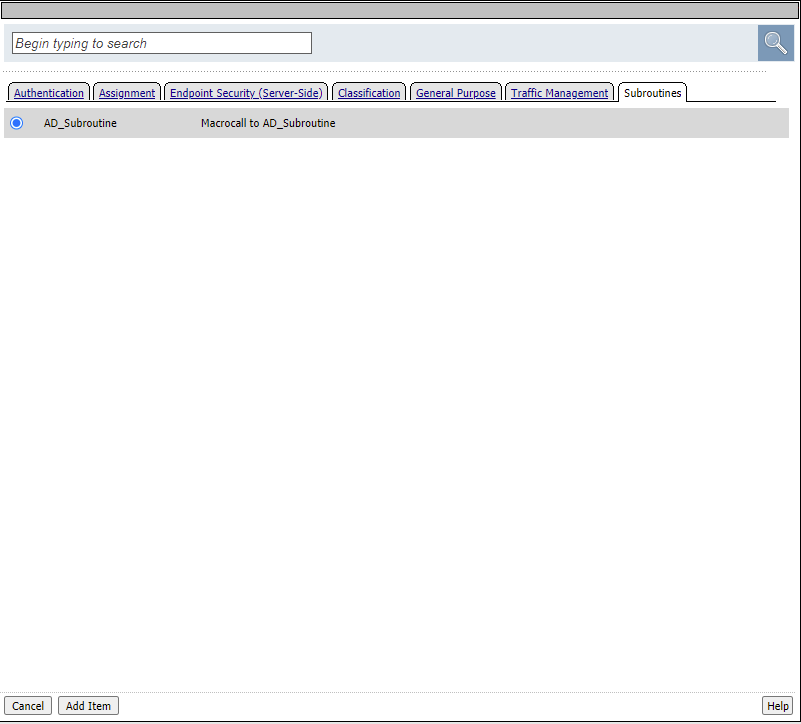
Click the + sign after the /apps/app1/ branch you just added and select the subroutines tab and click the AD_Subroutine radio button and click Add Item
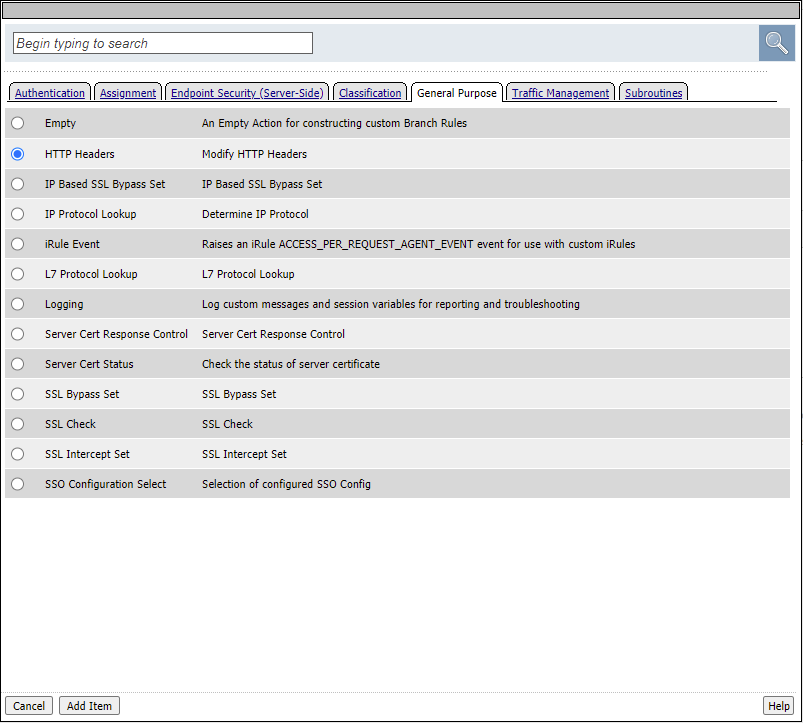
Click the + sign after the AD_Subroutine Box you just added and select the General Purpose tab and click the HTTP Headers radio Button
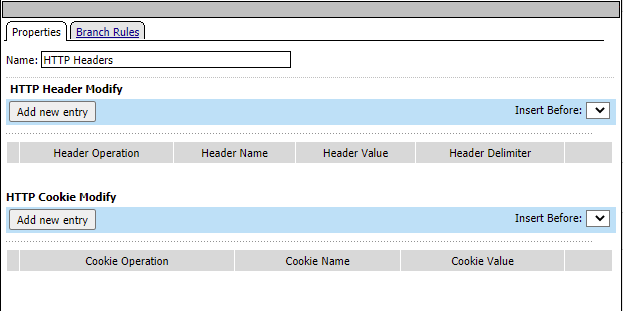
Under HTTP Header Modify, click Add new entry
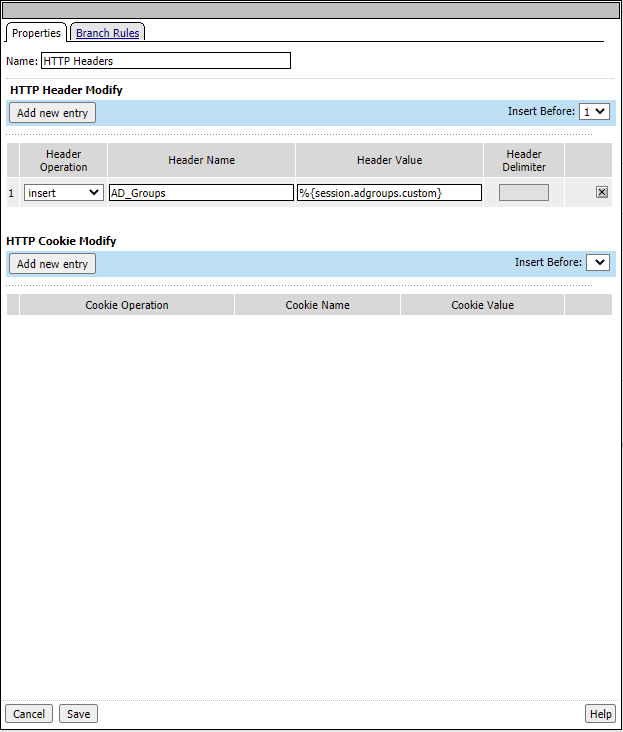
Type AD_Groups for header name and %{session.adgroups.custom} for Header Value and click Save
In the Per-Request Policy follow the fallback branch for the URL Branching. Click on the Reject terminal and change to Allow
Your Per-Request Policy should now look like this
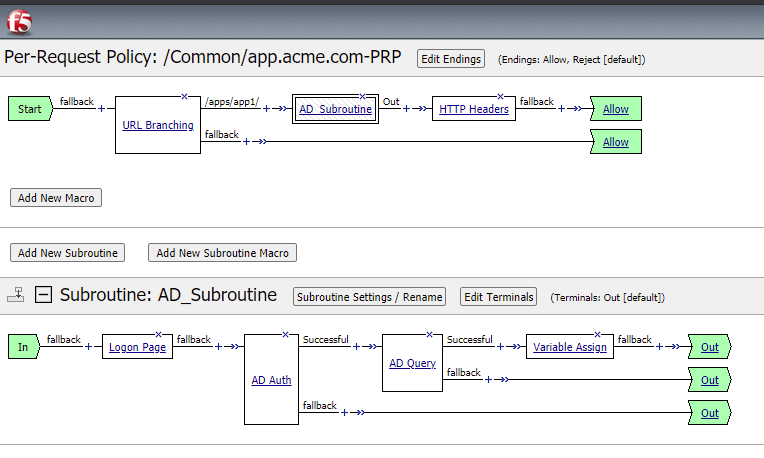
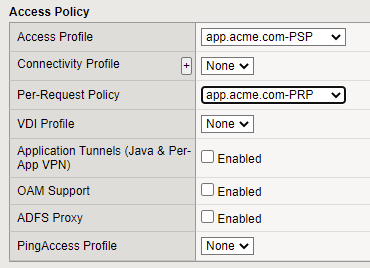
Navigate back to Local Traffic -> Virtual Servers and select your VIP, under the Access policy section of your VIP bind your Per-Session and Per Request policies
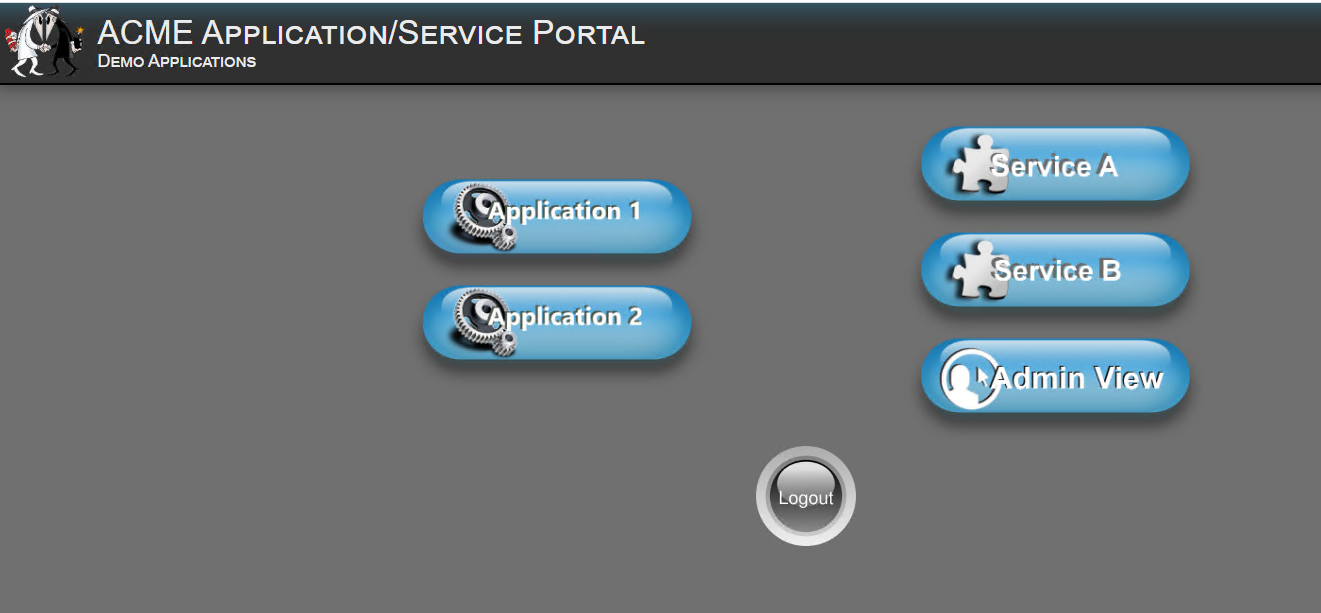
In a browser on your jumphost access https://app.acme.com you should see the webpage listed below, click the Application1 link
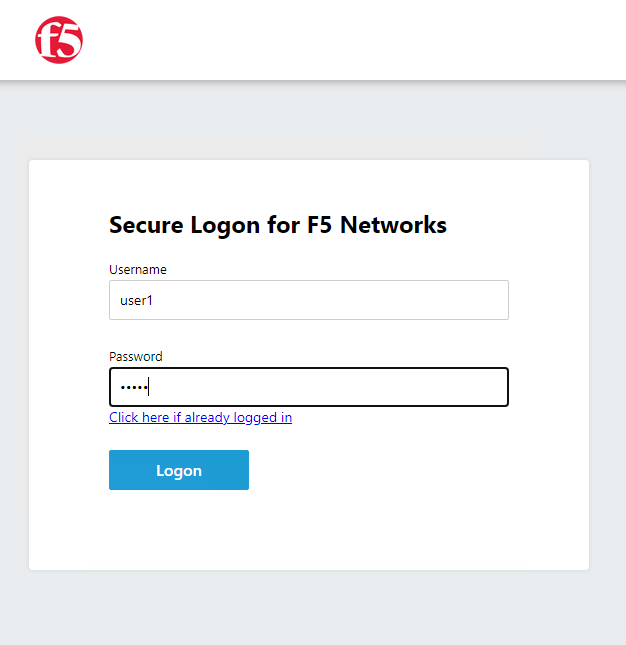
Authenticate with the user1 username and user1 password
Notice the Ad-Groups header which contains the extracted AD group information submitted to the application as a HTTP Header
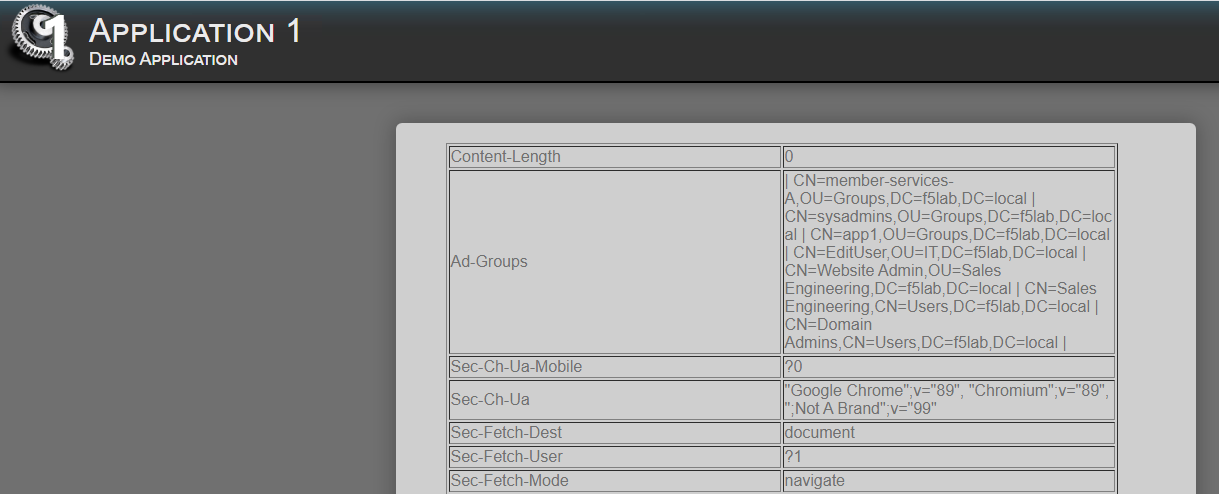
What we have demonstrated here is the application of step-up authentication to a portion of the webpage, from there we extracted information from Active Directory to submit to the application in the form of an HTTP Headers
Lab 2 is now complete.