F5 Identity and Access Management Solutions > Archived Identity & Access Management Labs > 300 Series: Advanced Use Cases & Solutions Source | Edit on
Lab 6: SAML IdP Chaining to AzureAD (BIG-IP Primary IdP)
Task 1 - Setup Lab Environment
To access your dedicated student lab environment, you will need a web browser and Remote Desktop Protocol (RDP) client software. The web browser will be used to access the Unified Demo Framework (UDF) Training Portal. The RDP client will be used to connect to the jumphost, where you will be able to access the BIG-IP management interfaces (HTTPS, SSH).
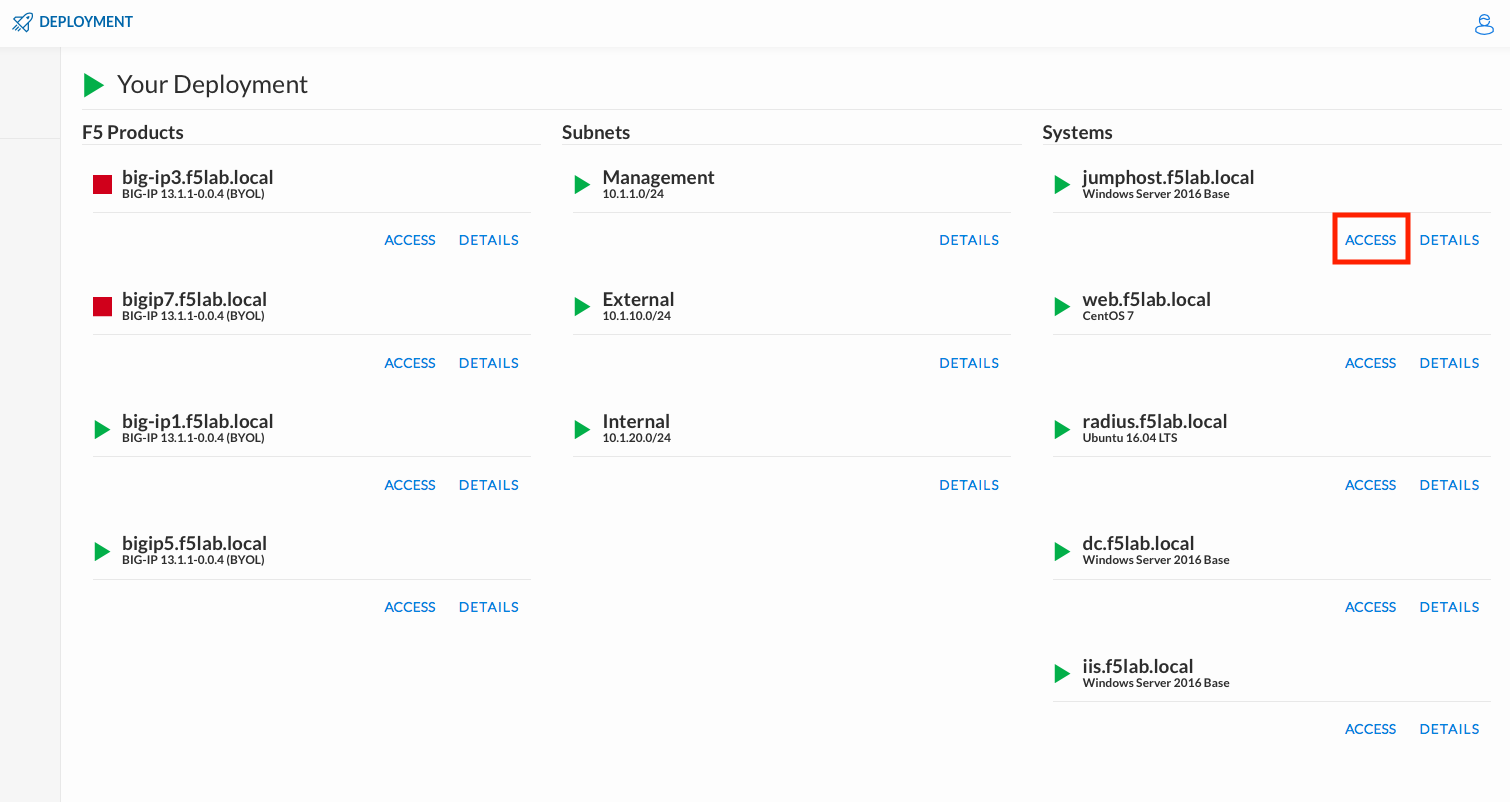
Click DEPLOYMENT located on the top left corner to display the environment
Click ACCESS next to jumphost.f5lab.local
Select your RDP resolution.
The RDP client on your local host establishes a RDP connection to the Jump Host.
Login with the following credentials:
- User: f5lab\user1
- Password: user1
After successful logon the Chrome browser will auto launch opening the site https://portal.f5lab.local. This process usually takes 30 seconds after logon.
Click the Classes tab at the top of the page.
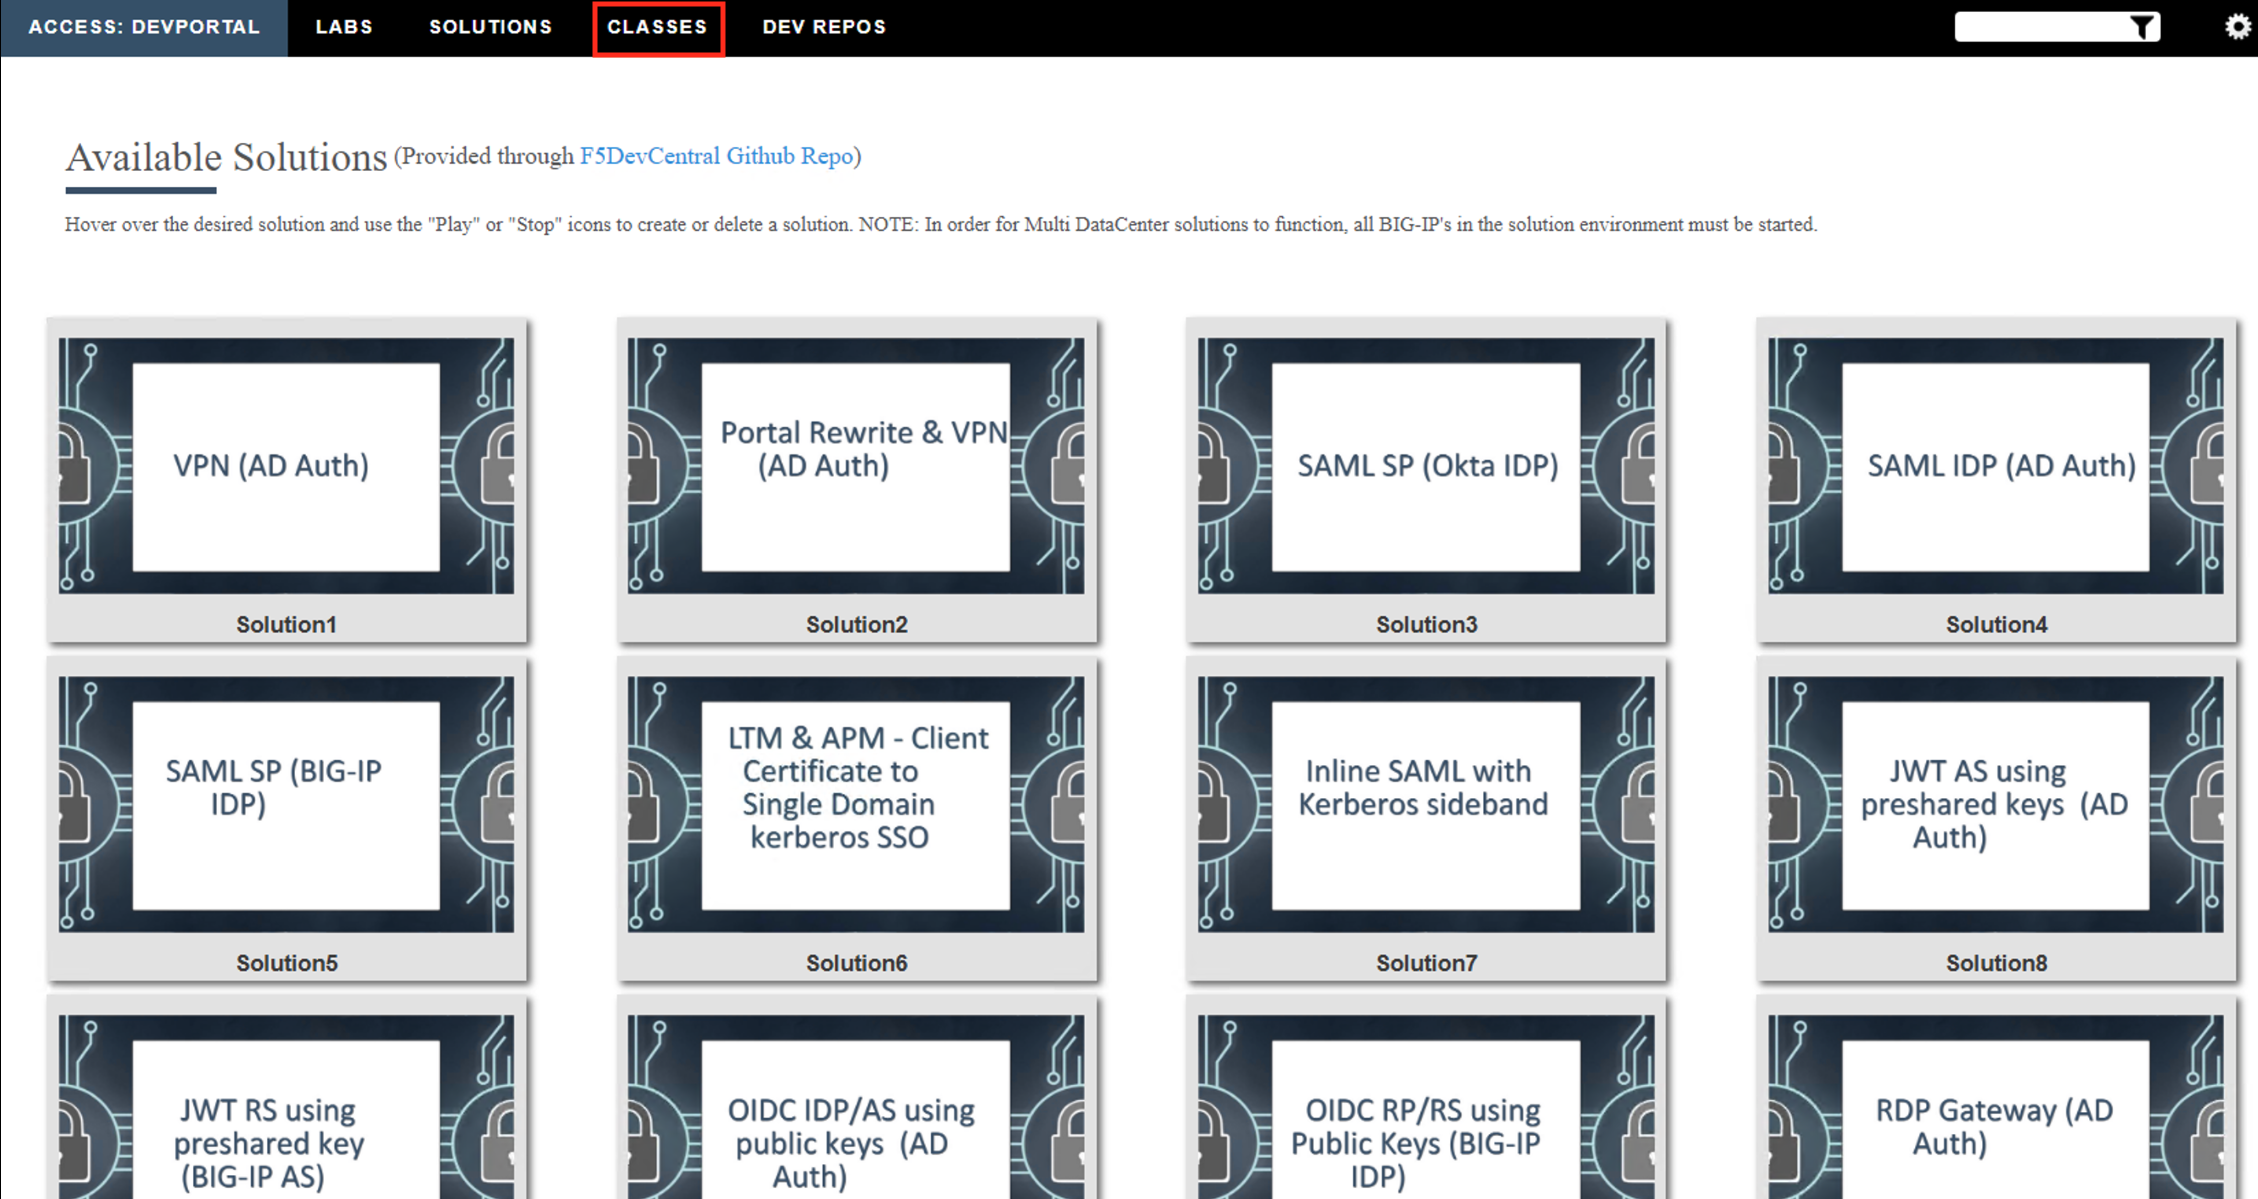
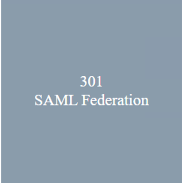
Scroll down the page until you see 301 SAML Federation on the left
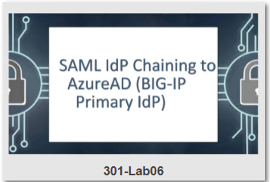
Hover over tile SAML IdP Chaining to AzureAD (BIG-IP Primary IdP). A start and stop icon should appear within the tile. Click the Play Button to start the automation to build the environment
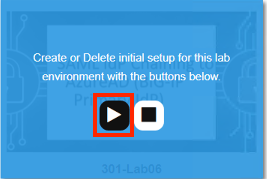
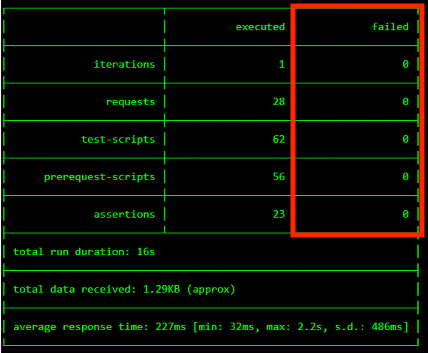
The screen should refresh displaying the progress of the automation within 30 seconds. Scroll to the bottom of the automation workflow to ensure all requests succeeded. If you experience errors try running the automation a second time or open an issue on the Access Labs Repo.

Task 2 - Create portal.acme.com SAML Service Provider(SP) Service
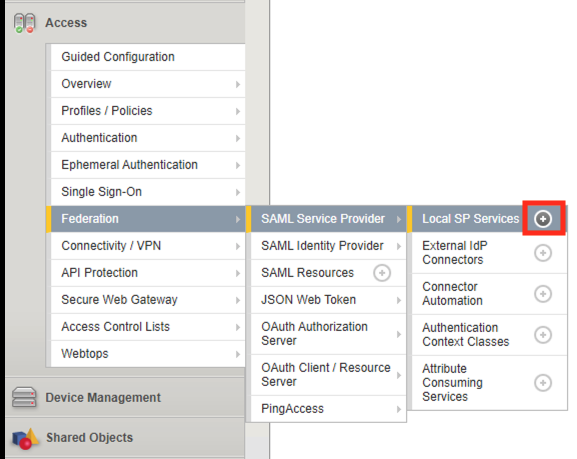
Begin by selecting: Access ‑> Federation ‑> SAML Service Provider ‑> Local SP Services. Click the Plus (+) Sign
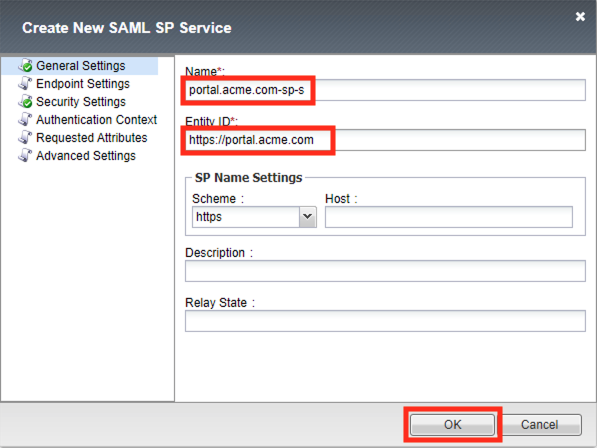
In the Create New SAML SP Service dialog box, click General Settngs in the left navigation pane and key in the following:
Service Name: portal.acme.com-sp-sEntity ID: https://portal.acme.comClick OK
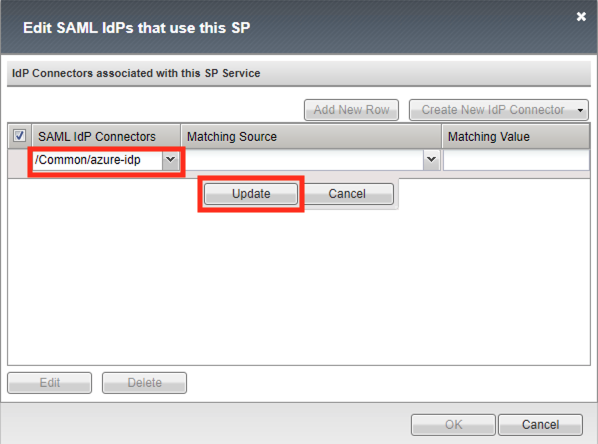
Select the Checkbox next to the previously created
portal.acme.comand click the Bind/Unbind IdP Connectors button at the bottom of the GUI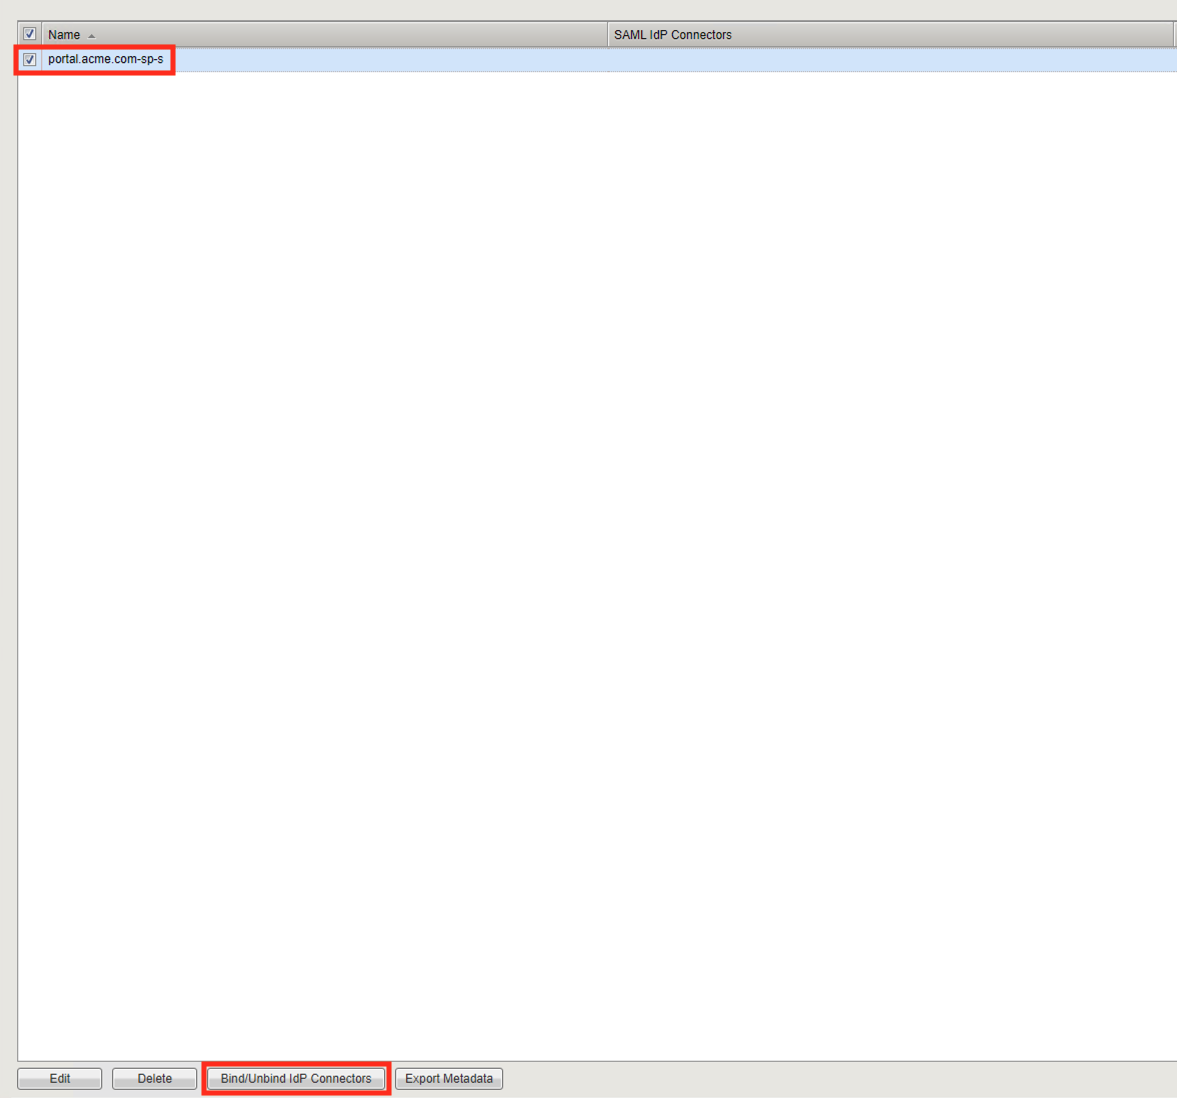
Click Add New Row

Select /Common/azure-idp from the SAML IdP Connectors dropdown menu
Click Update
Note
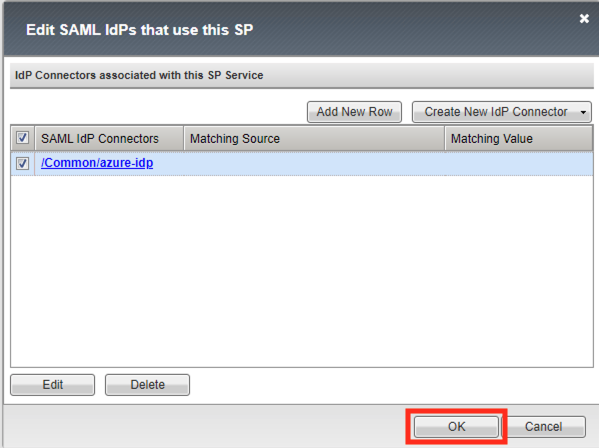
The Azure IdP connector was previously configured through the automation.
Click OK
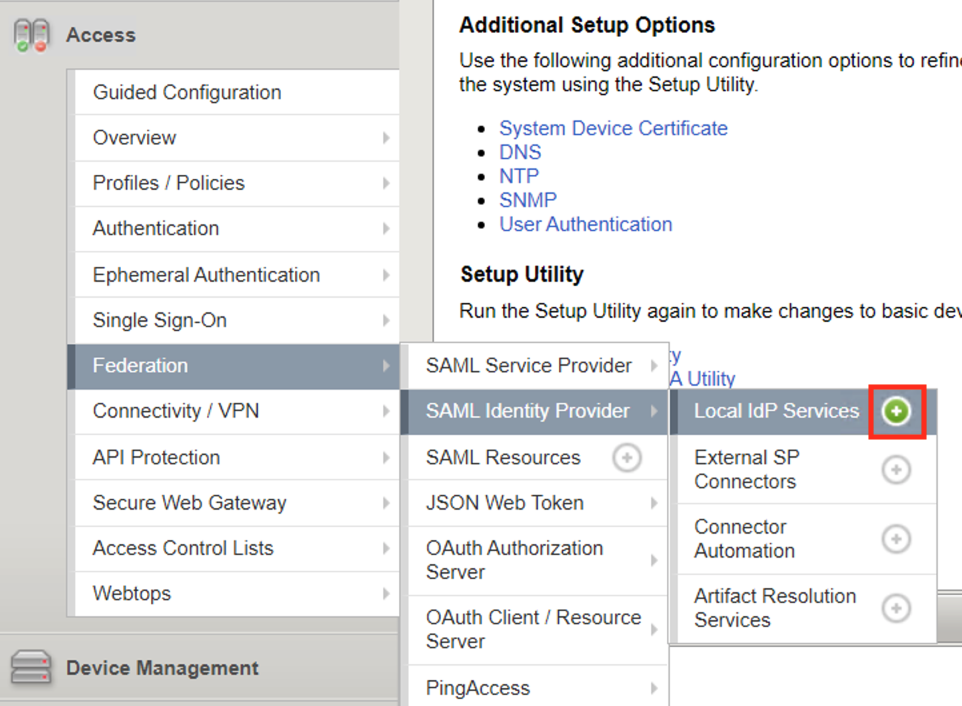
Task 3 ‑ Configure the SAML Identity Provider (IdP) Service
Begin by selecting: Access ‑> Federation ‑> SAML Identity Provider ‑> Local IdP Services. Click the Plus (+) Sign
In the Create New SAML IdP Service dialog box, click General Settngs in the left navigation pane and key in the following:
IdP Service Name: portal.acme.com-idp-sIdP Entity ID: https://portal.acme.com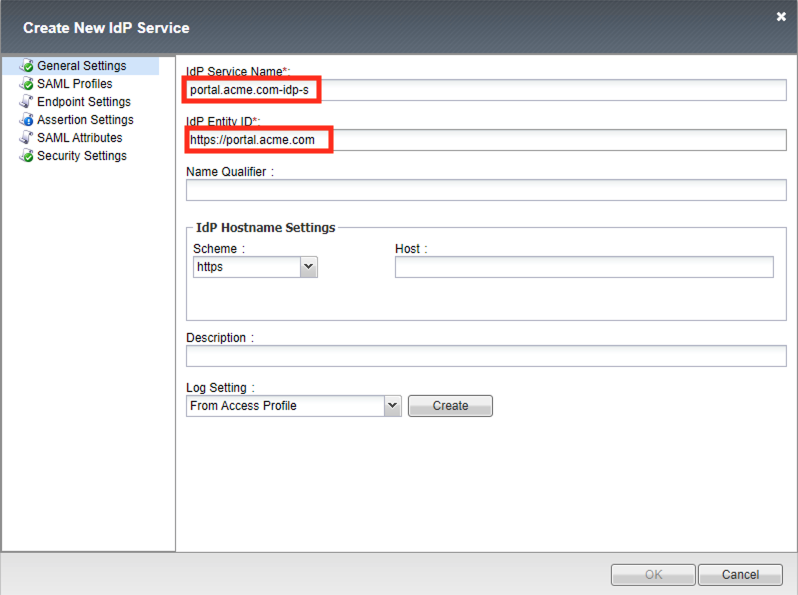
Note
The yellow box on “Host” will disappear when the Entity ID is entered
In the Create New SAML IdP Service dialog box, click Assertion Settings in the left navigation pane and key in the following:
Assertion Subject Type: Persistent Identifier(drop down)Assertion Subject Value: %{session.logon.last.username}(drop down)Authentication Context Class Reference %{session.saml.last.authNContextClassRef}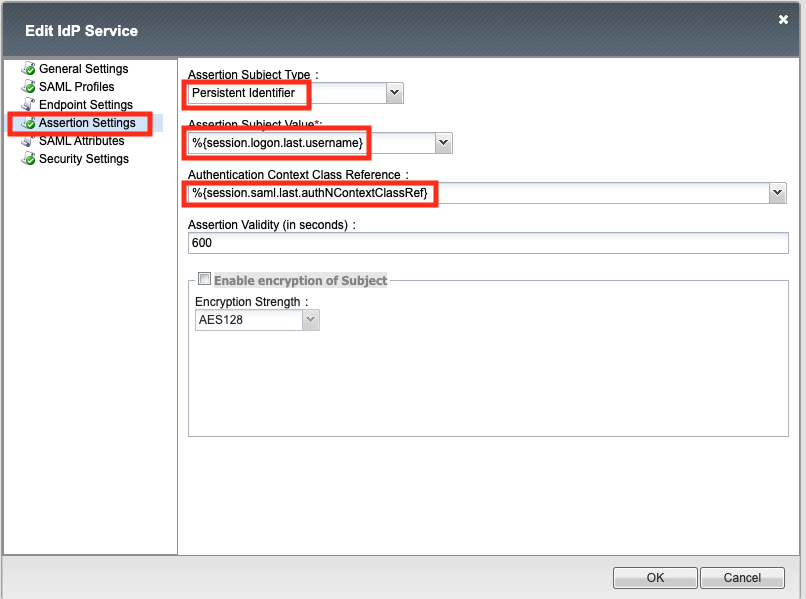
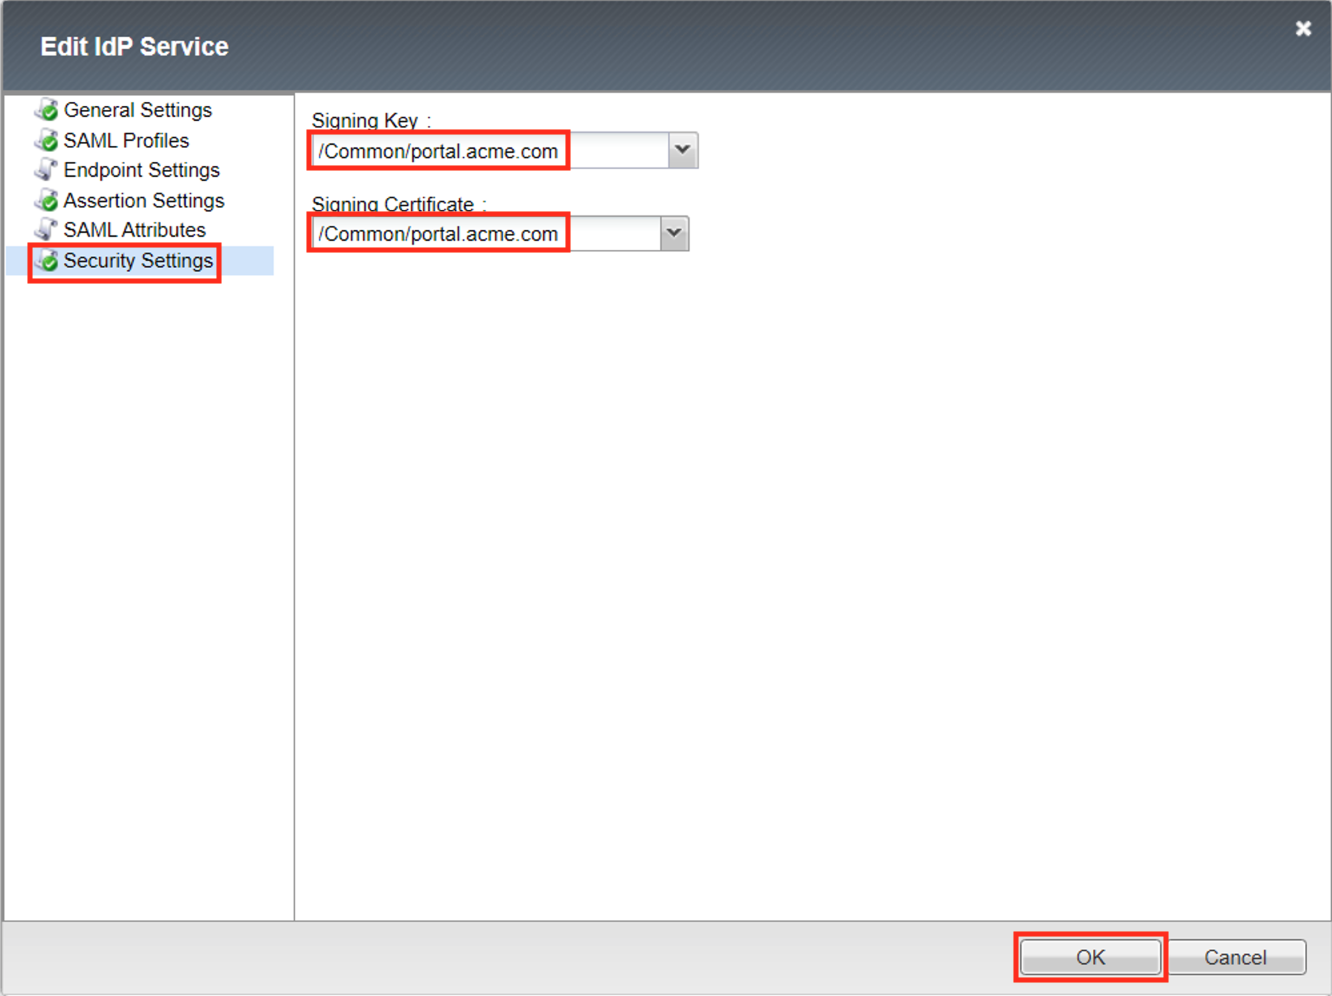
In the Create New SAML IdP Service dialog box, click Security Settings in the left navigation pane and key in the following:
Signing Key: /Common/portal.acme.com(drop down)Signing Certificate: /Common/portal.acme.com(drop down)Note
The certificate and key were previously imported via automation
Click OK to complete the creation of the IdP service
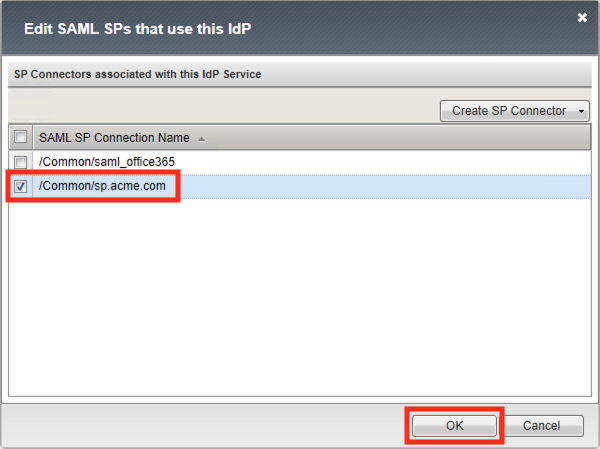
Select the Checkbox next to the previously created
portal.acme.com-idp-sand click the Bind/Unbind SP Connectors button at the bottom of the GUI
In the Edit SAML SP’s that use this IdP dialog, select the
/Common/sp.acme.comSAML SP Connection Name.Click the OK button at the bottom of the dialog box
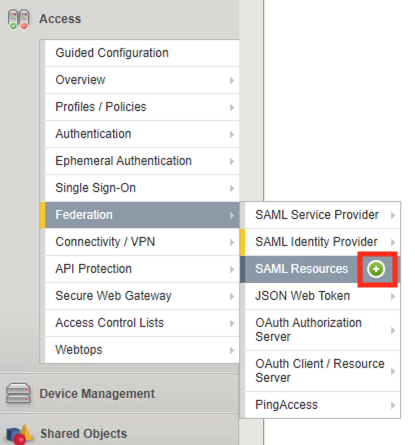
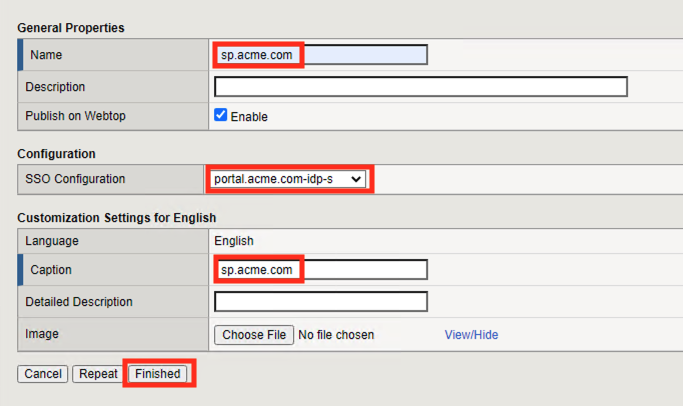
Task 4 - Create a SAML Resource
Begin by selecting Access ‑> Federation ‑> SAML Resources >> Plus (+) Sign
In the New SAML Resource window, enter the following values:
Name: sp.acme.comSSO Configuration: portal.acmem.com-idp-sCaption: sp.acme.comClick Finished at the bottom of the configuration window
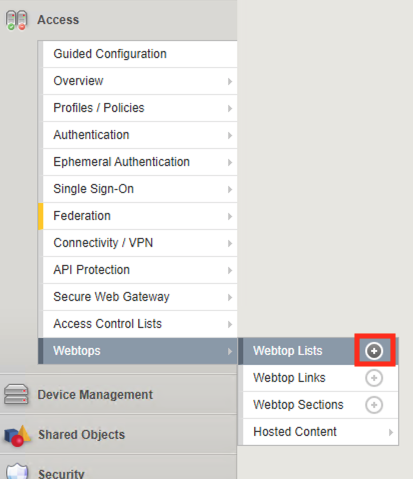
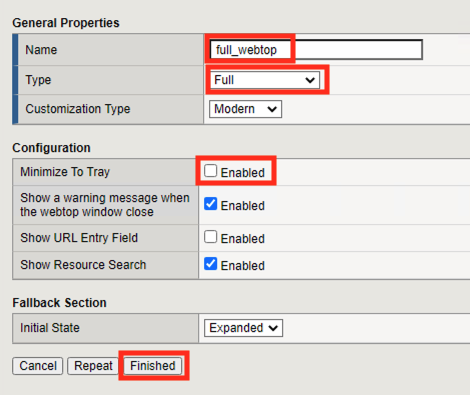
Task 5 - Create a Webtop
Select Access ‑> Webtops ‑> Webtop Lists >> Plus (+) Sign
In the resulting window, enter the following values:
Name: full_webtopType: Full(drop down)Minimize To Tray uncheckClick Finished at the bottom of the GUI
Task 6 - Create a SAML IdP Access Policy
Select Access ‑> Profiles/Policies ‑> Access Profiles (Per-Session Policies) -> Plus (+) Sign

In the New Profile window, enter the following information:
Name: portal.acme.com‑pspProfile Type: All(drop down)Profile Scope: Profile(default)Customization Type: modern(default)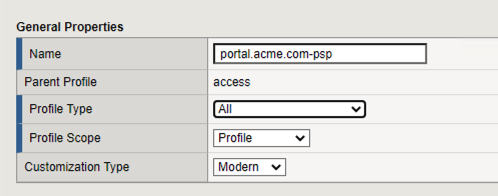
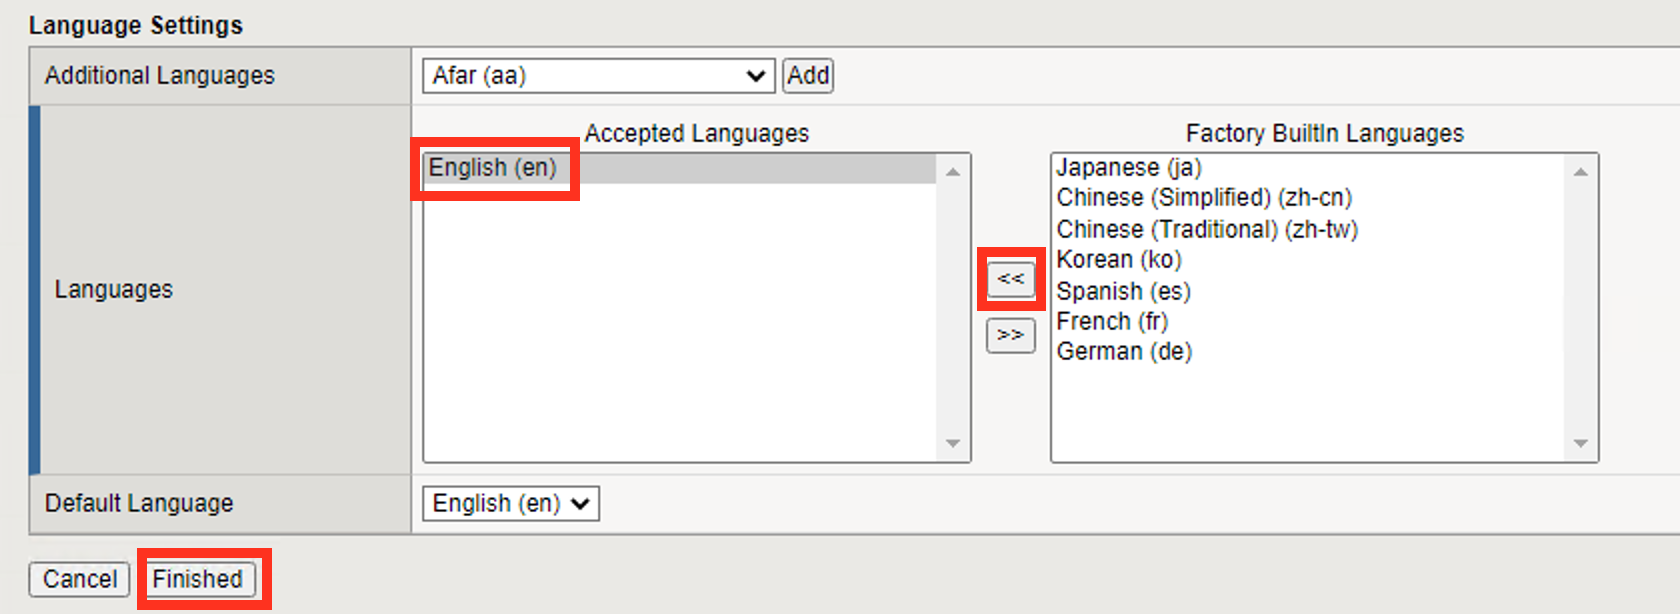
Scroll to the bottom of the New Profile window to the Language Settings section
Select English from the Factory Built‑in Languages menu on the right and click the Double Arrow (<<), then click the Finished button.
The Default Language should be automatically set
From the Access ‑> Profiles/Policies ‑> Access Profiles (Per-Session Policies) screen, click the Edit link on the previously created
portal.acme.com-pspline
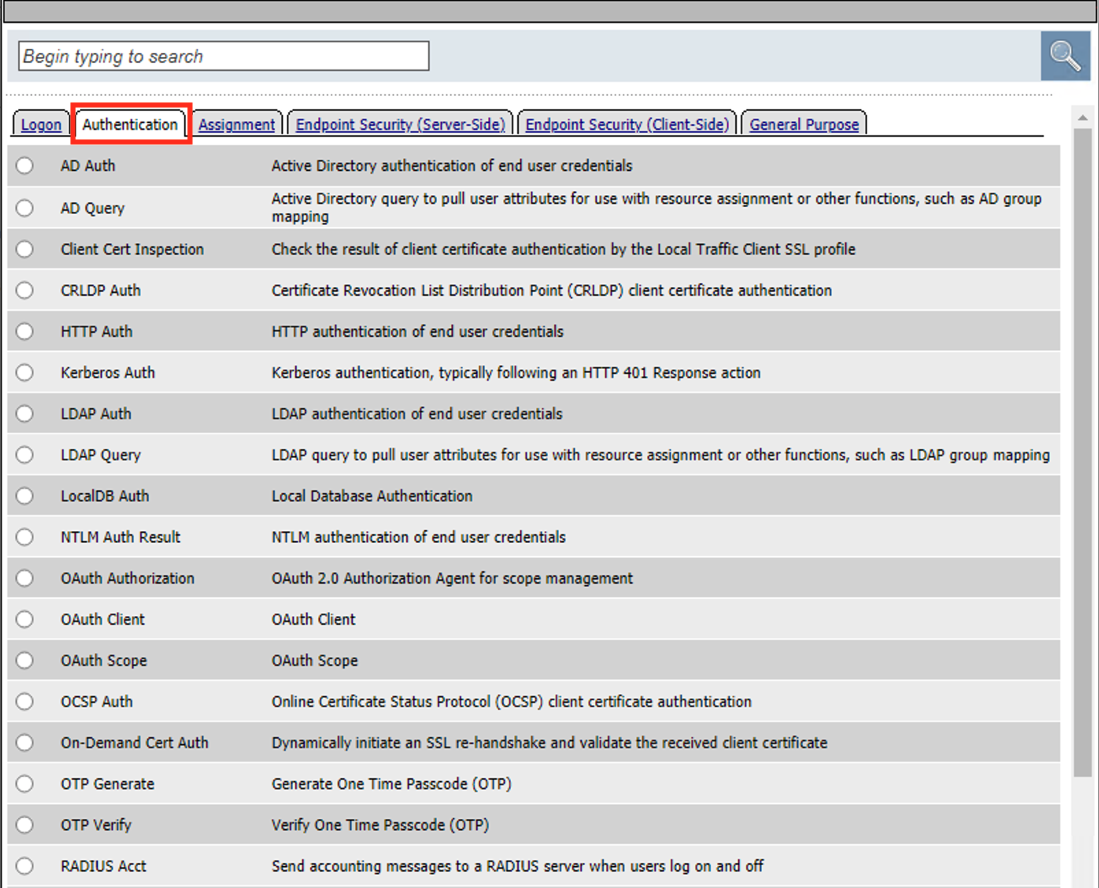
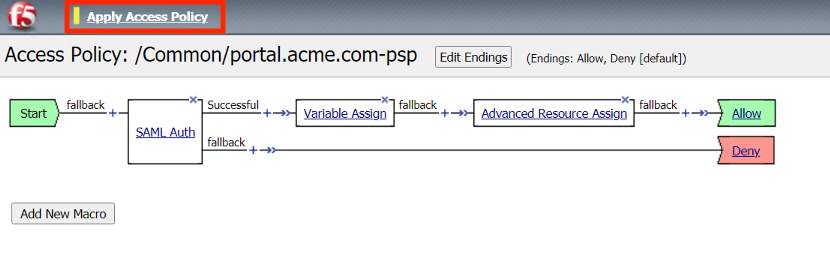
Click the Plus (+) Sign between Start and Deny

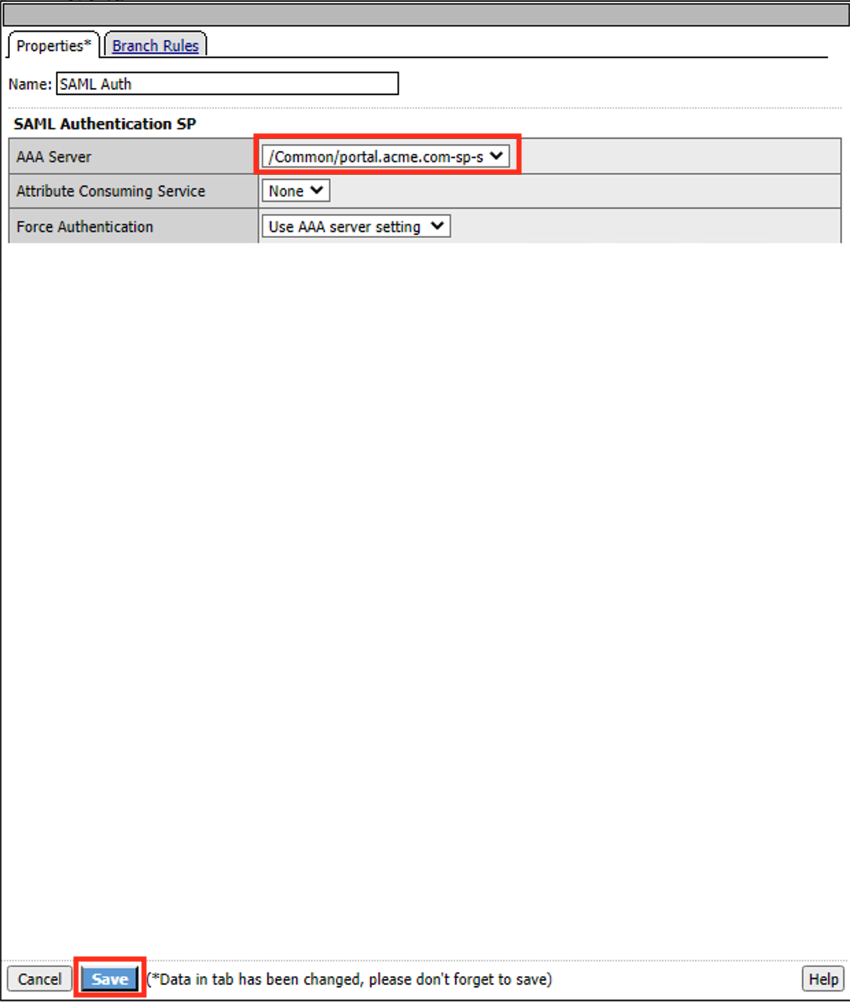
In the pop-up dialog box, select the Authentication tab and then select the Radio next to SAML Auth, and click the Add Item button

Select /Common/portal.acme.com-sp-s from the AAA Server dropdown menu
Click Save
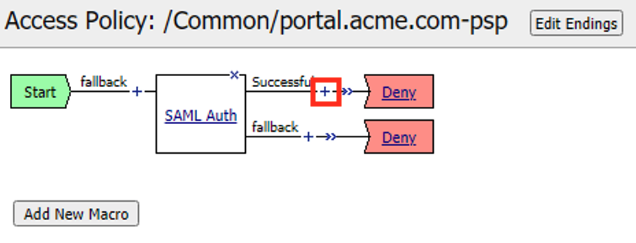
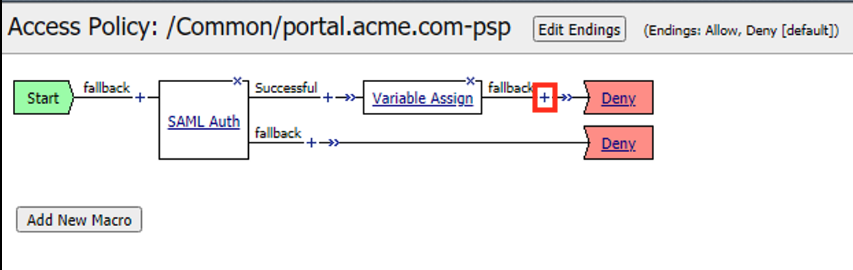
On the successful branch of the SAML Auth Policy-Item click the Plus (+) Sign
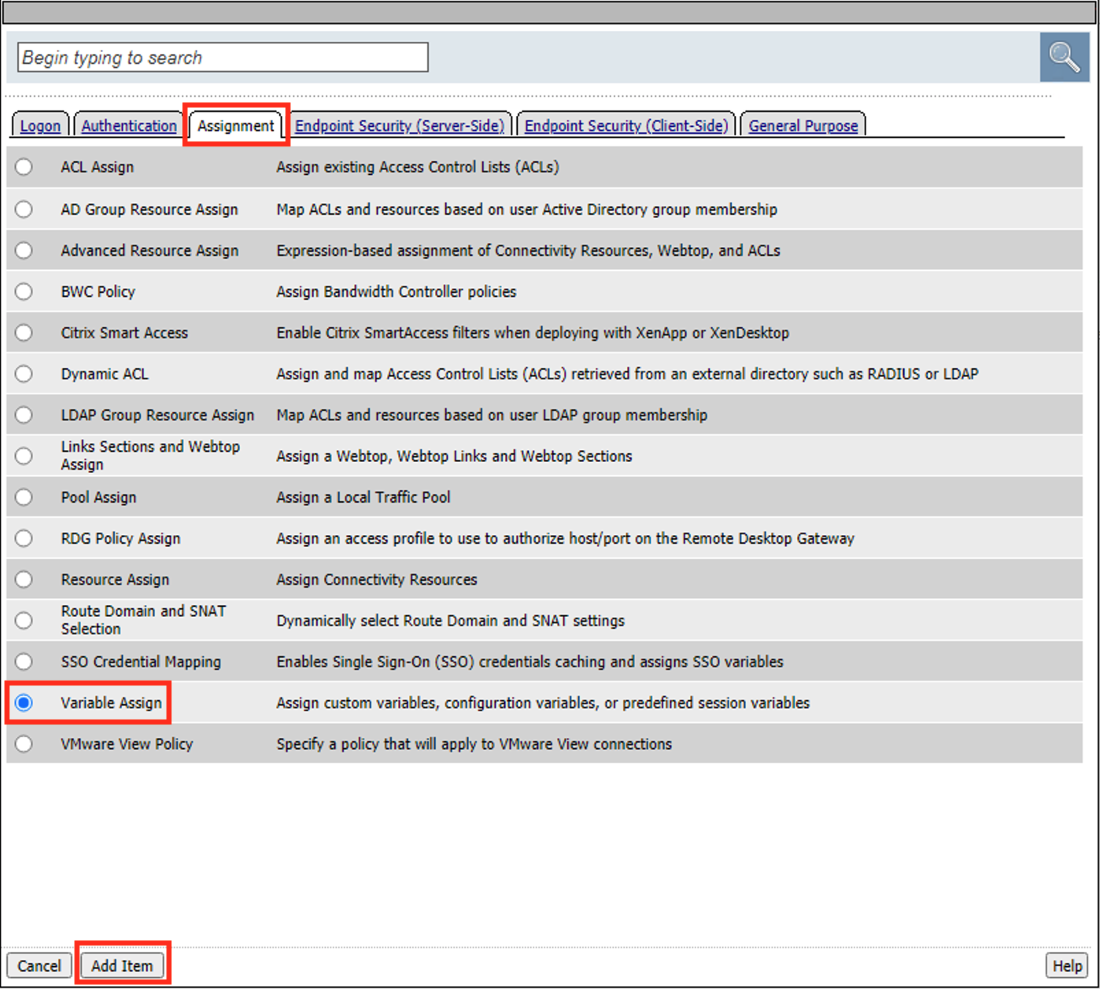
In the pop-up dialog box, select the Assignment tab and then select the Radio next to Variable Assign, and click the Add Item button
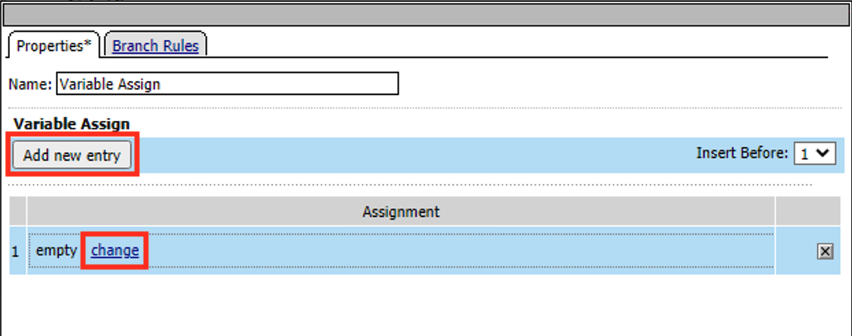
Click Add new entry
Click Change
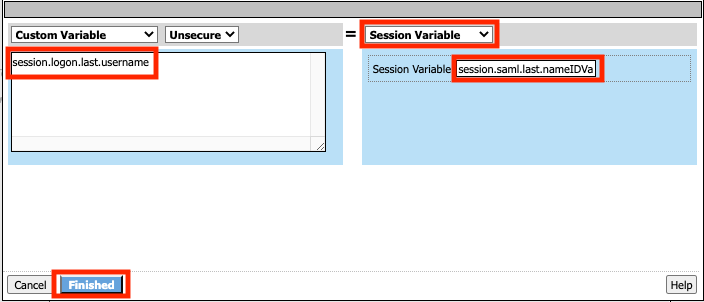
Enter the Custom Variable
session.logon.last.usernameSelect Session Variable from the right drop down menu
Enter the session variable name
session.saml.last.nameIDValueClick Finished
Click Save

Click the Plus (+) Sign on the fallback branch between Variable Assign and Deny
In the pop-up dialog box, select the Assignment tab and then select the Radio next to Advanced Resource Assign, and click the Add Item button

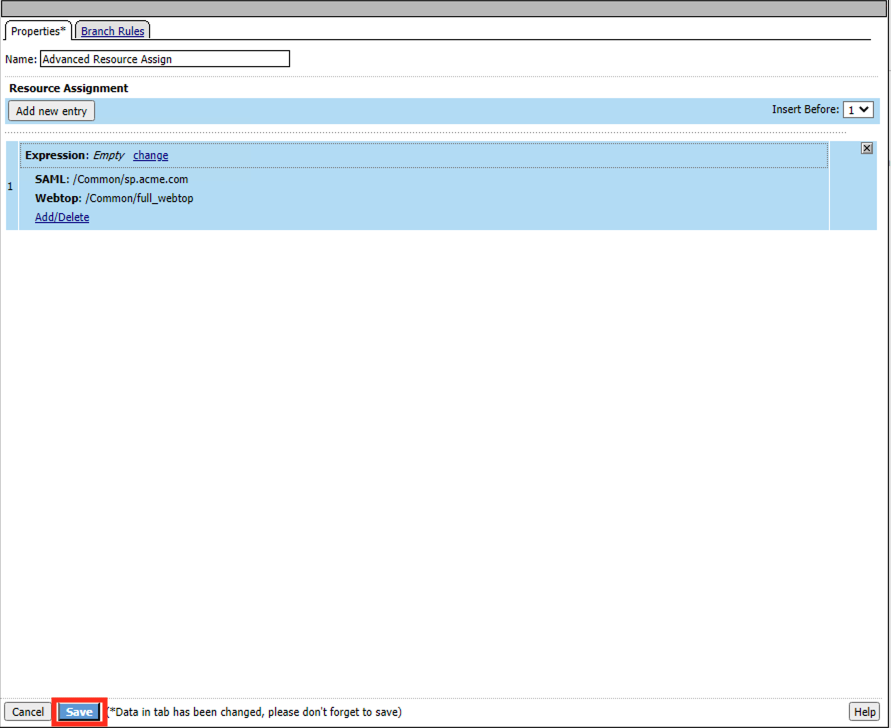
Click Add new entry
In the new Resource Assignment entry, click the Add/Delete link

In the resulting pop-up window, click the SAML tab, and select the Checkbox next to
/Common/sp.acme.com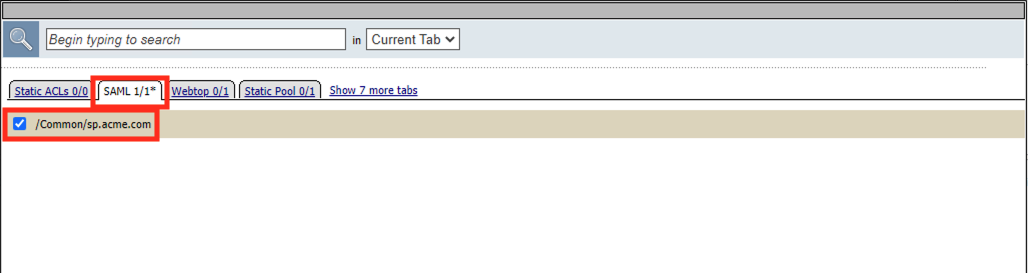
Click the Webtop tab, and select the Checkbox next to
/Common/full_webtopClick the Update button at the bottom of the window to complete the Resource Assignment entry

Click the Save button at the bottom of the Advanced Resource Assign window
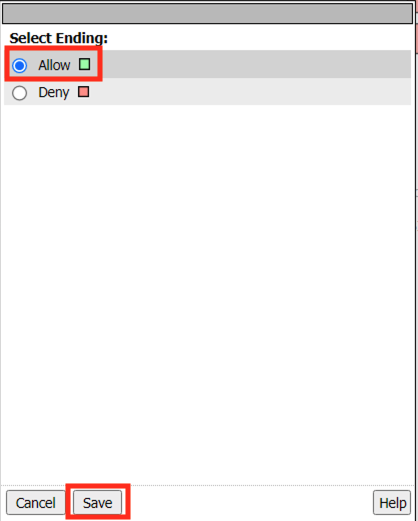
In the Visual Policy Editor, select the Deny ending on the fallback branch following Advanced Resource Assign

In the Select Ending dialog box, selet the Allow radio button and then click Save
In the Visual Policy Editor, click Apply Access Policy (top left), and close the Visual Policy Editor
Task 7 - Create an IdP Virtual Server
Navigate to Local Traffic ‑> Virtual Servers -> Virtual Server List. Click the Plus (+) Sign

In the New Virtual Server window, enter the following information:
General Properties Name: portal.acme.comDestination Address/Mask: 10.1.10.102Service Port: 443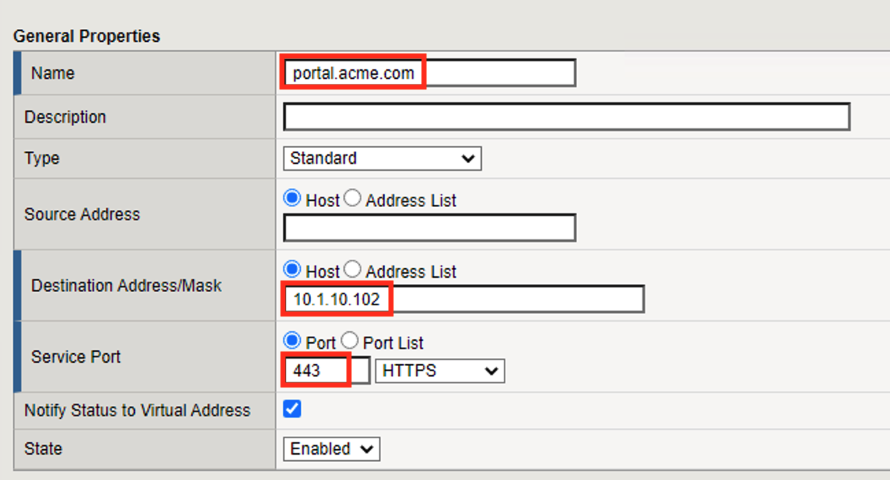
Configuration HTTP Profile: http(drop down)SSL Profile (Client) wildcard.acme.com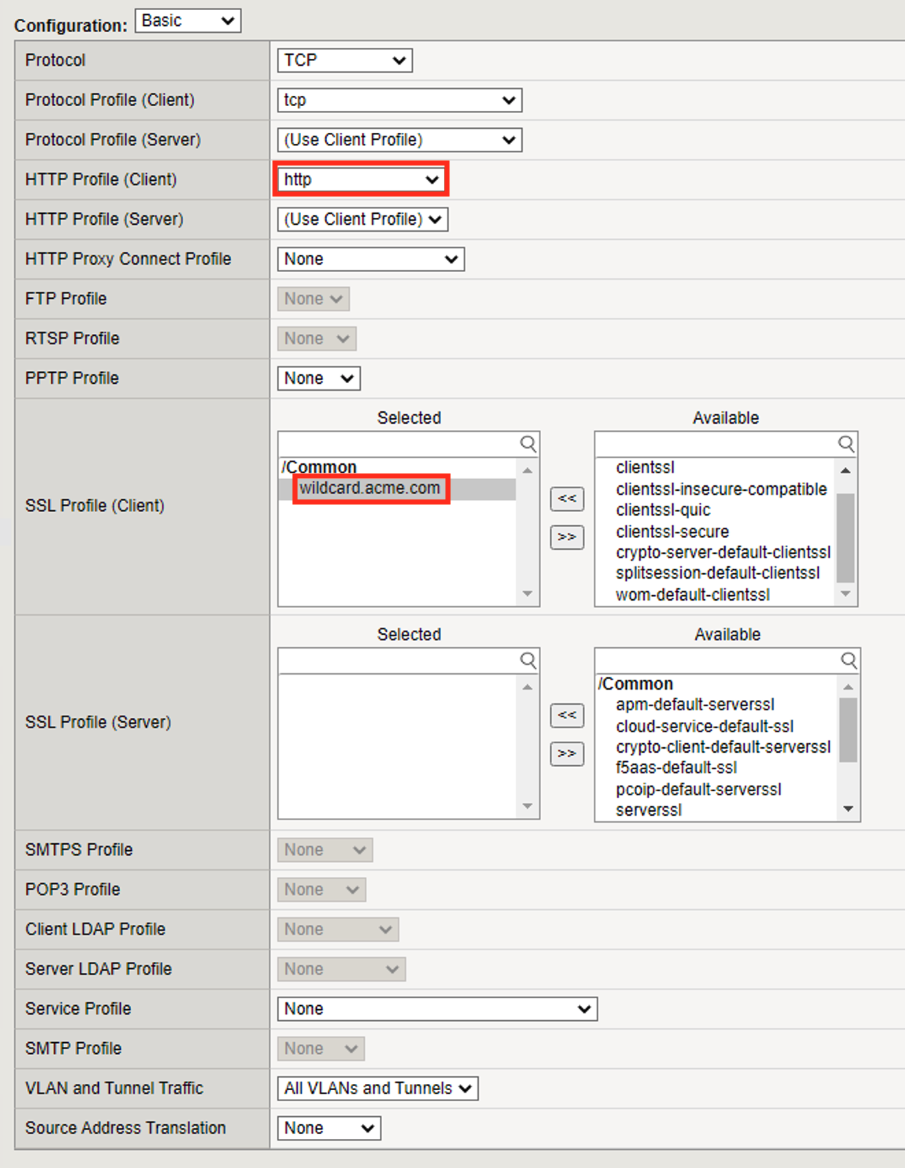
Access Policy Access Profile: portal.acme.com-psp
Scroll to the bottom of the configuration window and click Finished
Task 8 - Test Access to sp.acme.com
From the jumphost’s browser, navigate to
https://sp.acme.comYou will not see this but you are redirected to
https://portal.acme.combefore finally landing at the Azure Login Screenhttps://login.microsoft.com
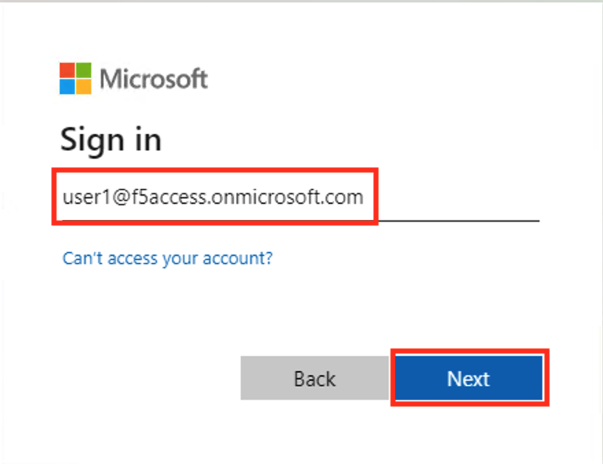
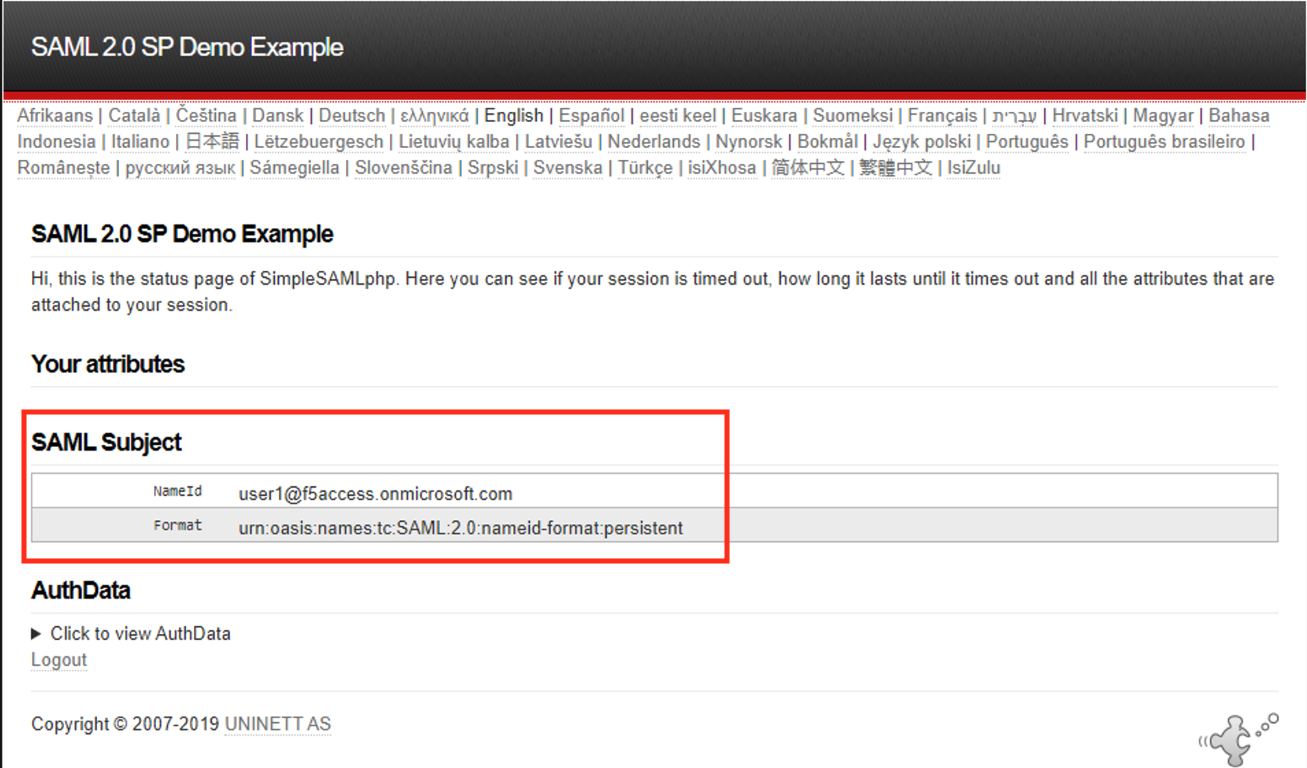
Enter the username: user1@f5access.onmicrosoft.com
Click Next
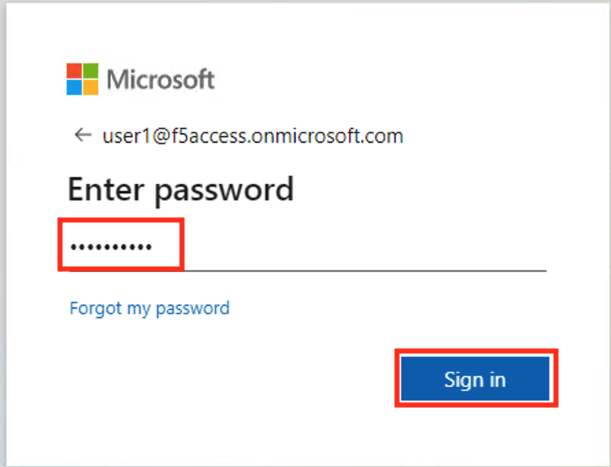
Enter the Password: F5twister$
Click Sign in
If you receive a notice about Staying Signed in simply click No

You are successfully logged into https://portal.acme.com, automatically redirected back to https://sp.acme.com, and presented a webpage.
Task 9 - Test access to portal.acme.com
The broswer completely or open a new session in incoginito view
From the jumphost’s browser, navigate to
https://portal.acme.comYou will not see this but you are redirected to
https://login.microsoftonline.comEnter the username: user1@f5access.onmicrosoft.com
Click Next
Enter the Password: F5twister$
Click Sign in
If you receive a notice about Staying Signed in simply click No
You automatically redirected back to https://portal.acme.com and presented a webtop.
Click the sp.acme.com resource on the Webtop

You are successfully authenticated to the sp.acme.com application
Task 10 - Lab Cleanup
From the jumphost’s browser navigate to https://portal.f5lab.local
Click the Classes tab at the top of the page.
Scroll down the page until you see 301 SAML Federation on the left
Hover over tile SAML IdP Chaining to AzureAD (BIG-IP Primary IdP). A start and stop icon should appear within the tile. Click the Stop Button to trigger the automation to remove any prebuilt objects from the environment
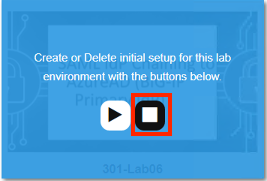
The screen should refresh displaying the progress of the automation within 30 seconds. Scroll to the bottom of the automation workflow to ensure all requests succeeded. If you you experience errors try running the automation a second time or open an issue on the Access Labs Repo.
This concludes the lab.