F5 Identity and Access Management Solutions > Archived Identity & Access Management Labs > 300 Series: Advanced Use Cases & Solutions Source | Edit on
Lab 2: Implement Priviledged User Access Authentication
The F5 Privileged User Access (PUA) solution provides an easy way to add CAC/PKI authentication or other strong authentication methods to network infrastructure and systems that do not natively support this functionality. It does this without requiring the addition of client software or agents anywhere in the environment and allows you to fully leverage your legacy or non-compliant systems in a safe and secure manner. It integrates directly into DoD PKI or MFA systems and may be configured to work cooperatively with existing TACACS, Active Directory, AAA servers, or a variety of third-party authentication databases.
F5 PUA is DoD CIO approved as an Identify Federation Service (IFS) for facilitating both privileged and unprivileged user authentication to unclassified and secret fabric DoD Information Systems.
IFS are third-party intermediary services facilitating user-authentication to resources or relying parties. IFS may be used when a system or application does not support direct authentication with PKI or MFA credentials, or the system owner desires a single management framework for a group of heterogeneous systems.
F5 Certifications
- DoD UC APL
- FIPS 140-2 Validated - Level 1, 2, or 3 depending on platform selection. F5 offers software (VE), F5 Full-Box FIPS platforms, integrated (HSM PCI Card), and external (Network HSM) FIPS solutions
- Common Criteria Certification
- NSA Commercial Solutions for Classified (CSfC) Components List
- DISA/JITC PKE (public key enabled)
- United States Government IPv6 Conformance Certification (USGv6)
Priviledged User Access (PUA) Requirements
In order to deploy the F5 PUA solution, you will require the following:
- F5 BIG-IP Access Policy Manager (APM)
- iRules LX licensed and provisioned
- F5 PUA platform and device licenses
- F5 PUA installation script (“build_pua.zip”) - for this release of PUA
The following resources will be defined for the lab environment:
| Resource | Description | Value |
|---|---|---|
| WebSSH_proxy_vs_IP | Virtual server IP Address of WebSSH2 service. | 10.1.10.104 |
| APM_Portal_vs_IP | Virtual server IP Address of APM portal for authentication | 10.1.20.104 |
| RADIUS_proxy_vs_IP | Virtual server IP address of RADIUS proxy service | 10.1.20.104 |
| LDAP_proxy_vs_IP | Virtual server IP address of LDAP proxy service | 10.1.20.104 |
| LDAPS_proxy_vs_IP | Virtual server IP address of LDAPS proxy service | 10.1.20.104 |
| LDAP_server_IP | IP Address of site LDAP or AD server (required for LDAP use) | 10.1.20.7 |
| RADIUS_server_IP | IP Address of site RADIUS server (if RADIUS bypass is used) | 10.1.20.7 |
Expected time to complete: 1 hour
Task 1 - Setup Lab Environment
To access your dedicated student lab environment, you will need a web browser and Remote Desktop Protocol (RDP) client software. The web browser will be used to access the Unified Demo Framework (UDF) Training Portal. The RDP client will be used to connect to the jumphost, where you will be able to access the BIG-IP management interfaces (HTTPS, SSH).
Click DEPLOYMENT located on the top left corner to display the environment
Click ACCESS next to jumpbox.f5lab.local

Select your RDP resolution.
The RDP client on your local host establishes a RDP connection to the Jump Host.
- Login with the following credentials:
- User: f5lab\user1
- Password: user1
After successful logon the Chrome browser will auto launch opening the site https://portal.f5lab.local. This process usually takes 30 seconds after logon.
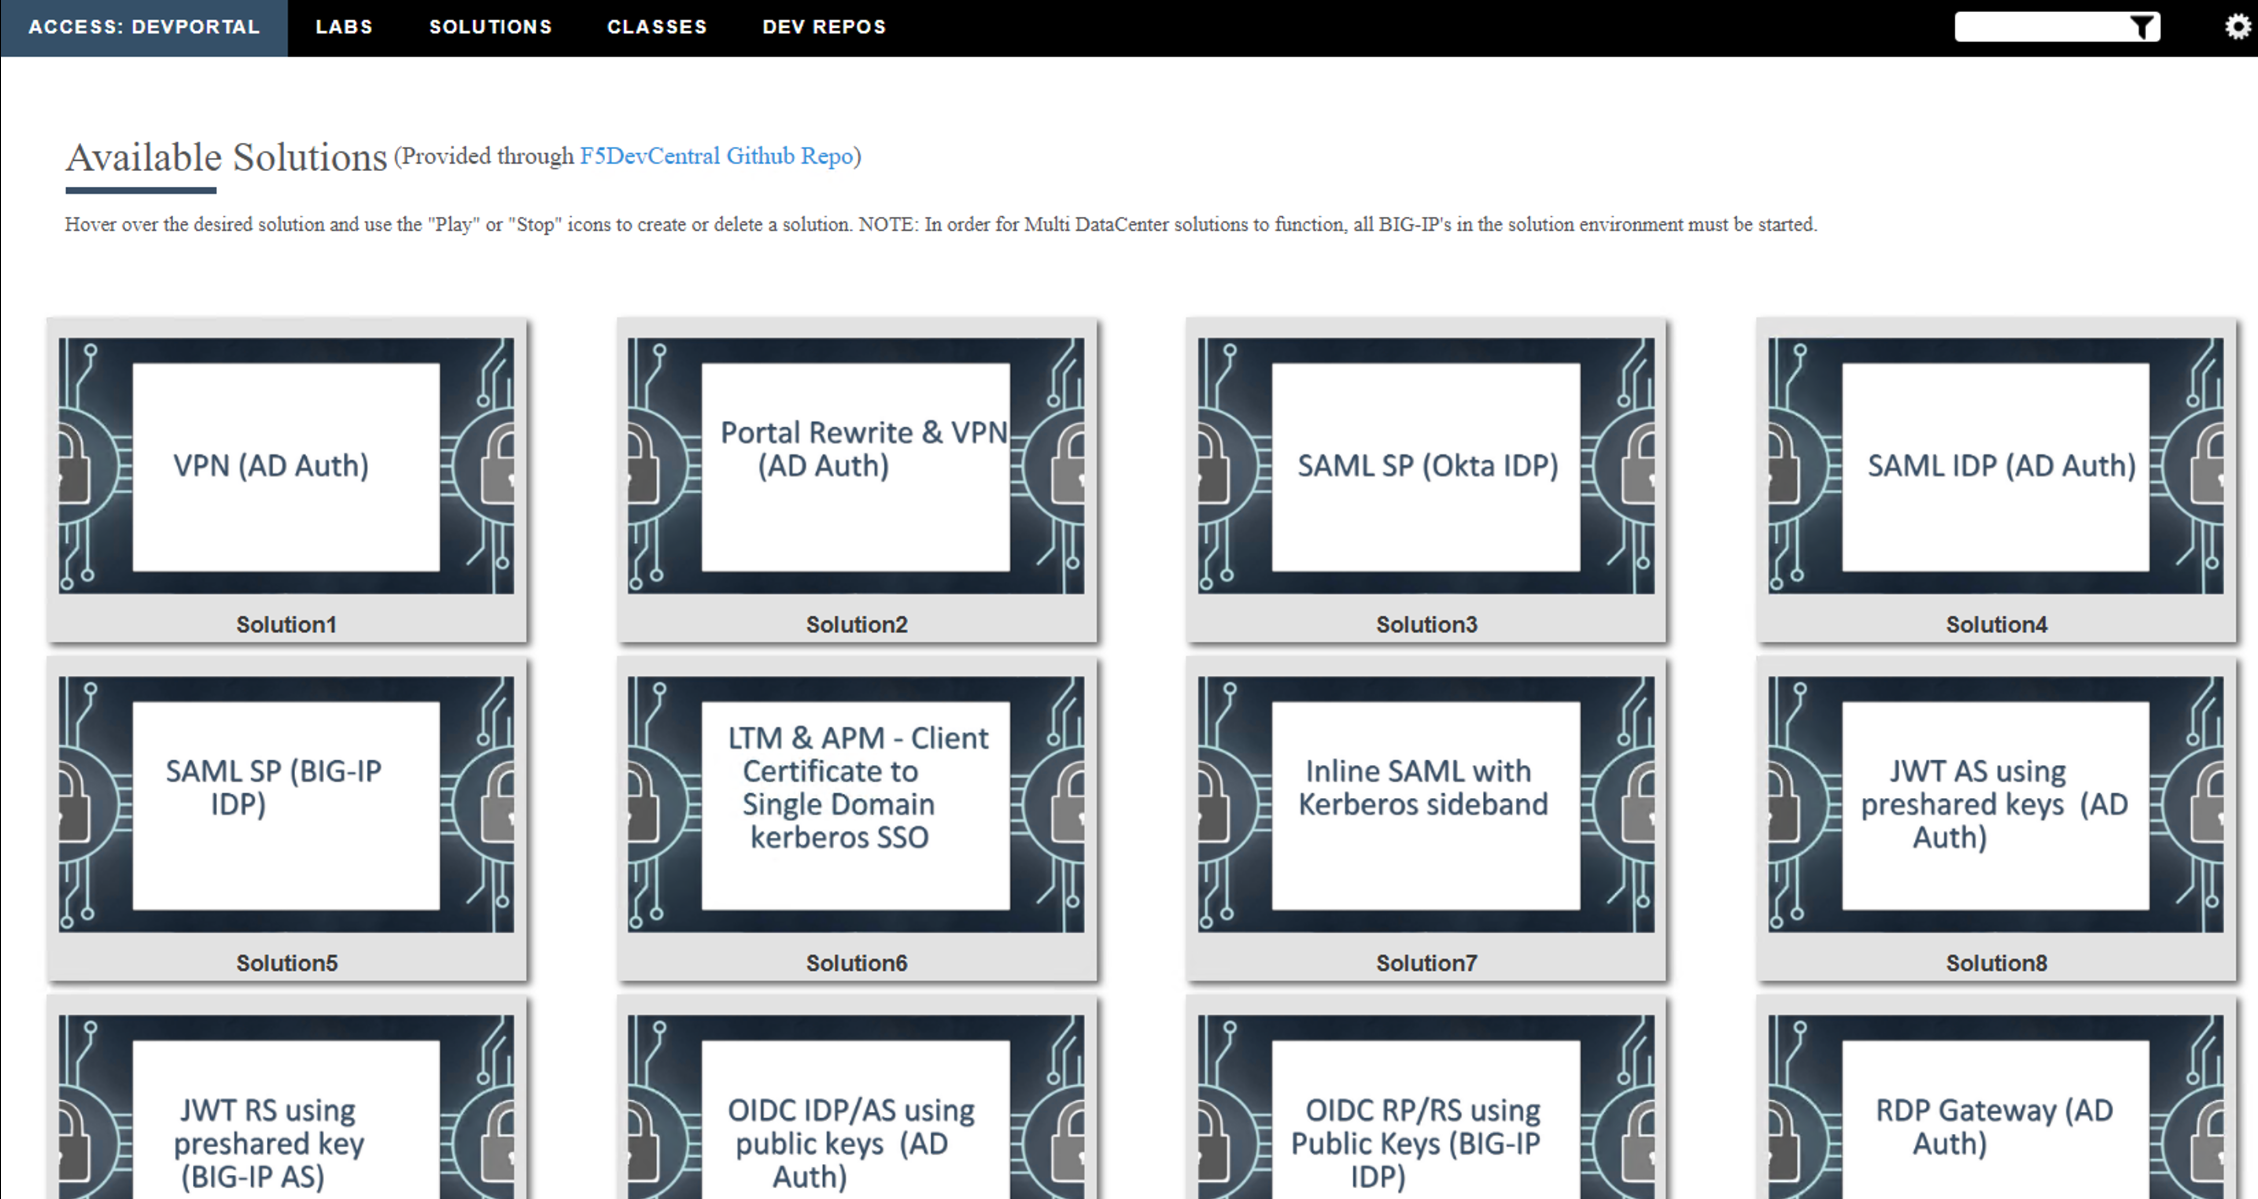
Click the Classes tab at the top of the page.
Scroll down the page until you see 302 Ephemeral Authentication on the left
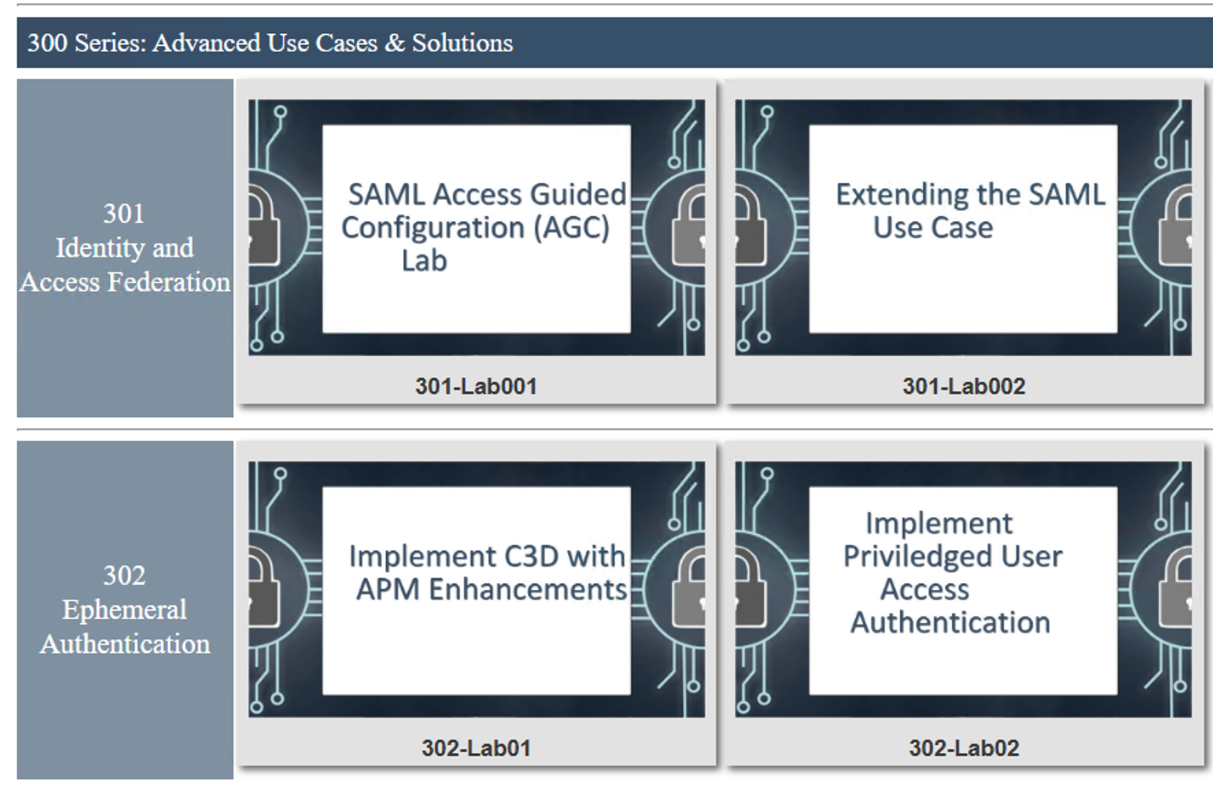
Hover over tile Implement Priviledged user Access Authentication. A start and stop icon should appear within the tile. Click the Play Button to start the automation to build the environment

The screen should refresh displaying the progress of the automation within 30 seconds. Scroll to the bottom of the automation workflow to ensure all requests succeeded. If you you experience errors try running the automation a second time or open an issue on the Access Labs Repo..

Task 2 - Executing the PUA Script
Overview
The ./build_pua.sh script will do a pre-flight check to ensure all the pre-requisites are met and will invoke a UCS backup by default before making any changes. If this script is run on a BIG-IP with a trial license, you must use the -s or –sanity option to prevent checking for licensing restrictions, this should only be done in a non-production environment as this may cause issues with production systems.
After each invocation, a log file will be left in /var/log called f5-pua-install-xxxx.log which will outline all the actions taken along with the result or any errors encountered. This log file may be requested by support or an F5 engineer to assist in any troubleshooting.
Usage
Invoking ./build_pua.sh with “-h” or “–help” will alert you to the potential options you may use to modify the behavior of the script. As of this document and version 1.1.3 the current options are:
| Options | Descriptions |
|---|---|
| -h, -\-help | This Notice |
| -s -\-sanity | Bypass santiy checks (license, BIG-IP status) |
| -u -\-update | Update existing installation |
| -e -\-extract | Extract files to temp location and exit |
| -n -\-nobackup | Does not perform UCS backup |
| -c -\-checkonly | Check installed versions against this package |
| -d -\-disabletest | Disable test user |
| -f -\-forceupgrade | Force upgrade of packages from this archive |
Note
This lab will automate the installation of the ./build_pua.sh script by creating a file called pua_config.sh and saving to the same directory as ./build_pua.sh. The pua_config.sh file is located in the /var/tmp/pua directory
# Sample unattended install script
# place this in the same directory as
# build_pua.sh to automatcailly install
#
# uncomment the lines below to use/customize
noninteractive=true
radiusvip=10.1.20.104
ldapvip=10.1.20.104
ldapsvip=10.1.20.104
webtopvip=10.1.10.104
radiusconfig=y
sampleca=y
disabletest=true
nobackup=true
Setting the “noninteractive=true” option will perform a full unattended install if all the sample prompts above are provided and uncommented, otherwise the answers provided in pua_config.sh will be used as the defaults in a semi-interactive install method.
Login to into the BIG-IP via SSH
Change Directory to /var/tmp/pua
cd /var/tmp/pua
Unzip the PUA Build Script
unzip build_pua-151-1.1.5-rc17.zip
Verify the pua_config.sh
cat pua_config.sh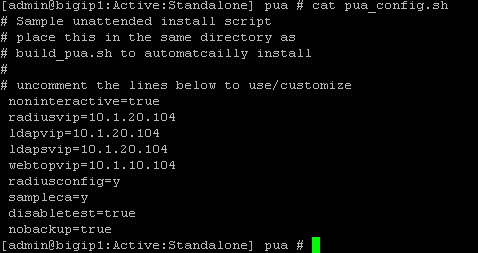
Run the PUA installation script ./build_pua.sh
./build_pua-151.sh[admin@bigip1:Active:Standalone] pua # ./build_pua-151.sh /var/tmp/pua/build_pua-151.sh - v1.1.5-rc17 on BIG-IP v15.1.0 Reading config from /var/tmp/pua/pua_config.sh... noninteractive is GO... Buckle up... Preparing environment... [OK] Changing to /tmp/pua.rILEoICRFw... [OK] Extracting archive... [OK] Checking License Entitlements for Privileged User Access... [OK] Adding ILX archive directory... [OK] Checking modules are provisioned. Checking apm... [OK] Checking ilx... [OK] SUCCESS: All modules provisioned. Checking for BIG-IP-ILX-WebSSH2-current.tgz... [OK] Hash check for BIG-IP-ILX-WebSSH2-current.tgz... [OK] Checking for BIG-IP-ILX-ephemeral_auth-151-current.tgz... [OK] Hash check for BIG-IP-ILX-ephemeral_auth-151-current.tgz... [OK] RADIUS = 10.1.20.104 LDAP = 10.1.20.104 LDAPS = 10.1.20.104 Webtop = 10.1.10.104 [OK] [OK] [OK] [OK] [OK] [OK] Checking for ca.pua.lab.cer... [OK] Hash check for ca.pua.lab.cer... [OK] Installing CA file ca.pua.lab.cer... [OK] Creating pua_webtop-clientssl profile with CA ca.pua.lab.cer... [OK] Creating ephemeral_config data group... [OK] Creating ephemeral_LDAP_Bypass data group... [OK] Creating ephemeral_RADIUS_Bypass data group... [OK] Creating ephemeral_radprox_host_groups data group... [OK] Creating ephemeral_radprox_radius_attributes data group... [OK] Creating ephemeral_radprox_radius_client data group... [OK] Creating WebSSH2 Workspace... [OK] Extracting BIG-IP-ILX-WebSSH2-current.tgz to /var/ilx/workspaces/Common... [OK] Copying WebSSH2 config.json.sample to config.json... [OK] Creating WebSSH2 Plugin... [OK] Importing APM sample profile ... [OK] Modifying pua Web Top Link... [OK] Applying pua APM Policy... [OK] Creating Ephemeral Authentication Workspace... [OK] Extracting BIG-IP-ILX-ephemeral_auth-151-current.tgz to /var/ilx/workspaces/Common... [OK] Modifying Ephemeral Authentication Workspace... [OK] Copying Ephemeral Auth config.json.sample to config.json... [OK] Creating Ephemeral Authentication Plugin... [OK] Creating RADIUS Proxy Service Virtual Server... [OK] Creating LDAP Proxy Service Virtual Server... [OK] Creating LDAP Proxy Service Virtual Server... [OK] Creating LDAPS (ssl) Proxy Service Virtual Server... [OK] Creating Webtop Virtual Server... [OK] Modifying BIG-IP for RADIUS authentication against itself... [OK] Saving config... [OK] You can test your new APM webtop now by browsing to: https://10.1.10.104 username: <any> password: <any> This will let anyone in with any policy. The next step after testing would be to add access control through AD, MFA, or some other method. If the RADIUS testing option was enabled, any username will log in using Ephemeral Authentication. Task complete. Now go build an APM policy for PUA! Cleaning up... /var/tmp/pua/build_pua-151.sh - v1.1.5-rc17 on BIG-IP v15.1.0 [admin@bigip1:Active:Standalone]
Task 3 - Accessing the BIG-IP via APM Webtop
In this section, you will test the initial installation of the PUA deployment.
Open a web browser and navigate to https://pua.acme.com
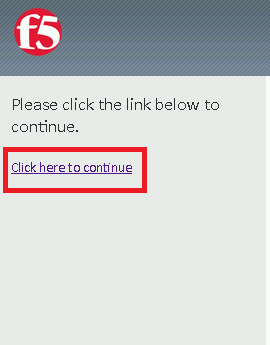
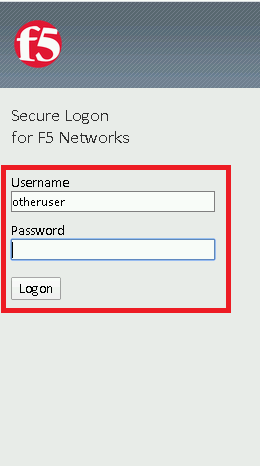
A Warning Banner page (customizable) should appear, click the Click here to continue link.
You should now see a logon page. Enter a random username and any password. Then, click the Logon button.
You should be directed to the webtop. Click the BIG-IP tile.

You should then see a WebSSH screen. Notice that you were logged into the BIG-IP with the username that you entered at the logon page.

Task 4 - Review the APM Policy Created by the PUA Build Script
Open a web browser and log into the BIG-IP via its management address: https://10.1.1.4
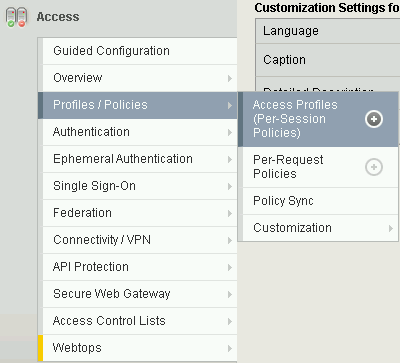
Navigate to Access >> Profiles/Policies >> Access Profiles (Per-Session Polices).

Click the Edit link for the pua Access Profile.

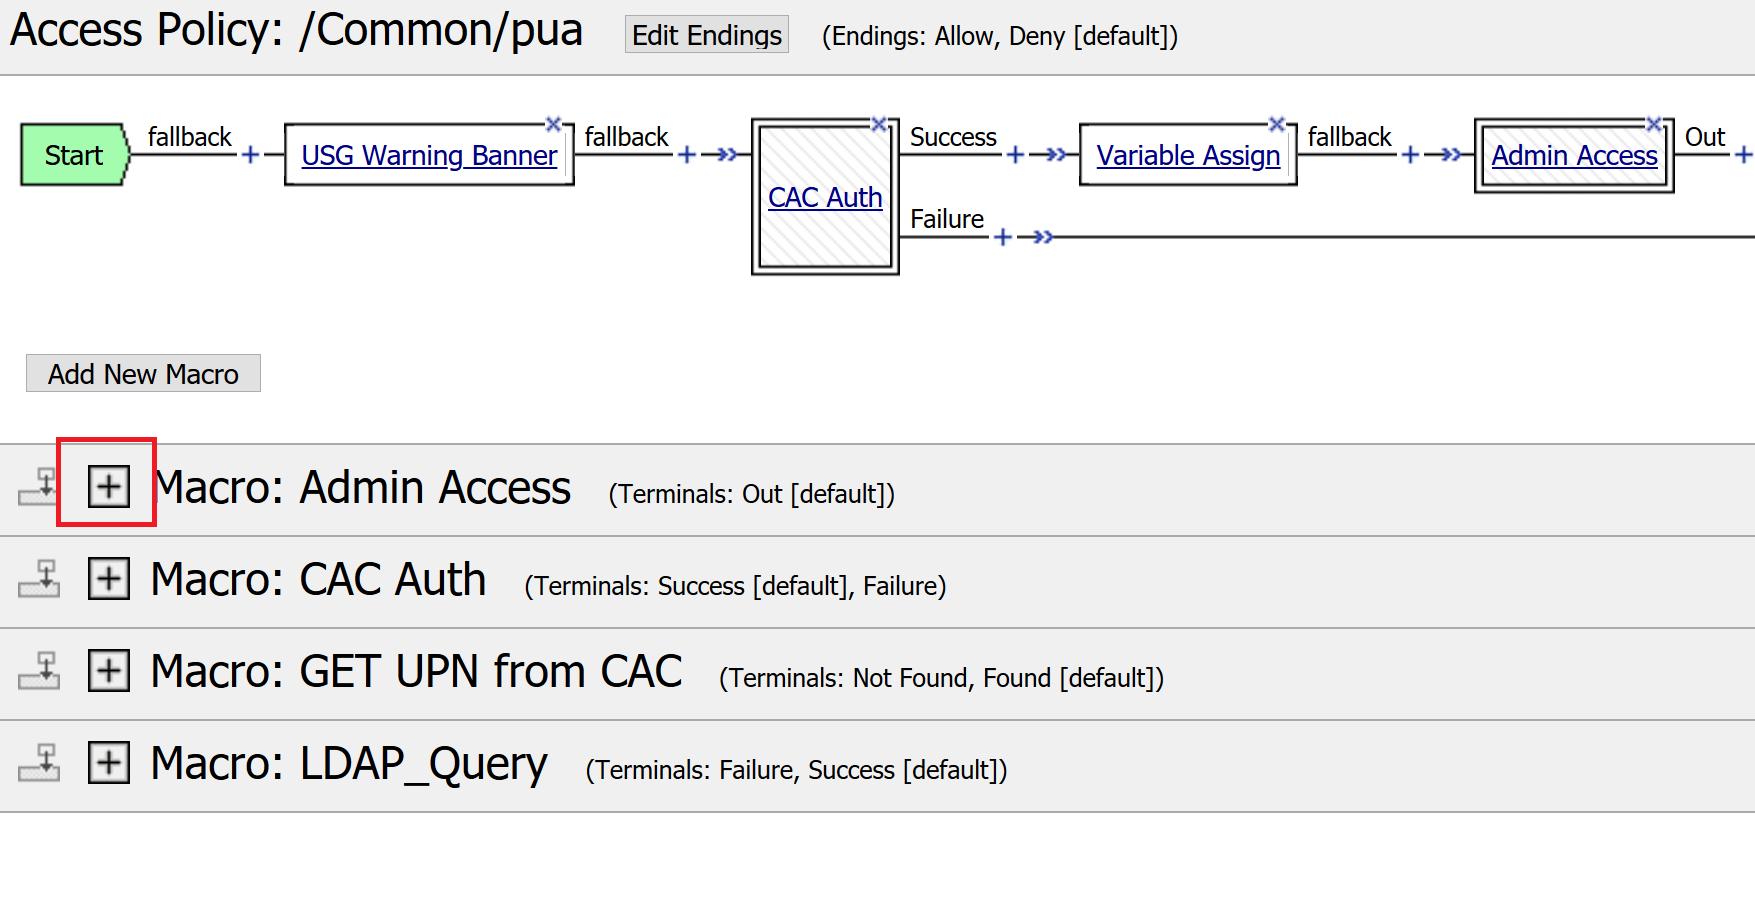
Expanded the Macros by clicking the square box with the plus sign inside.
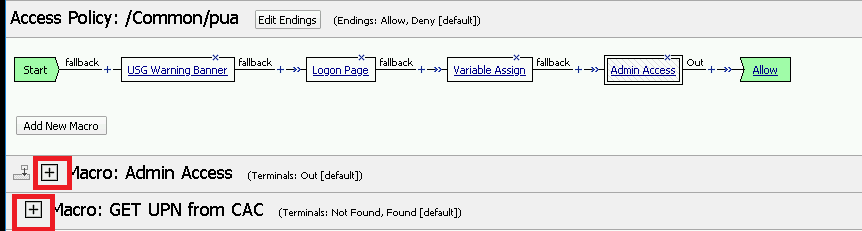
Here is the policy created by the PUA Build Script:

Task 5 - Build a LDAP macro
PUA requires a Directory Service to authenticate users. In this section you will build a LDAP macro to perform the authentication function.
Note
This lab makes use of APM macros to make policies easy to view and manage.
The LDAP macro will verify that the requesting user has a valid account and the appropriate group permission.
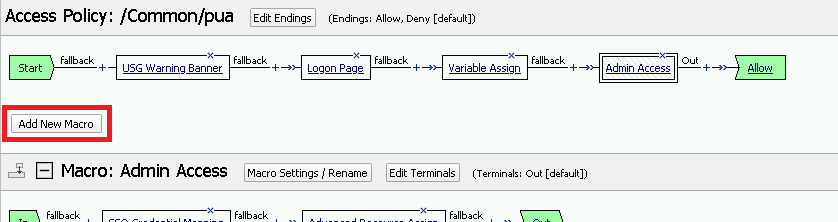
Click the Add New Macro button
Enter LDAP_Query for the and click Save

Open the newly created macro by clicking the plus sign by the name: Macro: LDAP_Query

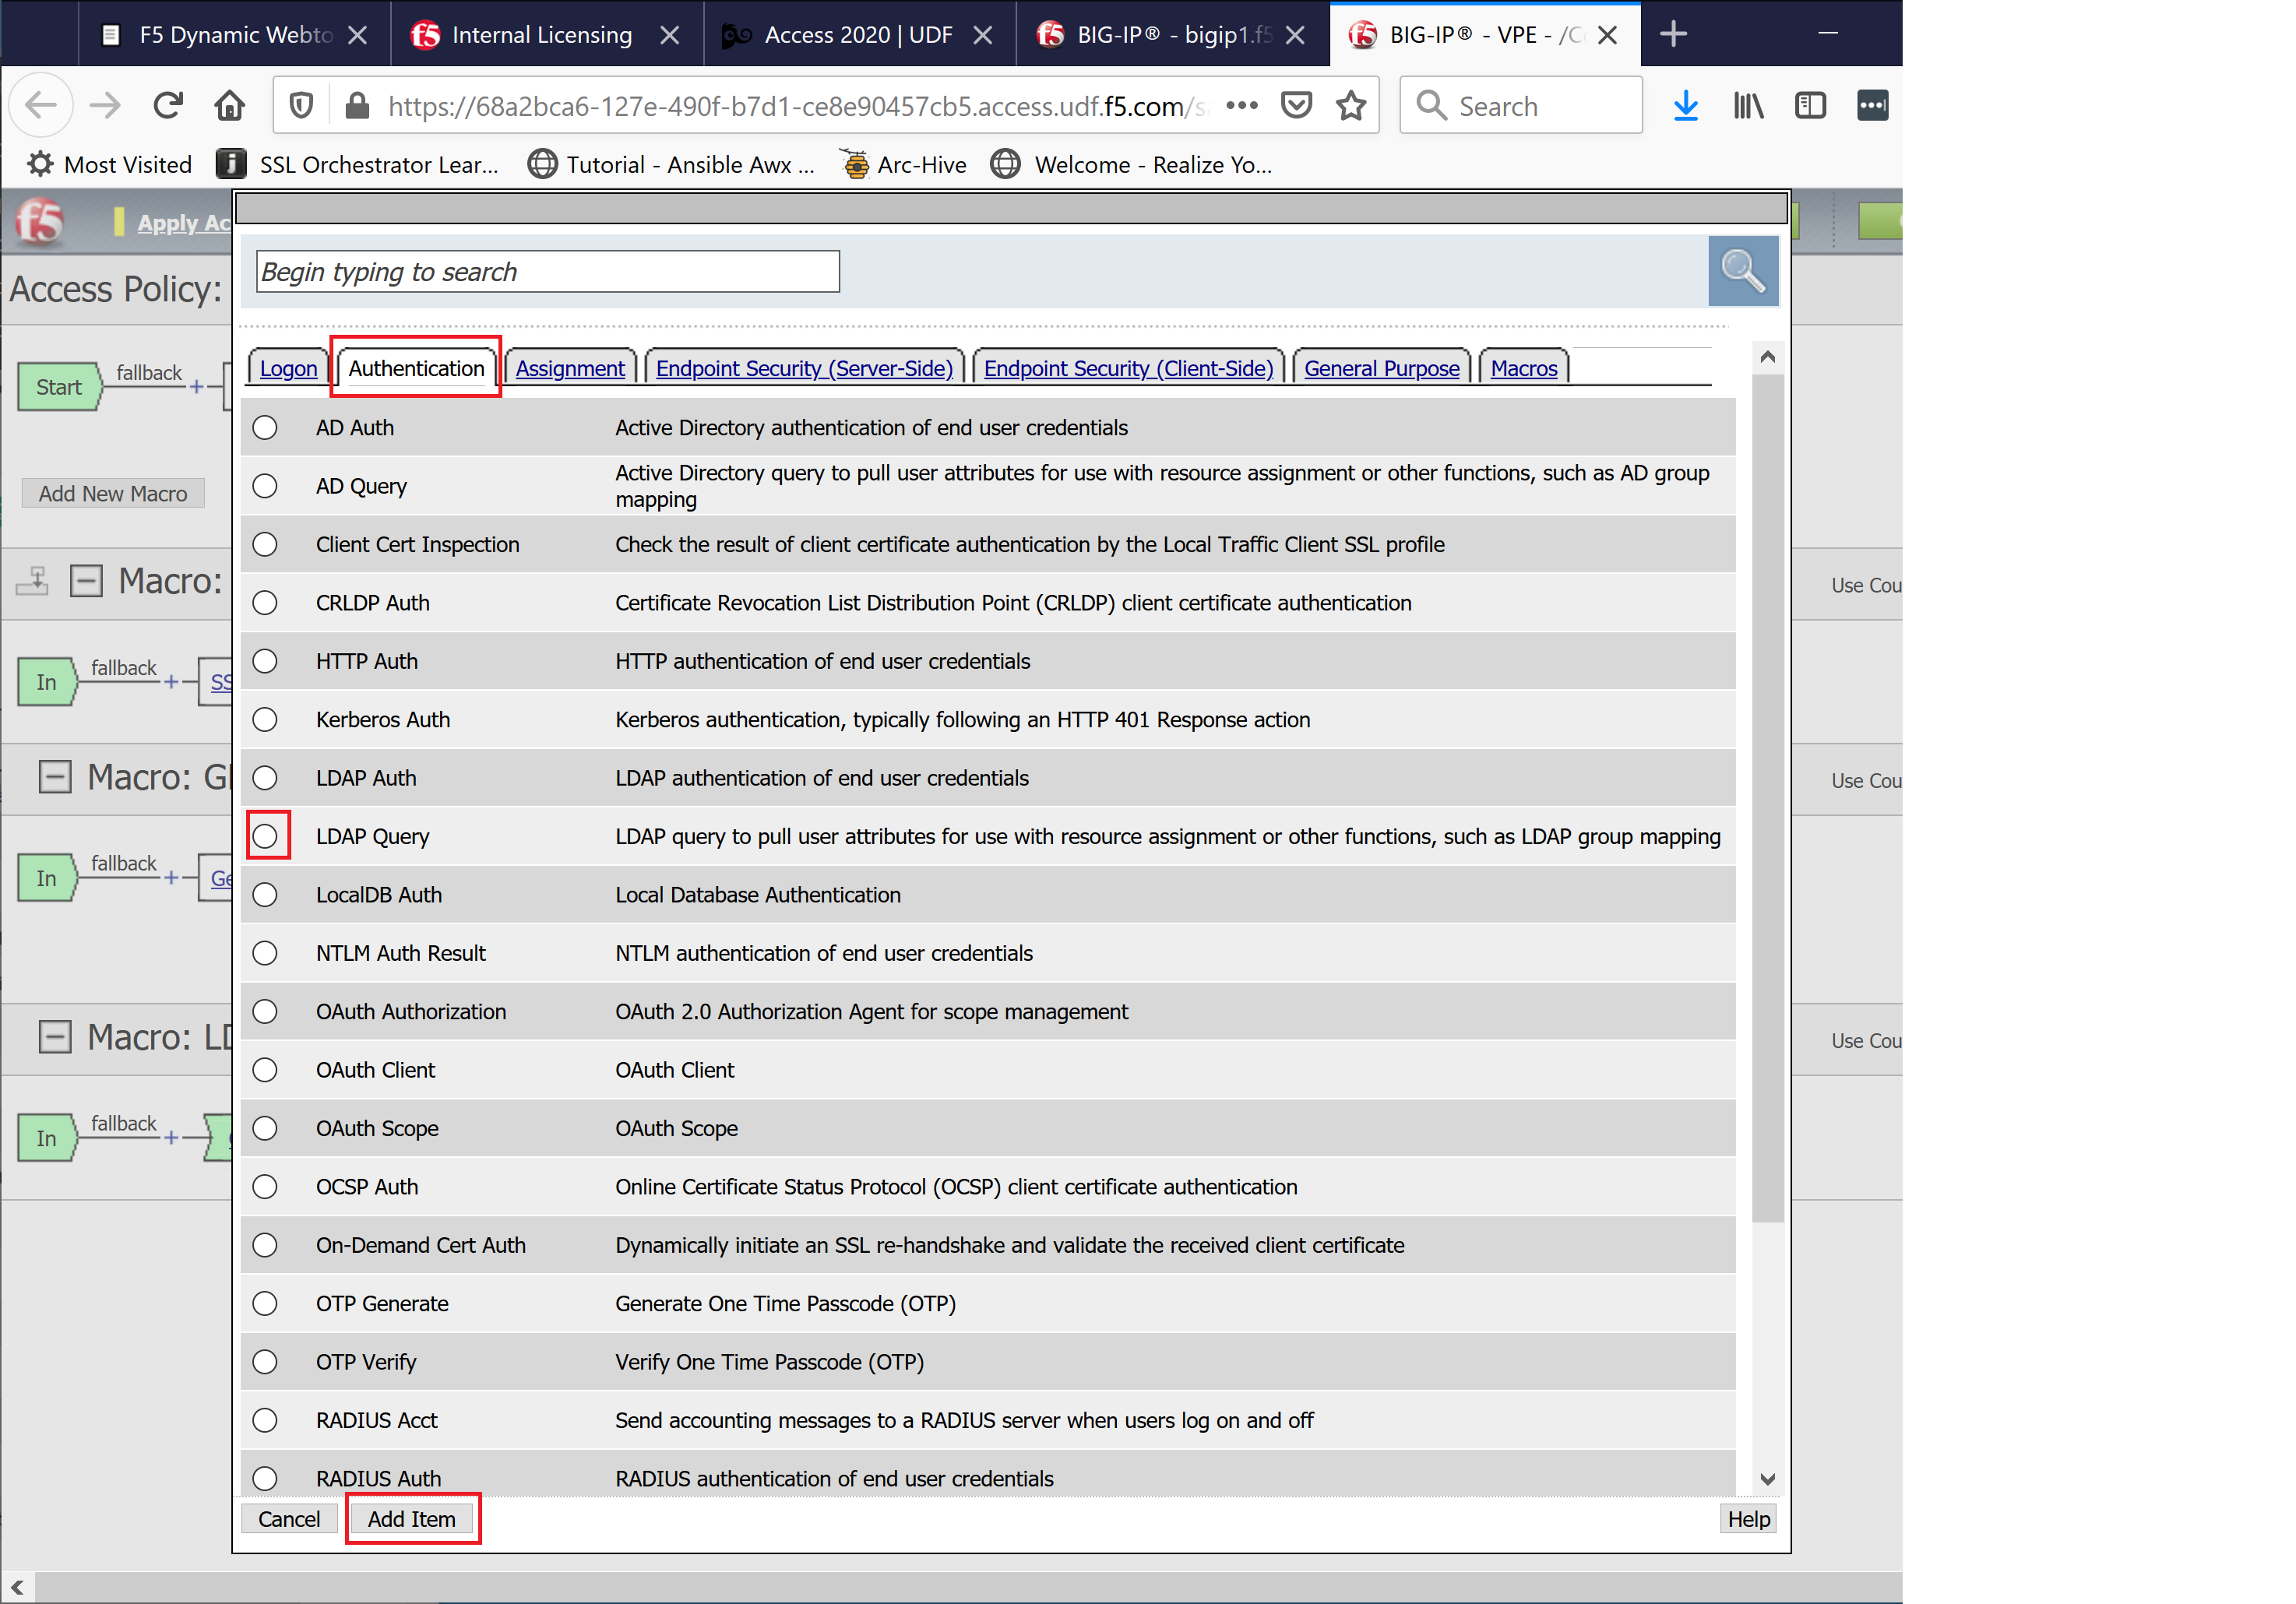
Add the LDAP Query action by clicking the plus sign

Select the Authentication tab, select the LDAP Query agent, and then click Add Item
Update the Properties tab by modifying the Server, SearchDN, SearchFilter, and Fetch Groups settings
- Server = /Common/ldap-servers
- SearchDN = DC=f5lab,DC=local
- SearchFilter = UserPrincipalName=%{session.custom.ephemeral.upn}
- Fetch groups to which the user or group belong = Direct

Click on the Branch Rules tab to edit the Branch Rules
Click the X button beside User Group Membership. This will delete the branch

Click Add Branch Rule

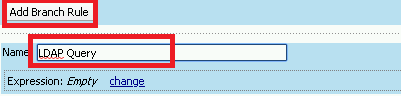
Enter LDAP Query in the Name field and click the change link
Click the Add Expression button

Change the Context setting to LDAP Query and the Condition setting to LDAP Query Passed. Ensure that LDAP Query has is set to Passed. Click th

Click the Add Expression button

Click Finish, and then click Save
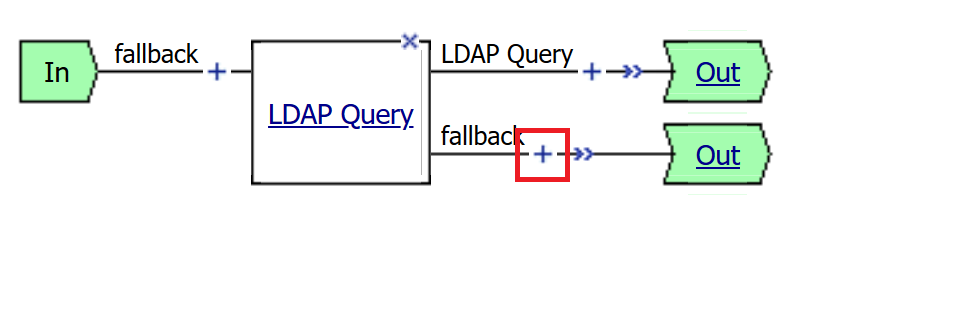
Now add a Message Box agent to alert when the LDAP query fails. Click on the plus sign on the fallback branch (between the LDAP Query and the OUT terminal)
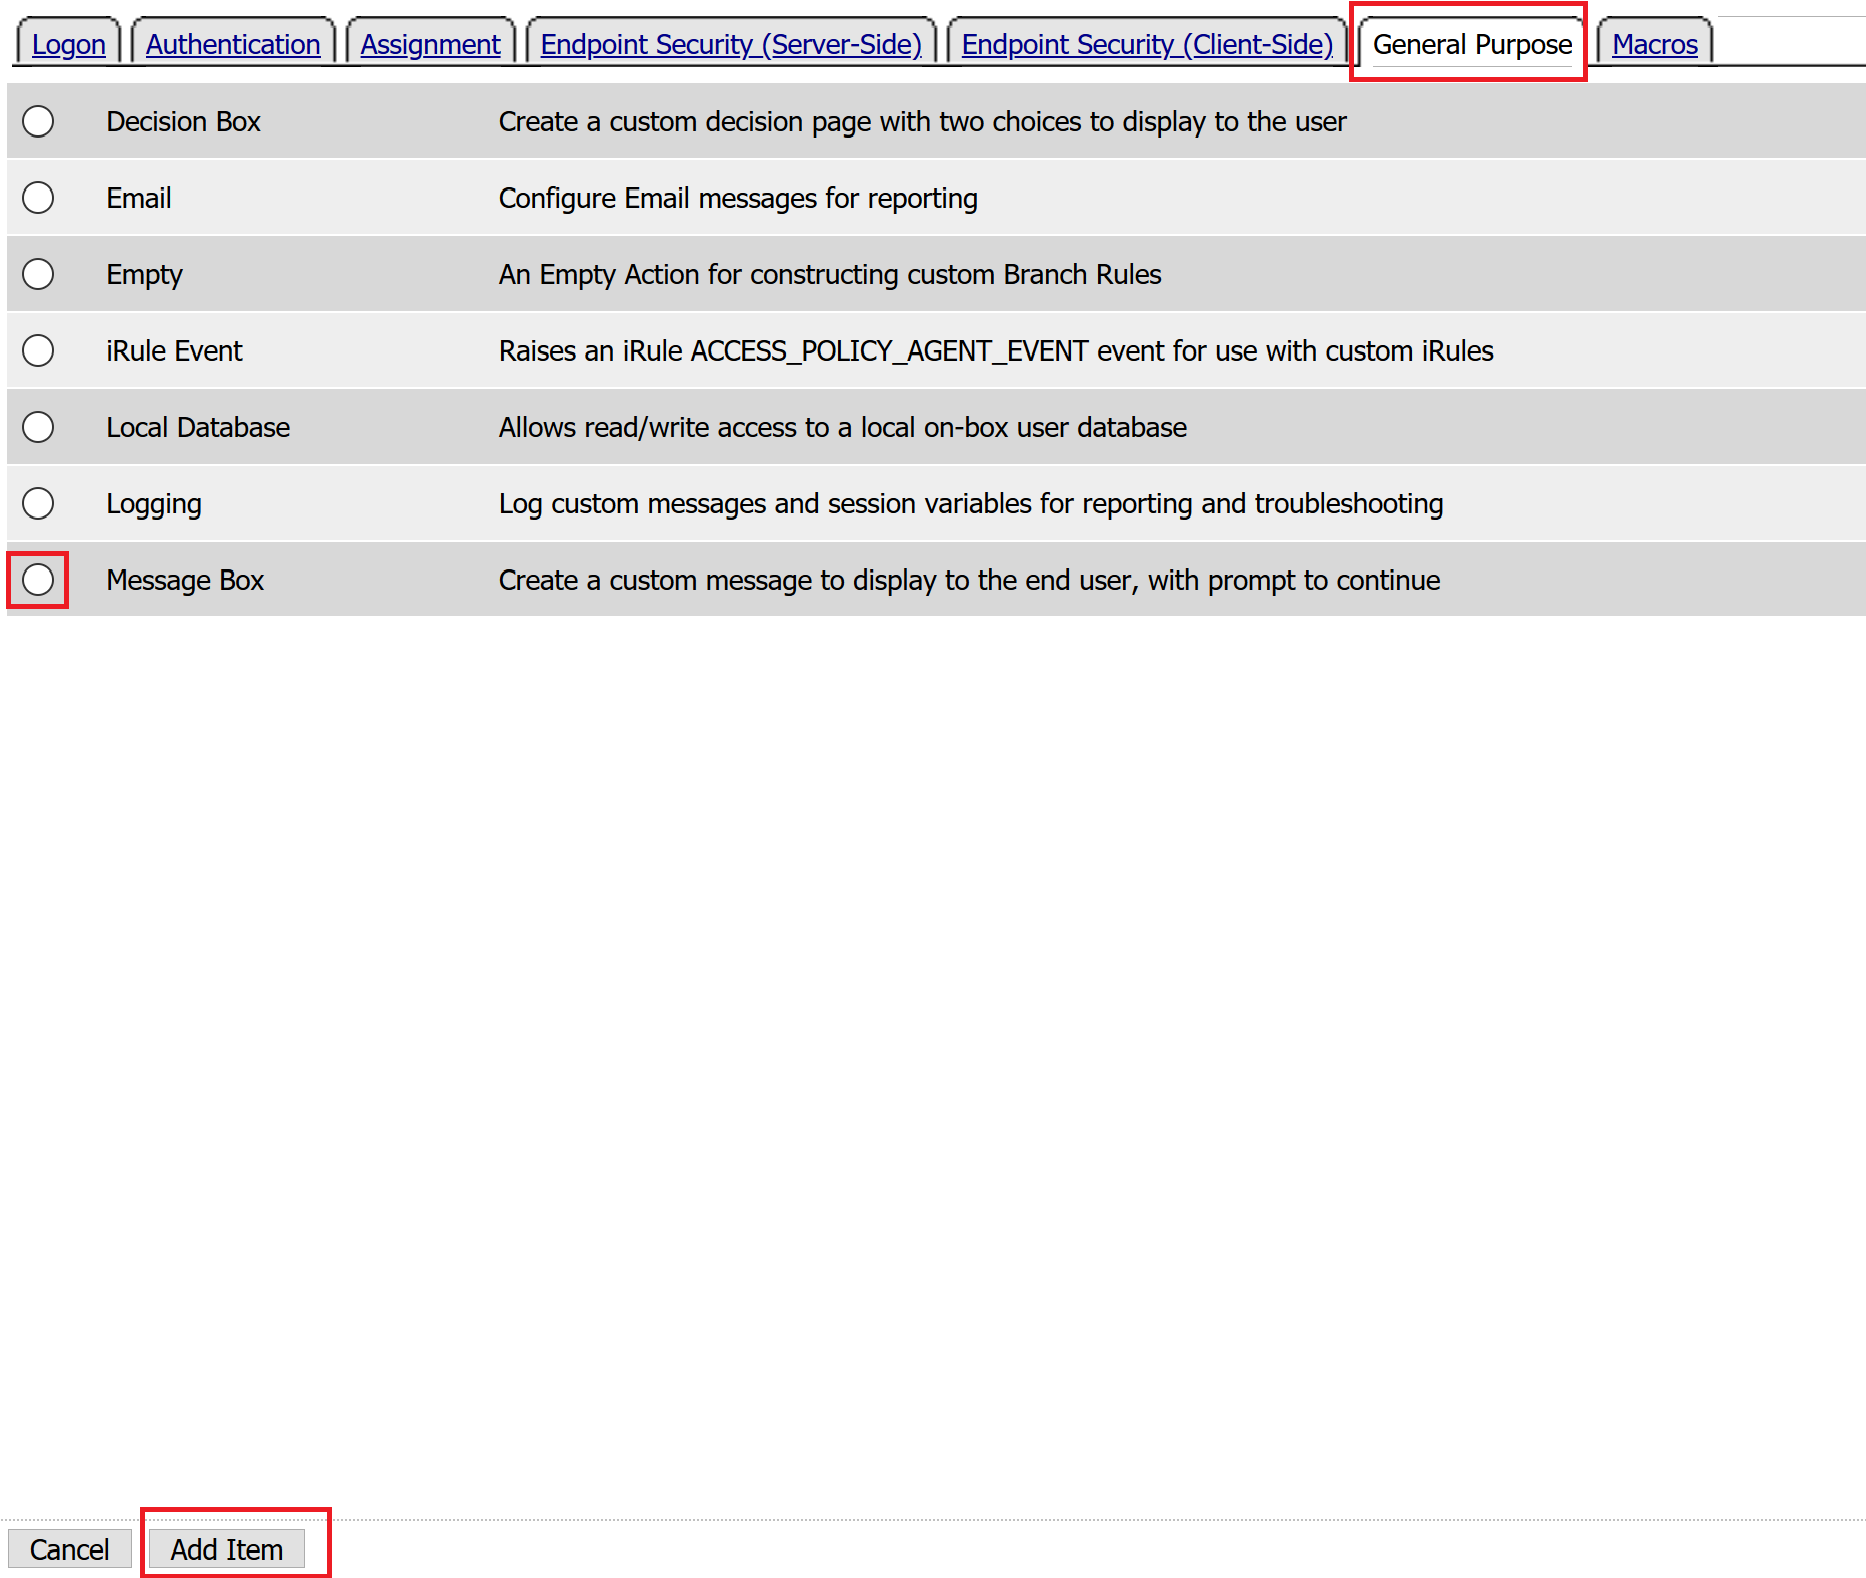
Select the General Purpose tab and then select Message Box in the main section, and Click the Add Item button
Enter the following values for the message box agent, and Click on the Save button
Name:    **LDAP Failure**
Message: **LDAP Failure for user %{UserPrincipalName}**

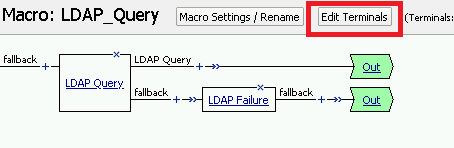
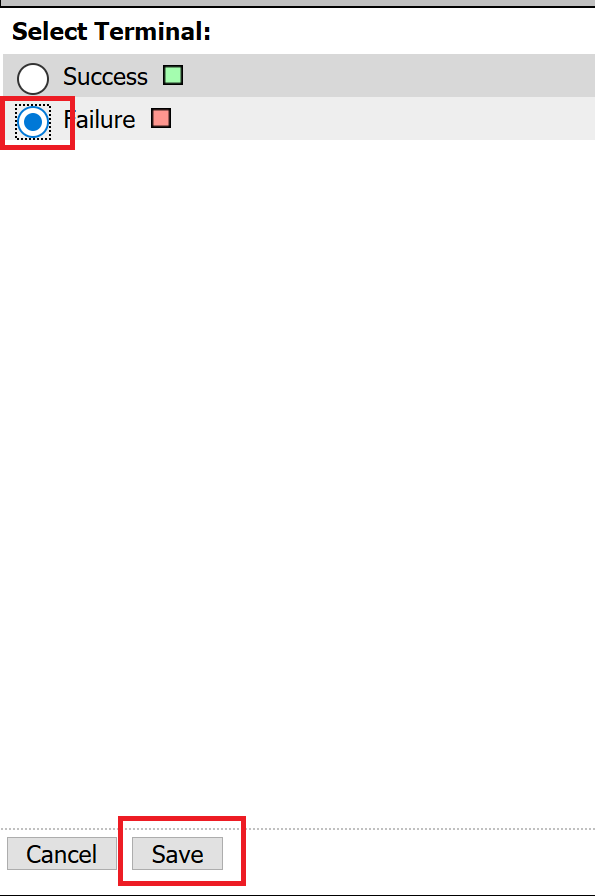
Click on the Edit Terminals button to change the terminals to report Success and Failure
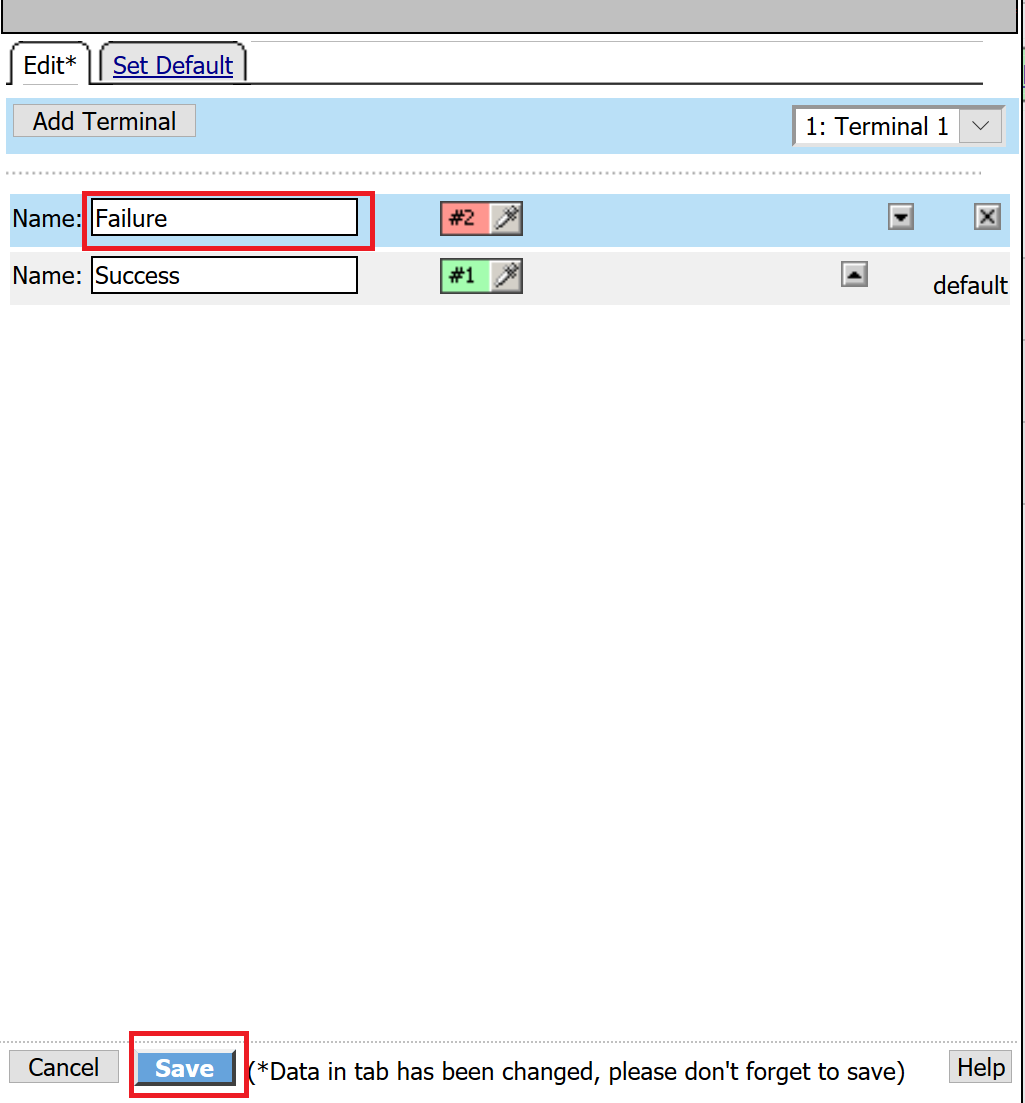
Change the Name from out to Success, and then click on the Add Terminal button

Change the name from Terminal 1 to Failure, and then click on Save
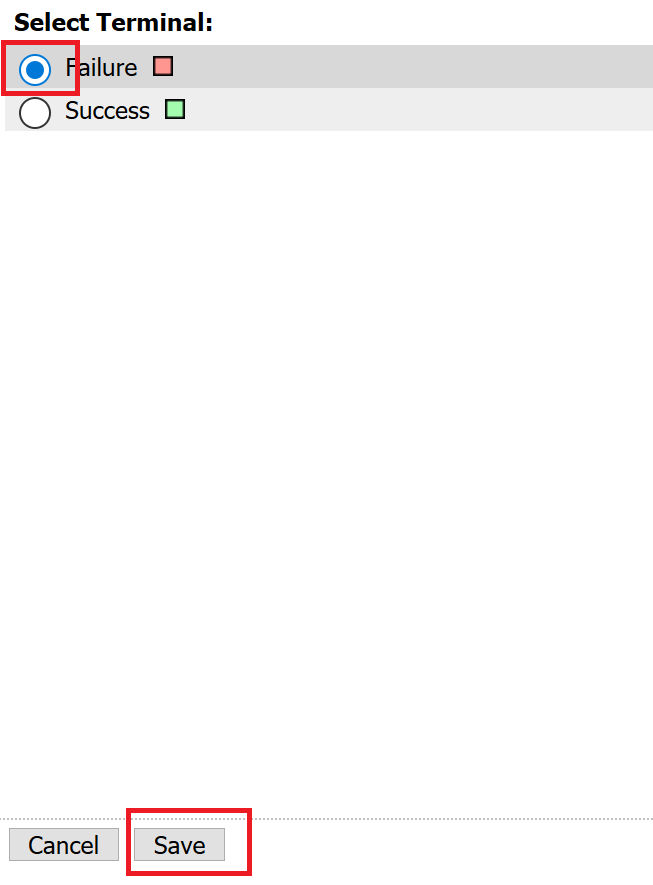
Click the terminal for the LDAP Failure branch
Change the setting from Success to Failure. and click Save
Click Save
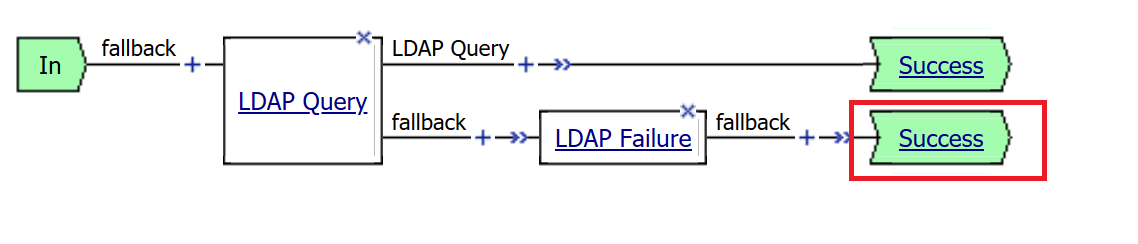
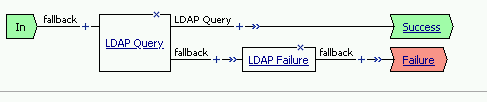
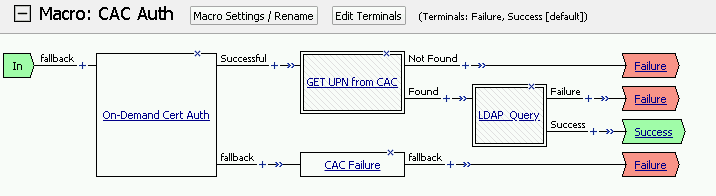
Here is the completed macro.
Task 6 - Build CAC AUTH Macro
In this section, you will build a macro to request the user certificate.
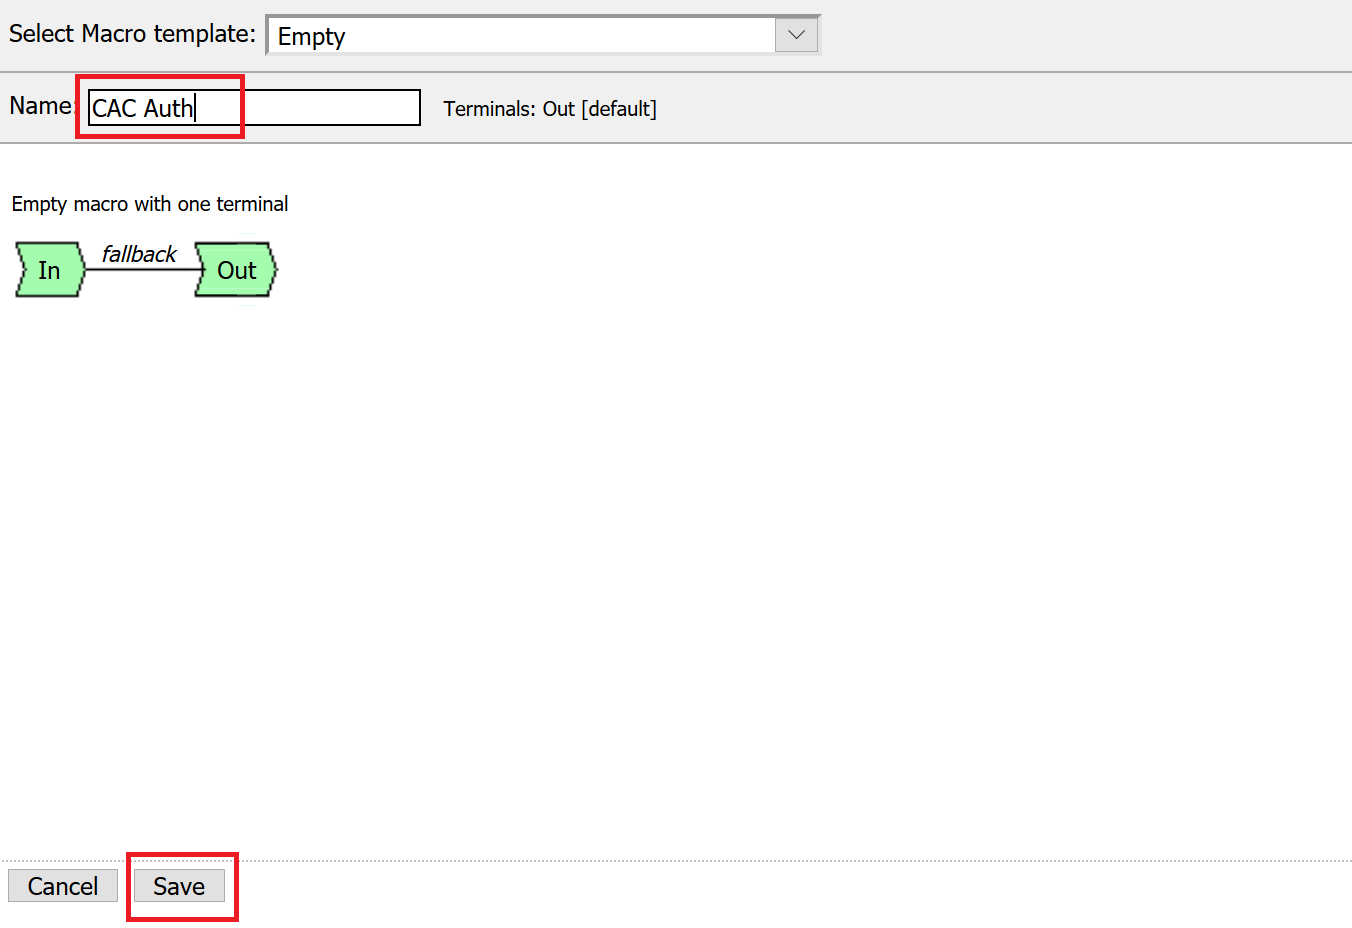
Click the Add New Macro button
Name the Macro CAC Auth and click save
Open the newly created macro by clicking the plus sign by the name: CAC Auth

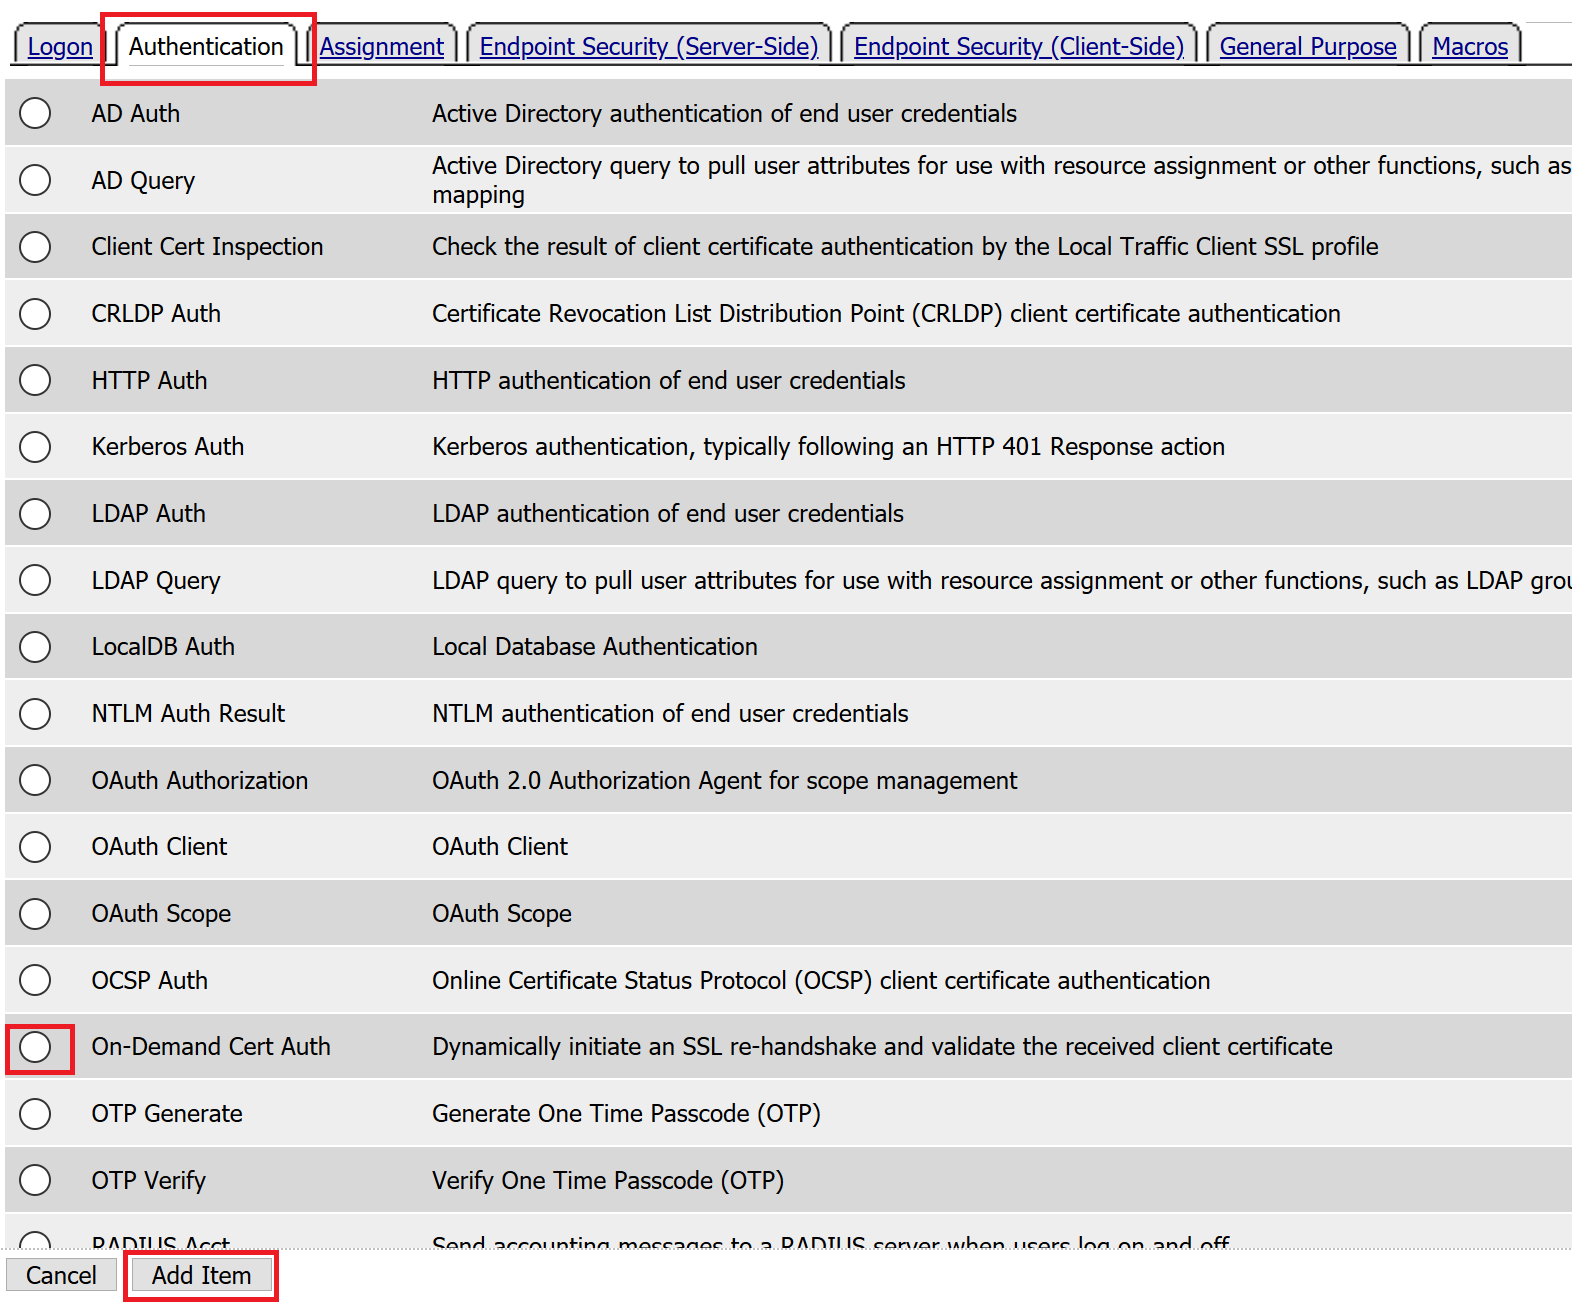
Click the Authentication tab across the top, select On-Demand Cert Auth, and click Add Item
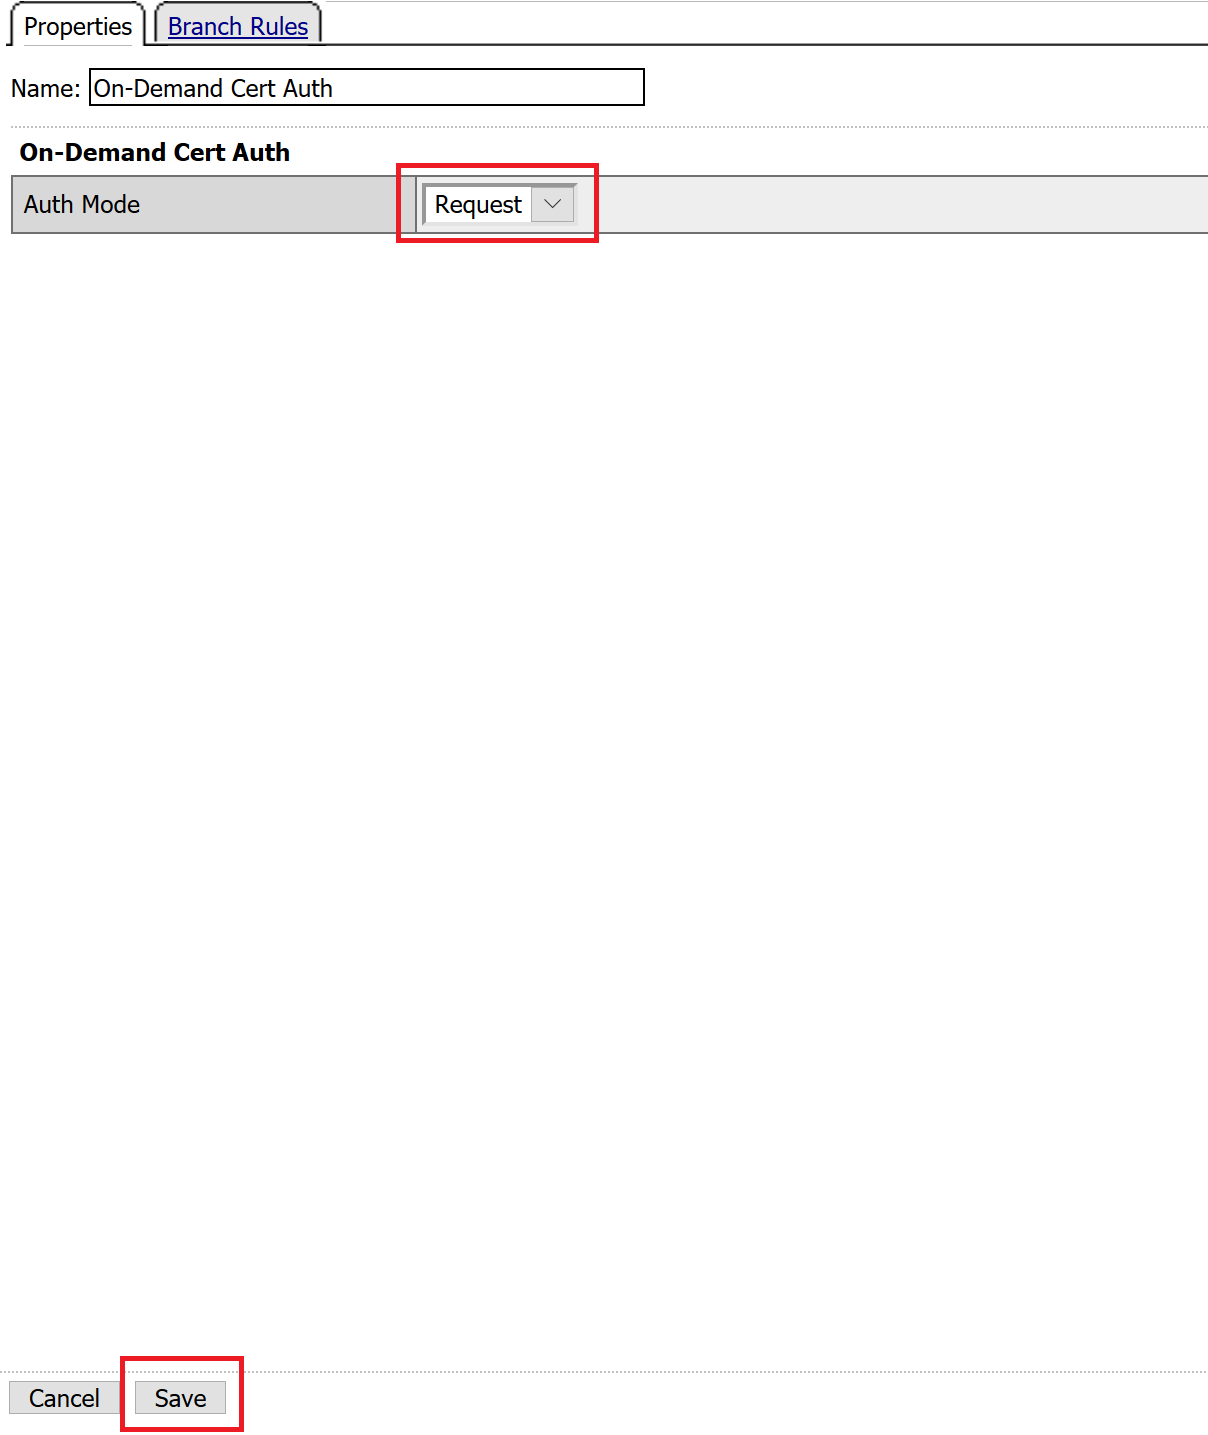
Leave the Auth Mode set to the default Request, and click Save
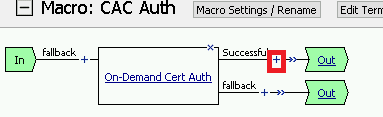
Click the plus sign on the Successful branch
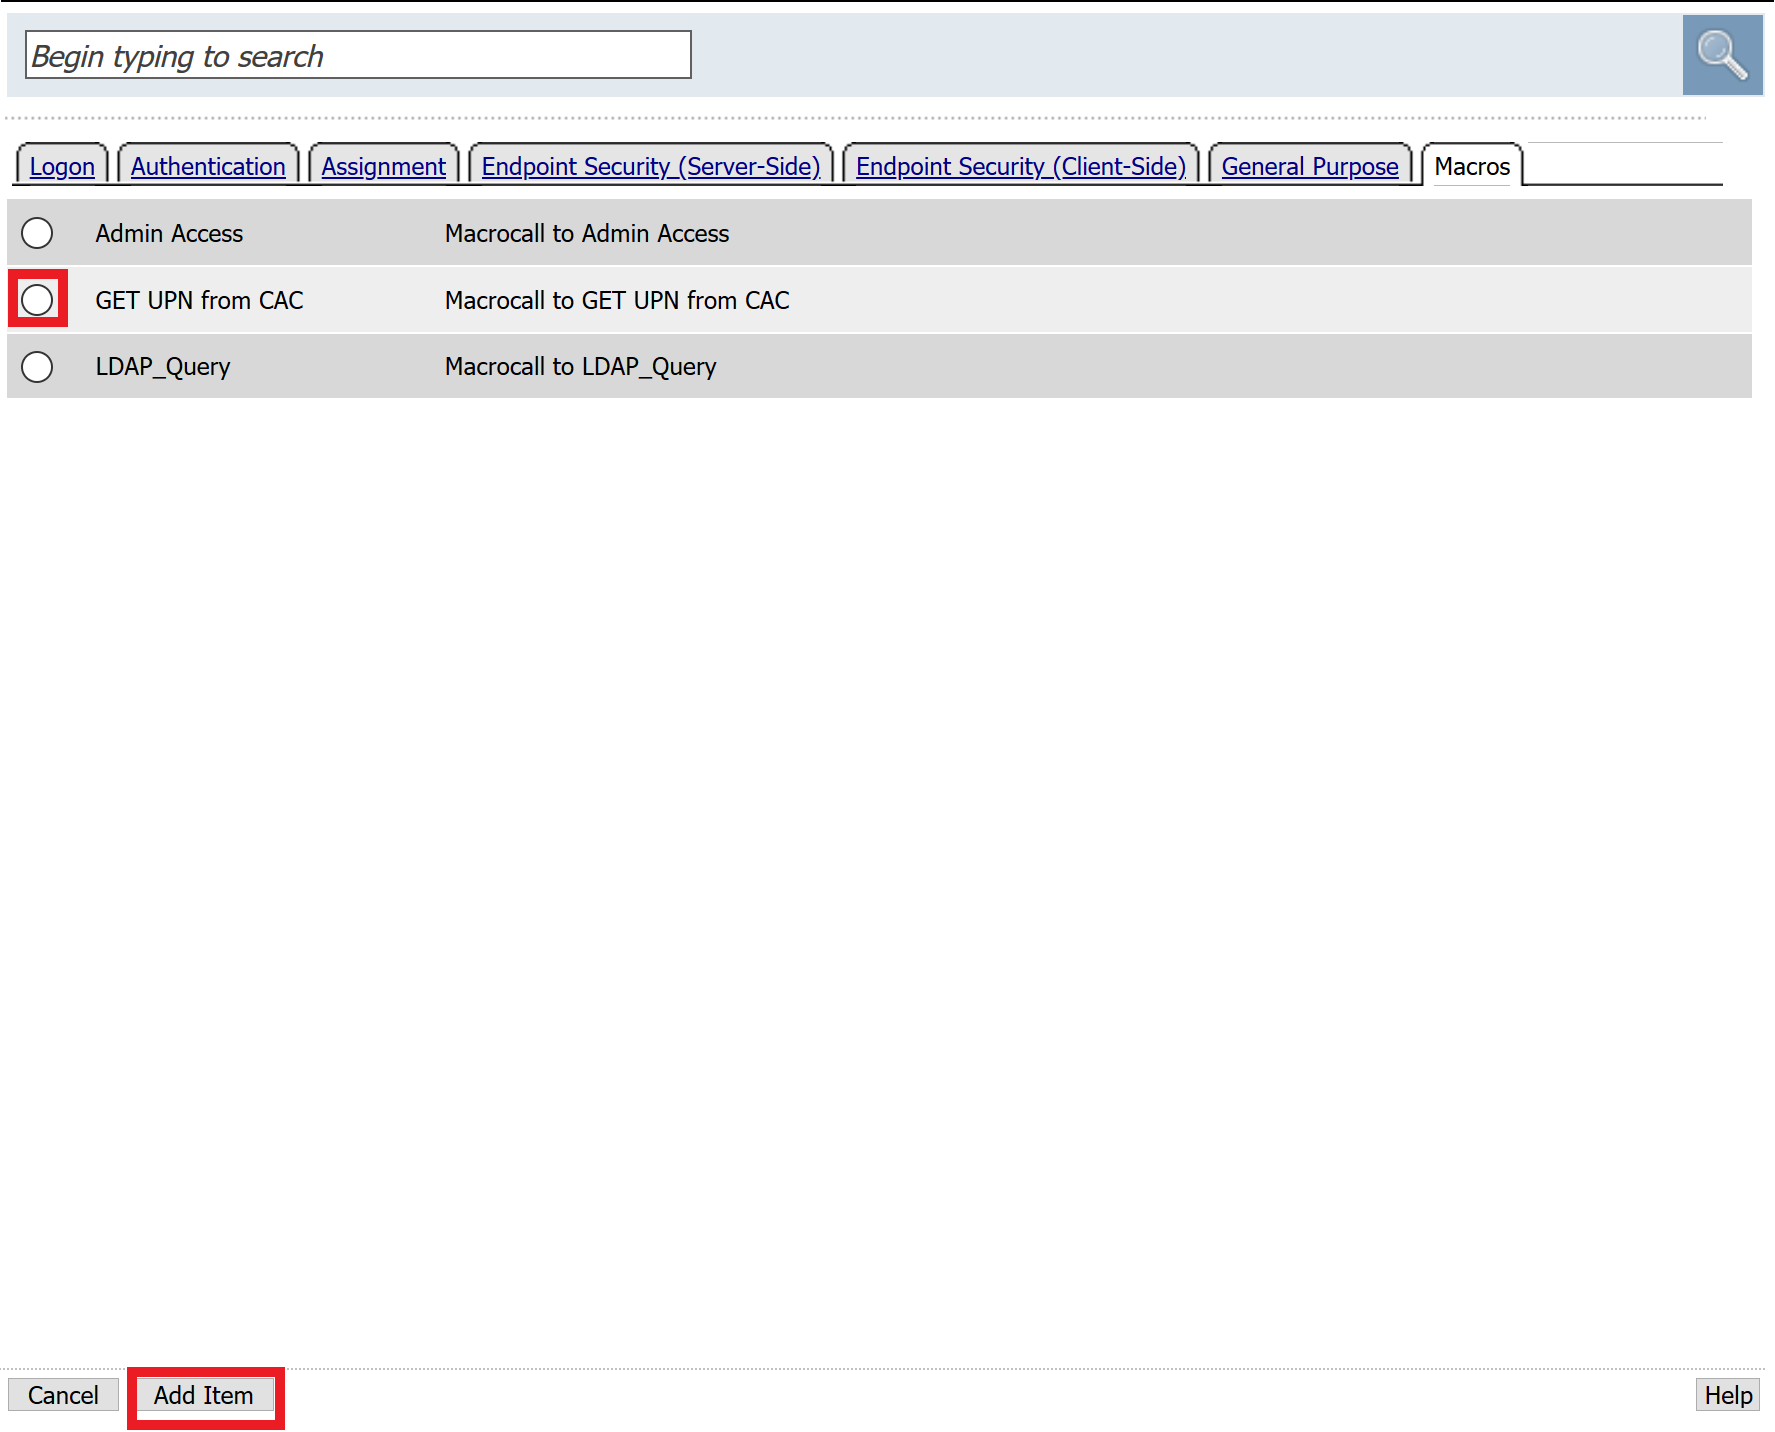
Click the tab Macros across the top, select the GET UPN from CAC button in the main page, and click Add Item
Click the plus sign on the Found branch

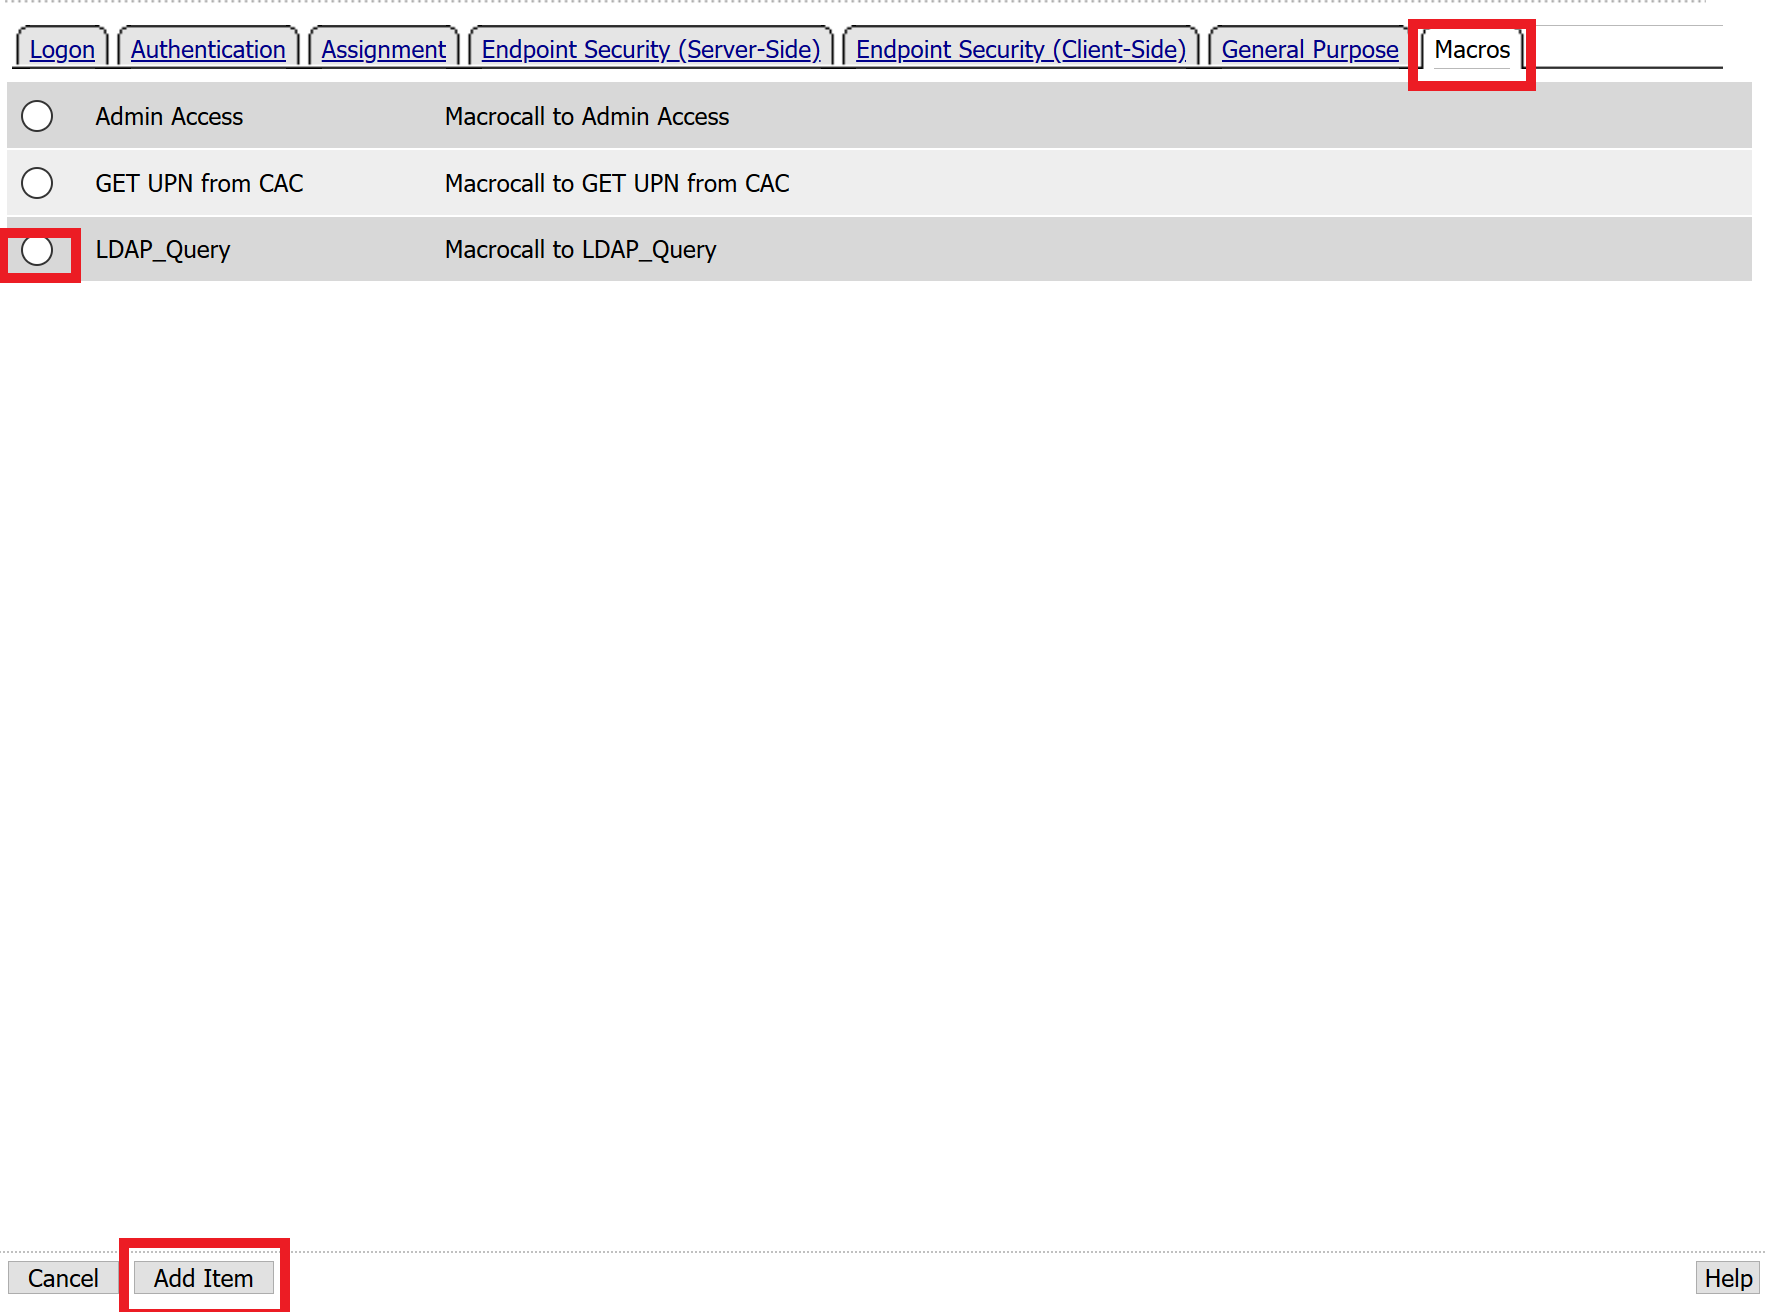
Select Macros across the top, select the LDAP_Query button in the main page, and click Add Item
Click the plus sign on the fallback branch after the On-Demand Cert Auth

Select General Purpose across the top, select Message Box in the main page, and click Add Item

Name the message box CAC Failure, enter CAC Failure in the Message box, and click Save

Click Edit Terminals

Change the default name from Out to Success, and click Add Terminal

Change the default name to Failure

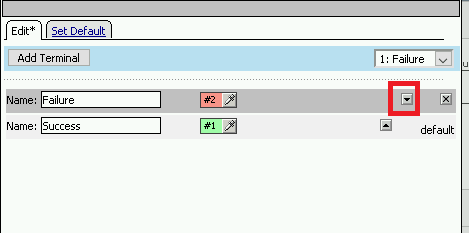
Click the down arrow beside the Failure box to change the order. The Success terminal should be on top. Click Save
Click the terminals on the Not Found, Failure, Fallback branches and change them from Success to Failure. Click Save
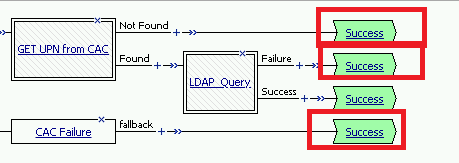
Note
The completed CAC Auth Macro
Task 7 - Update the Initial Access Policy
In this section, you will add the CAC Auth Macro to the initial access policy and update the variable assignments.
Click the X the Logon Page box to remove the Logon Page

Click the Delete button

Click the plus sign between USG Waring Banner and Variable Assign

Select Macros across the top, select the CAC Auth button in the main page, and click Add Item

Click the Variable Assign box

Click change on row 1

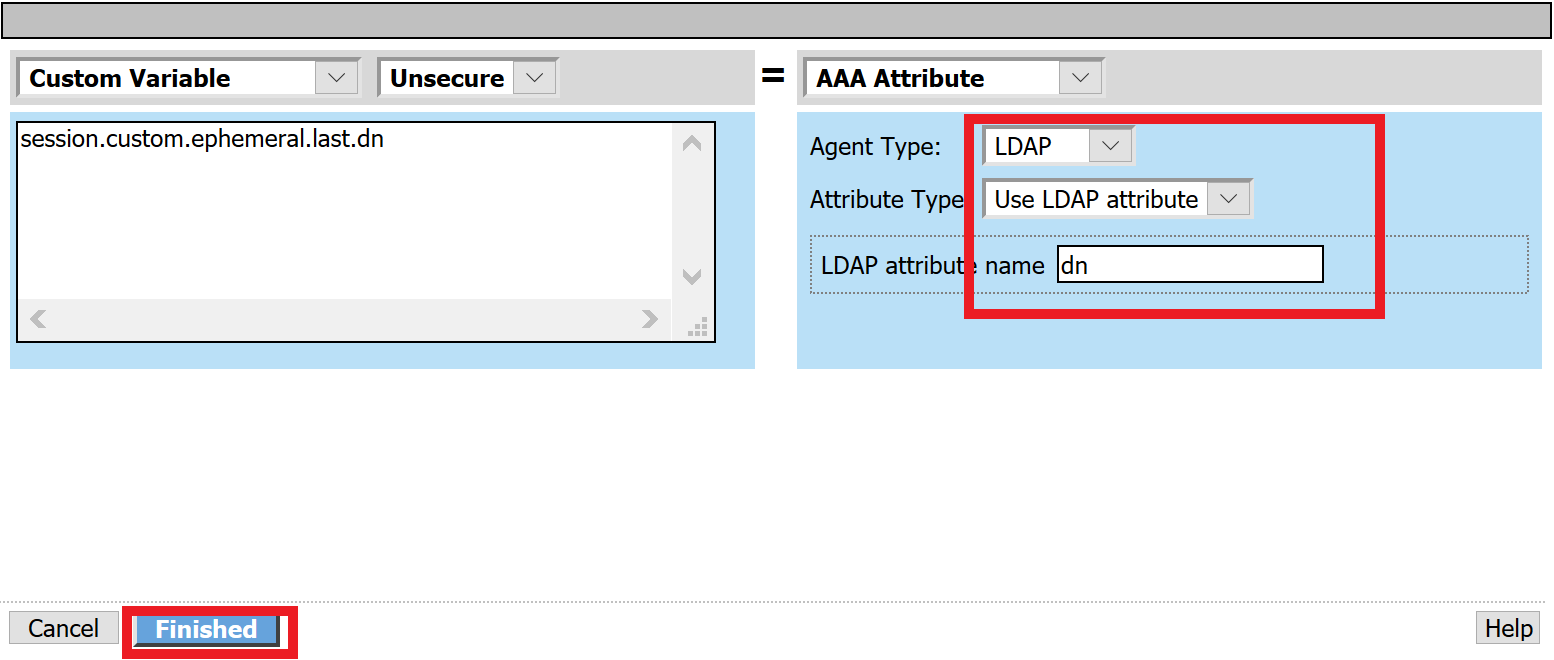
Make the following changes
- Change the right hand pull down setting to AAA Attribute
- Change the Agent Type to LDAP
- Change the Attribute type to USE LDAP attribute
- Set the LDAP attribute name to dn
- Click Finished
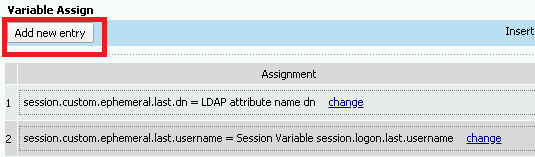
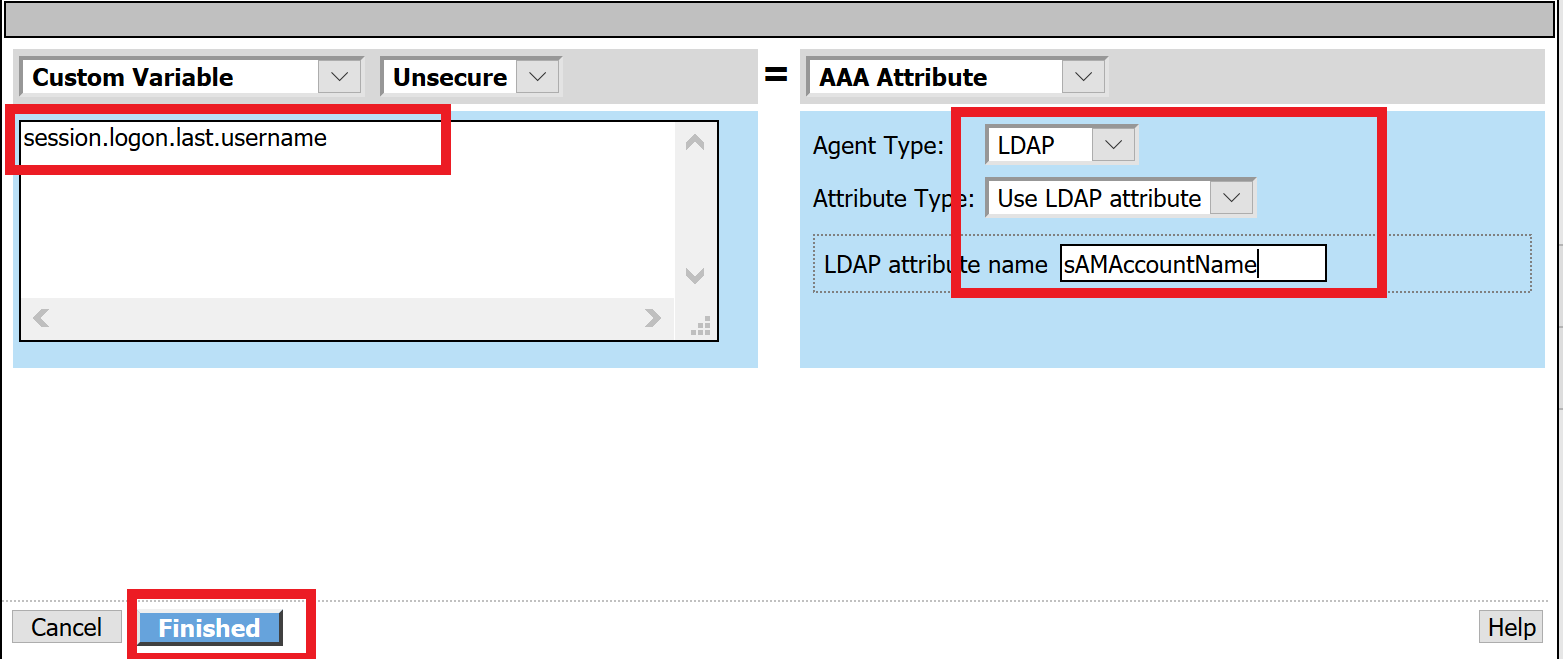
Click Add new entry
Click change

Make the following changes
- Update the field below Custom Variable with session.logon.last.username
- Change the Custom Expression pull down to AAA Atribute
- Change the Agent Type to LDAP
- Change the Atribute type to Use LDAP attribute
- Set the LDAP attribute name to sAMAccountName
- Click Finished
Click the down arrow on row 1 to move the Assignment to the second row, and click Save
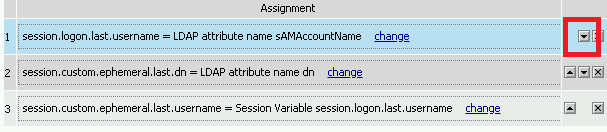
Here is the completed initial policy

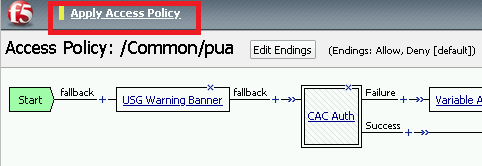
Click Apply Access Policy
Task 8 - Update the SSL Profile
In this section, you will modify the SSL profile to present an internally signed certificate for the PUA webtop and select a trusted Certificate Authority to validate the user certificates.
Click Local Traffic >> Profiles >> SSL >> Client

Click pua_webtop-clientssl

Update the Certificate Key Chain
Check the custom box beside Certificate Key Chain
Highlight the default key chain and click delete
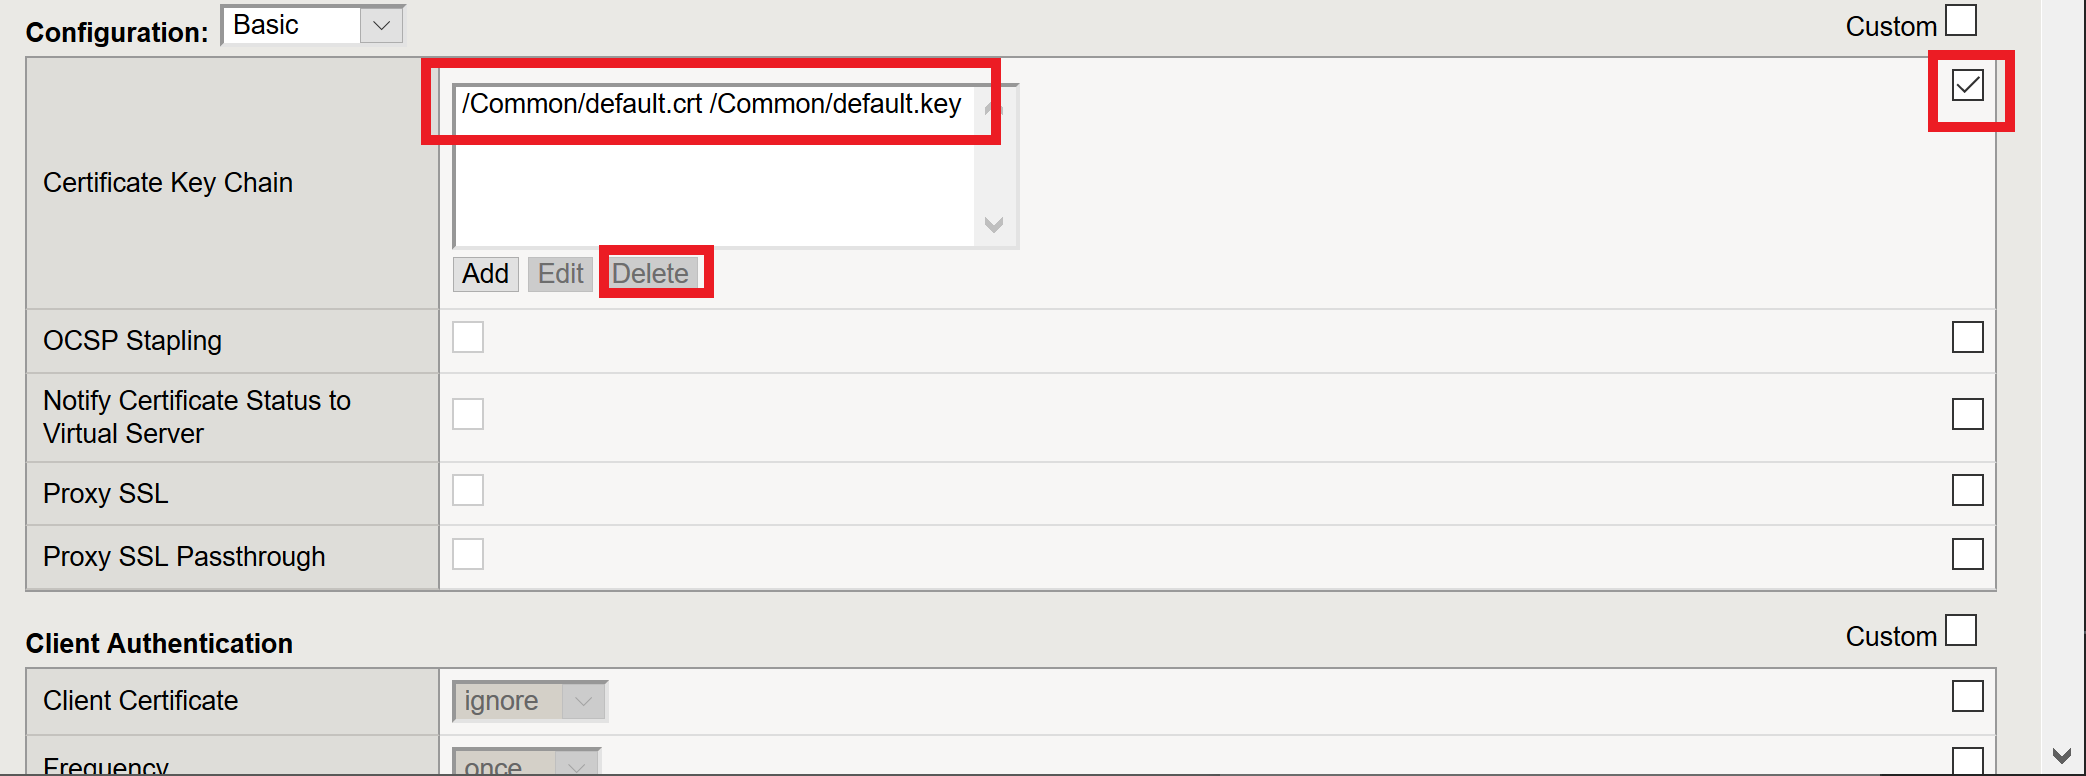
Click ADD

Change the Certificate to acme.com-wildcard.crt
Change the Key to acme.com-wildcard.key
Click ADD

Update the Certificate Authorities
- Change the Trusted Certificate from ca. pua.lab.cer to ca.f5lab.local
- Change the Advertised Certificate from ca. pua.lab.cer to ca.f5lab.local
- Click Update

Task 9 - Adding Devices to the webtop
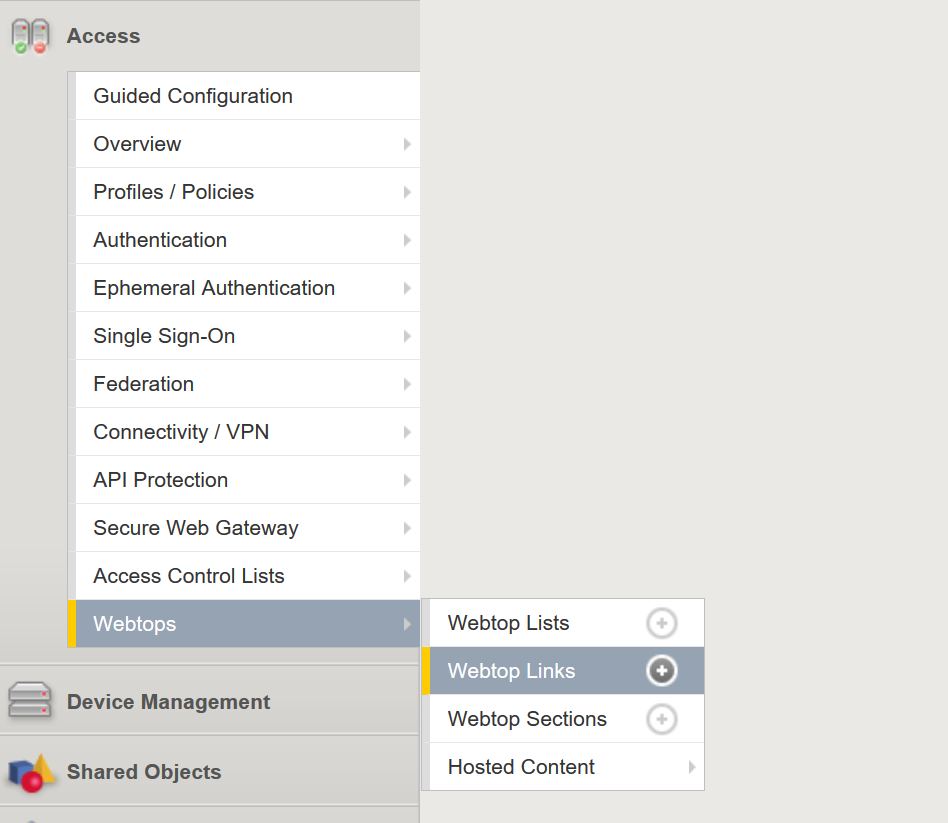
click Access >> Webtops >> Webtop Links
Click Create

Make the following changes
- Enter Host01 as the Name
- Change the Link Type to Application URI
- Update the Application URI with https://%{session.server.network.name}/ssh/host/10.1.20.8
Click Finish

Click Access >> Profiles/Policies >> Access Profiles (Per-Session Polices)
Click the Edit button on the pua row

Click the plus sign beside the Macro: Admin Access
Click Advanced Resource Assign

Click the Add/Delete button
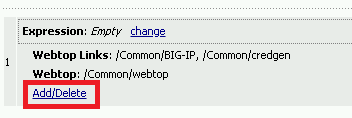
Click the Webtop Links tab and enable the /Common/Host1 checkbox
Click Update, and then click Save

Click Apply Access Policy

Task 10 - Modifying Radius Configurations
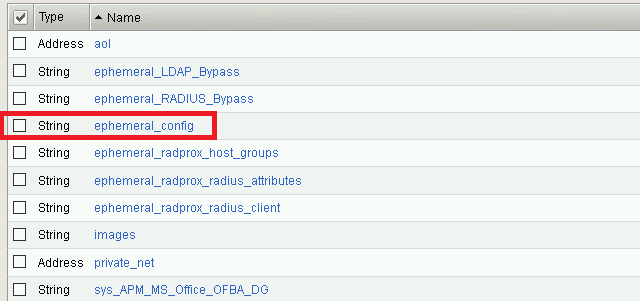
Navigate to Local Traffic >> iRules >> Data Group List

Click ephemeral_config
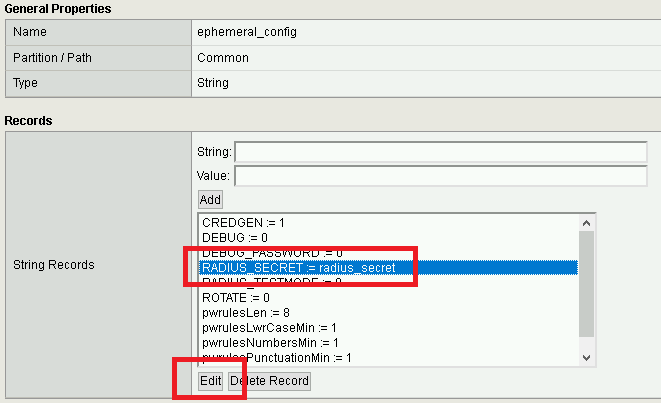
Change the Radius Secret
- Highlight RADIUS_SECRET in the String Records window
- Click Edit
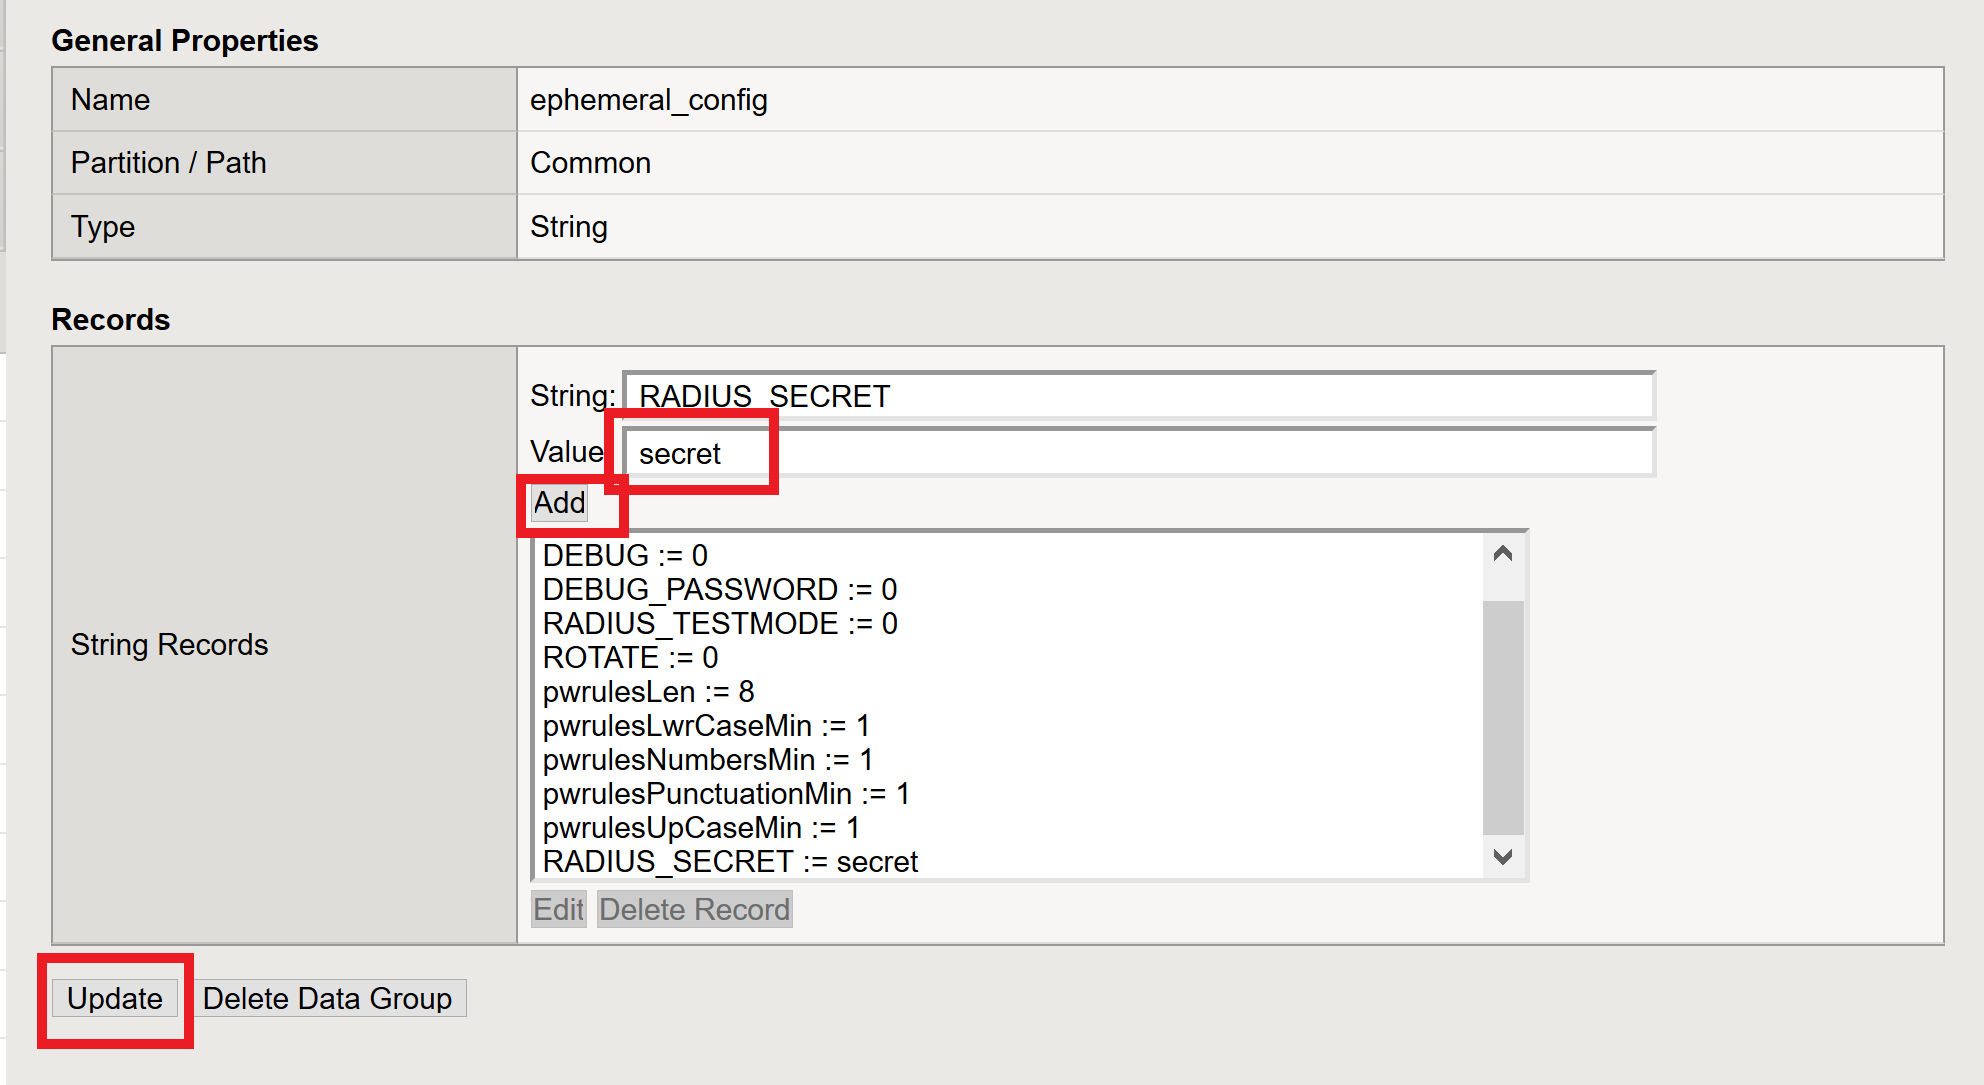
Change the Value from radius_secret to secret, Click ADD, and click Update
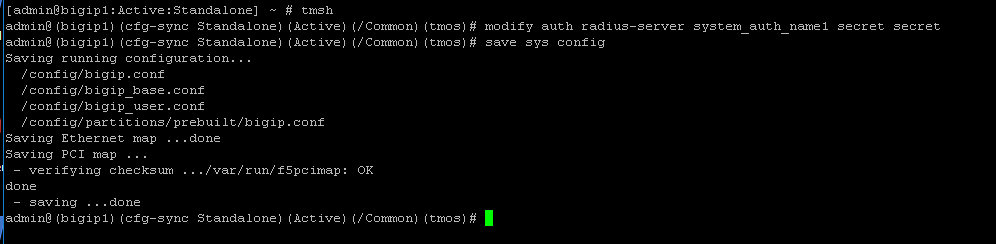
SSH into the BIG-IP and enter traffic management shell by typing tmsh
Enter the following commands
modify auth radius-server system_auth_name1 secret secret
save sys config
Task 11 - Verification Testing
Access the webtop via https://pua.acme.com
A Warning Banner page (customizable) should appear, click the Click here to continue link.

Select the certificate for user1 and click OK

Observer the updated webtop with Host01

Click the BIG-IP icon, and observer the username in the bottom left corner
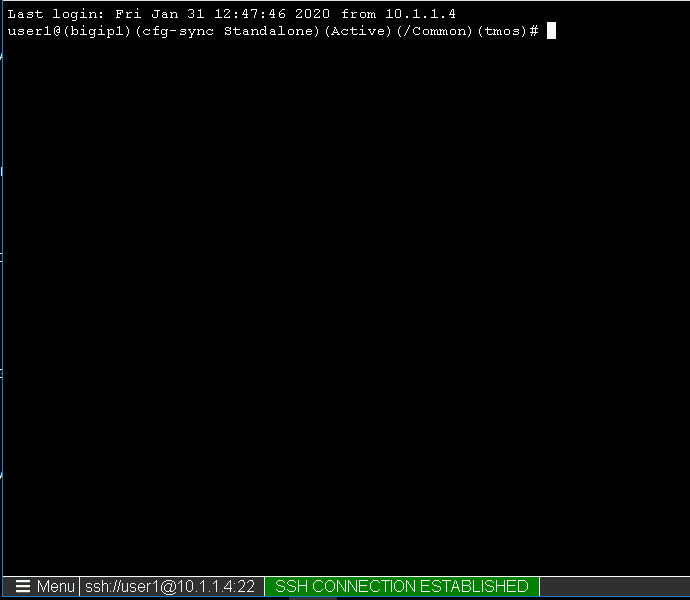
Close the browser window and return to webtop
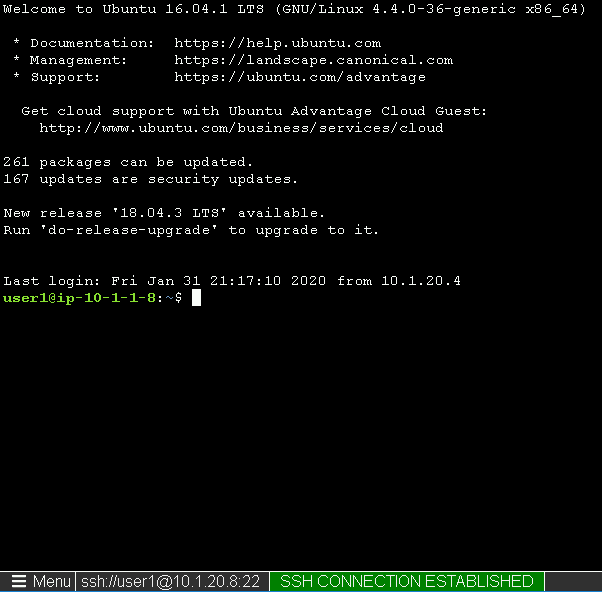
Click the Host01 icon
Observer the the username at the bottom left corner
Escalate Priviledges
- type sudo -i
- click the Menu button
- click click Credentials button
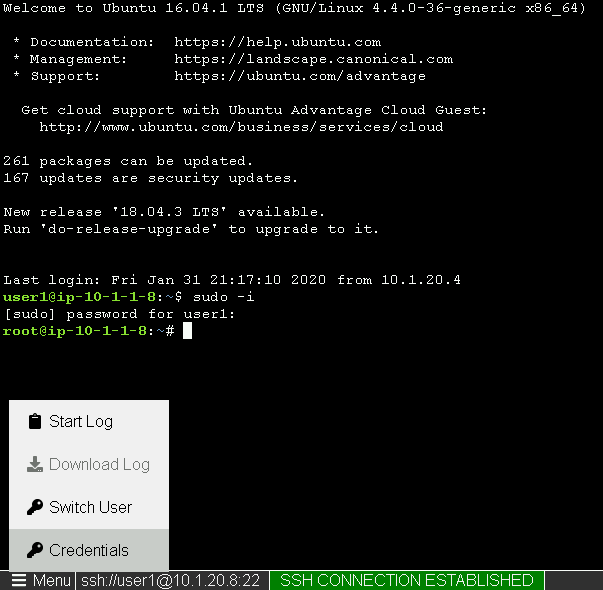
Note
The Credentials button sends the password to terminal