F5 Identity and Access Management Solutions > Archived Identity & Access Management Labs > 300 Series: Advanced Use Cases & Solutions Source | Edit on
Lab 1: Deploy Priviledged User Access (PUA) using LDAP
In this lab ephemeral authentication is configured on Access Policy Manager (APM) using LDAP authentication.
Note
An External LDAP server is required for this scenario
Task 1 - Access Lab Environment
To access your dedicated student lab environment, you will need a web browser and Remote Desktop Protocol (RDP) client software. The web browser will be used to access the Unified Demo Framework (UDF) Training Portal. The RDP client will be used to connect to the jumphost, where you will be able to access the BIG-IP management interfaces (HTTPS, SSH).
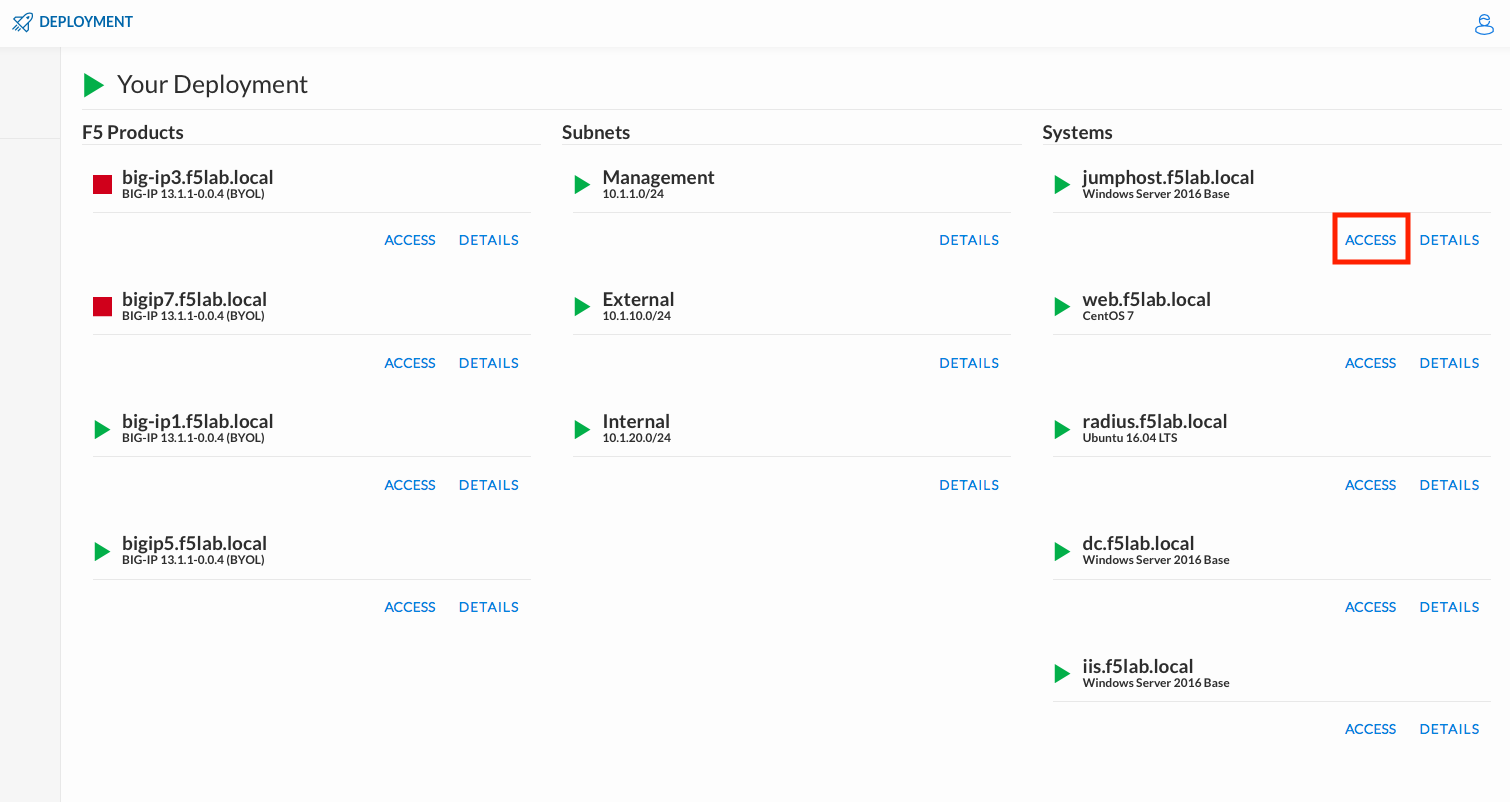
Click DEPLOYMENT located on the top left corner to display the environment
Click ACCESS next to jumphost.f5lab.local
Select your RDP resolution.
The RDP client on your local host establishes a RDP connection to the Jumphost.
Login with the following credentials:
- User: f5labuser1
- Password: user1
After successful logon the Chrome browser will auto launch opening the site https://portal.f5lab.local. This process usually takes 30 seconds after logon.

Click the Classes tab at the top of the page.
Scroll down the page until you see 302 Ephemeral Authentication-v16 on the left
Hover over tile Implement Priviledged User Access Authentication. A start and stop icon should appear within the tile. Click the Play Button to start the automation to build the environment

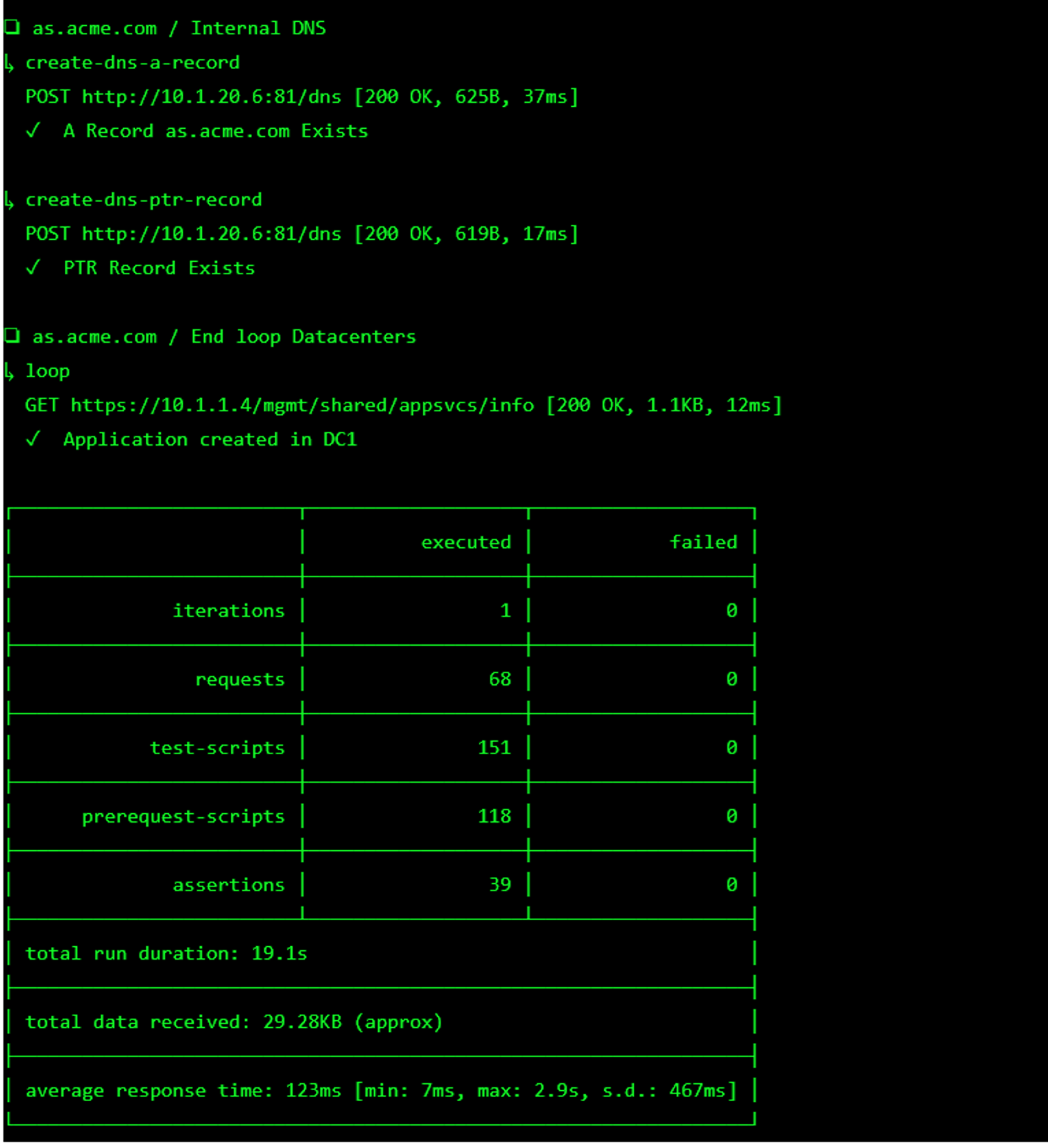
The screen should refresh displaying the progress of the automation within 30 seconds. Scroll to the bottom of the automation workflow to ensure all requests succeeded. If you you experience errors try running the automation a second time or open an issue on the Access Labs Repo.
Task 2 - Create Ephemeral Authentication configuration
Ephemeral authentication Configuration defines the authentication method (LDAP or radius) and ephemeral password usage for privileged user access.
Navigate to Access >> Ephemeral Authentication >> Authentication Configuration >> Click the + (Plus Symbol)

Configure the General Properties:
- Name: ldap.auth.conf
- Authentication Method: ldap
- Click Save
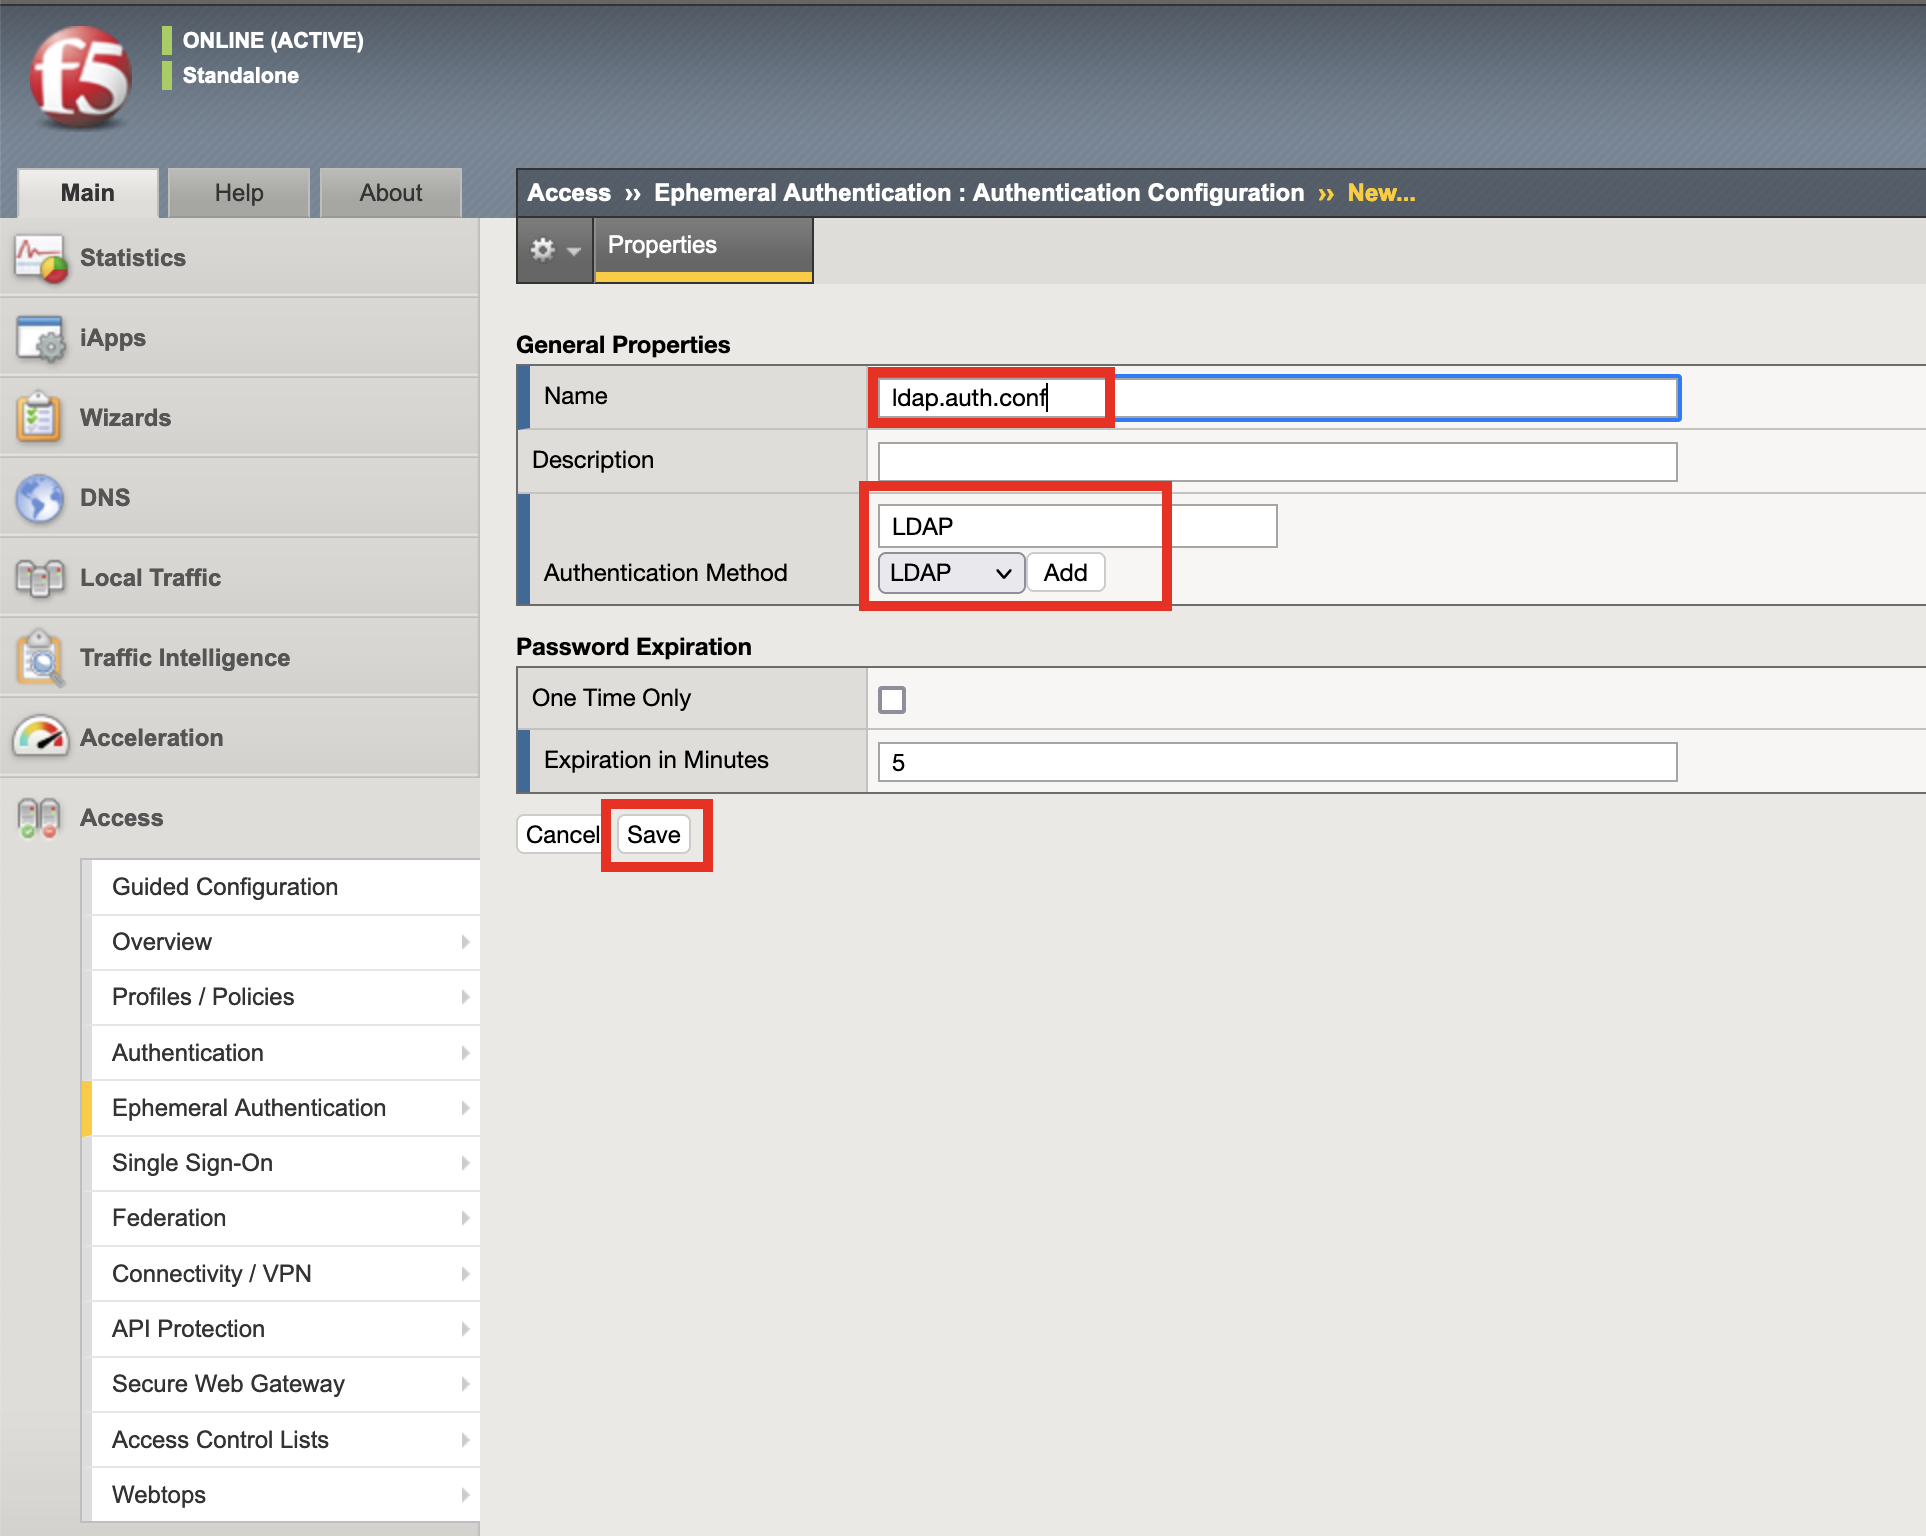
Note
Password Expiration section defines the password usage and timer.
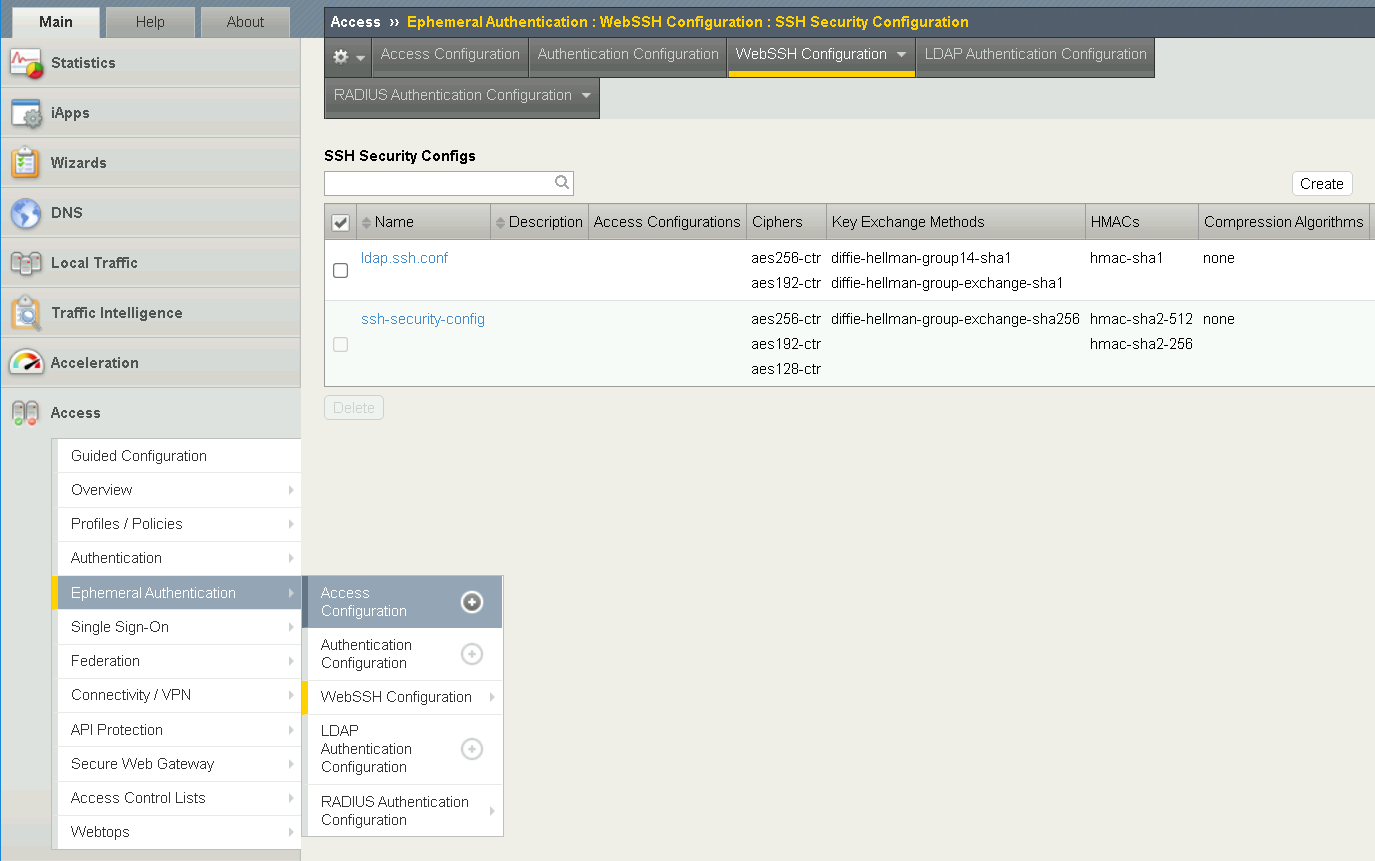
Task 3 - Create an SSH Security Configuration
The SSH Security Configuration defines the ciphers, exchange methods, HMACs, and compression algorithms required by the backend resource.
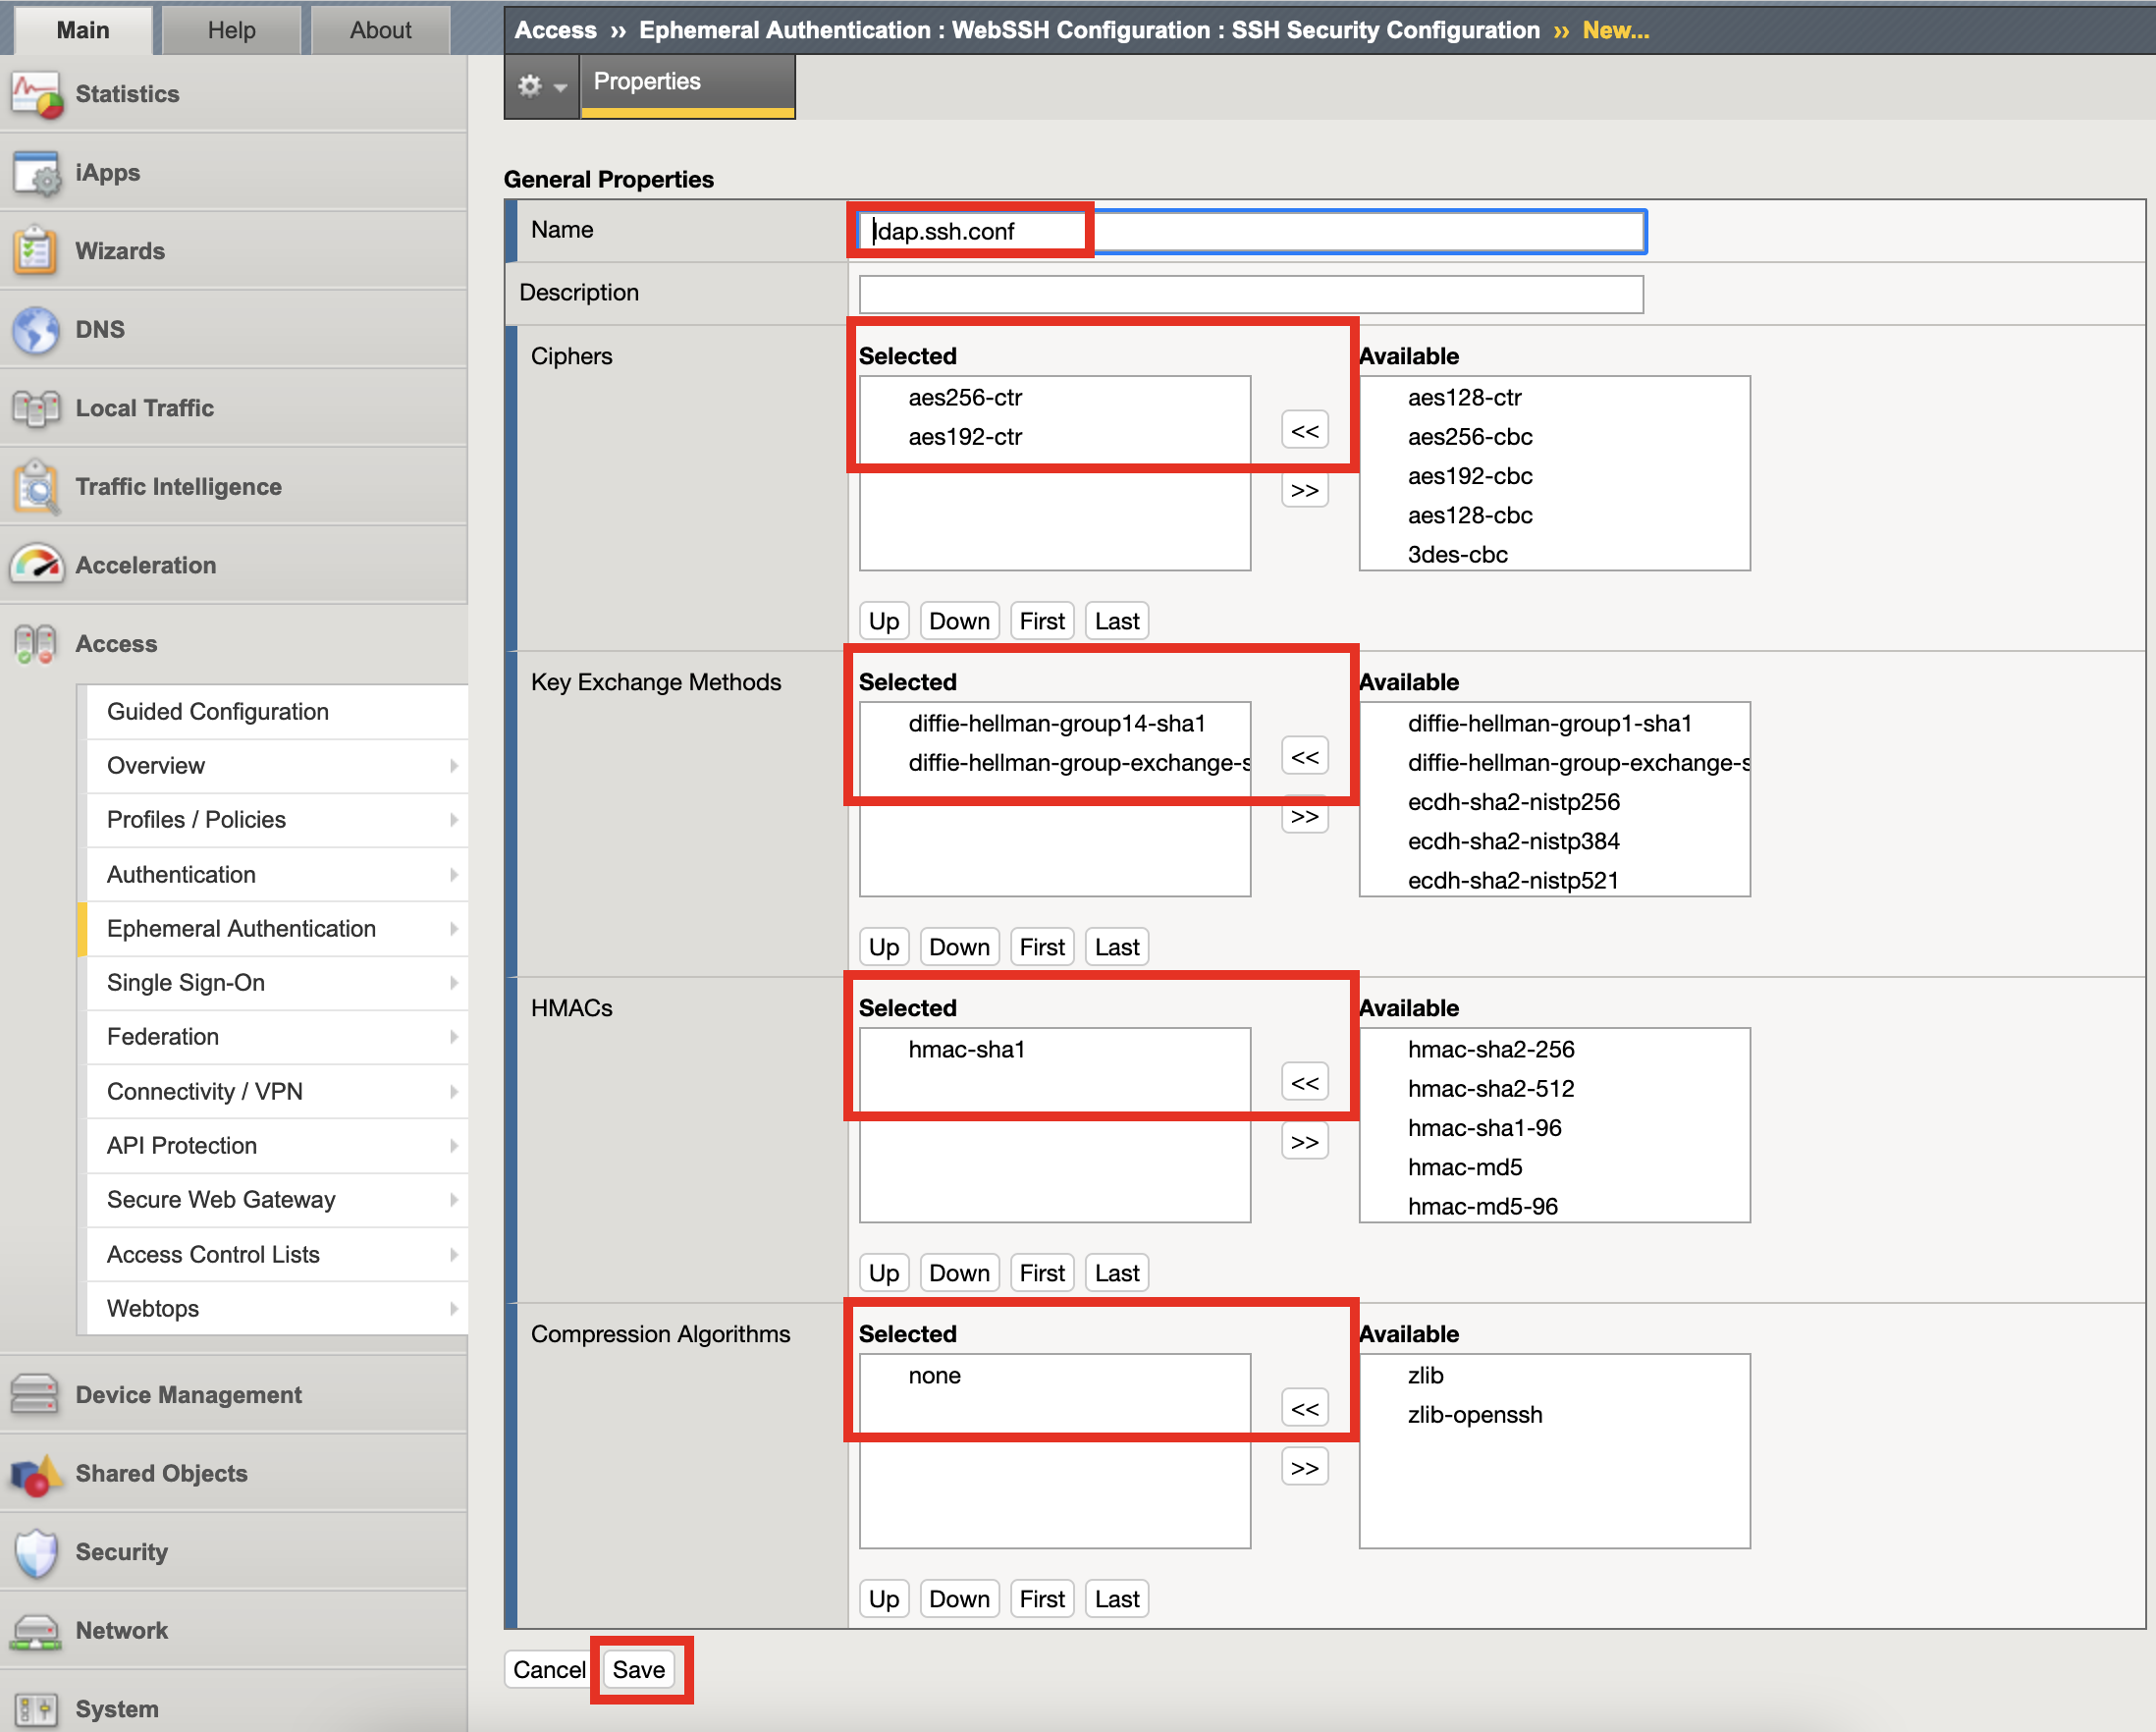
Navigate to Access >> Ephemeral Authentication >> WebSSH Configuration >> SSH Security. Click the + (Plus Symbol).

Configure the SSH Properties
- Ciphers: aes256-ctr, aes192-ctr
- Key Exchange Methods: diffie-hellman-group1-sha14, diffie-hellman-group-exchange-sha1
- HMACs: hmac-sha1
- Compression Algorithms: none
- Click Save
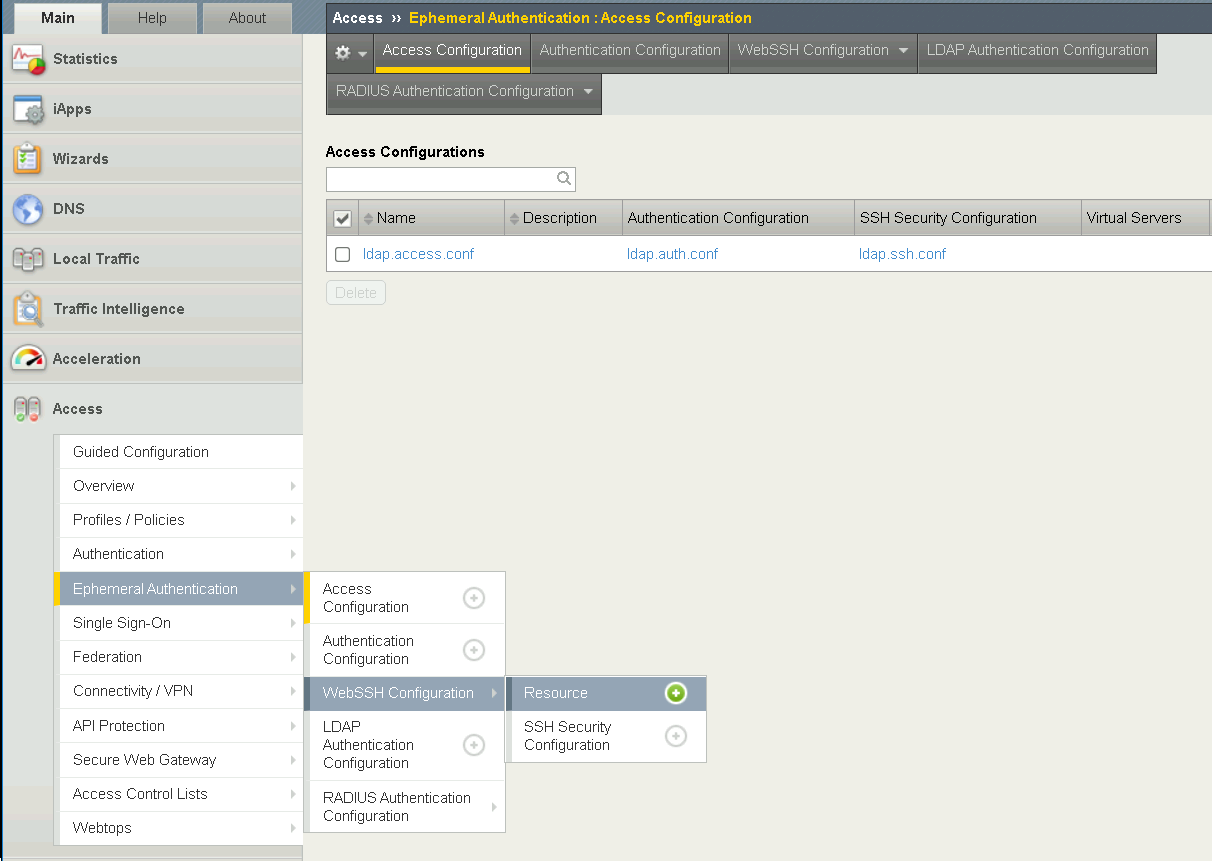
Task 4 - Create an Access Configuration for Ephemeral Authentication
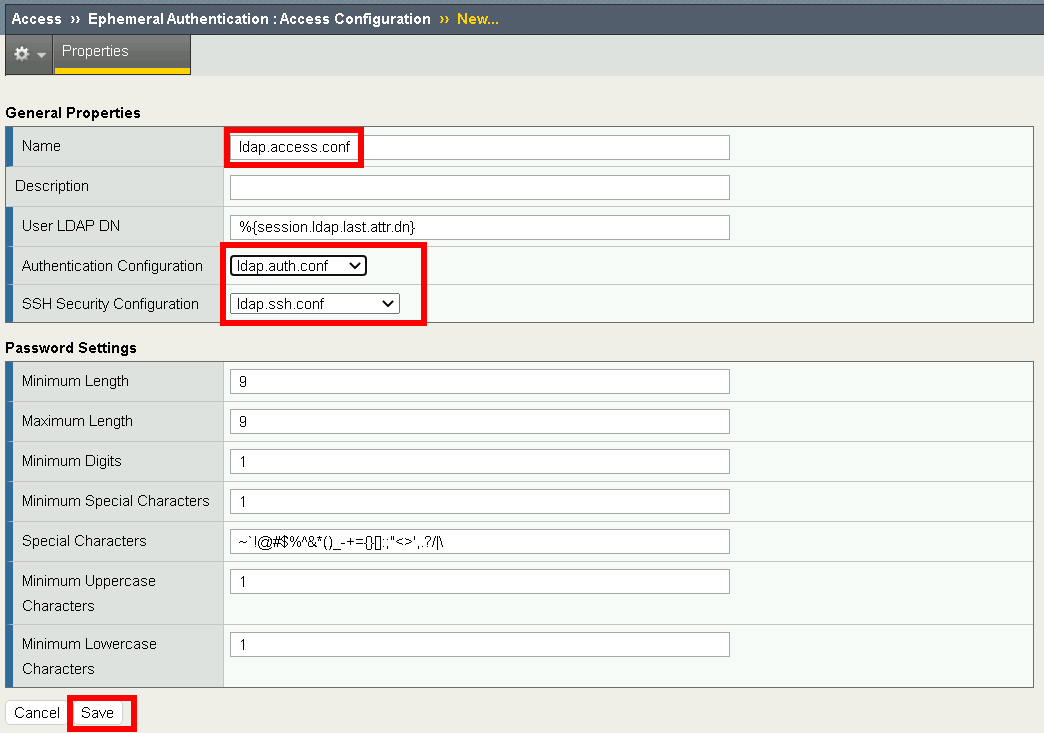
Ephemeral Authentication Configuration specifies the password setting for privileged use access.
Navigate to Access >> Ephemeral Authentication >> Access Configuration. Click the + (plus symbol)
Configure the General Properties
- Name: ldap.access.conf
- Authentication Configuration: ldap.auth.conf
- SSH Security Configuration: ldap.ssh.conf
- Click Save
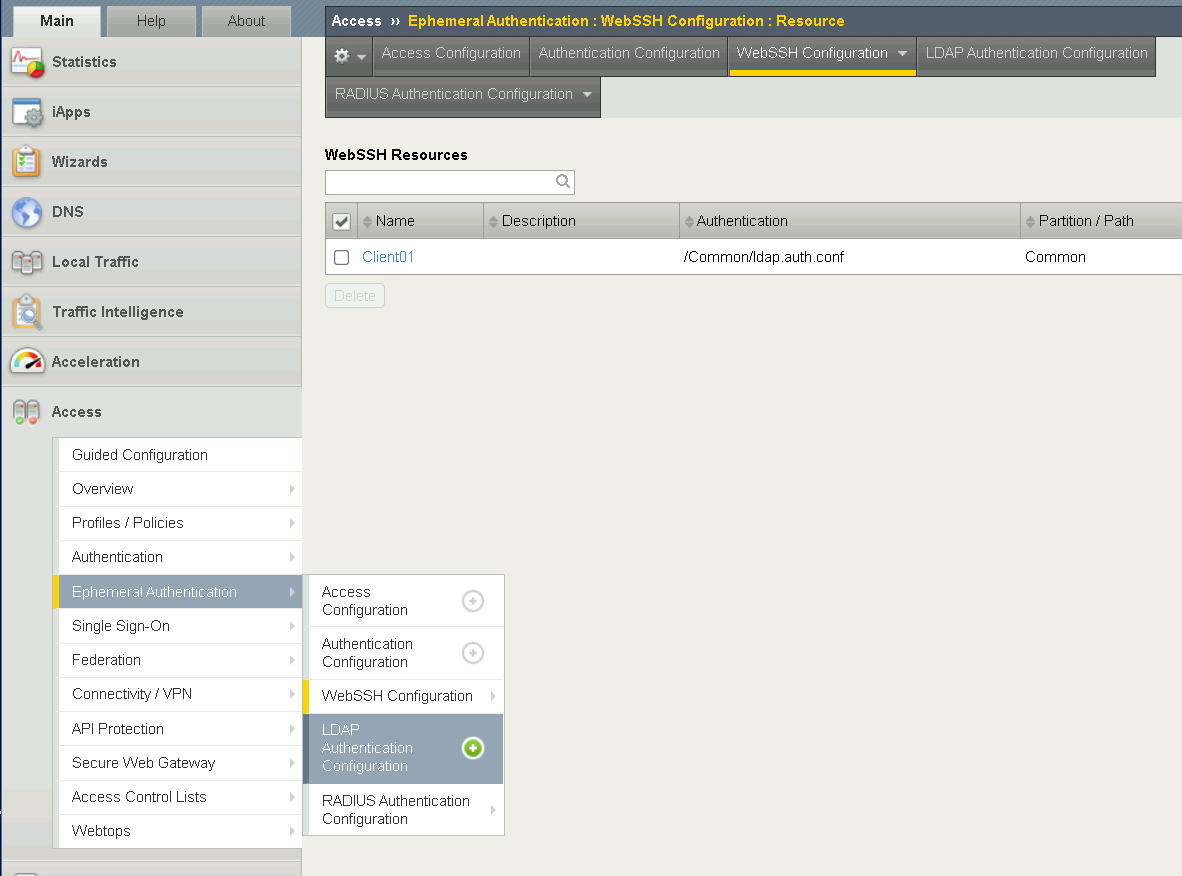
Task 5 - Create WebSSH Resource
Navigate to Access >> Ephemeral Authentication >> WebSSH Configuration >> Resource. Click the + (plus symbol)
Configure the General Properties
- Name: Client01
- Destination: #. select: IP Address radio button #. Enter IP: 10.1.20.8 #. Port: 2022
- Authentication configuration: ldap.auth.conf
Configure the Customization Setting for English
- Caption: Client01
- Click Save

Task 6 - Creating an LDAP Authentication configuration
The LDAP Authentication configuration defines the external LDAP server used to identity users.
Navigate to Access >> Ephemeral Authentication >> LDAP Authentication. Click the + (plus symbol)
Configure General Properties
- Name: ldap.conf
- Proxy User DN: cn=Admin,cn=Users,dc=f5lab,dc=local
- Proxy User Password: admin
User settings
- Bypass User List: cn=Admin,cn=Users,dc=f5lab,dc=local, and Click Add
- Click Finished

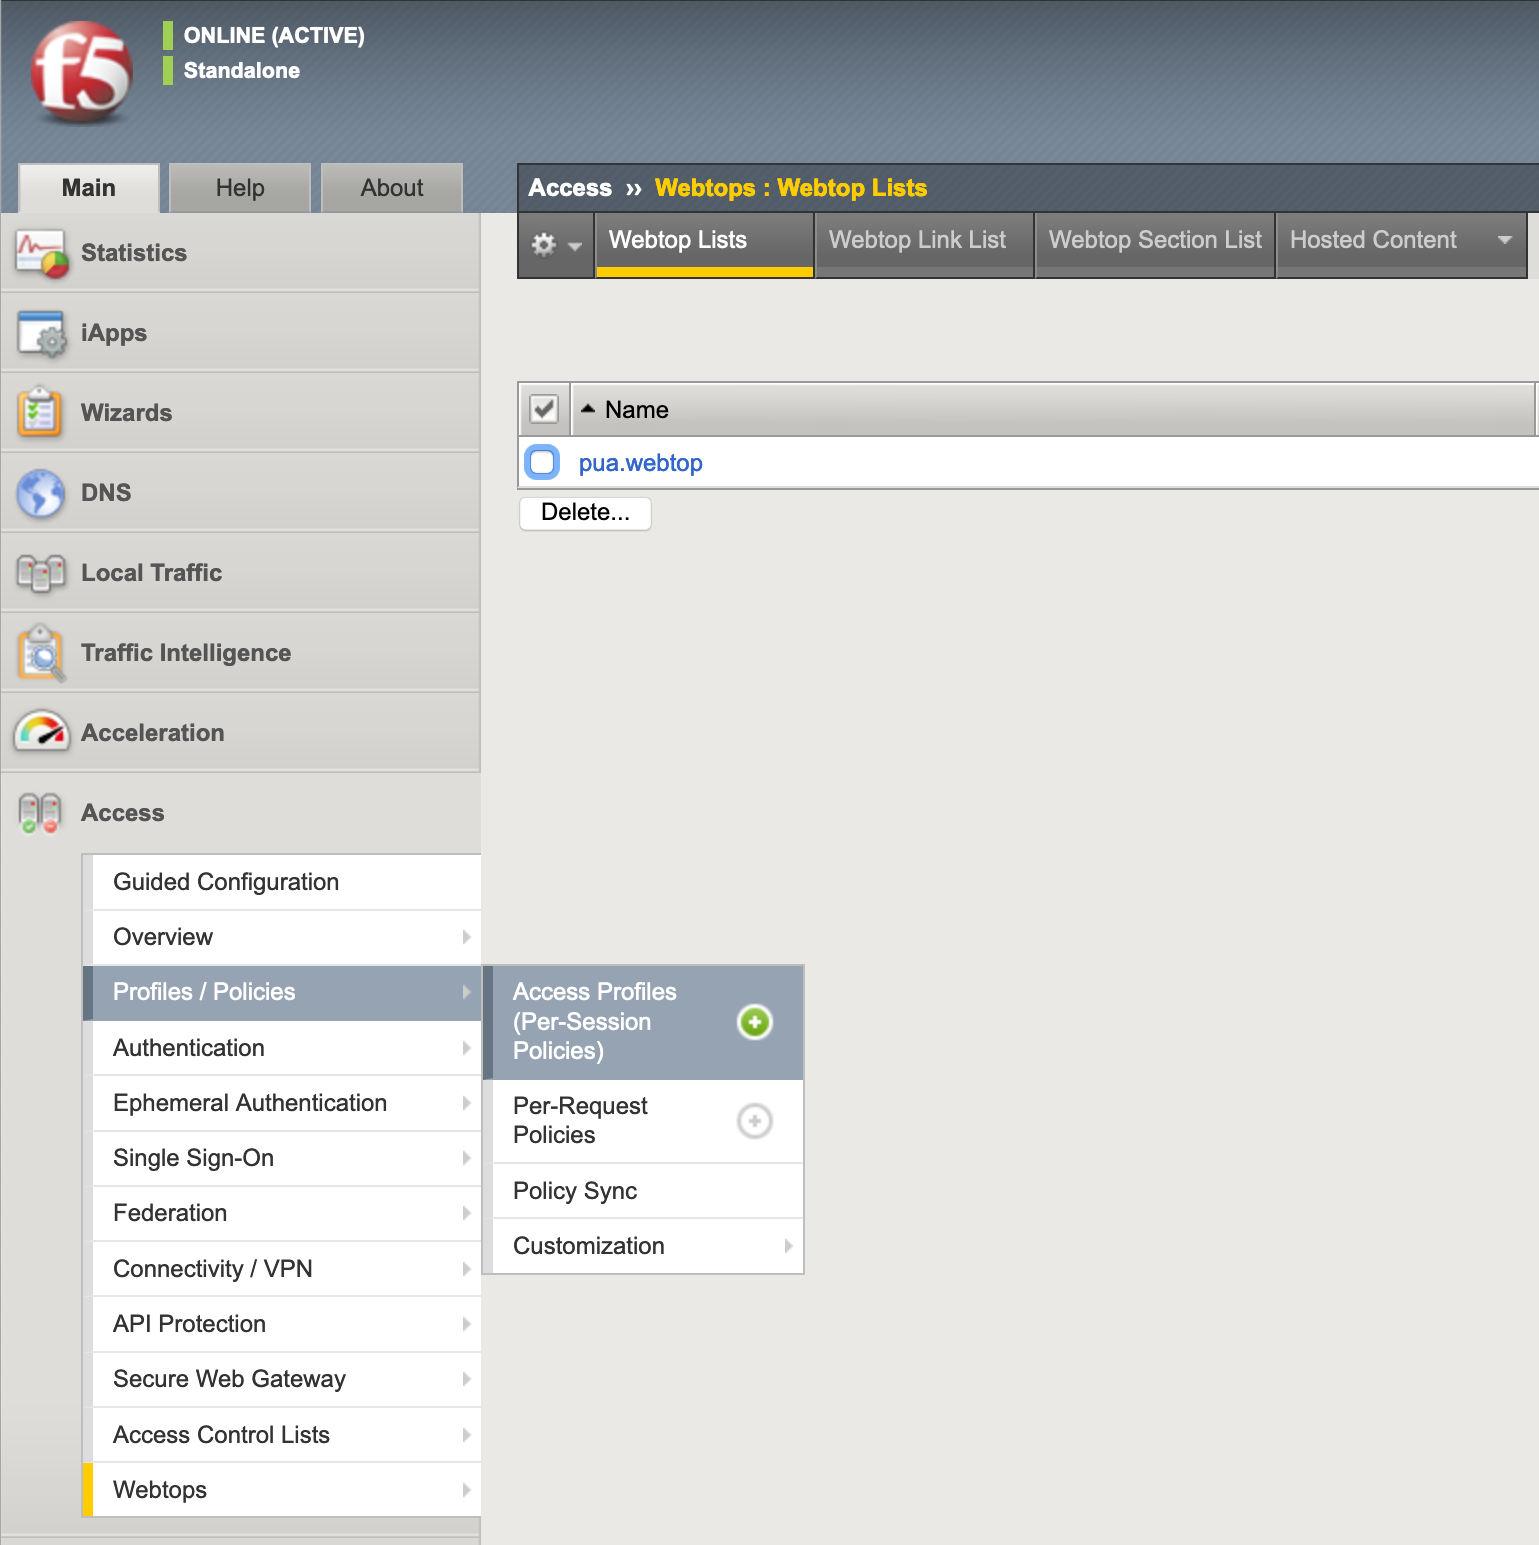
Task 7 - Create a Webtop
The Webtop houses links to resources we would like to access.
Navigate to Access >> Webtops >> Webtop Lists. Click the + (plus symbol)

General Properties
- Name: pua.webtop
- Type: Full
- Click Finish

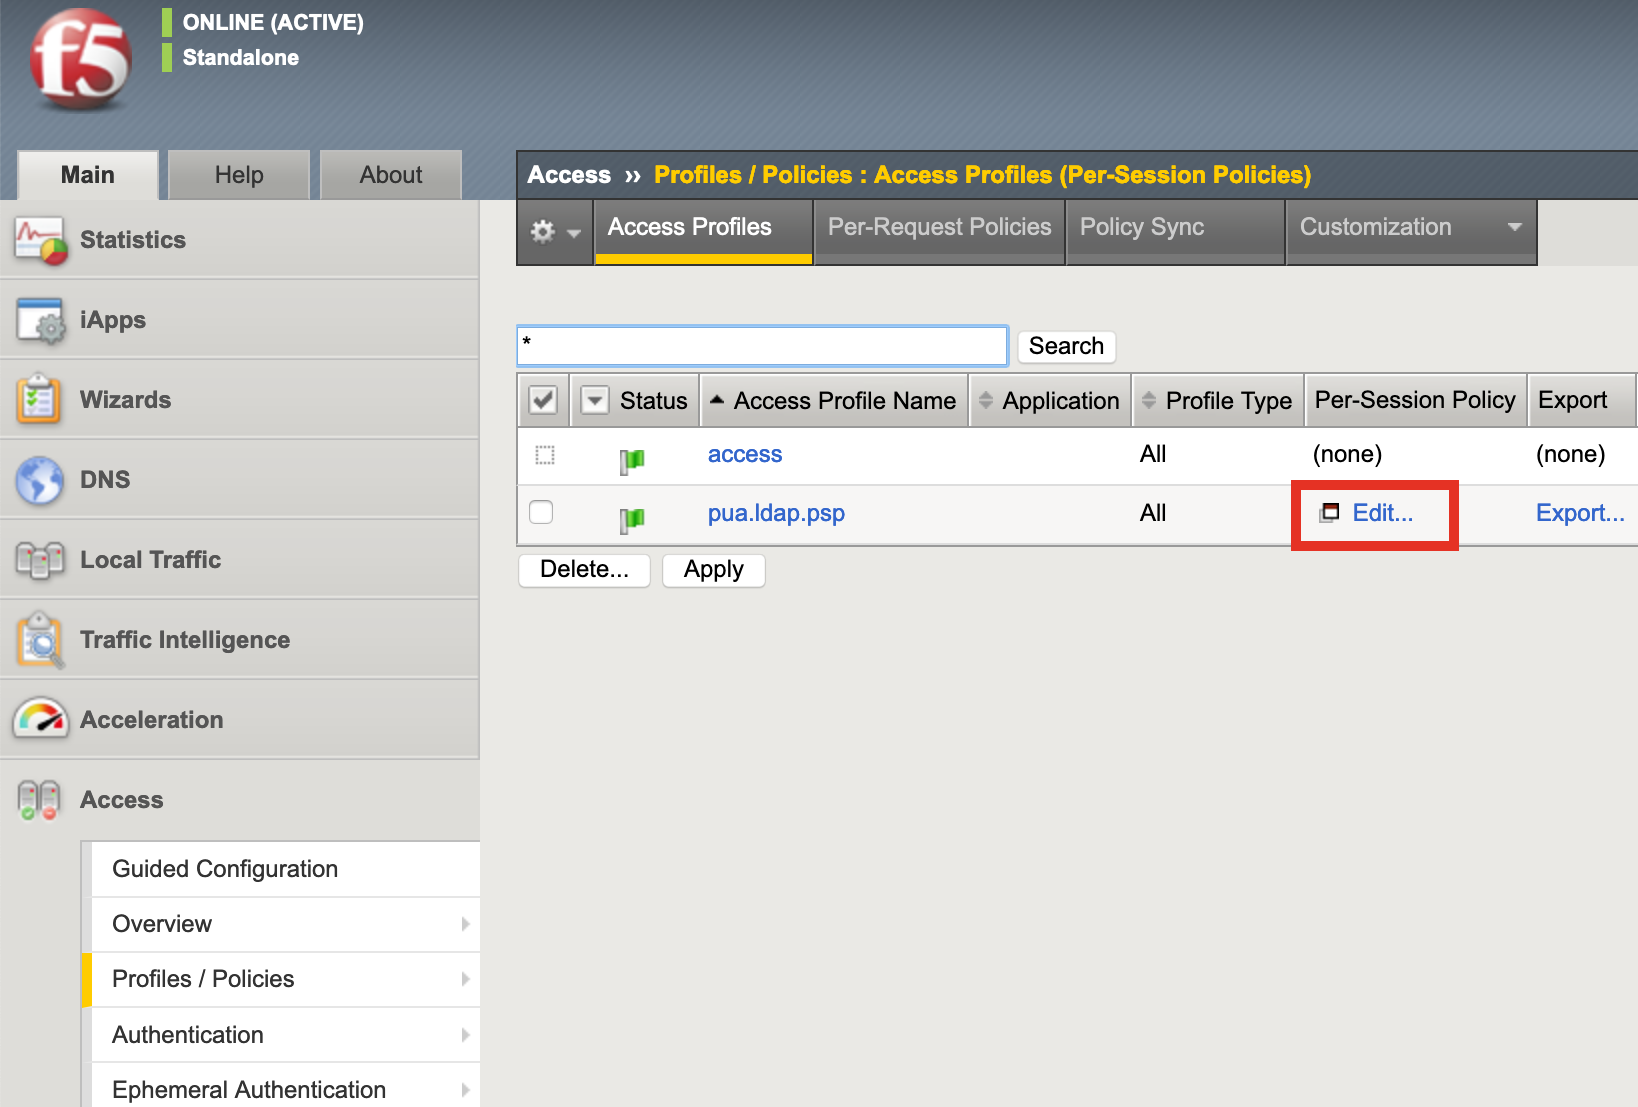
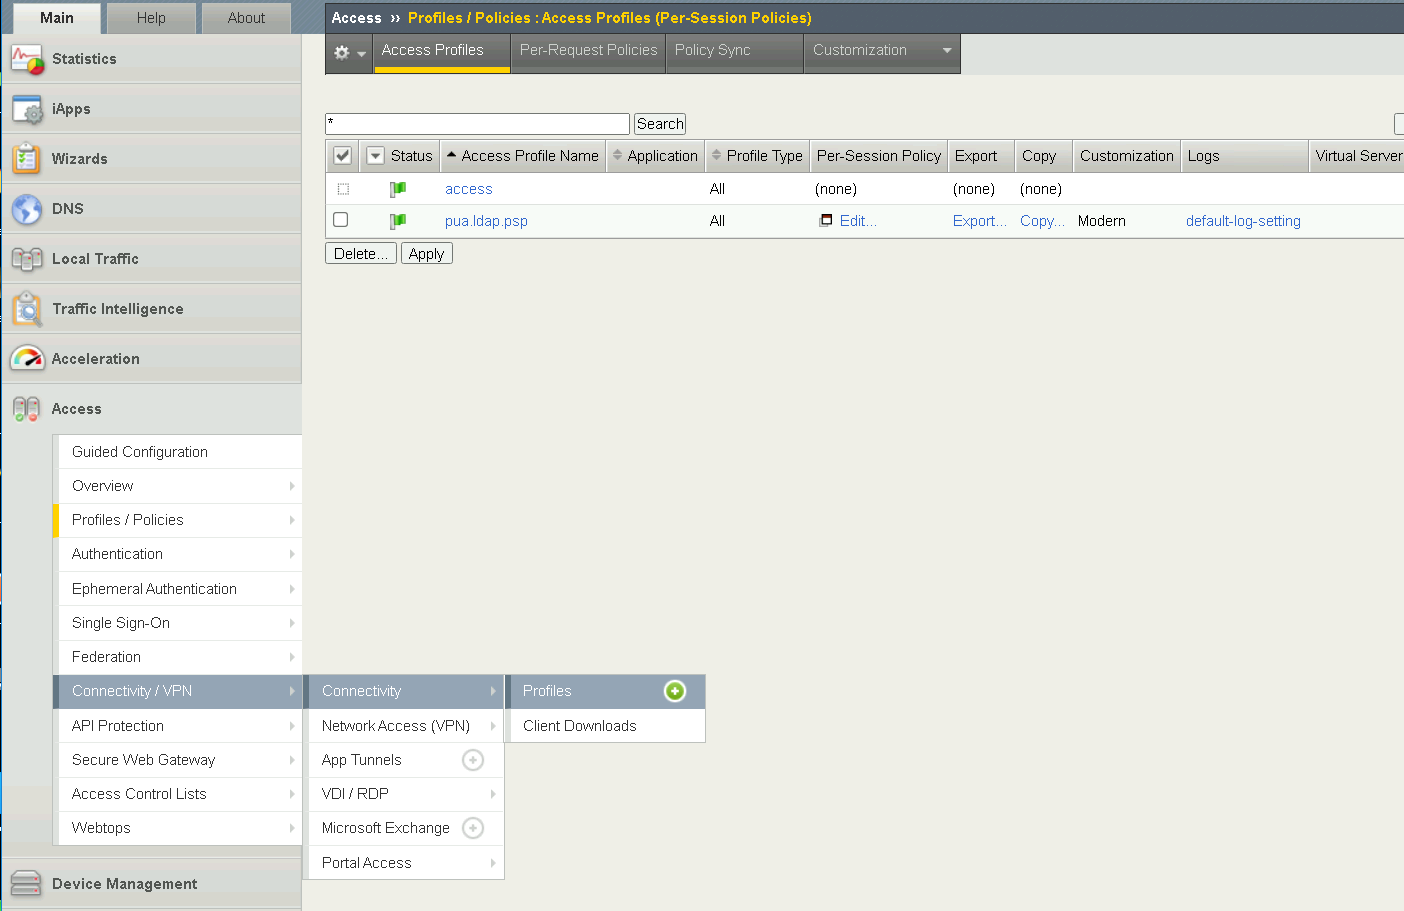
Task 8 - Create an Access Profile
Navigate to Access >> Profiles / Policies >> Access Profiles (Per-Session Policies). Click the + (plus symbol)
Configure General Properties
- Name: pua.ldap.psp
- Profile Type: All
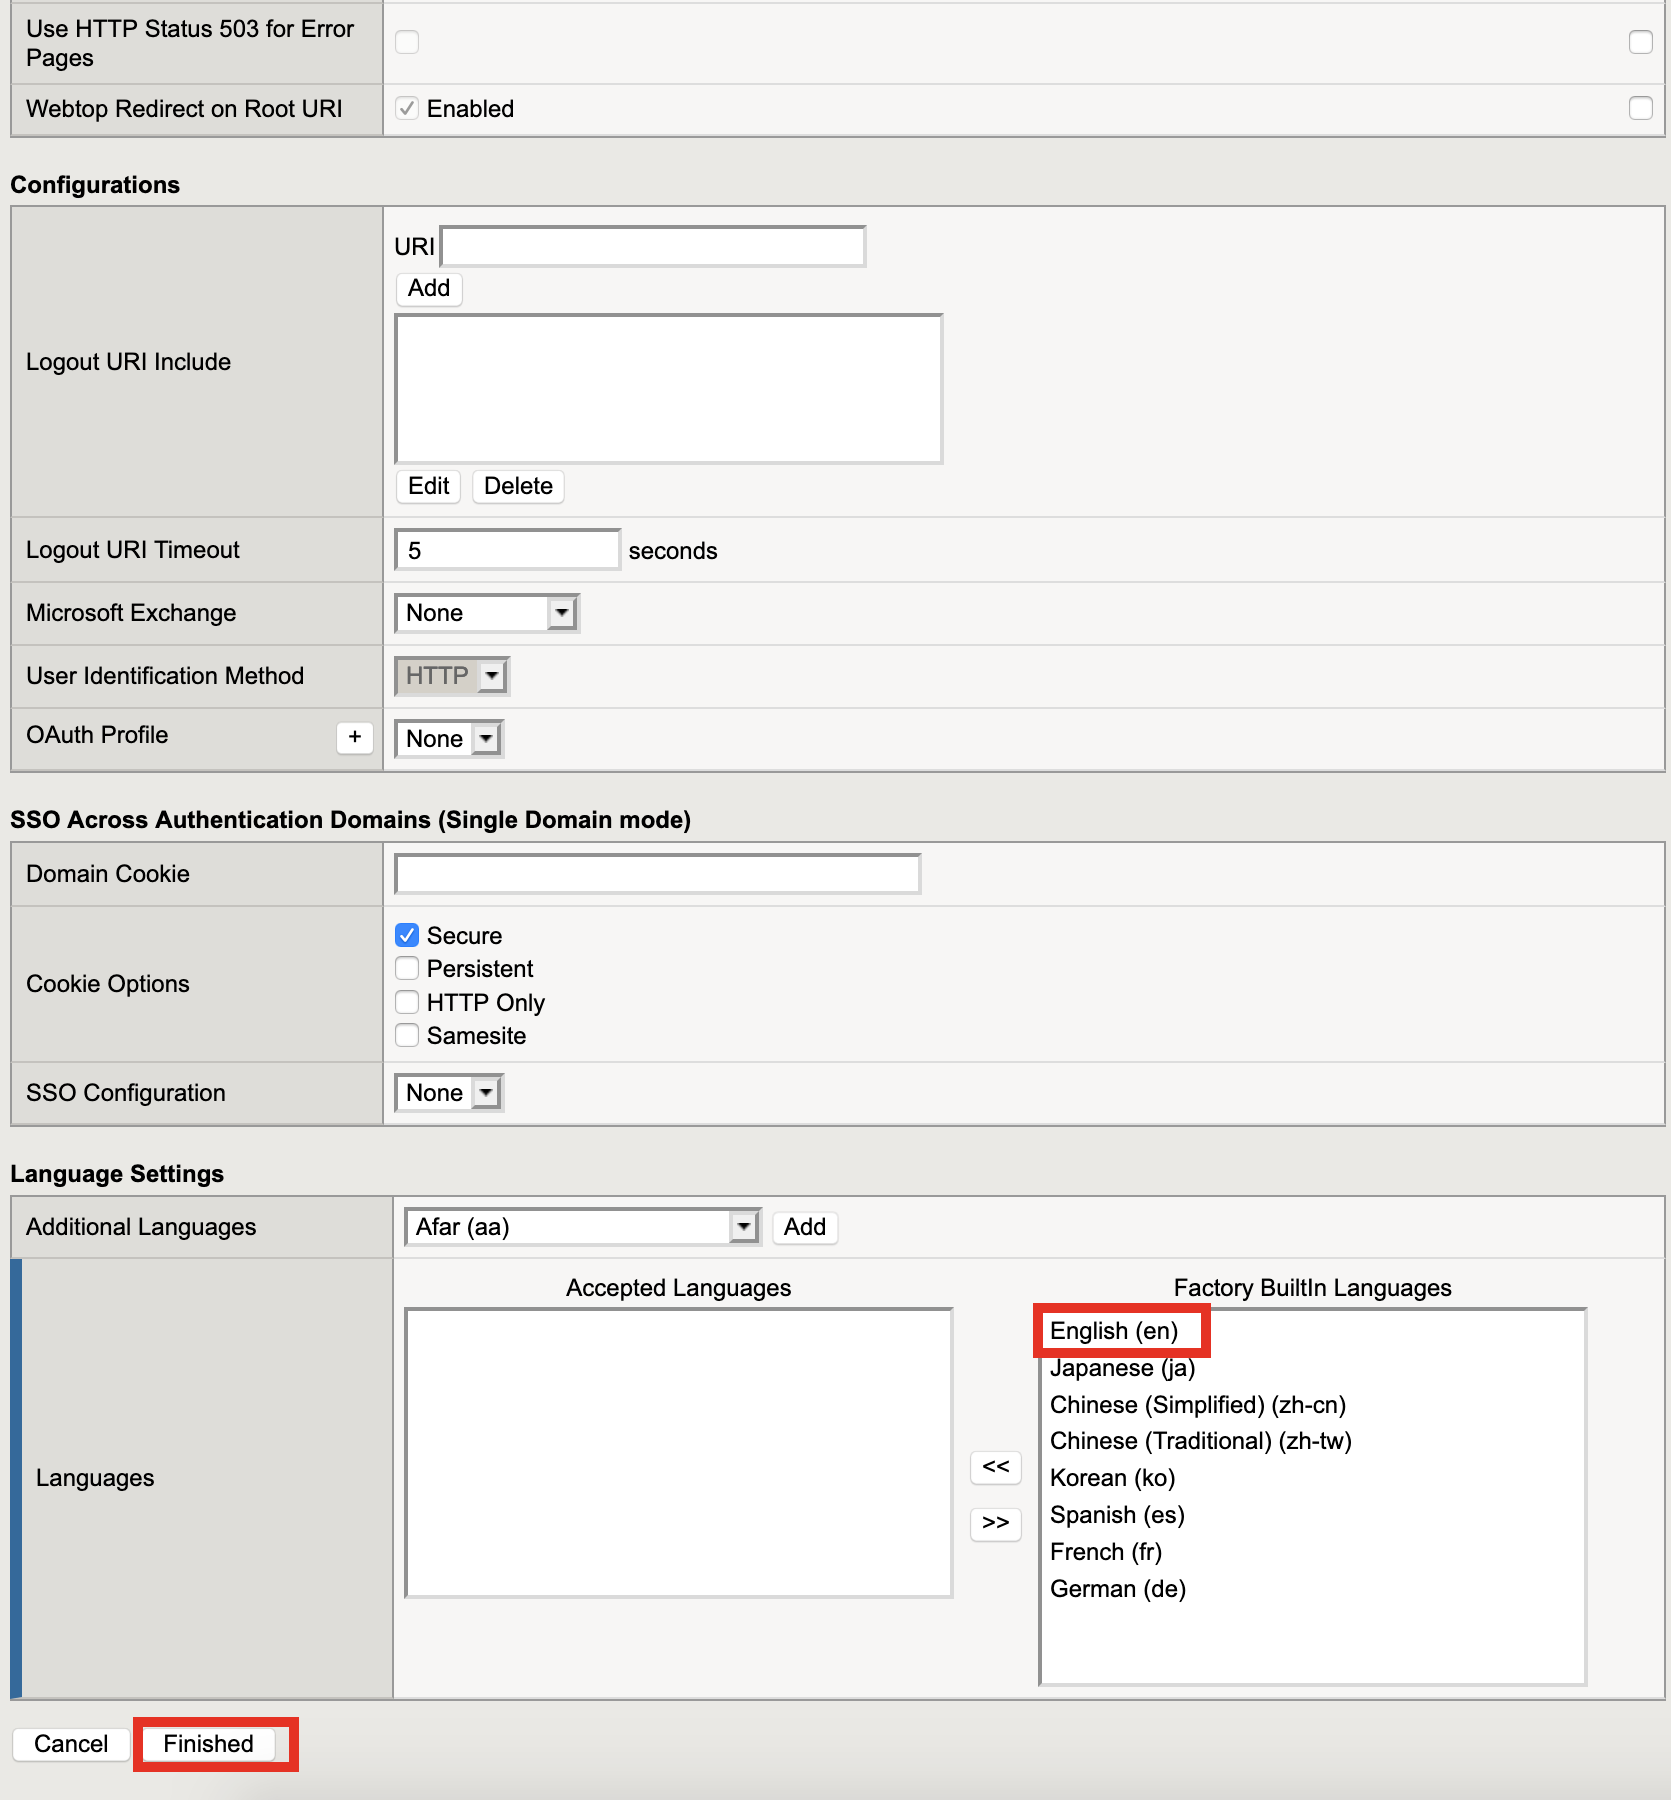
Configure Language Setting
- Click English
- CLick <<
- Click Finish
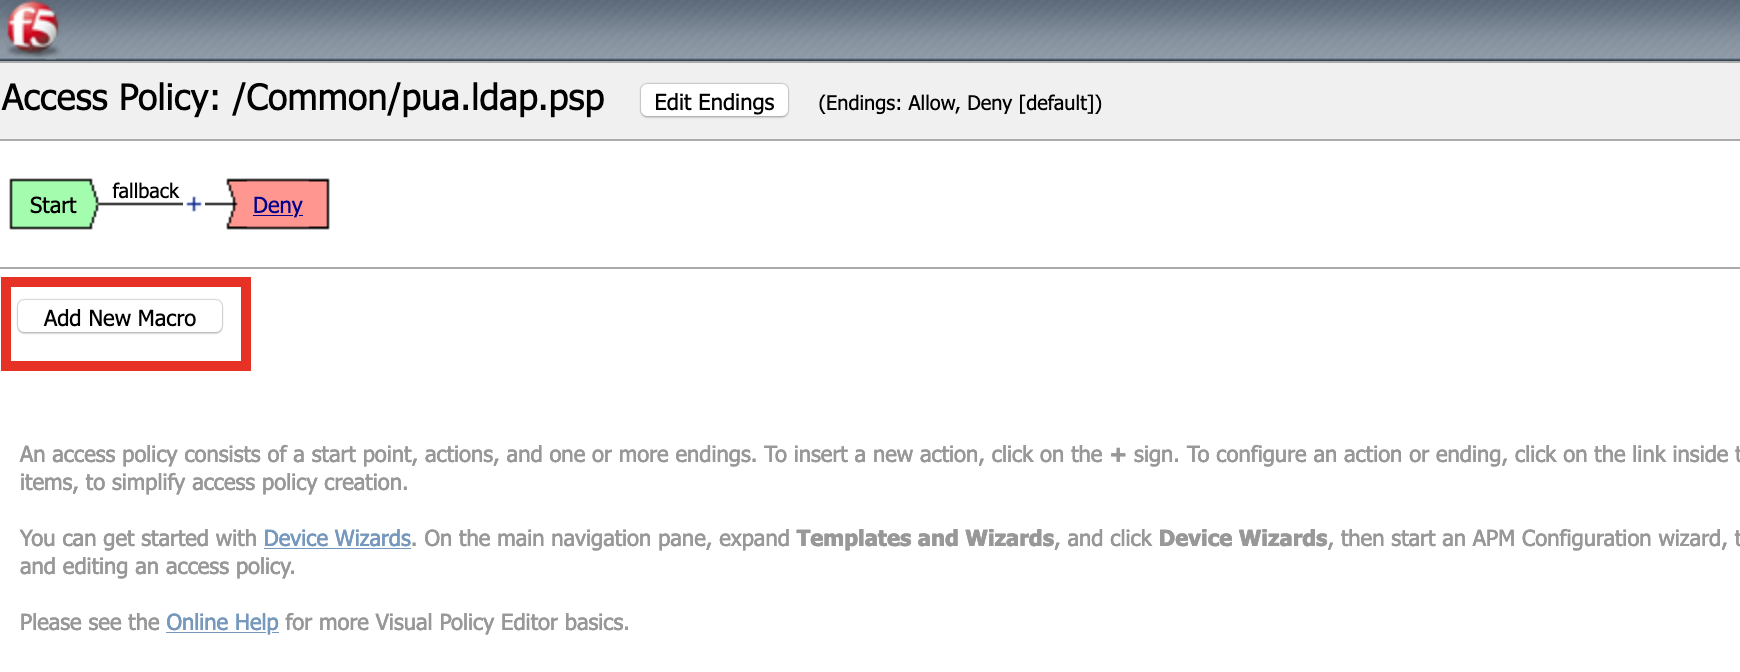
Task 9 - Create an Admin Access Macro
Click Edit to modify the access profile
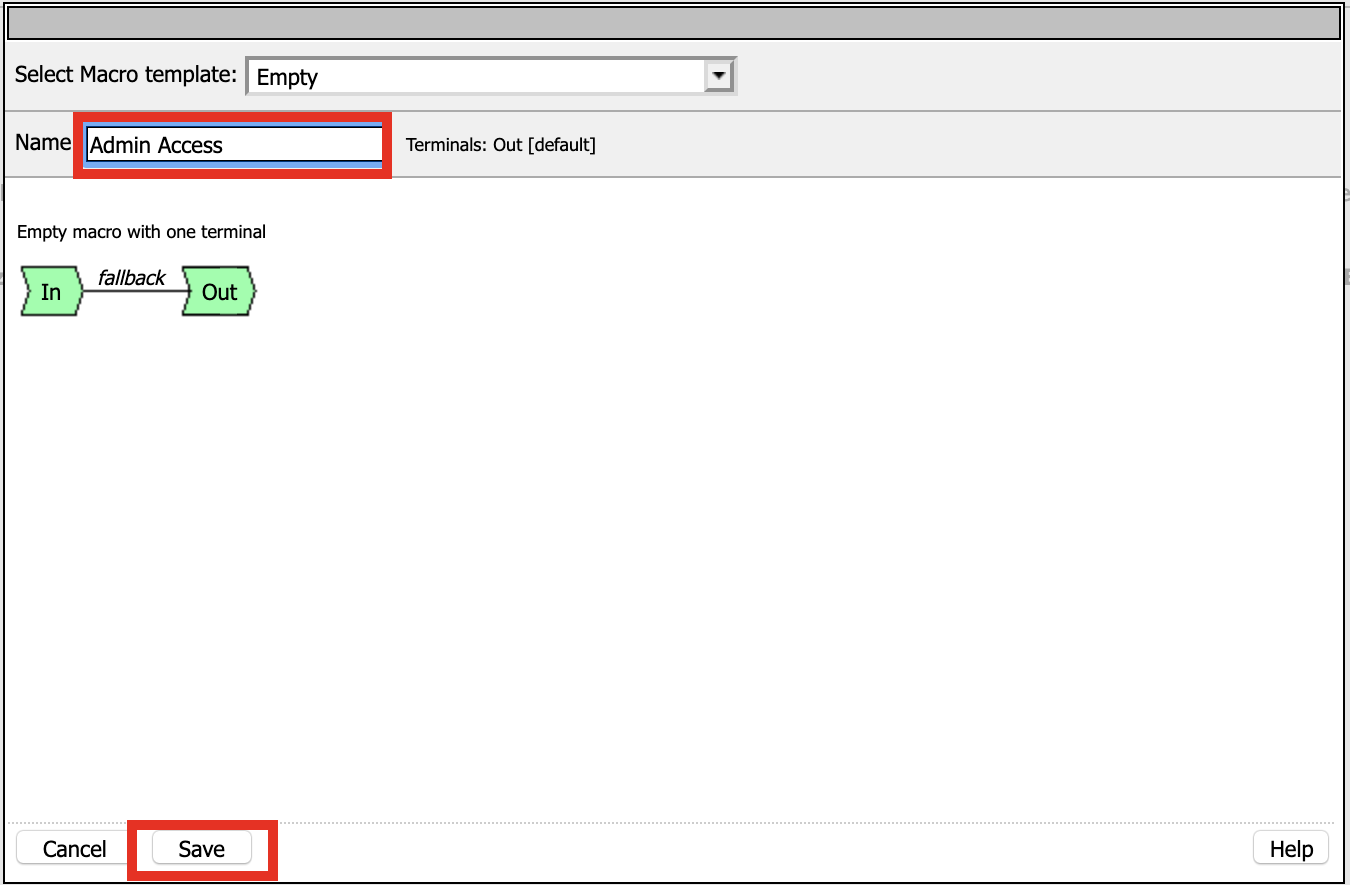
Click Add Macro
Enter Admin Access for the Name
Click Save
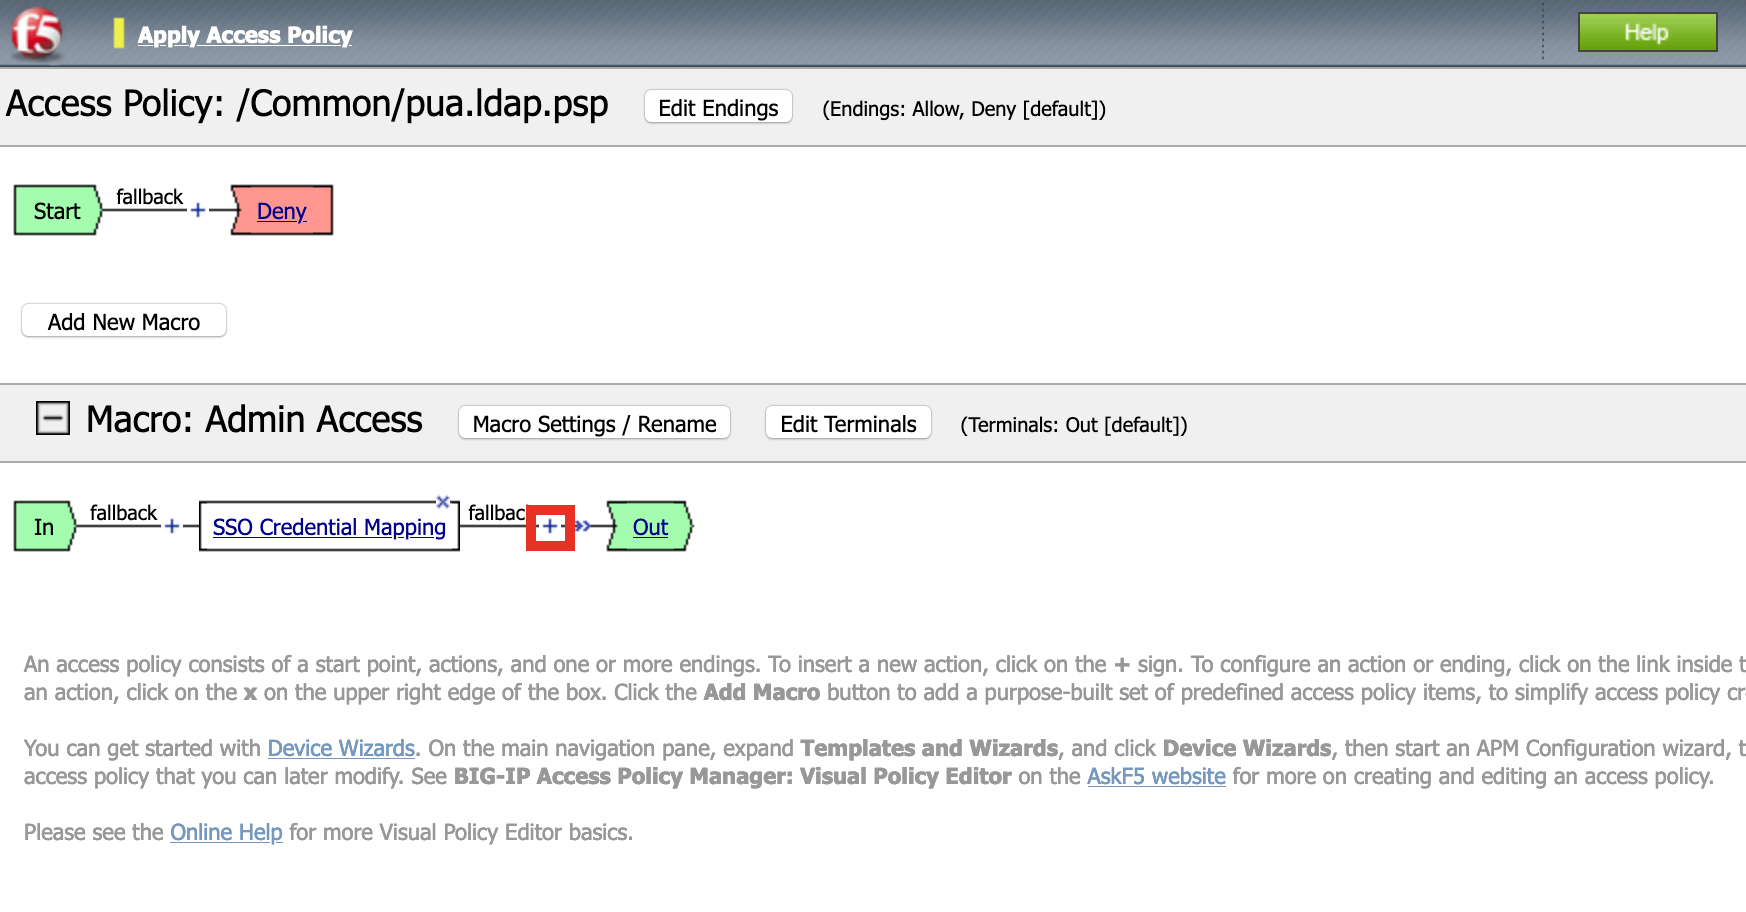
Expand the Admin Access Macro
Click the + (plus symbol) symbol between In and Out

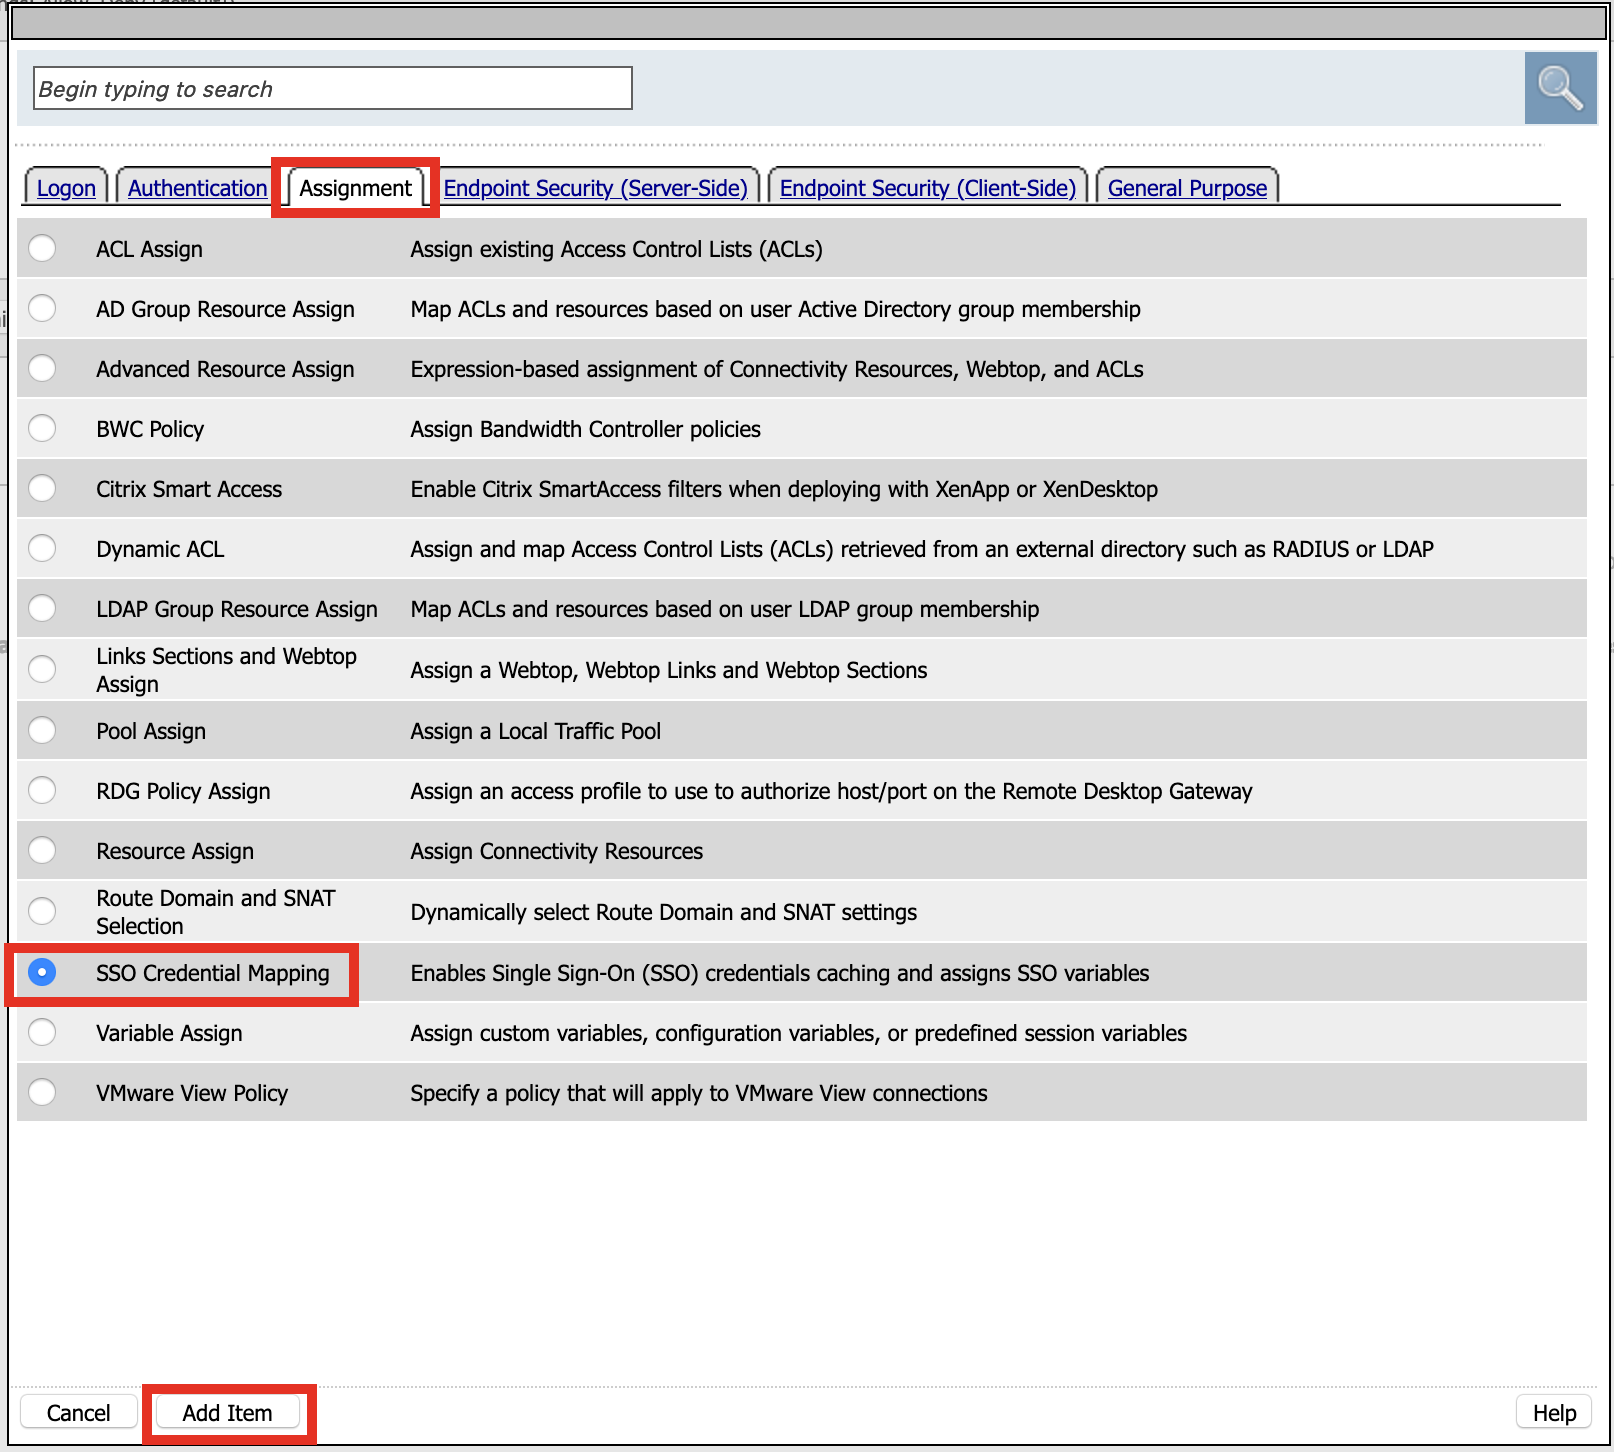
Click Assignment
Click SSO credentials Mapping
Click Add Item
Click Save

Click the + (plus symbol) symbol to right of SSO Credential Mapping
Click Assignment
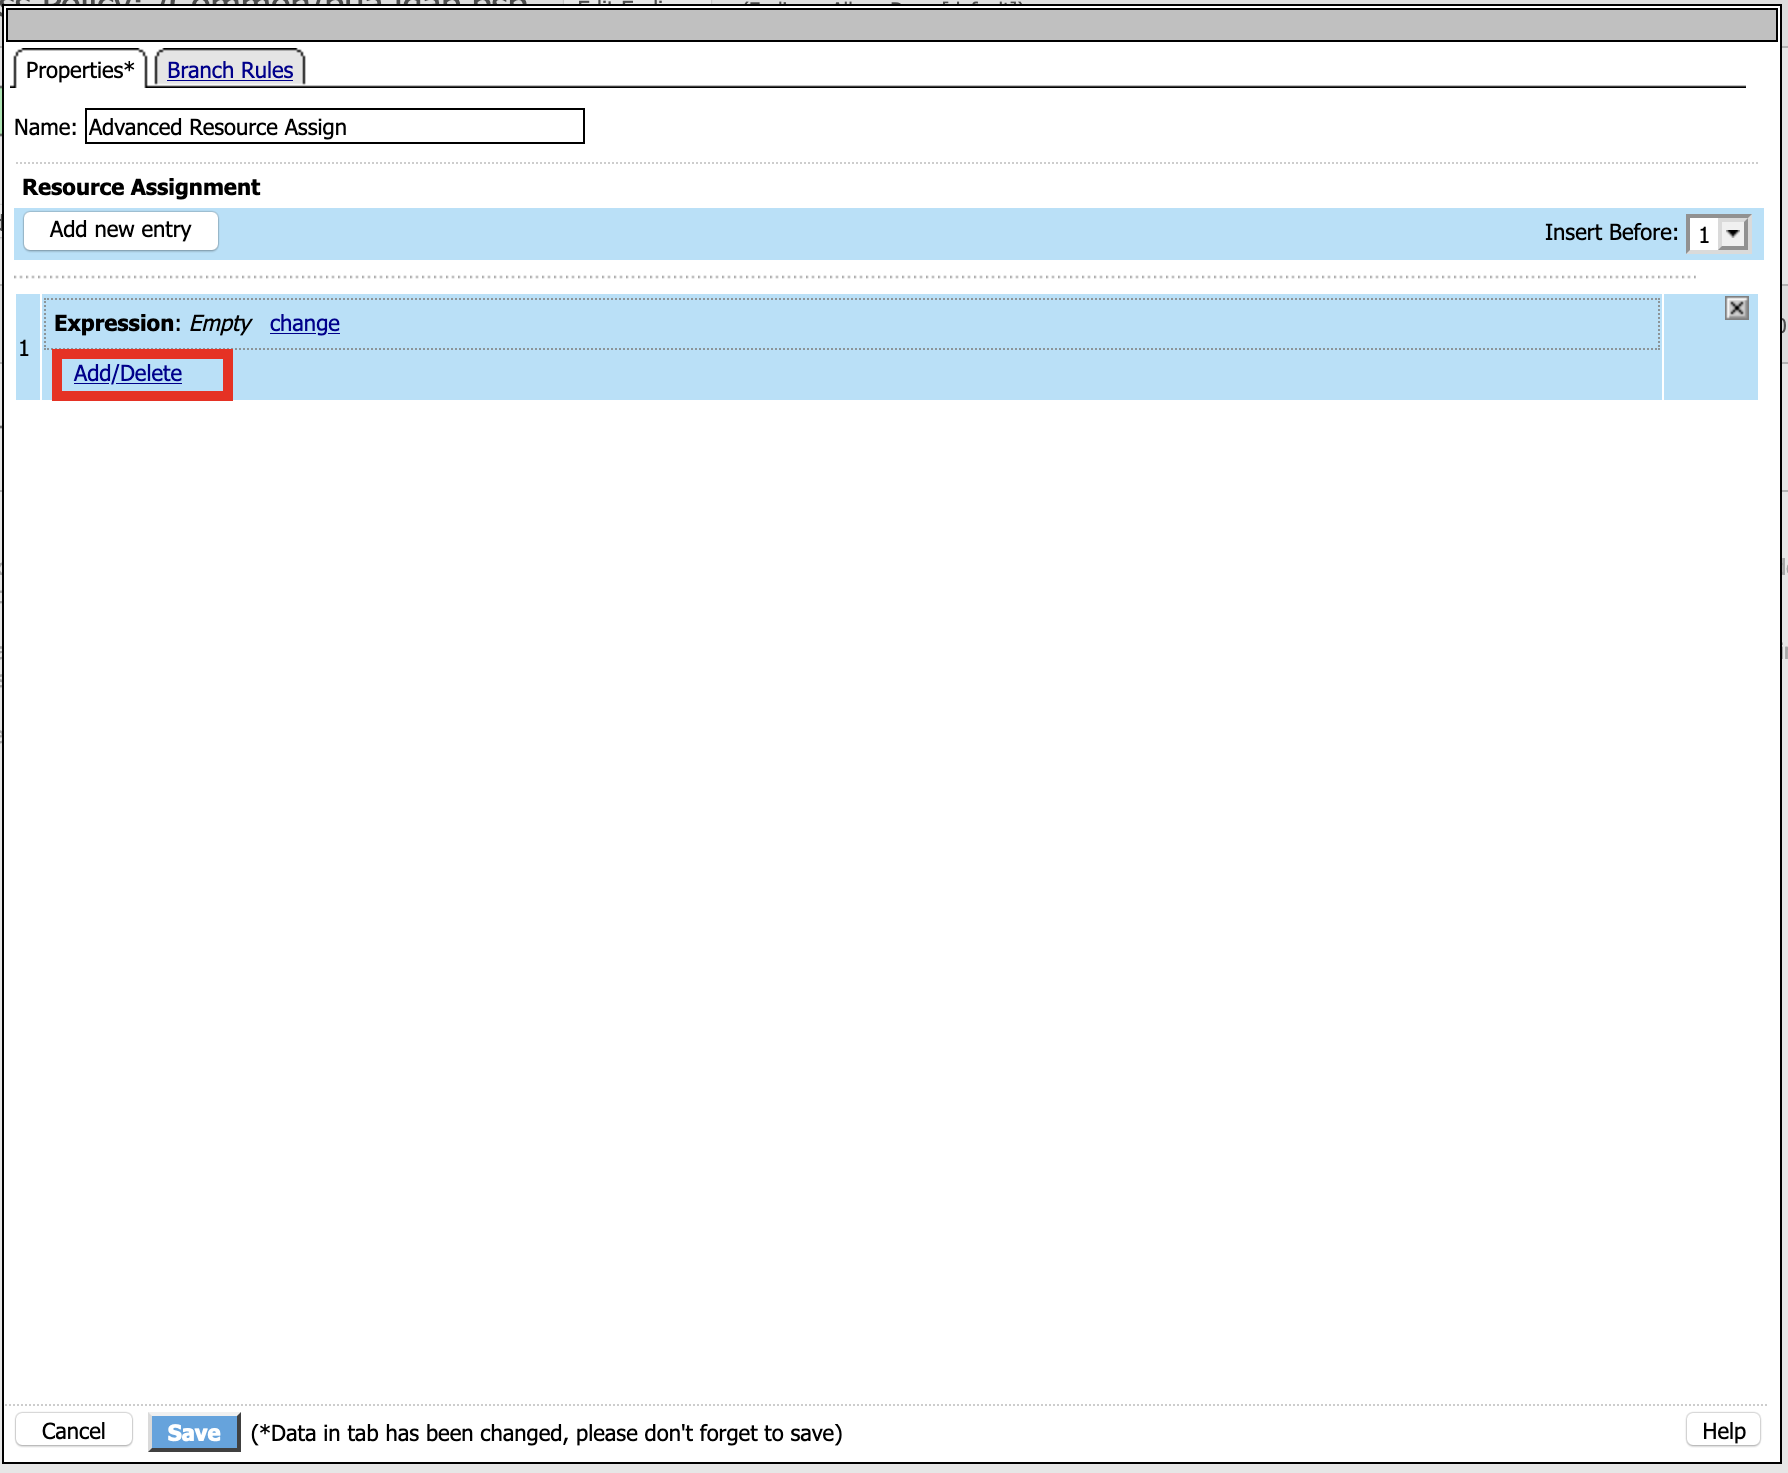
Click Advance Rsource Assign
Click Add Item

Click Add new entry
Click Add/Delete
Click WebSSH
Click /Common/Client01
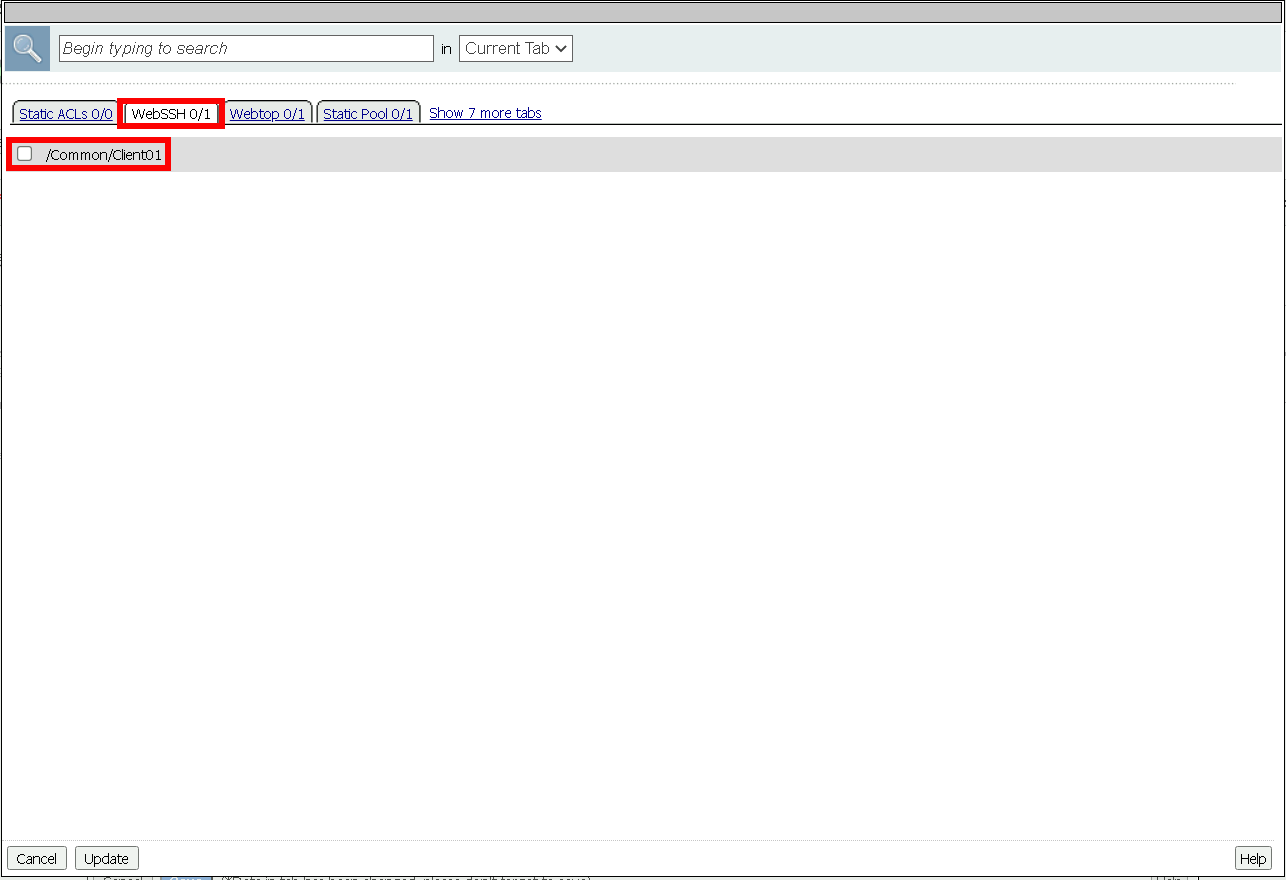
Click Webtop
Click /Common/pua.webtop
Click Update

Click Save

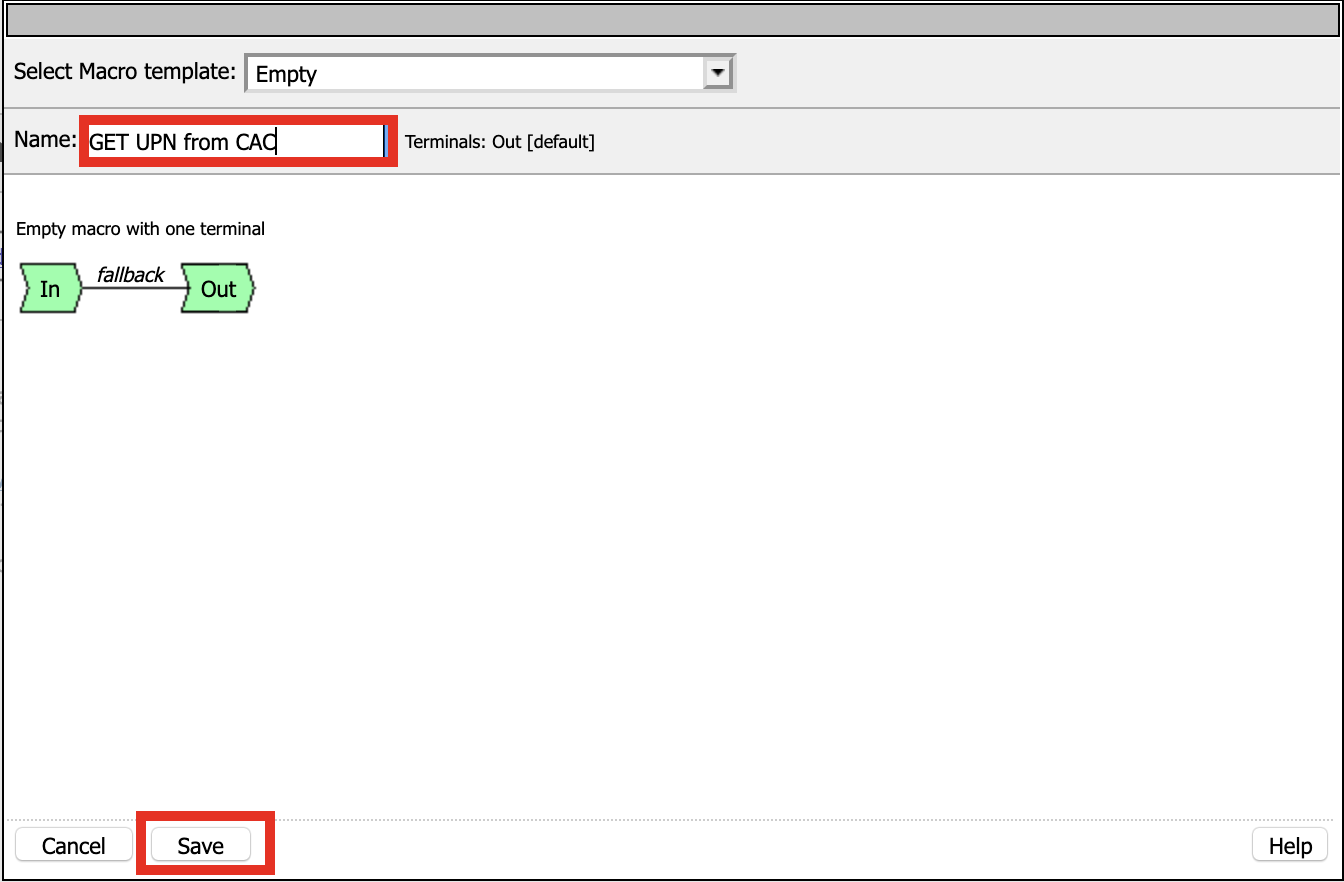
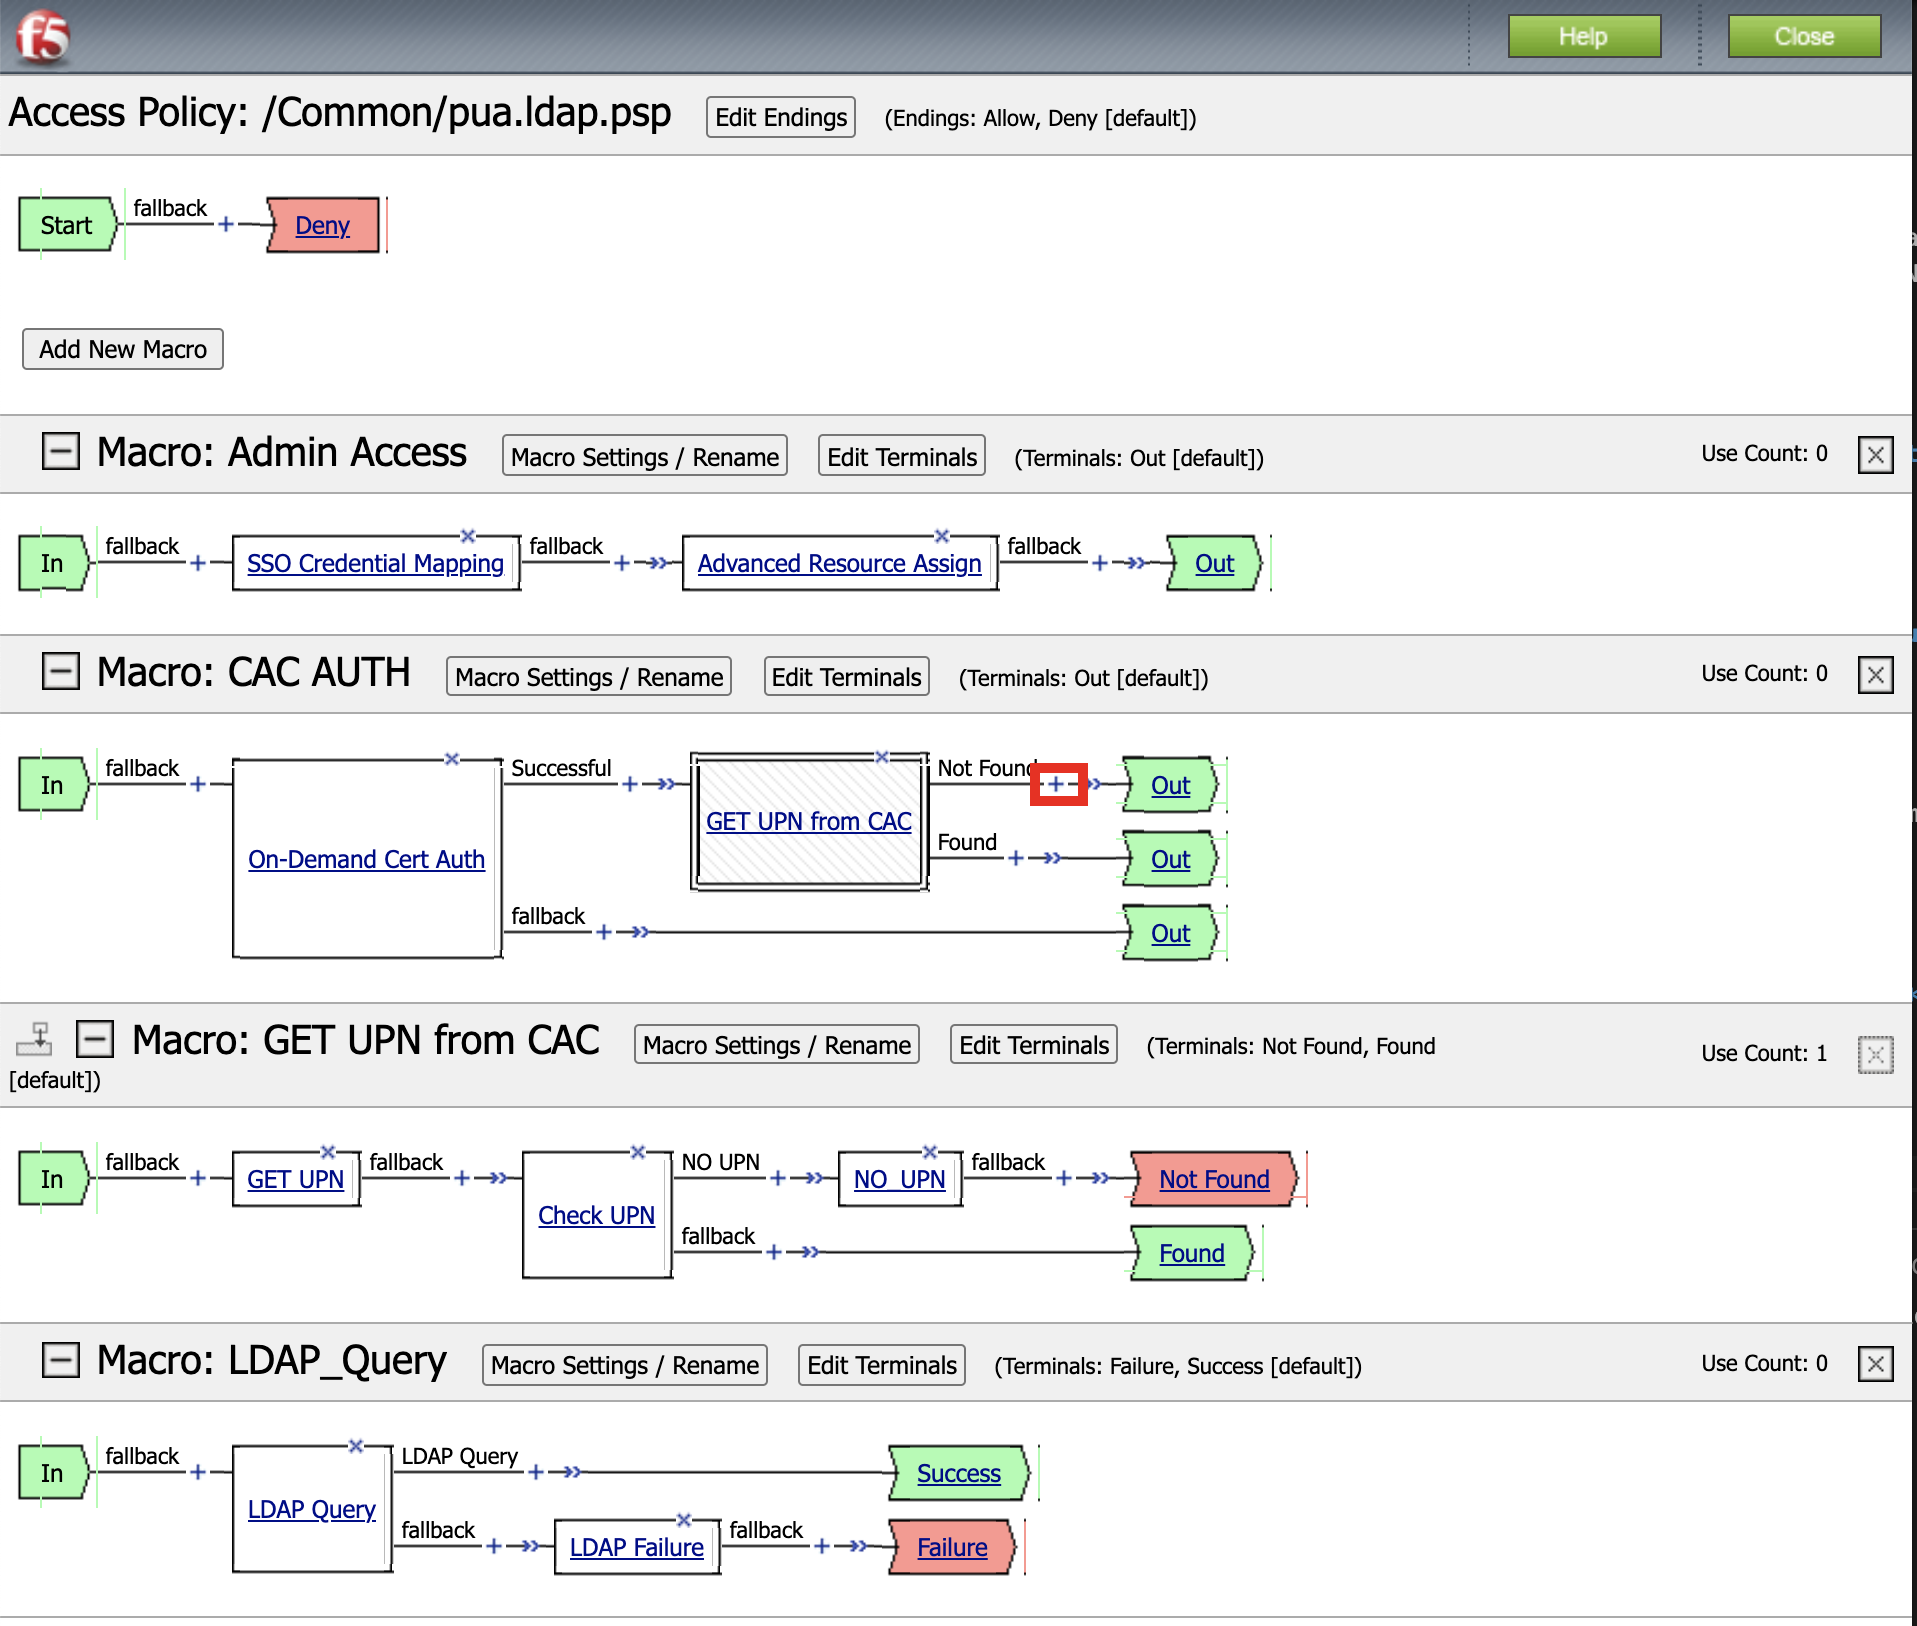
Task 10 - Create an GET UPN from CAC Macro
Click Add New Macro
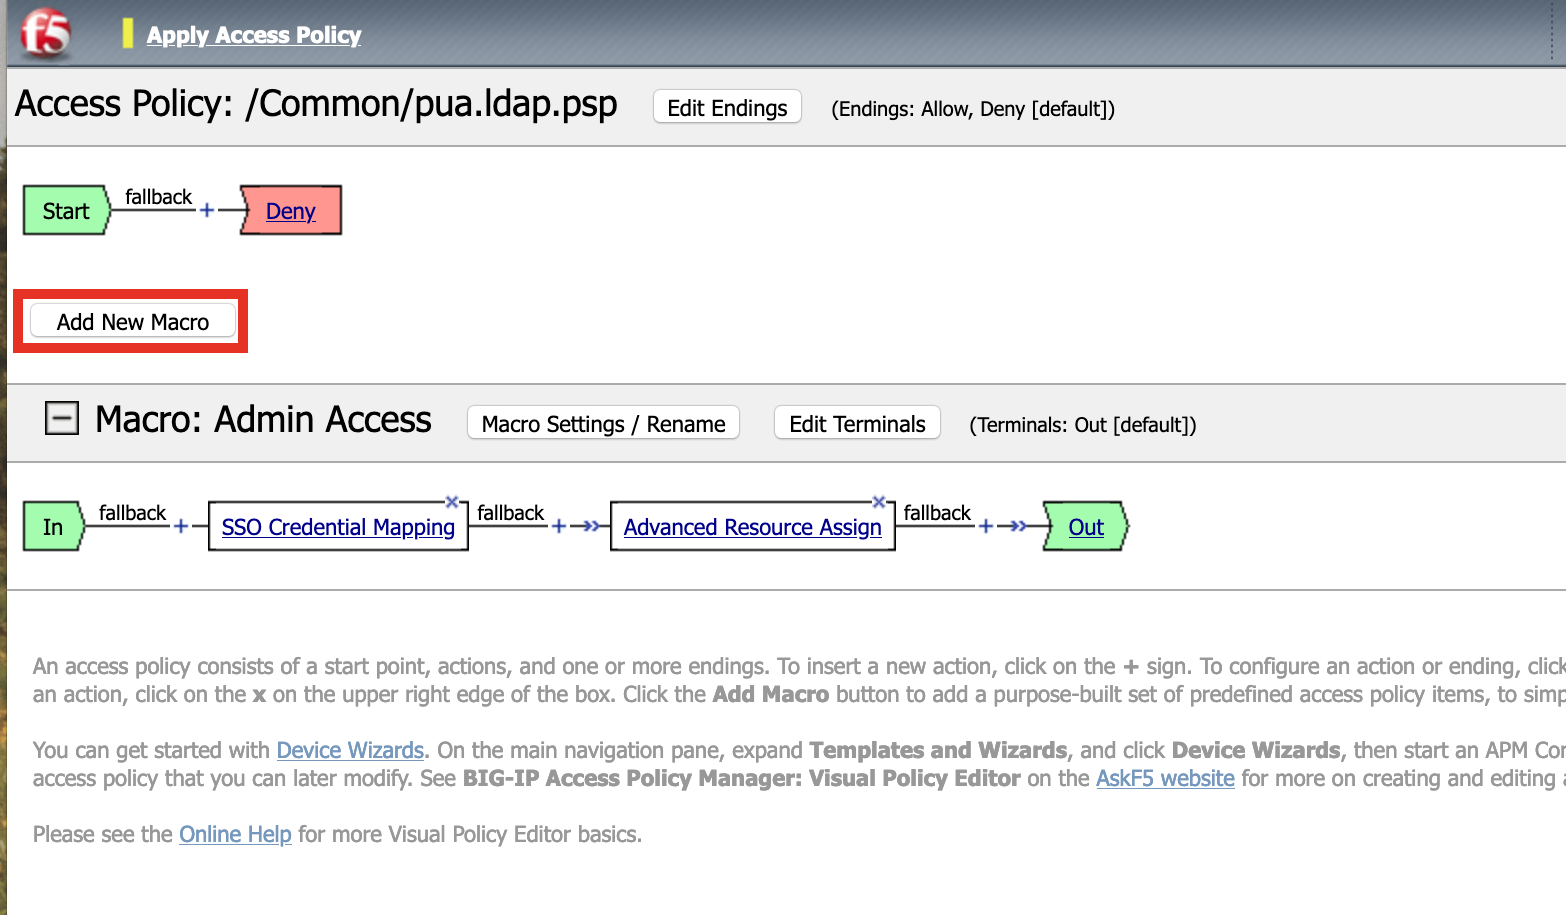
Name: GET UPN from CAC
Click Save
Expand GET UPN from CAC
Click + Symbol

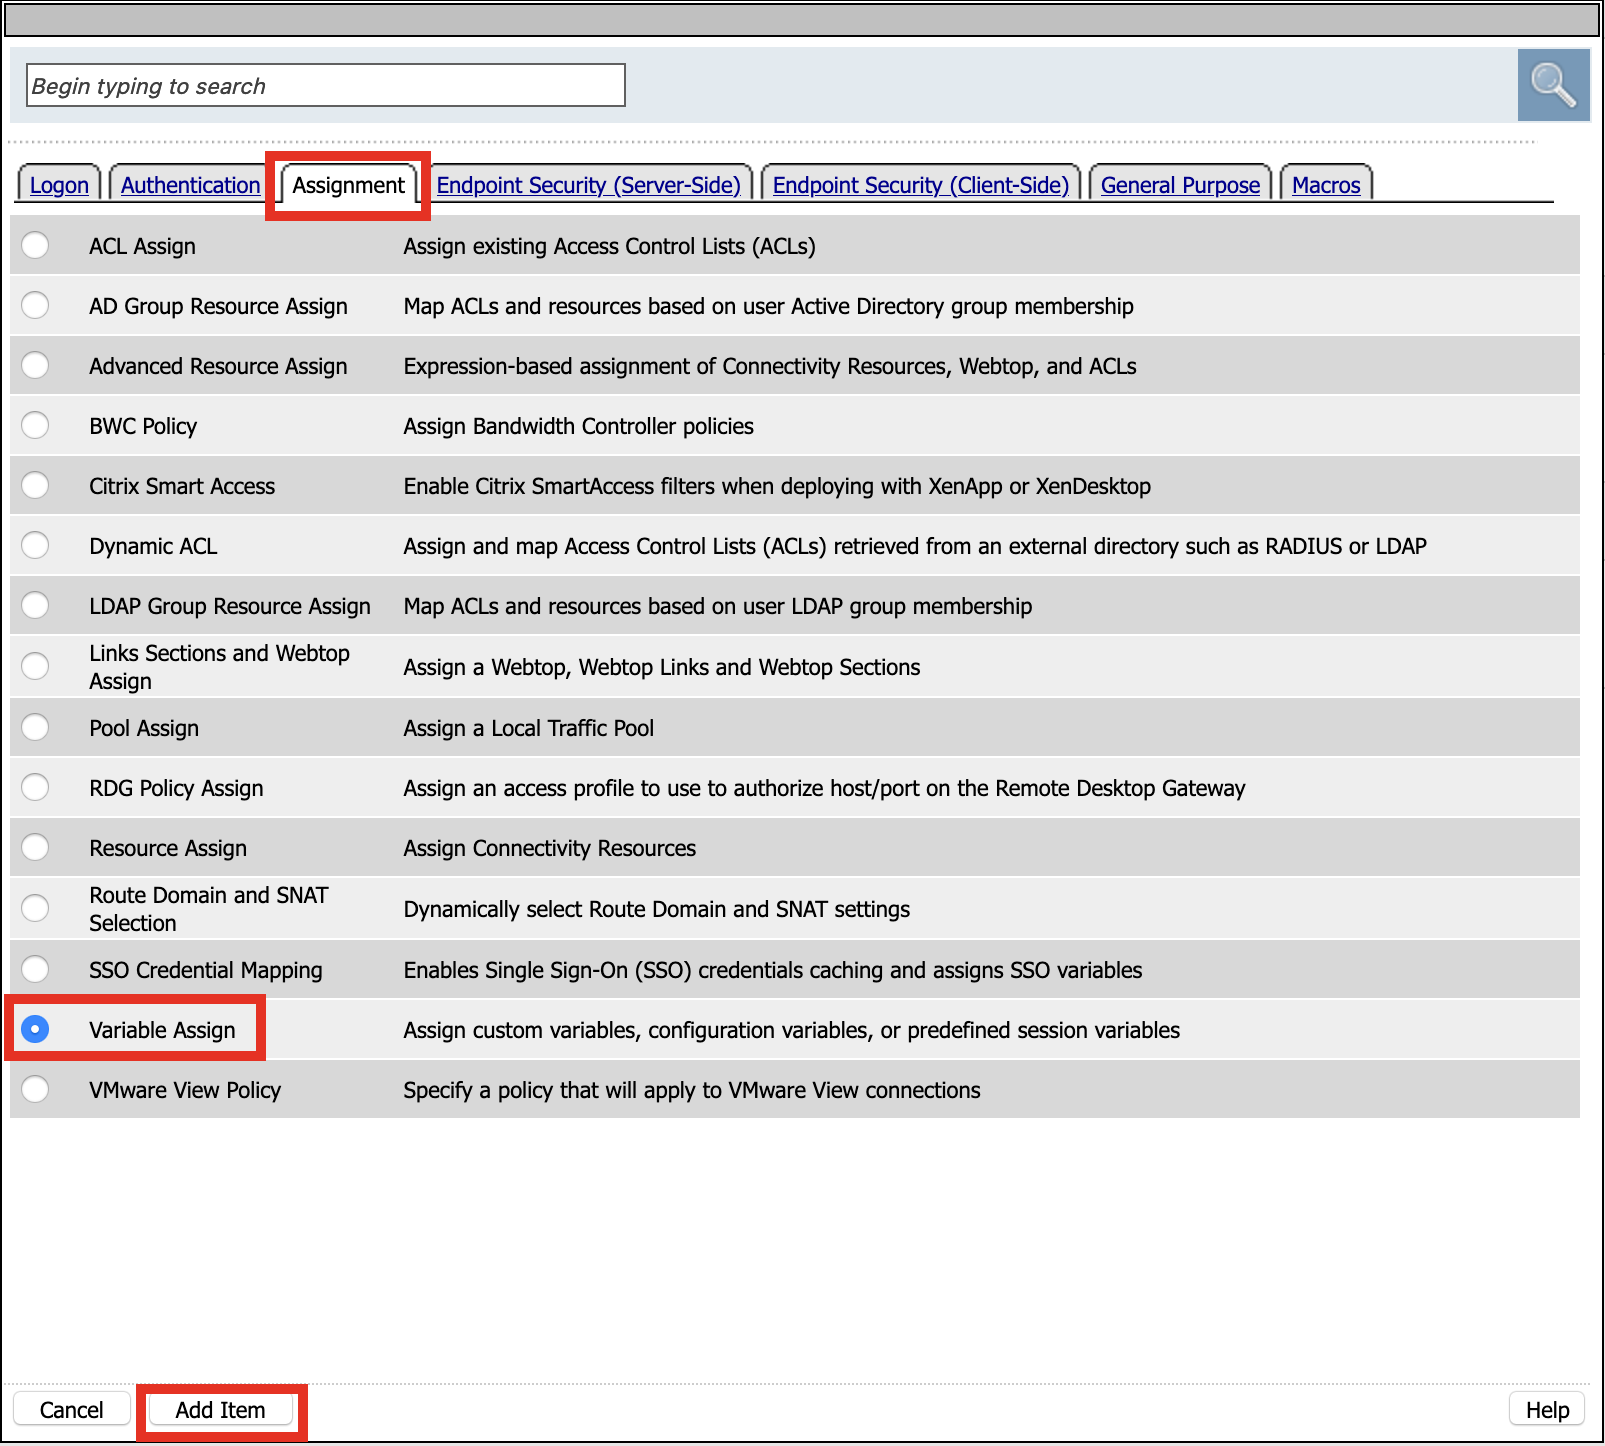
Click Assignment
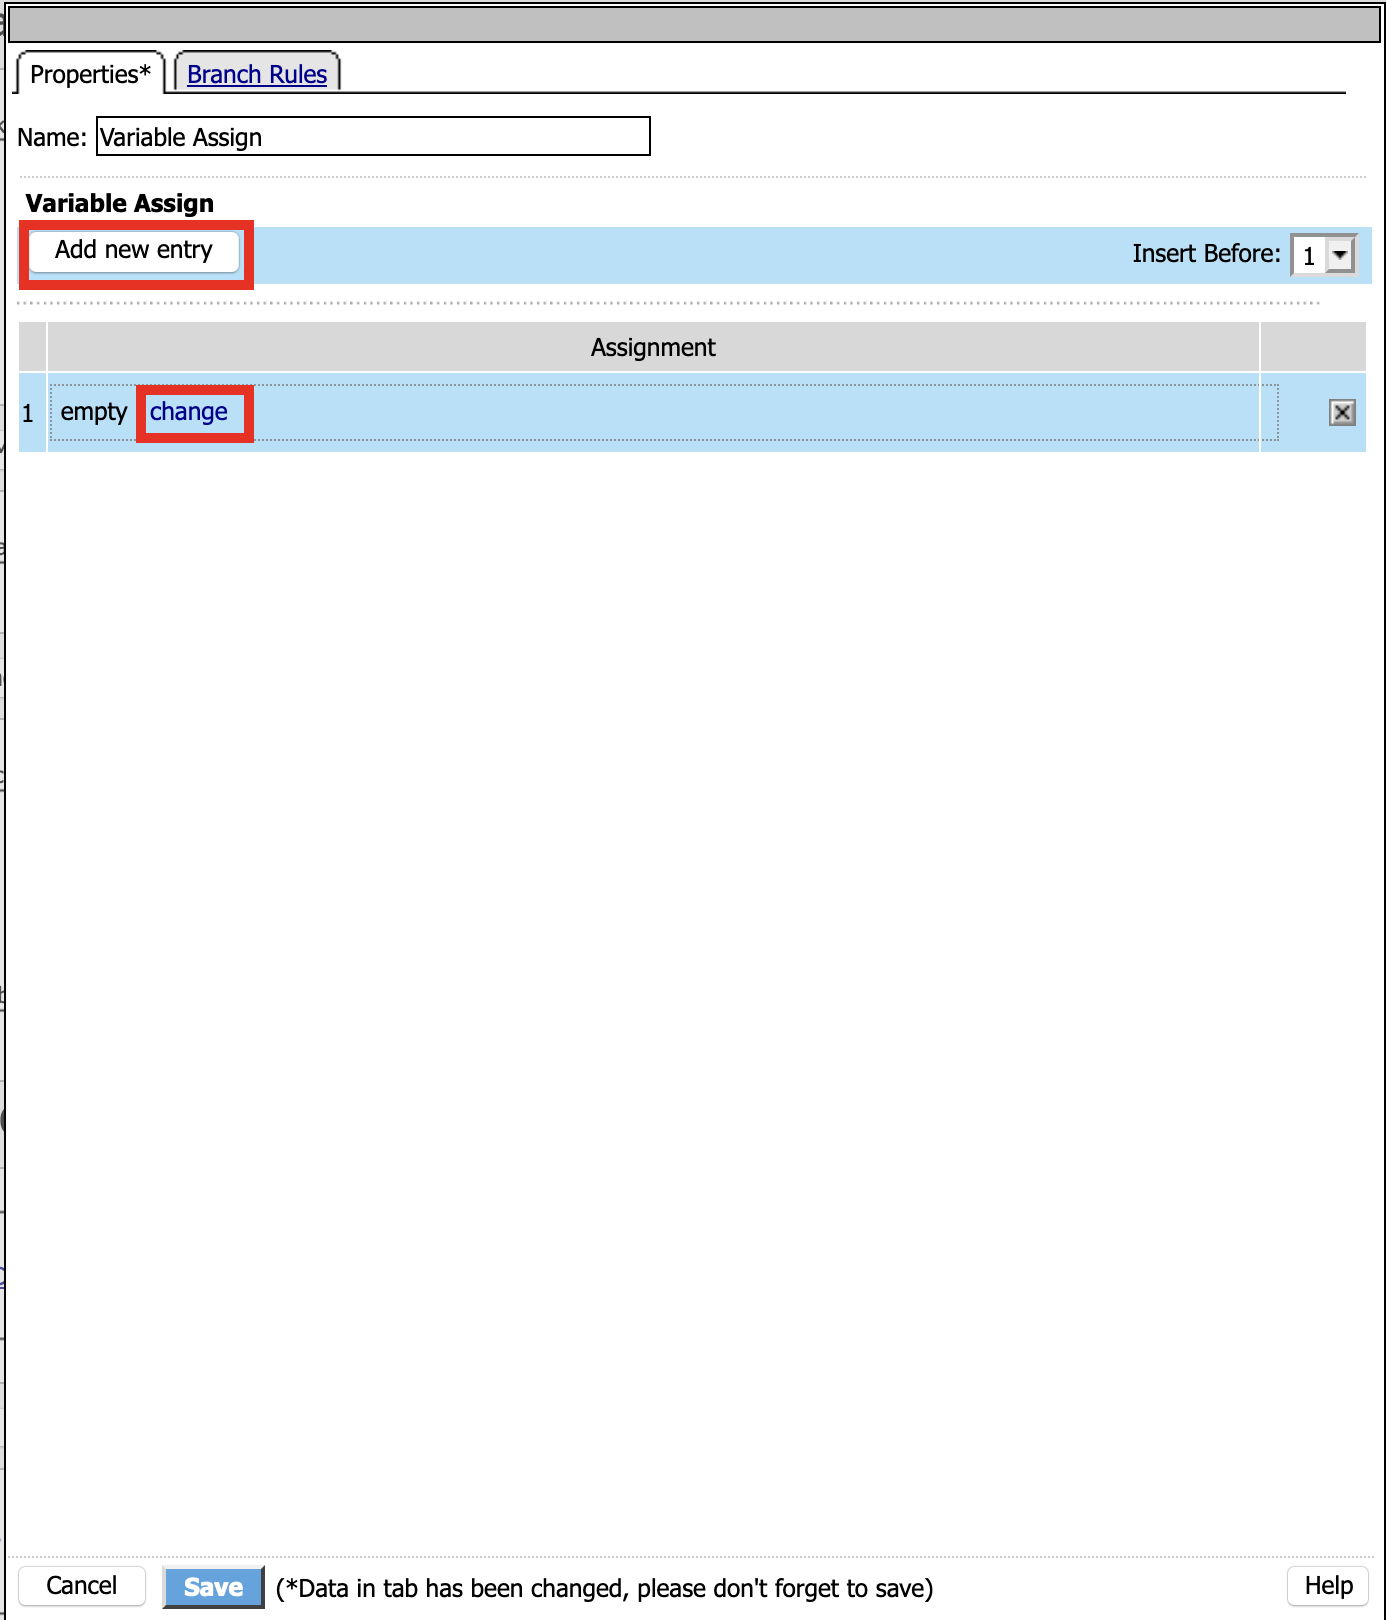
Click Variable Assign
Click Add Item
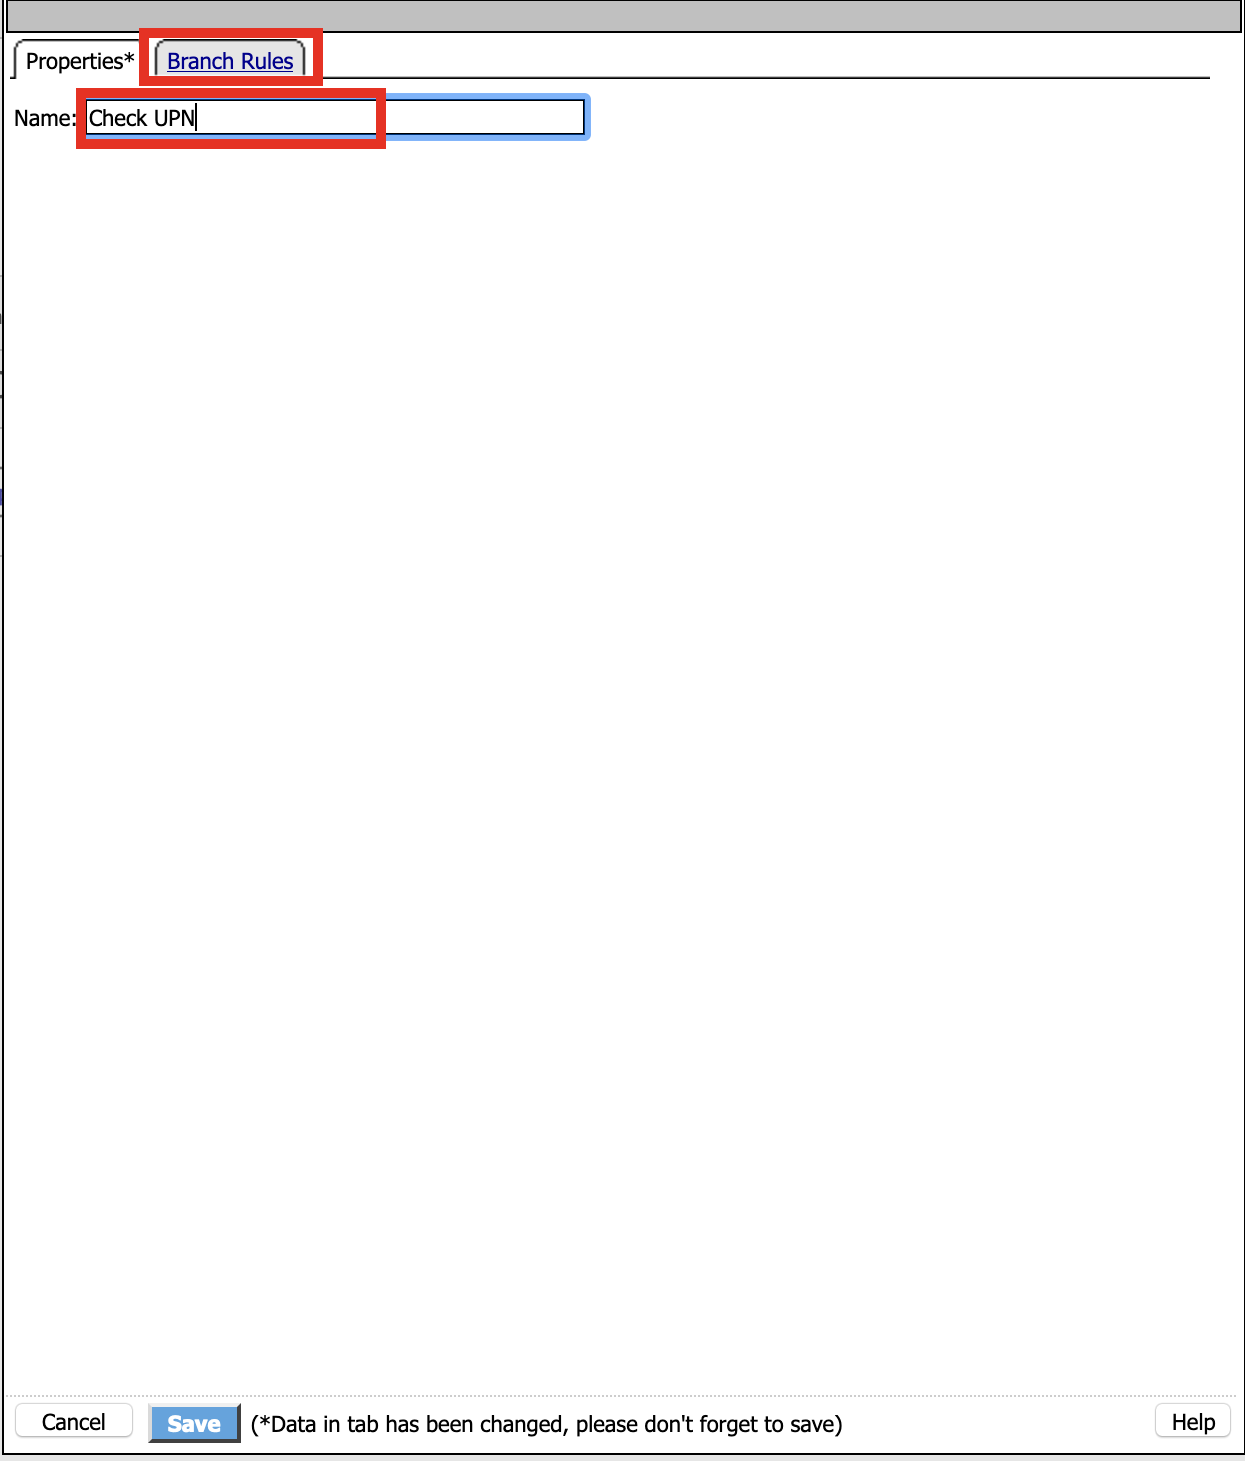
Name: GET UPN
Click Add new entry
Click change

Define Custom Variable and Custom Expression
Custom Variable = session.custom.ephemeral.upn

Custom Expression =
set x509e_fields [split [mcget {session.ssl.cert.x509extension}] "\n"];
# For each element in the list:
foreach field $x509e_fields {
# If the element contains UPN:
if { $field contains "othername:UPN" } {
## set start of UPN variable - updated for new CACs
set start [expr {[string first "othername:UPN<" $field] +14}]
# UPN format is <user@domain>
# Return the UPN, by finding the index of opening and closing brackets, then use string range to get everything between.
return [string range $field $start [expr { [string first ">" $field $start] - 1 } ] ];??} }
# Otherwise return UPN Not Found:
return "UPN-NOT-FOUND";
Click Finished

Click Save

Click + (plus symbol) beside GET UPN

Click General Purpose
Click Empty
Click Add Item

Name: Check UPN
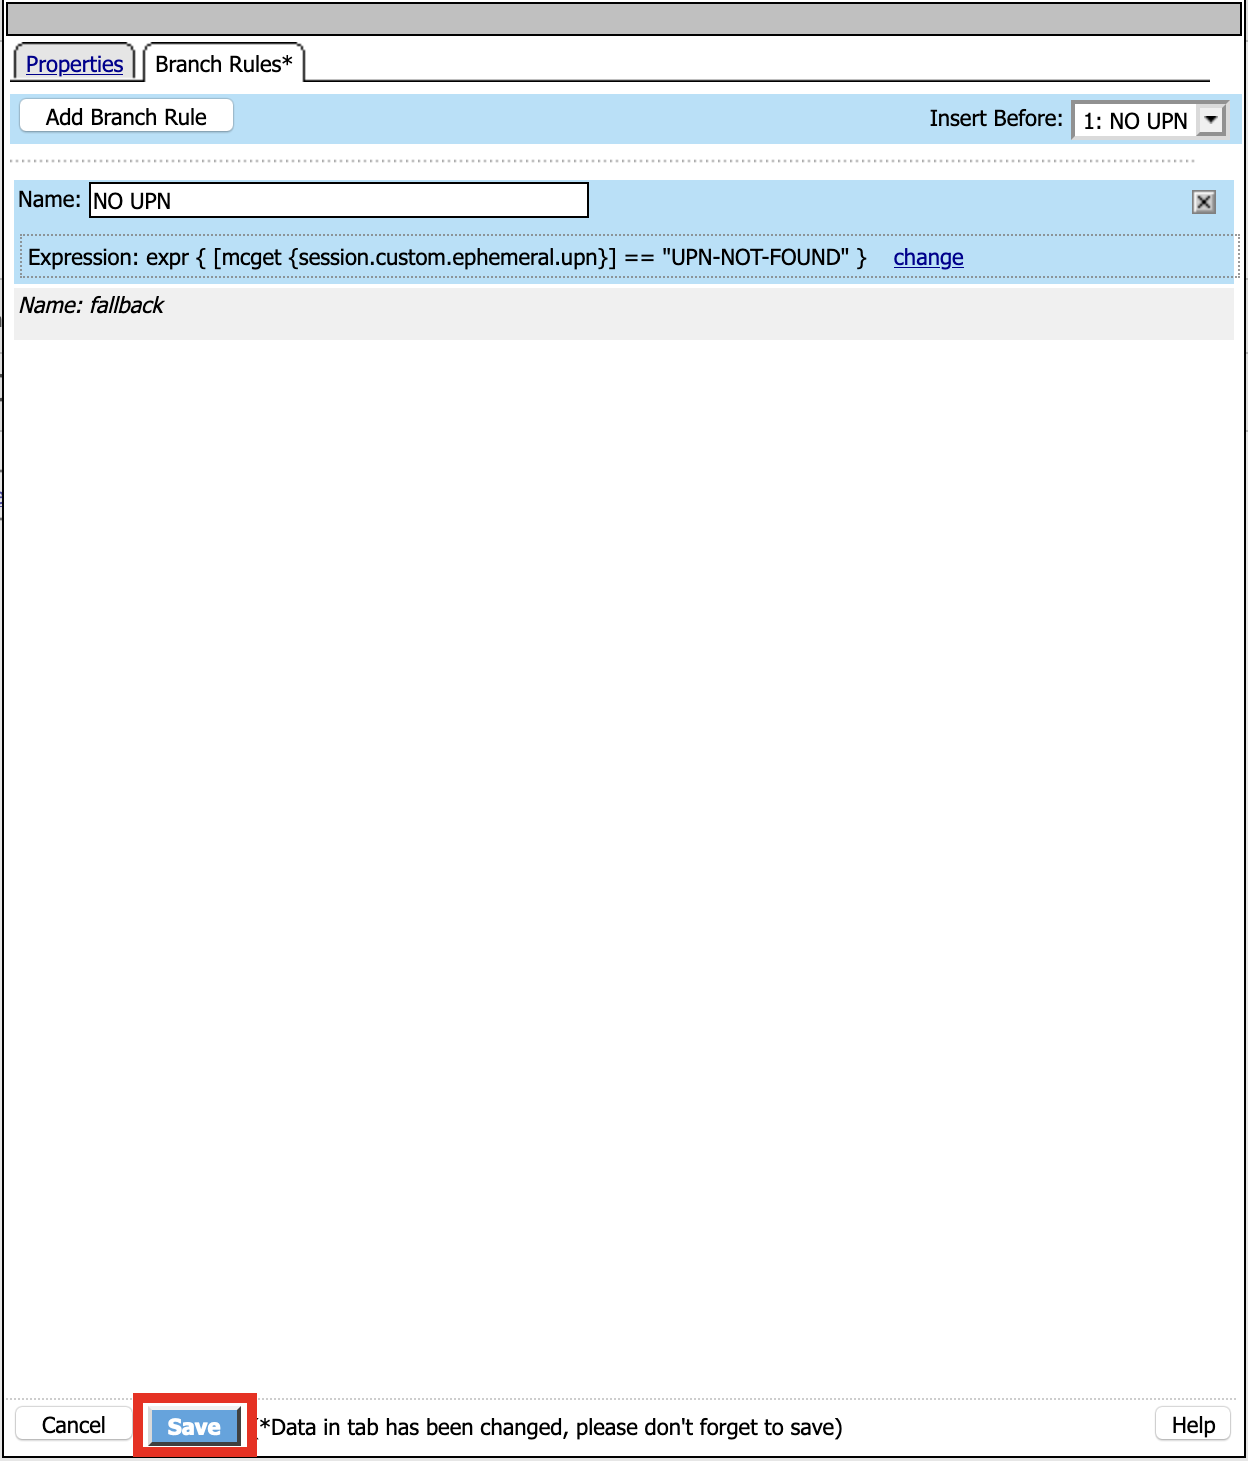
Click Branch Rules
Click Add Branch Rule
Name: NO UPN
Click change

Click Advance

Enter: expr { [mcget {session.custom.ephemeral.upn}] == “UPN-NOT-FOUND” }
Click Finished
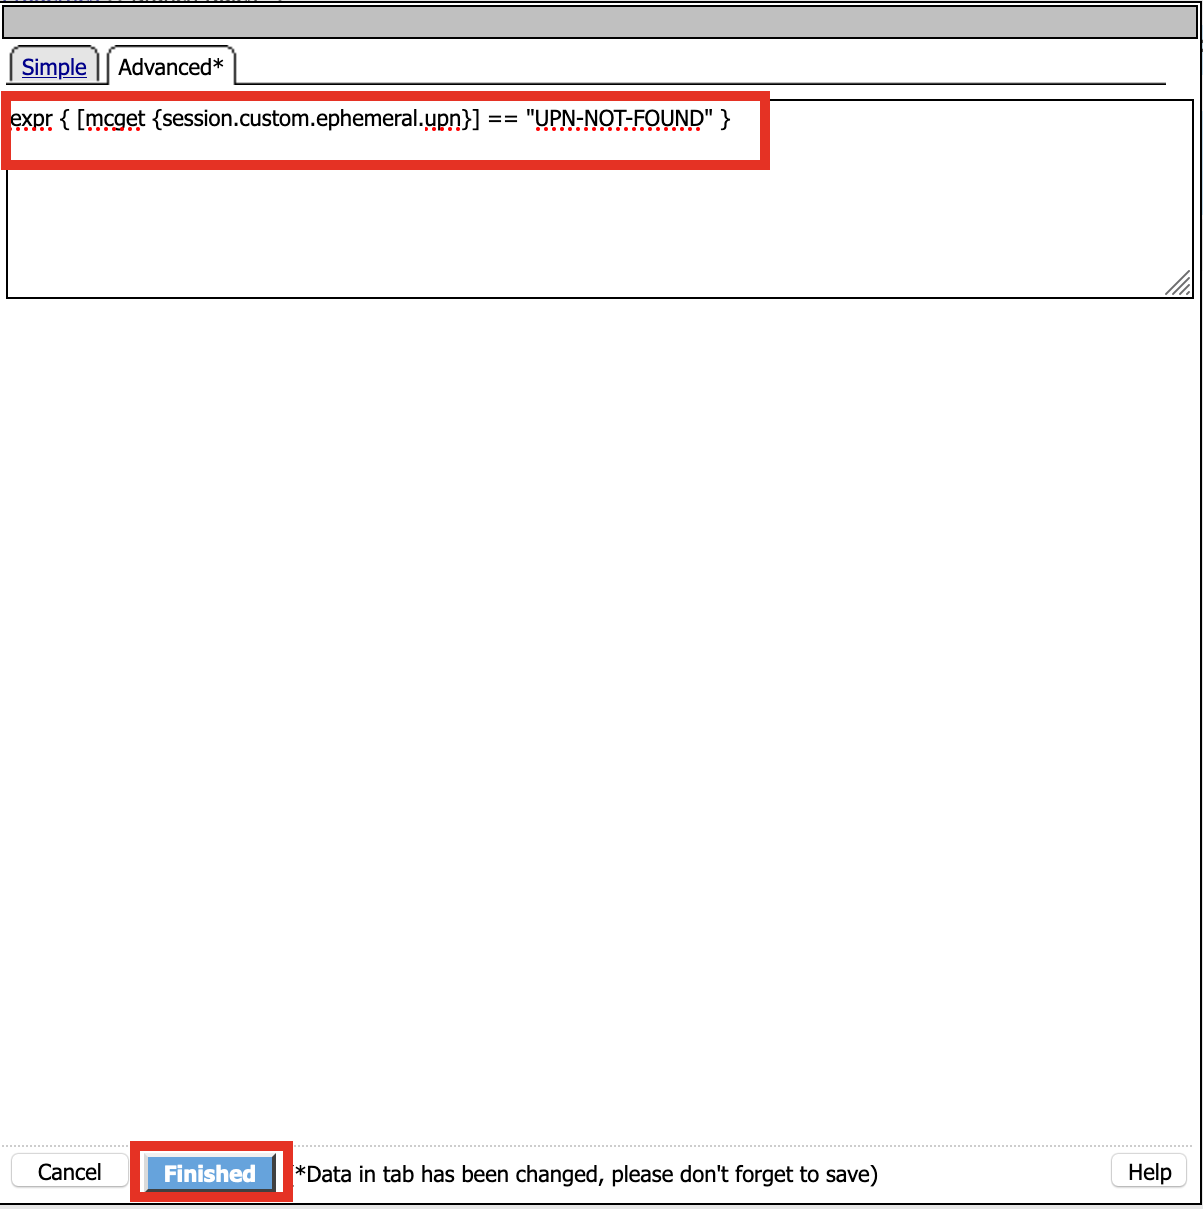
Click Save
# Click + (plus symbol) to the right of NO UPN
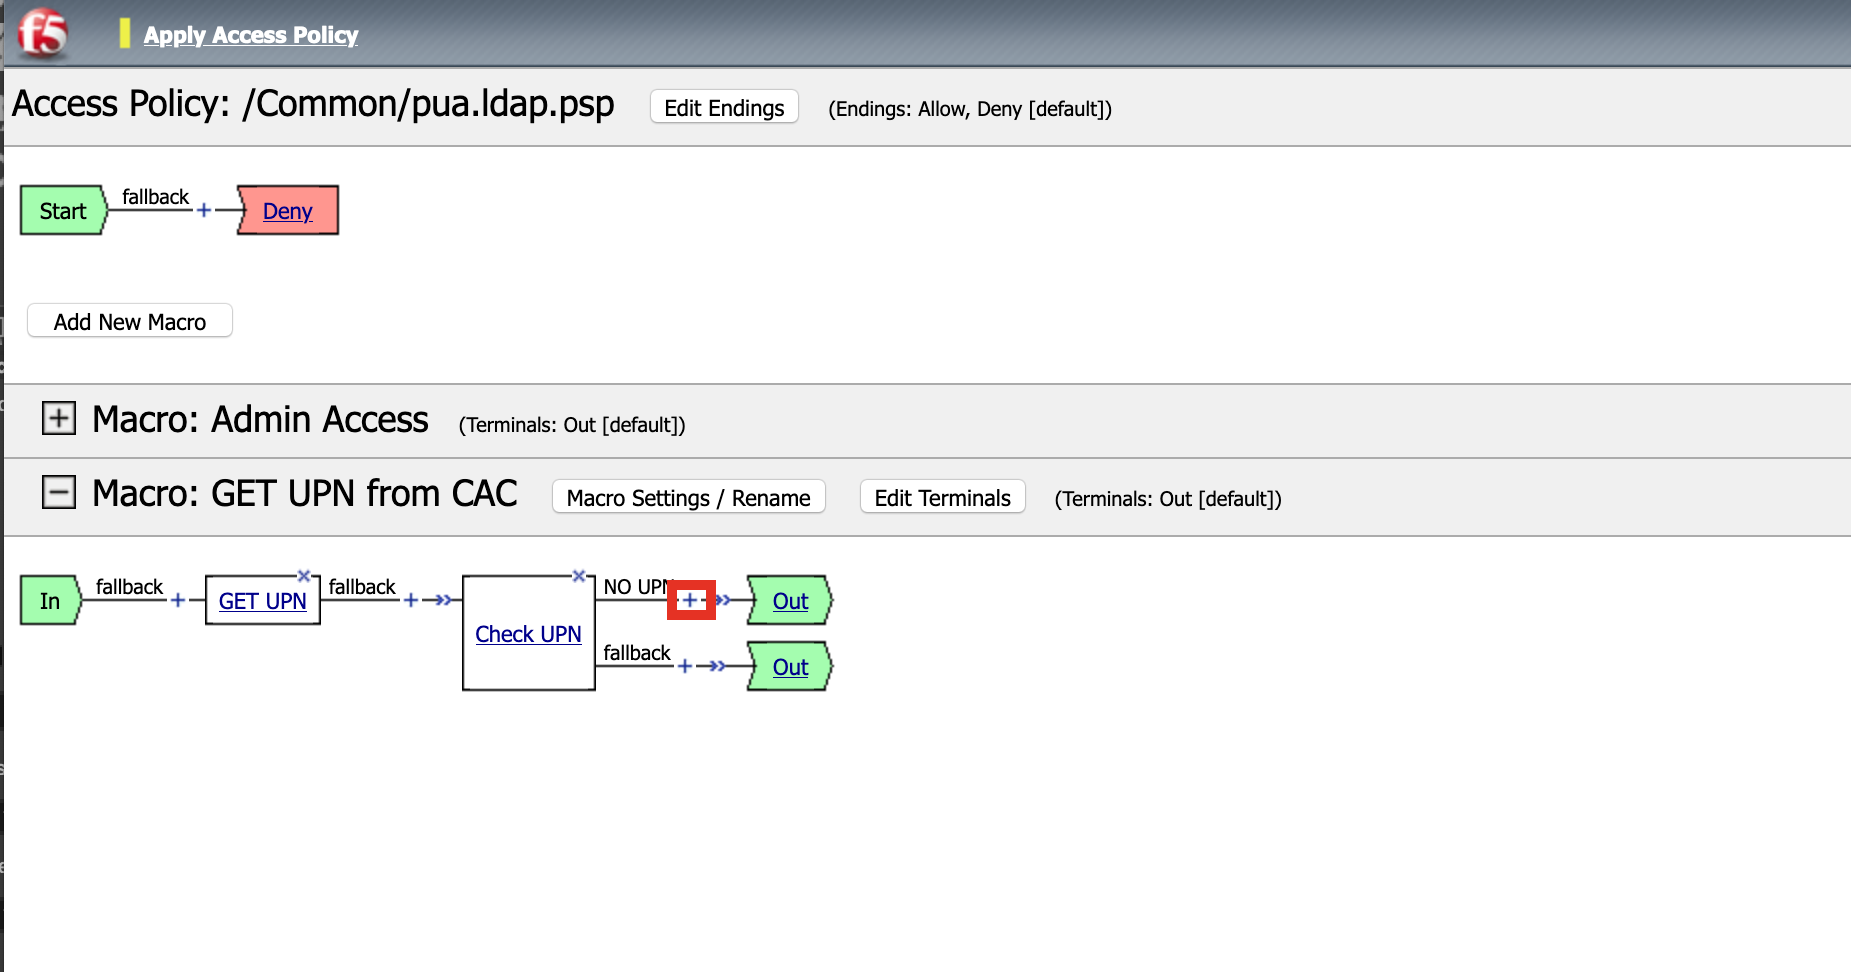
Click General Purpose
Click Message Box
Click Add Item

Name: NO UPN
Tile: NO UPN
Click Save

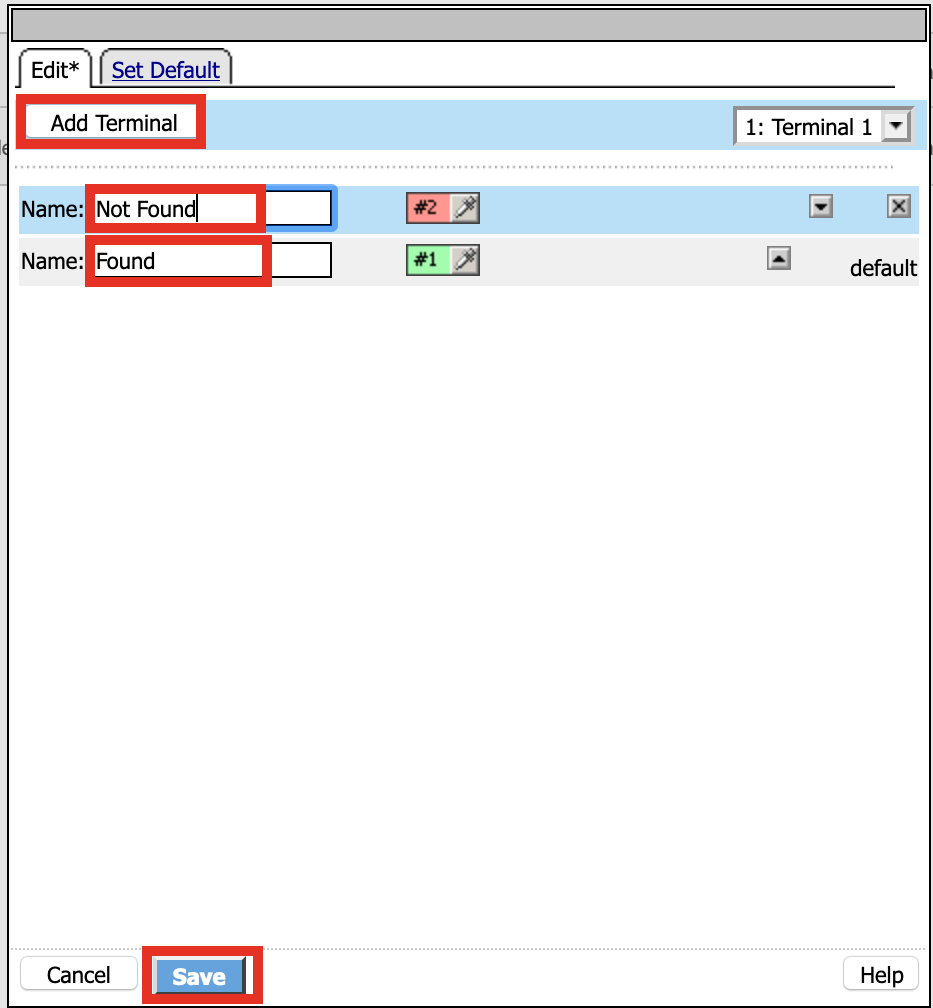
Click Edit Terminals
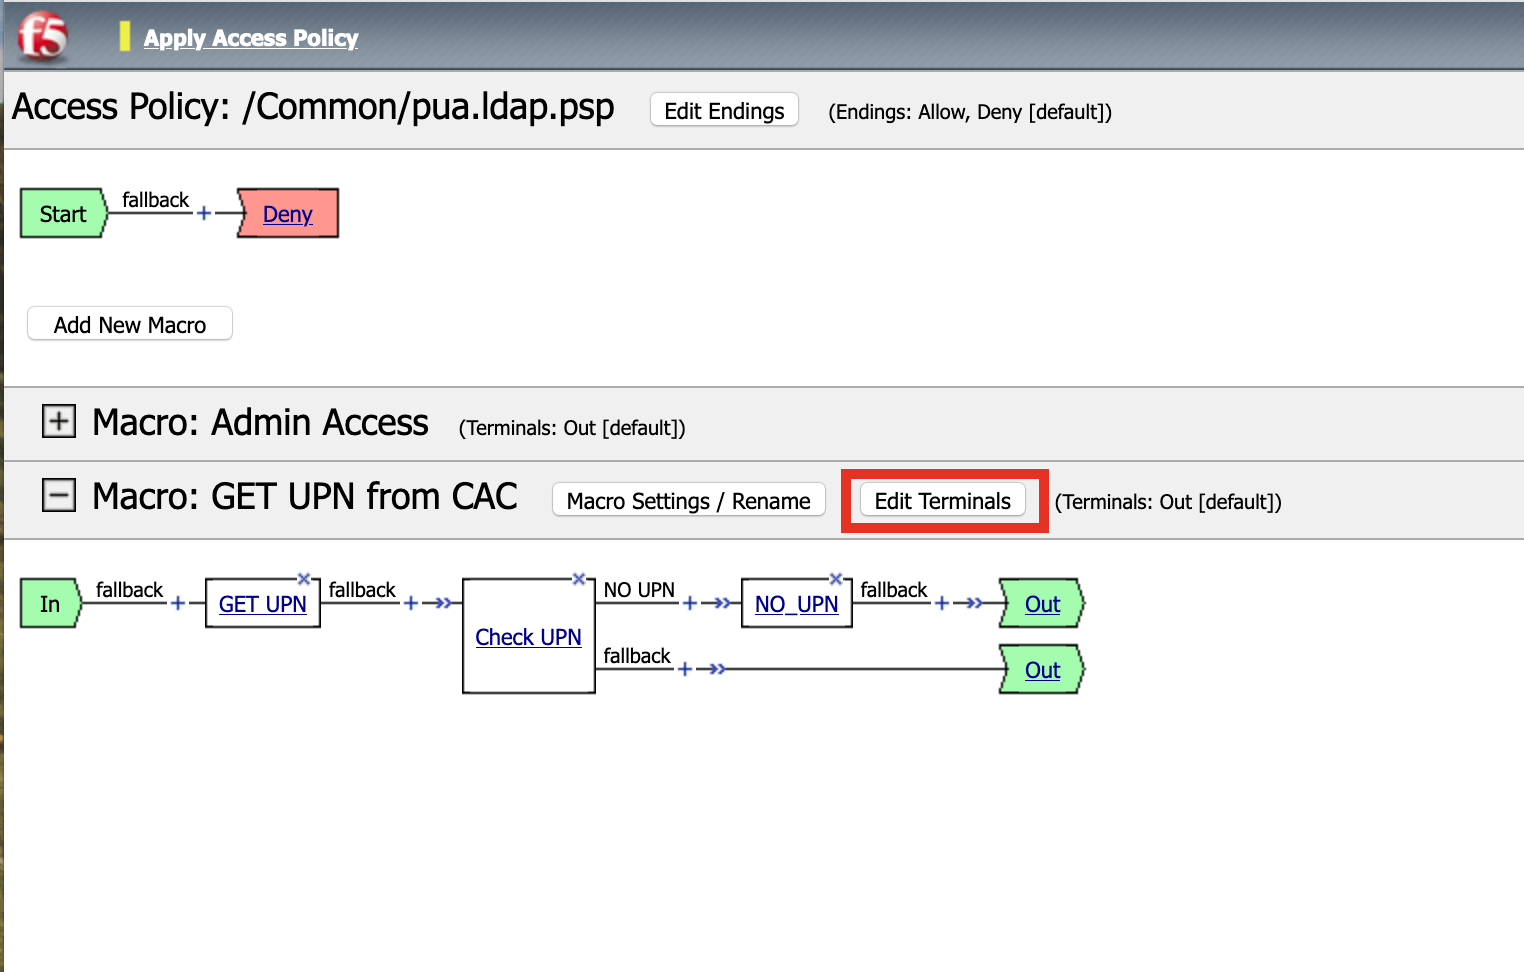
Name: Found
Click Add Terminal
Name: Not Found
Click Save
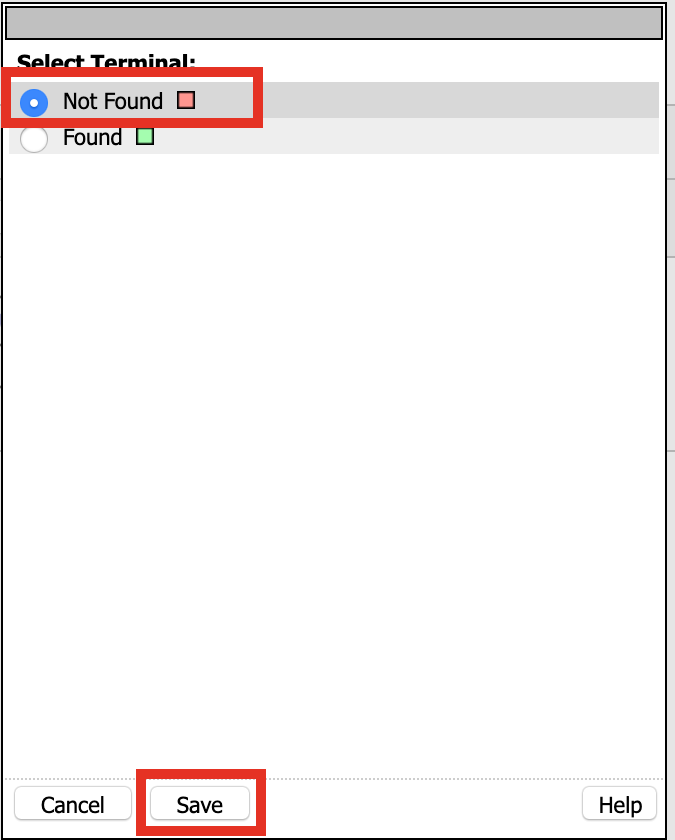
Click the Found Terminal beside NO UPN
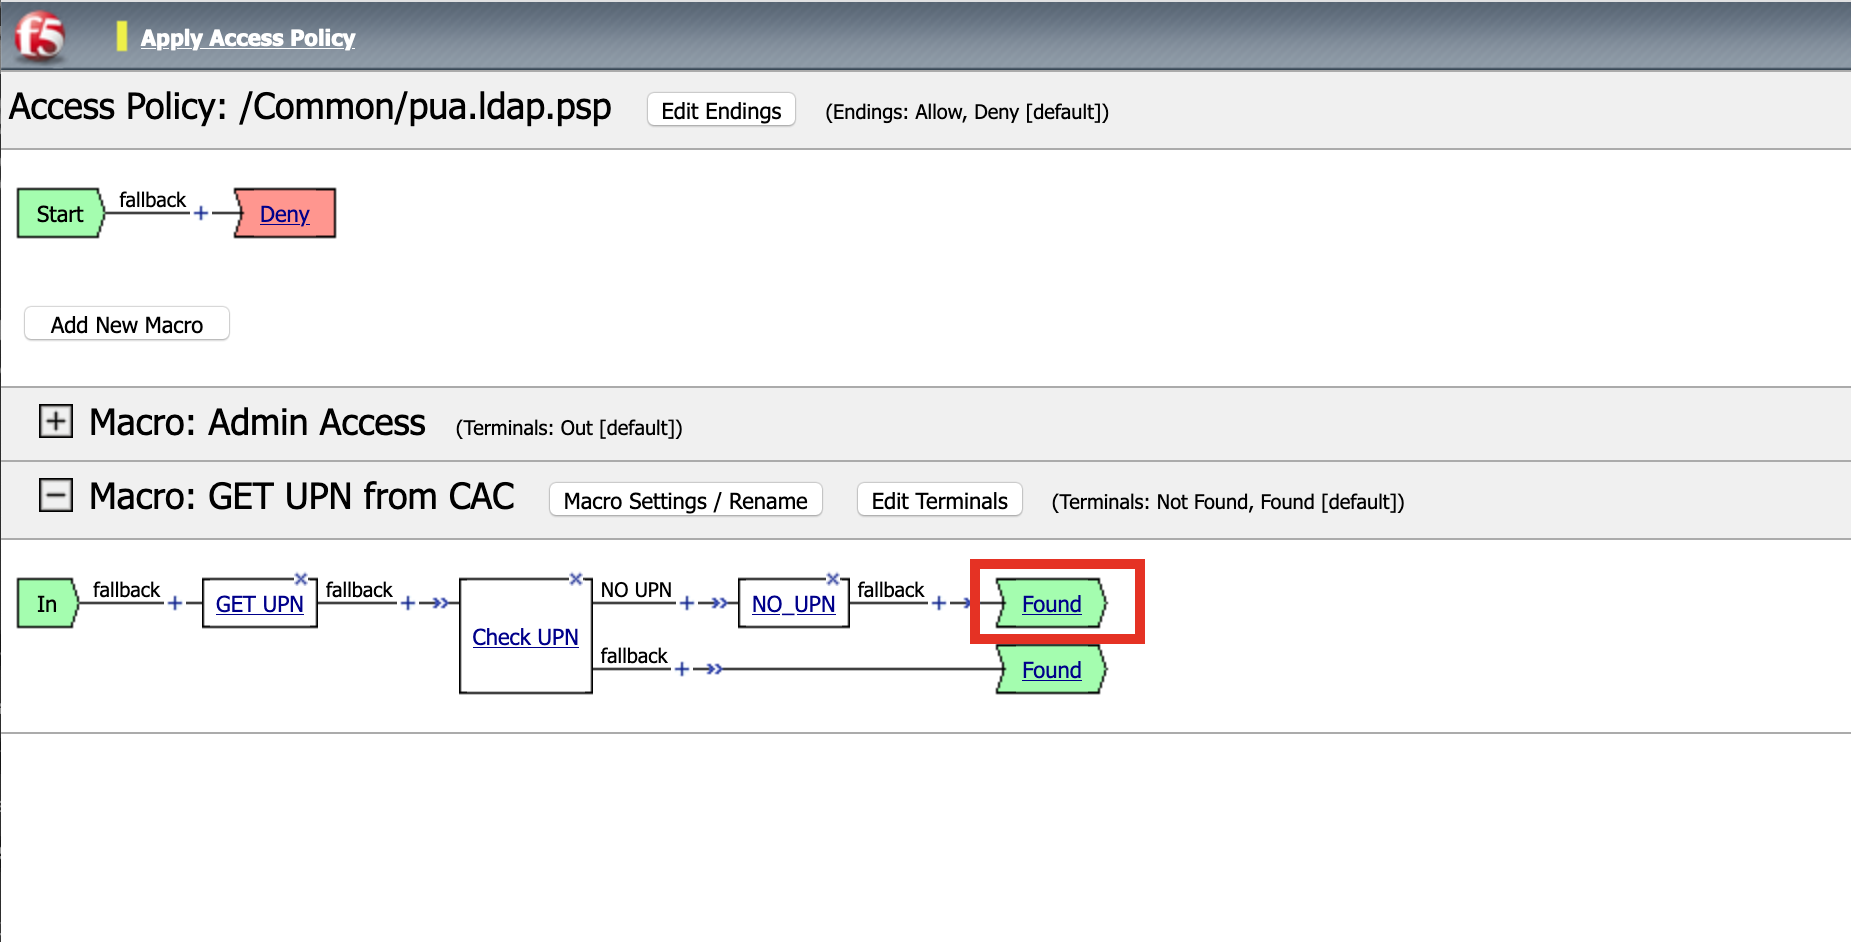
Click Not Found
Click Save
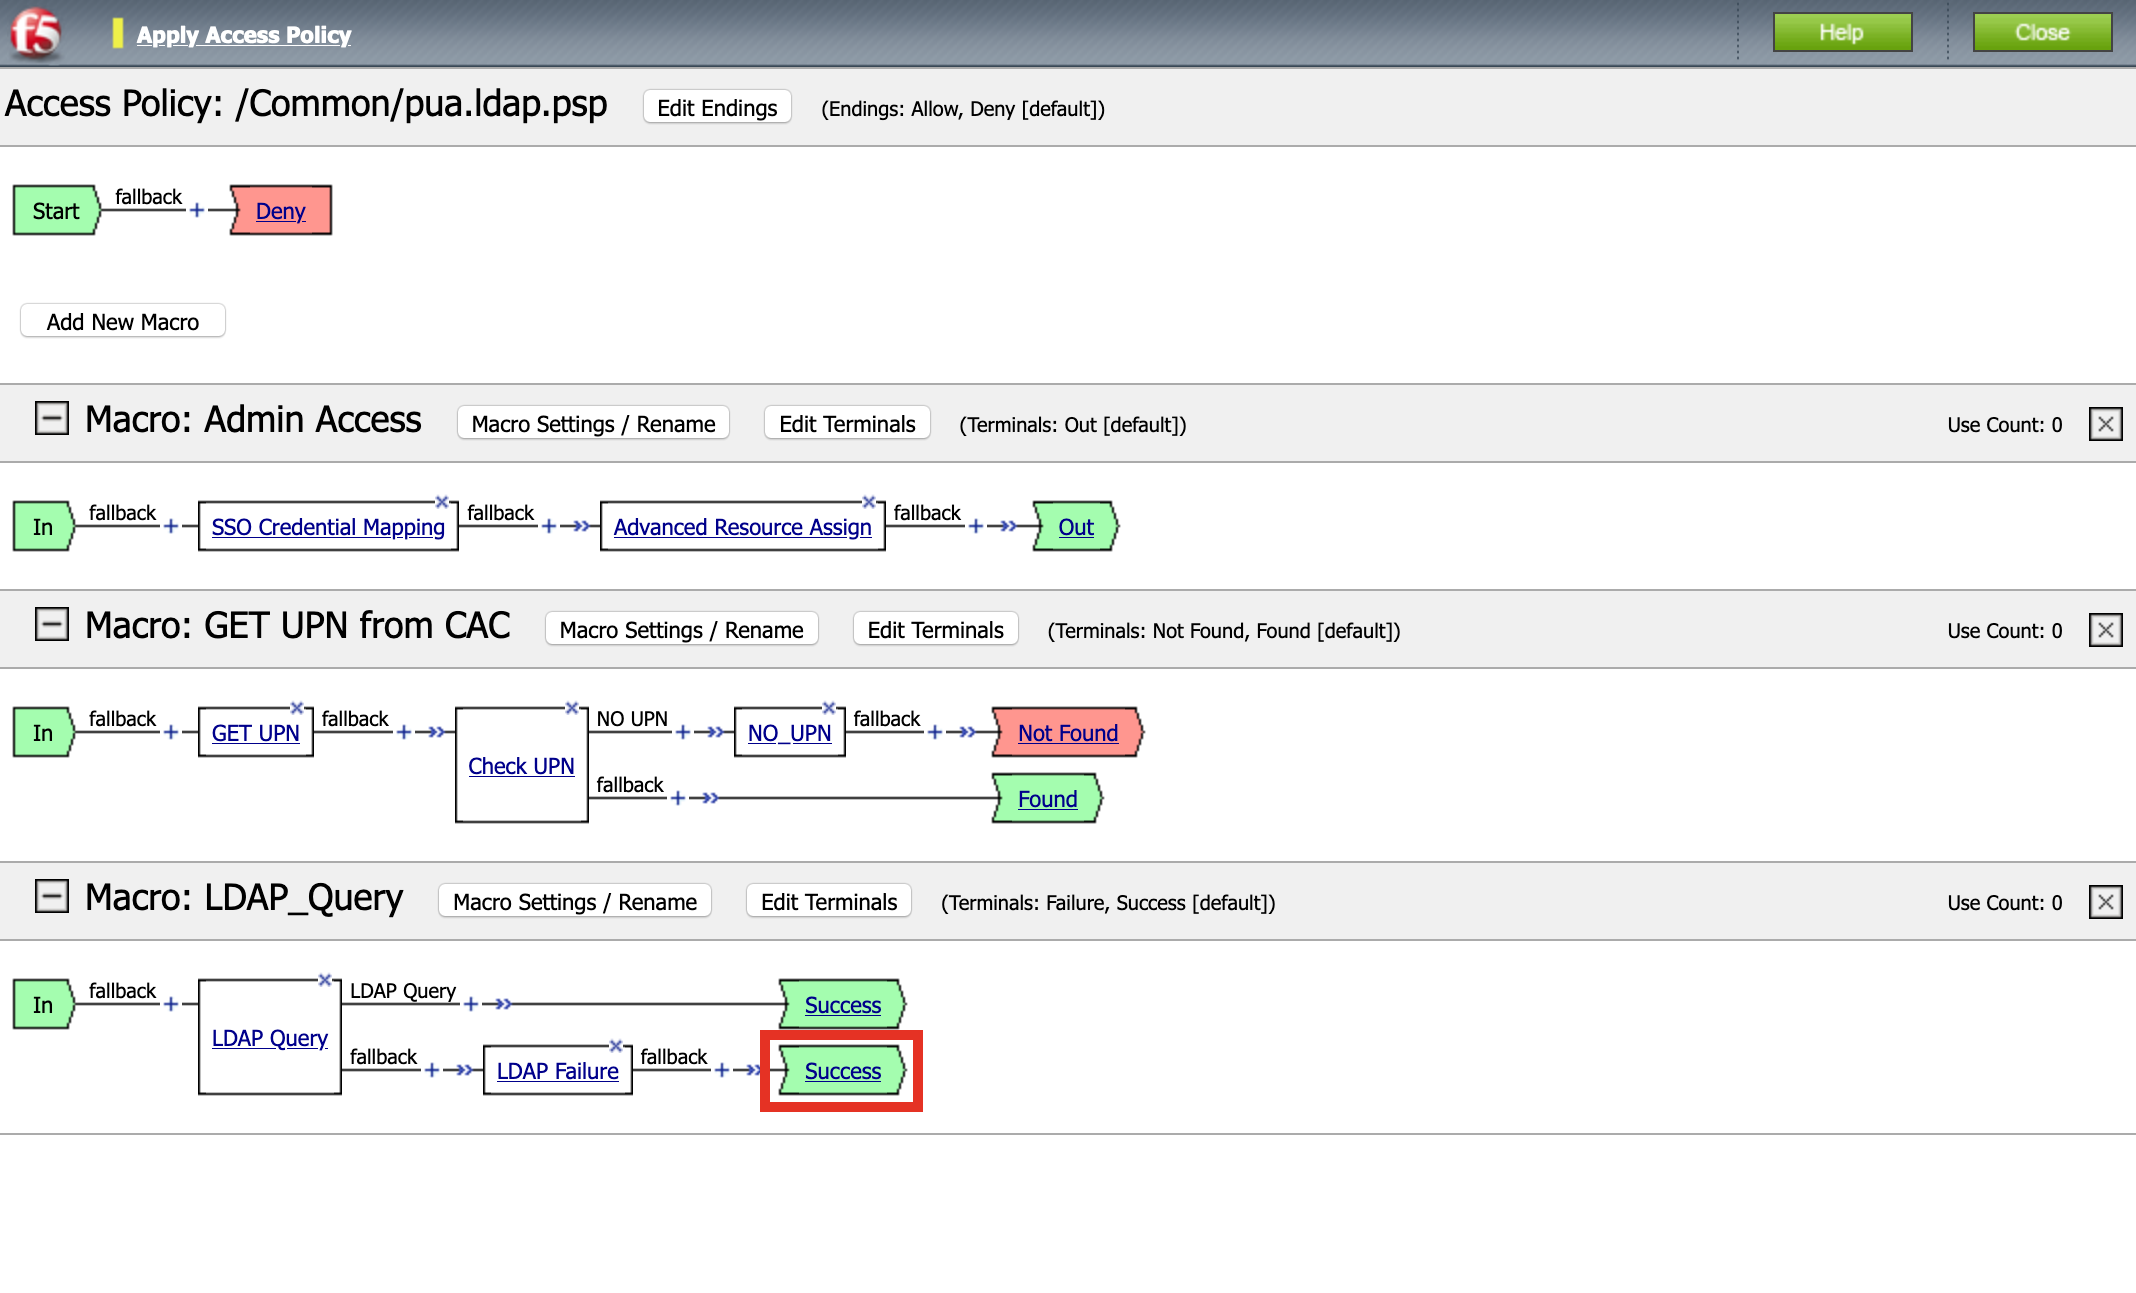
Task 11 - Create the LDAP Macro
Click Add New Macro
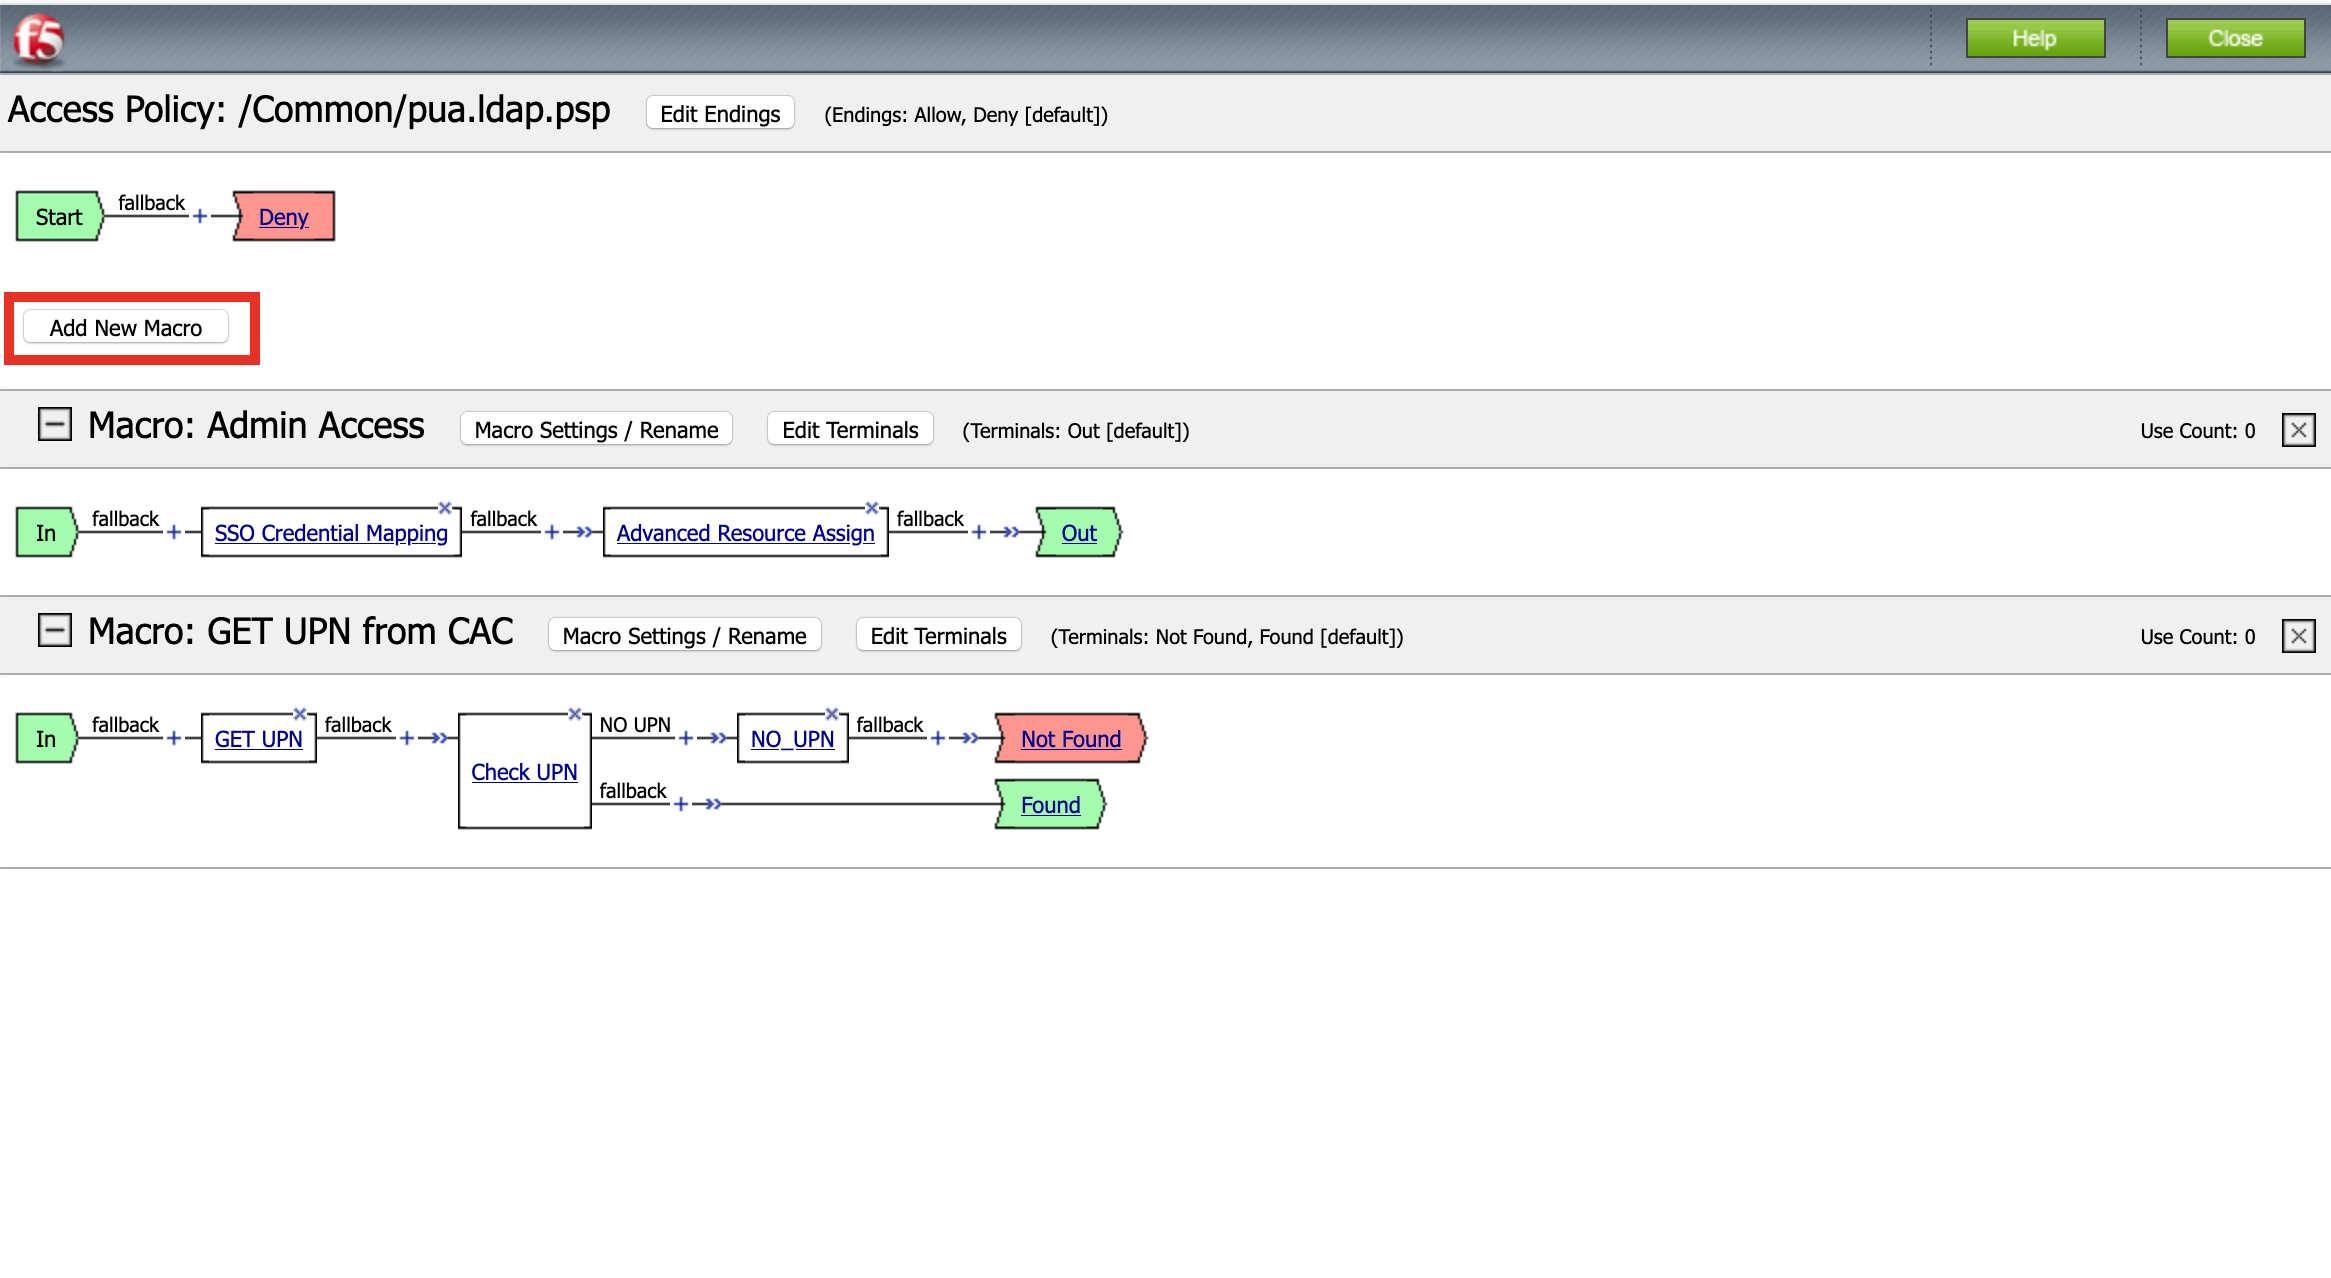
Name: LDAP Query
Click Save

Expand the LDAP Query Macro
Click + (plus symbol)
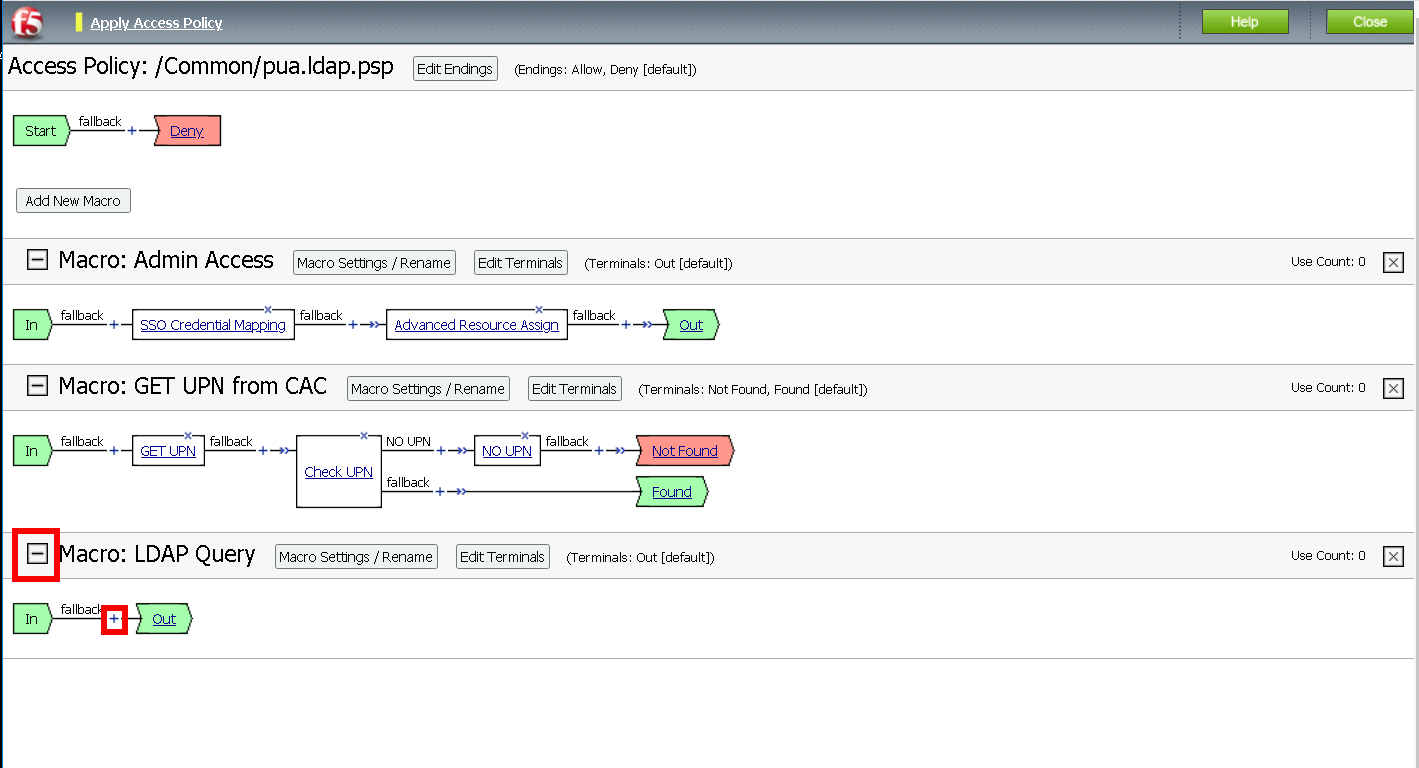
Click Authentication
Click LDAP Query
Click Add Item

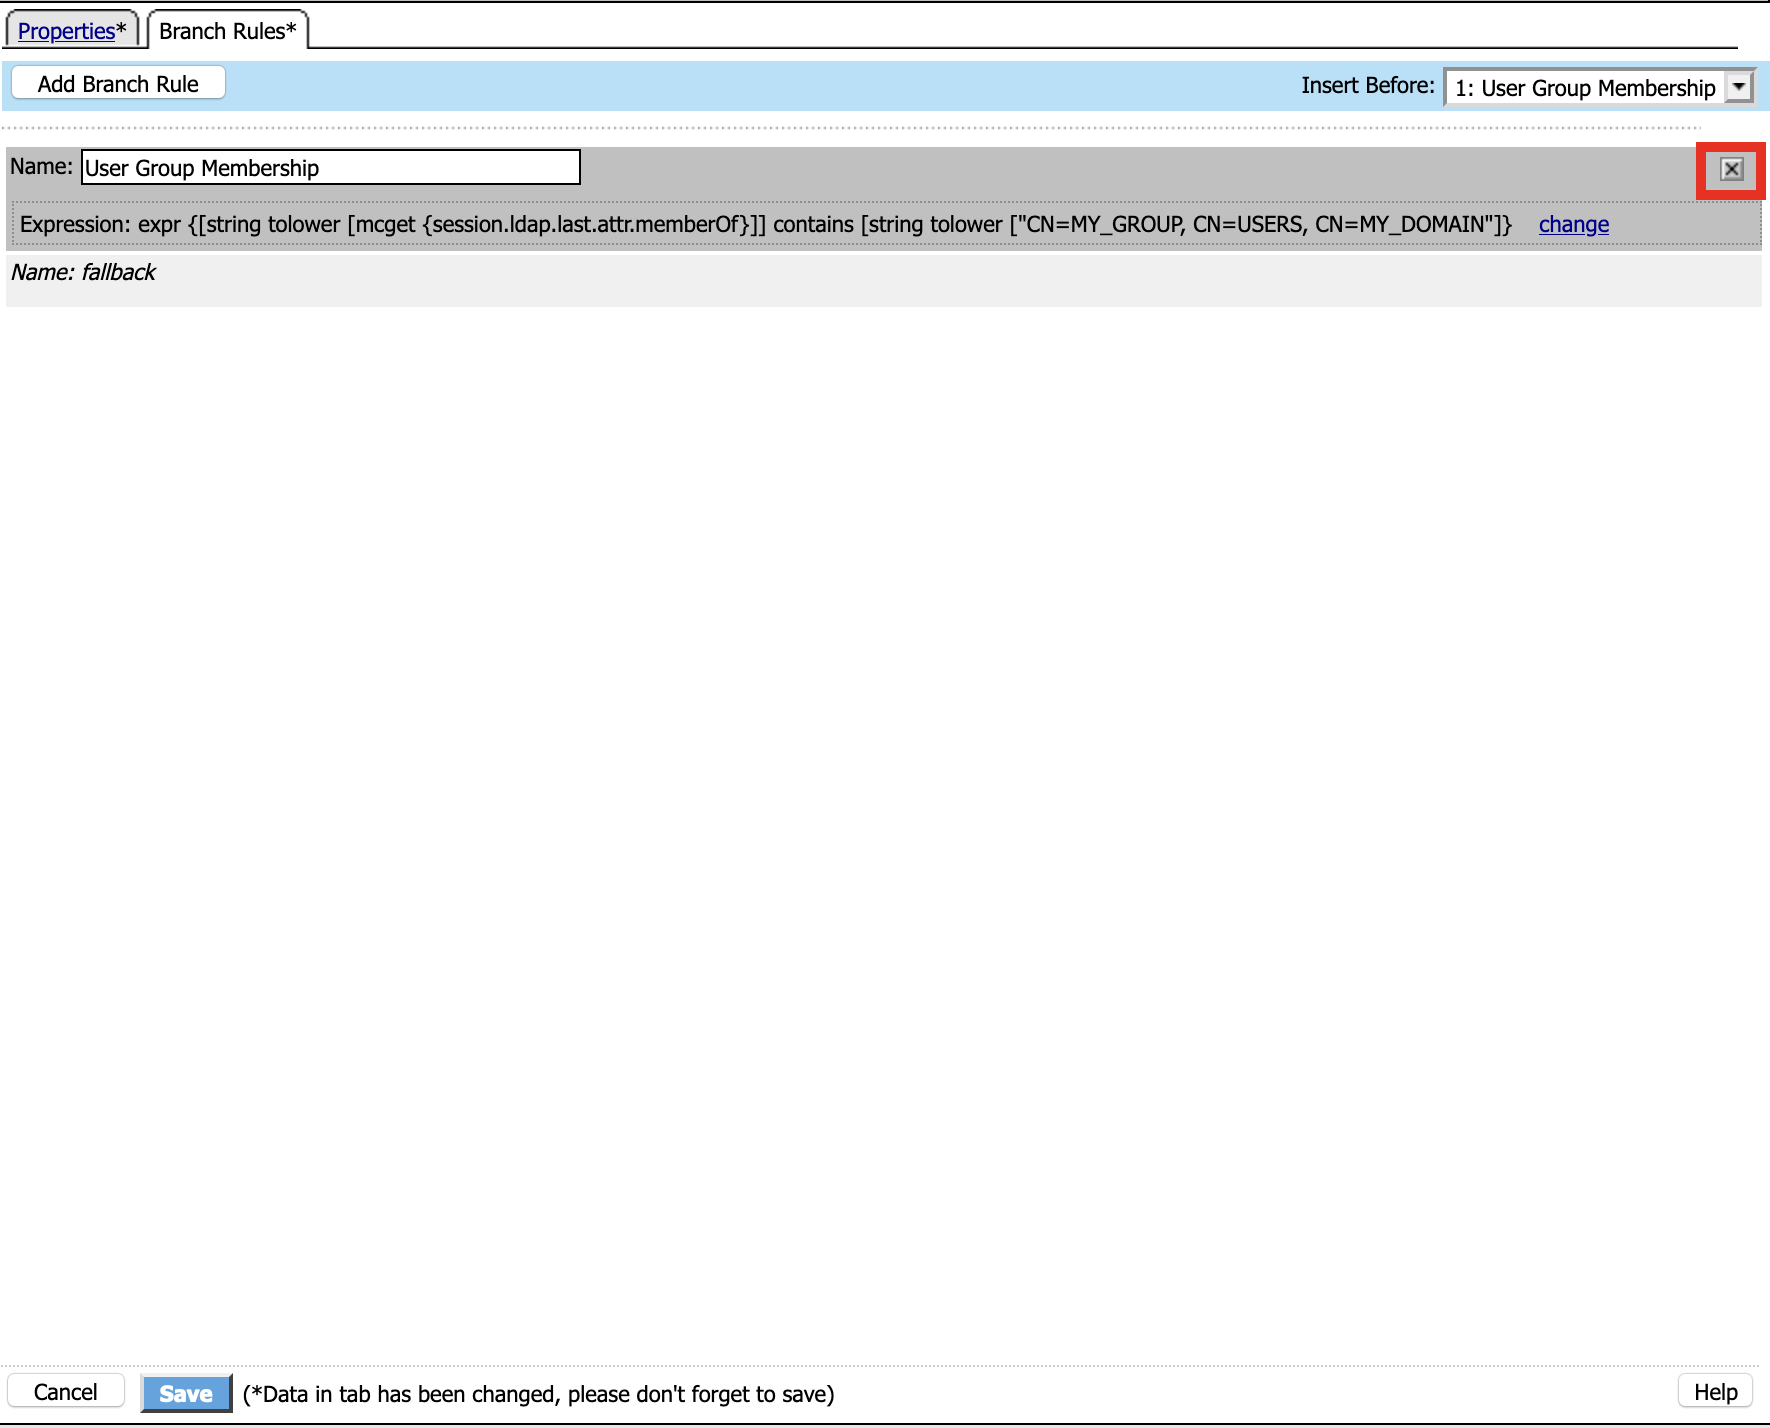
Update the Properties tab . Server = */Common/pua.ldap-servers** . SearchDN = **DC=f5lab*, DC=local . SearchFilter = **UserPrincipalName=%{session.custom.ephemeral.upn}* . Fetch groups to which the user or group belong = **Direct* S. Click **Branch Rules*

Click the X to remove the User Group Membership query
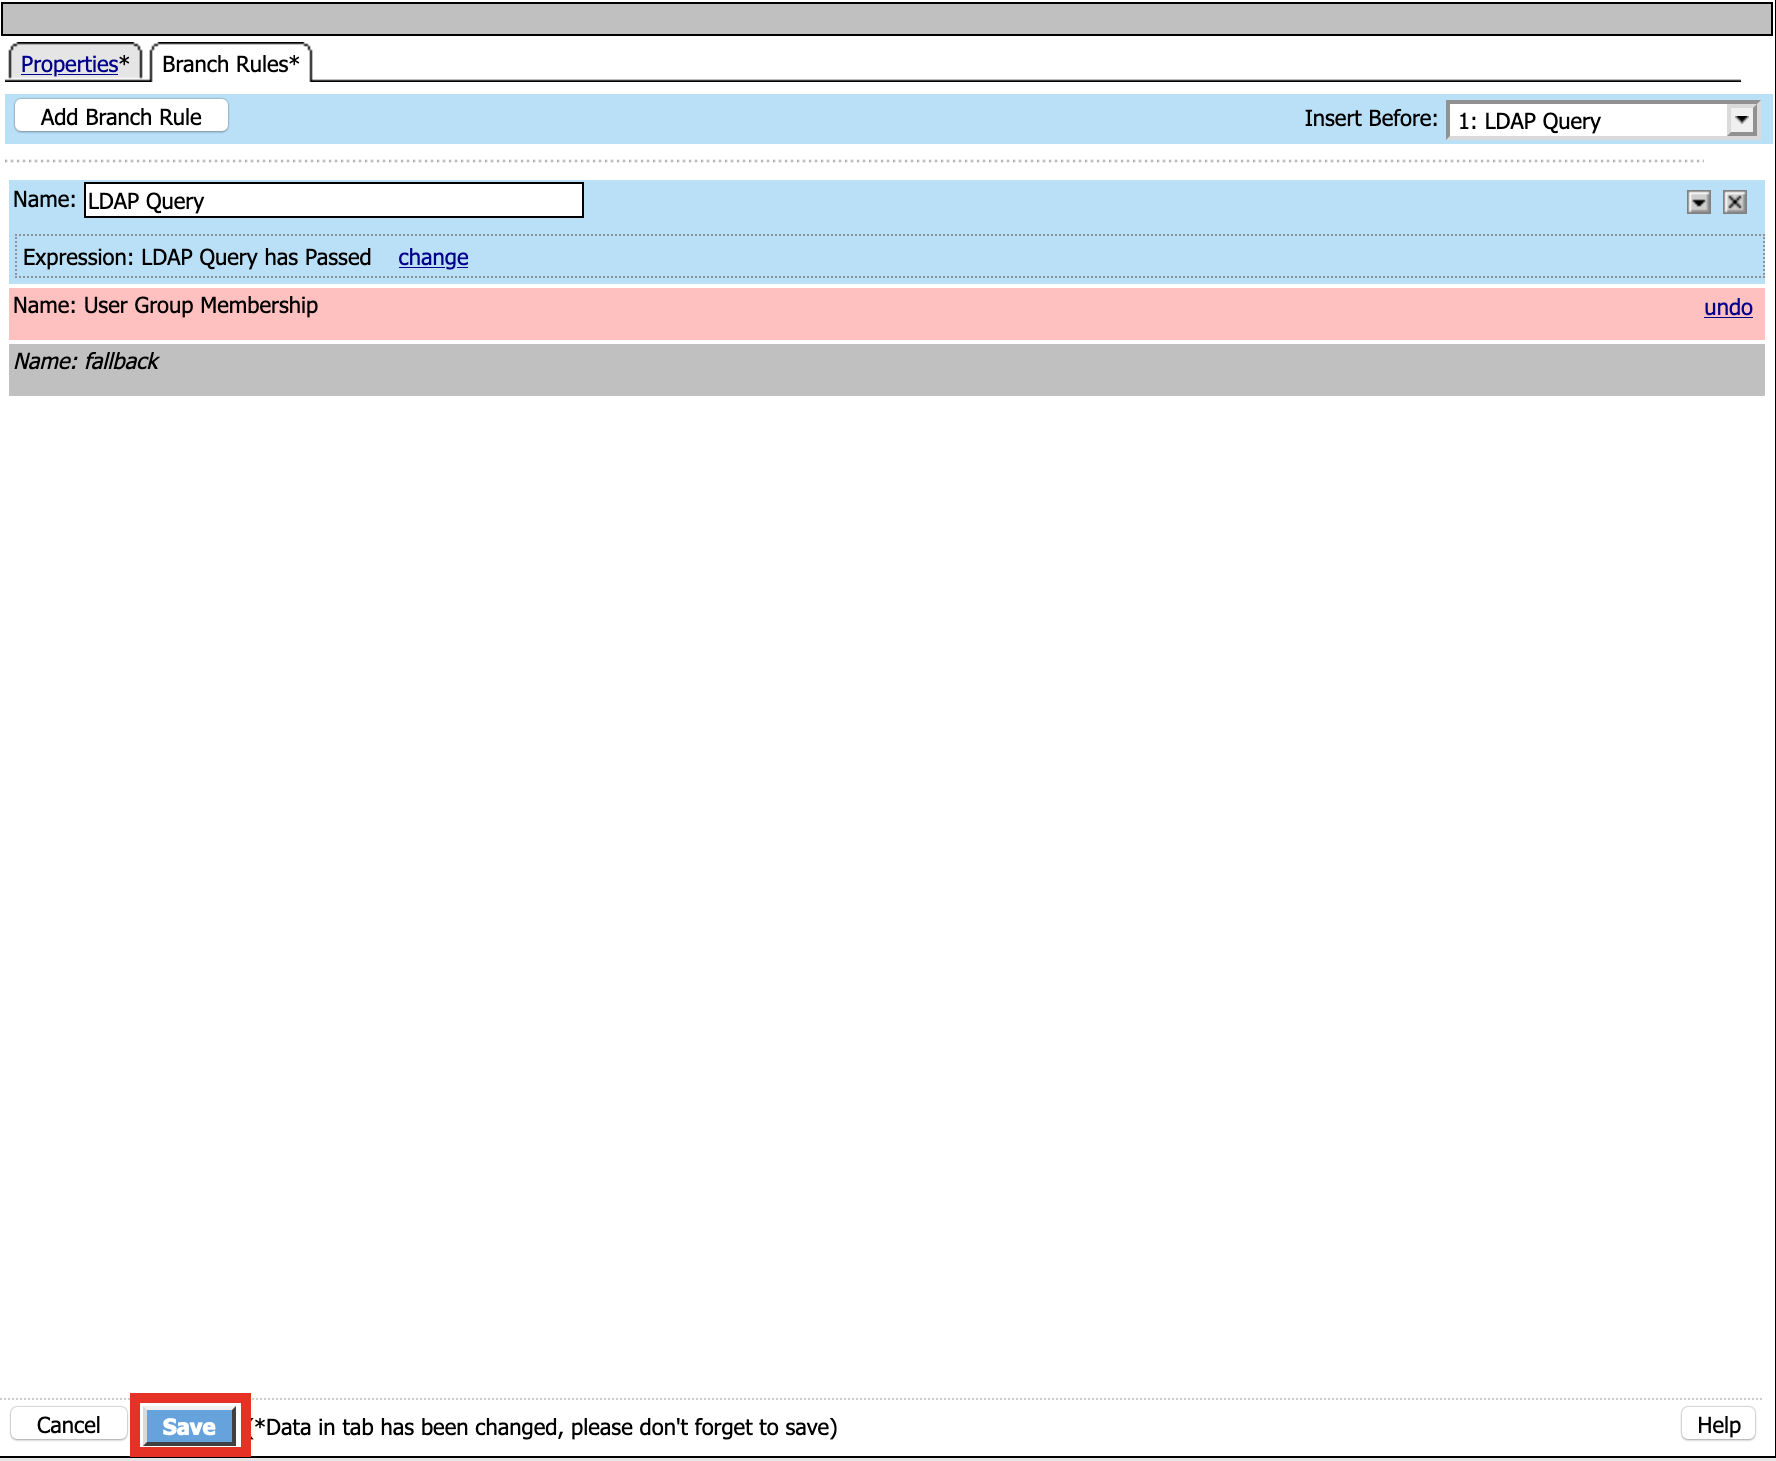
Click Add Branch Rules
Name: LDAP Query
Click change

Click Add Expression

Context: LDAP Query
Condition: LDAP Query Passed
LDAP Query has Passed
Click Add Expression
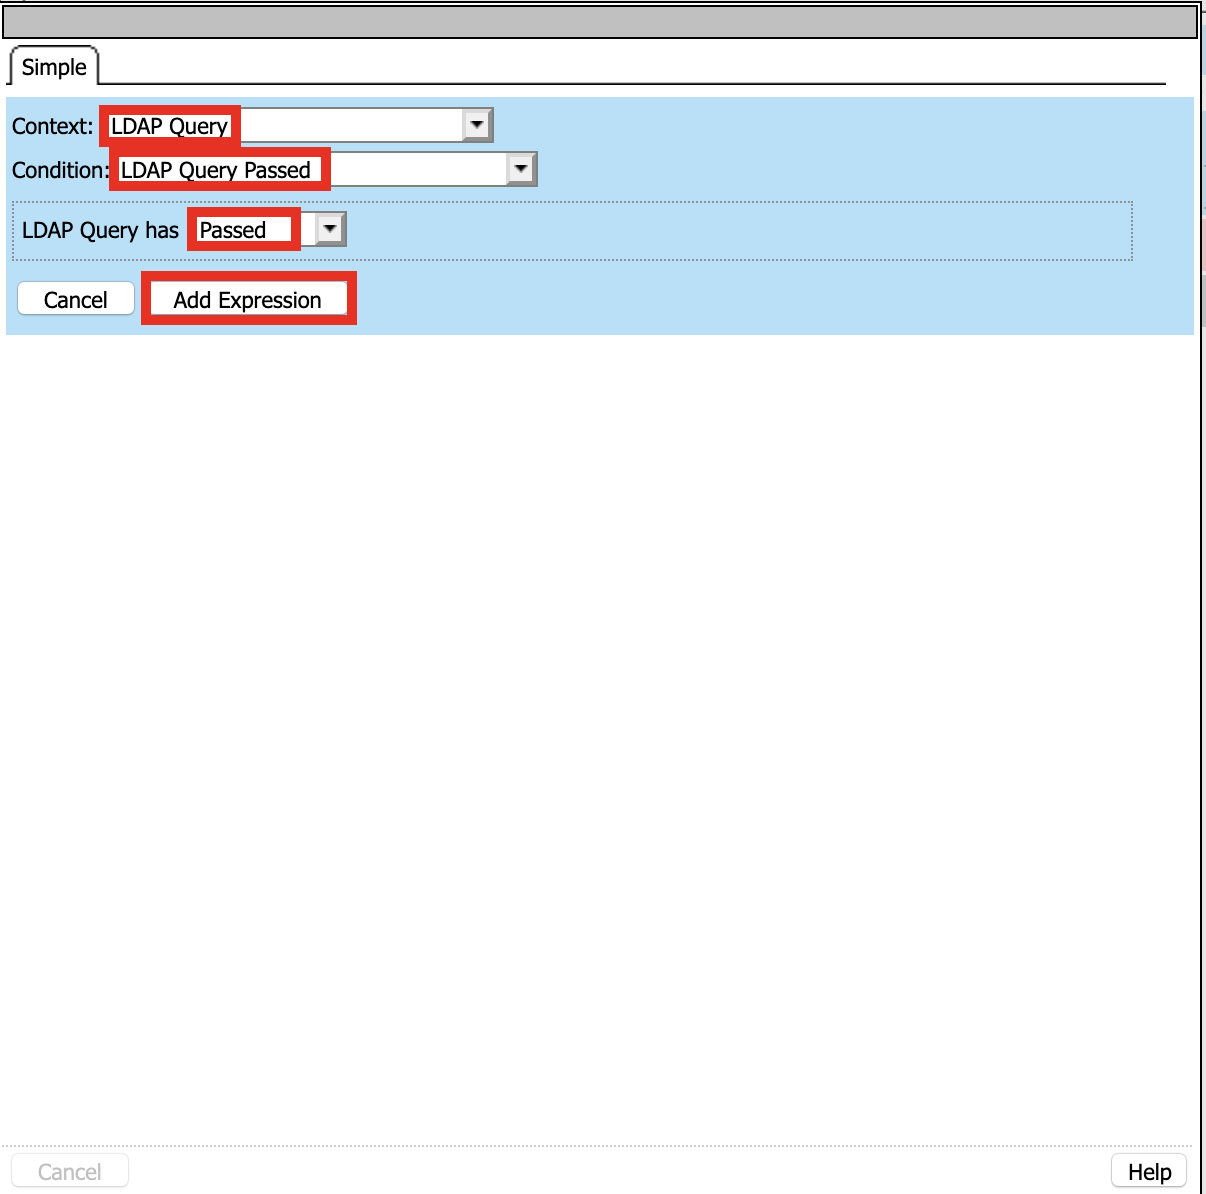
Click Finished and Save

Click + (plus symbol) on the fallback branch
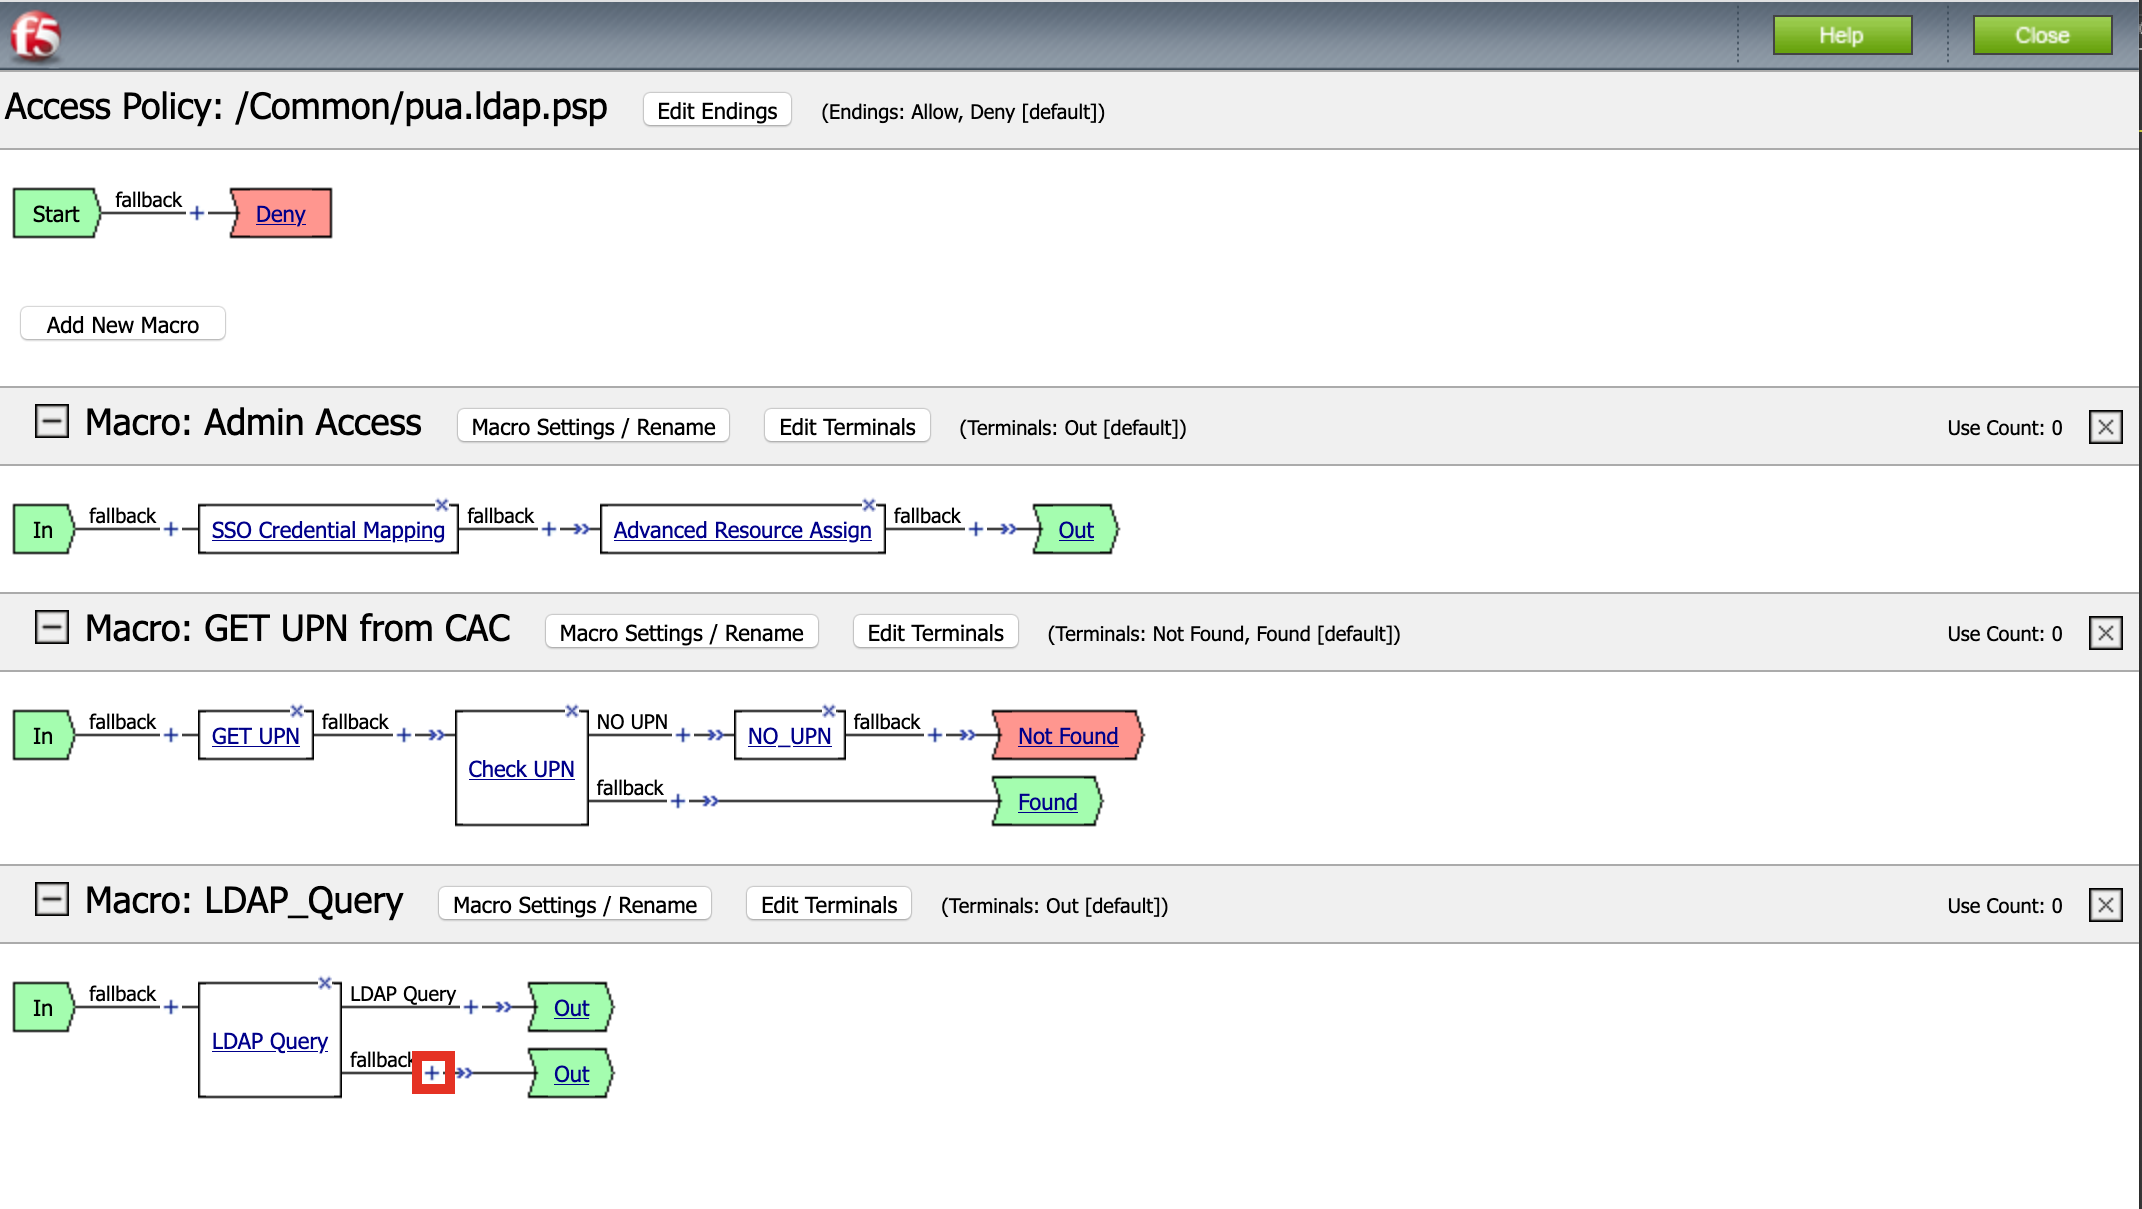
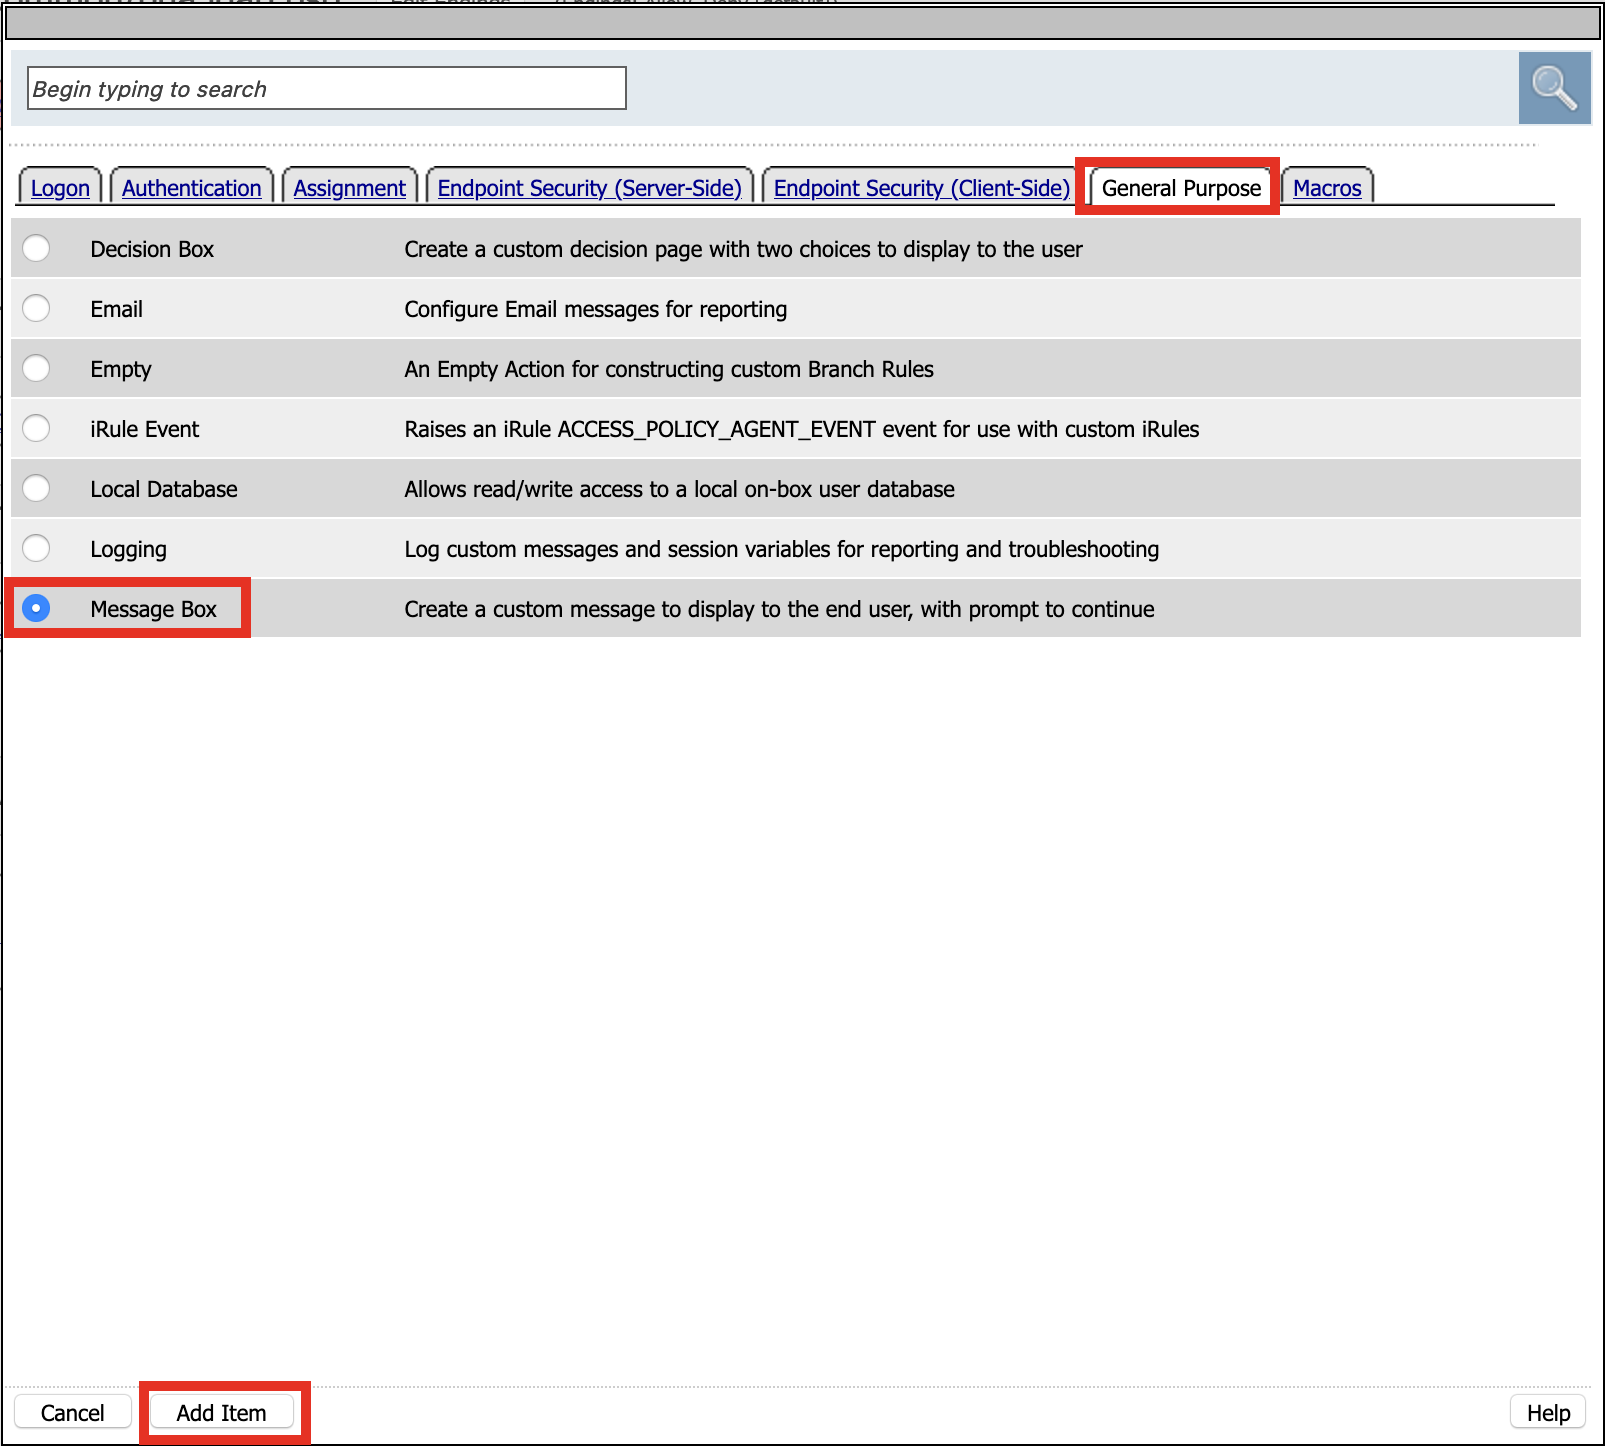
Click General Purpose
Click Message Box
Click Add Item
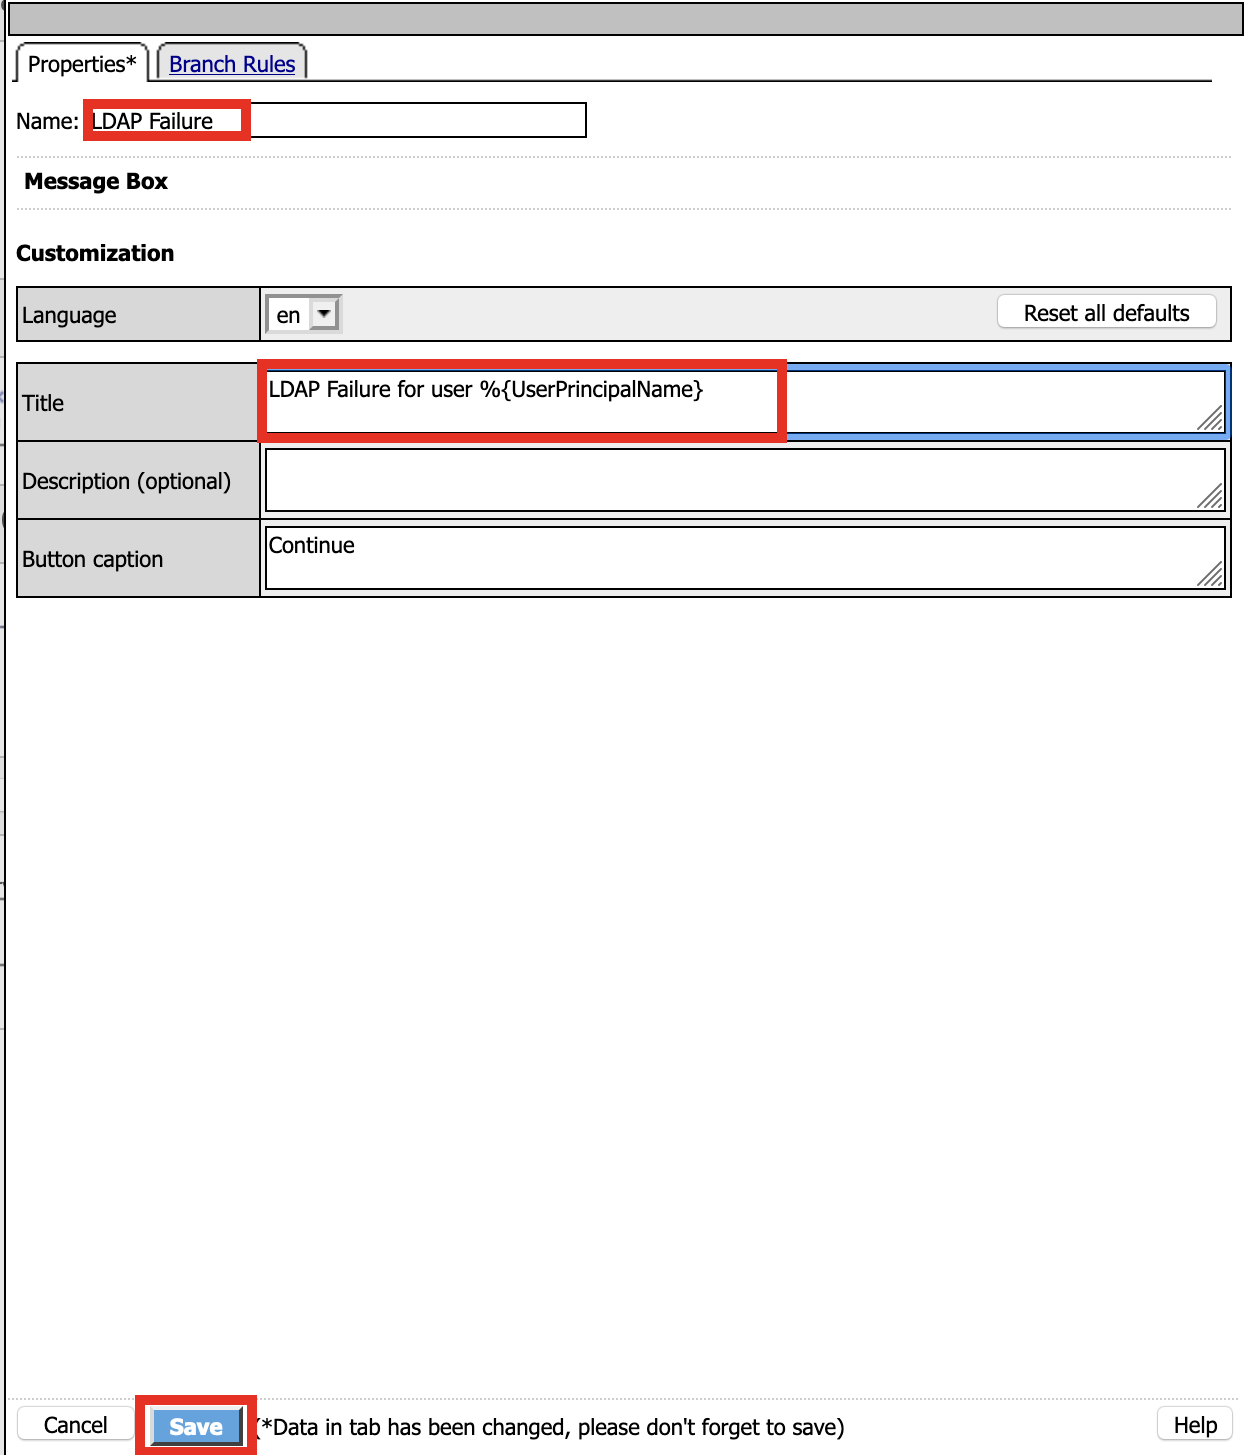
Name: LDAP Failure
Tile: LDAP Failure for user %{UserPrincipalName}
Click: Save
Click: Edit Terminals
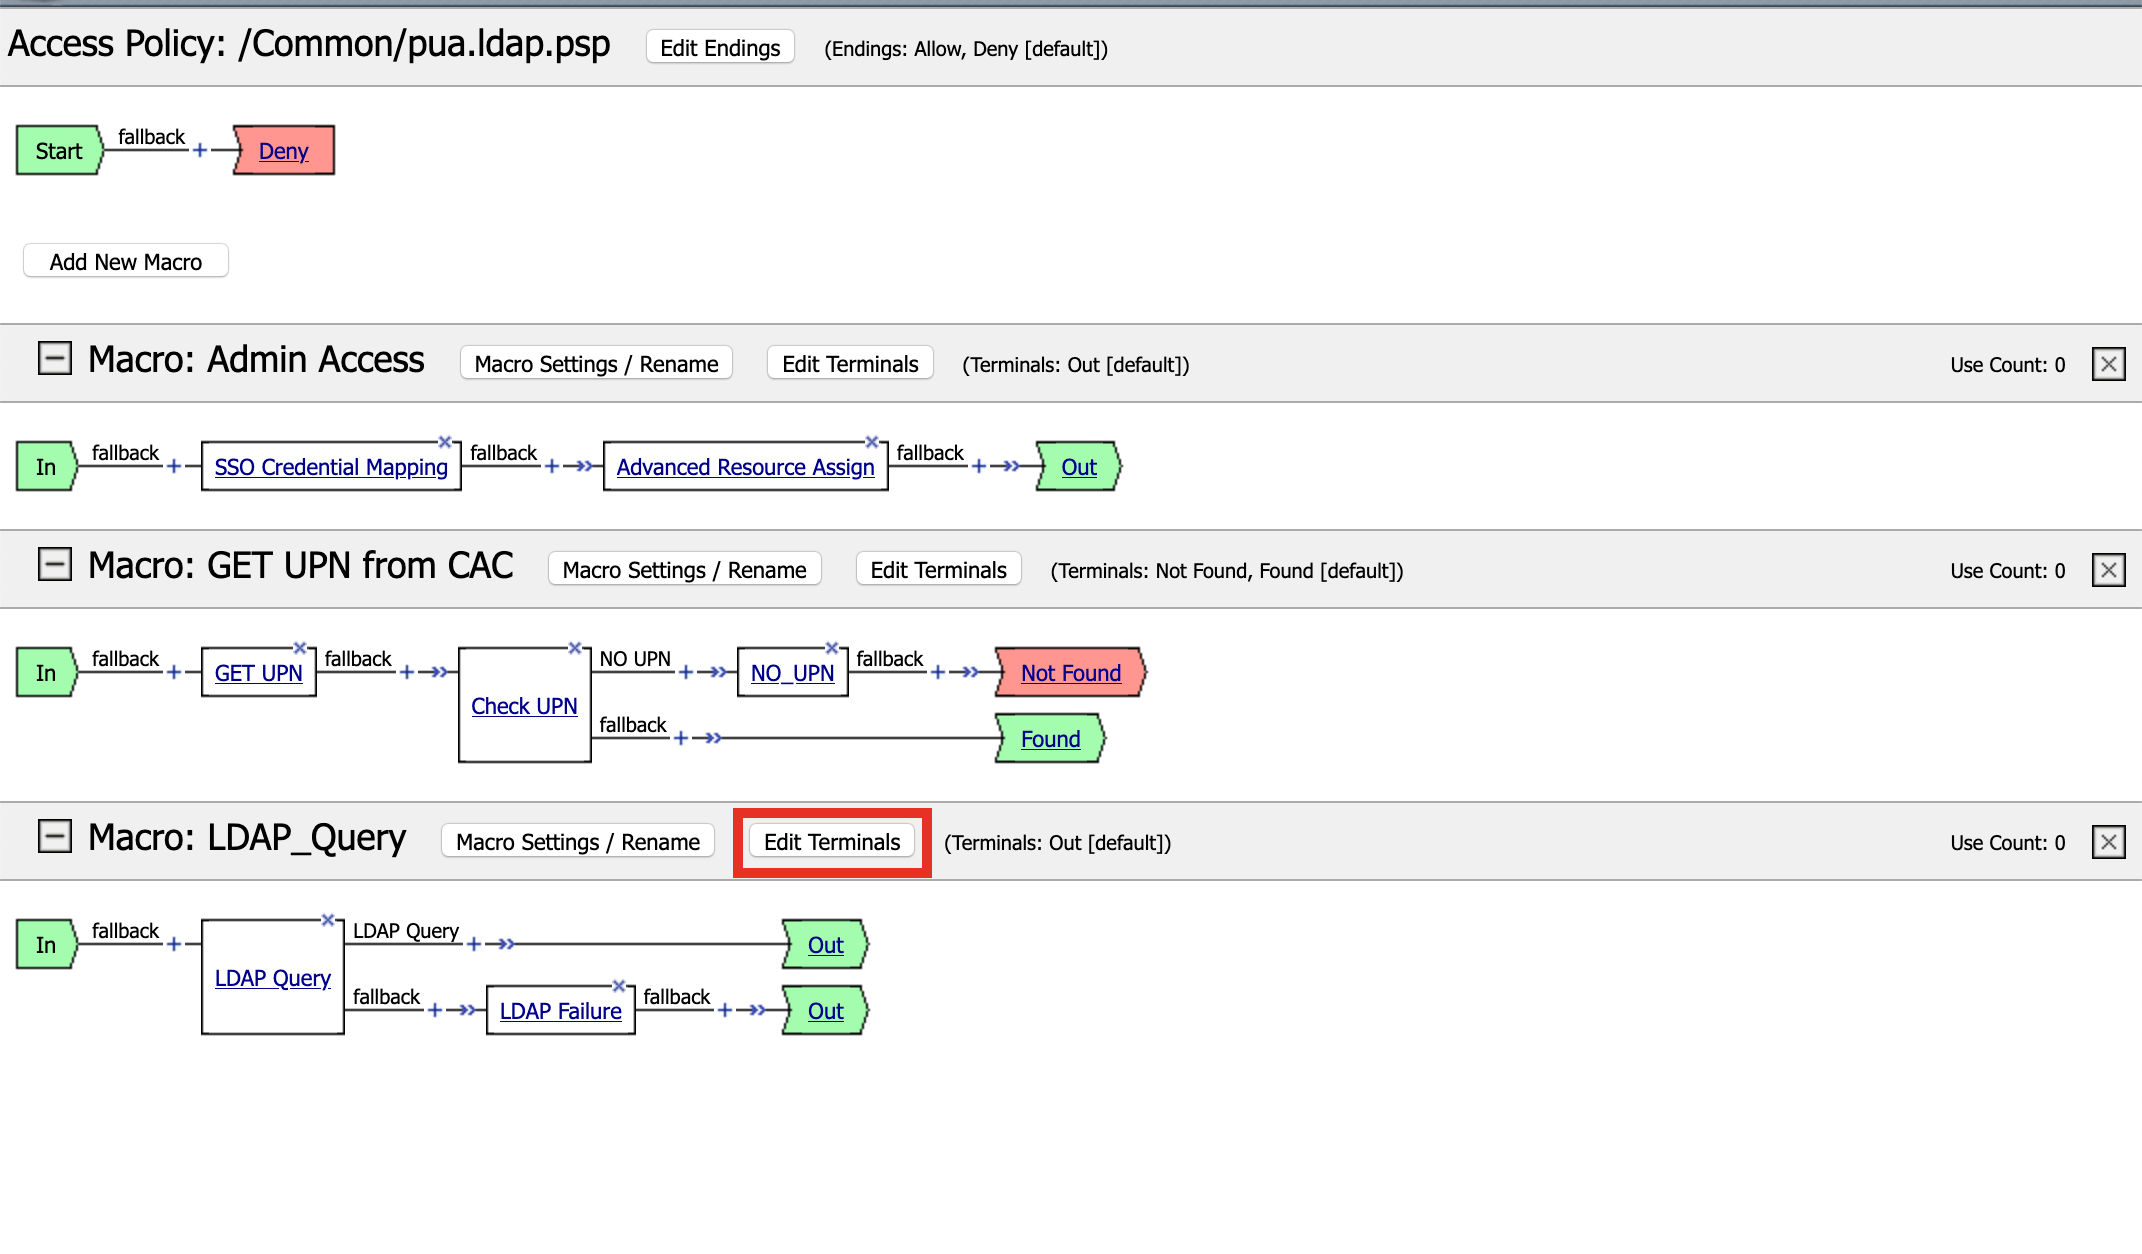
Name: Success
Click Add Terminal
Name: Failure
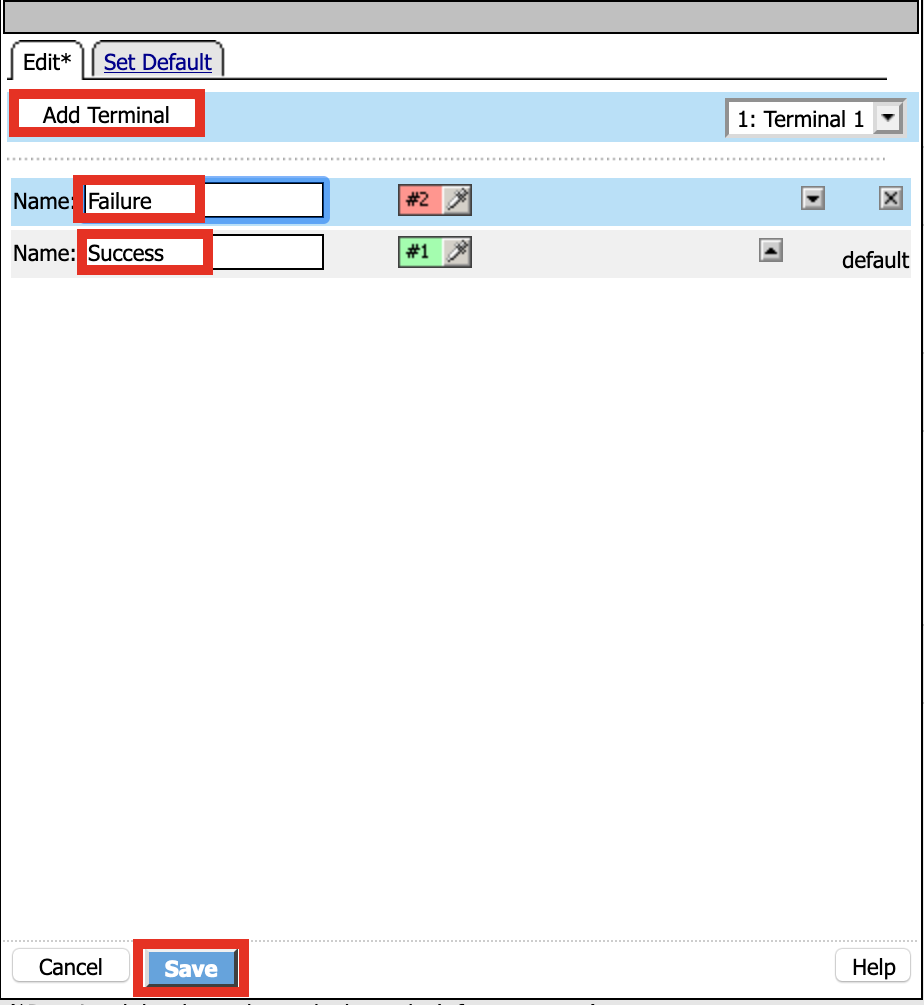
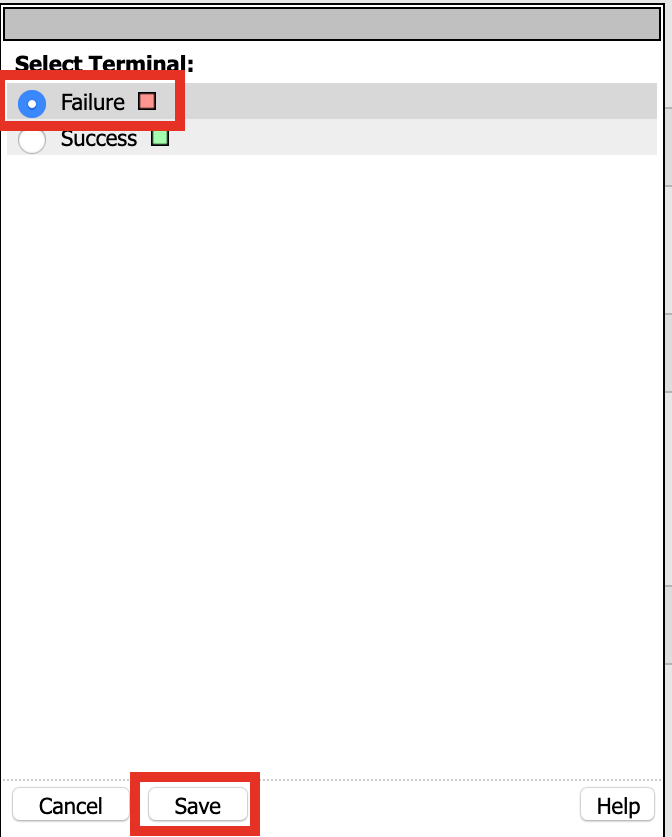
Click the Success Terminal beside LDAP Failure
Click Failure
Click Save
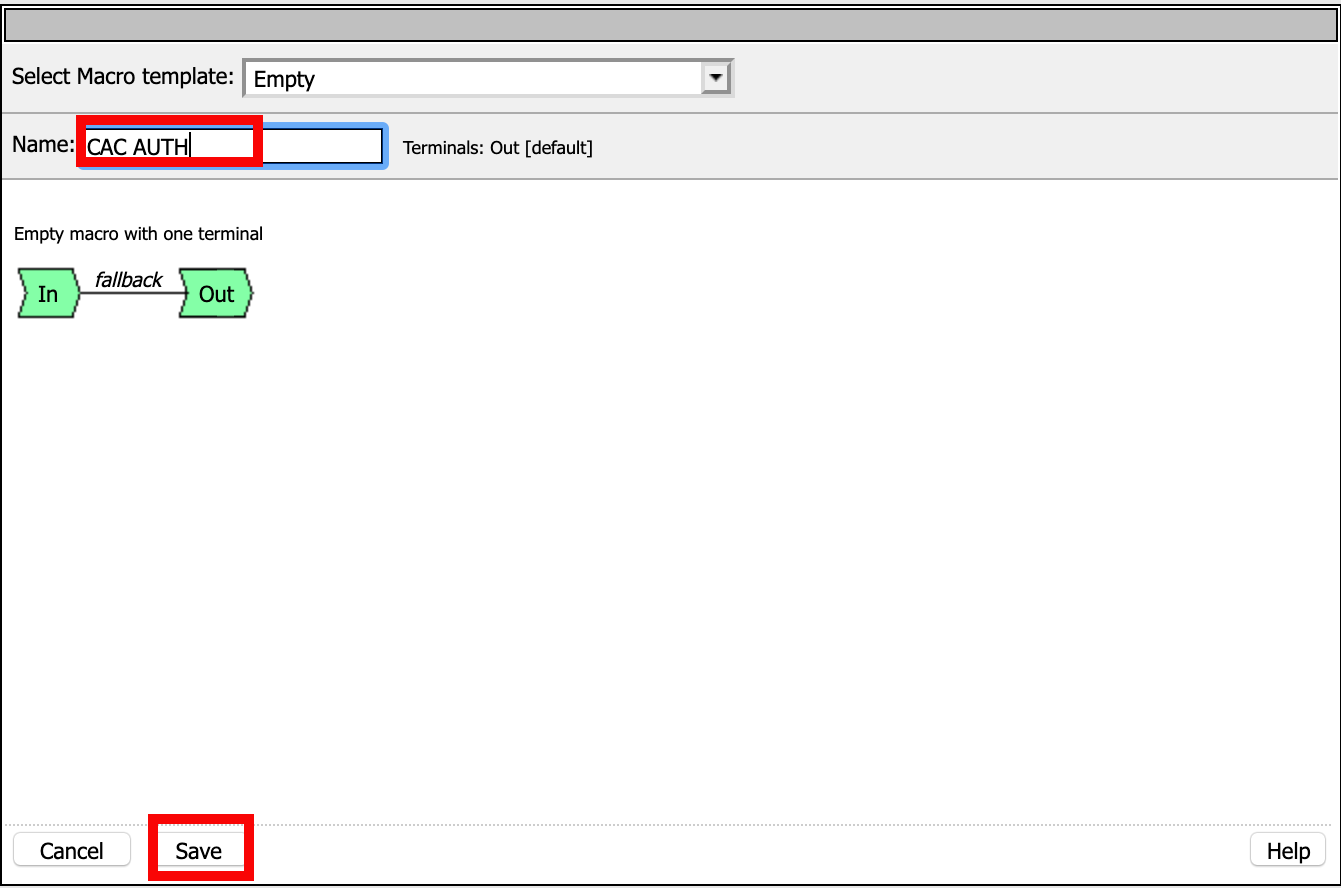
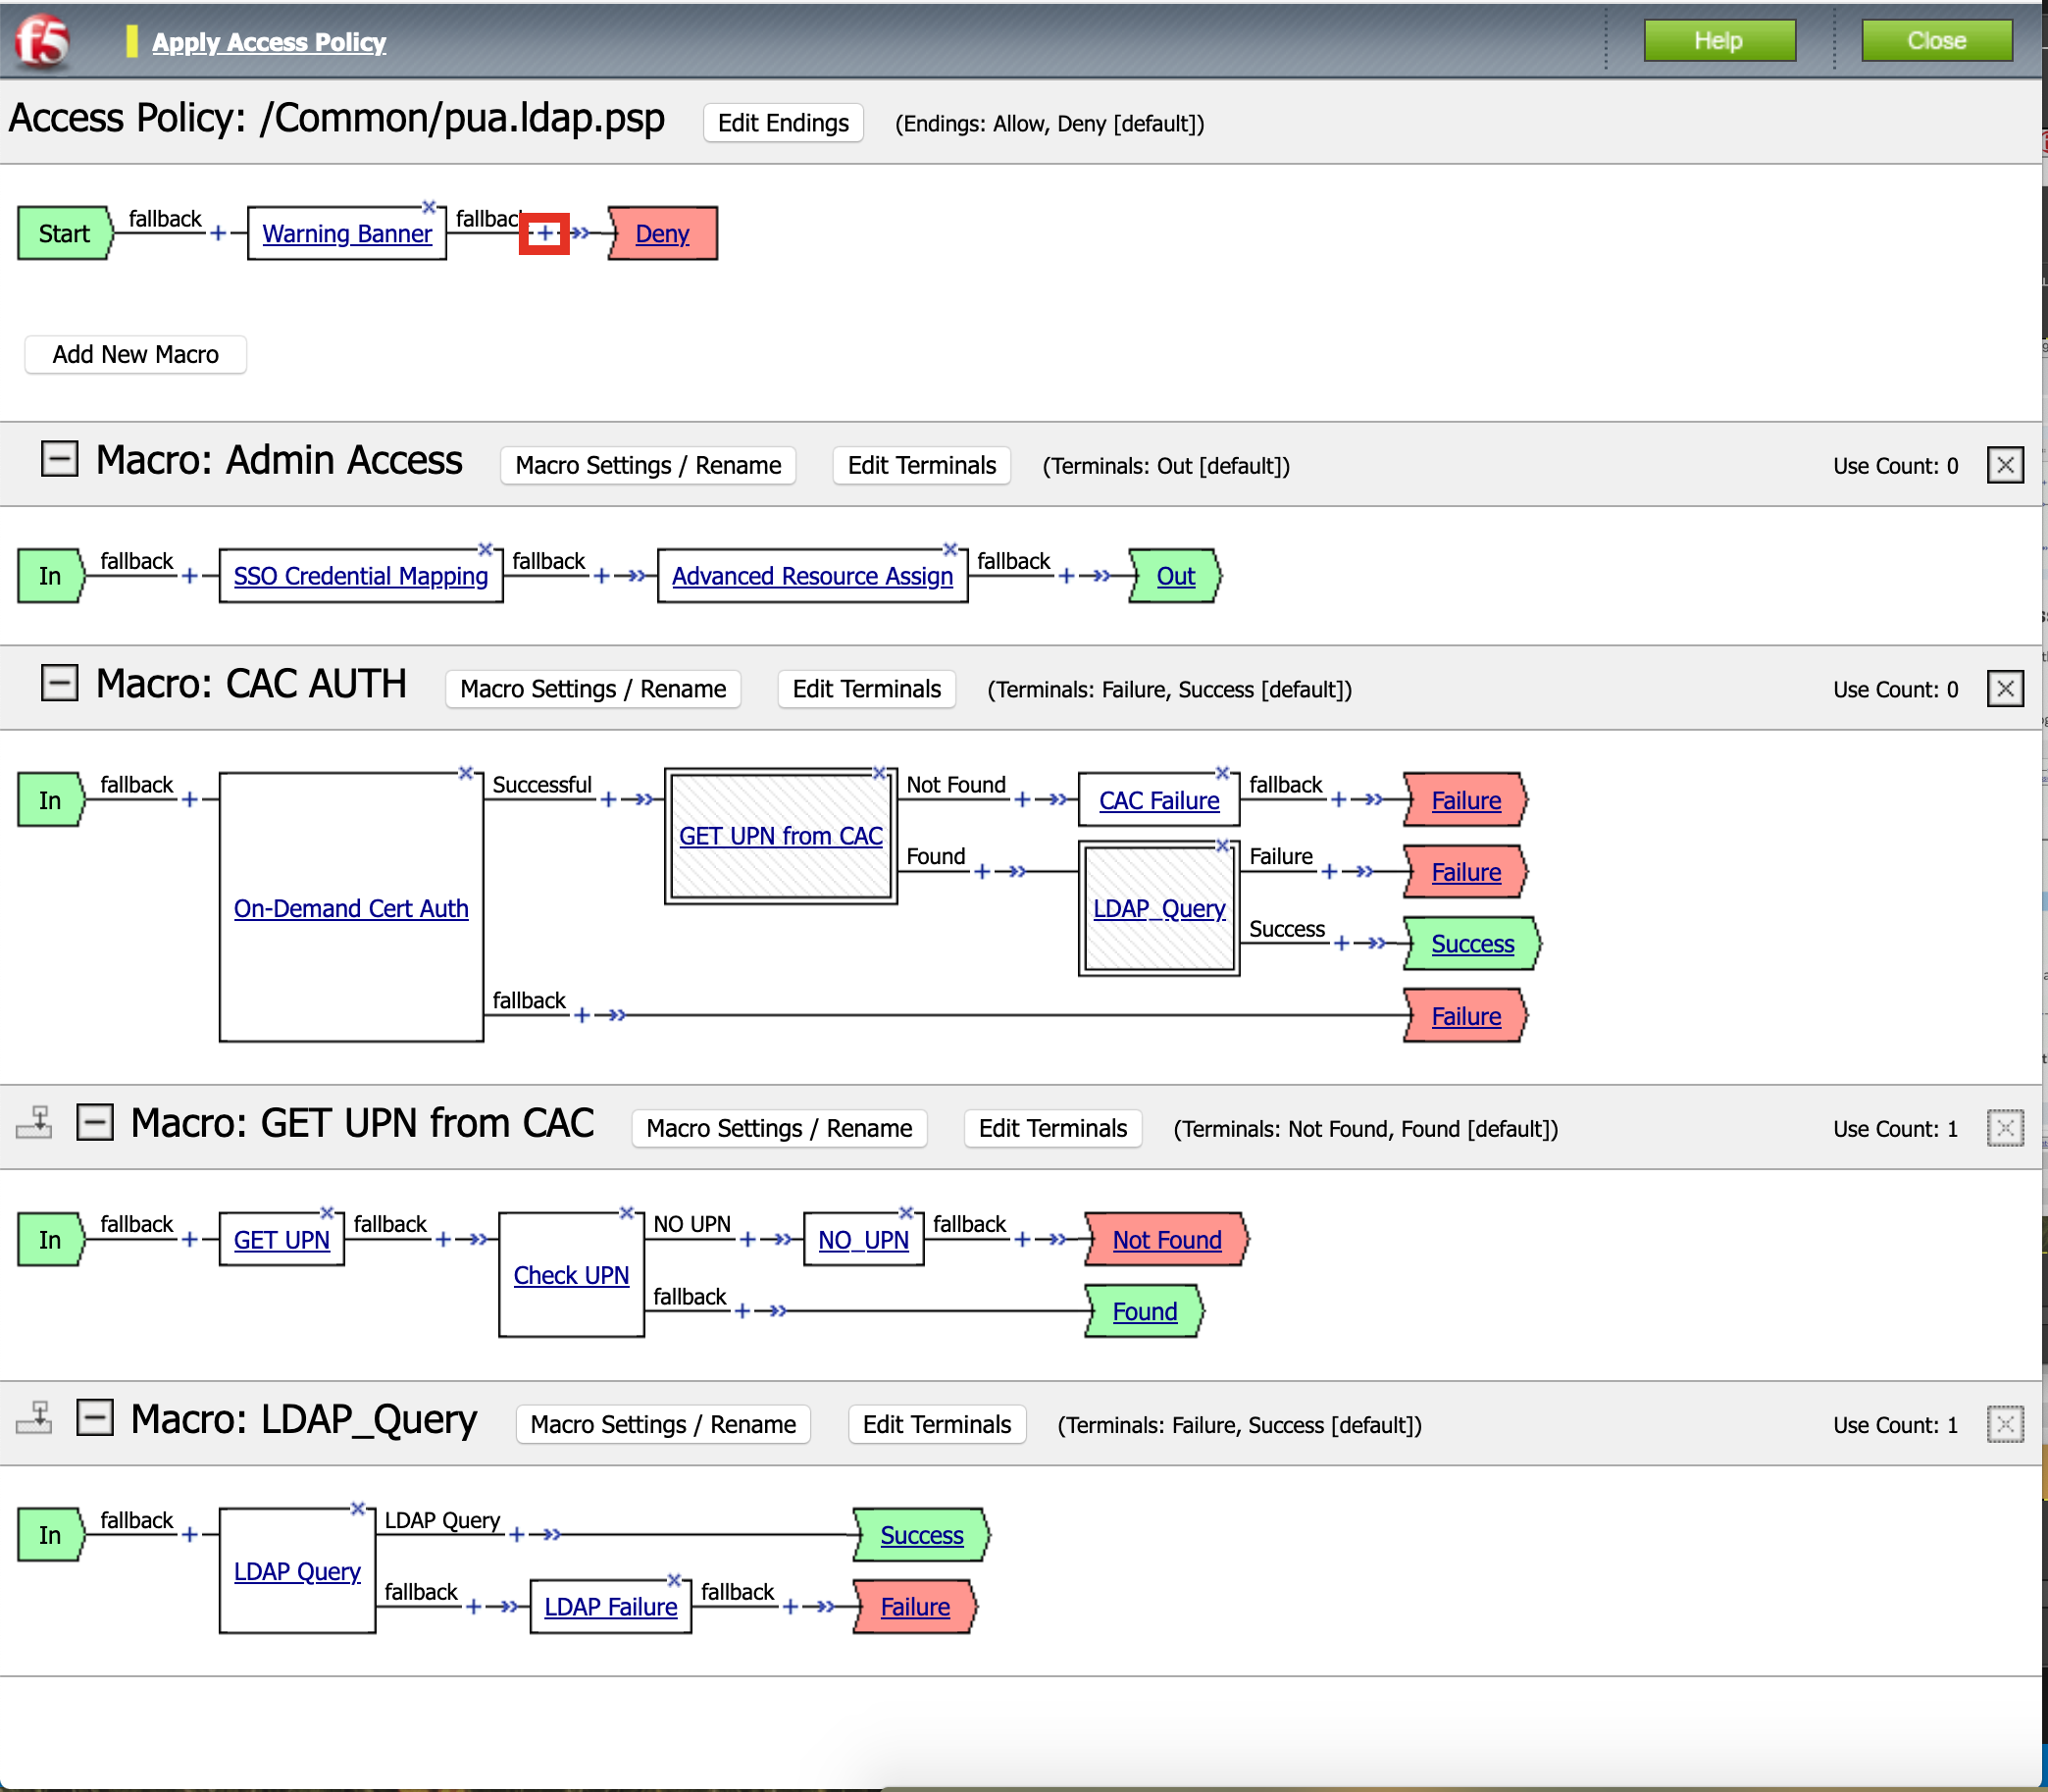
Task 12 - Create the CAC AUTH Macro
Click Add New Macro

Name: CAC AUTH
Click Save
Expand the CAC AUTH Macro
CLick + (plus symbol) between the IN and Out Terminal

Click Authentication
Click On-Demand Cert-Auth
Click Add Item

Ensure Auth Mode is set to Request
Click Save

Click + between On-Demand Cert-Auth and Out on the successful branch

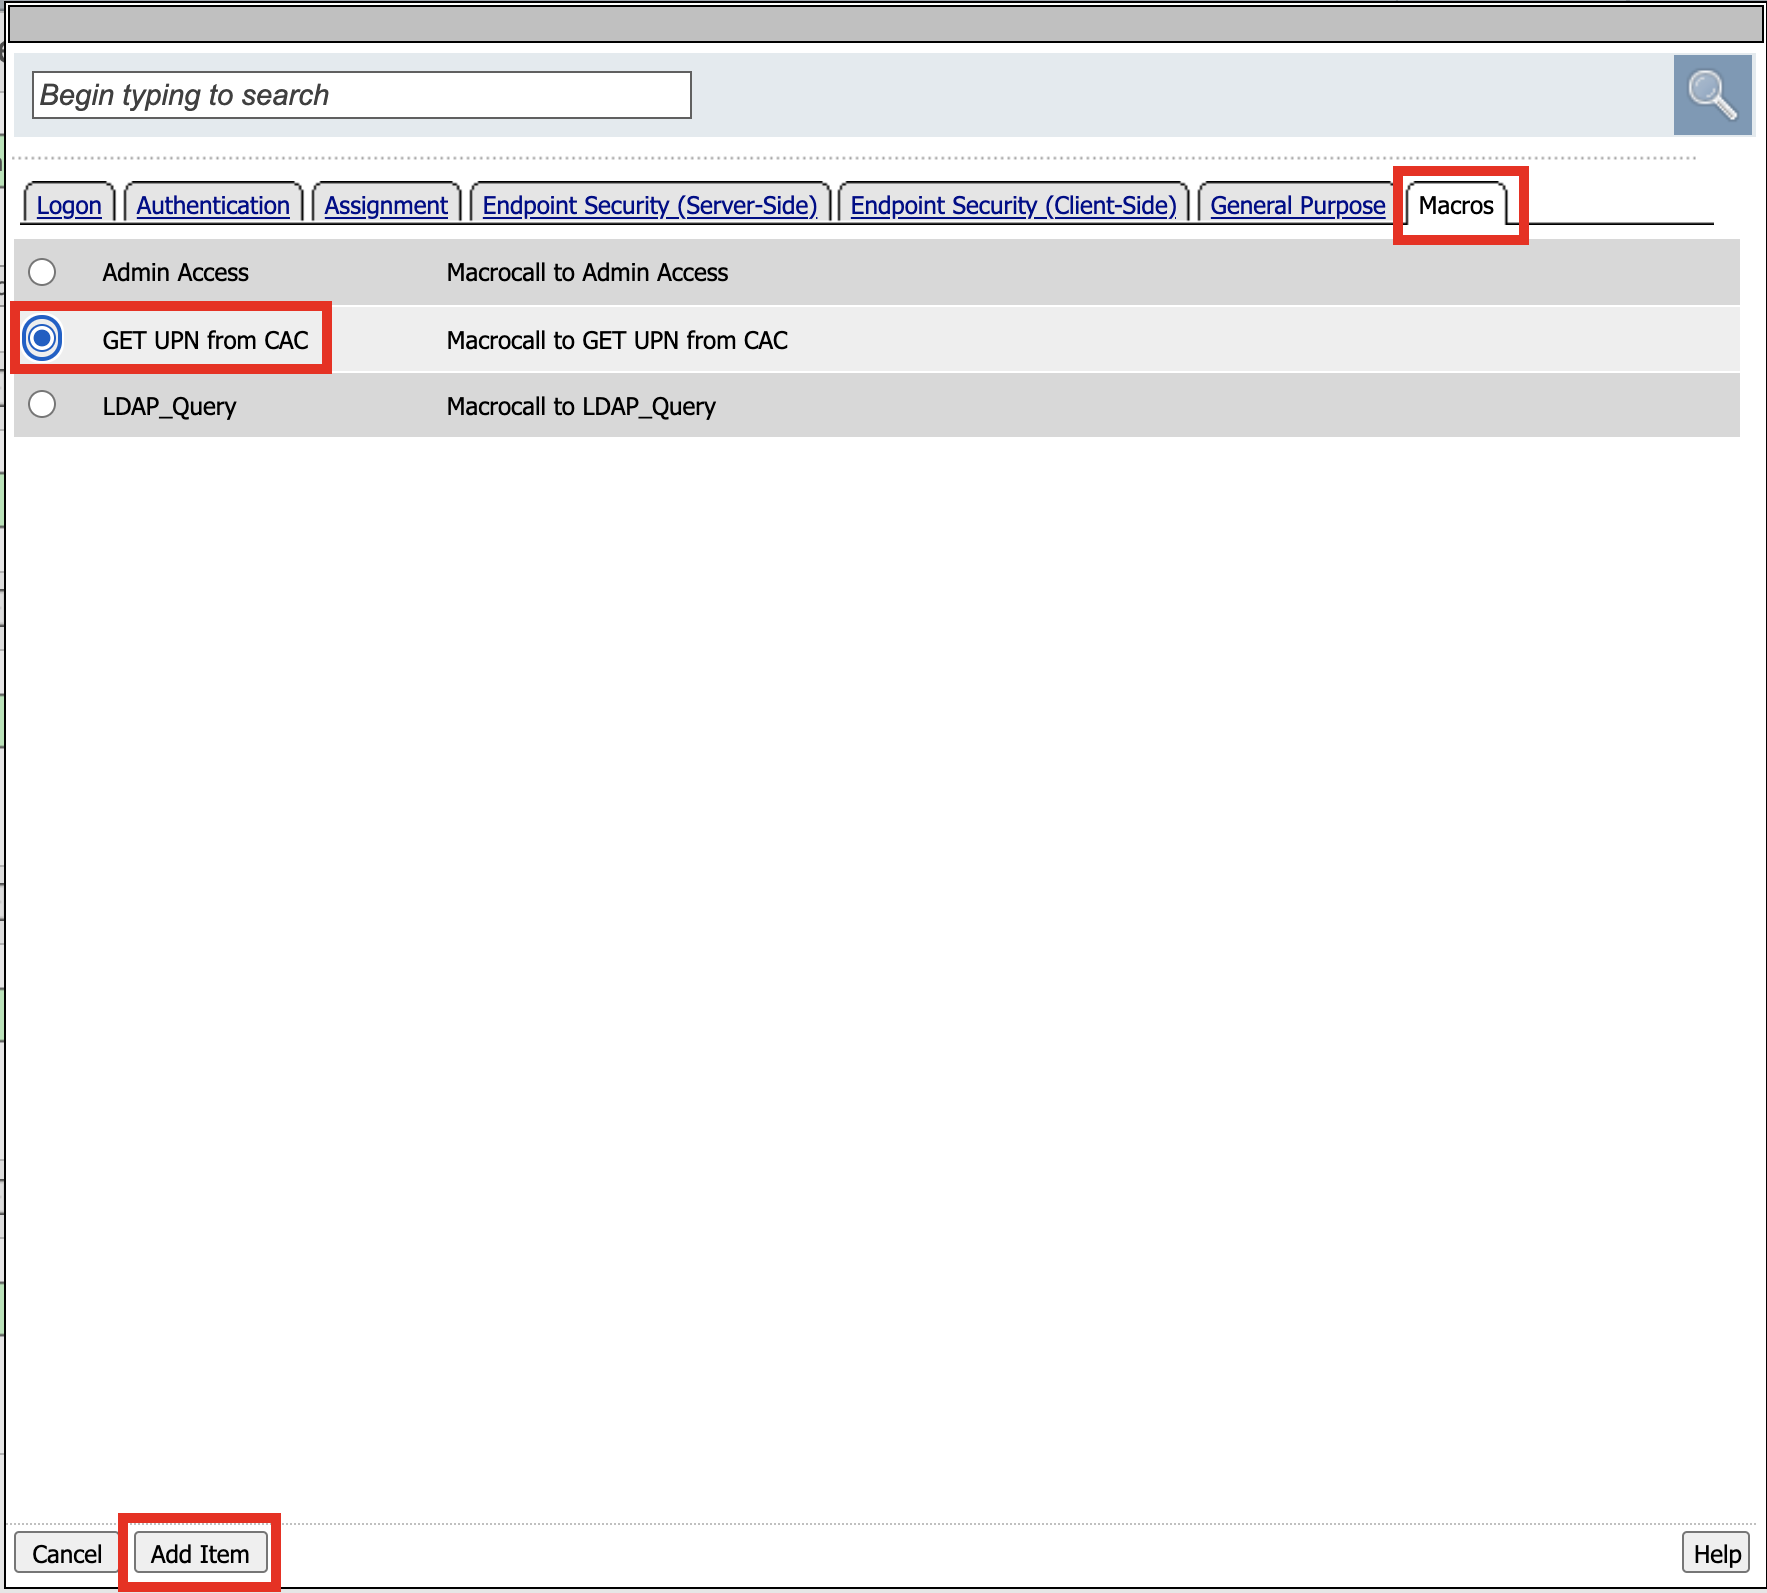
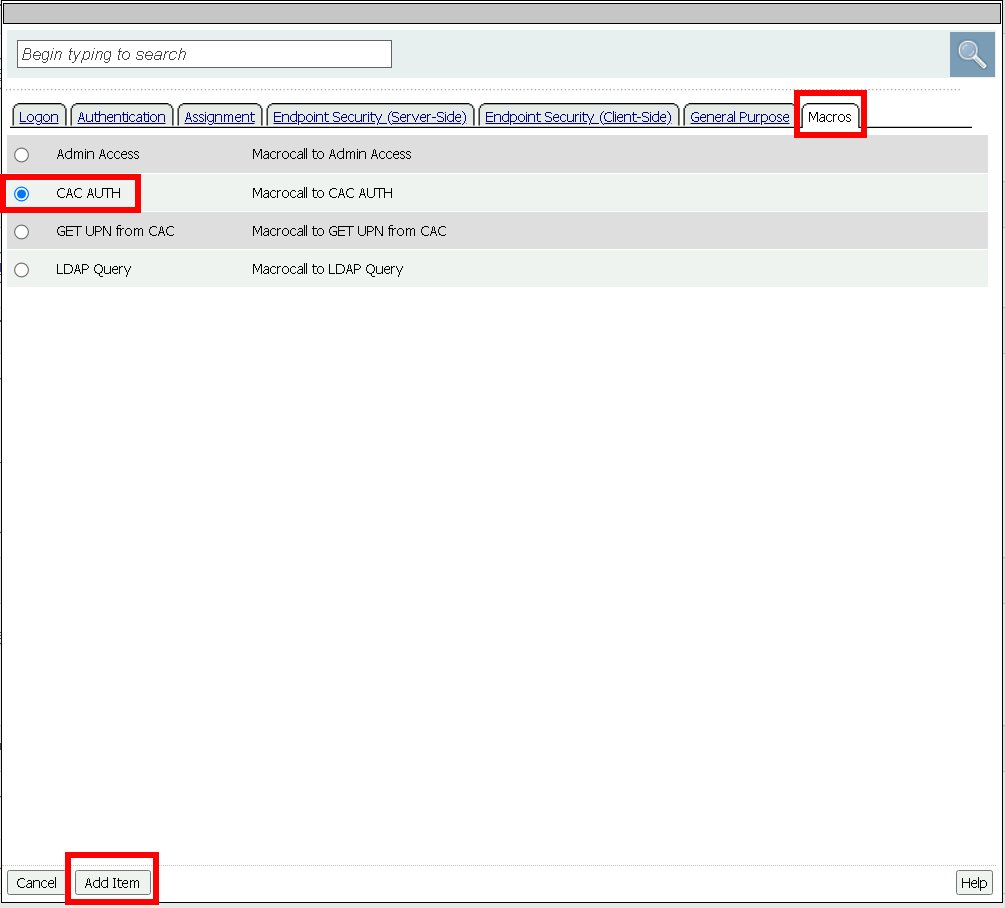
Click Macro
Click GET UPN from CAC
Click Add Item
Click + on the Not Found branch between GET UPN from CAC and Out
Click General Purpose
Click Message Box
Click Add Item

Name: CAC Failure
Title: CAC Failure
Click Save

Click +* (plus symbol) on the Found Branch between GET UPN from CAC and Out

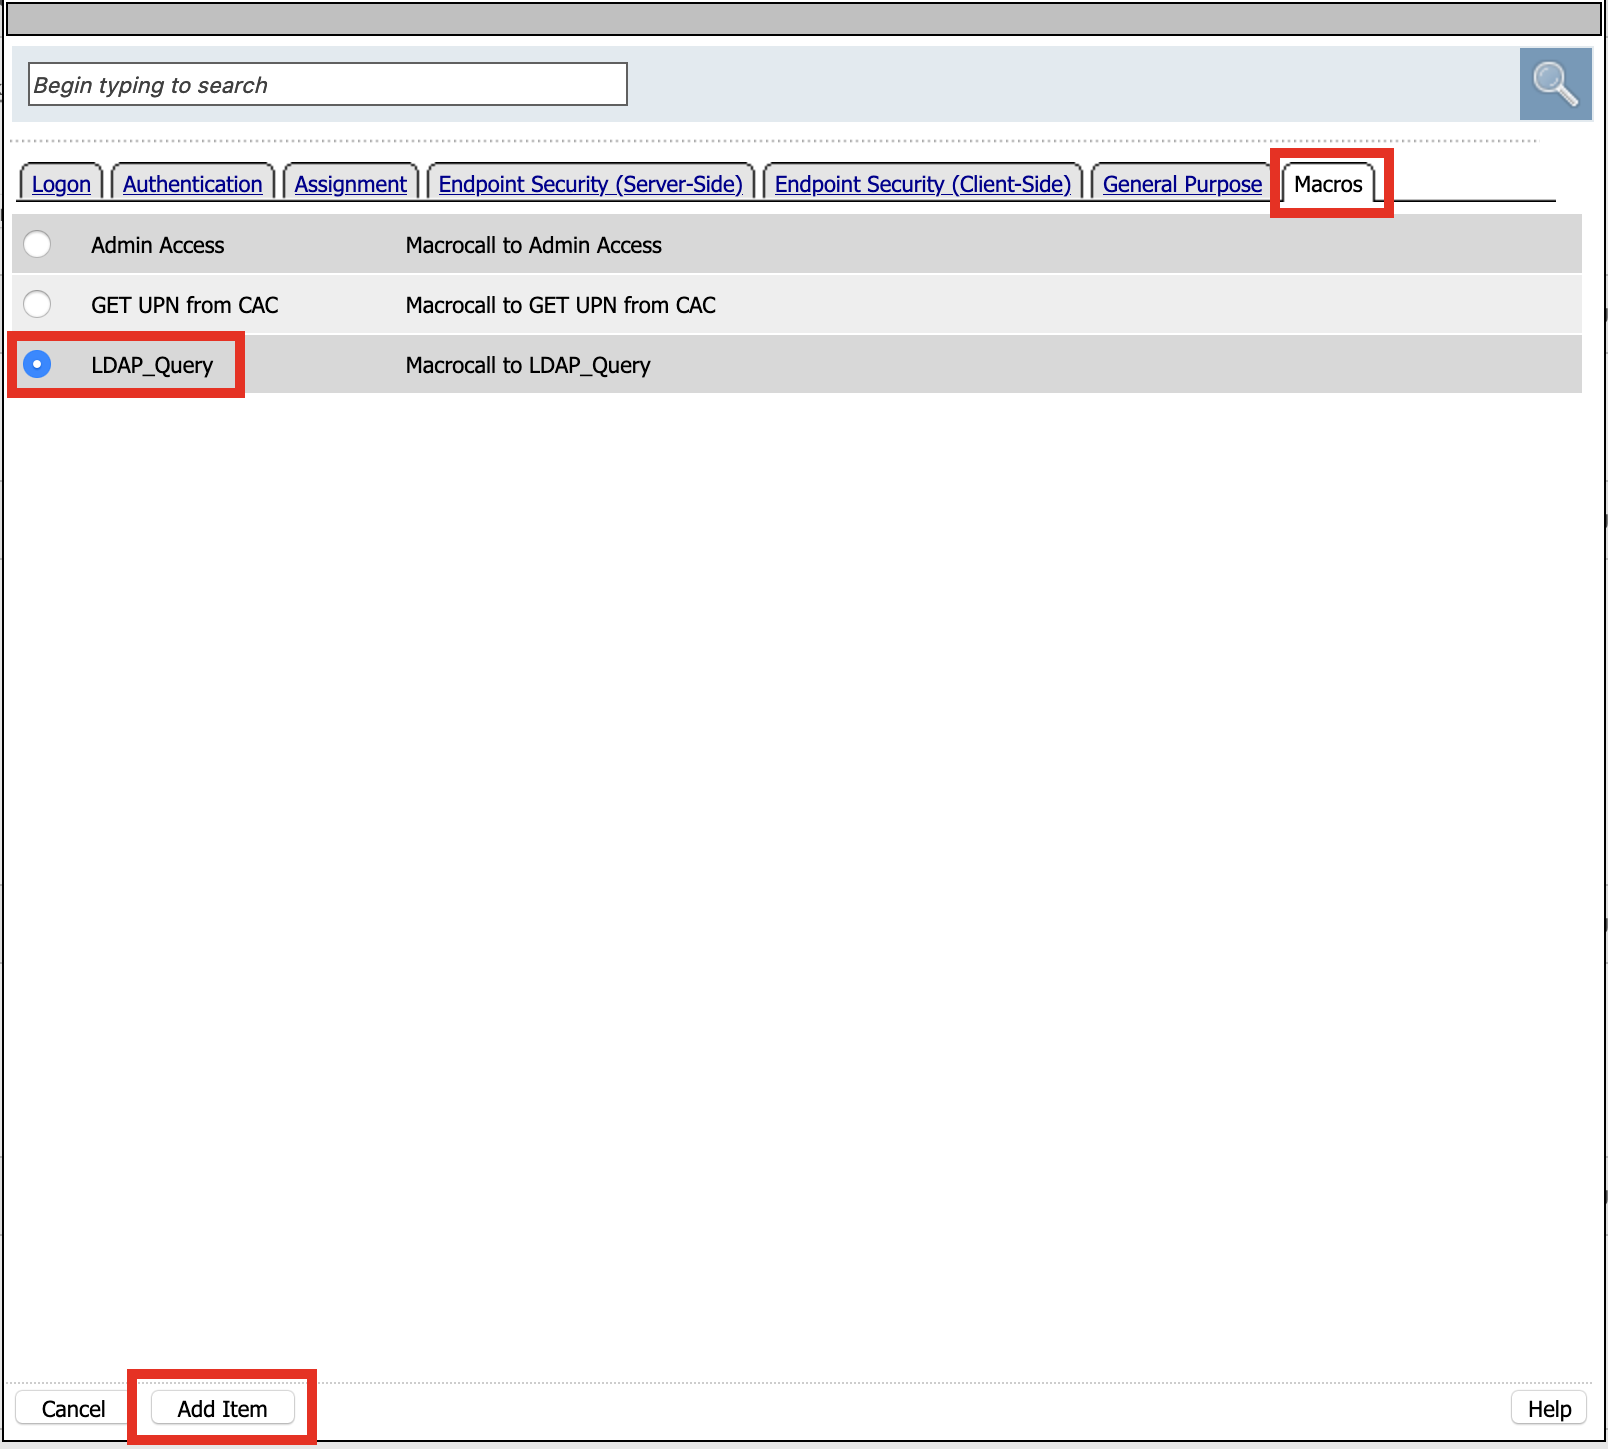
Click Macro
Click LDAP_Query
Click Add Item
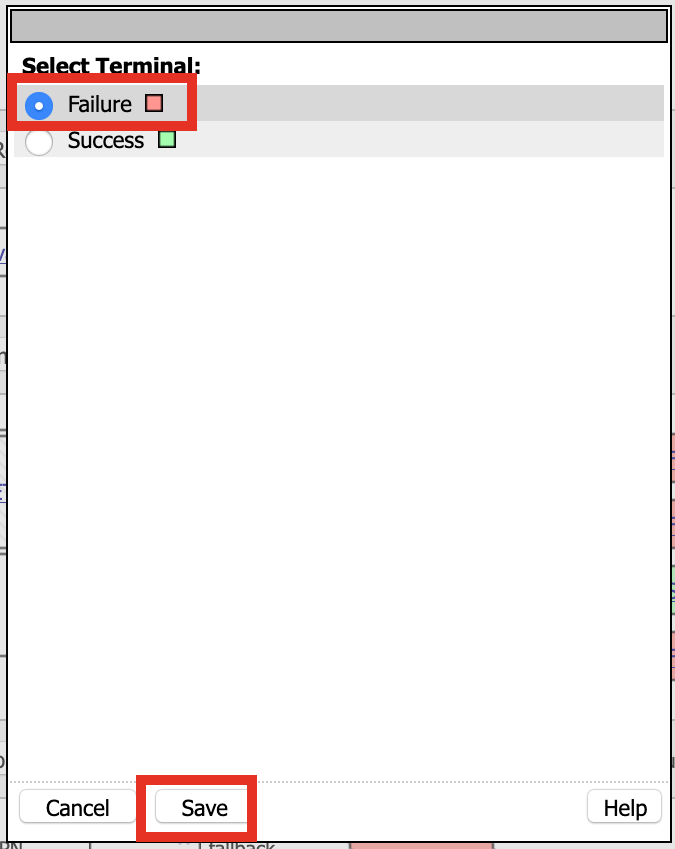
Click Edit Terminal

Name: Success
Click Add Terminal

Name: Failure
Click the down arrow beside the Failure box to change the order.

Click Save

Change the Success 1st, 2nd, and 4th terminal to Failure, and click Save


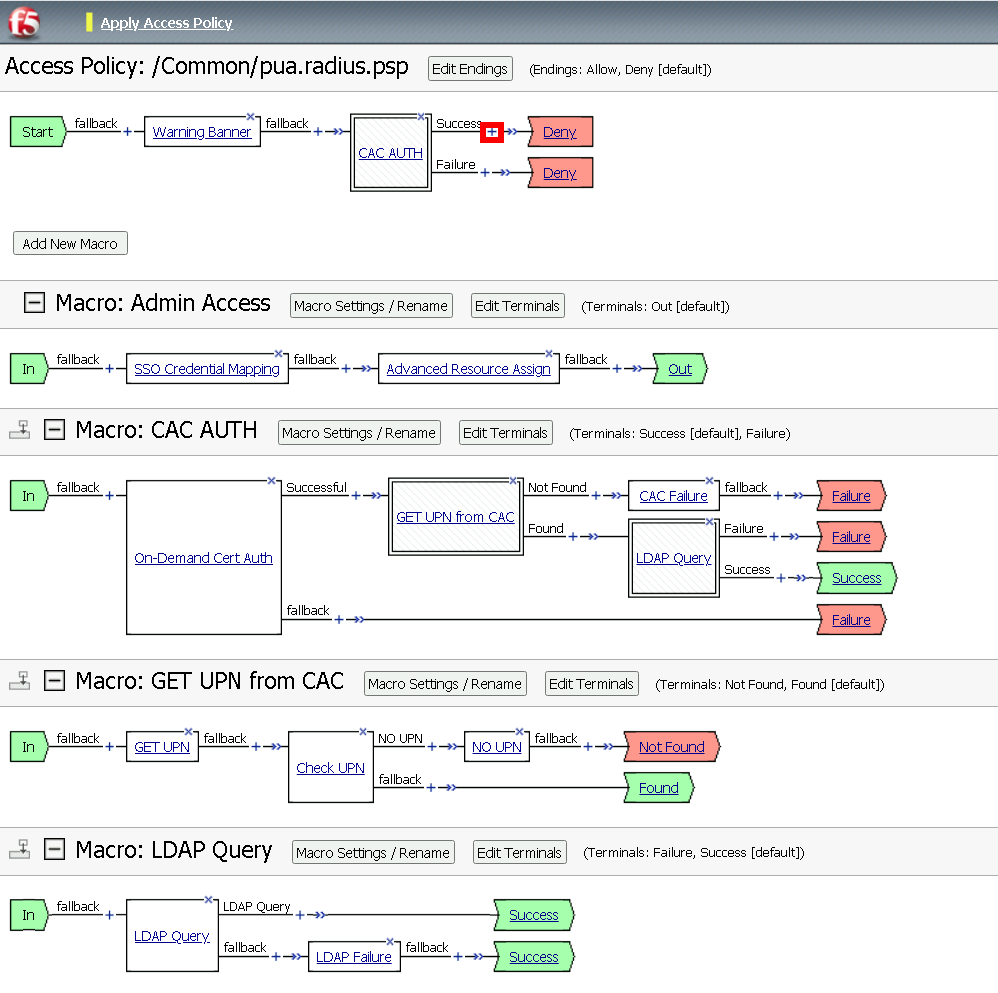
Task 13 - Update the Initial Access Policy
Click the + (plus symbol) between the Start and Deny Terminals

Click General Purpose
Click Message Box
Click Add Item

Name: Warning Banner
Title: Official Lab Use Only!!
Click Save

Click + (plus symbol) between the Warning Banner and Deny Terminals
Click Macro
Click CAC Auth
Click Add Item
Click + (plus symbol) between CAC Auth and Deny Terminals on the successful branch
Click Assignment
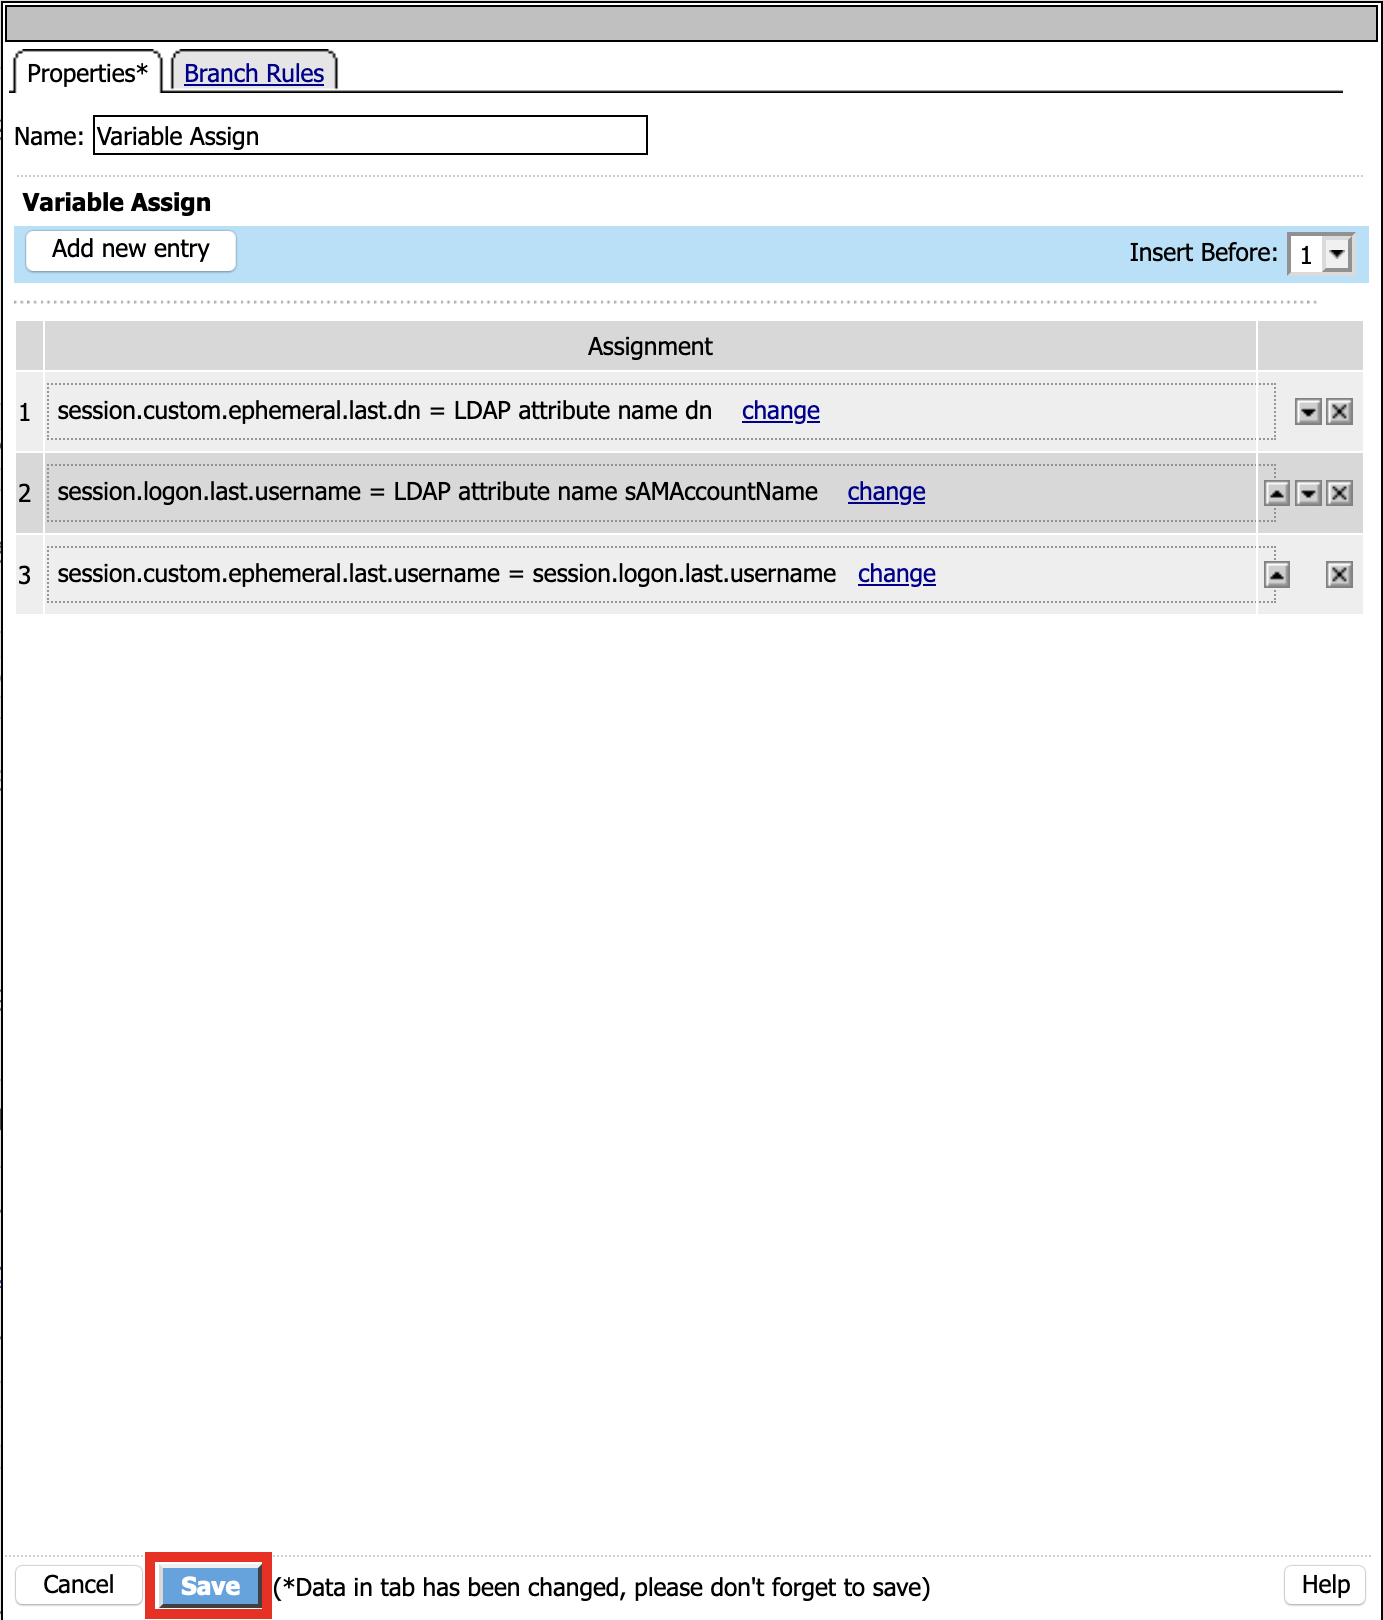
Click Variable Assign
Click Add Item

Click Add new entry
Click Change
Set Custom Variable = session.custom.ephemeral.last.username
Set Custom Expression = session.logon.last.username
Click Finish

Click Add new entry
Click Change

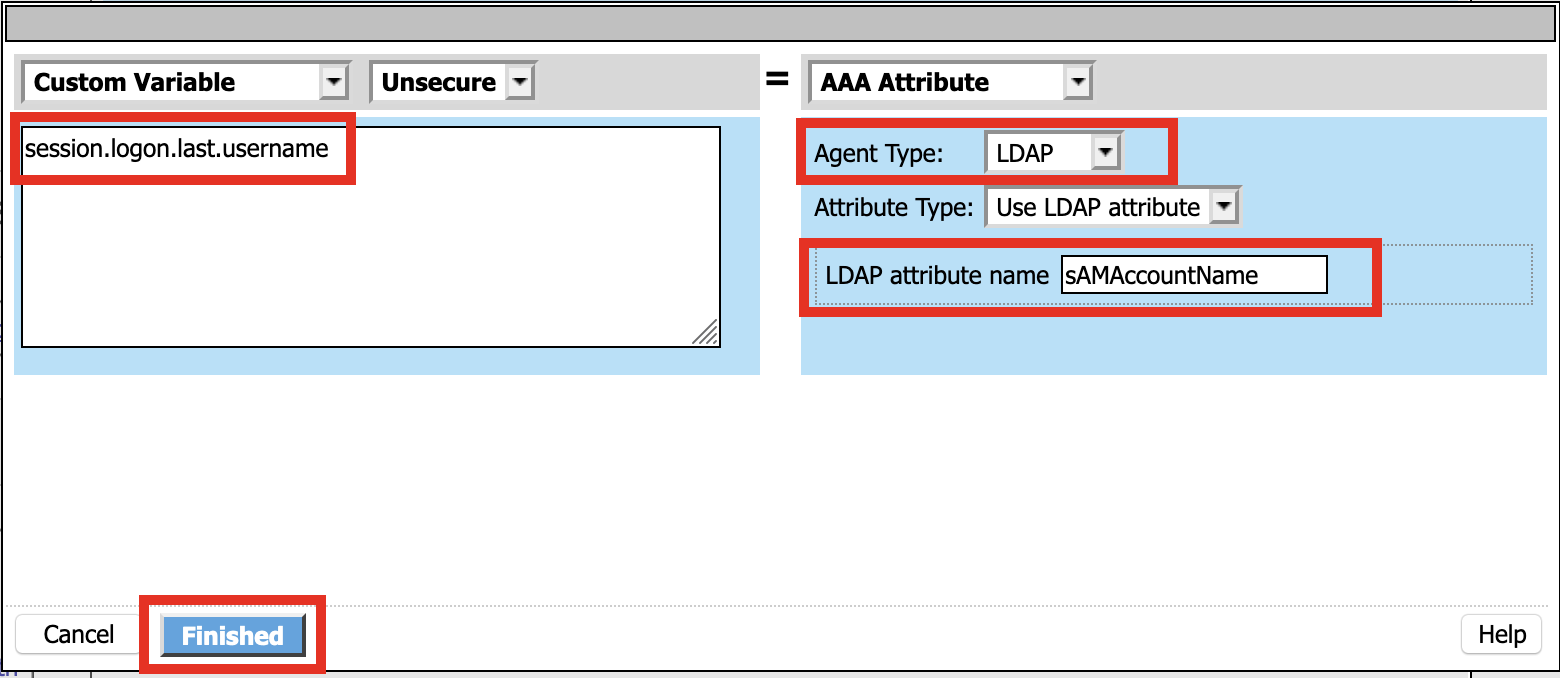
Set Custom Variable = session.logon.last.username
Change Customer Expression to AAA Attribute
Change Agent Type: LDAP_Query to LDAP
Change LDAP attribute name to sAMAccountName
Click Finish
Click Add new entry
Click Change

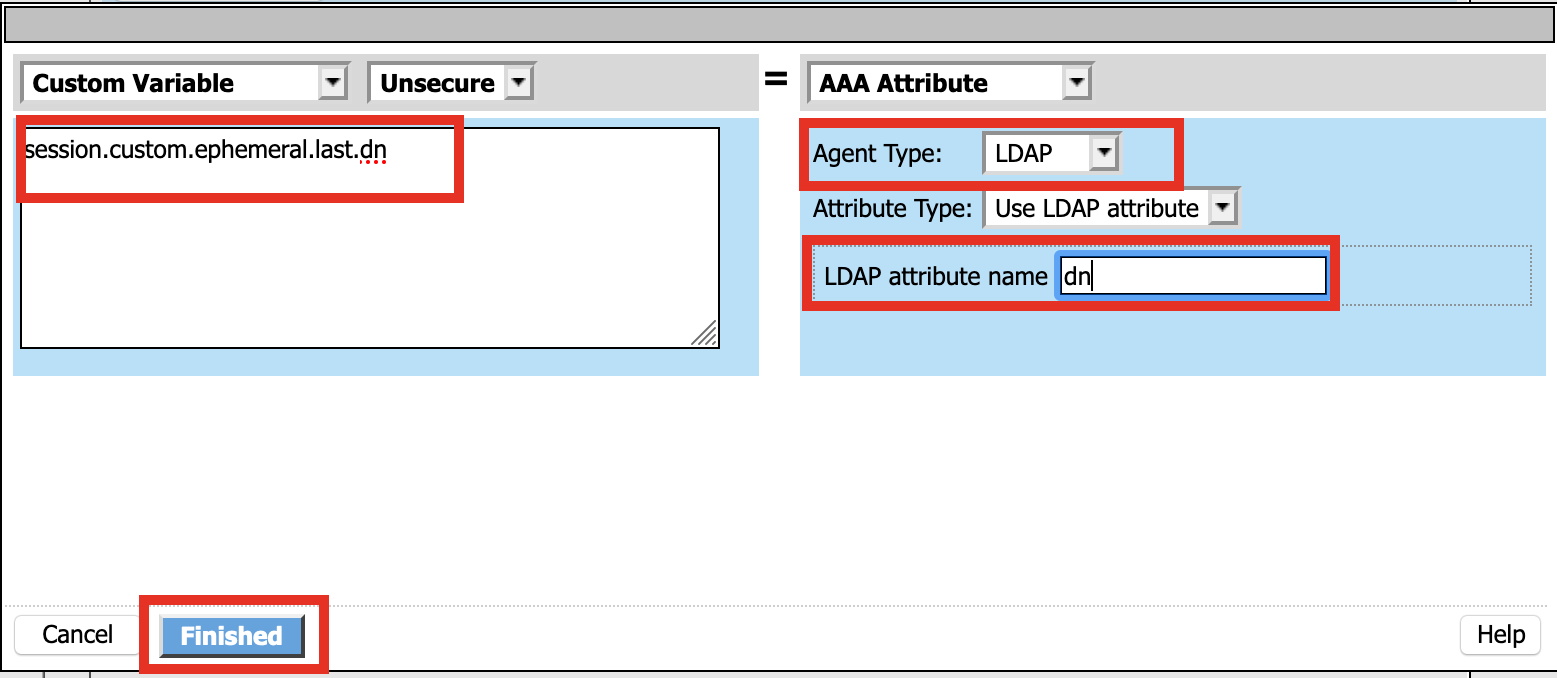
Set Custom Variable = session.custom.ephemeral.last.dn
Change Customer Expression to AAA Attribute
Change Agent Type: LDAP_Query to LDAP
Change LDAP attribute name to dn
Click Finish
Click Save
Click + (plus symbol) between the Variable Assign and deny Terminals
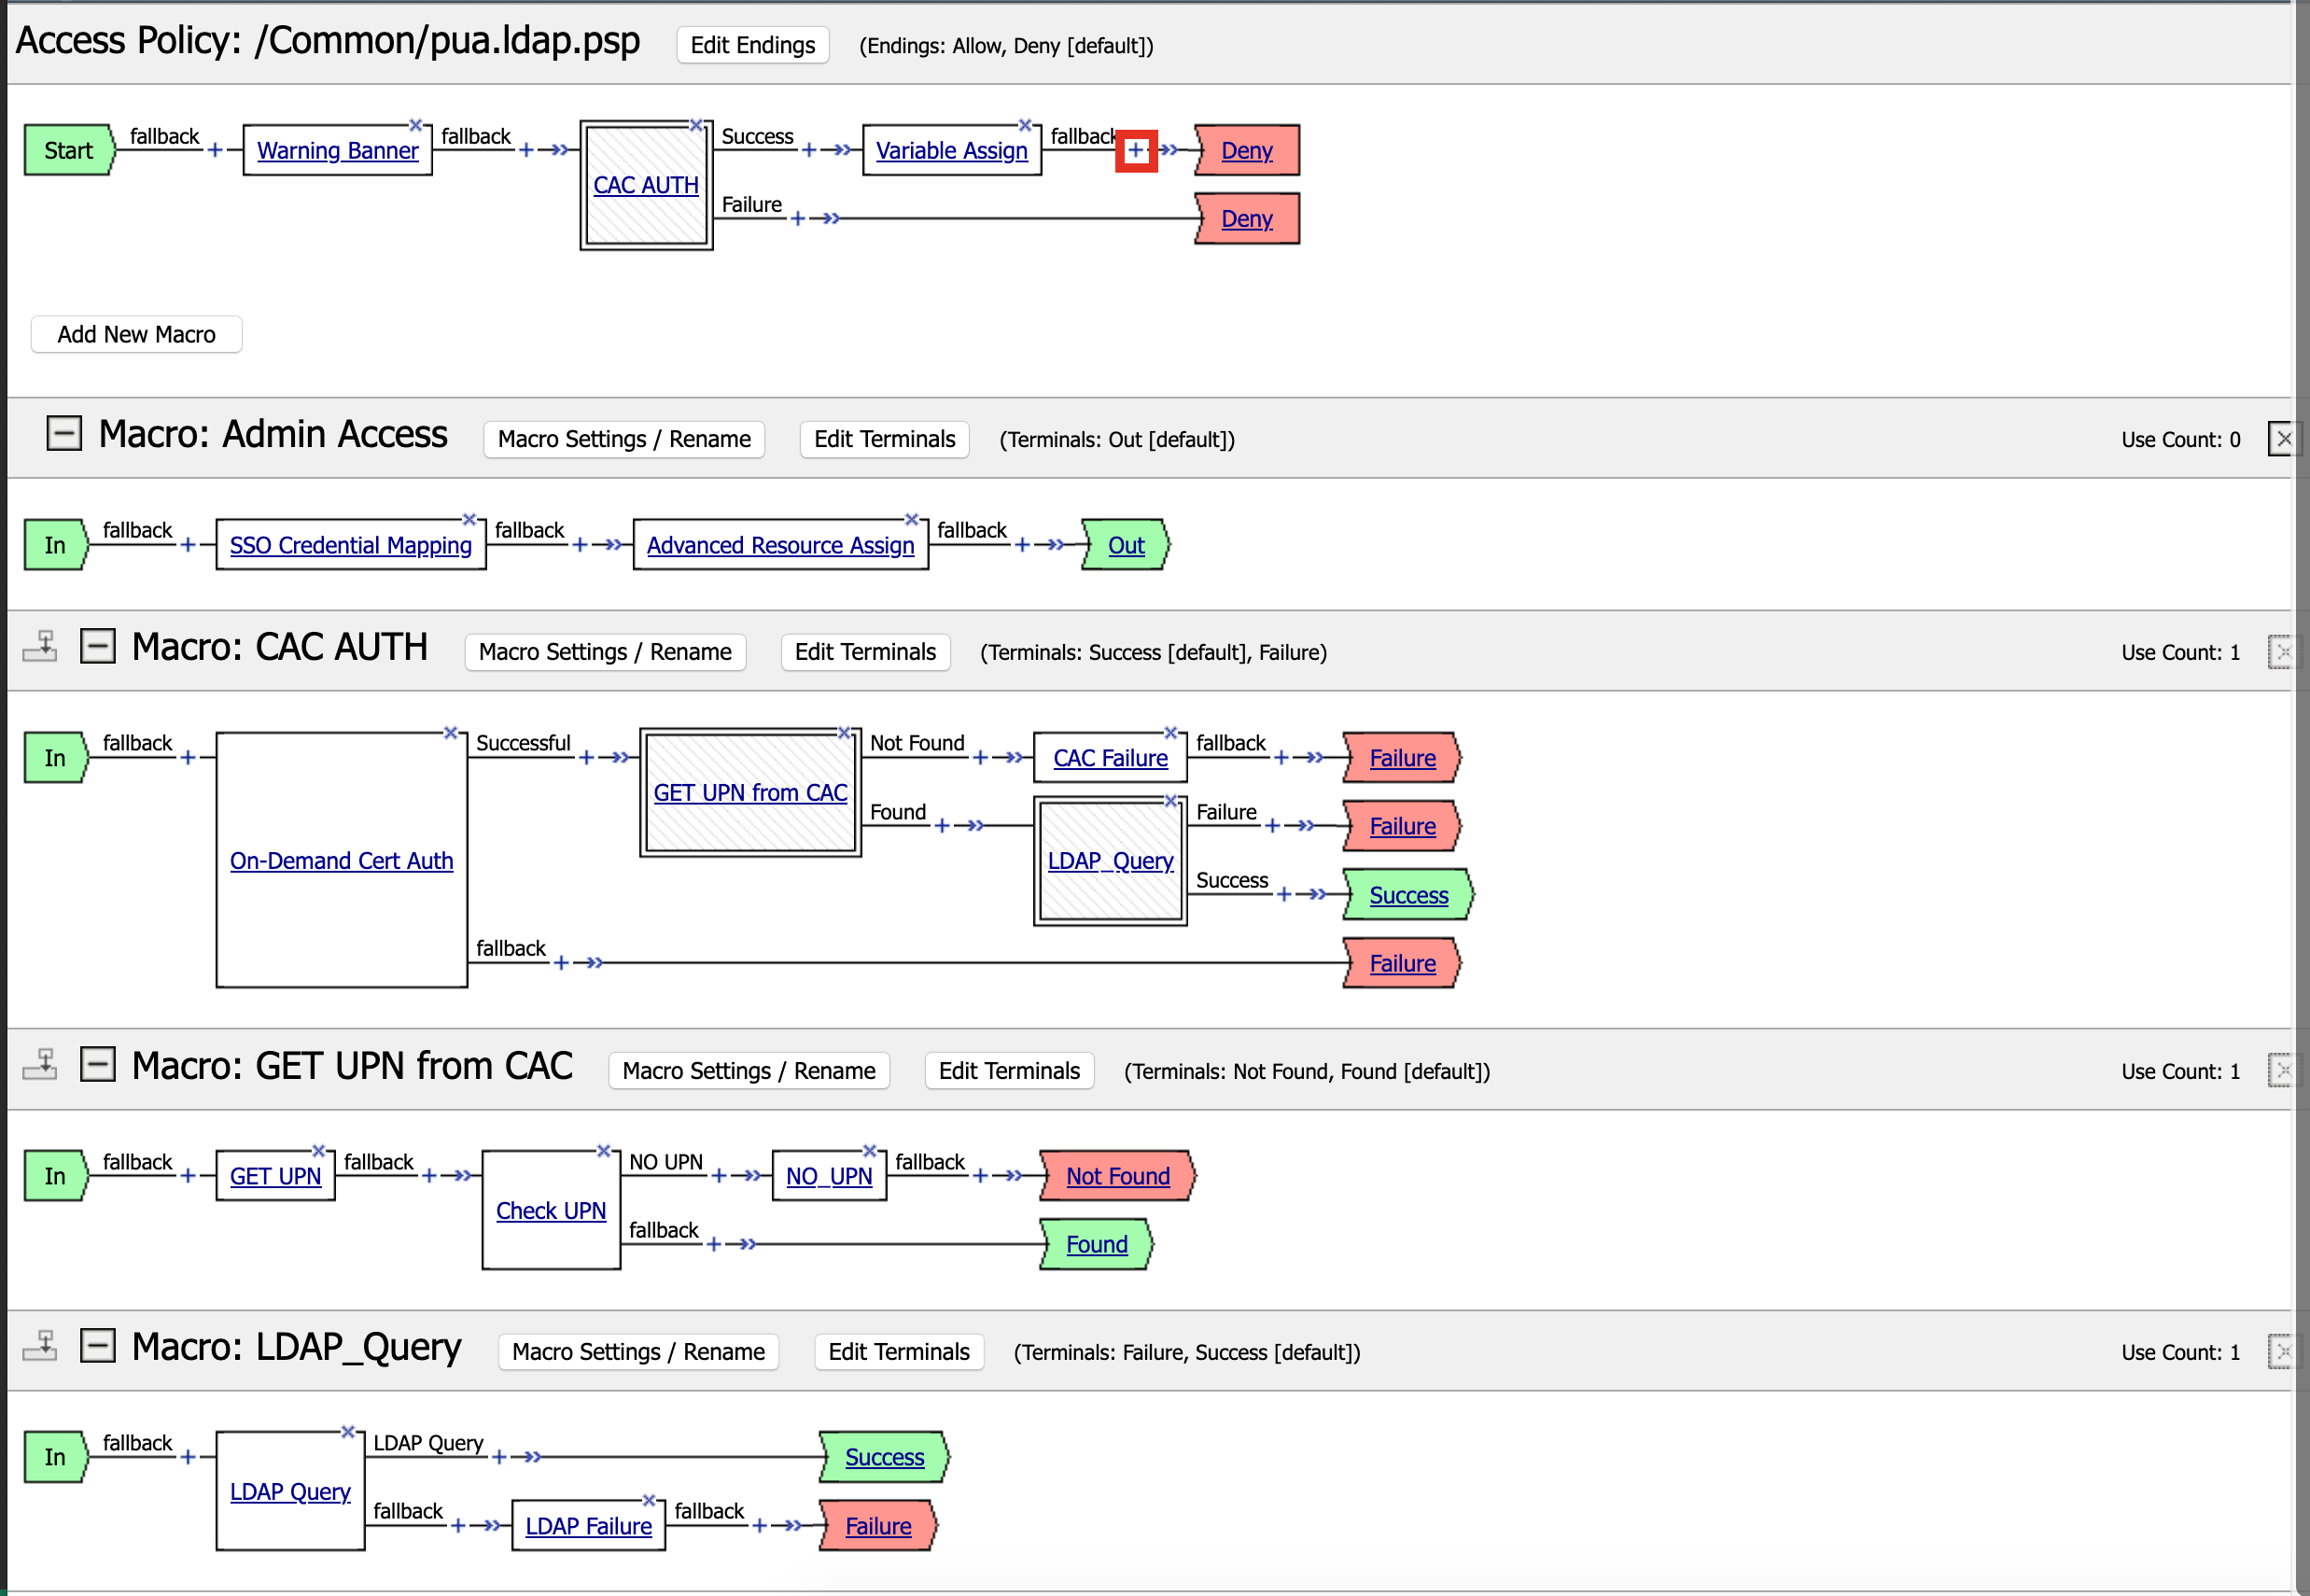
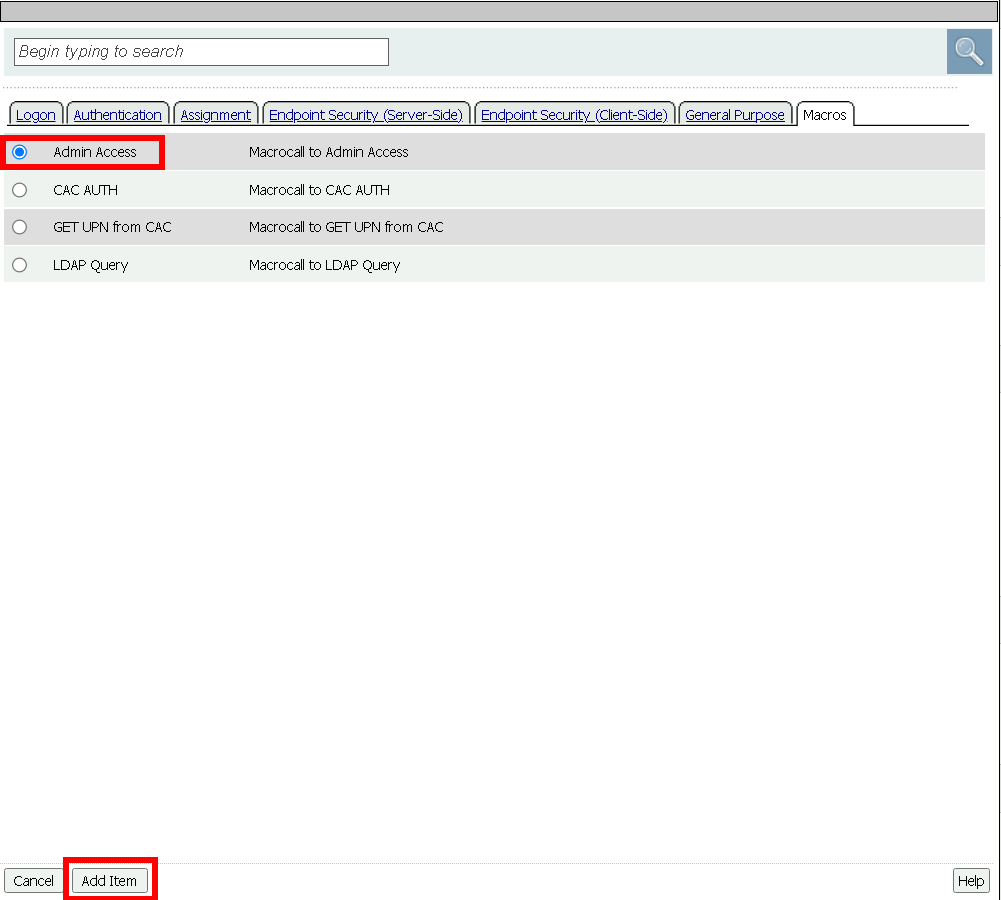
Click Macro
Click Admin Access
Click Add Item
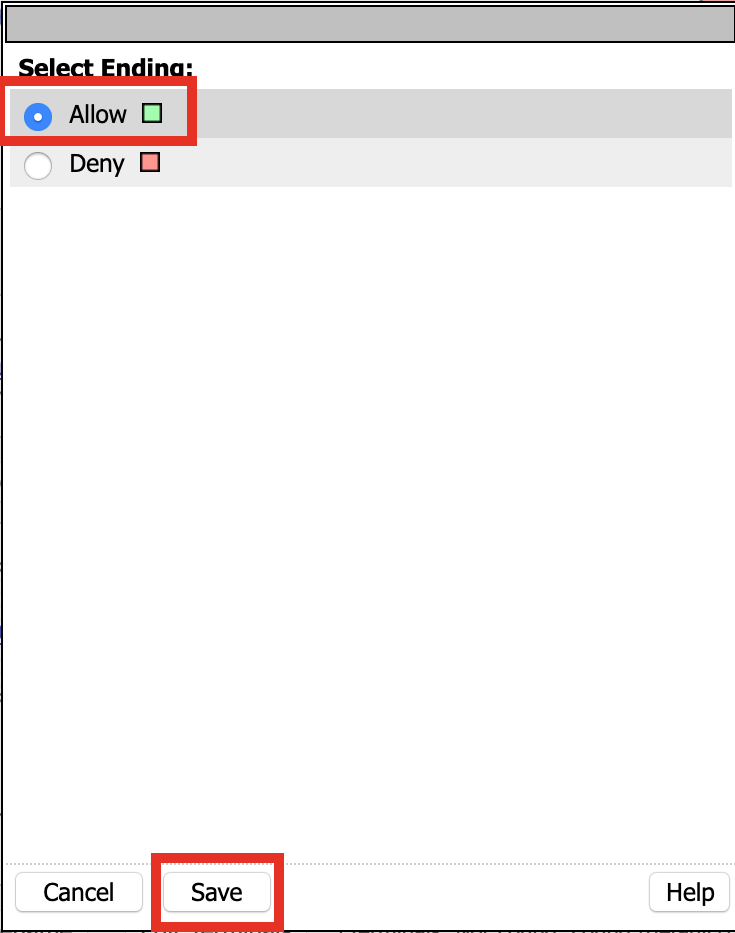
Click the Deny terminal beside Admin Access

Click Allow
Click SAVE
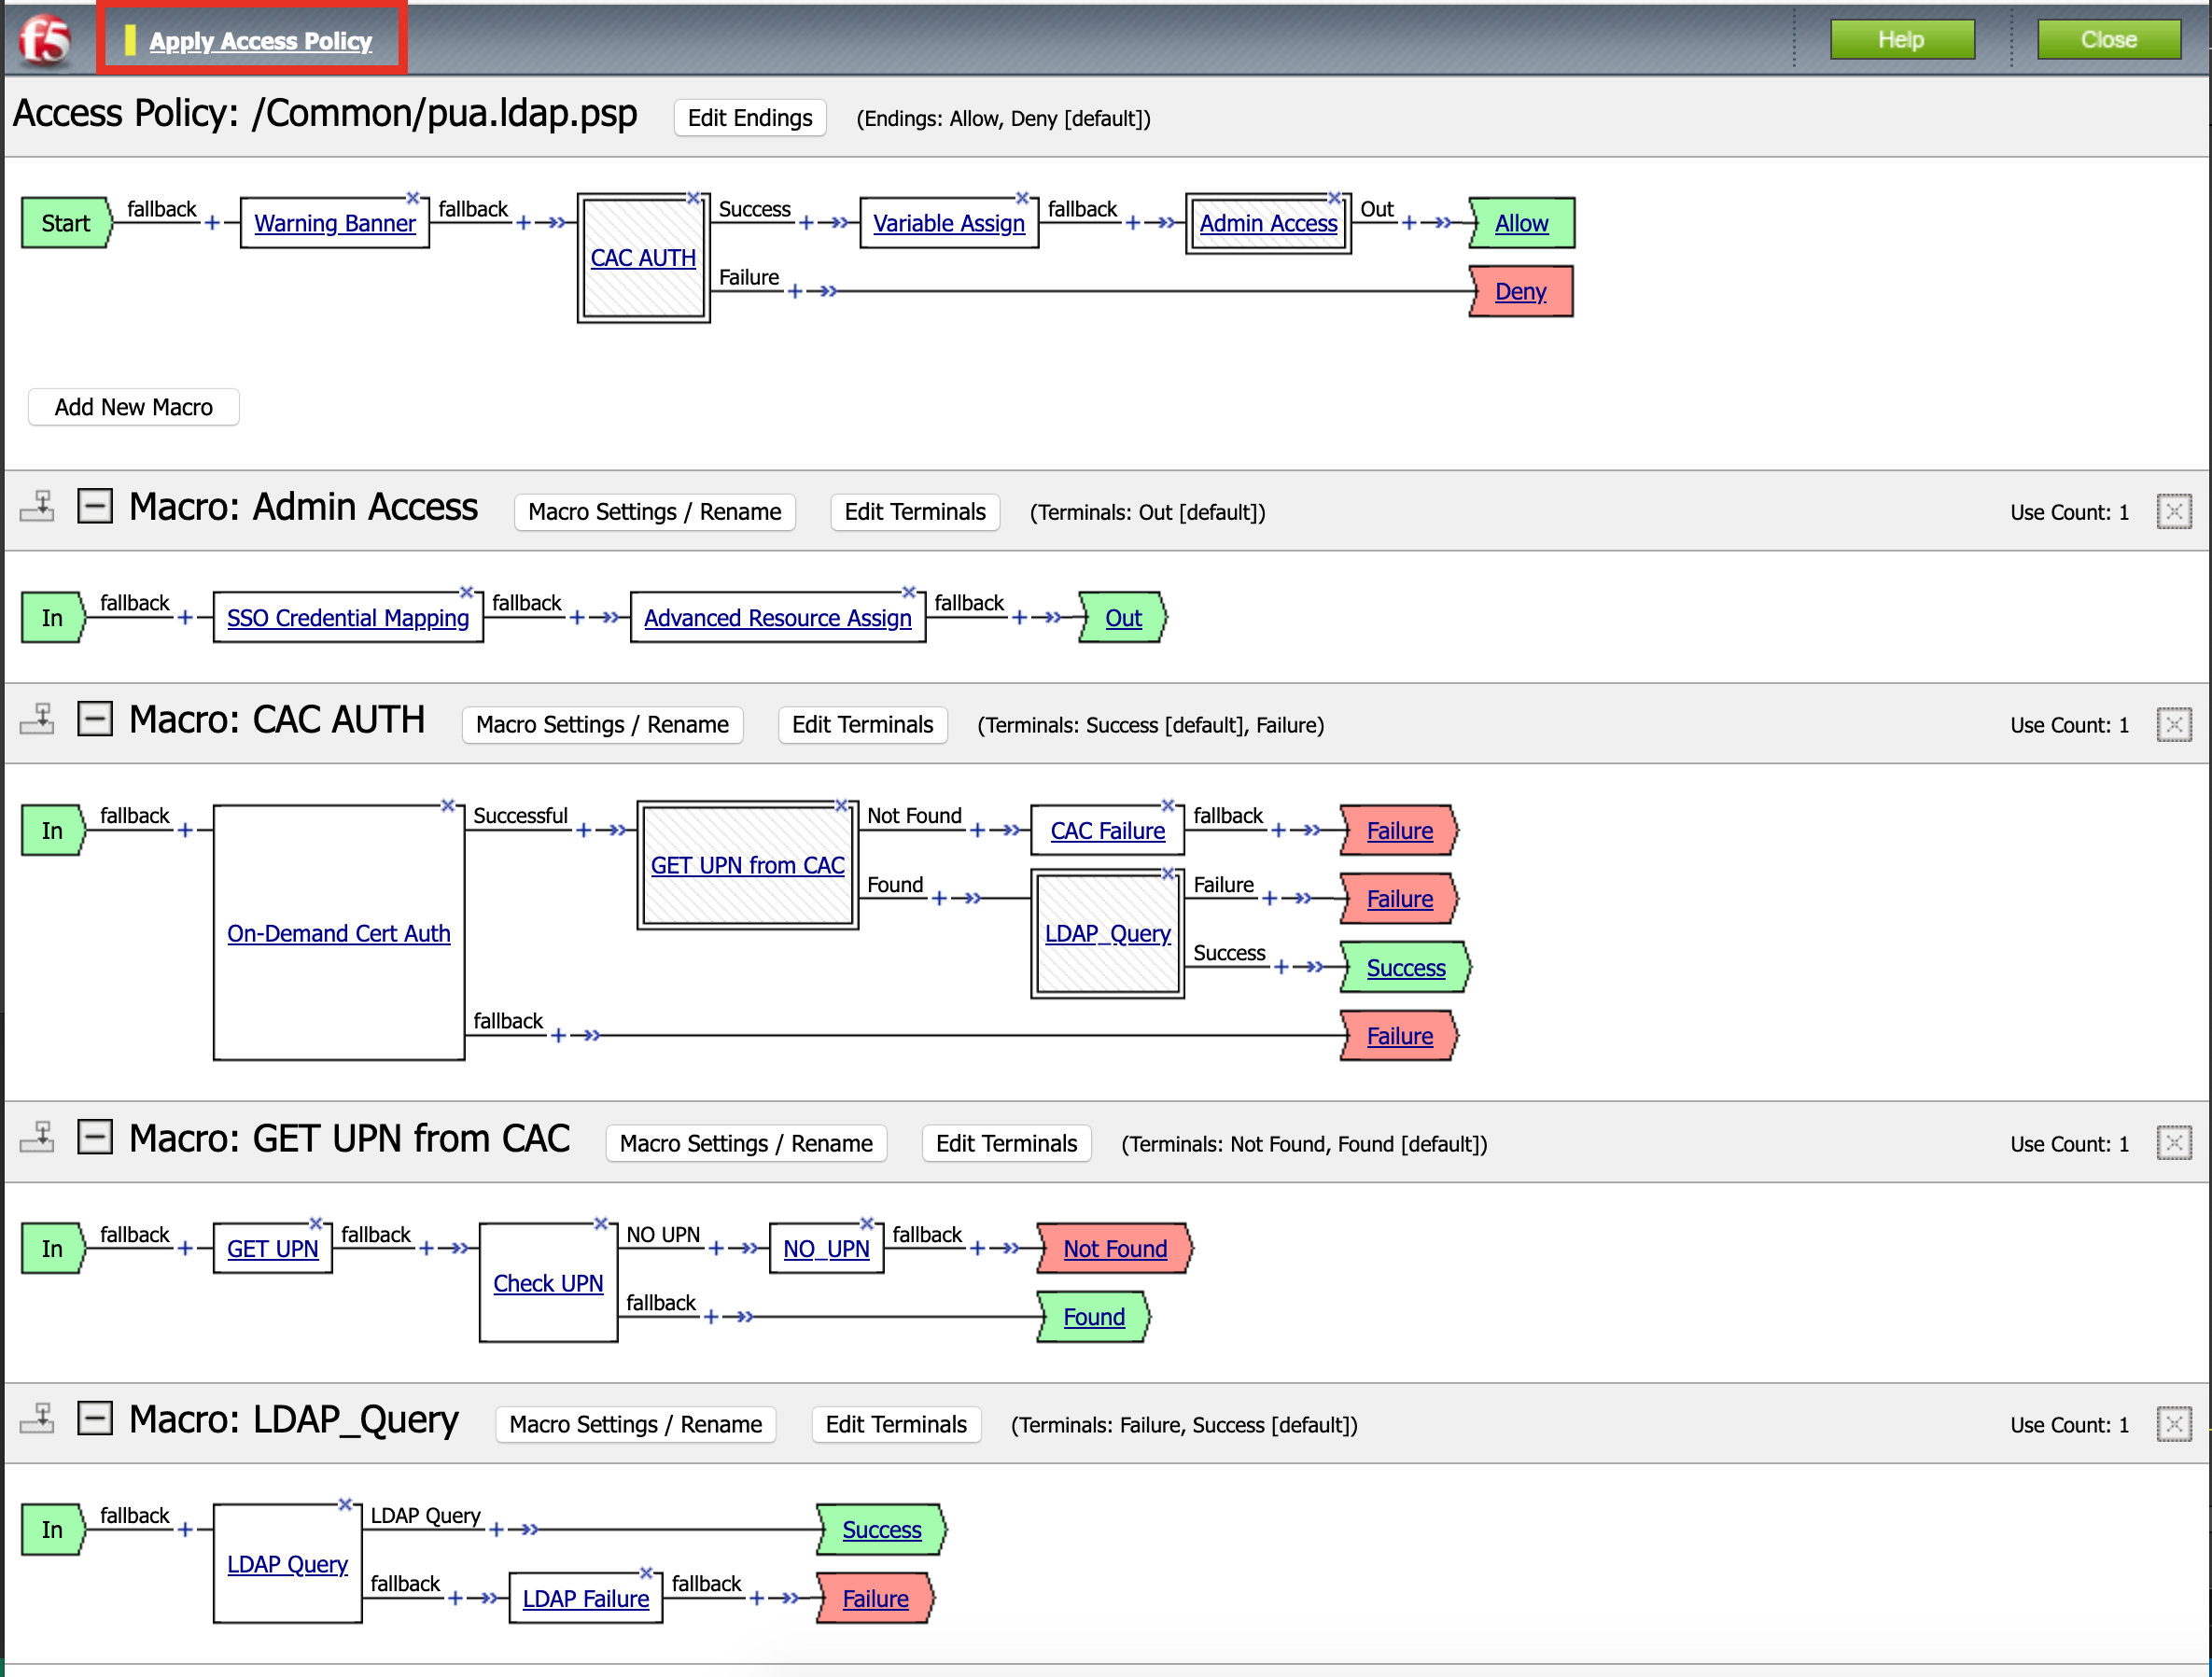
Click Apply Policy
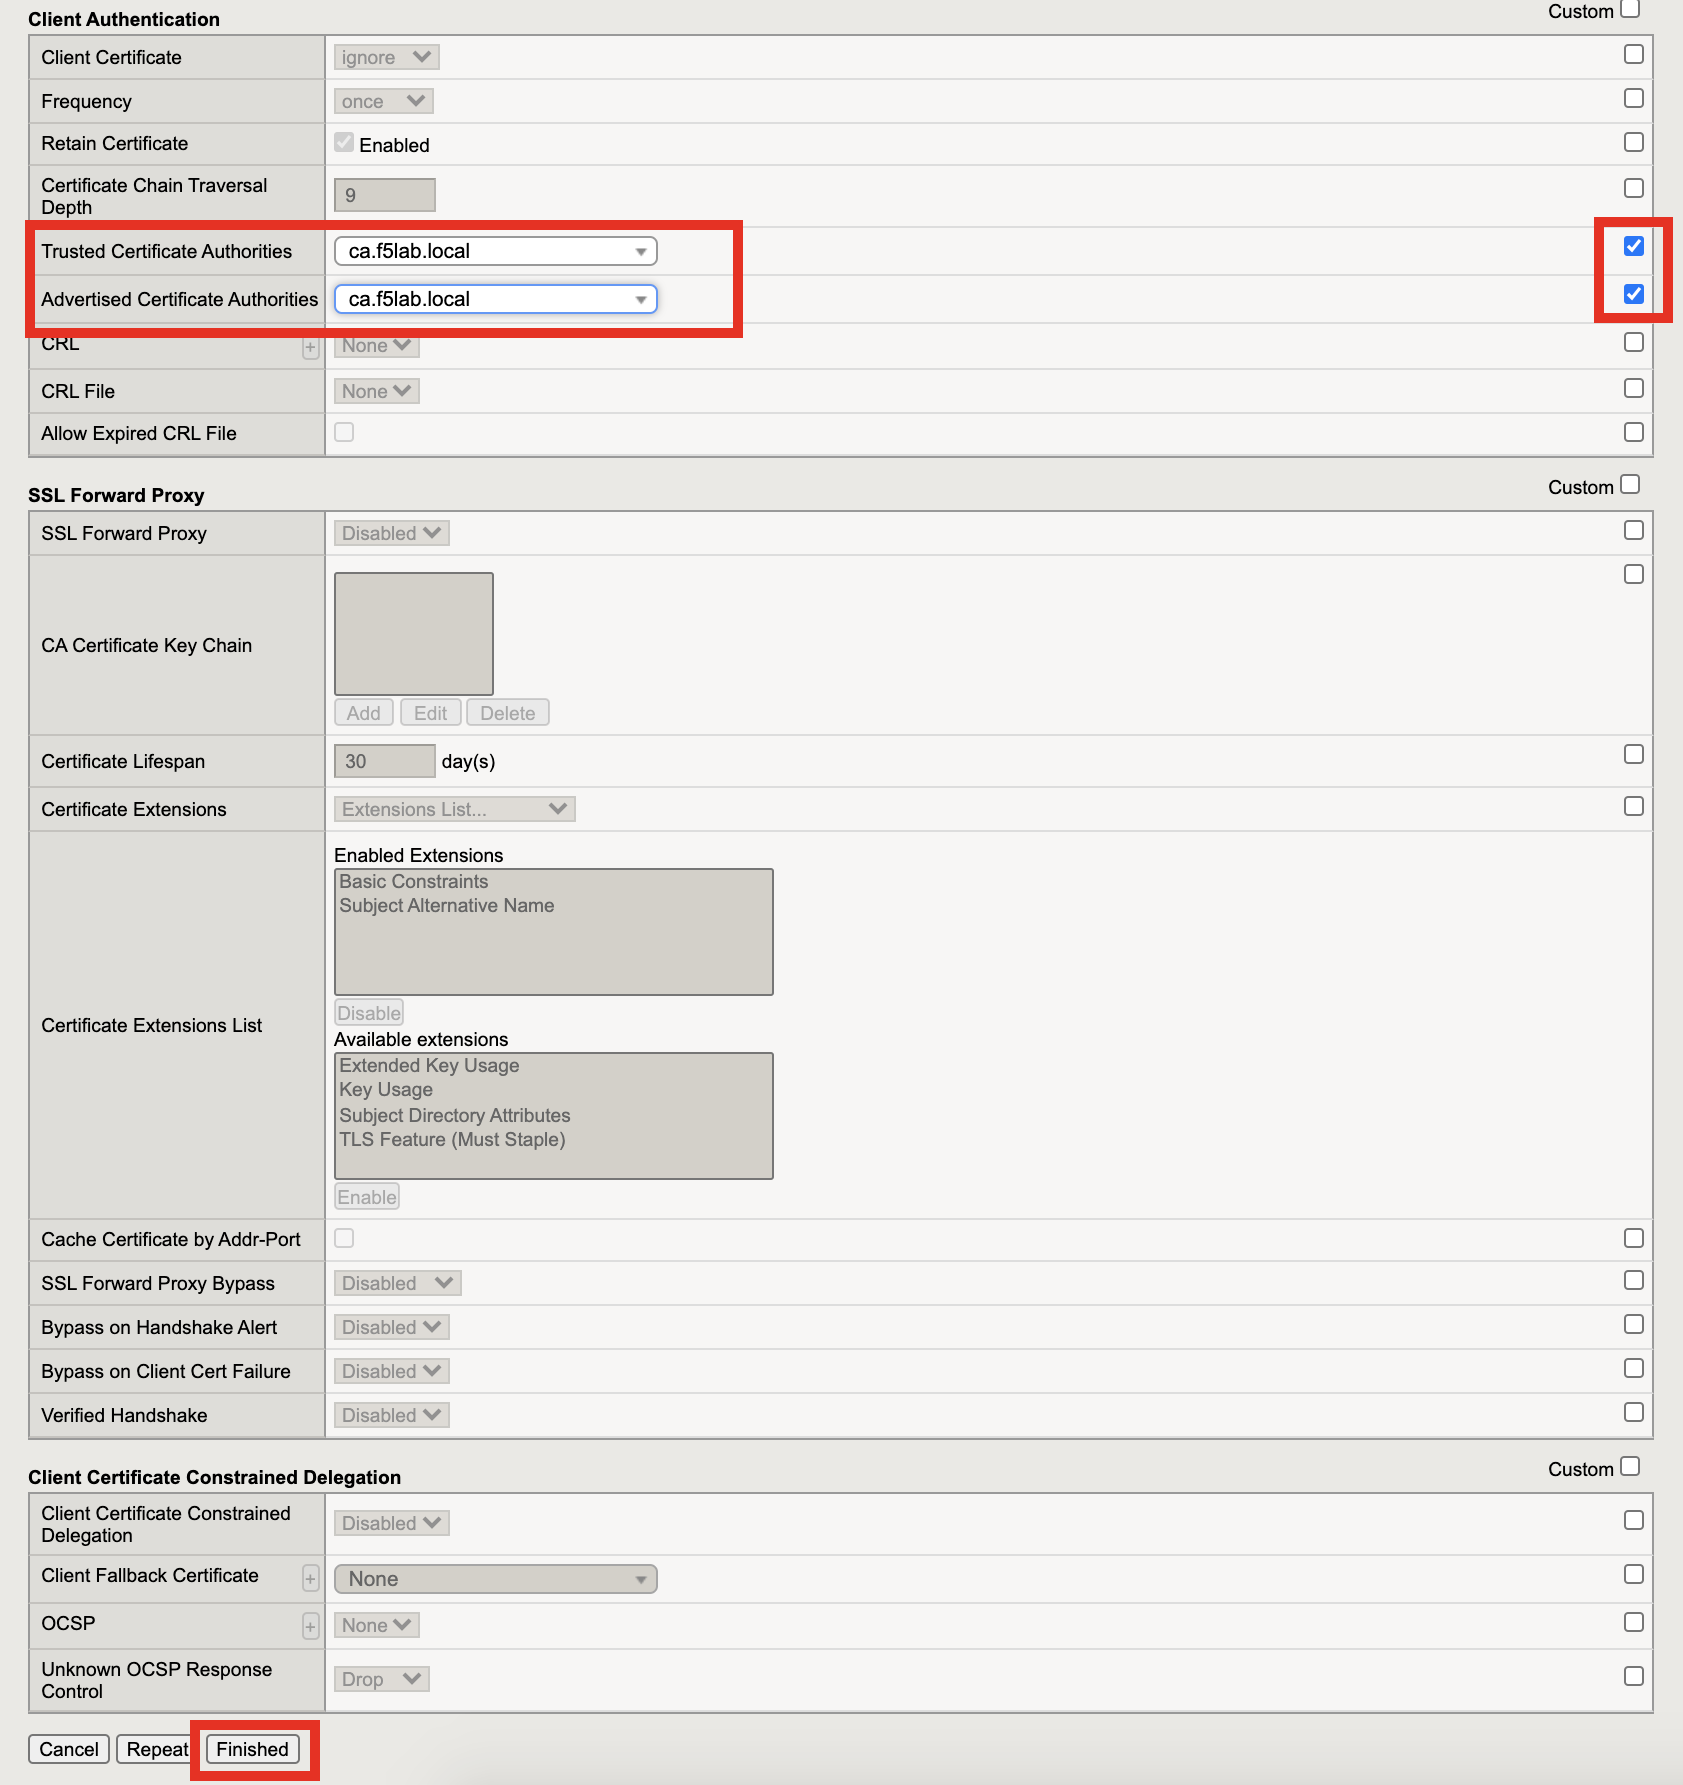
Task 14 - Create an SSL Profile
Navigate to Local Traffic >> Profiles >> SSL >> Client >> + (plus symbol)
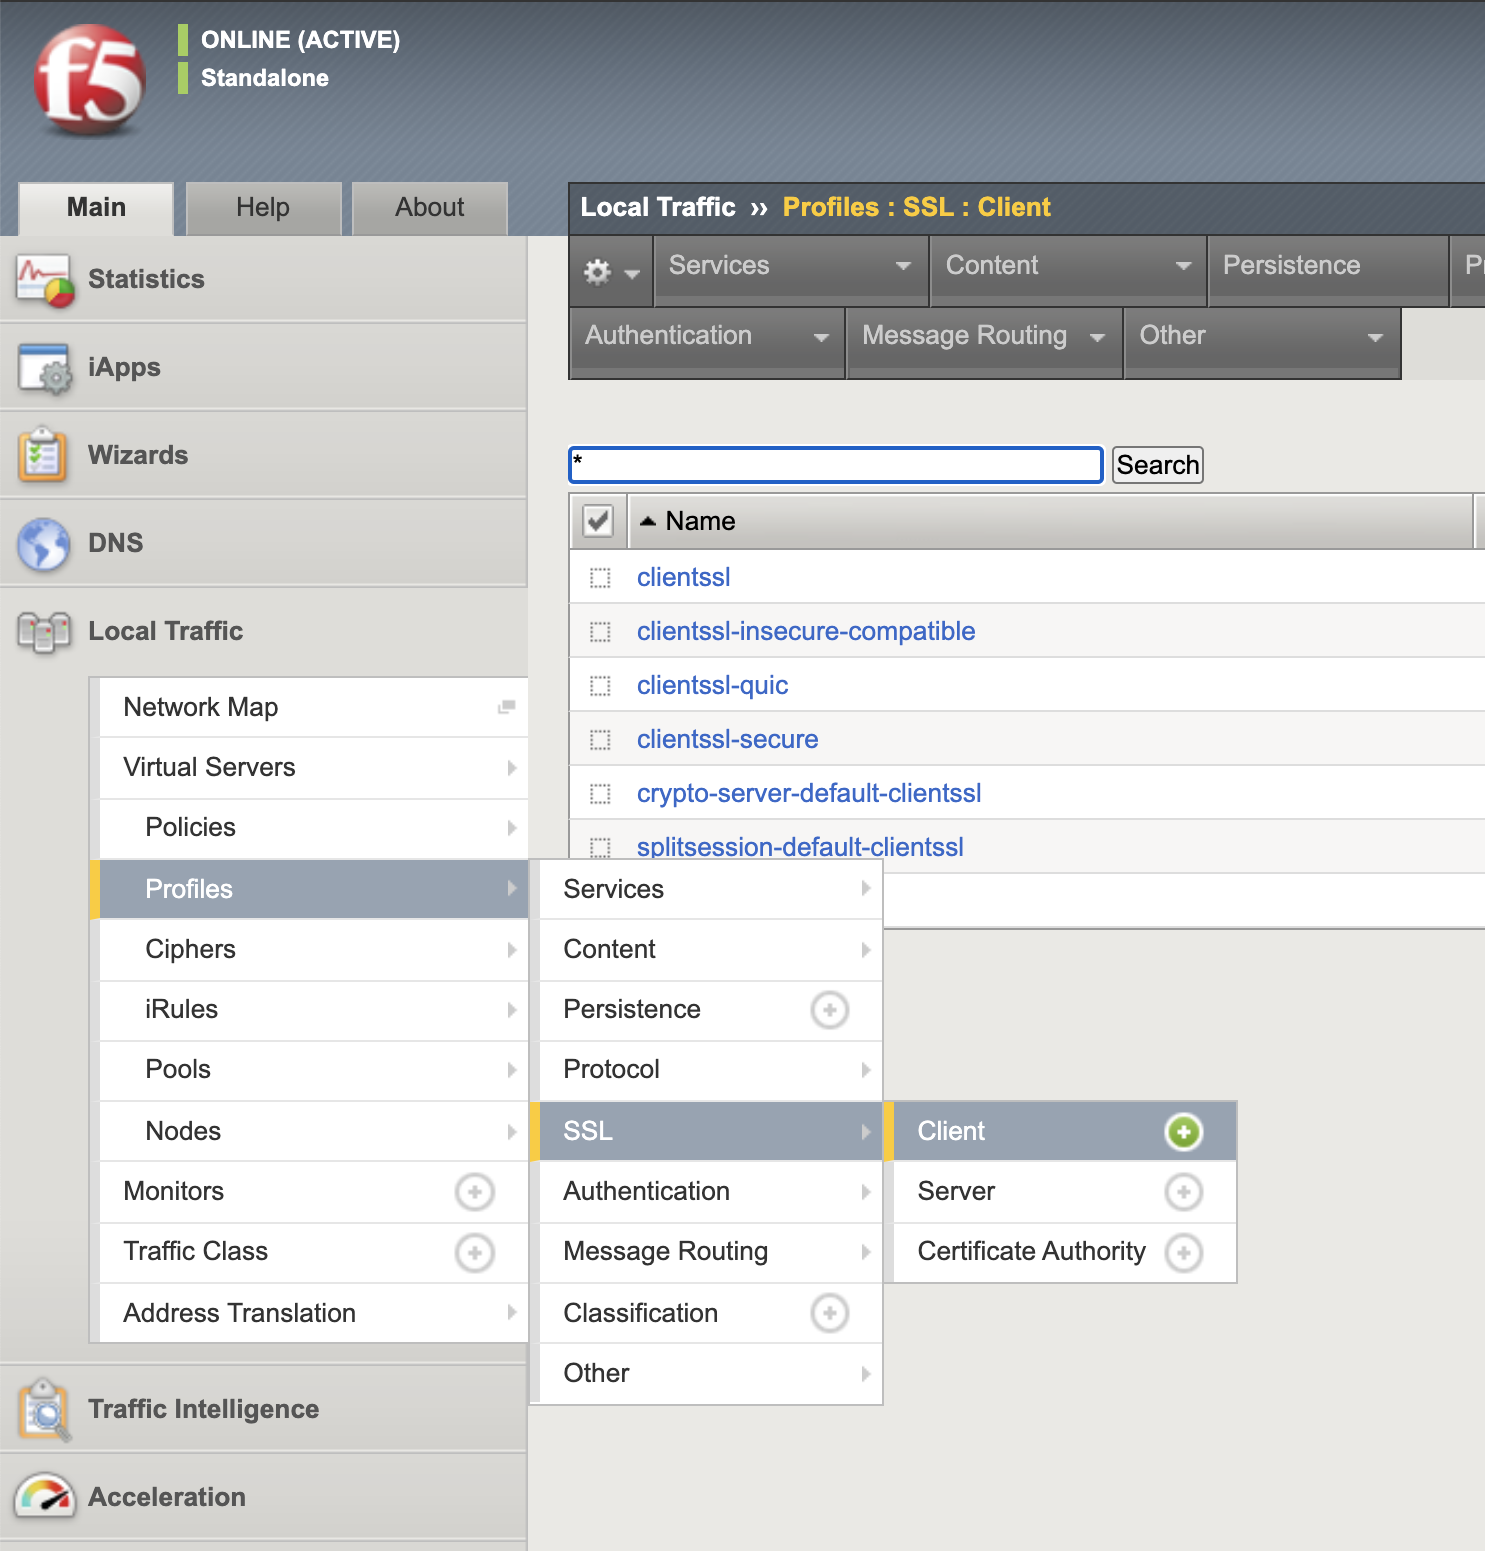
Name: pua.webtop.ssl
Click Custom box beside Certificate Key Chain
Click Add

Verify Certificate is set to acme.com-wildcard
Verify Key is set to acme.com-wildcard

Verify Trusted Certficate Authorities is set to ca.f5lab.local
Verify Advertised Certificate Authorities is set to ca.f5lab.local
Click update
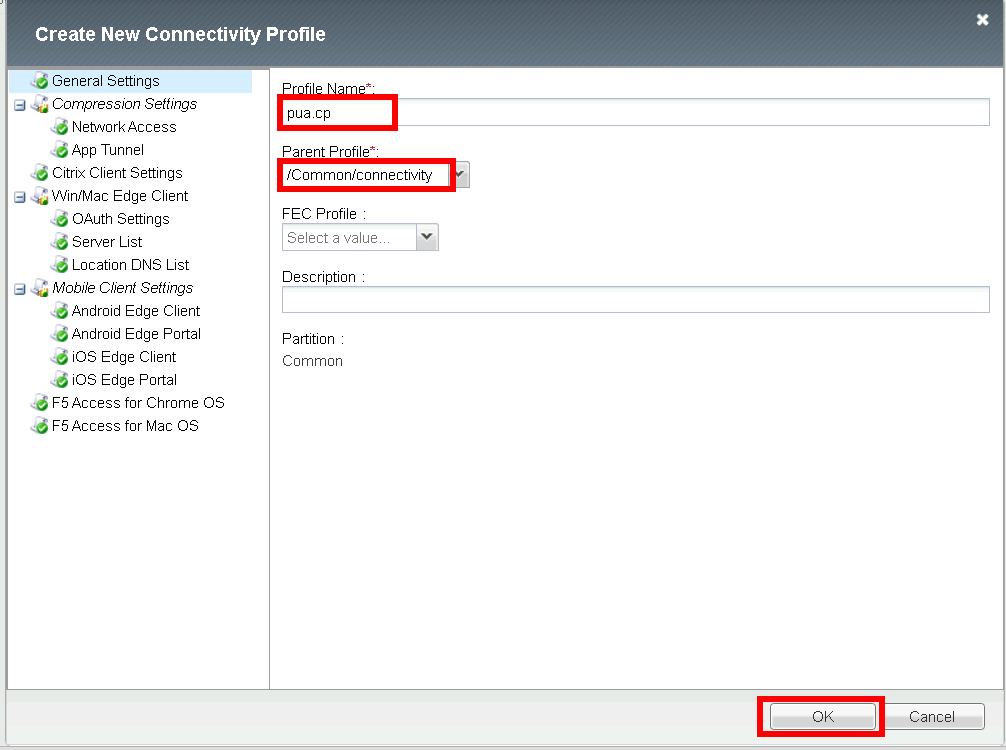
Task 15 - Create a Connectivity Profile
Navigate to Access >> Profiles / Policies >> Connectivity / VPN >> Connectivity >> Profile + (plus symbol)
Profile Name: pua.cp
Parent Profle: /Common/Connectivity
Click OK
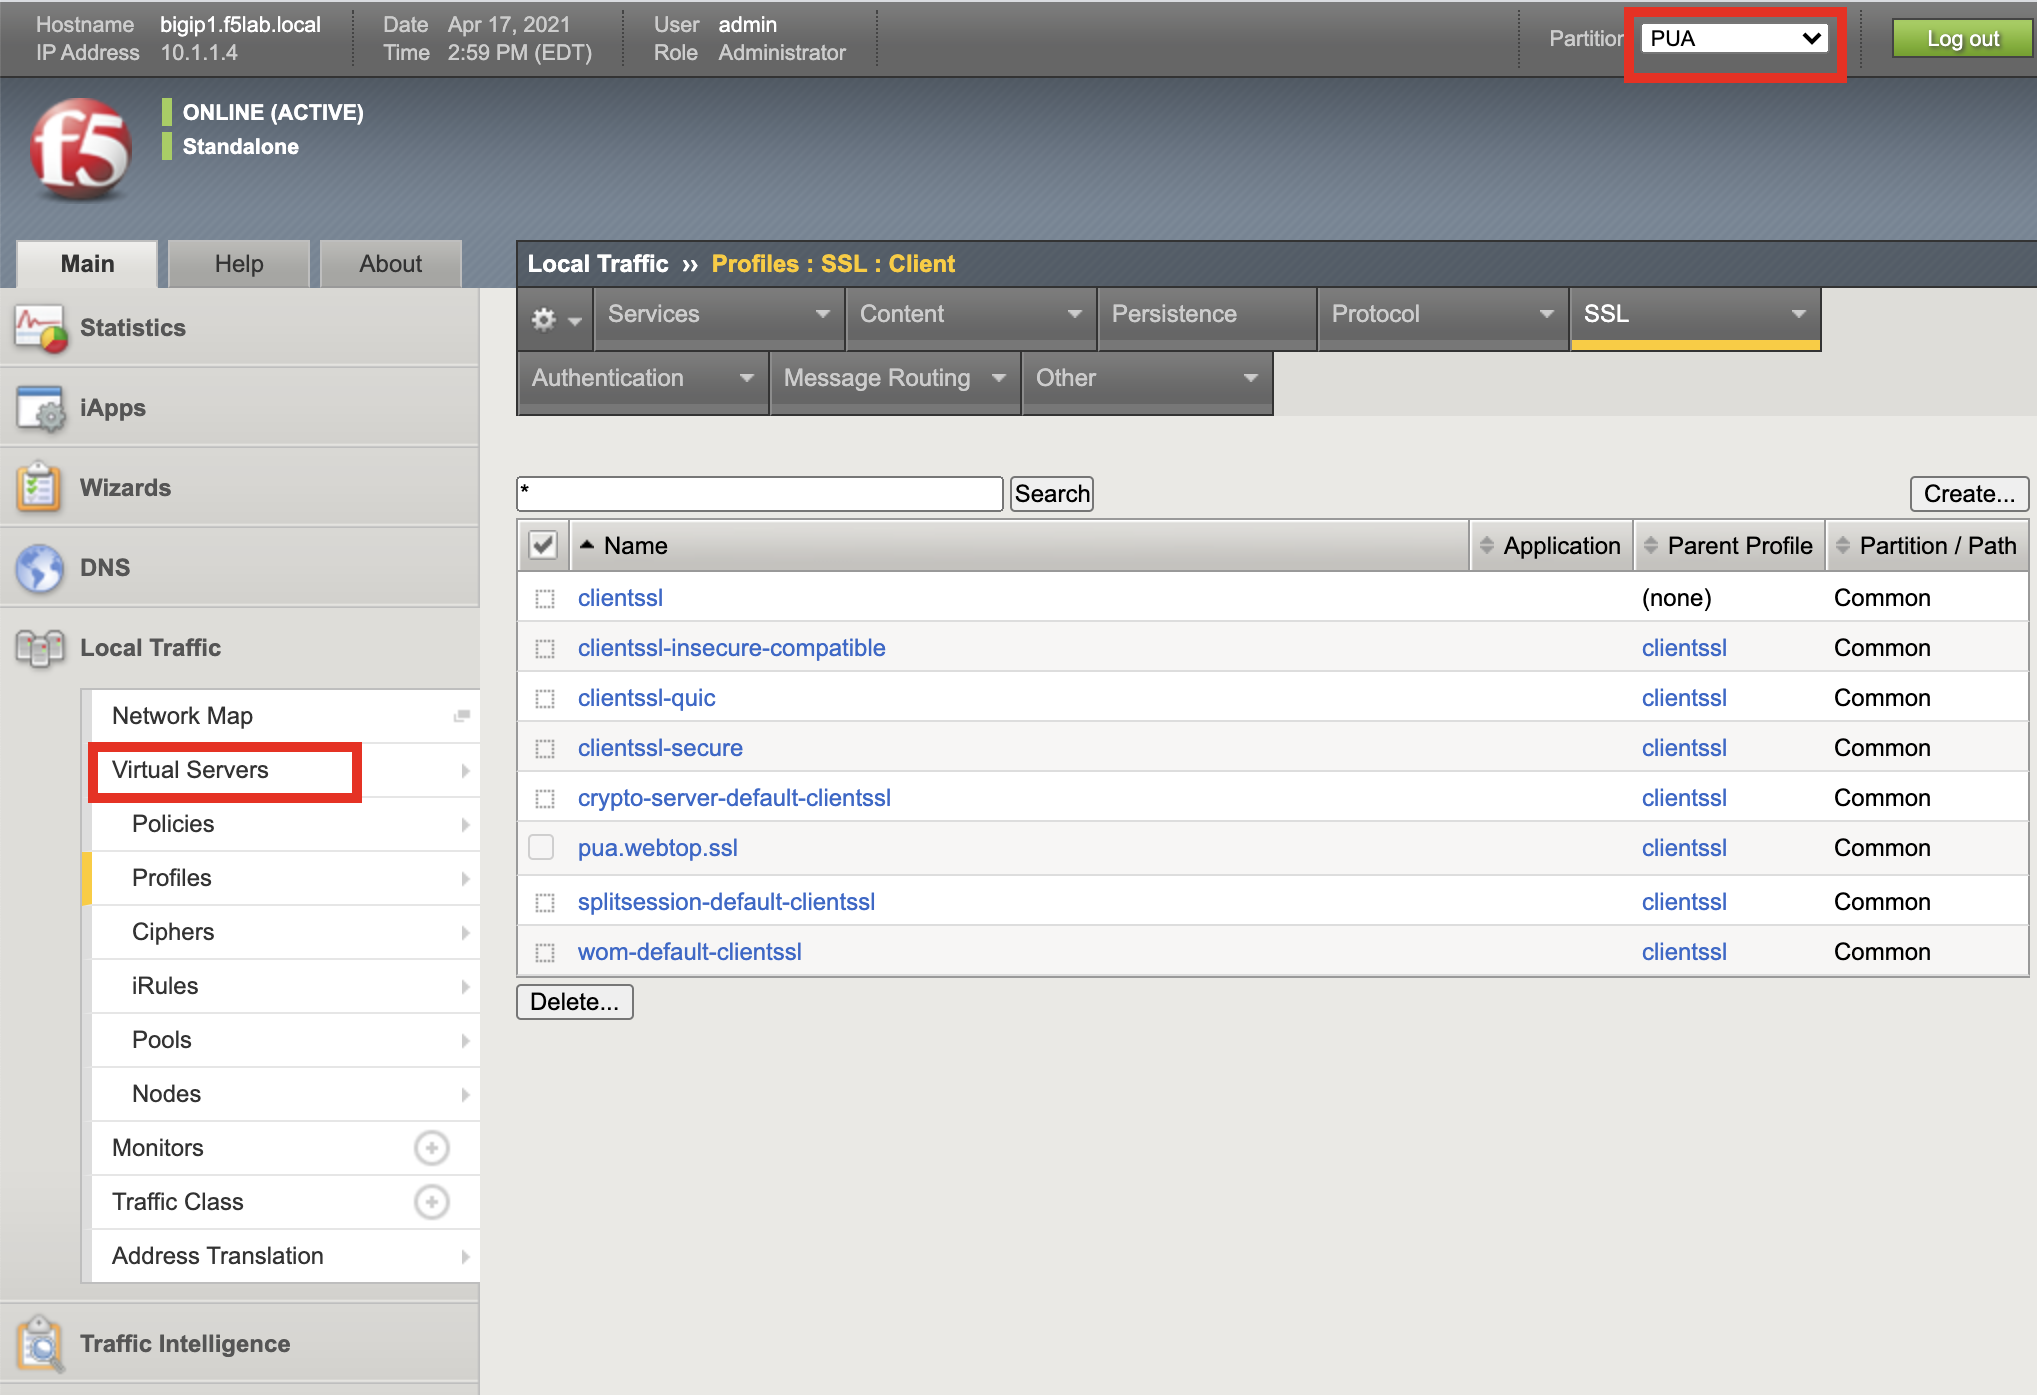
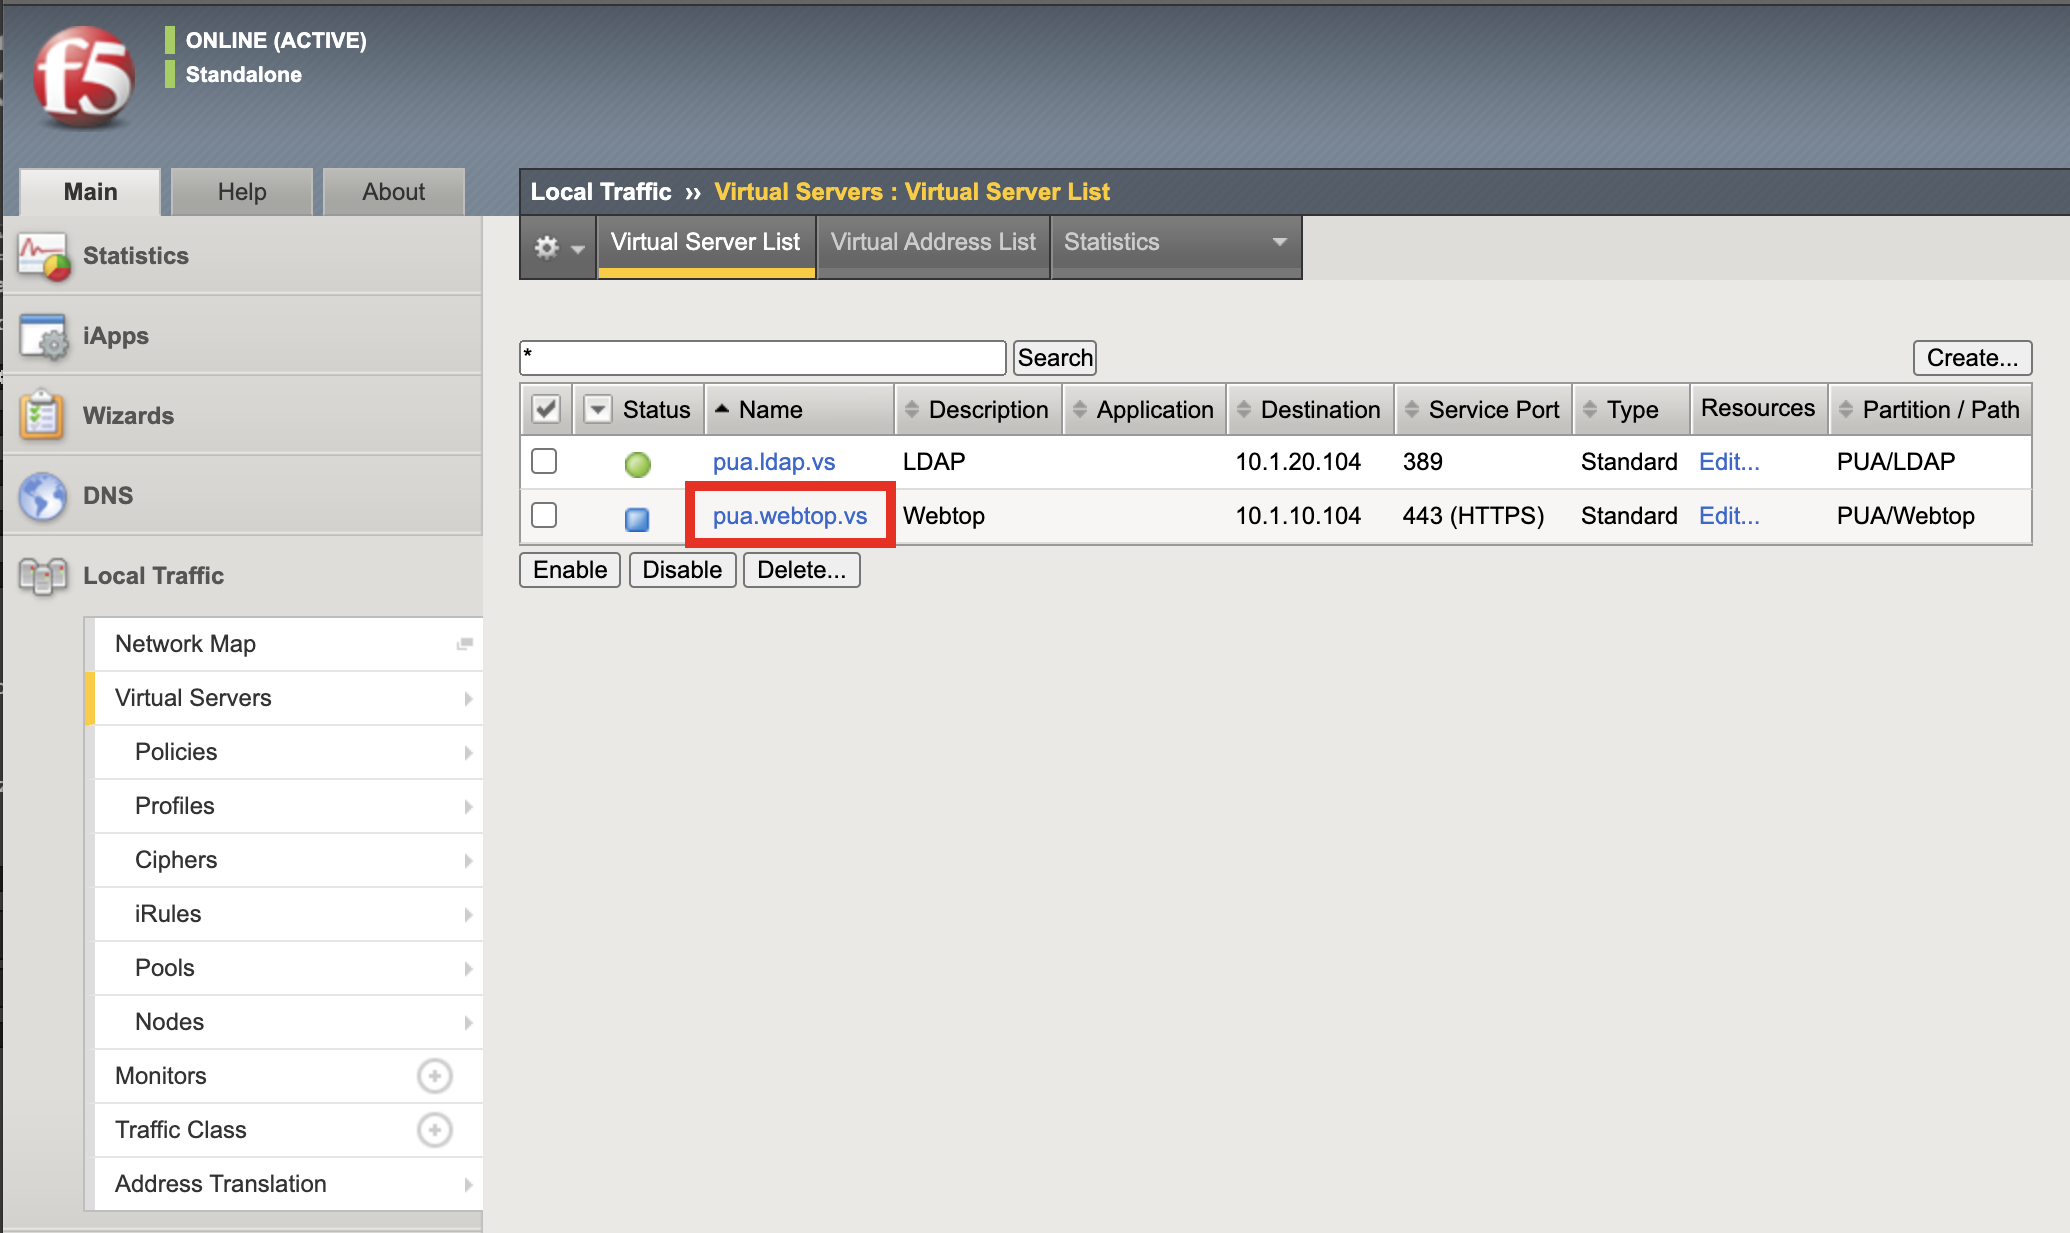
Task 16 - Add the pua.webtop.ssl profile to pua.webtop.ssl virtual Server
Navigate to Local Traffic >> Virtual Servers #. Select the PUA partitiion #. Click Virtual Servers
Click the pua.acme.com link
Under Configuration, move pua.webtop.ssl SSL Profile to Selected

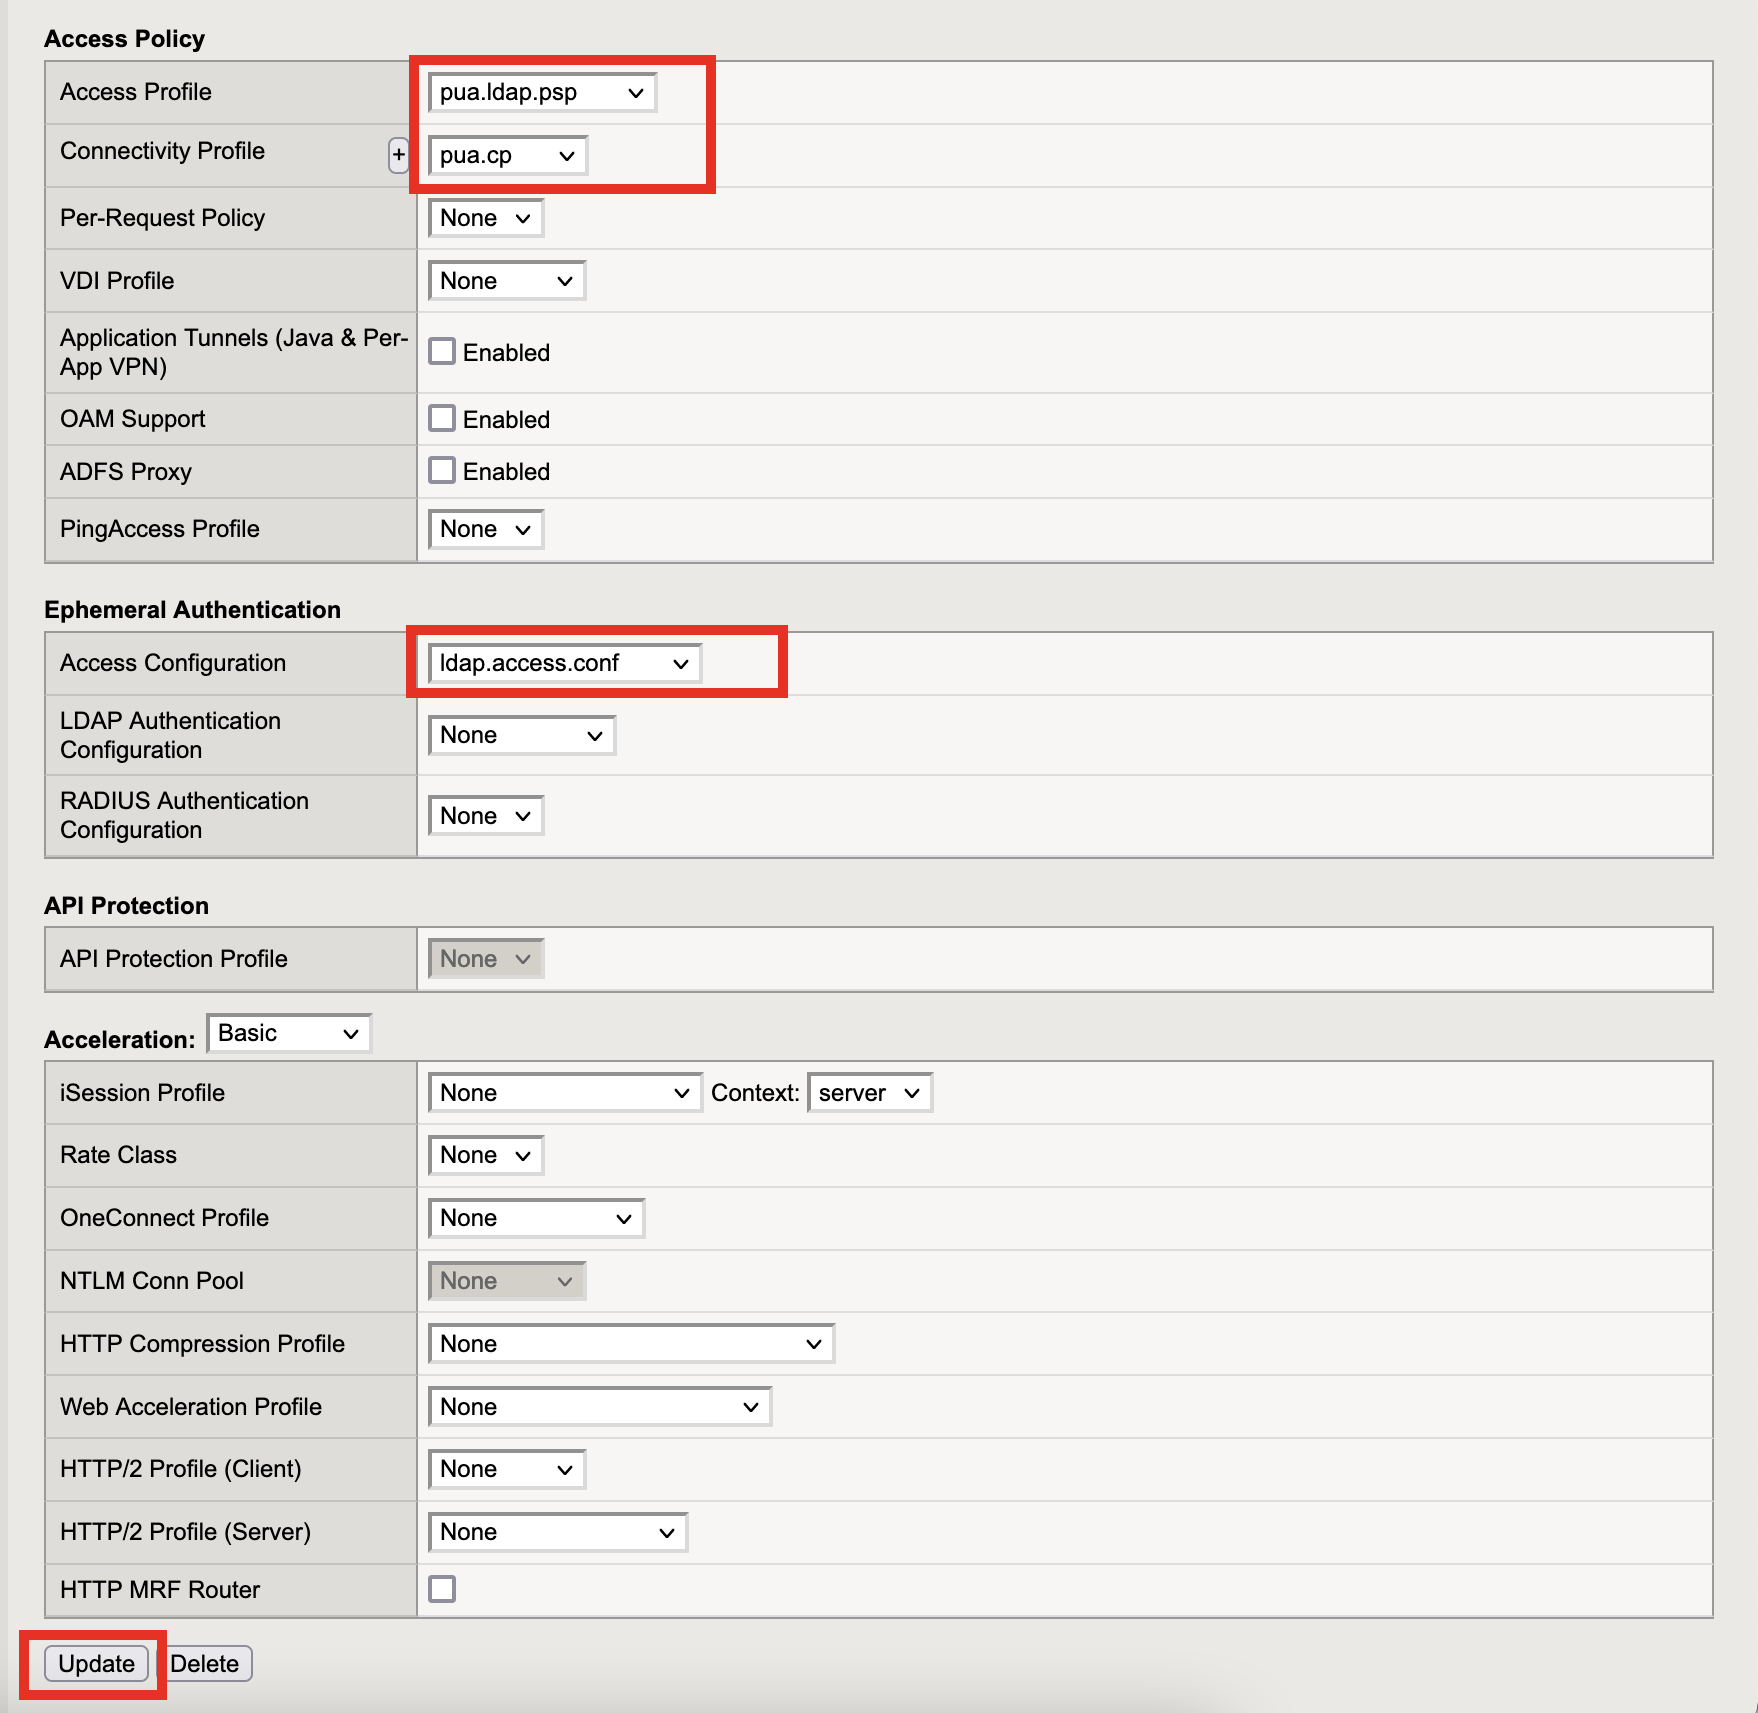
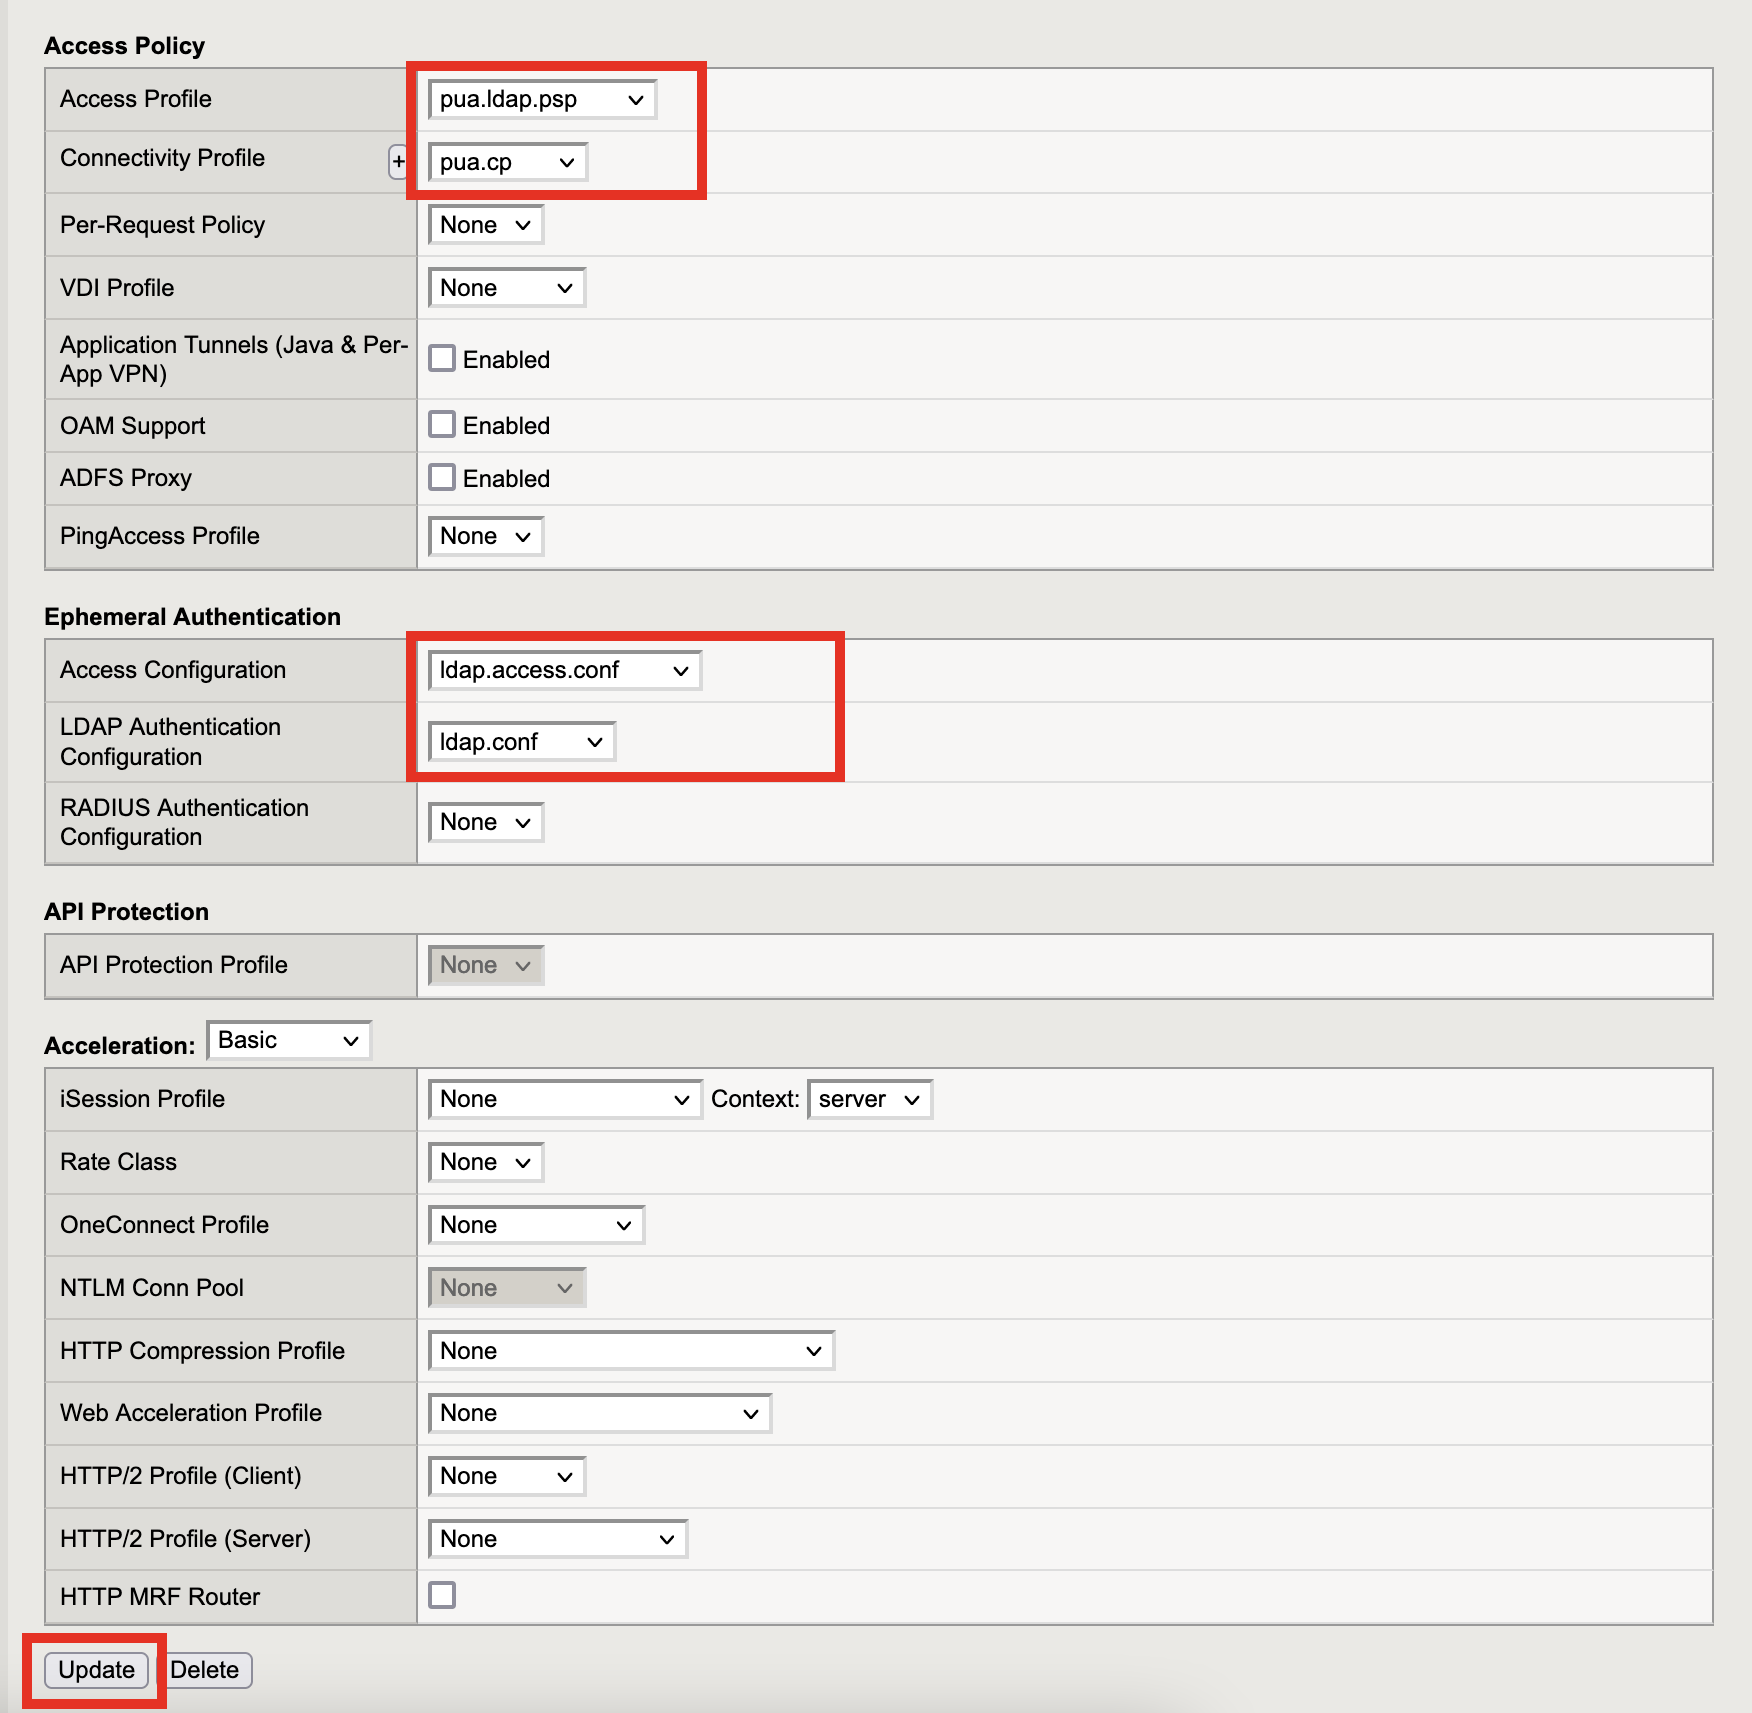
Access Policy . Set Access Profile to **pua.ldap.psp* . Set Connectivity Profile to **pua.cp*
Ephemeral Authentication * Set Access Configuration to pua.access.conf * Set LDAP Authentication Configuration to pua.ldap.conf * Click Update
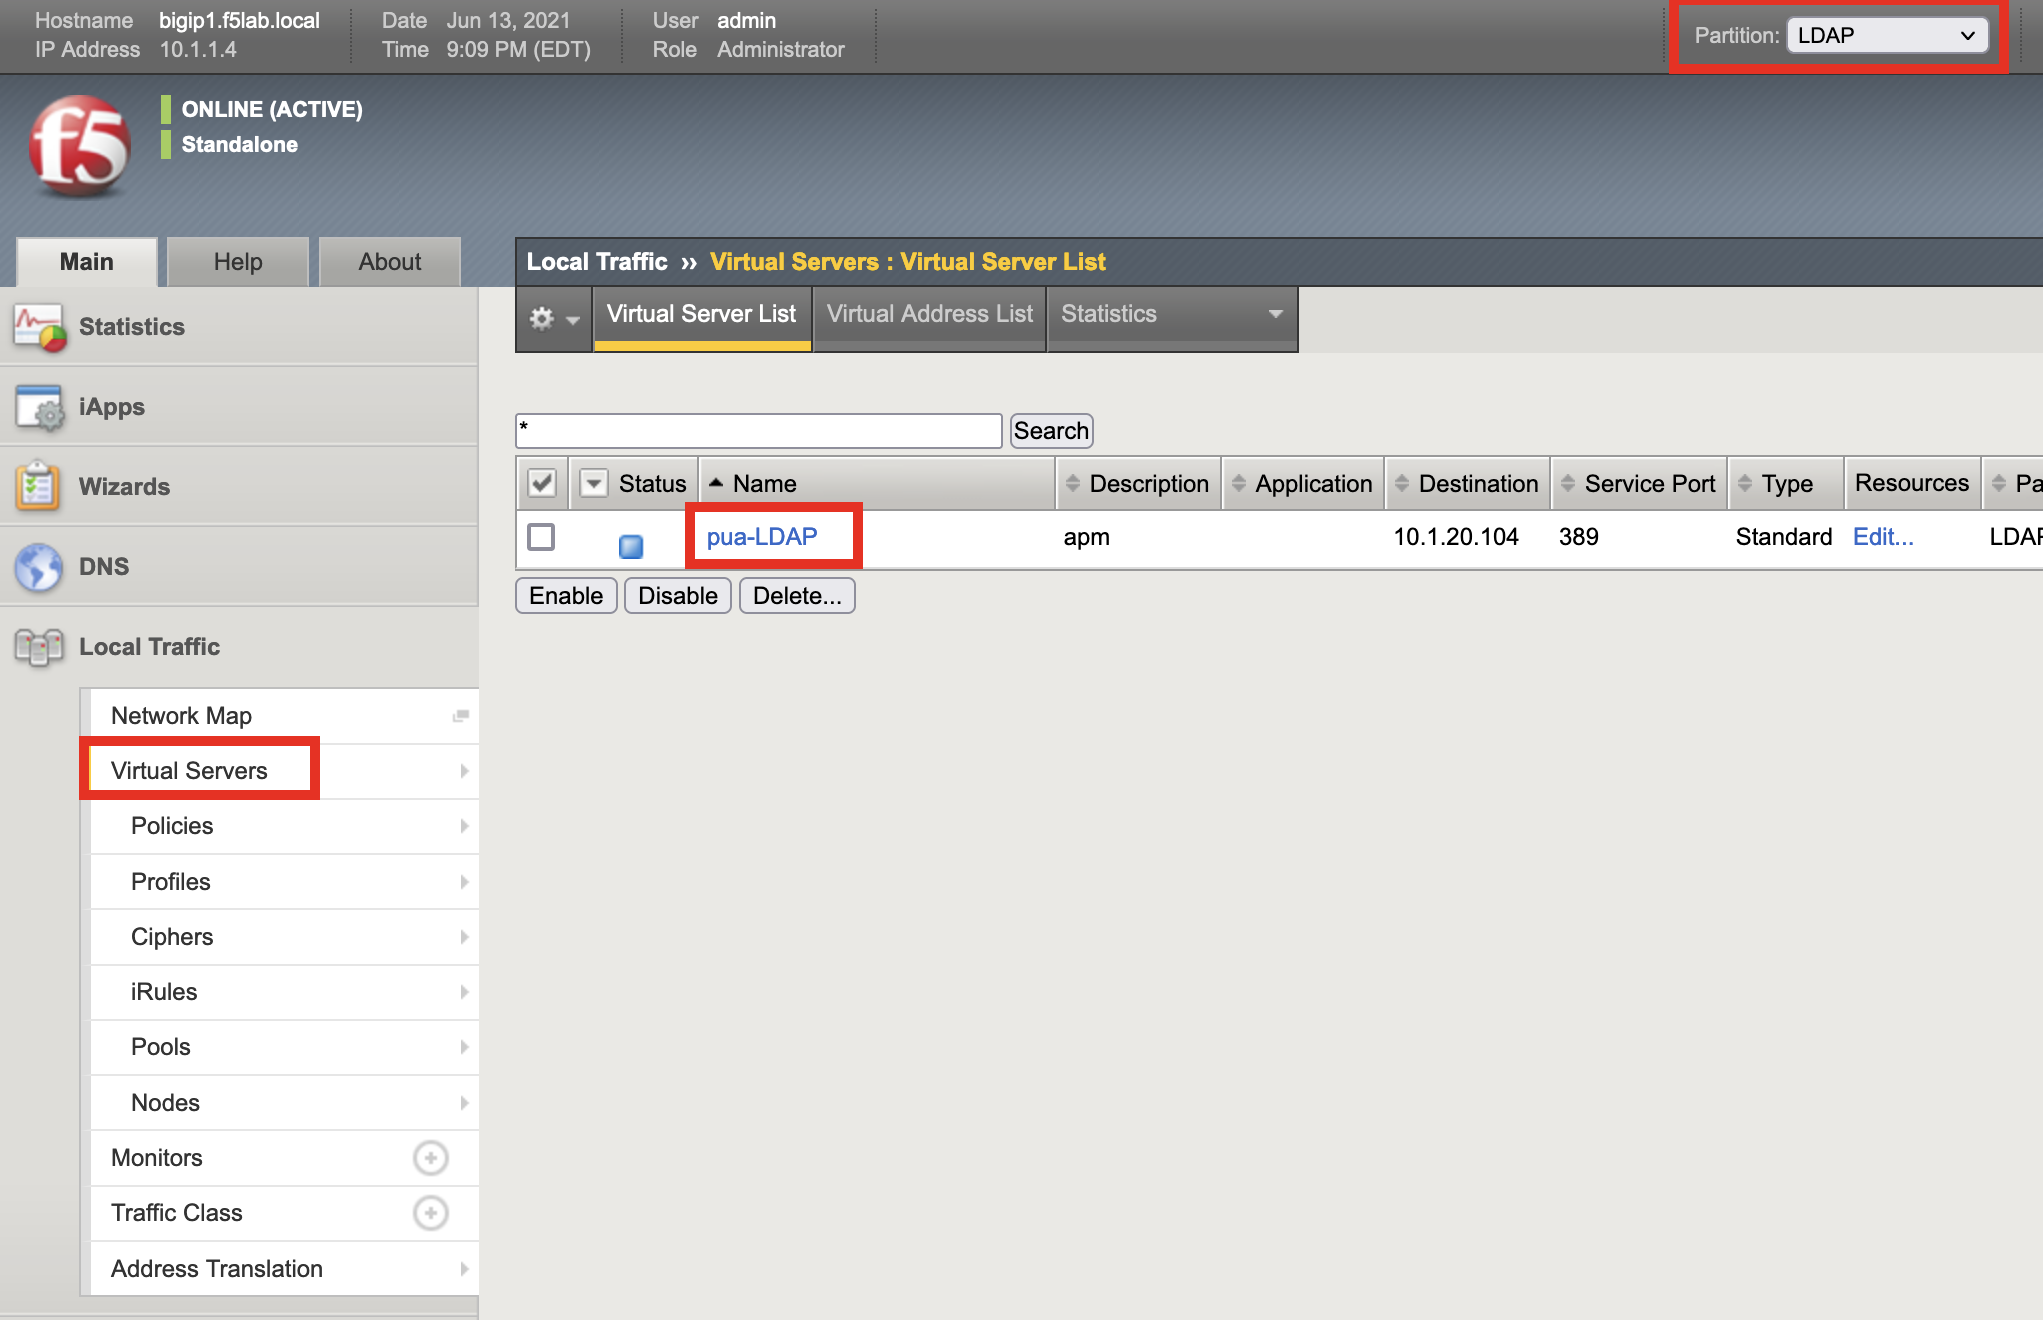
Navigate to Local Traffic >> Virtual Servers
Select the LDAP partitiion
Click pua-LDAP
Ephemeral Authentication * Set Access Configuration to pua.access.conf * Set LDAP Authentication Configuration to pua.ldap.conf * Click Update
Task 17 - PUA testing
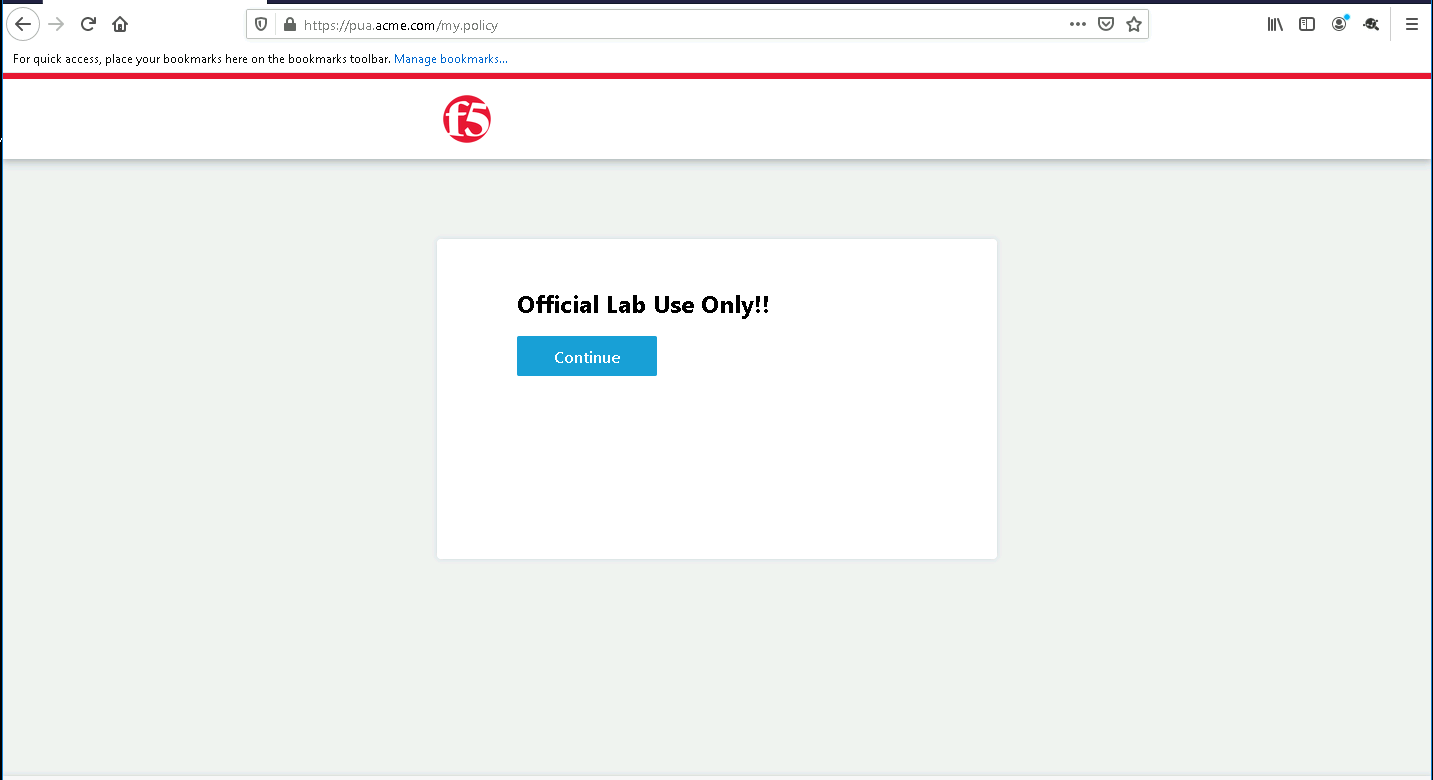
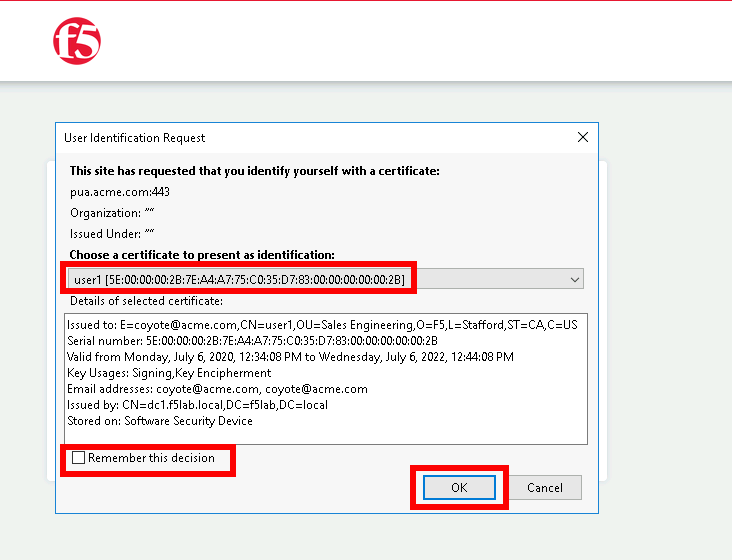
Open a browser to https://pua.acme.com
Click Continue
Uncheck Remember this decision
Choose user1 Certificate
Click OK
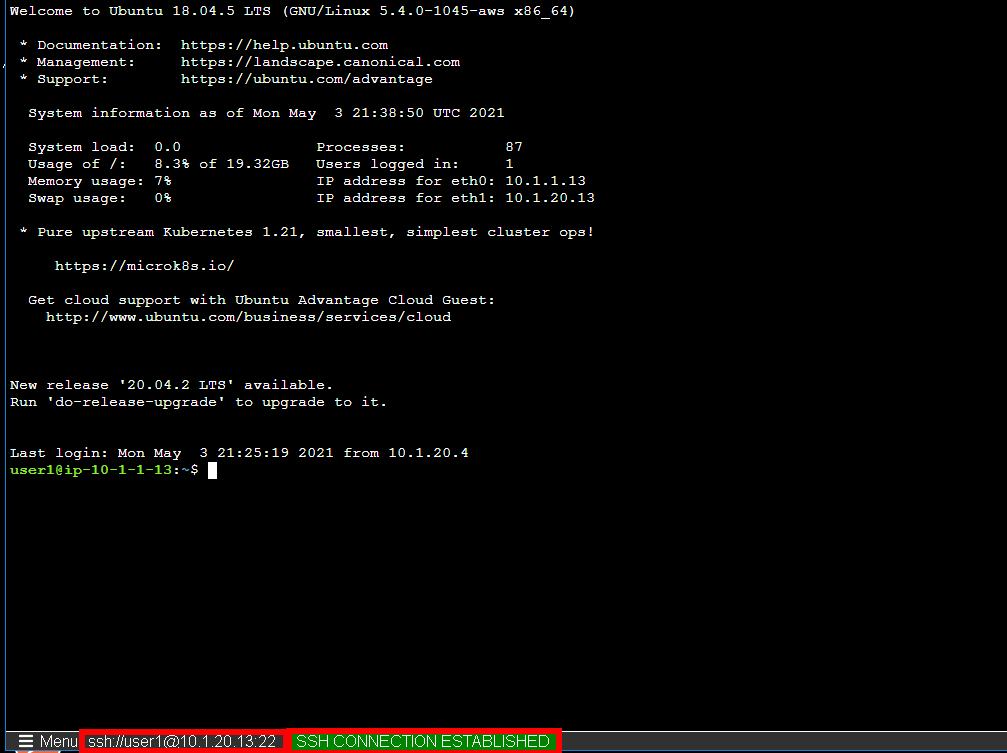
Click Client01 tab
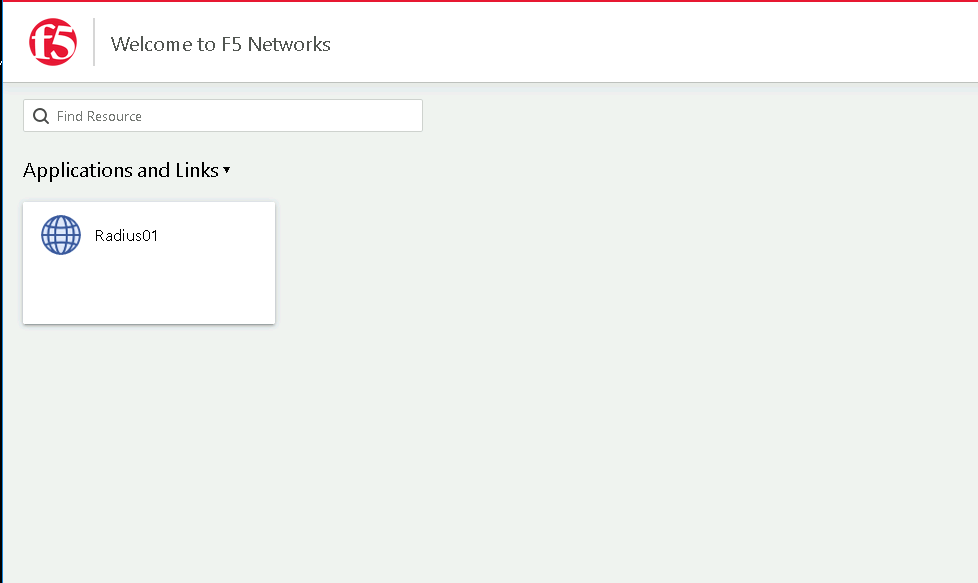
Observer the user logged into the server and connectivity status