F5 Identity and Access Management Solutions > Archived Identity & Access Management Labs > Class 9: Multi-Factor Auth for Cloud Applications > Lab 5: Set up DUO Source | Edit on
Lab – Set up DUO as Second Auth Factor
This lab will teach you how to configure DUO as Second Auth Factor. Estimated completion time: 30 minutes
Task - Get the values from DUO Admin Panel
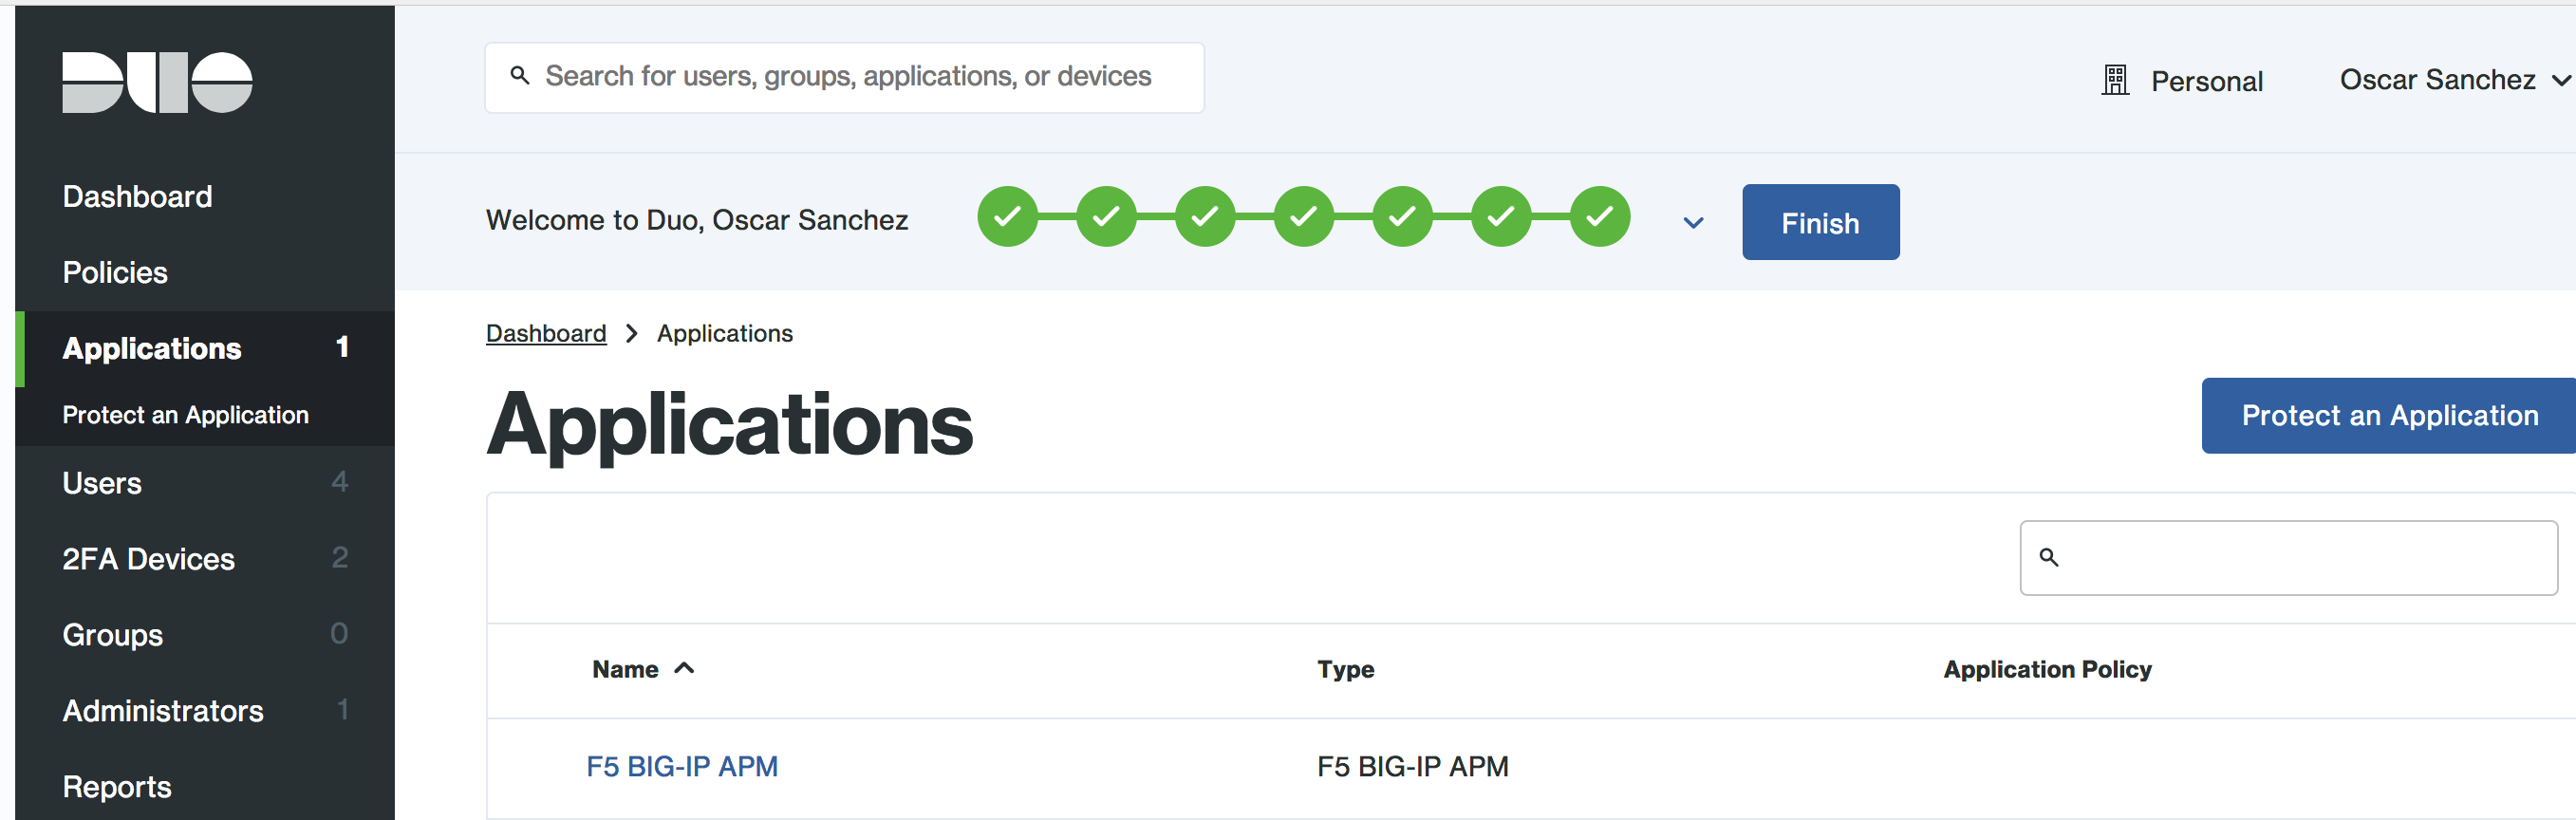
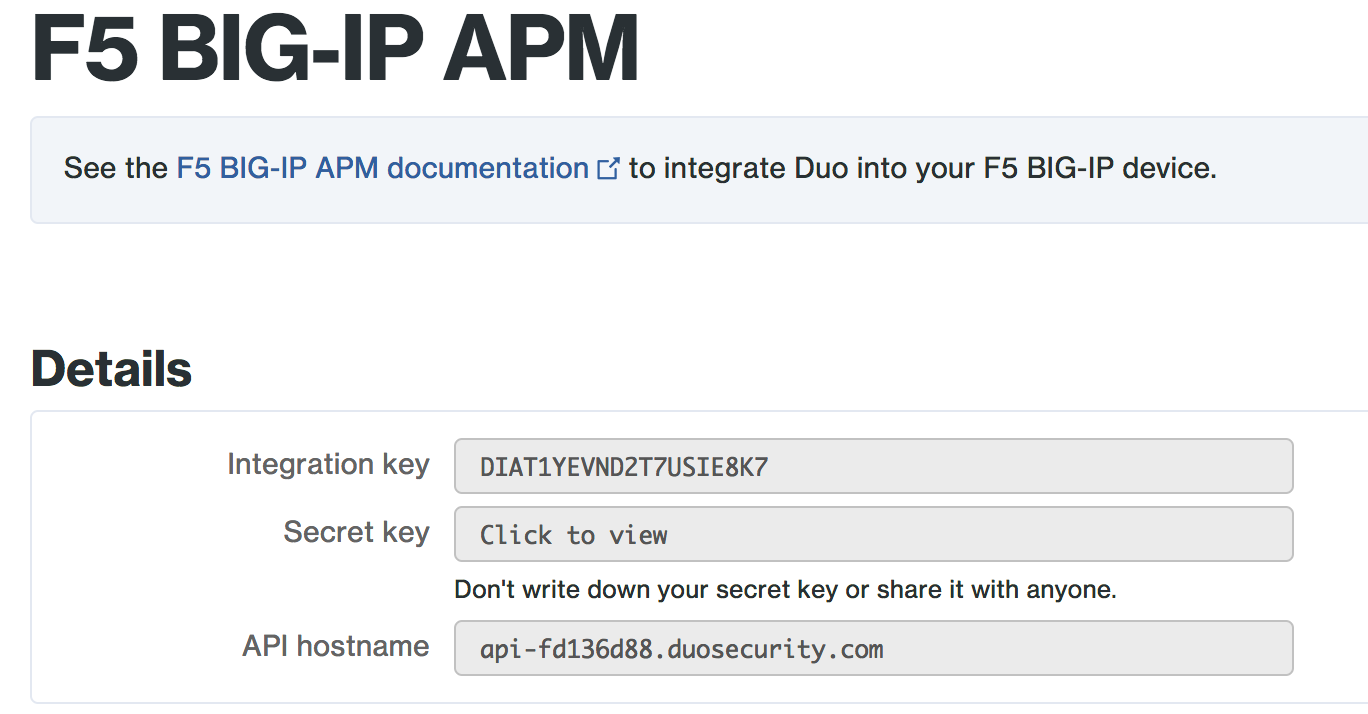
1. Log in to the Duo Admin Panel and navigate to
Applications. Then click on F5 BIG-IP APM. |
 |
|
 |
Task - Configure the Proxy for APM
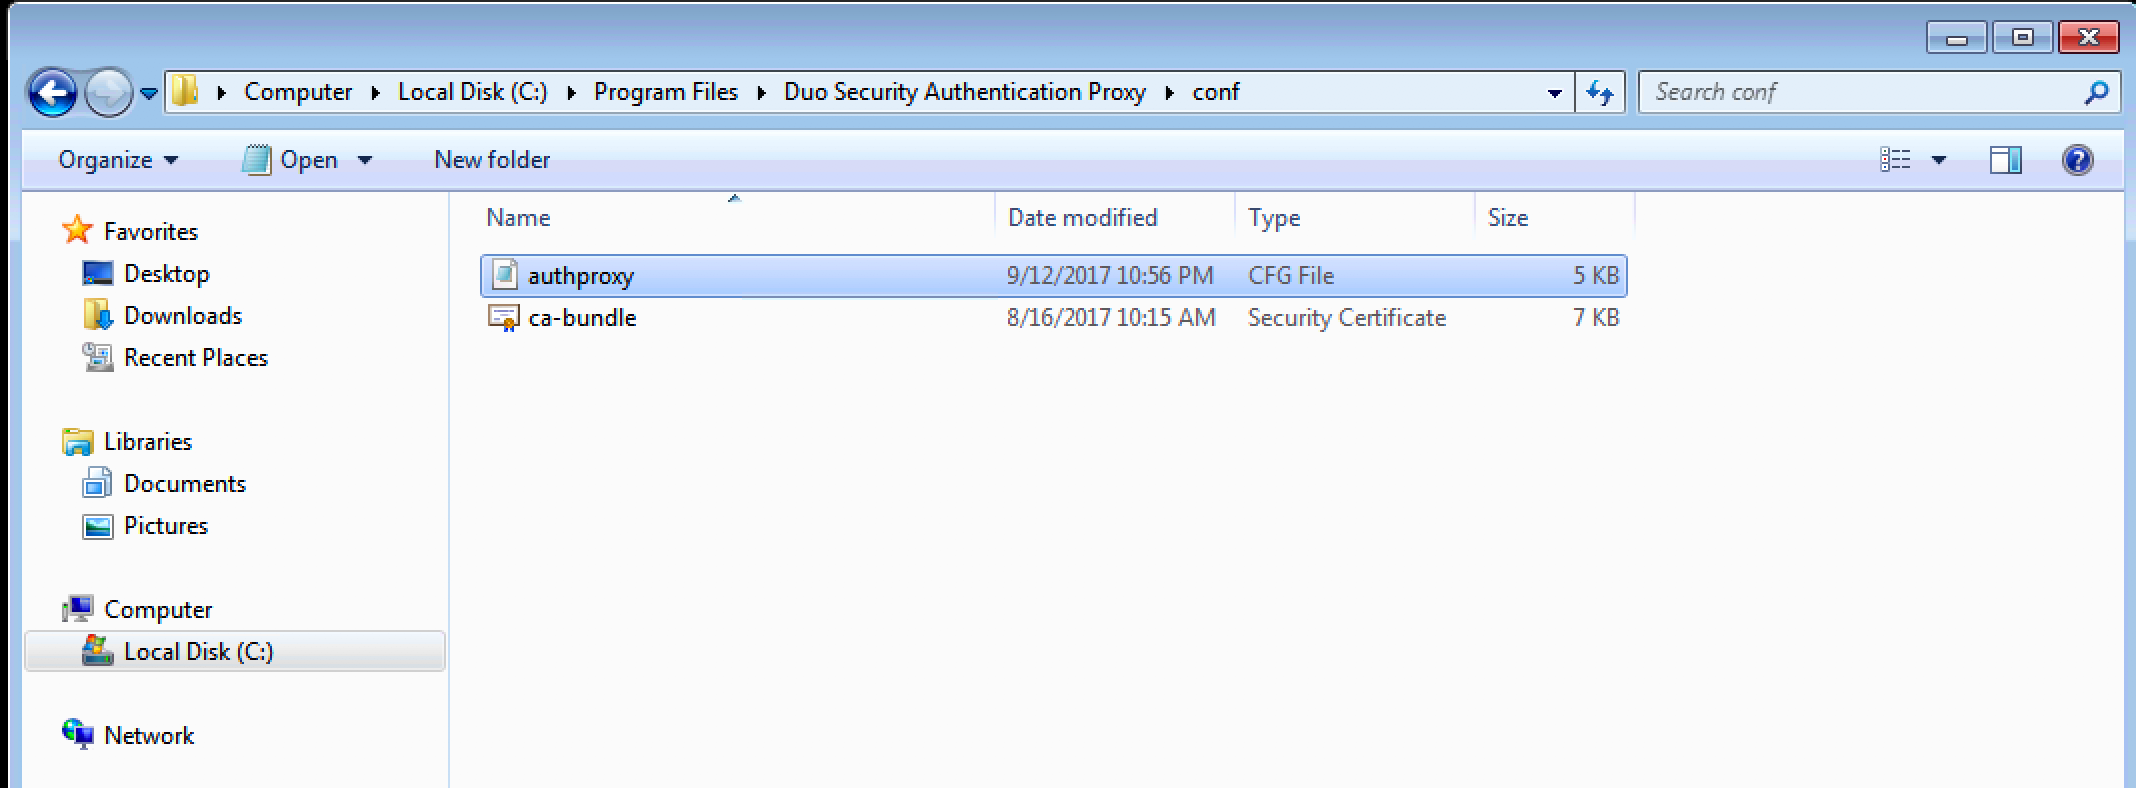
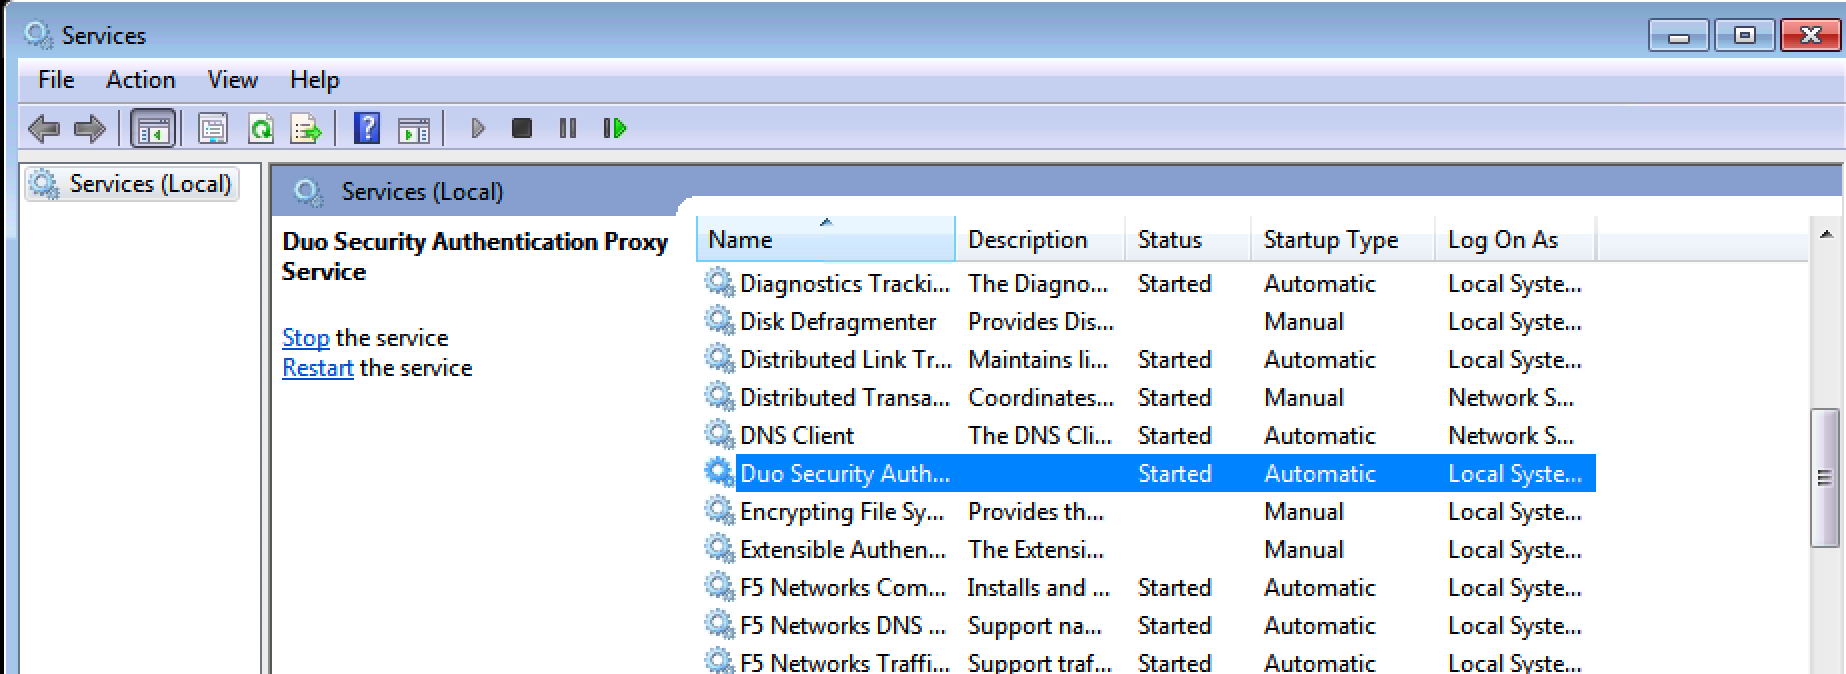
1. In the Win 7 External open (as administrator) the
file
C:Program FilesDuo Security Authentication Proxyconfauthproxy.cfg |
 |
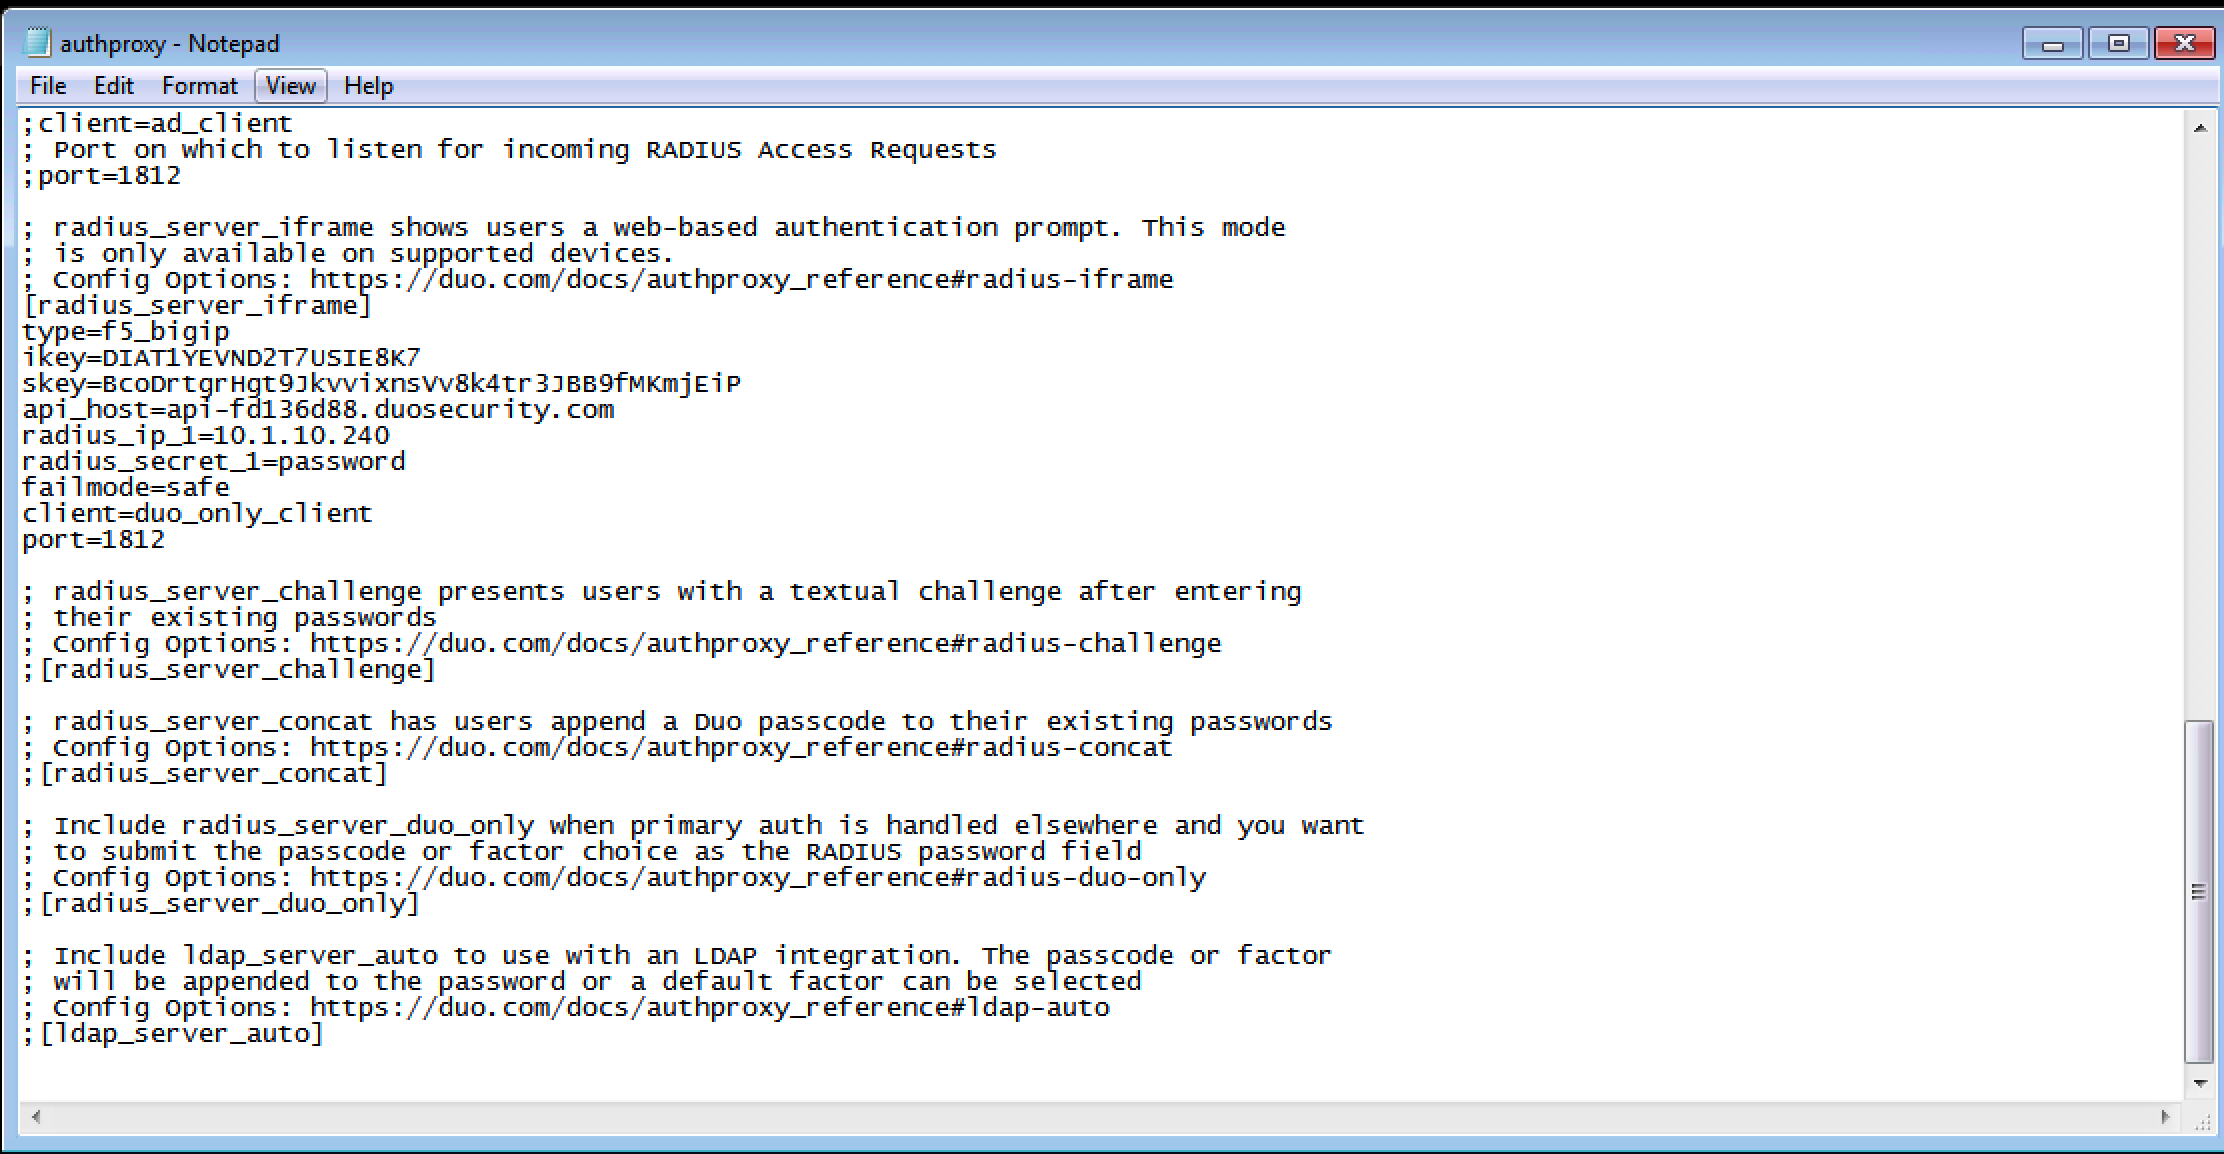
1. Search the section [radius_server_iframe] and modify the following values according to your DUO account
|
 |
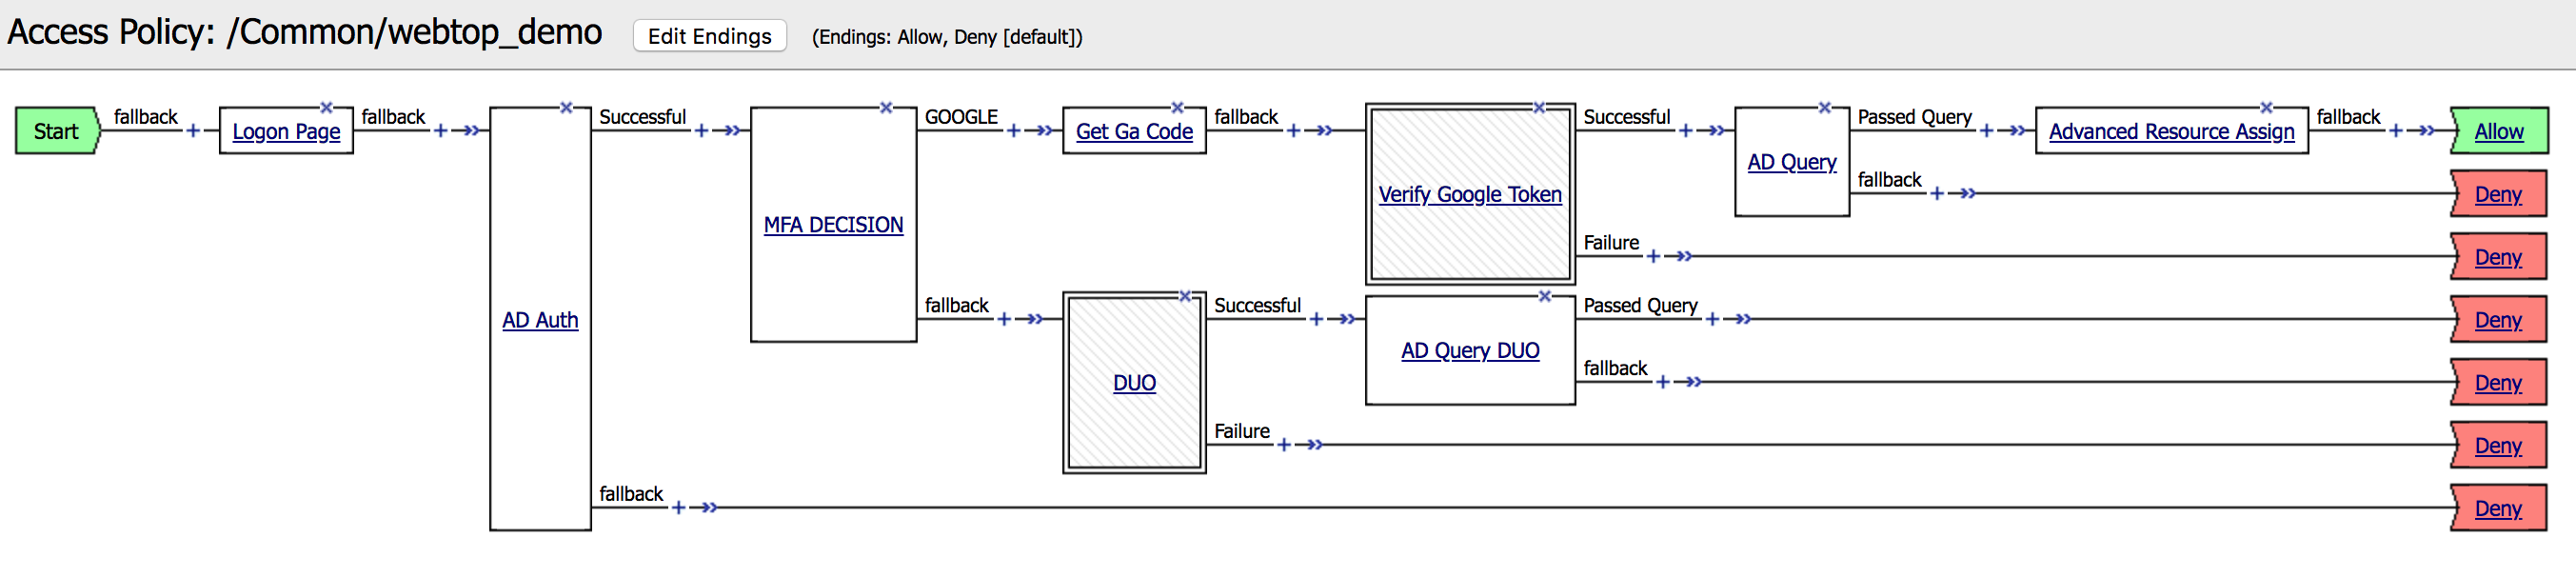
Task - Modify the Access Policy to include DUO
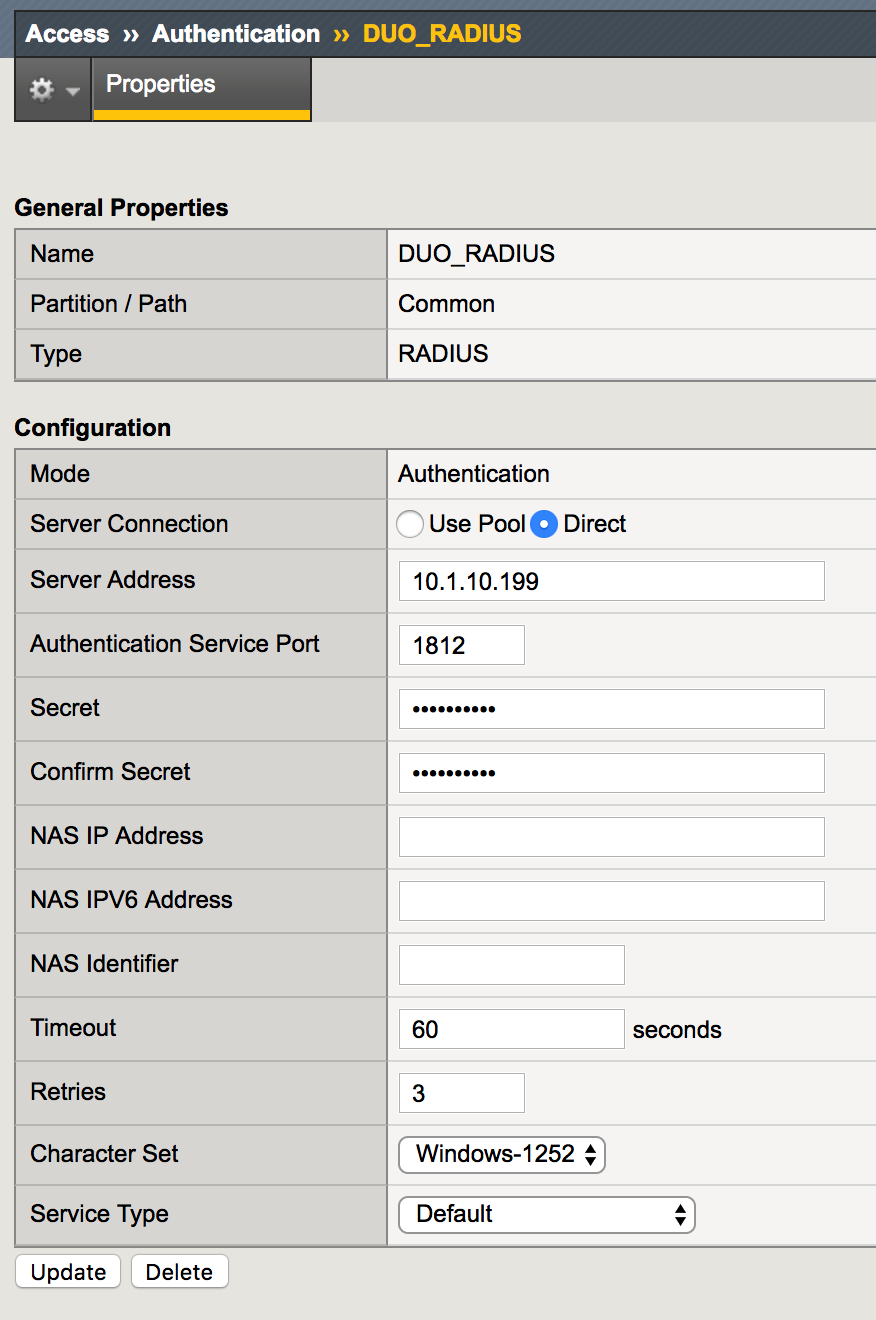
| 1. Go to Access -> Authentication -> RADIUS -> Create. |  |
2. Create a new record, using the following info and then Finished.
|
 |
| 3. Go to Access -> Profile / Policies -> Access Profile then locate the webtop_demo profile and click Edit. | 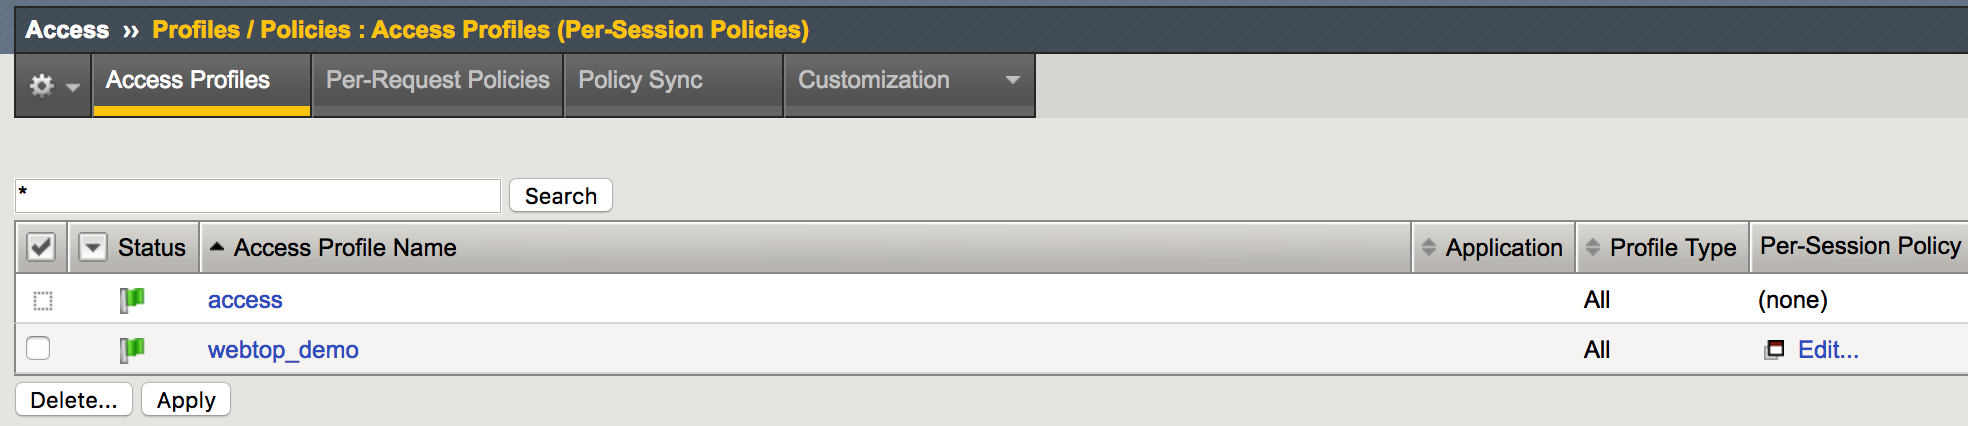 |
|
 |
|
 |
|
 |
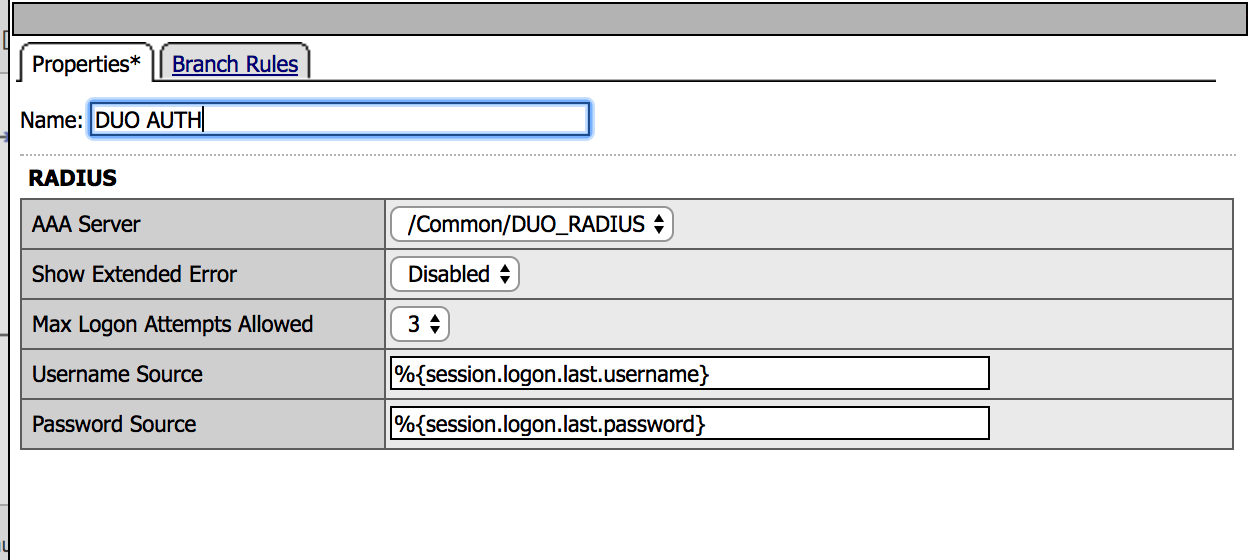
| 7. Under the Authentication tab, search for RADIUS Auth and click Add Item |
|
8. Create a new record, using the following info (leave the defaults) and then Save.
|
 |
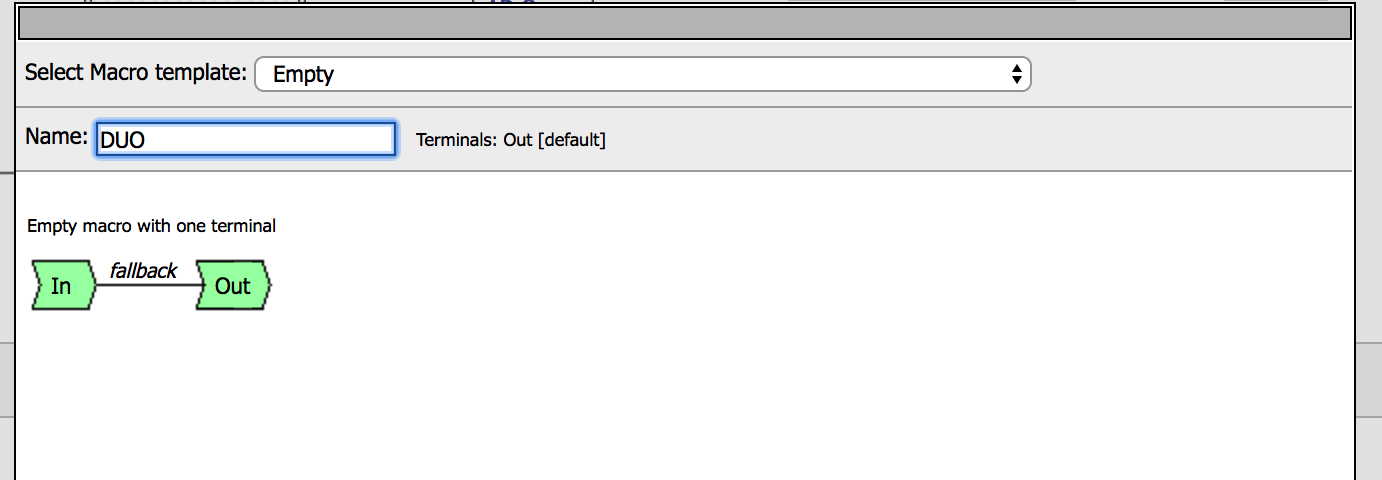
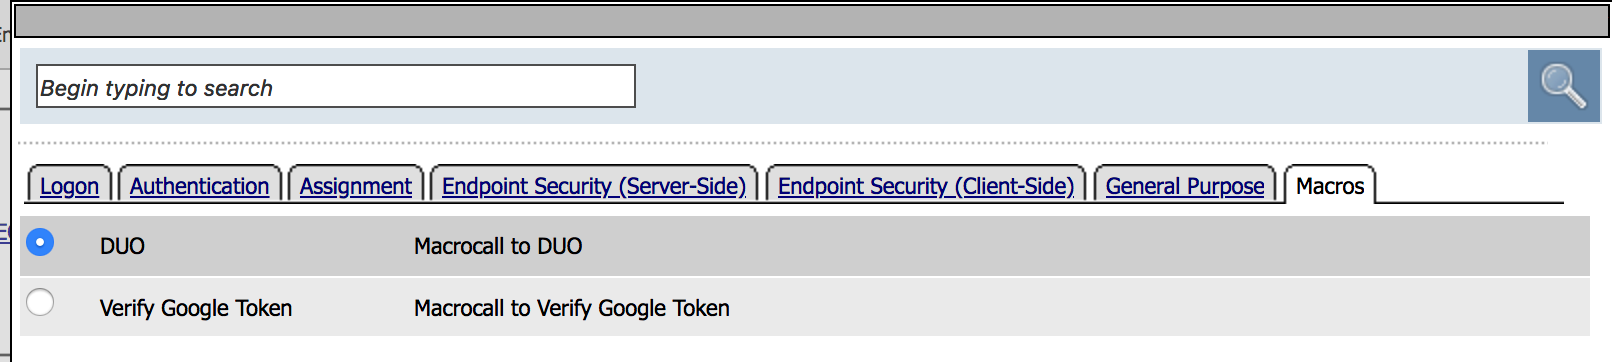
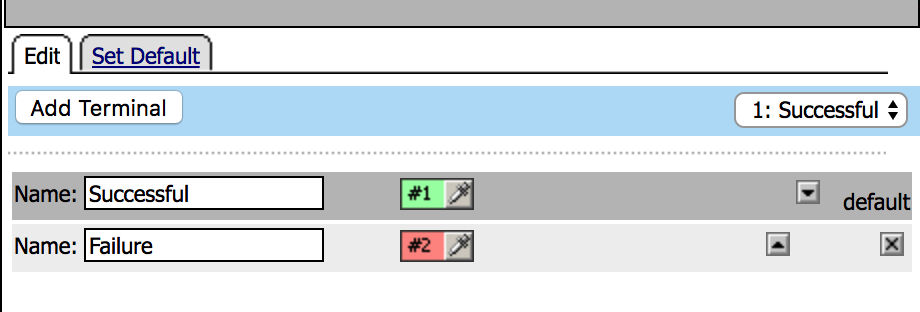
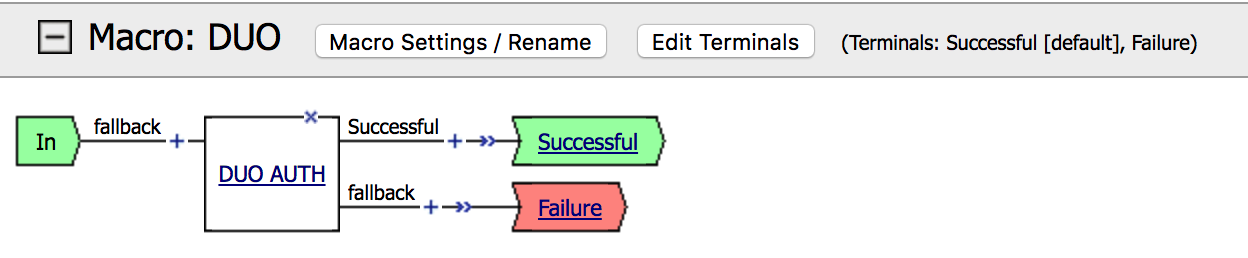
| 9. Go to the Macro DUO and click on Edit Terminals. Then Add Terminal and Rename the terminals according to the image. Also change the order. |
|
10. Click on the + between AD Auth and
Get Ga Code |
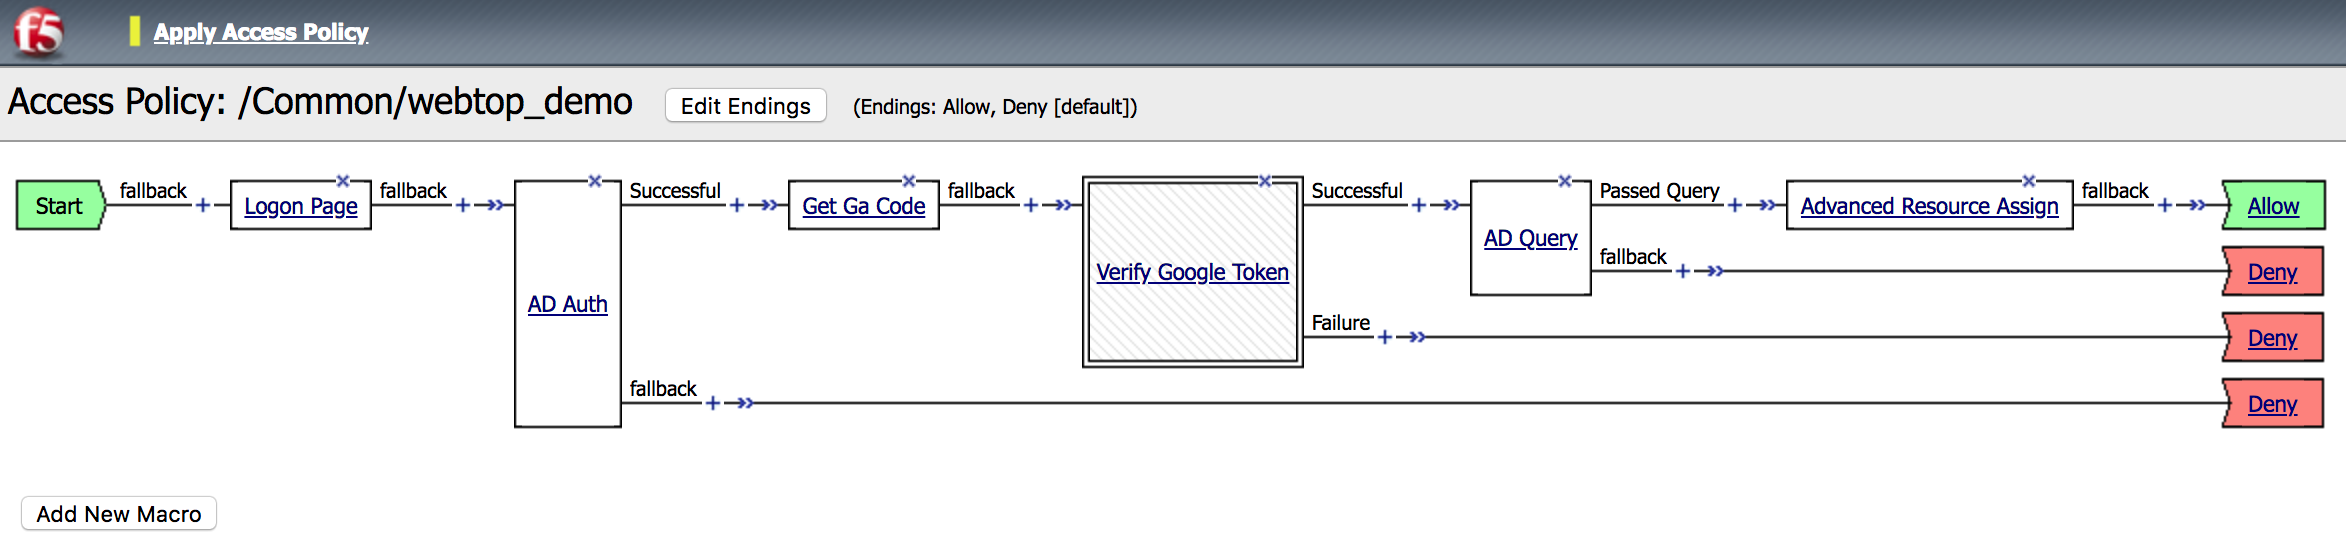 |
| 11. Under the General Purpose tab, choose Decision Box and then Add Item | 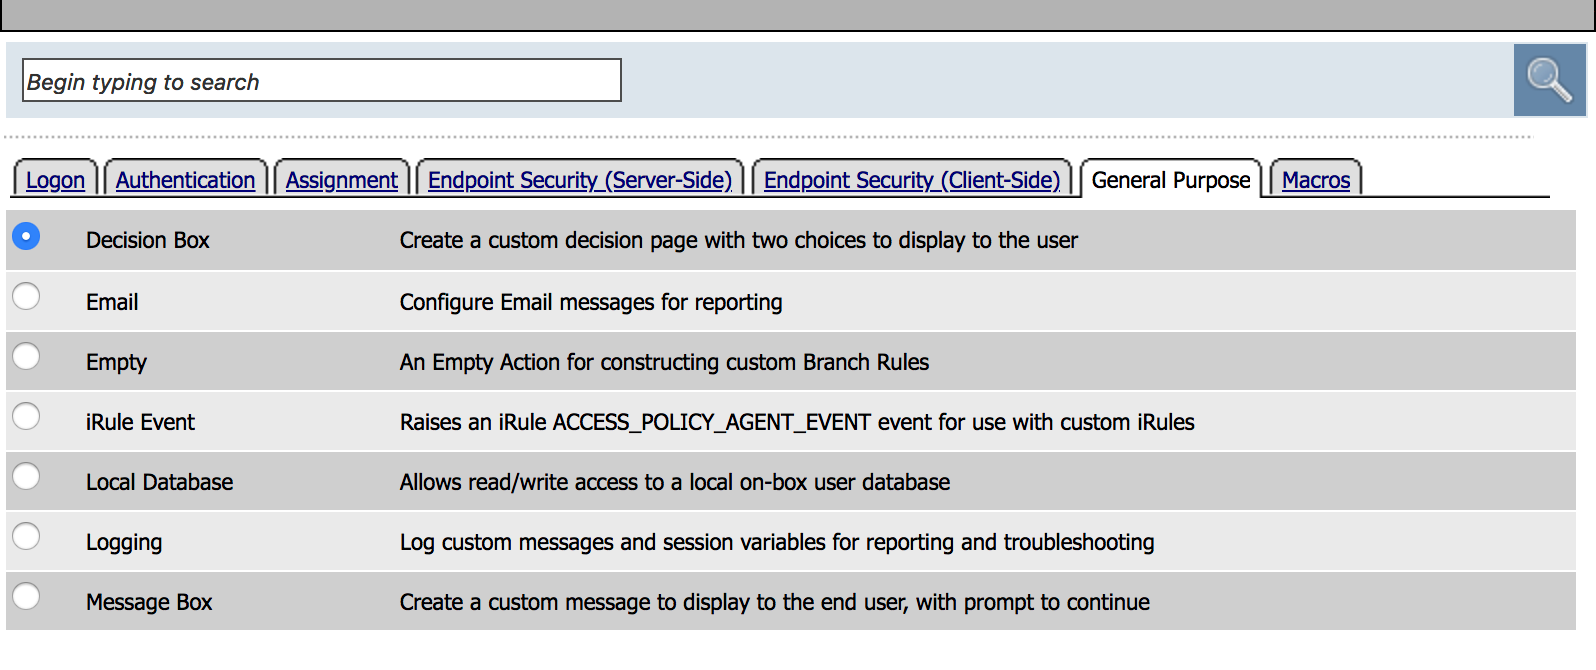 |
12. Create a new record, using the following info (leave the defaults).
|
 |
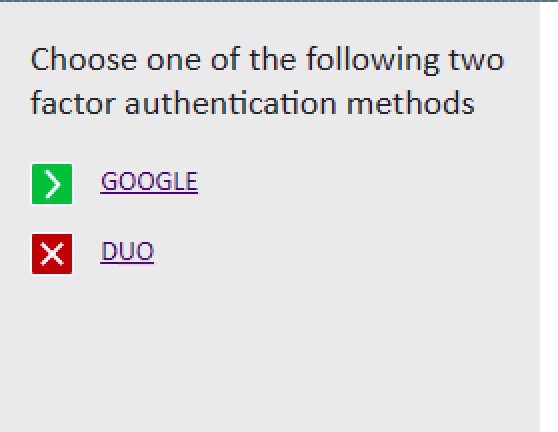
13. Under the Branch Rules tab change the name
to GOOGLE and then Save. |
 |
14. Click on the + in front of the
MFA DECISION fallback branch. |
 |
|
 |
16. Click on the + in front of the DUO Successful
branch. |
 |
| 17. Under the Authentication tab, choose AD Query and then Add Item |  |
18. Create a new record, using the following info (leave the defaults).
|
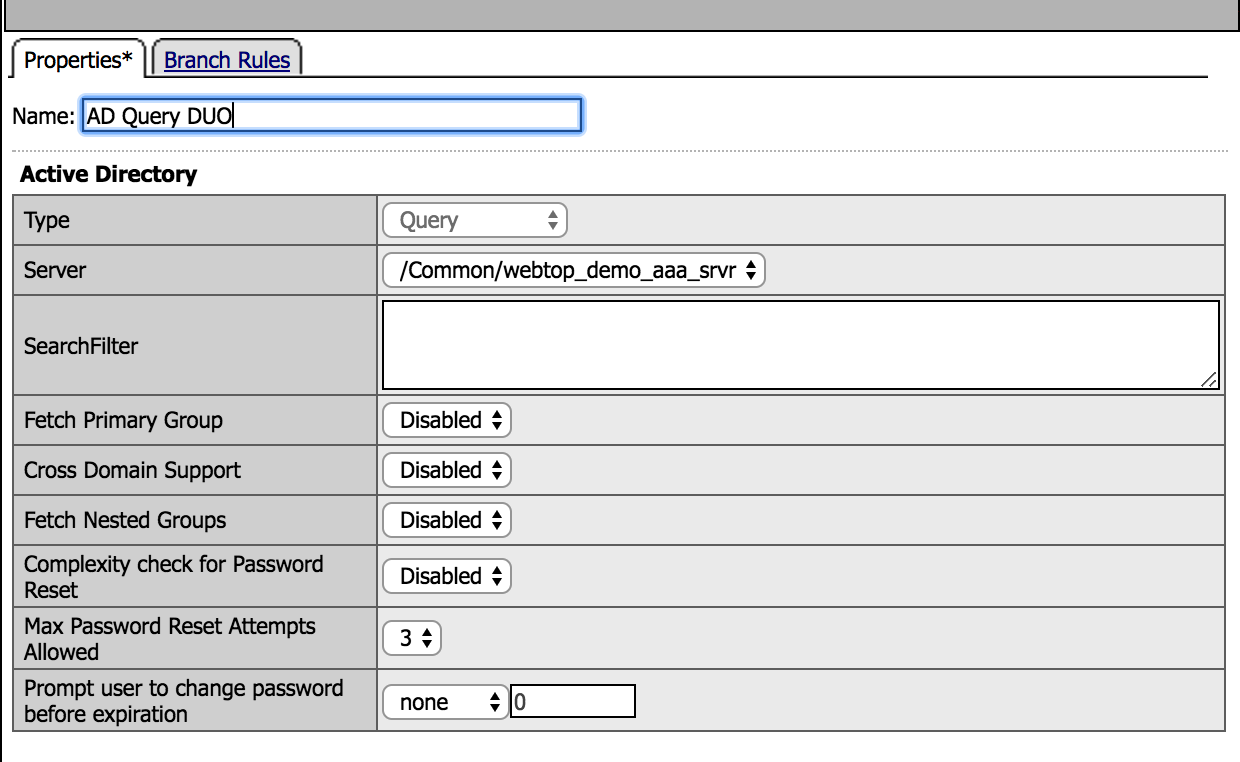 |
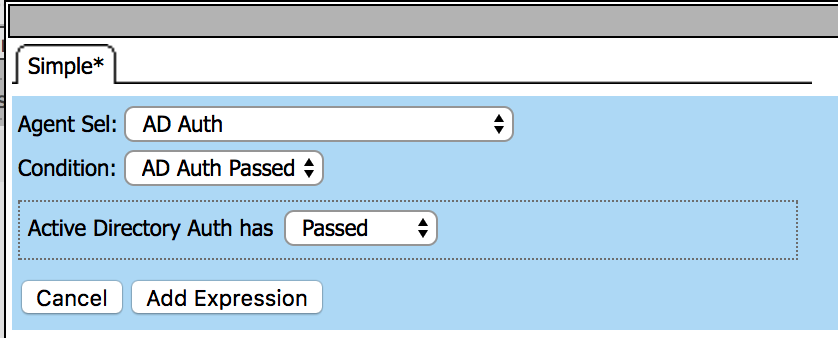
| 19. Under the Branch Rules tab, click on change Expression. | 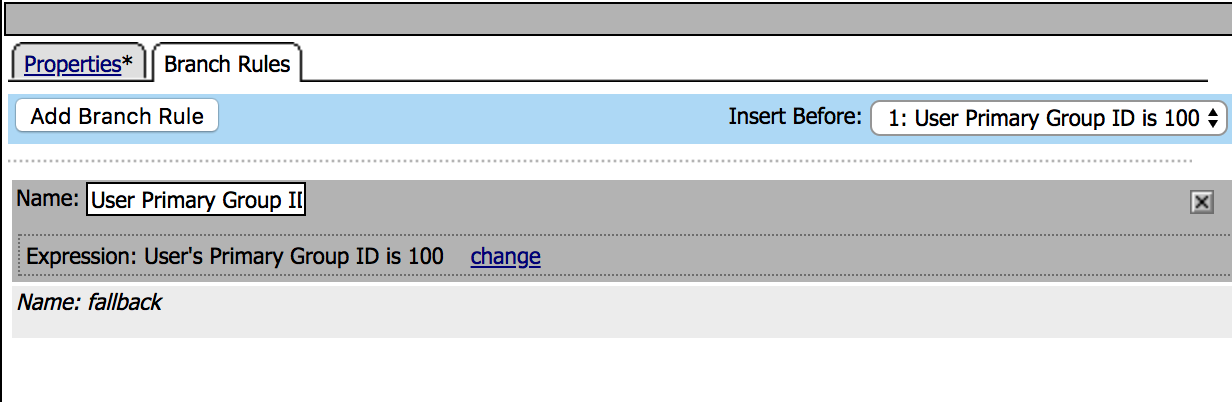 |
|
 |
21. Create a new expression, using the following info (leave the defaults), then click Add Expression and Save
|
 |
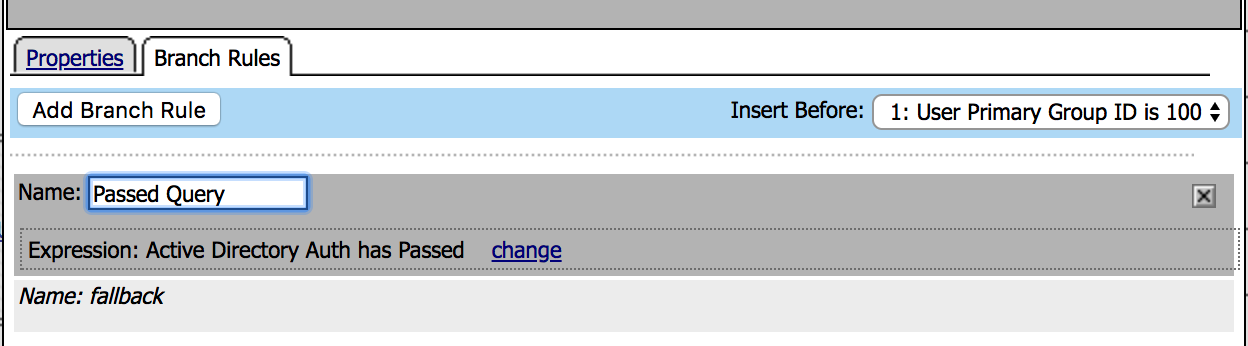
| 22. Click on the AD Query DUO box, then go to Branch Rules tab and modify the name to Passed Query and Save |
|
23. Click on the + in front of the
AD QUERY DUO Passed Query branch. |
 |
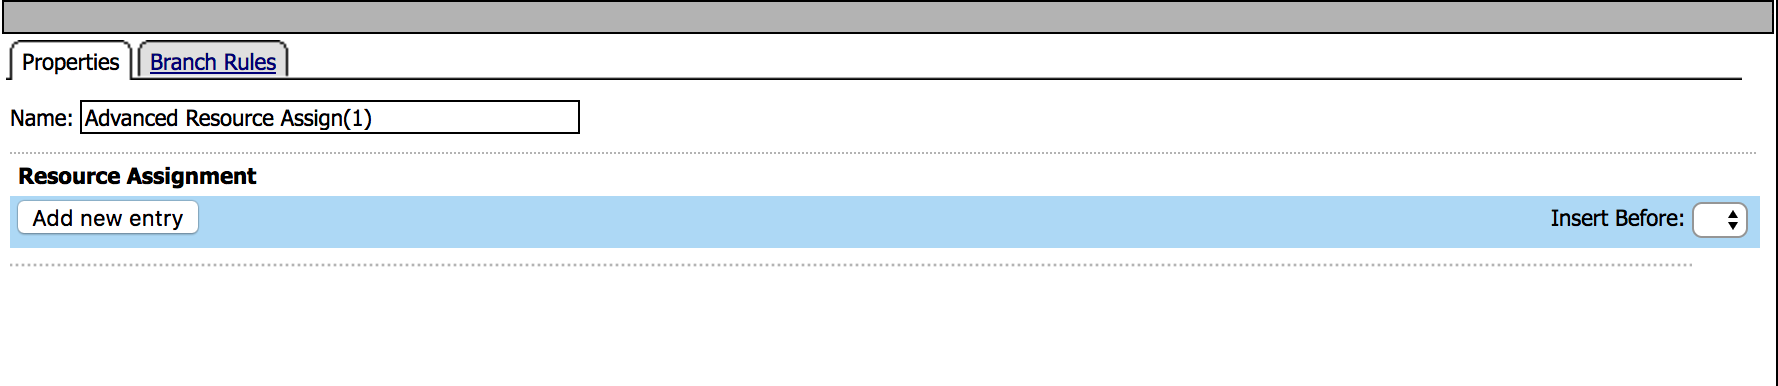
| 24. Under the Assignment tab choose Advanced Resource Assign, then Add Item |  |
|
 |
|
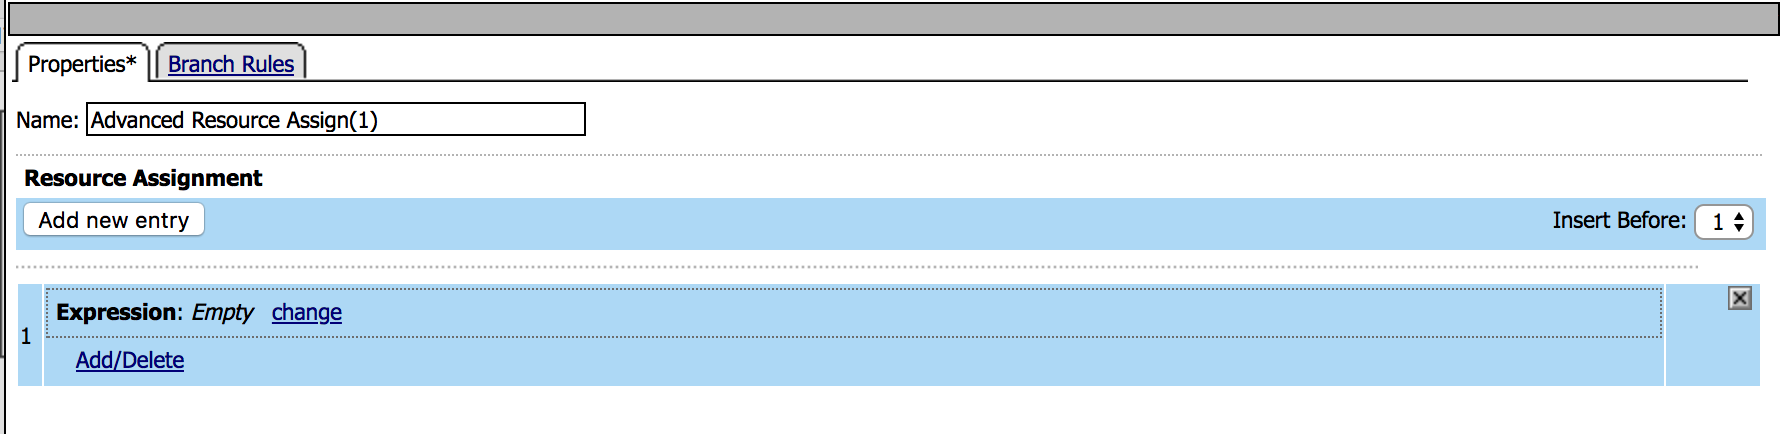 |
|
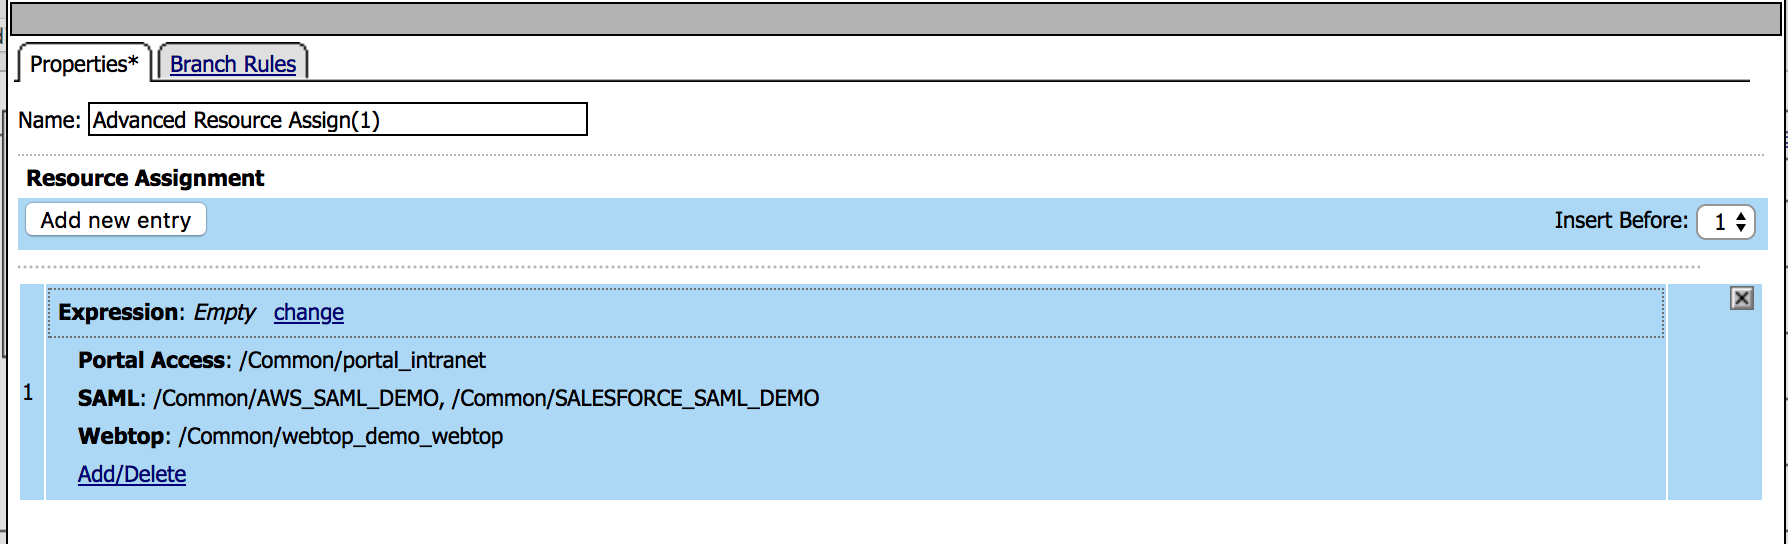 |
| 28. Change the ending to Allow and click on Apply Access Policy. | 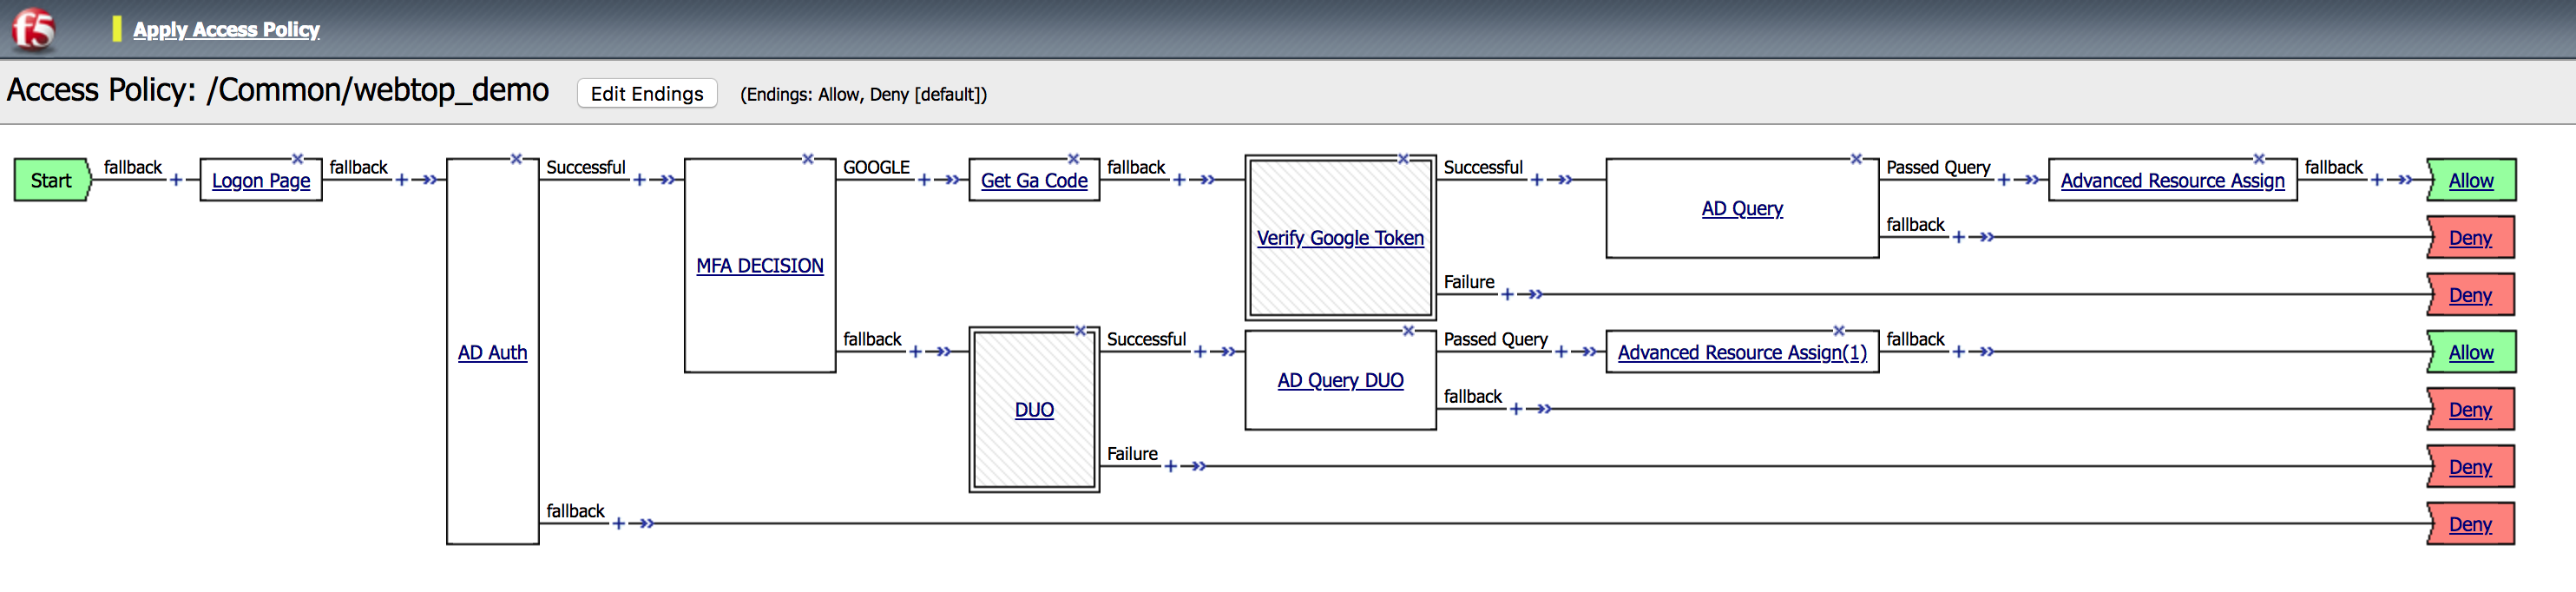 |


Task - Configure the APM to use the DUO Service
| 1. Go to Access -> Profiles / Policies -> Customization -> Advanced | 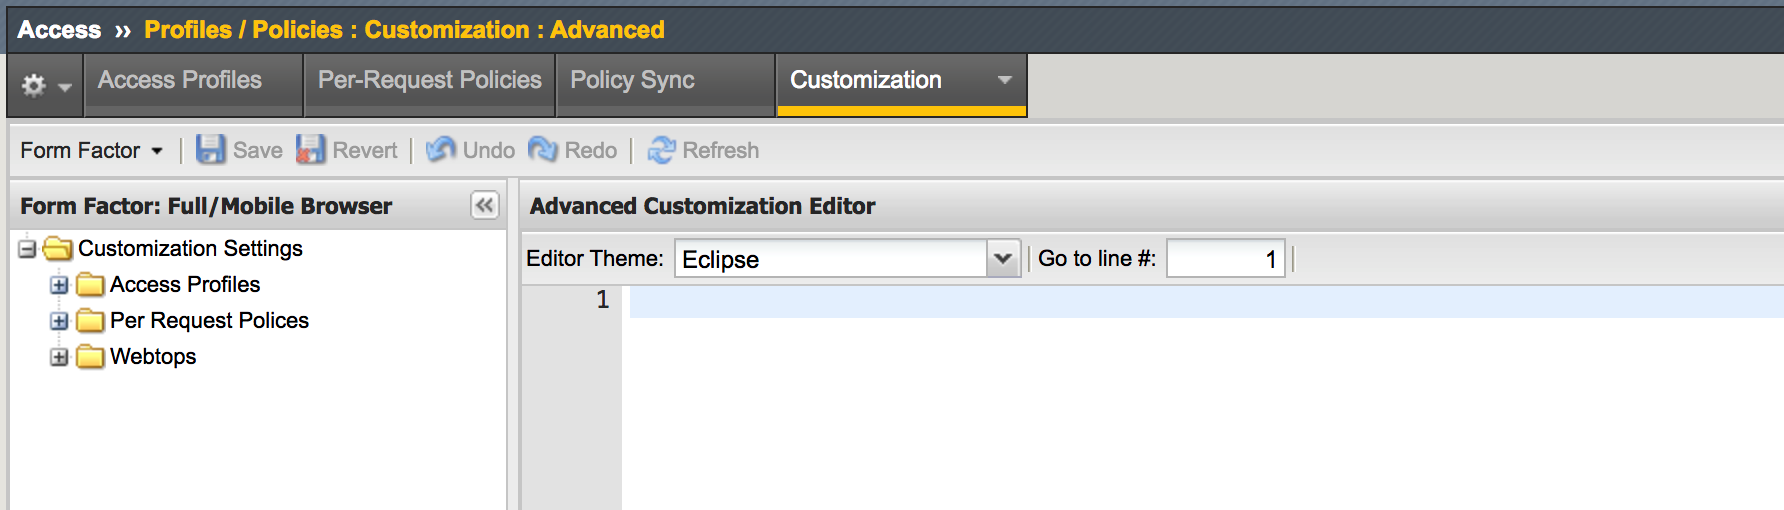 |
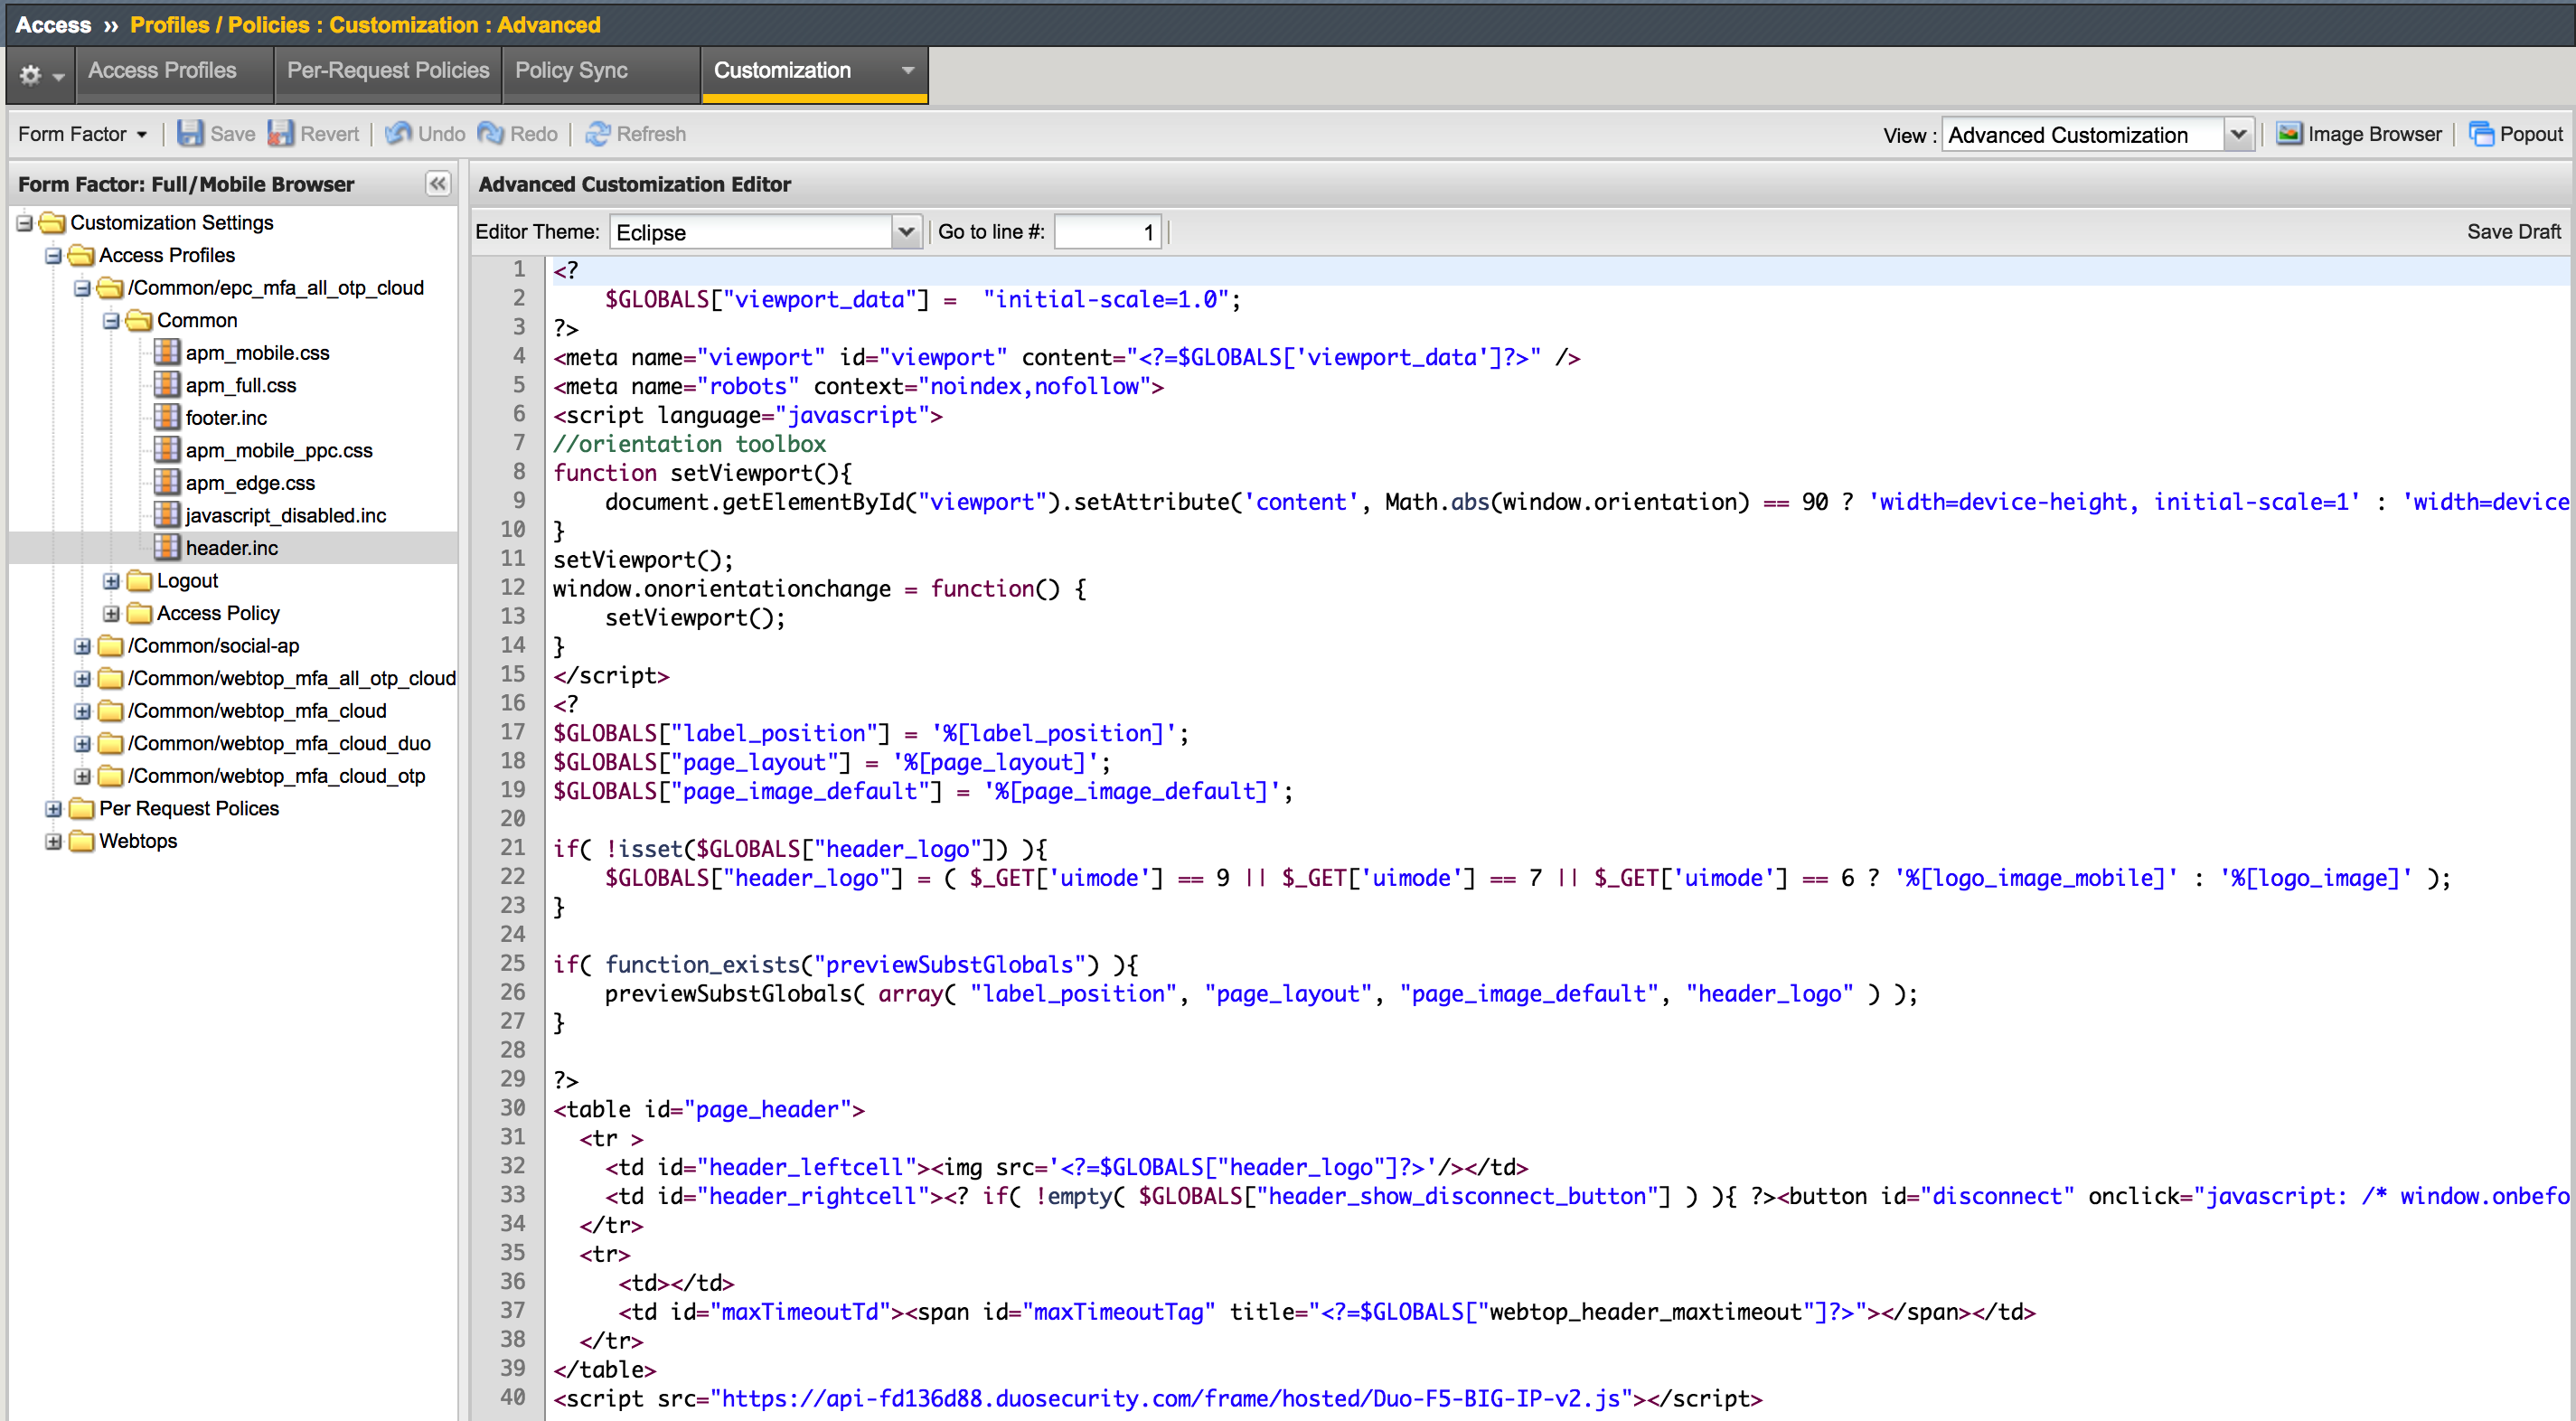
2. Navigate to Access Profiles -> /Common/webtop_demo
-> Common -> header.inc and insert the line
NOTE: Use the |
 |
|
 |
|
 |
5. Go to
|
 |