NGINX Modern Apps > Class 6 - NGINX API Management > Module 3 - Publish the API Source | Edit on
Step 4 - Publish API v1.0
Before publishing our first API, it’s important to understand what the DevOps (or API Dev) team provided us.
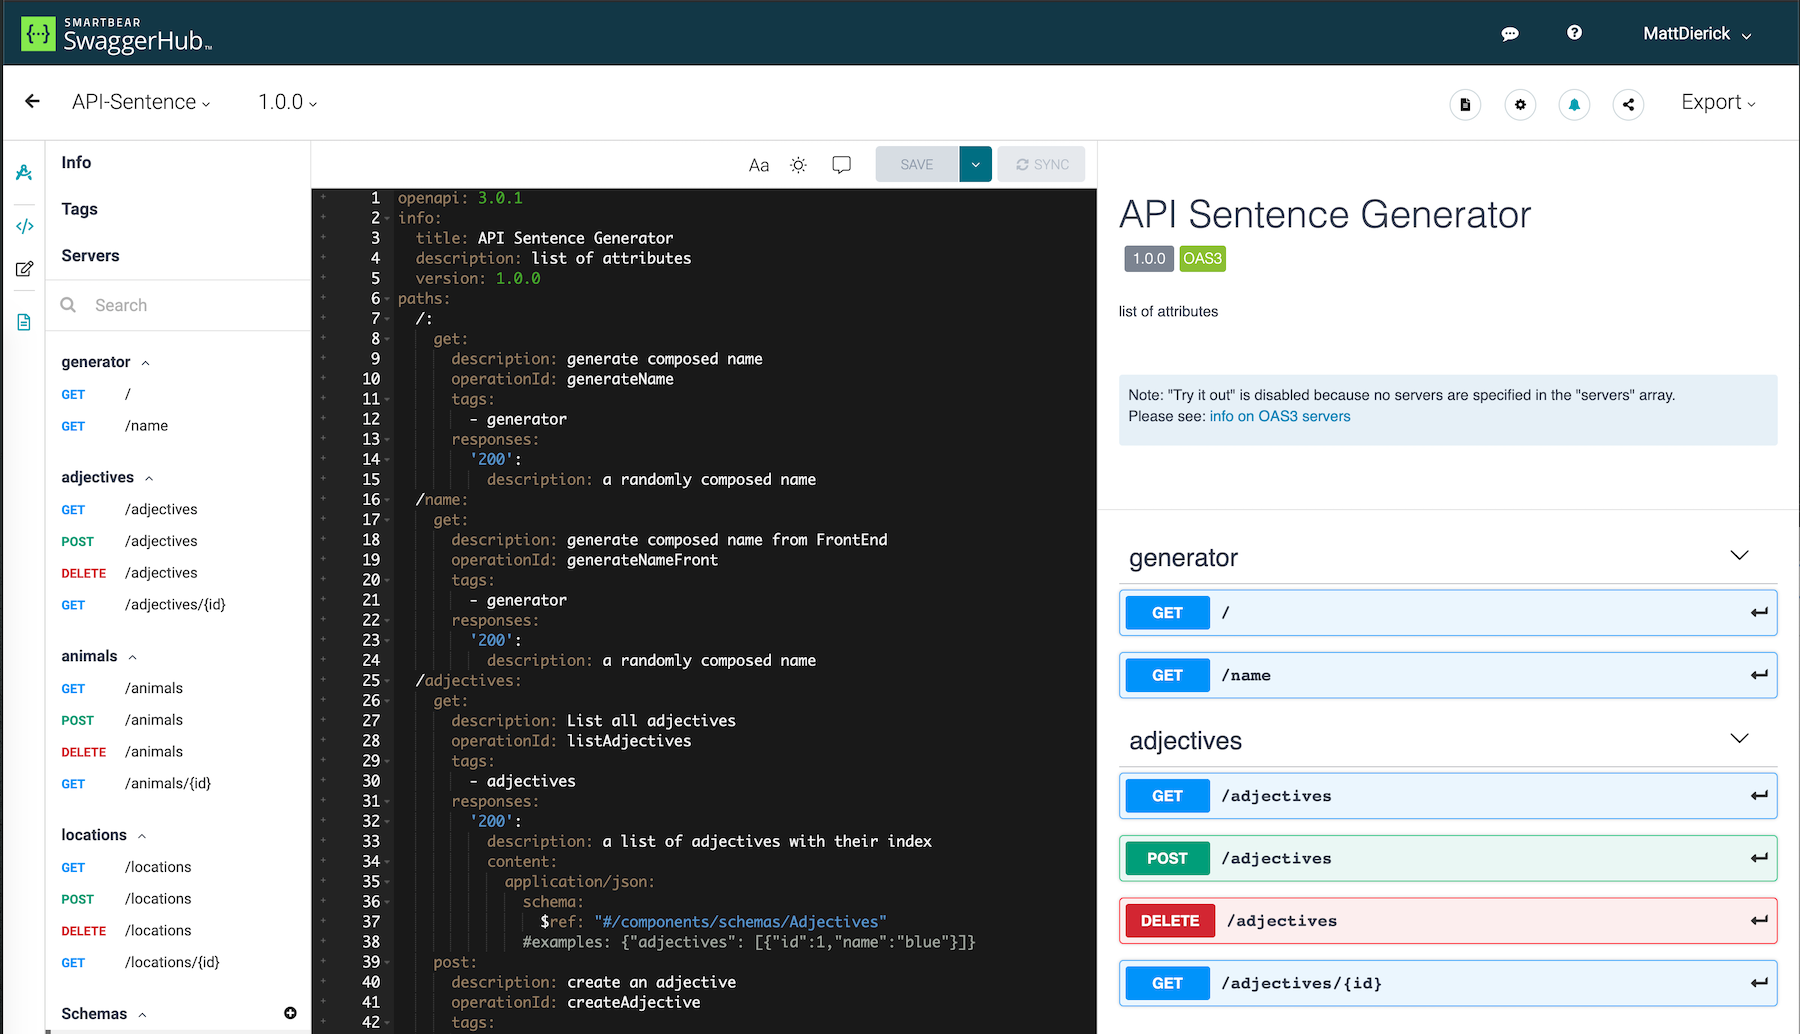
They provided us an OpenAPI spec file (OASv3) via SwaggerHub. You can consult version 1.0 here: https://app.swaggerhub.com/apis/F5EMEASSA/API-Sentence/1.0
Note
This is version 1.0 of the API, and in this version, as you can notice, the Colors micro-service is not yet available. This means that with this spec file we will publish the API Sentence application without the Colors micro-service (e.g. a sample sentence might look like calm mouse of the mountain).
Steps to publish version 1.0 of the API
Create the API Definition
In NGINX Controller, select
Home(the NGINX logo on the top left corner) ->Services->APIs->Create API Version:- First, you will need to create an
API Definition. To do so, click onCREATE NEWunder the API Definition box (which is empty):- Name:
api-sentence - Click
Submit
- Name:
- Select
OpenAPI Specification->Copy and paste specification text. - Copy and paste the YAML content from https://app.swaggerhub.com/apis/F5EMEASSA/API-Sentence/1.0
- Verify that the version set by NGINX Controller is
1.0. This information is extracted from the spec file. - Click
Next. You will notice NGINX Controller imported all thePATHandMETHODSresources from the spec file. - Click
Submit
Note
At this moment in the configuration process, NGINX Controller knows the API paths and methods, but does not know where to proxy the traffic to.
- First, you will need to create an
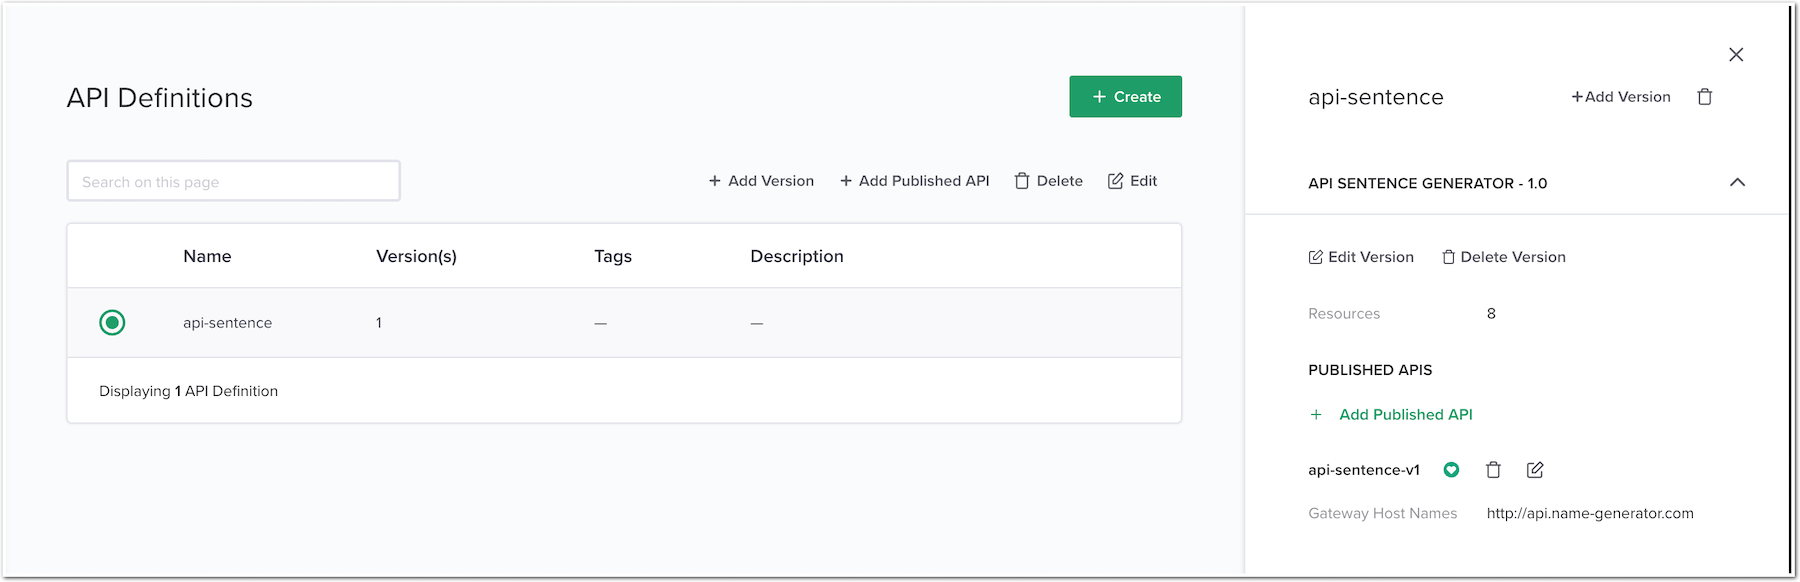
Click on the created API Definition. On the right side menu you can see the
versionand the number ofresources: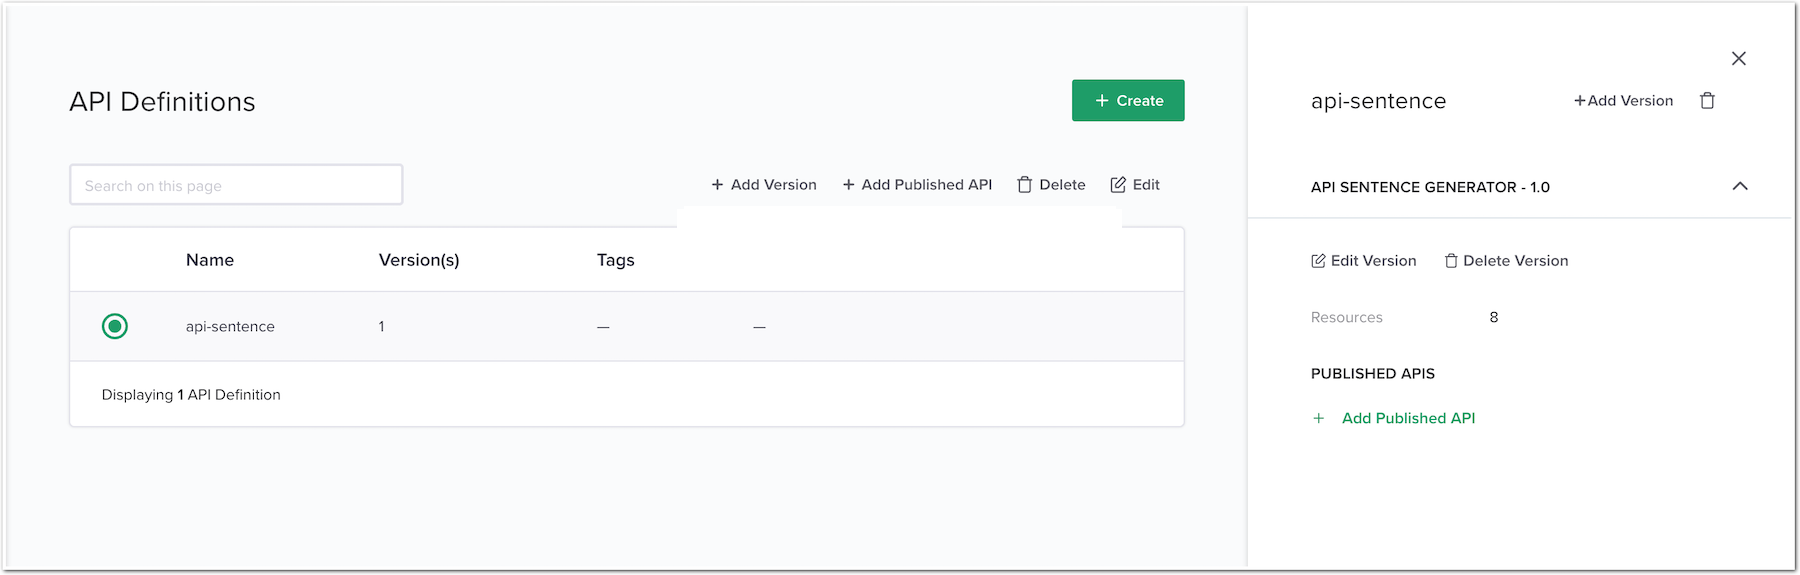
Create a Published API for v1.0
Let’s now publish version 1.0 of the API. Click on
Add Published API. Use the following values:Name:
api-sentence-v1Click
NextEnvironment:
env_prodApp:
api-sentence-app(we automatically created this for you behind the scenes for this lab)Gateways:
apigwClick
Next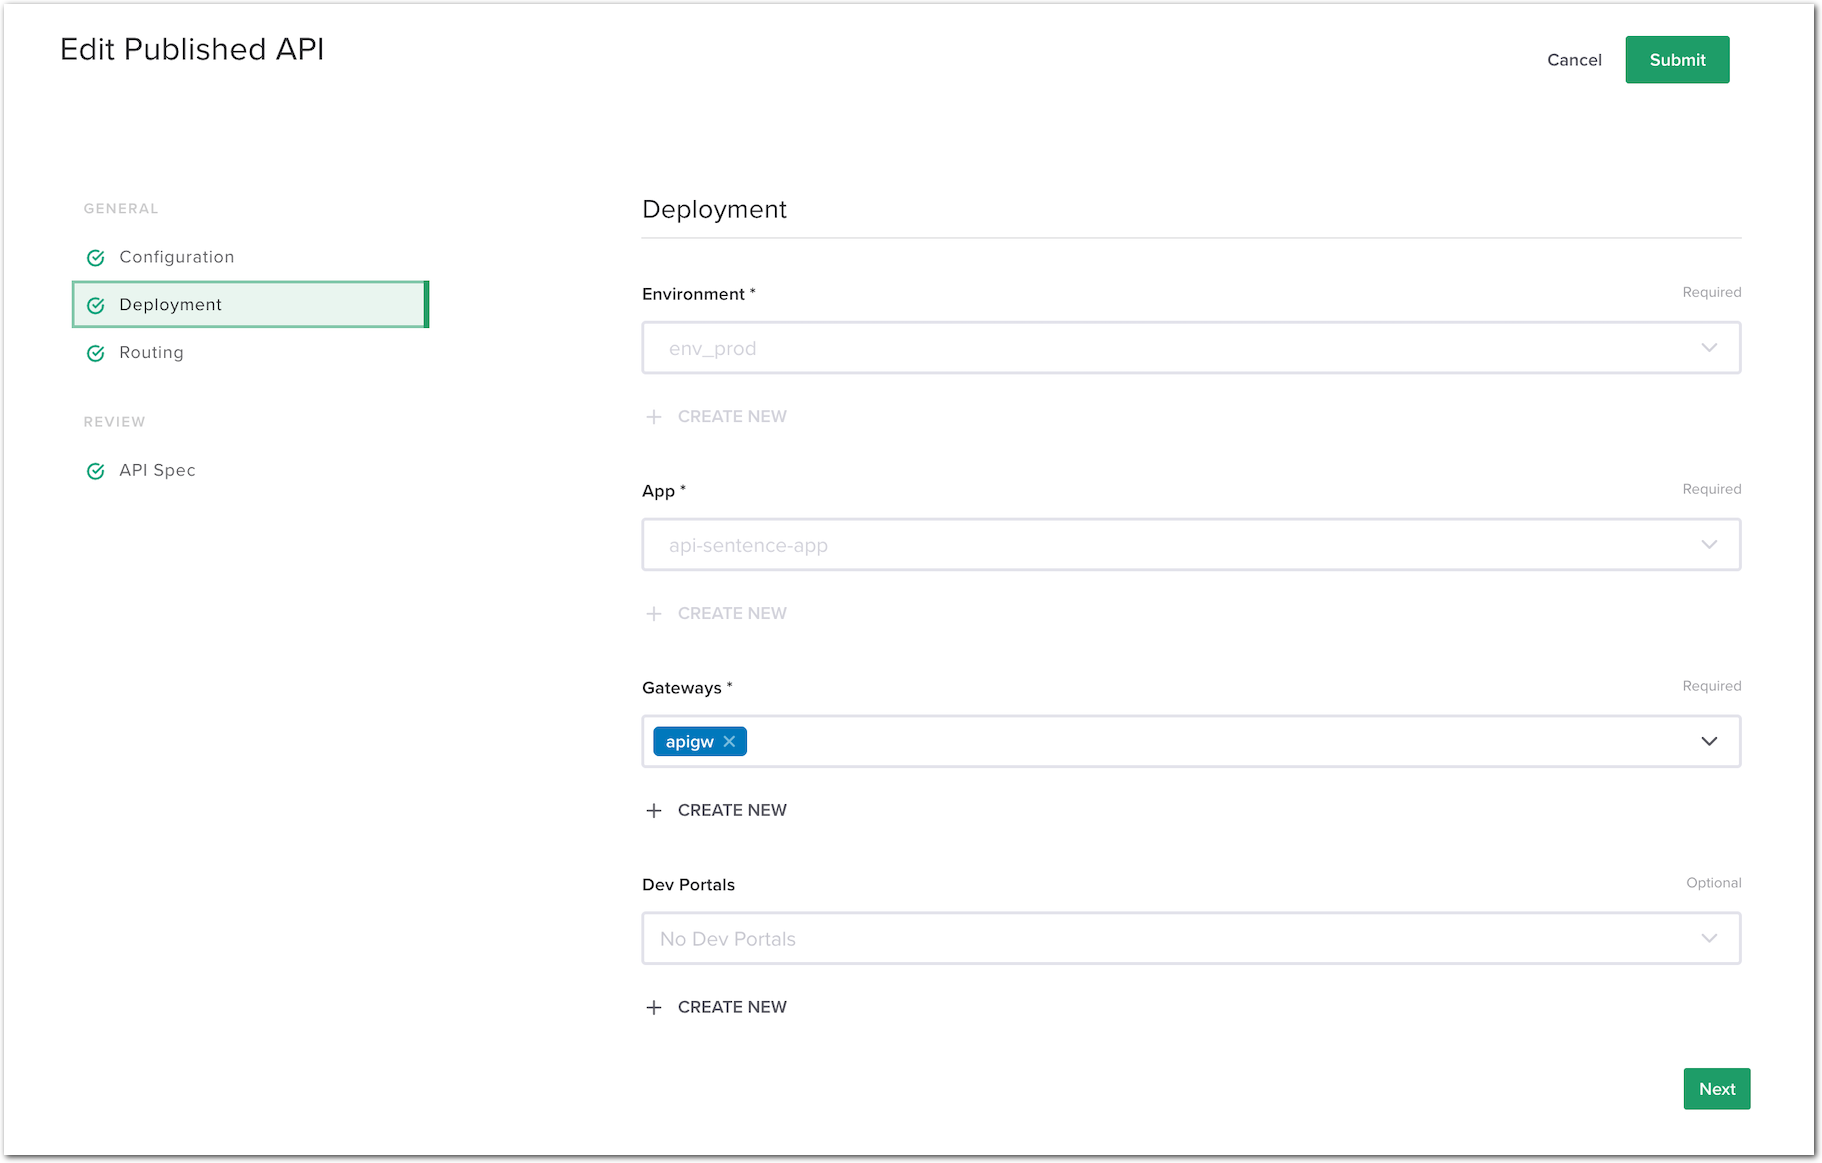
- In
Routing, we will create onecomponentpermicro-service: - Click
Add Newto create a new component for theGeneratormicro-service: Name:
cp-generatorClick
Next- In
Workload Groups: Name:
wl-generatorIn
Backend Workload URIs:URI:
http://10.1.20.8:31200Note
This URL is the FQDN and the NodePort used by the micro-service running in the K3S.
Click
Done
Click
Done
- In
Click
Next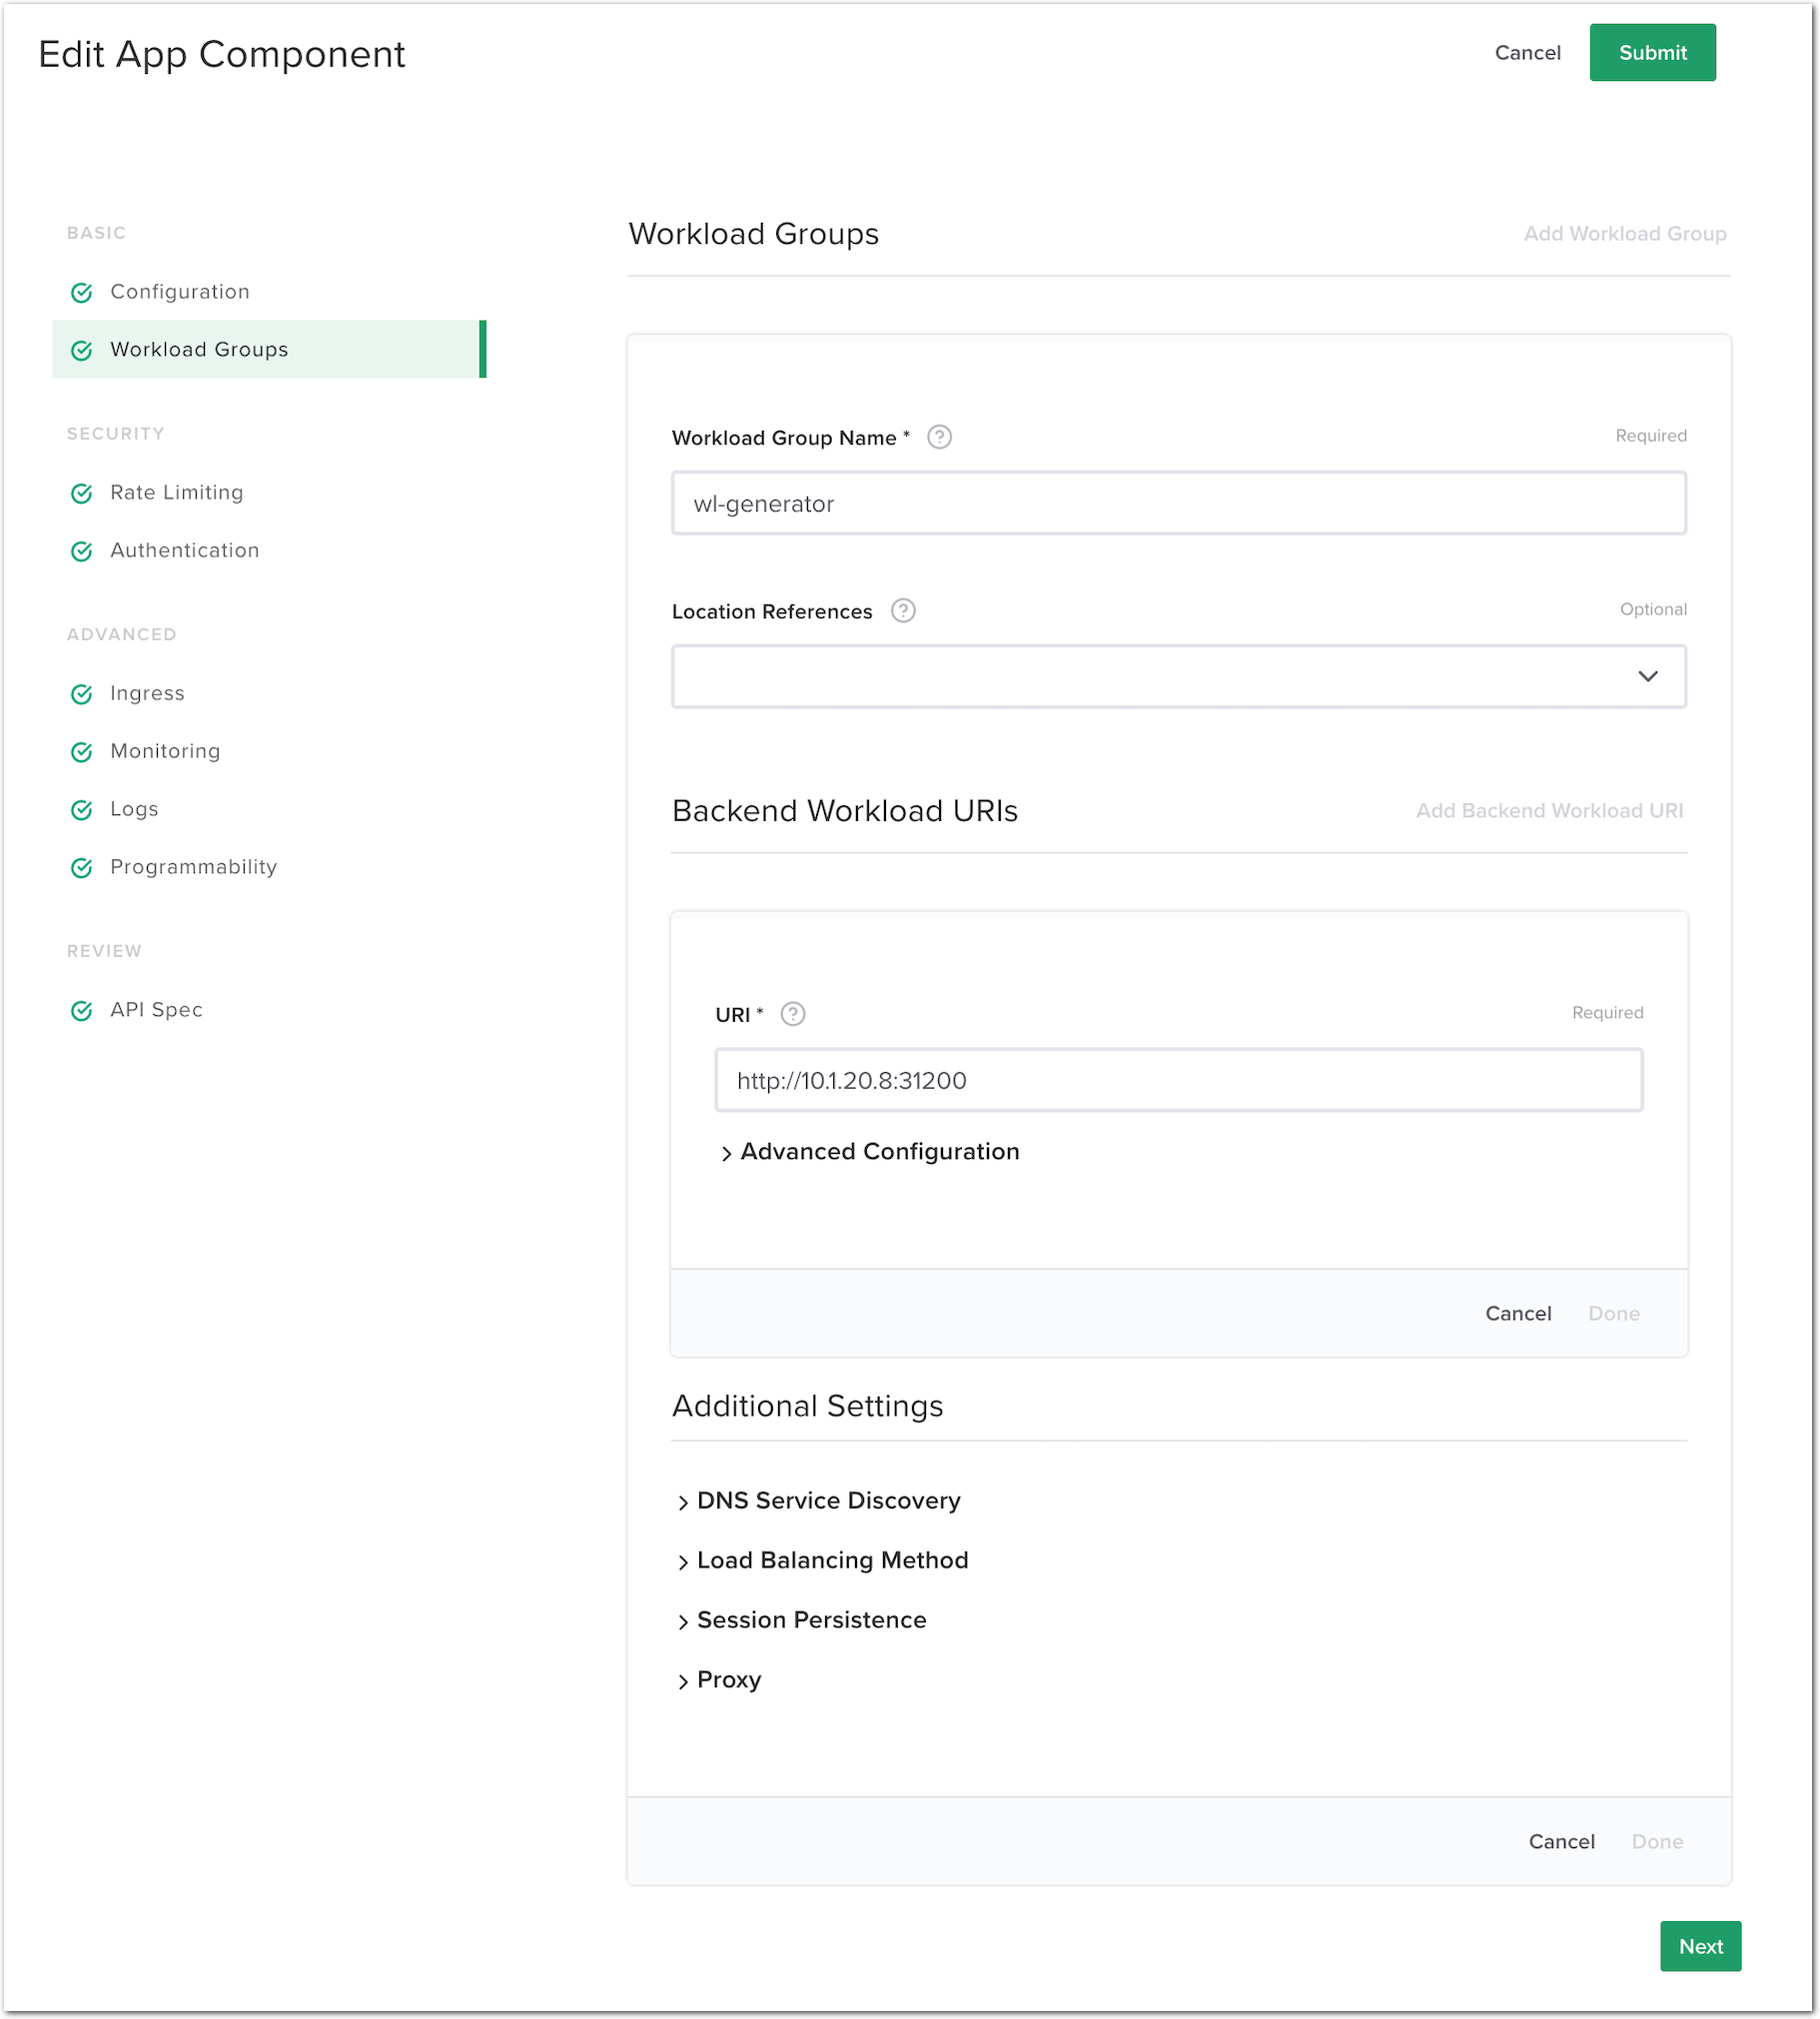
Click
Submit
- Click
We now have to replicate the same steps for each other of the micro-services
List of all micro-services and their component configuration¶ Name Workload Group Name Backend Workload URI cp-generator wl-generator http://10.1.20.8:31200 cp-locations wl-locations http://10.1.20.8:31103 cp-animals wl-animals http://10.1.20.8:31101 cp-adjectives wl-adjectives http://10.1.20.8:31100 You should now have a list of 4 empty
components.On the left side, under
Unroutedyou can see every APIPathimported from the OAS spec file.Drag and drop each unrouted API
Path(shown as aresourcehere) to thecorresponding component.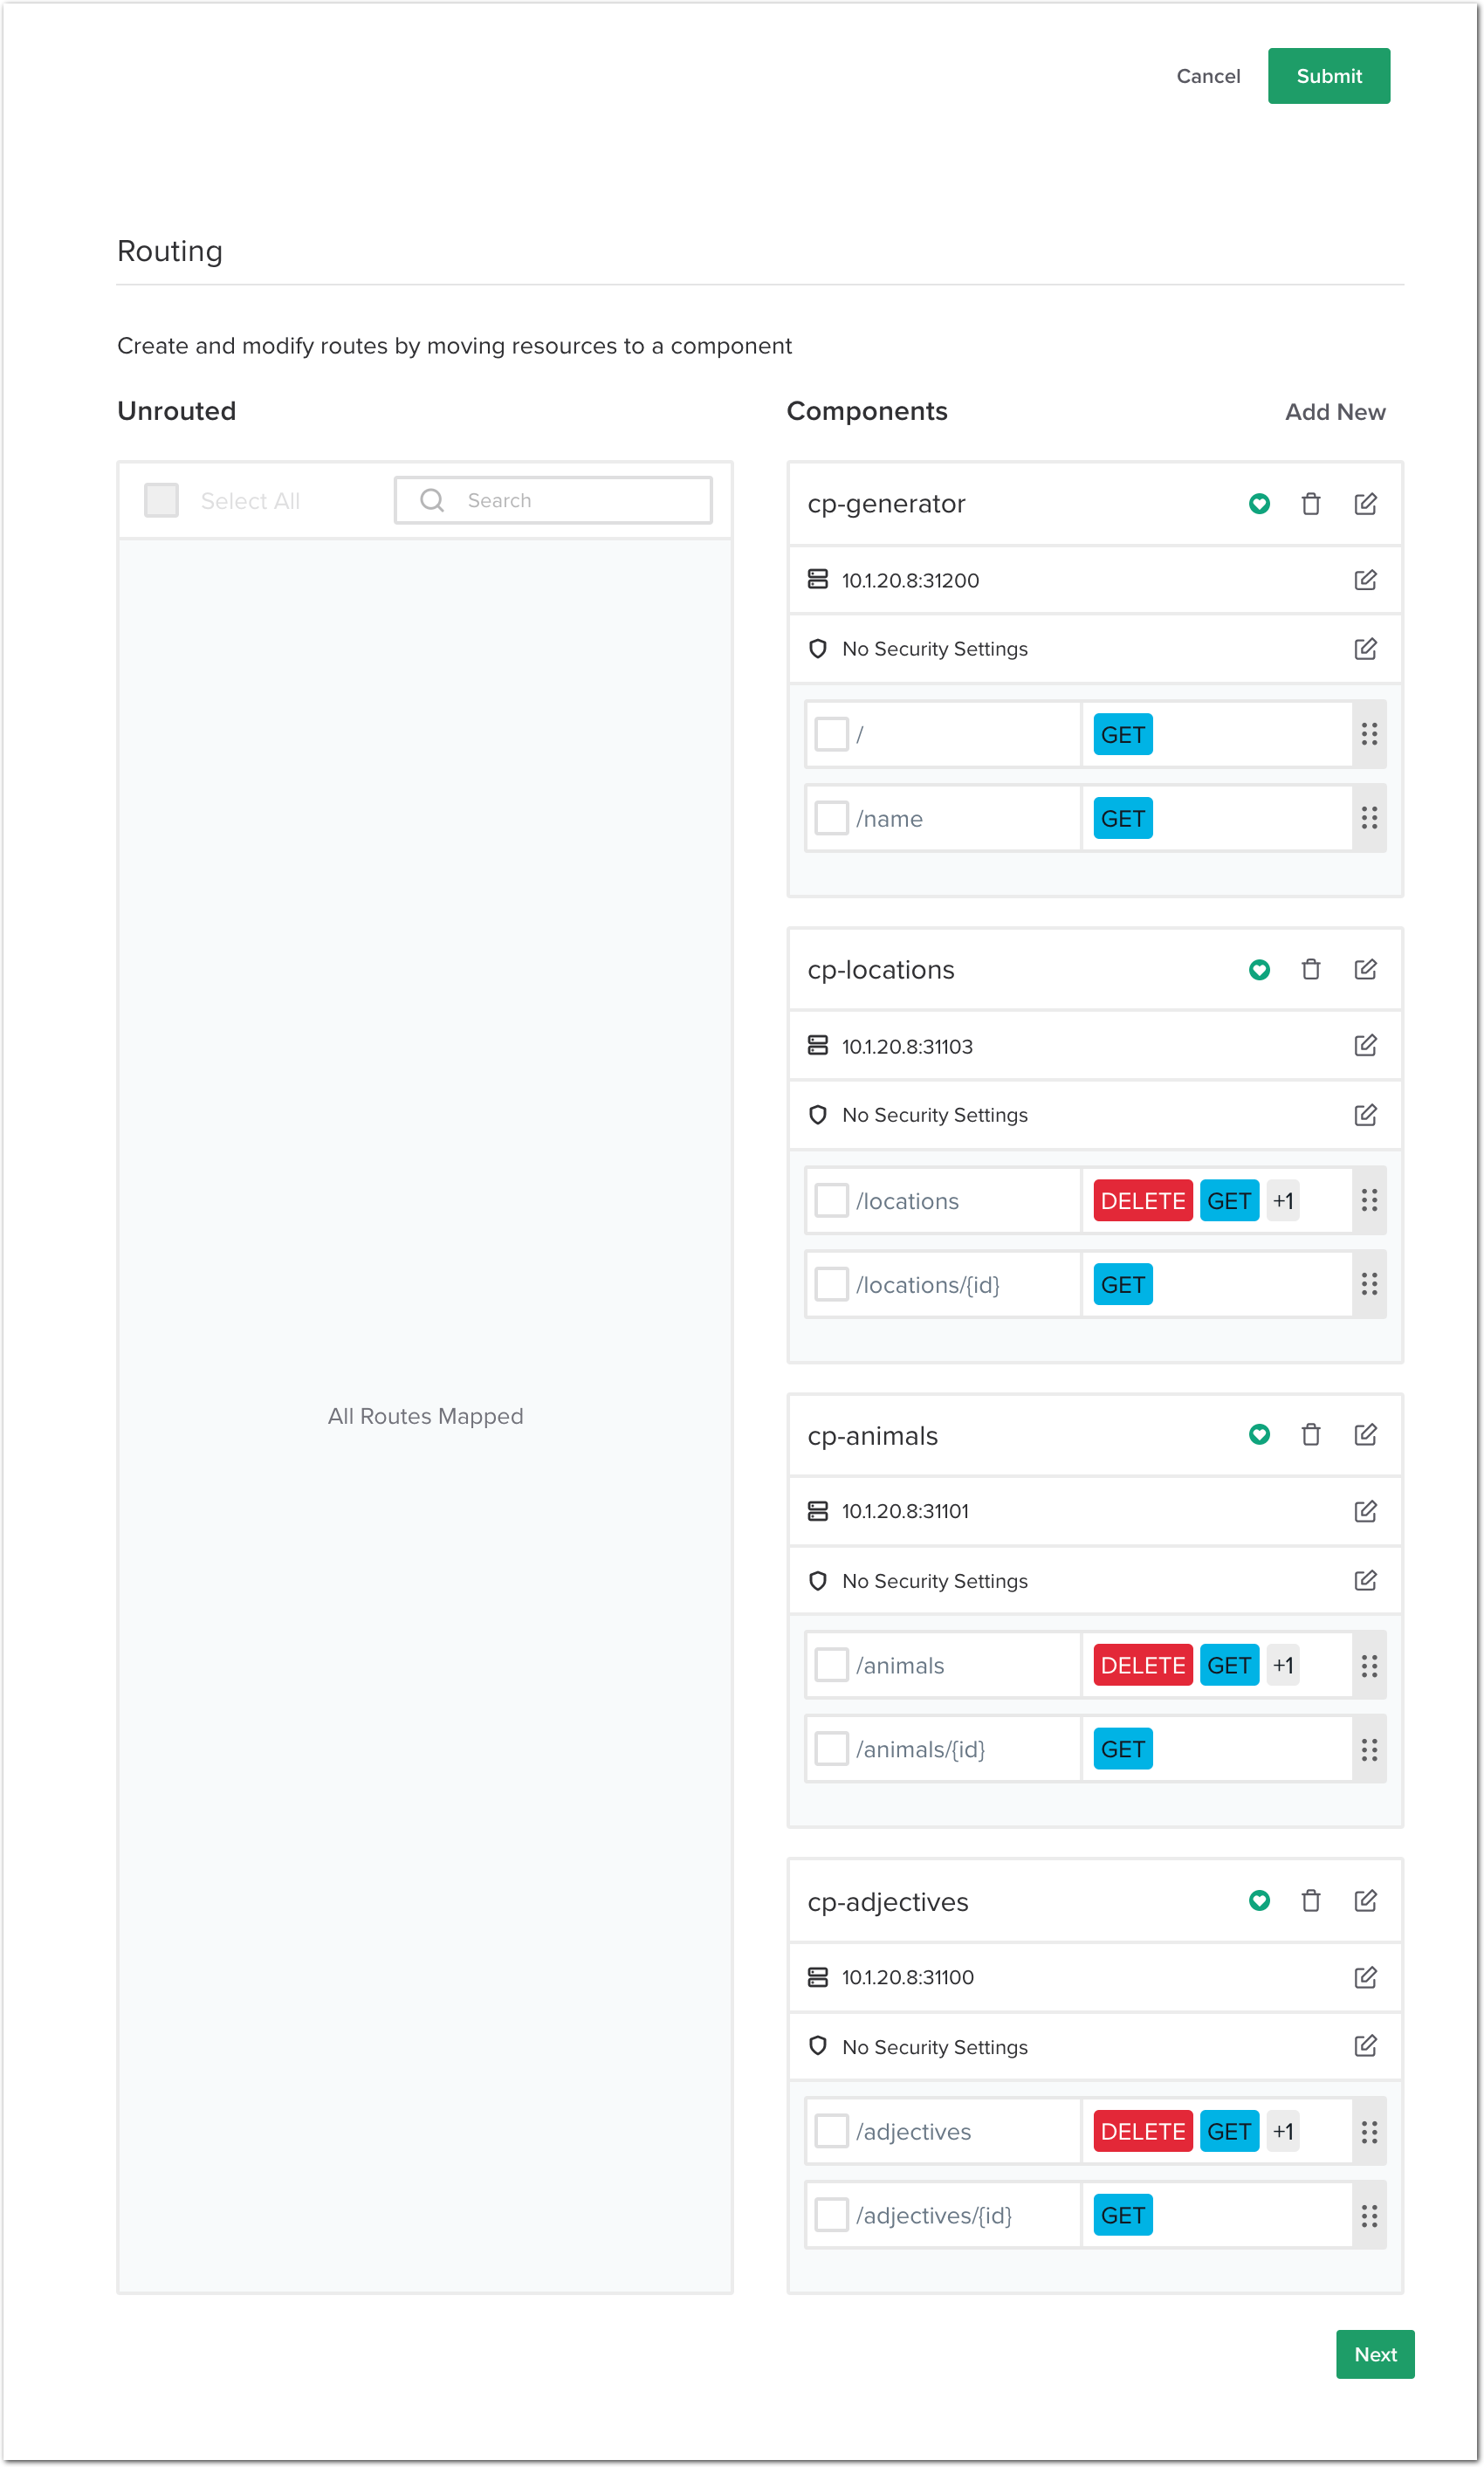
- In
Click
Submit
Note
API v1.0 is now published, and we can now check if it is working as expected.
Test the v1.0 API deployment
Steps:
RDP to the
Win10VM (user/user).Open the
Edge Browserand select theRandom Name Generatorbookmark.The
Frontendwill display a sentence withWordscoming from theGenerator.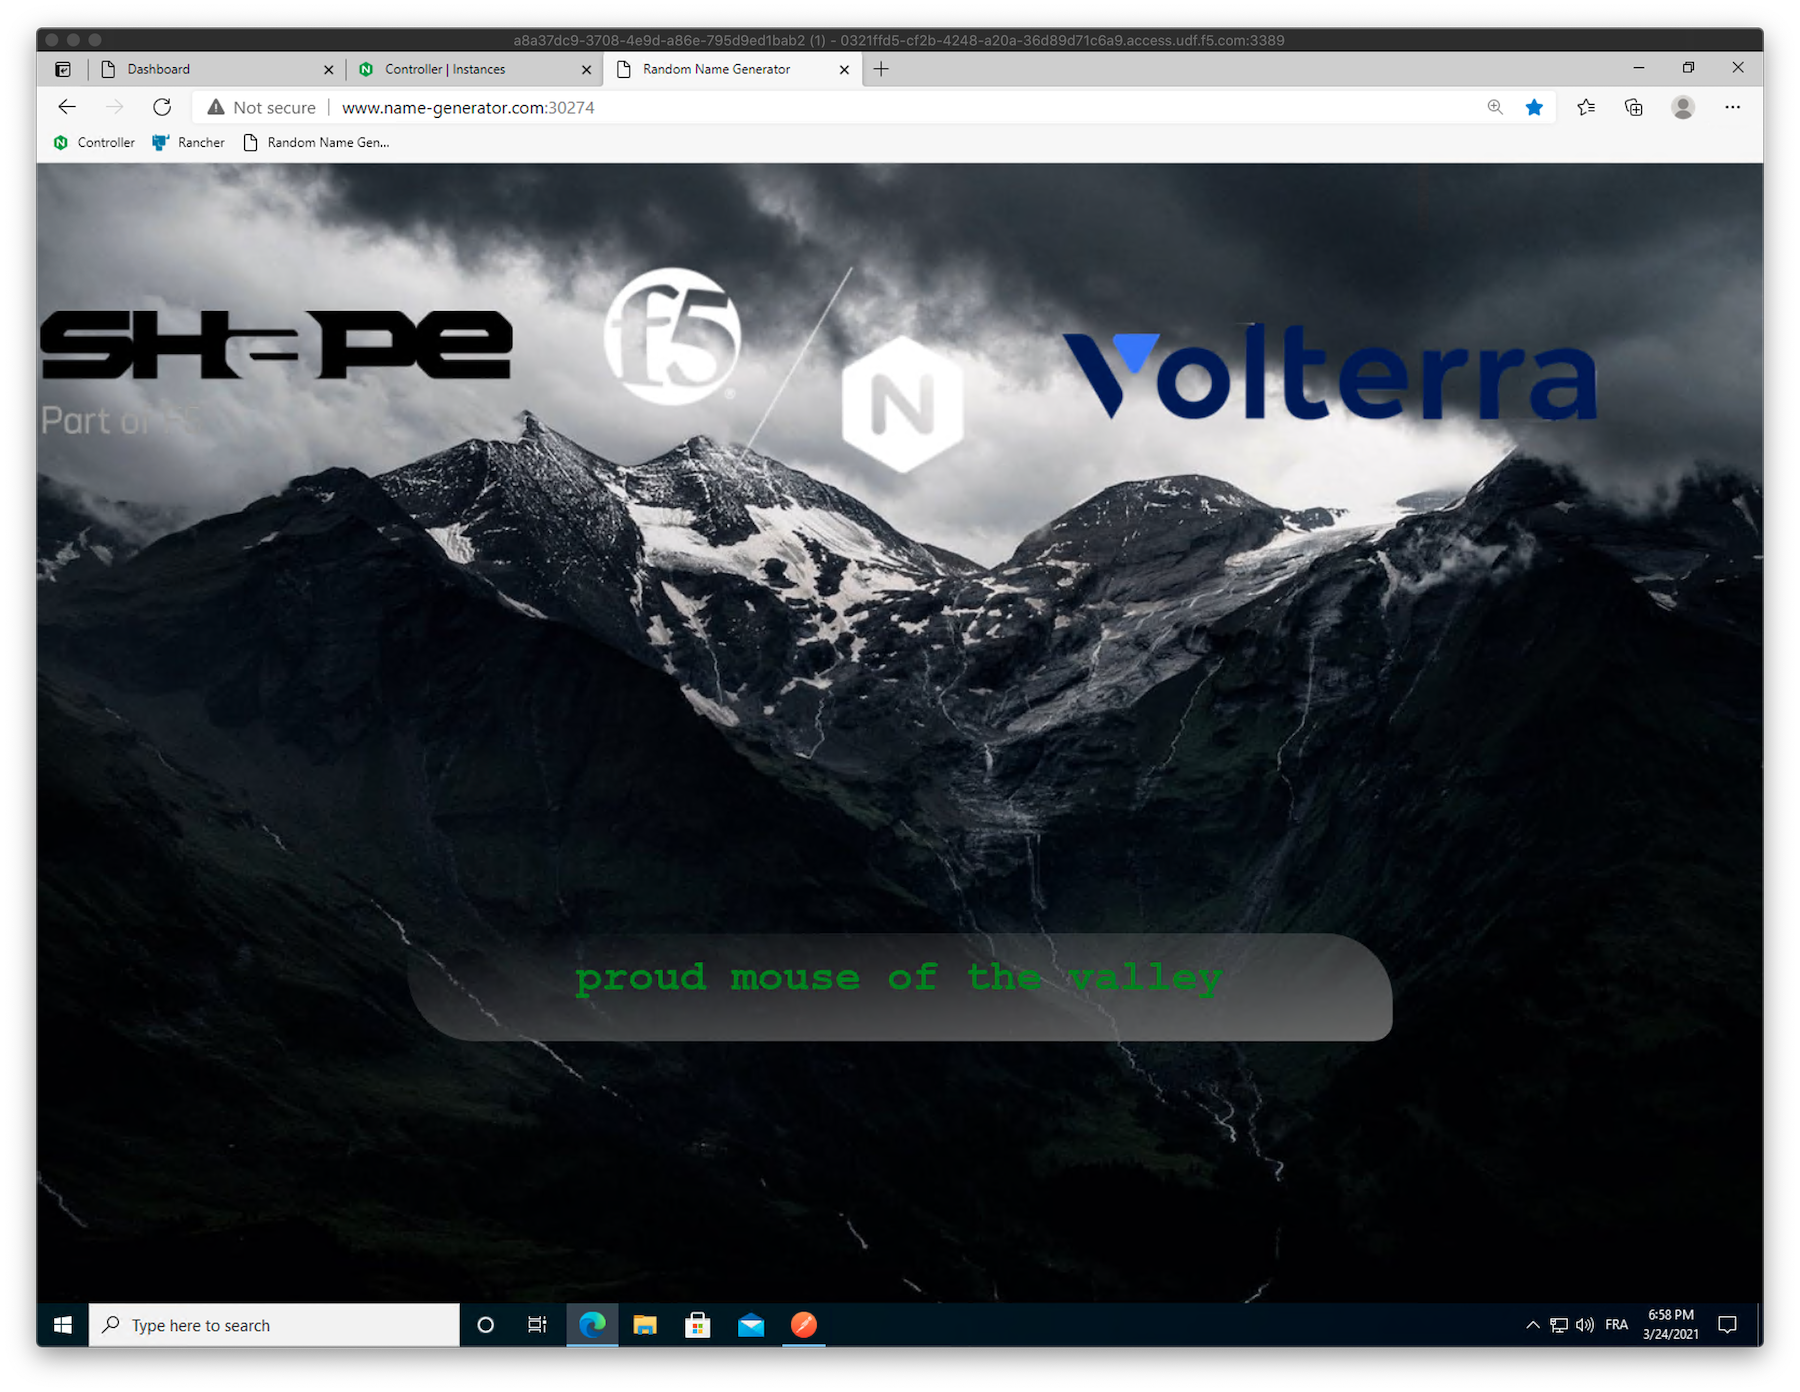
Note
As you can notice, there are no
Colorsin the sentence as we didn’t deploy and publish theColormicro-service. This lab’s traffic flow is shown below, and as you can see, the web traffic is not passing through the API Gateway yet. Instead, all the web traffic is routed through the k8s ingress.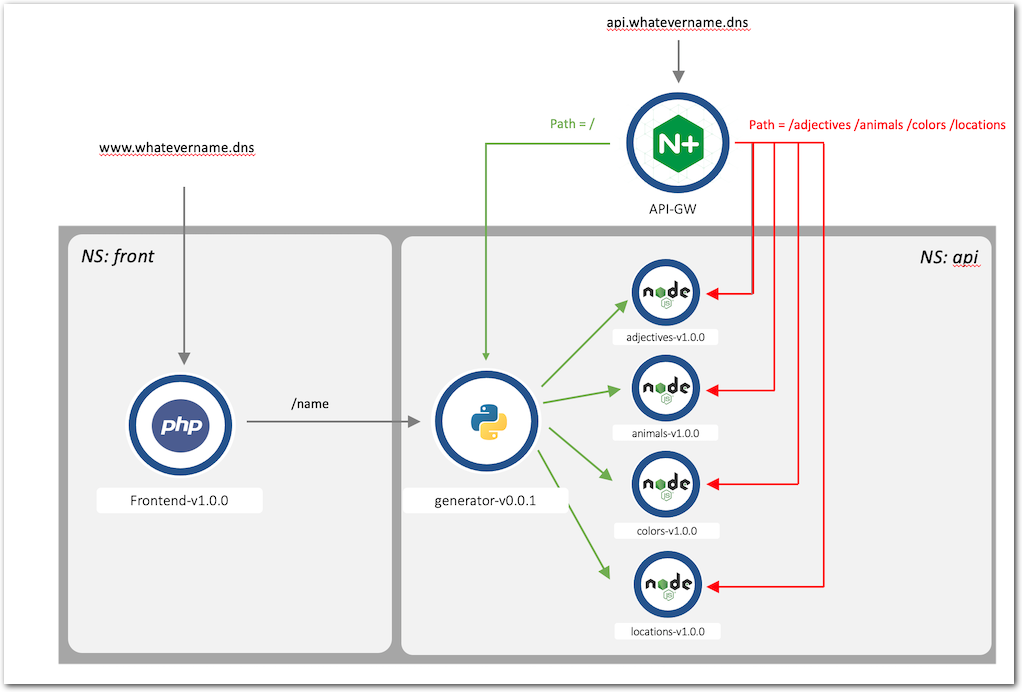
Open
Postmanand select theAPI Sentence Generator v1 and v2collection.Send a request with the
GET Locationscall. The FQDN is different from theFrontendweb app, and reaches the API Gateway directly. The API Gateway will in turn route the request to theLocationsmicro-service, and will return all the entries (all the words).[ { "id": 1, "name": "valley" }, { "id": 2, "name": "park" }, { "id": 3, "name": "mountain" } ]
Send a request with the
GET a Sentence from Generatorcall. This request will request theGeneratormicro-service to get one word perWordmicro-service.{ "adjectives": "calm", "animals": "whale", "locations": "park" }
Note
The above results will generate the sentence
calm whale of the parkin theFrontendapplication.
Warning
Congrats! You just published your first API using NGINX Controller and NGINX Plus as an API Gateway!