F5 Public Cloud Solutions > A&O Toolchain: BIG-IP HA in Public Cloud with Terraform (Agility Labs 2023) > 3. App Deployment with Application Services 3 Extension (AS3) Source | Edit on
3.5. Convert an existing config to AS3 using the F5 VS Code Extension
3.5.1. Import a Qkview File
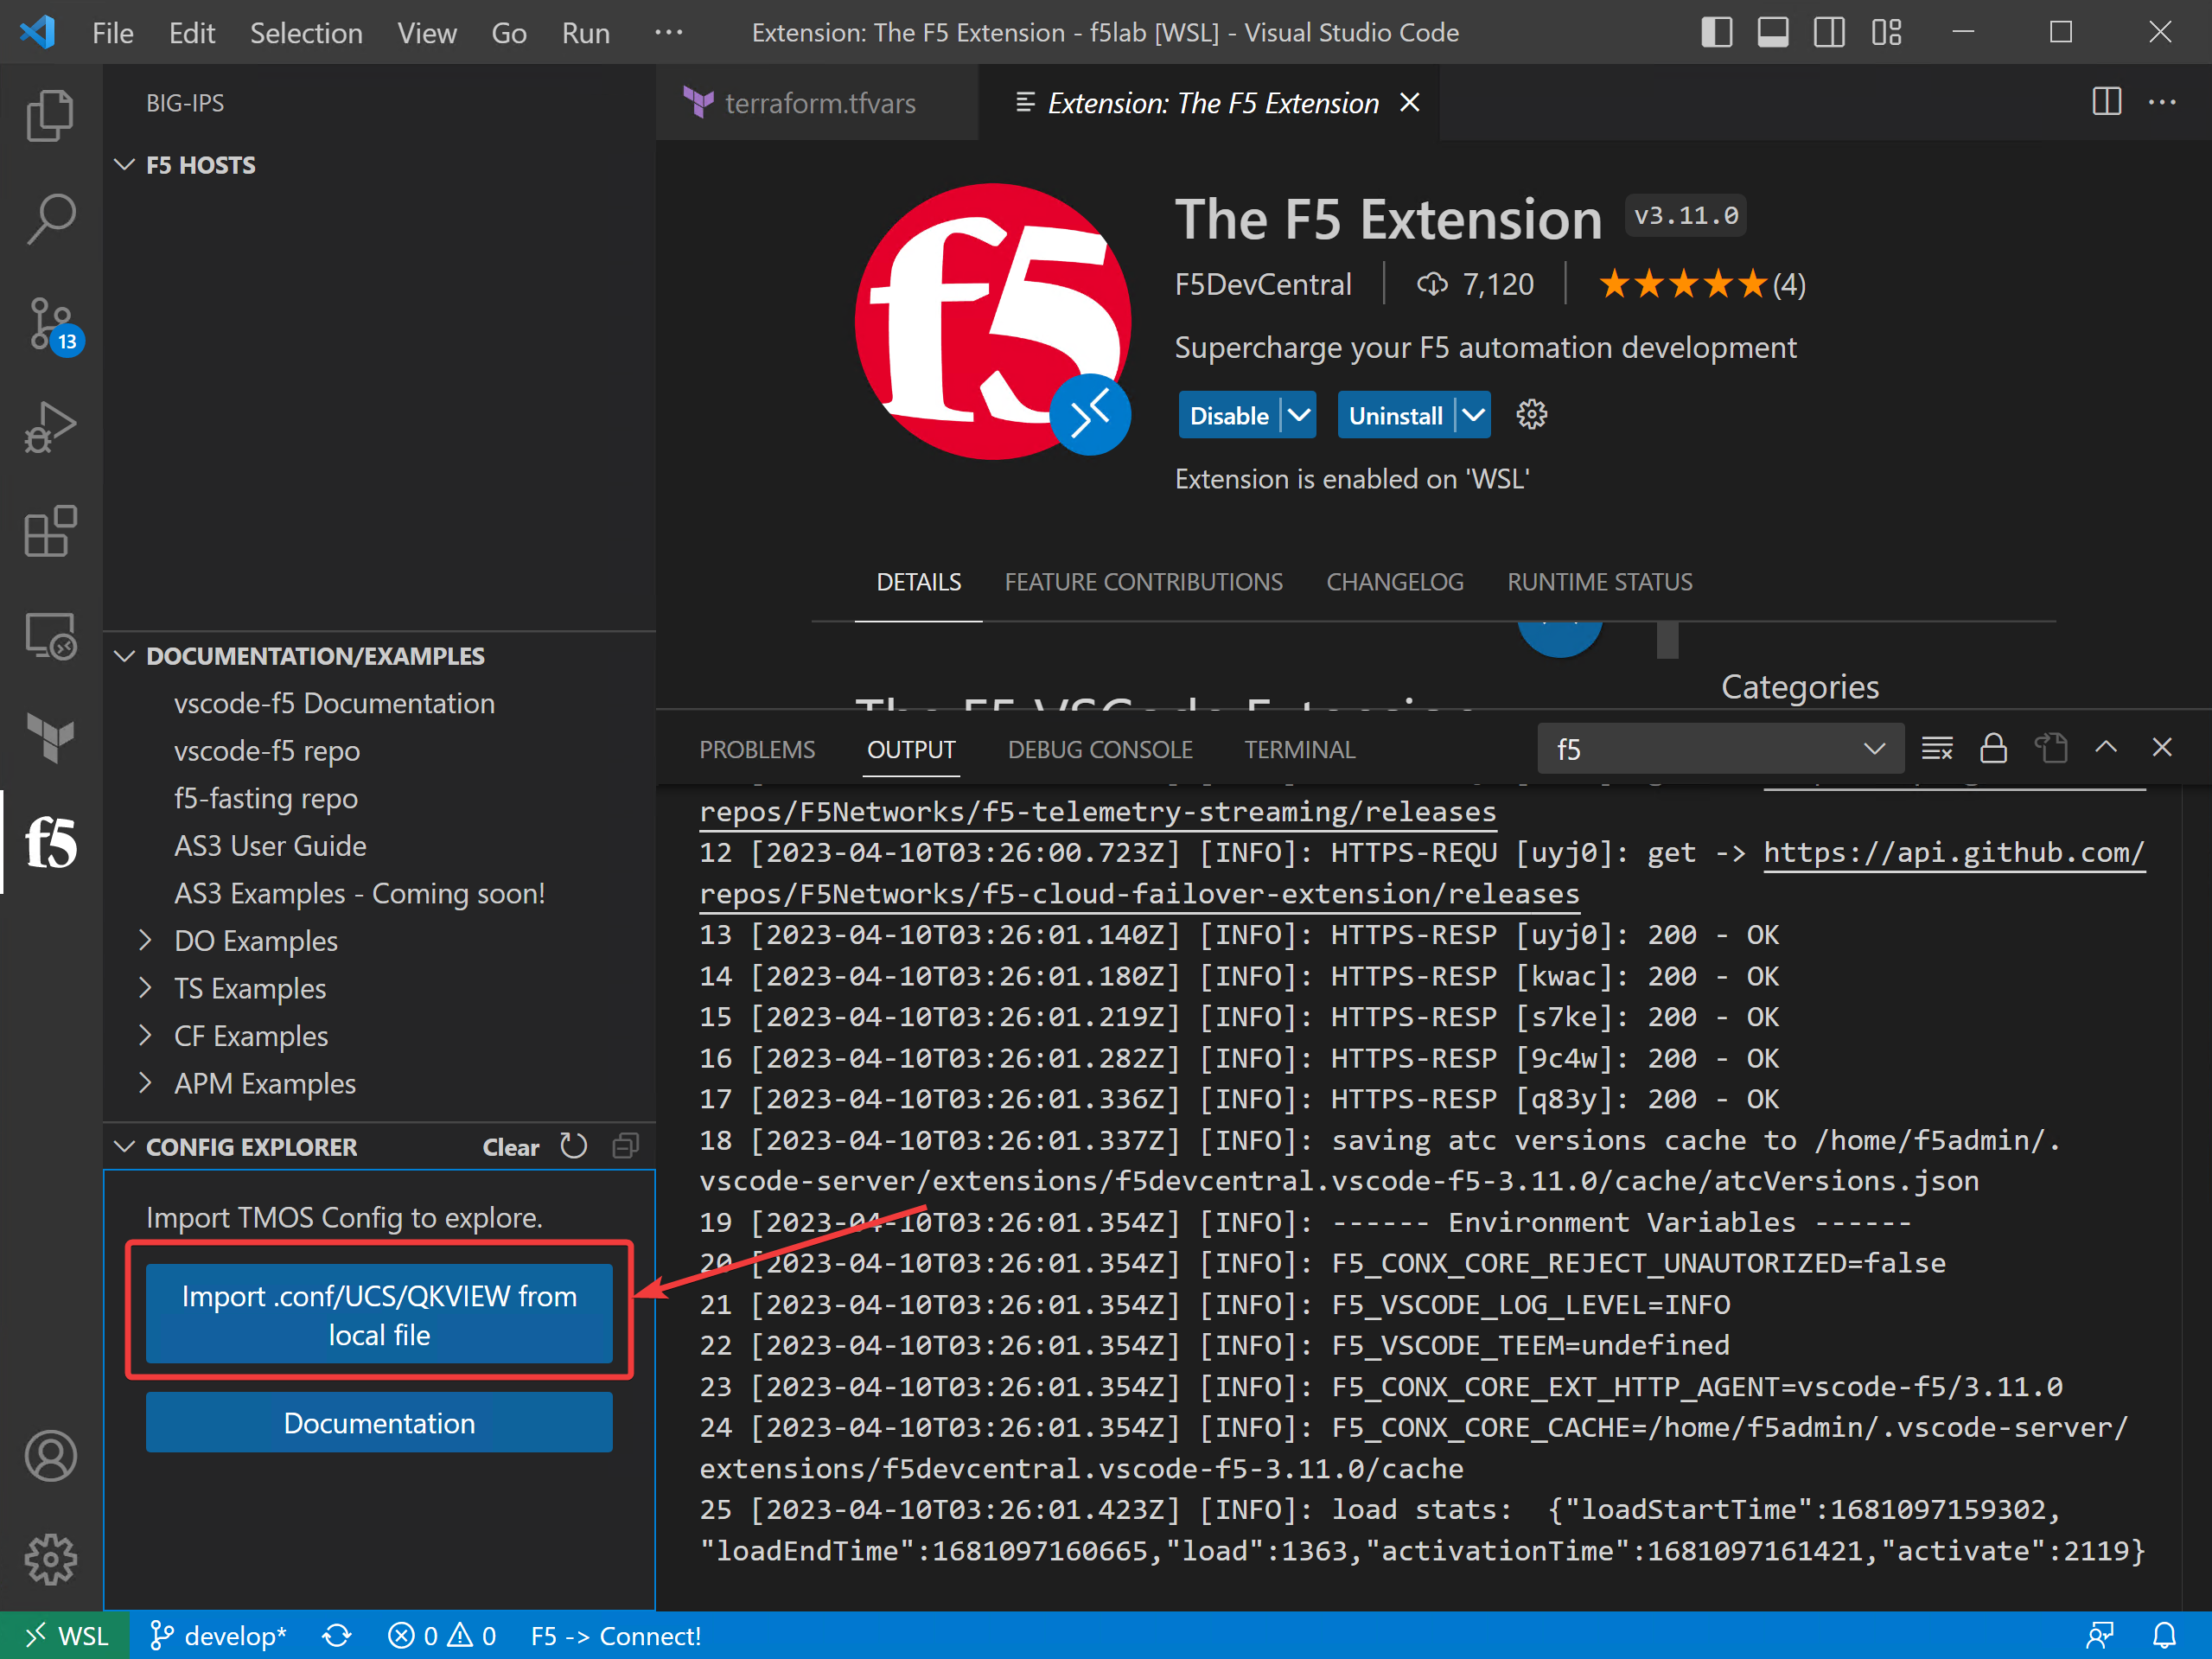
Click on the the F5 Extension icon in the left navigation panel.

In the lower left part of the screen, select Import.conf/UCS/QKVIEW from local file.
In the toolbar that appears, navigate to the /home/f5admin/f5lab/ATC/f5extension directory. Select the qkview file.

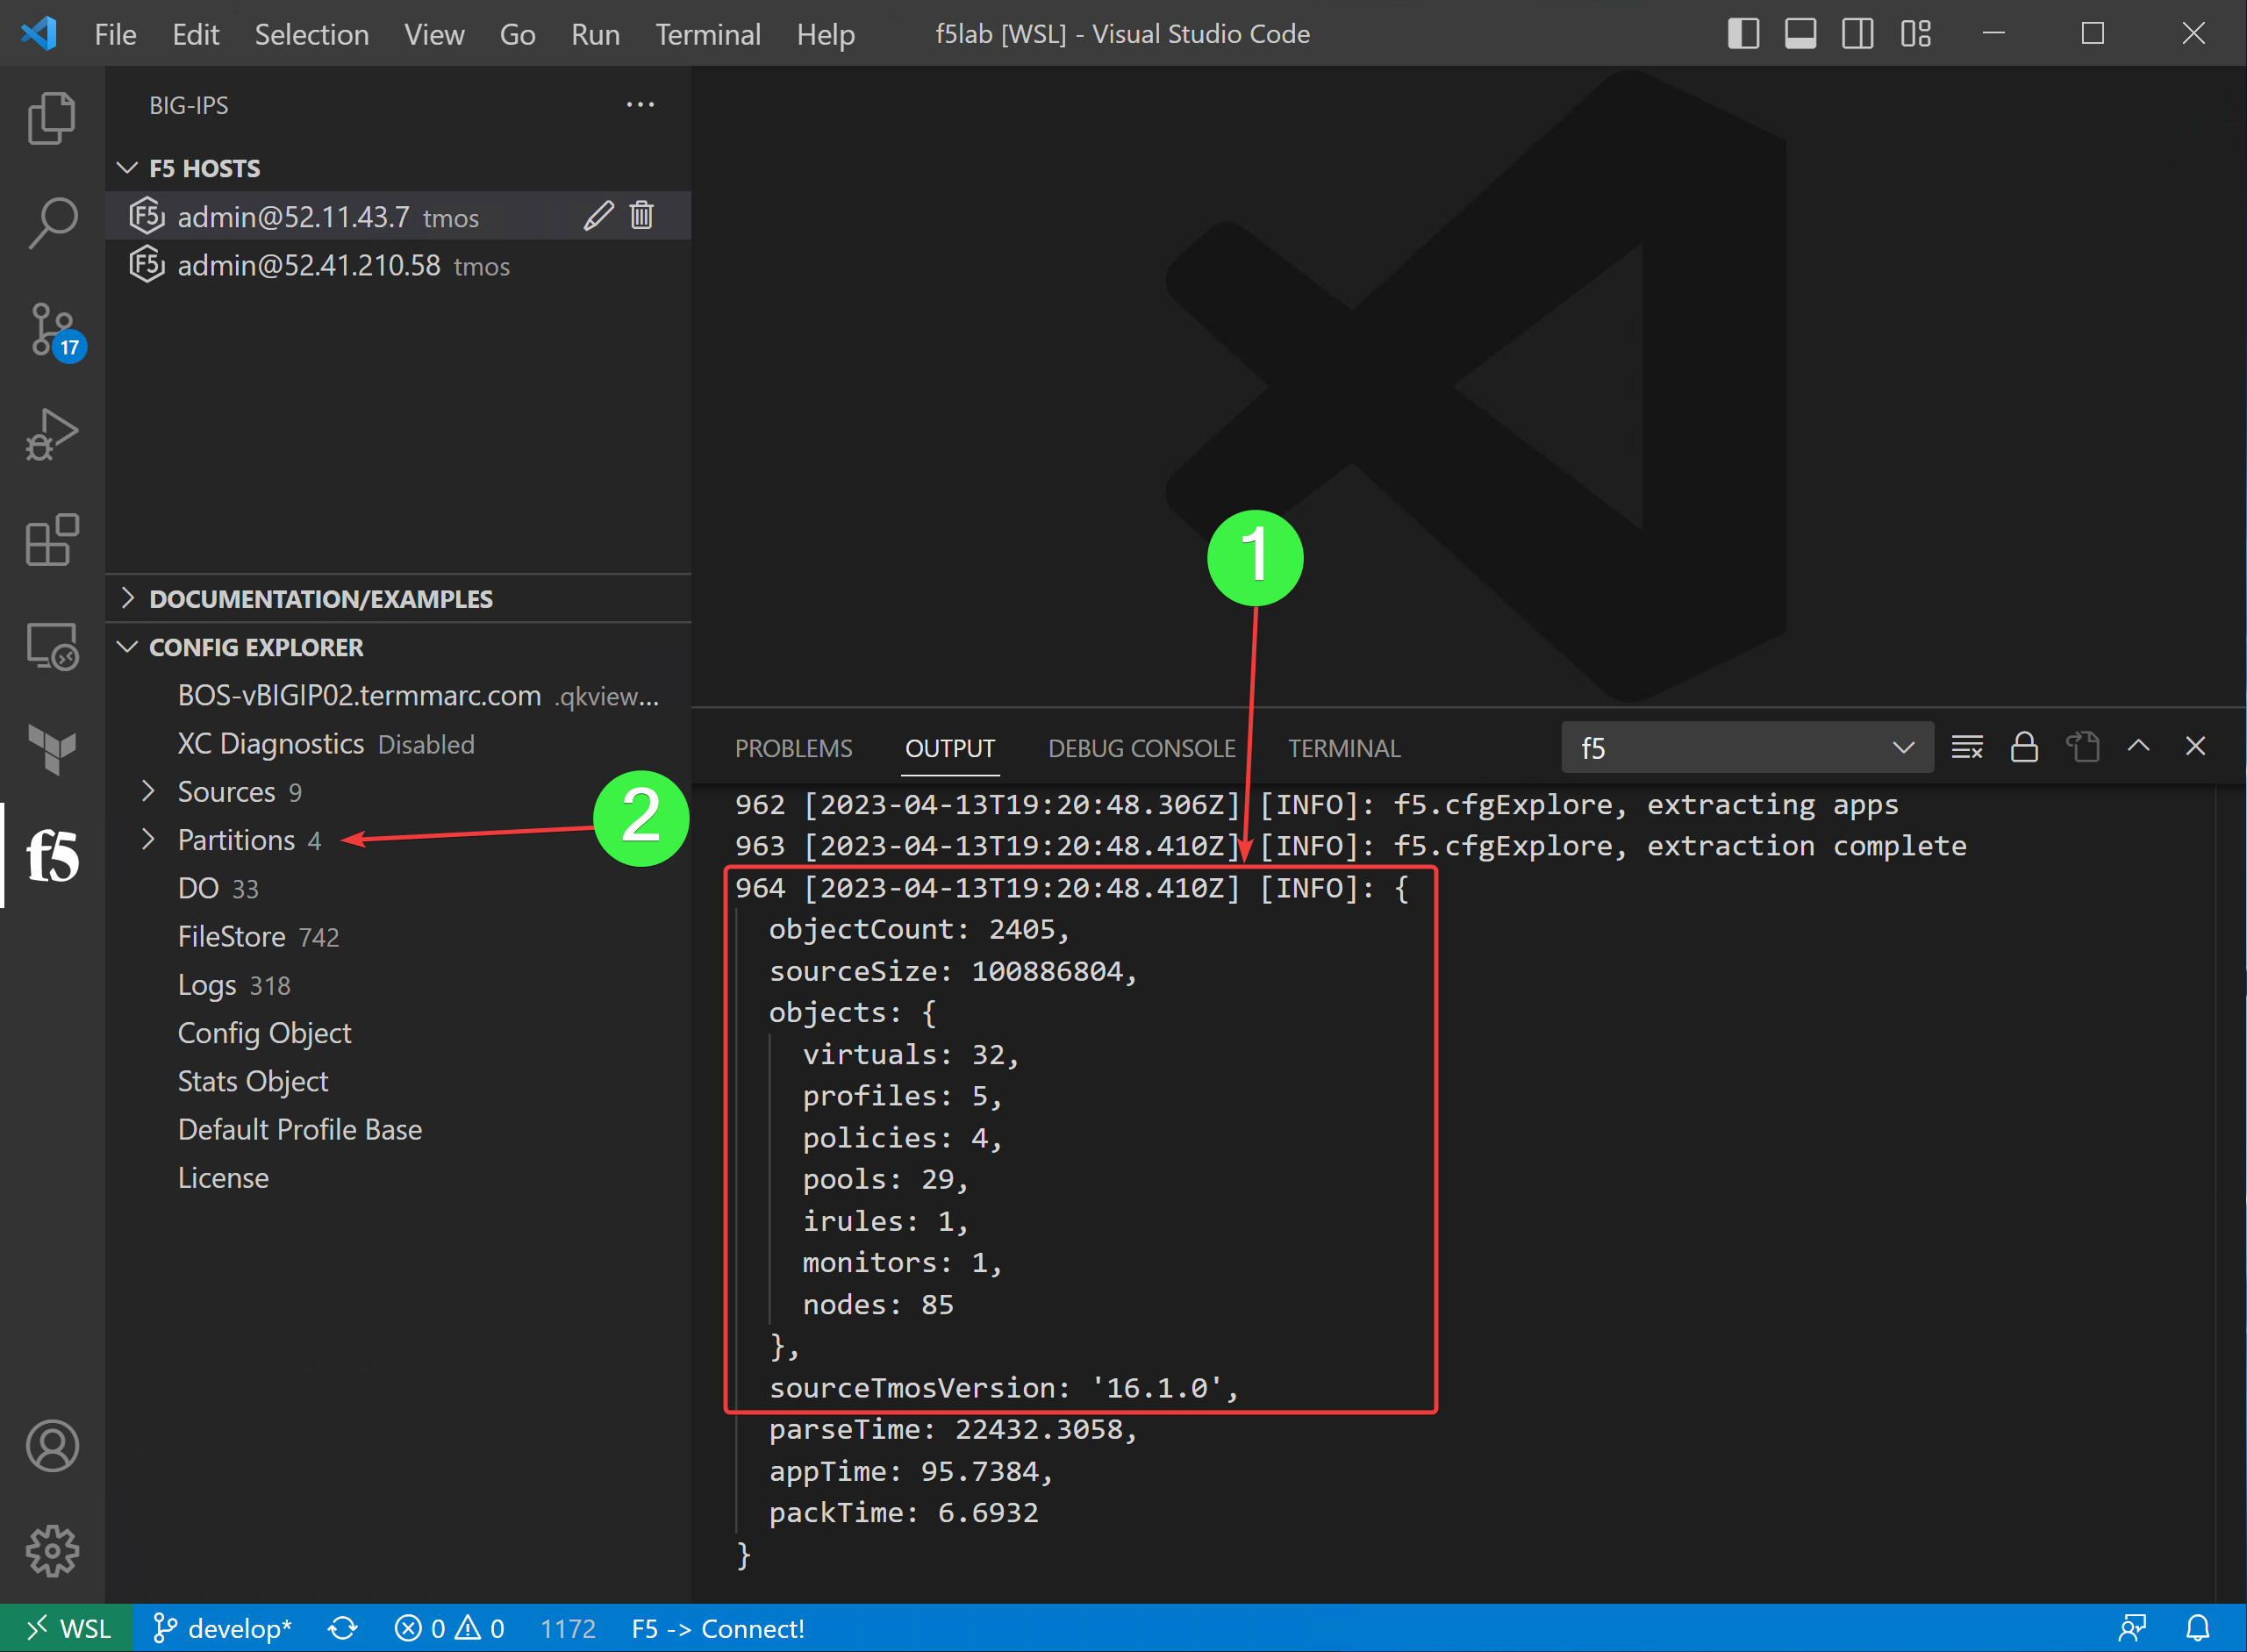
It will take a little while to ingest the file and read it. When it is done, you will see the machine name of the device and a tree structure below it.
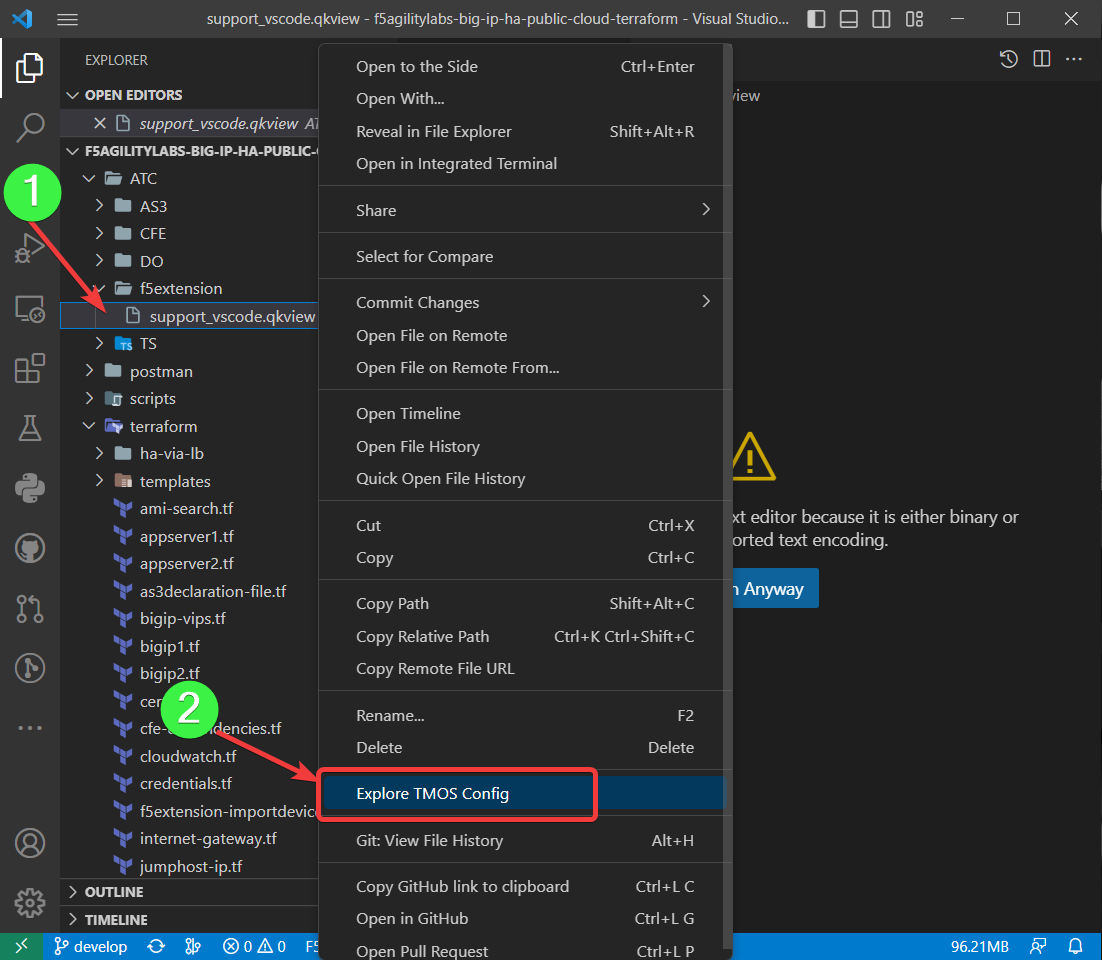
Optional Secondary way to open a qkview/ucs/.conf file. In the Explorer view, you can right click on the qkview file and select Explore TMOS Config.
3.5.2. Explore a qkview with the F5 VS Code Extension
Lets take a quick tour of what you can see in the config explorer.
- The first item under the Config Explorer is the name of the system that generated the qkview.
- XC Diagnostics is disabled by default. Enabling this allows you to determine the readiness to migrate the configuration elements into F5’s SaaS offering.
- Sources all of the conf files from the device.
- Partitions all of the partitions and the virtual servers/apps.
The remaining menu items can be explored later.
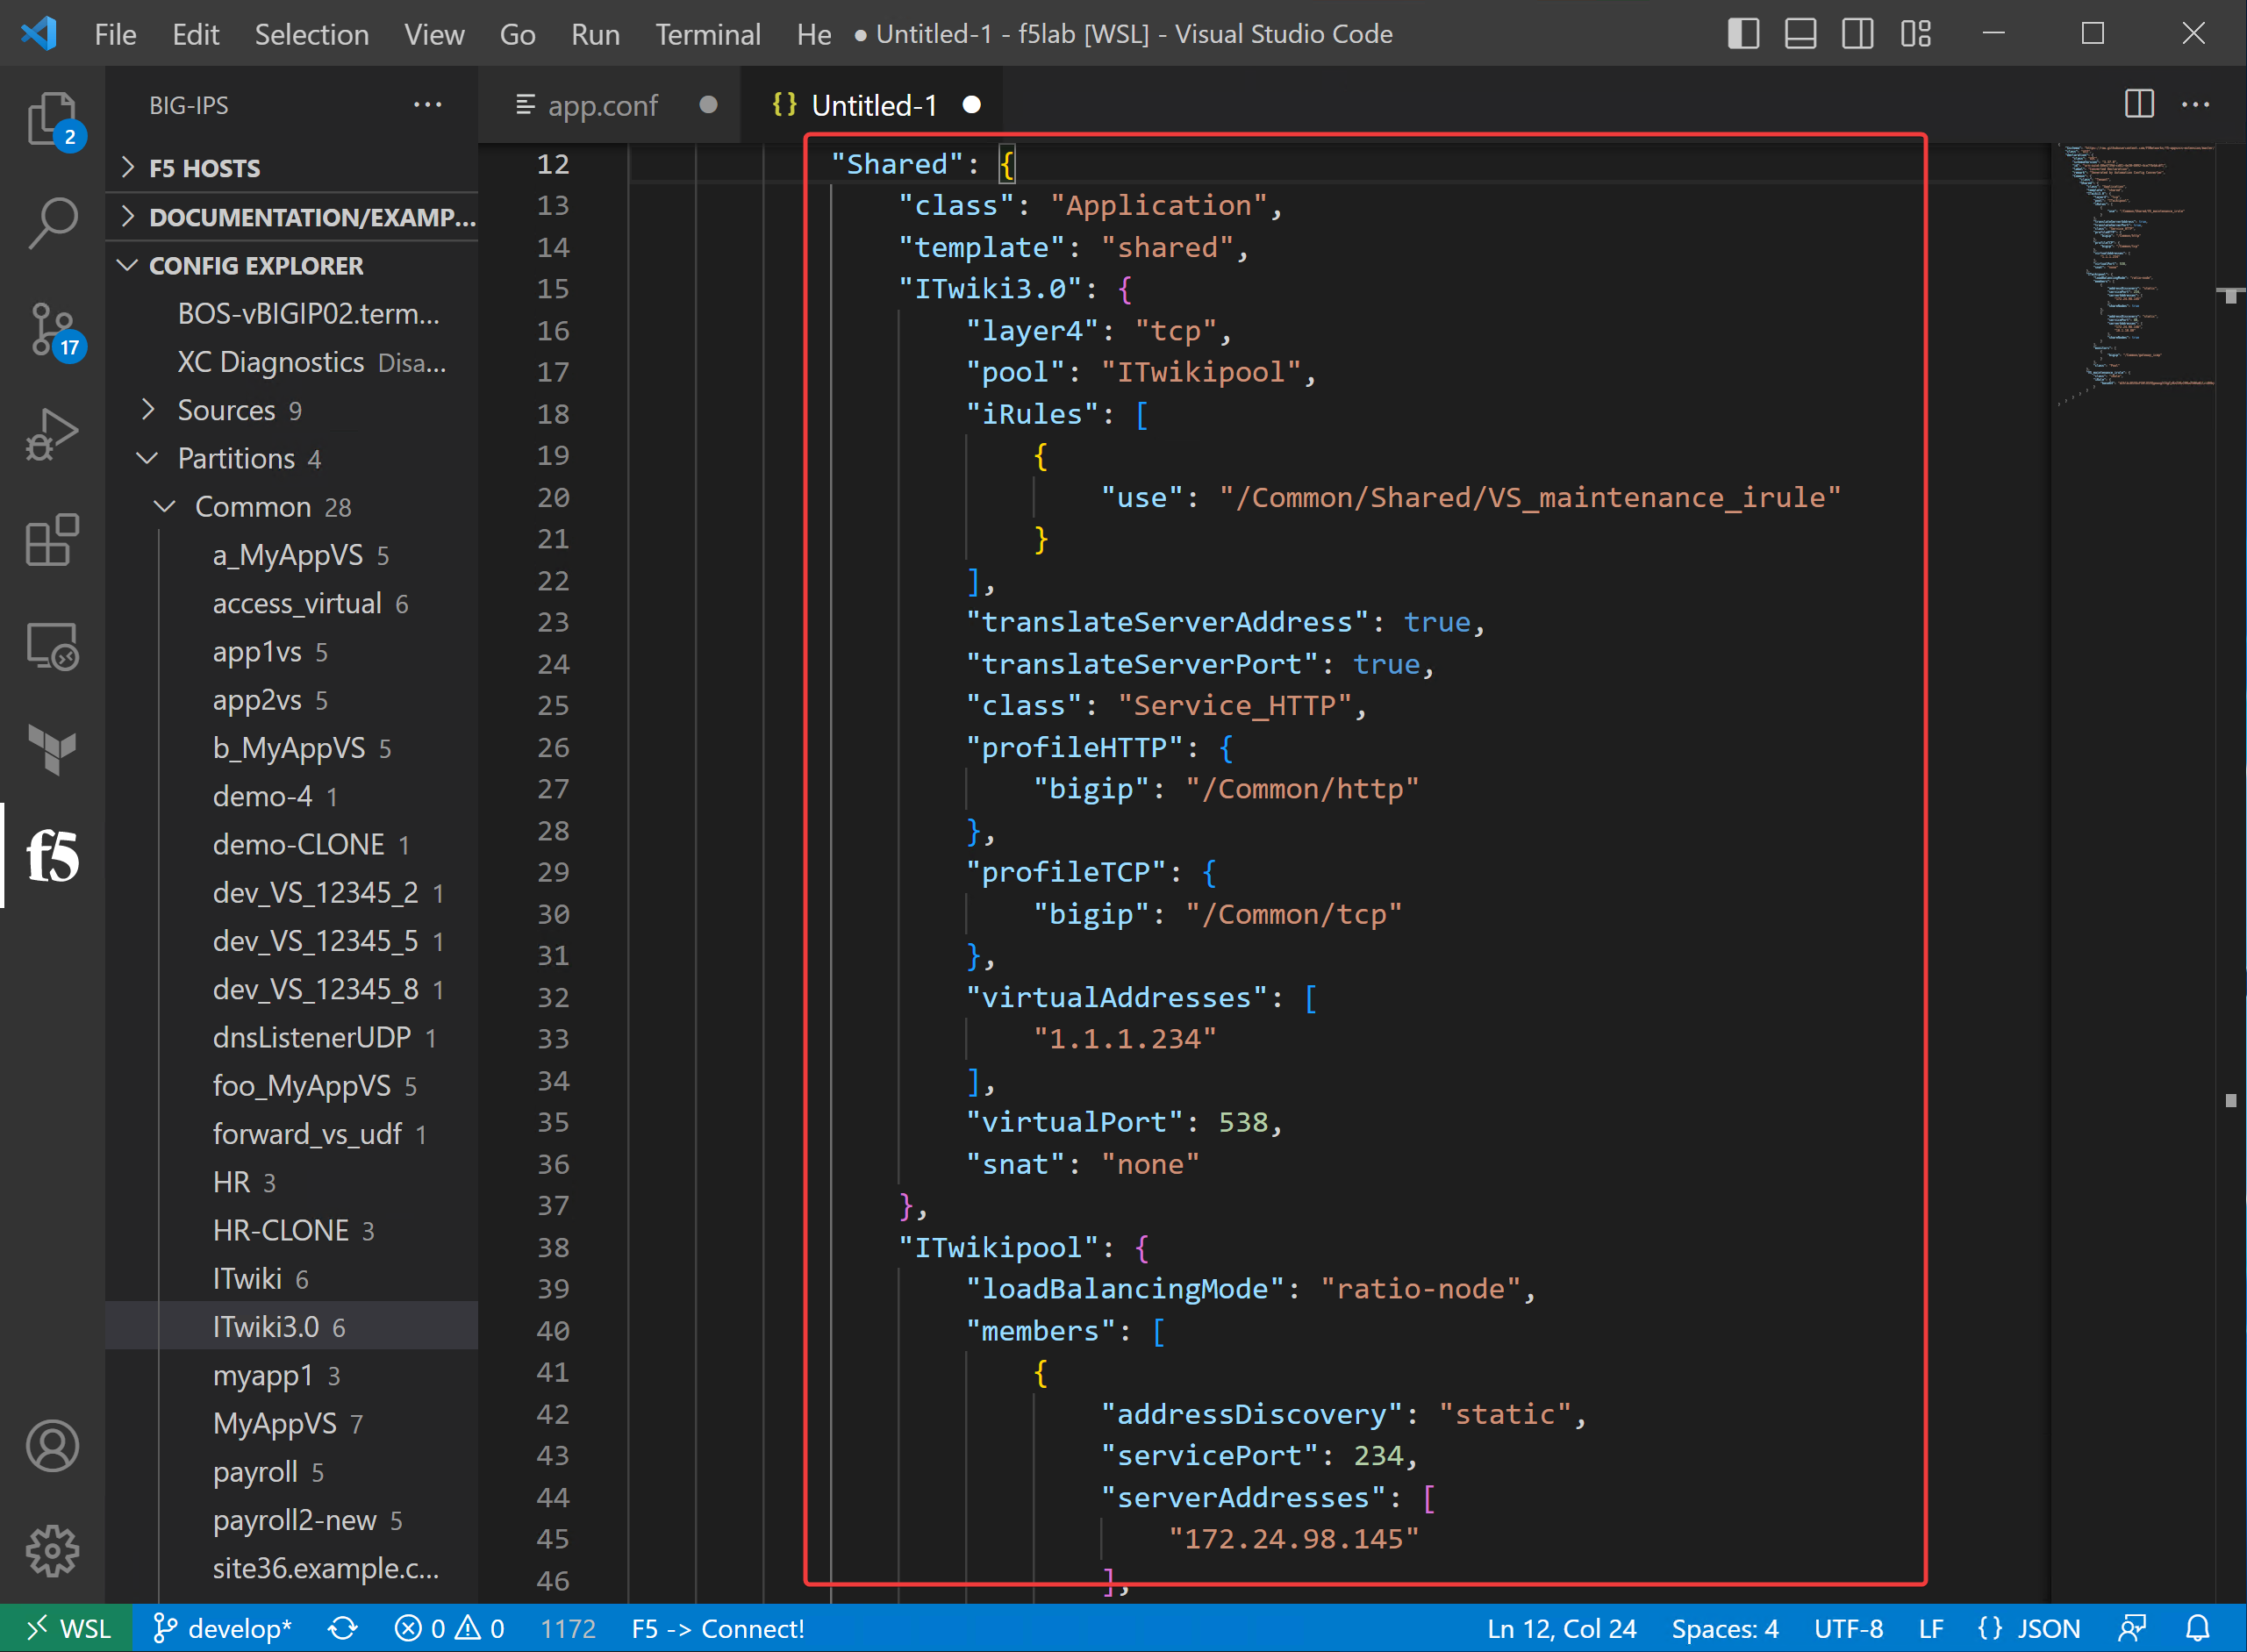
3.5.3. Convert an application/virtual server into an AS3 Declaration
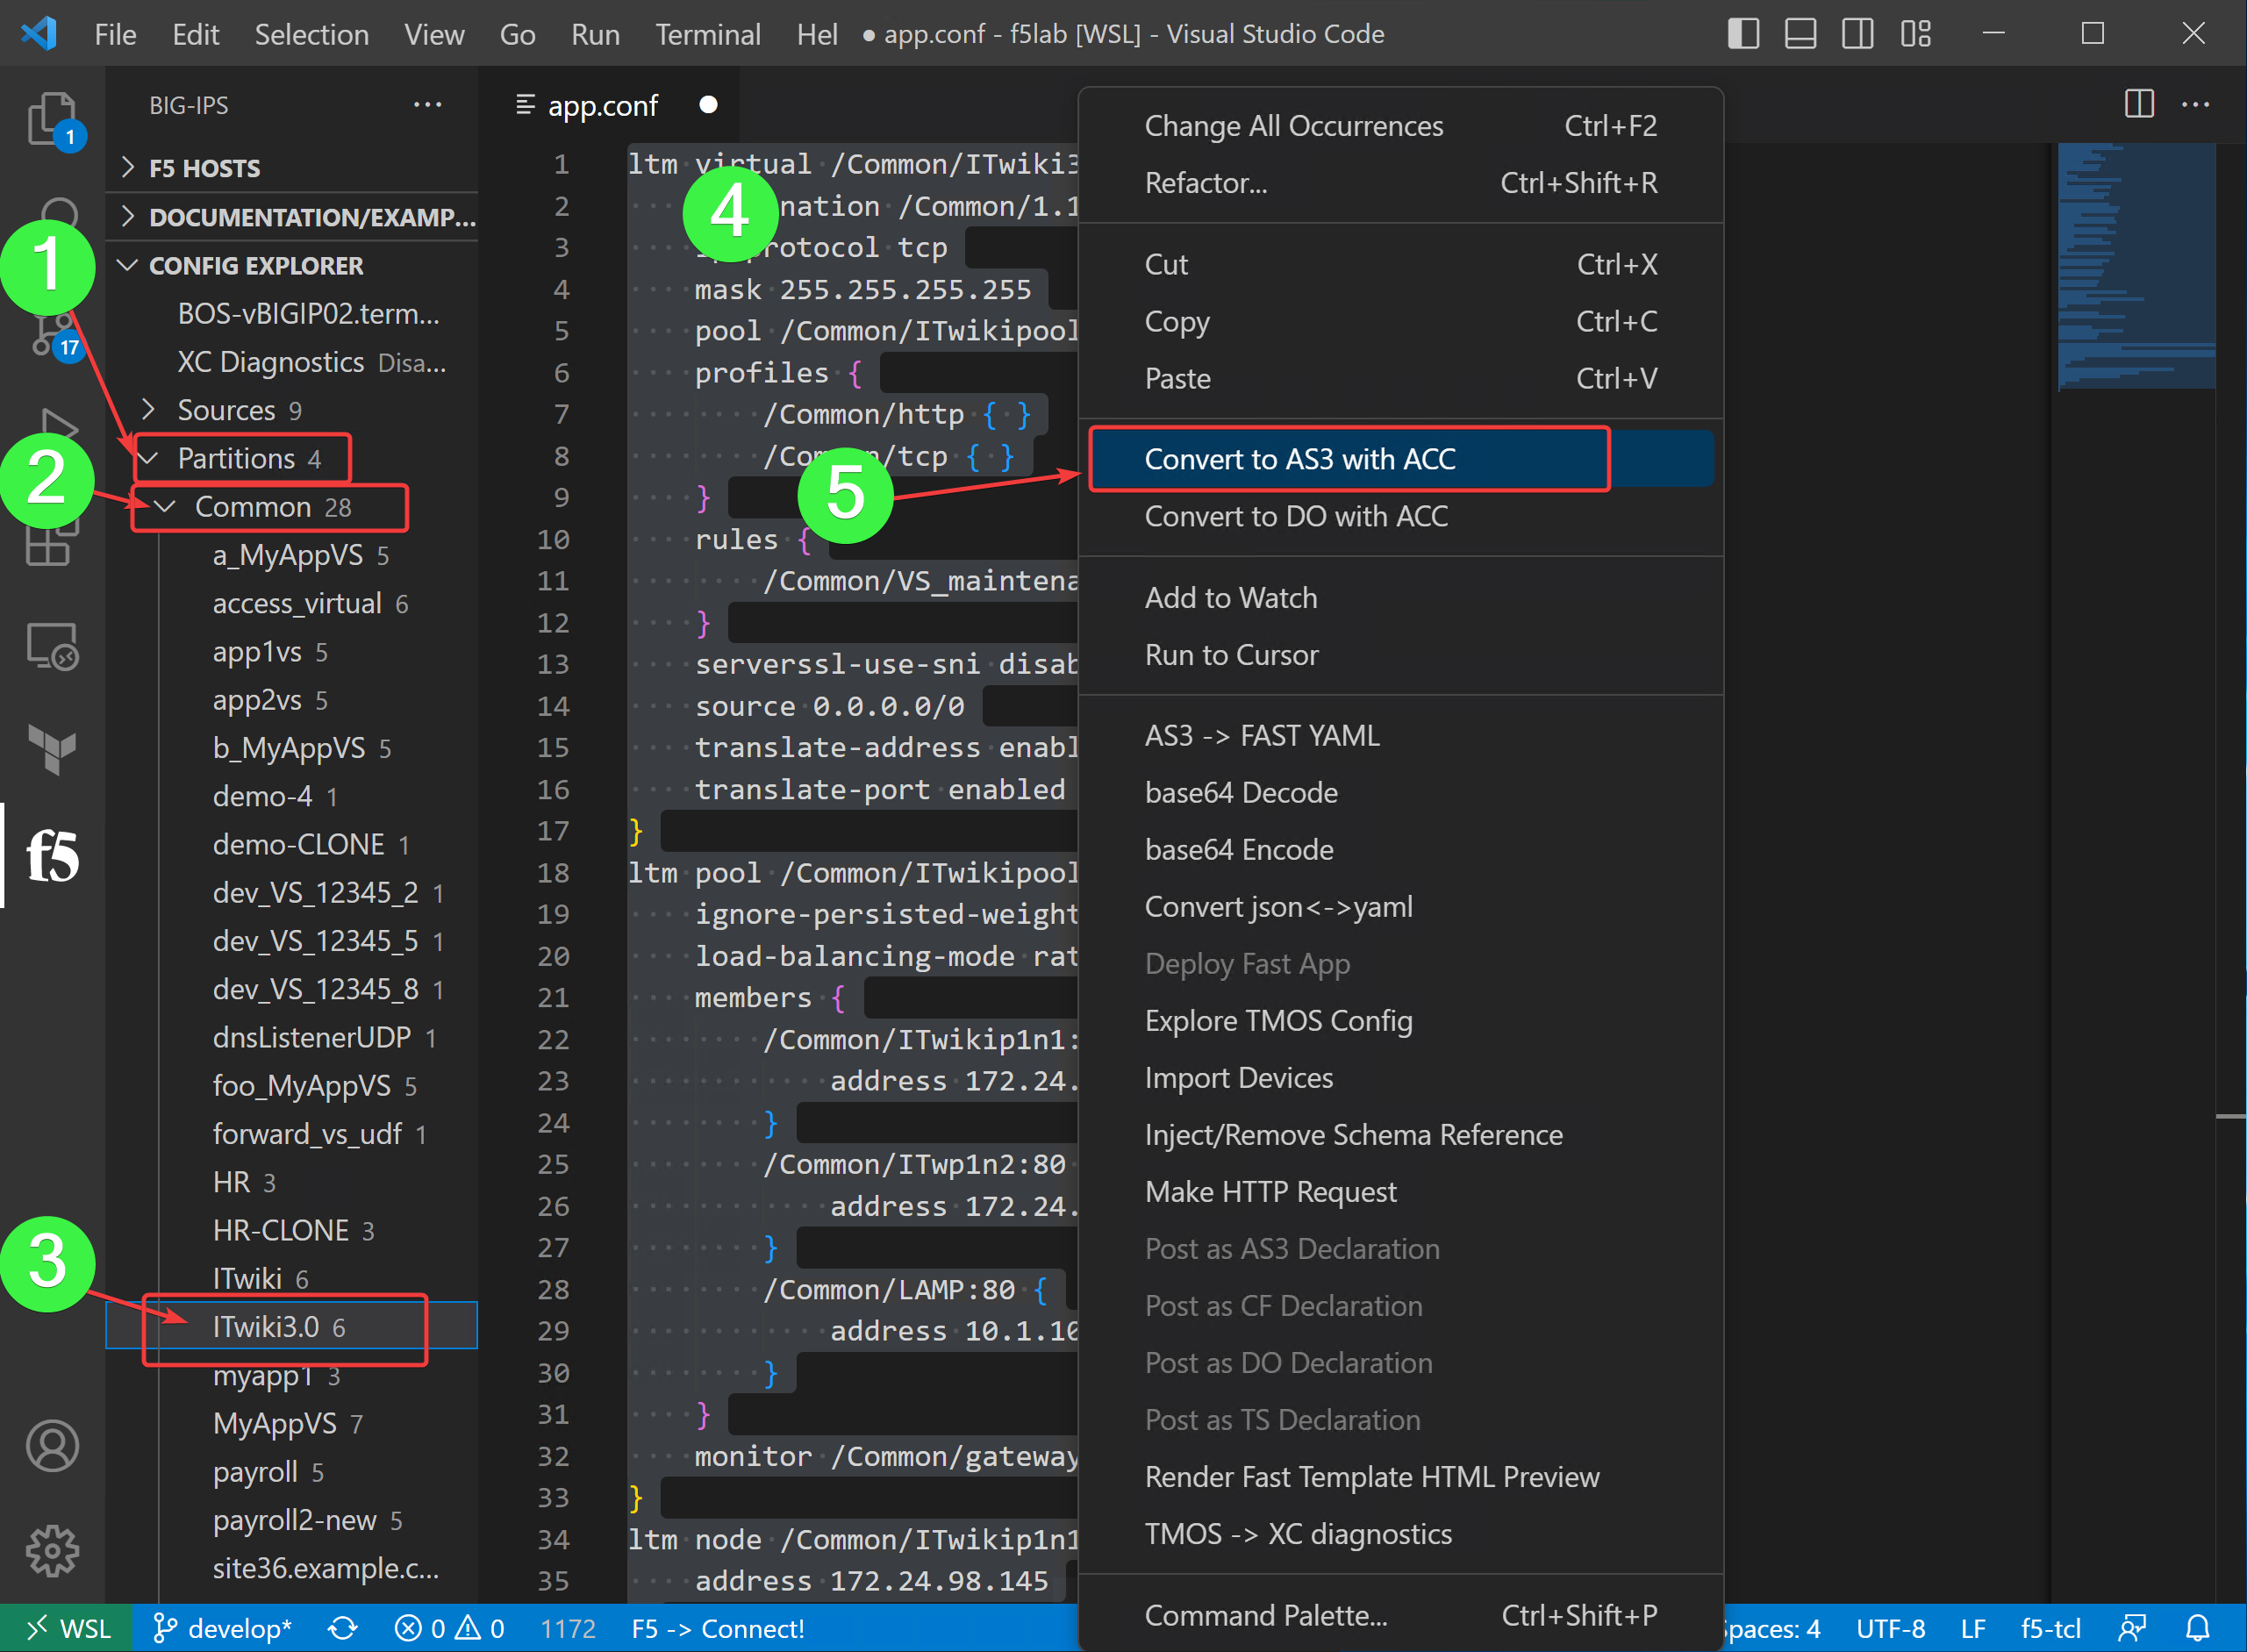
Expand the Partitions, then expand Common and search for ITWiki3.0.
Select the application and then select all of the text in the window.
Right-click and select Convert to AS3 with ACC.
A new window will open with your new AS3 declaration that matches that configuration.
This is the end of the module.