F5 Public Cloud Solutions > A&O Toolchain: BIG-IP HA in Public Cloud with Terraform (Agility Labs 2023) > 3. App Deployment with Application Services 3 Extension (AS3) Source | Edit on
3.4. Deploy AS3 declarations with F5 VS Code Extension
3.4.1. Connect to BIG-IPs
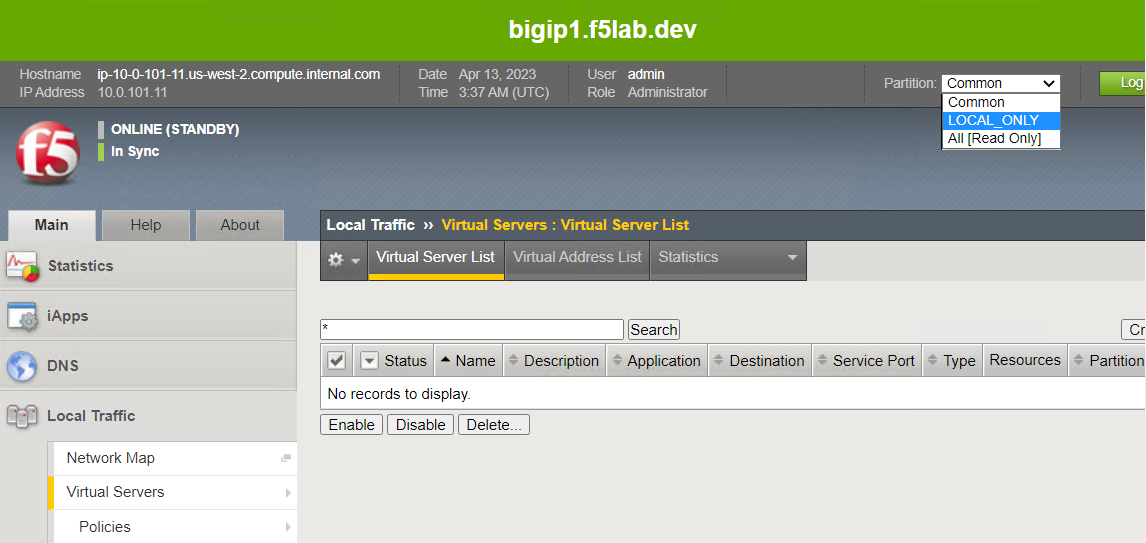
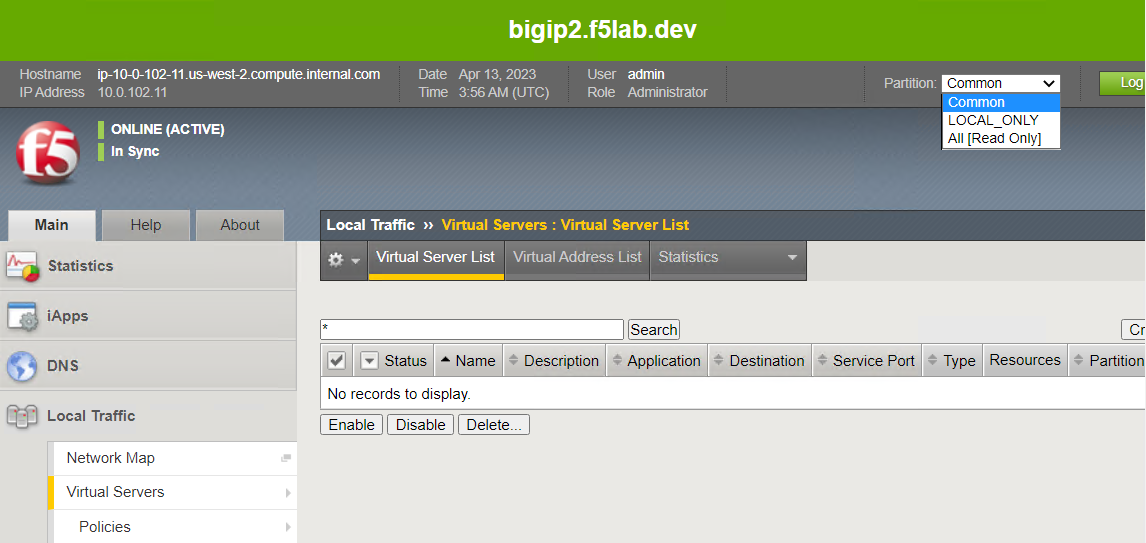
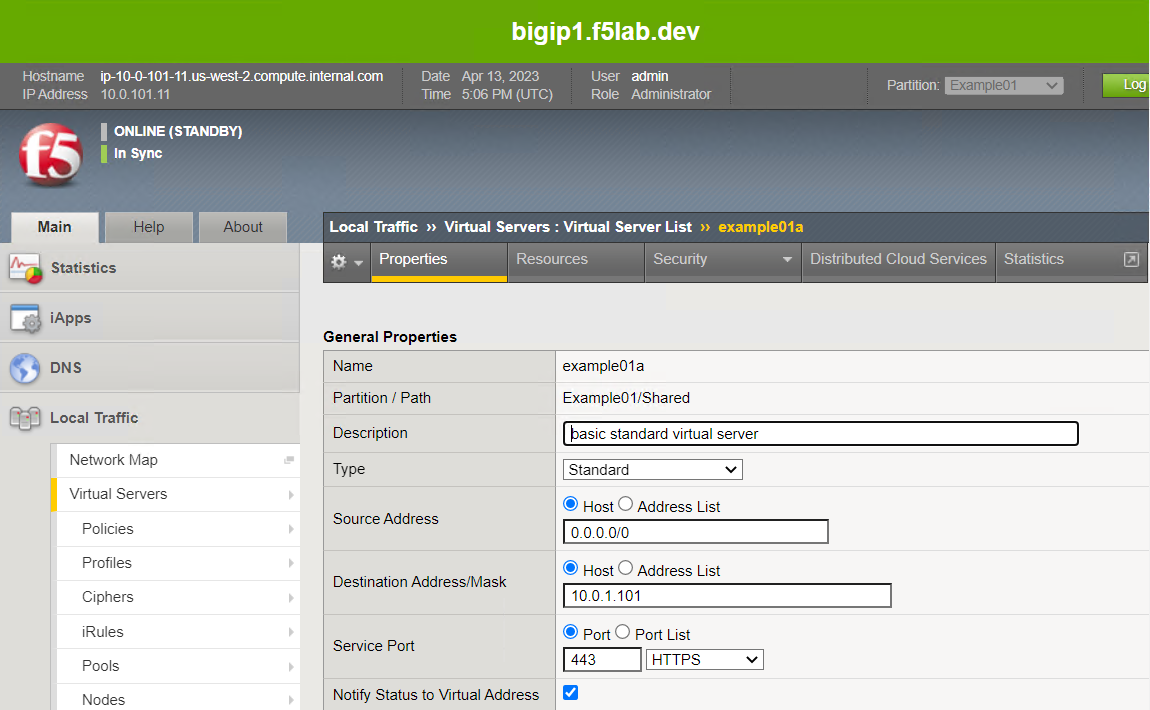
Go to the BIG-IP #1 TMUI. Notice that it is in the Standby state. Leave it as is for now.
Navigate to Local Traffic > Virtual Servers. There should be no virtual servers configured.
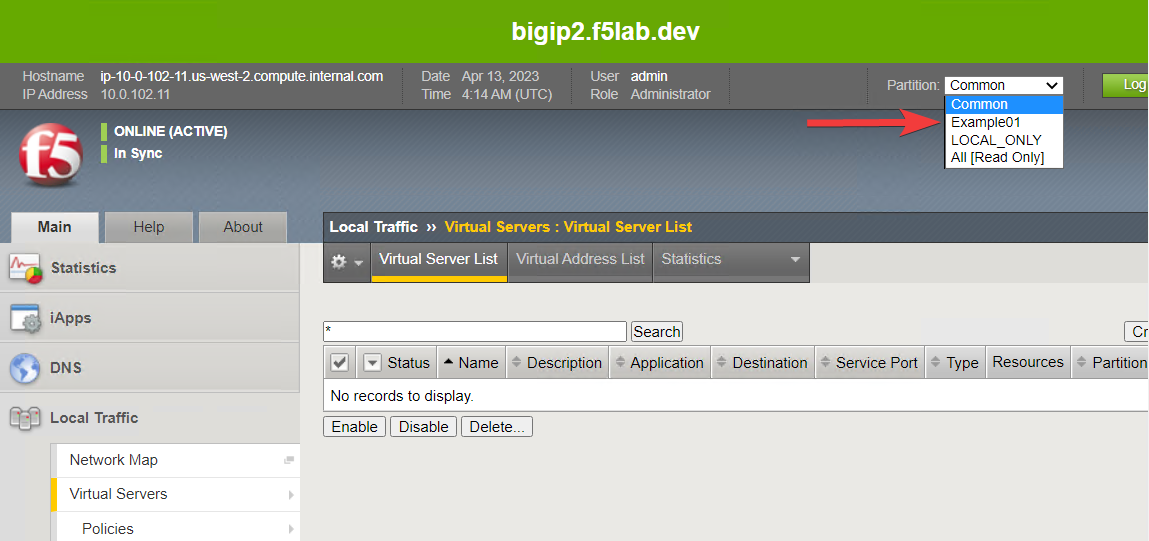
Click on the Partition drop-down list at the top-right of the TMUI. Notice that have two administrative partitions: Common and LOCAL_ONLY.
Common is the default parititon. LOCAL_ONLY is a special partition that was created during the onboarding process to support configurations unique to each BIG-IP (will not be synchronized).
BIG-IP #1
BIG-IP #2
3.4.2. Create HTTP Virtual Servers with AS3 and Service Discovery
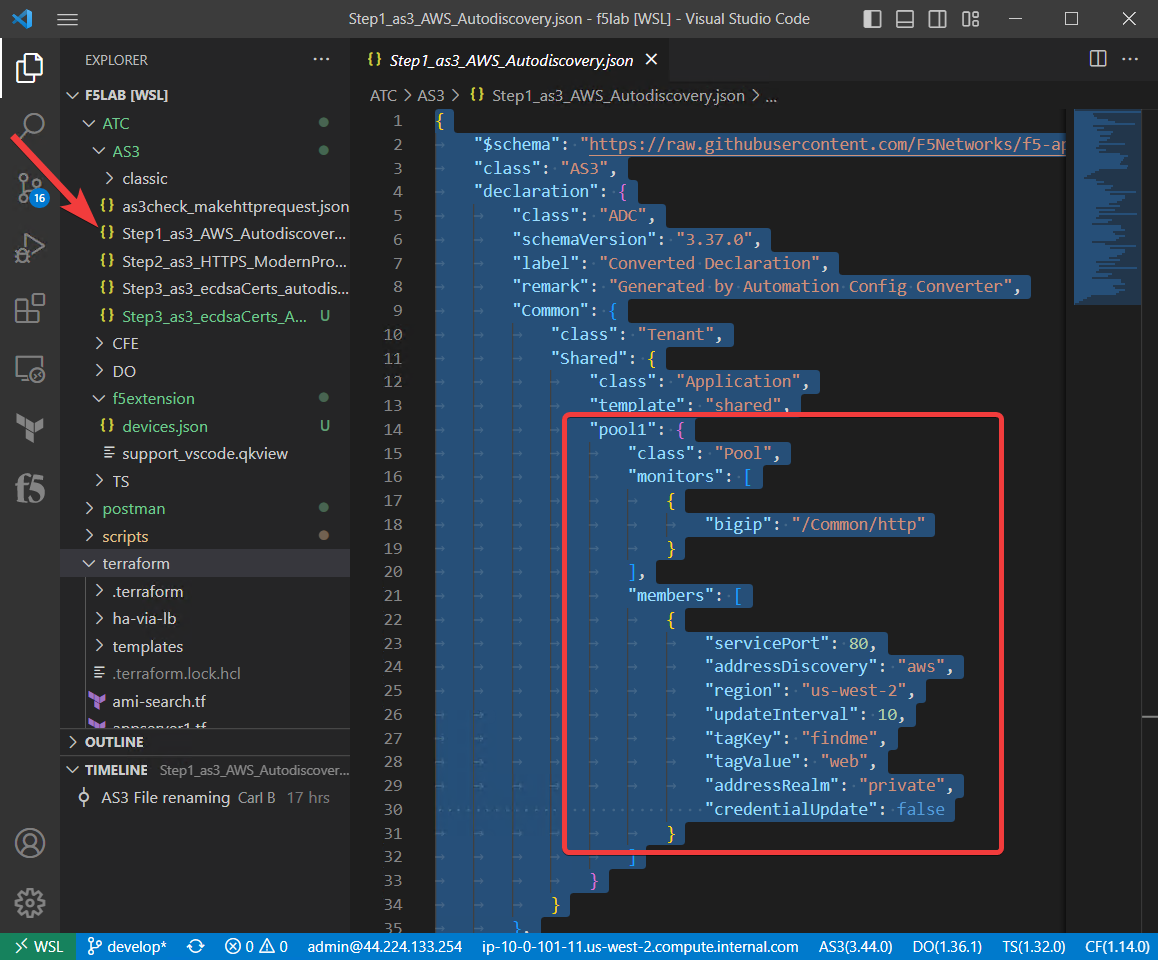
Switch to the VS Code window and ensure that you are in the file Explorer view.
Close the as3check_makehttprequest.json and any untitled-n tabs.
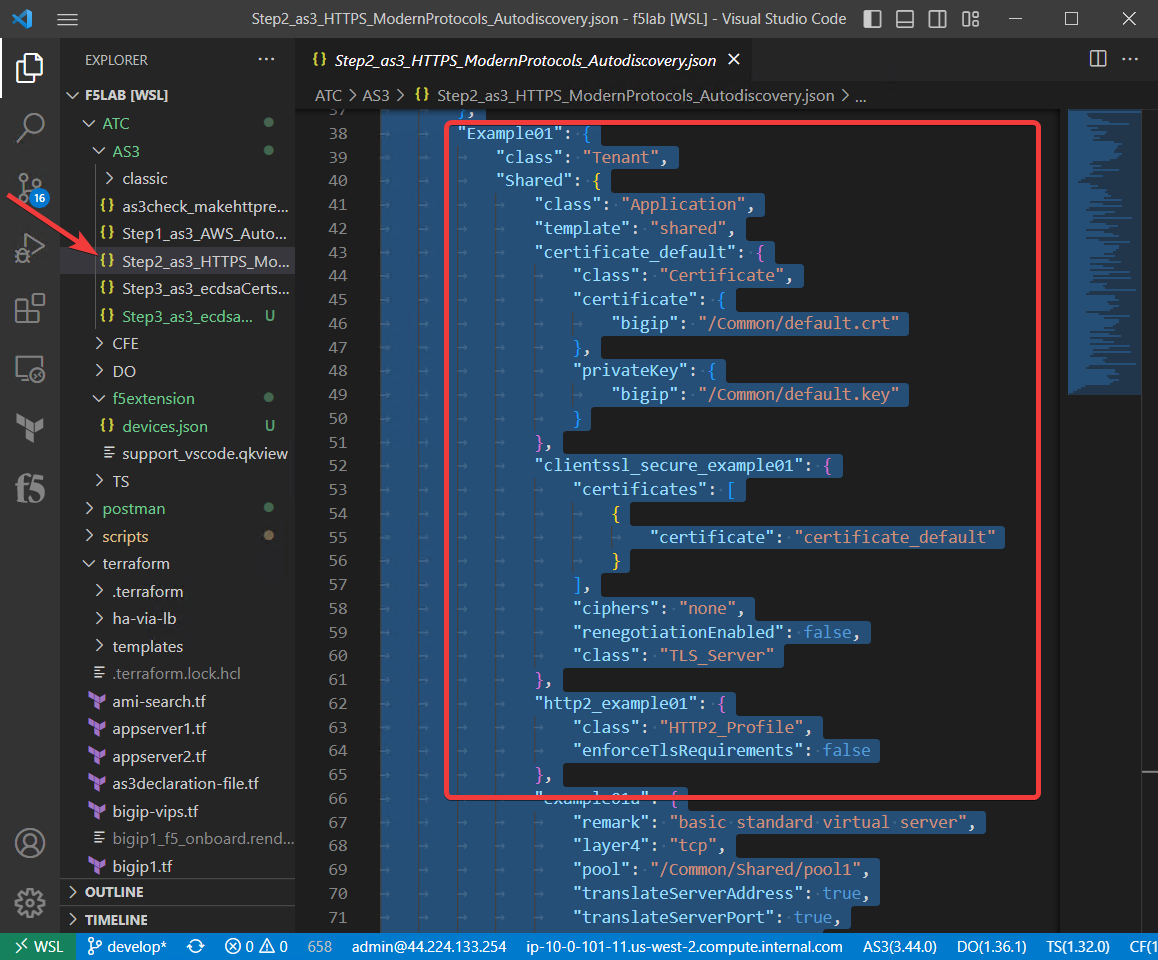
Navigate to the ATC/AS3 folder and open the Step1_as3_AWS_Autodiscovery.json file.
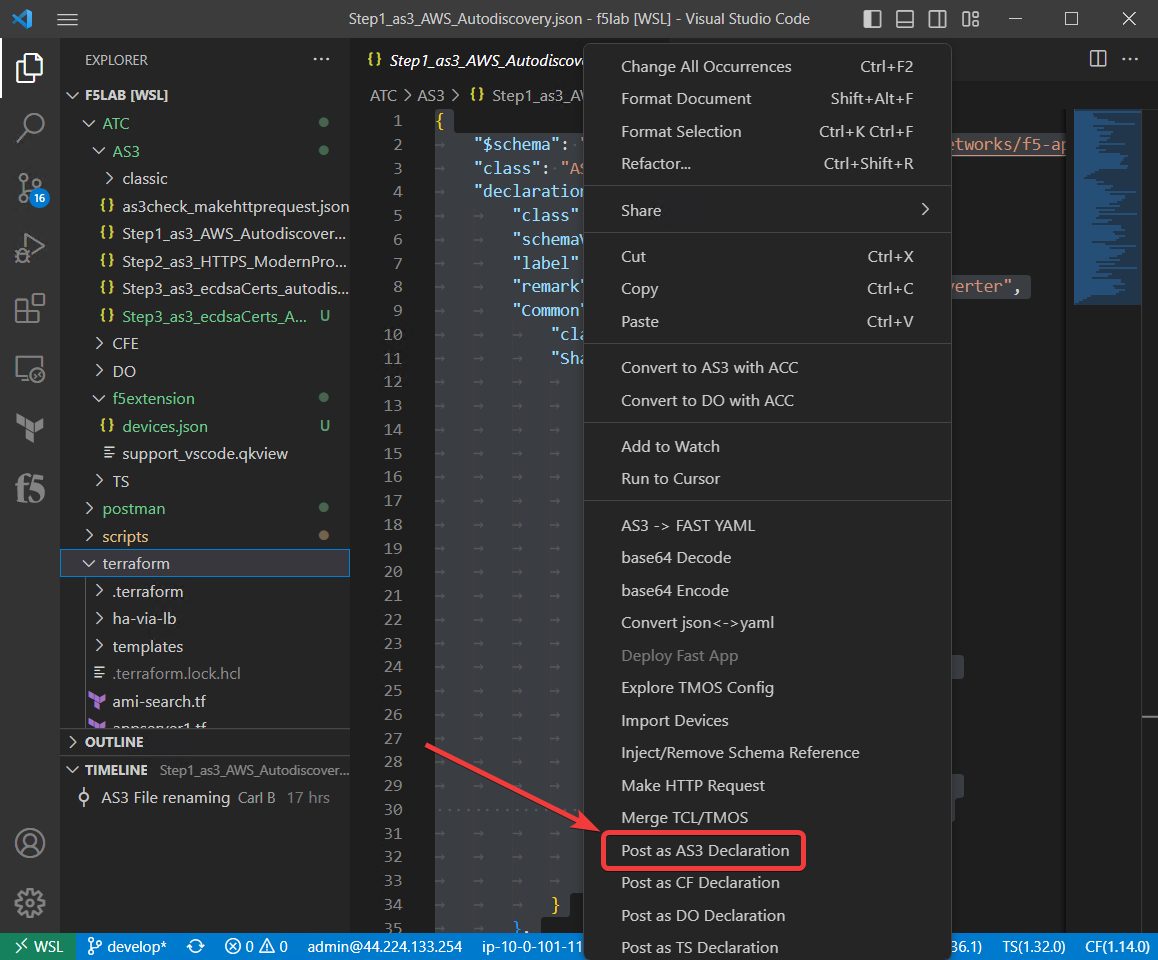
In the window with the JSON declaration, select all of the text. Scroll down and you will see that we are configuring AS3 to look for tagged AWS EC2 instances to add to the pool.
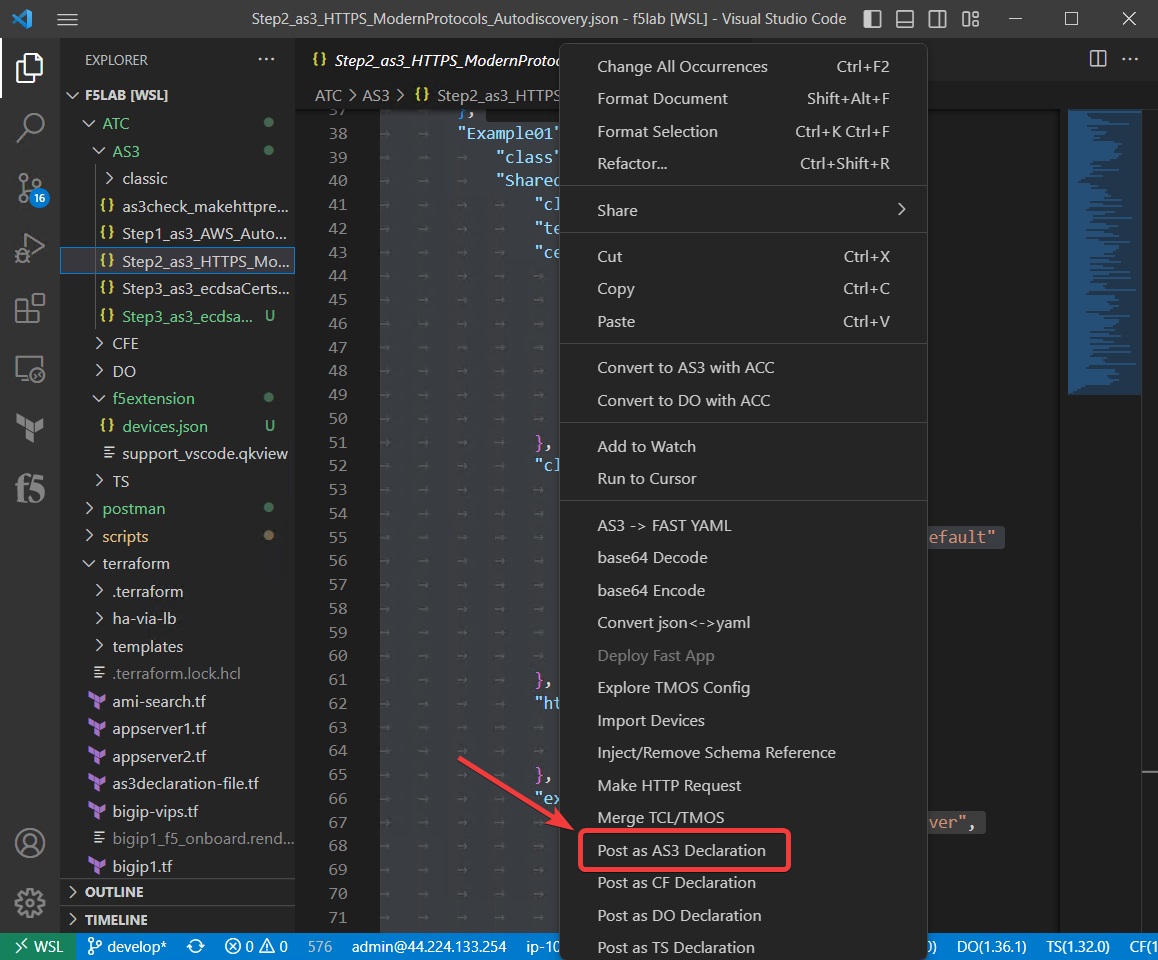
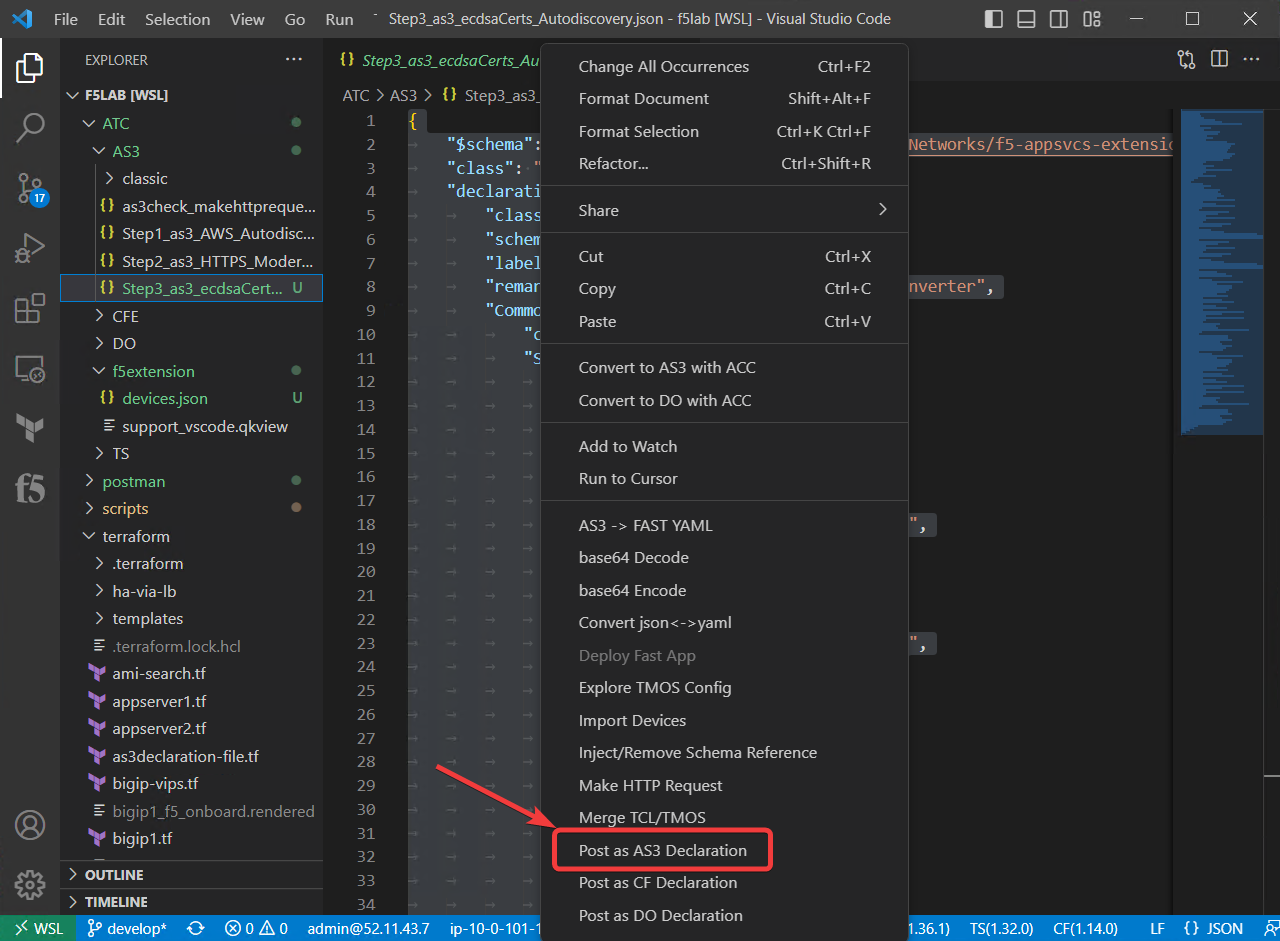
Select all of the text and right click. Then, select Post as AS3 Declaration.
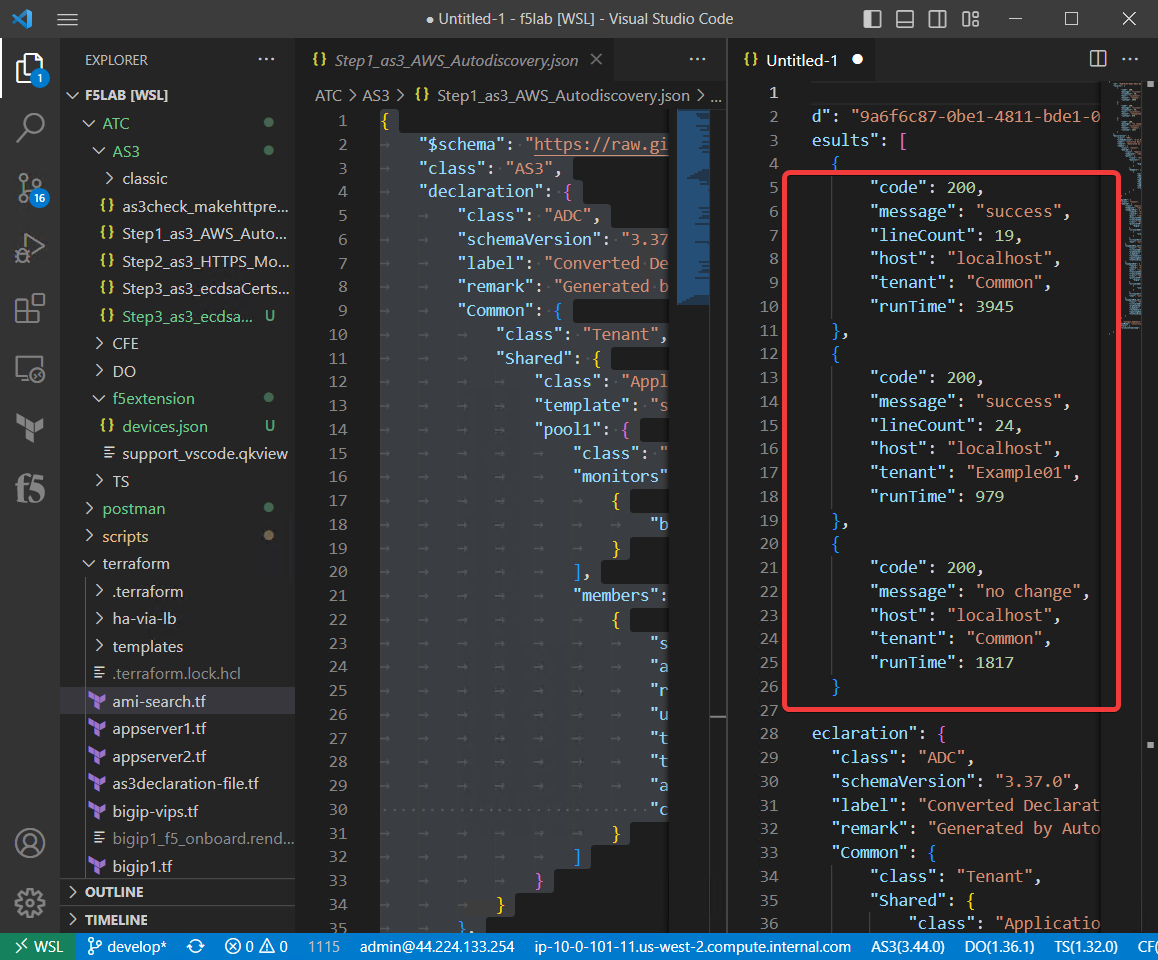
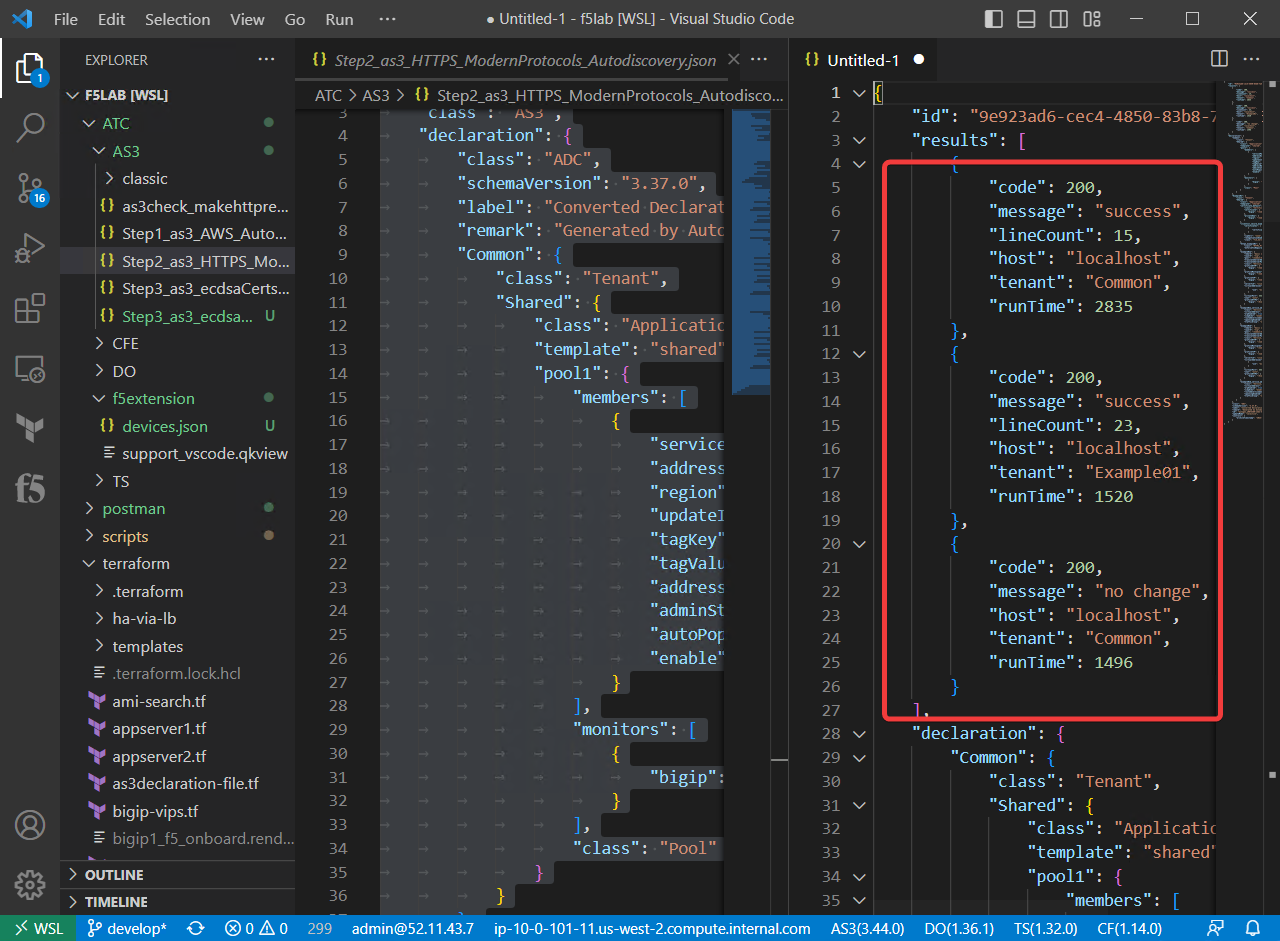
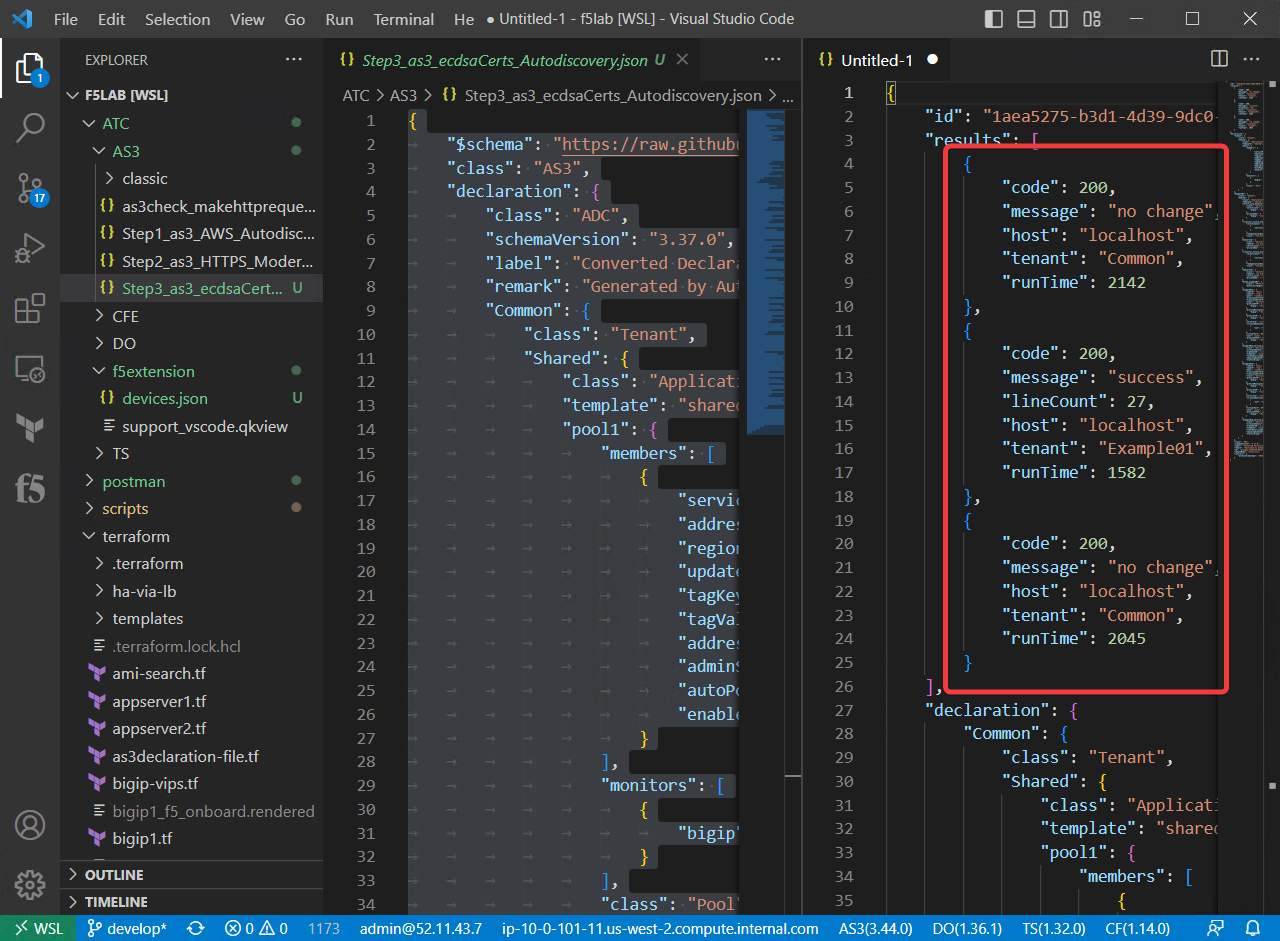
As the extension waits for AS3 to validate and apply the declaration, you will see the following:

A new panel will open with the response from AS3. Here you can see that all sections of the declaration were successful. Below the highlighted area is the declaration that you submitted.
Hint
If needed, you can resize the VS Code Console/Terminal panel by grabbing the top edge and dragging it down.
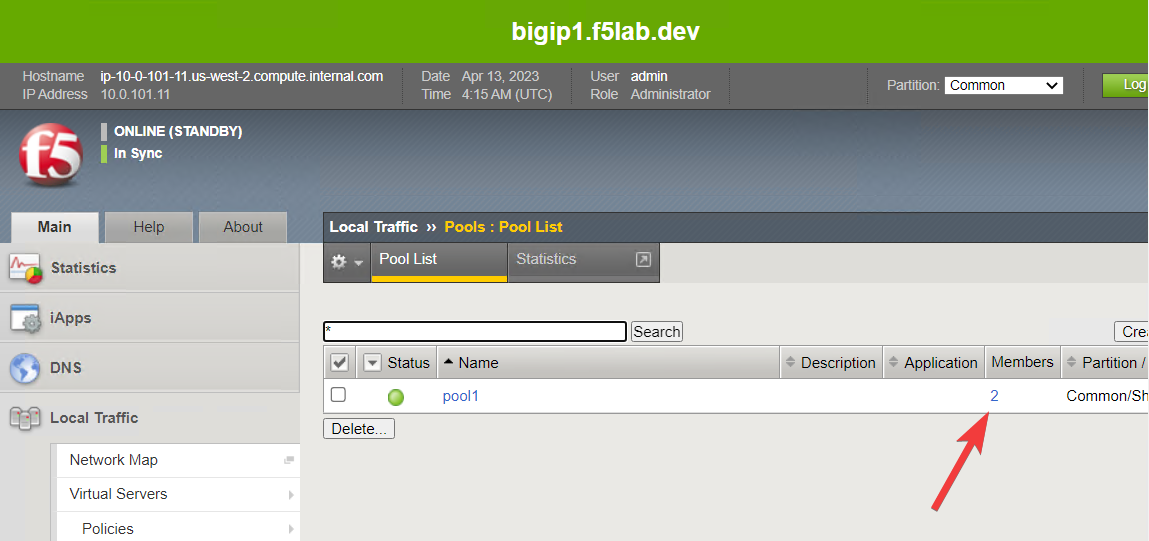
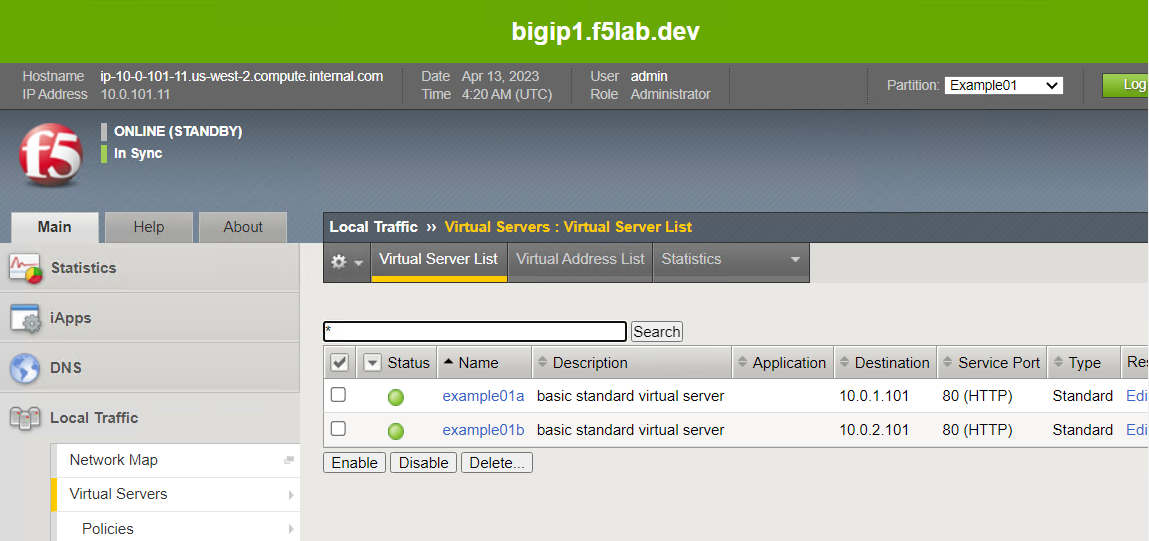
In the TMUI of both BIG-IP devices, confirm the creation of:
- A new BIG-IP administrative partition (AS3 tenant named Example01)
- Two new virtual servers in the Example01 partition
- A new Pool (with two pool members) in the Common partition
Note
Since configuration sync was enabled as part of the BIG-IP onboarding, you will see the same configuration on both BIG-IP instances.
BIG-IP #1

BIG-IP #2


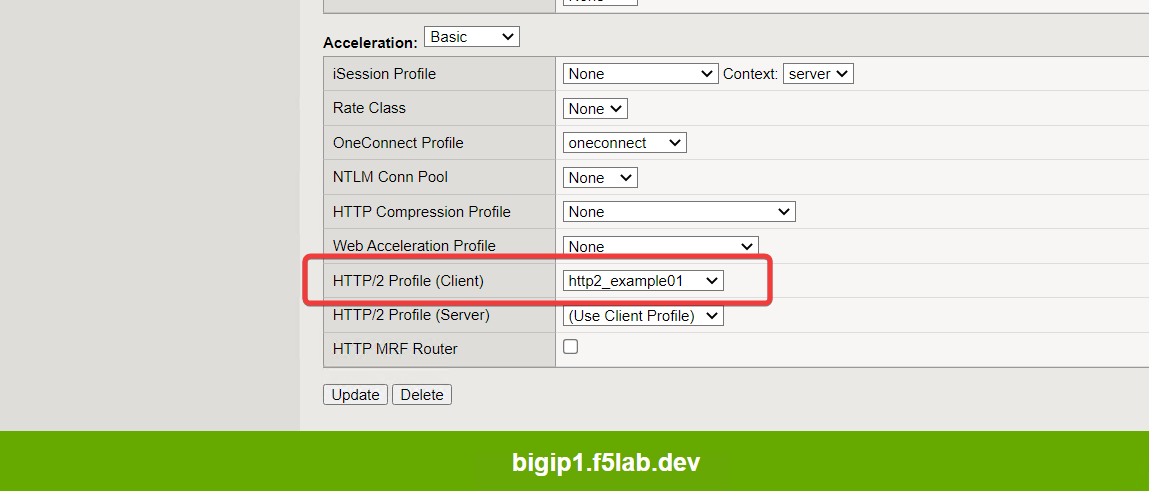
3.4.3. Enable HTTP/2 with AS3
By default, BIG-IP uses HTTP/1.1. In this section, you will enable HTTP/2, which is a more modern protocol version.
Close the Step1_as3_AWS_Autodiscovery.json and untitled-1 file tabs.
Open Step2_as3_HTTPS_ModernProtocols_Autodiscovery.json, select all of the text, right click, and then select POST as AS3 Declaration.
When successful, the BIG-IP will return a status code of 200 and a message of SUCCESS.
In the TMUI of both BIG-IP devices, confirm the following:
- Two HTTPS virtual servers were created, each with an HTTP/2 Profile (Client) attached
- Two HTTP redirect virtual servers were created
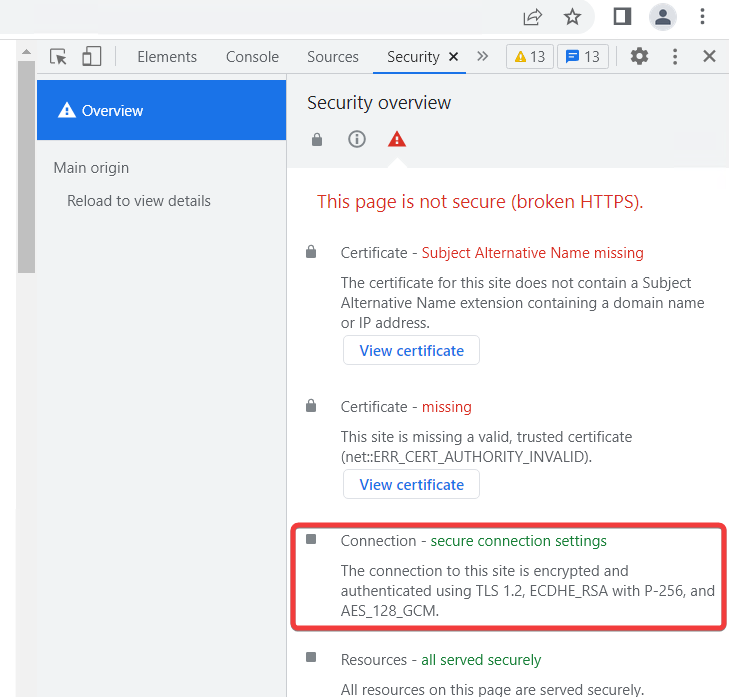
Now, you will verify connectivity to the HTTPS application and examine the ciphers used.
- Open the web browser and navigate to the IP address vip1_public_ip (refer to
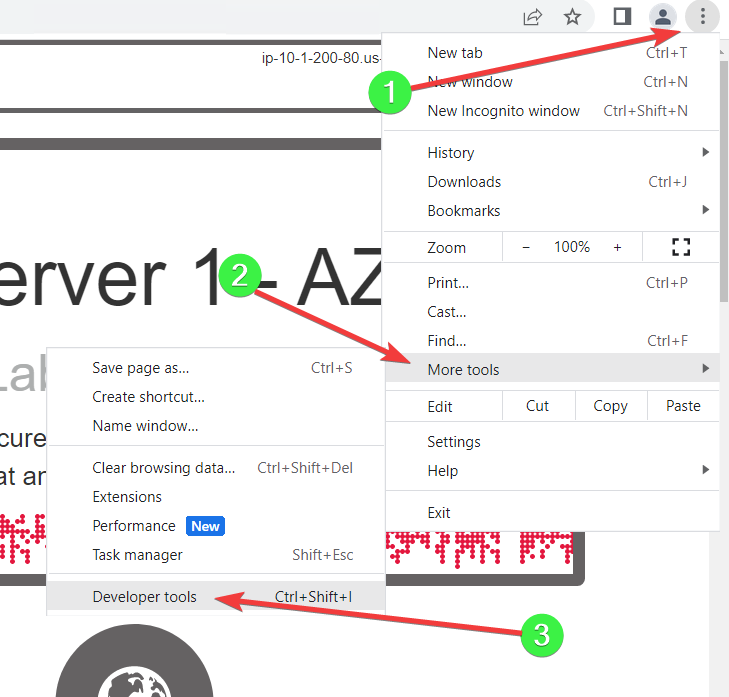
terraform outputif needed). - Use the web browser’s developer tools to see the ciphers in use.

- Open the web browser and navigate to the IP address vip1_public_ip (refer to
Click on the Network tab.
Right-click on the Name column header and select the Protocol field to add it to the table.
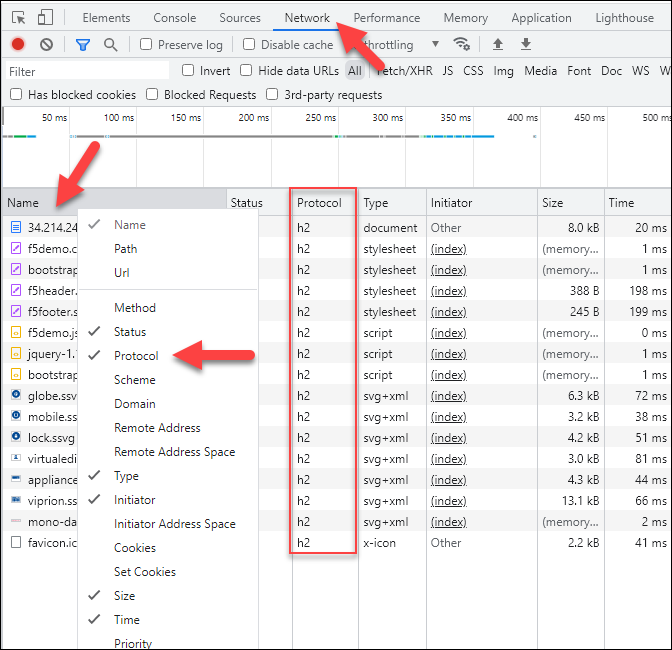
You should see h2 in the Protocol column. This confirms that the connection was made using the HTTP/2 protocol.
3.4.4. Adding ECDSA certificates to the application
Elliptic Curve Cryptography (ECC) provides strong security with smaller key sizes than traditional RSA cryptography. ECC is also more computationally efficient, which is better for use with mobile devices. You will now apply ECDSA certificates to your application virtual servers.
Close the previous AS3 declaration and the untitled-1 file tabs.
Open Step3_as3_ecdsaCerts_Autodiscovery.json and select all of the text.
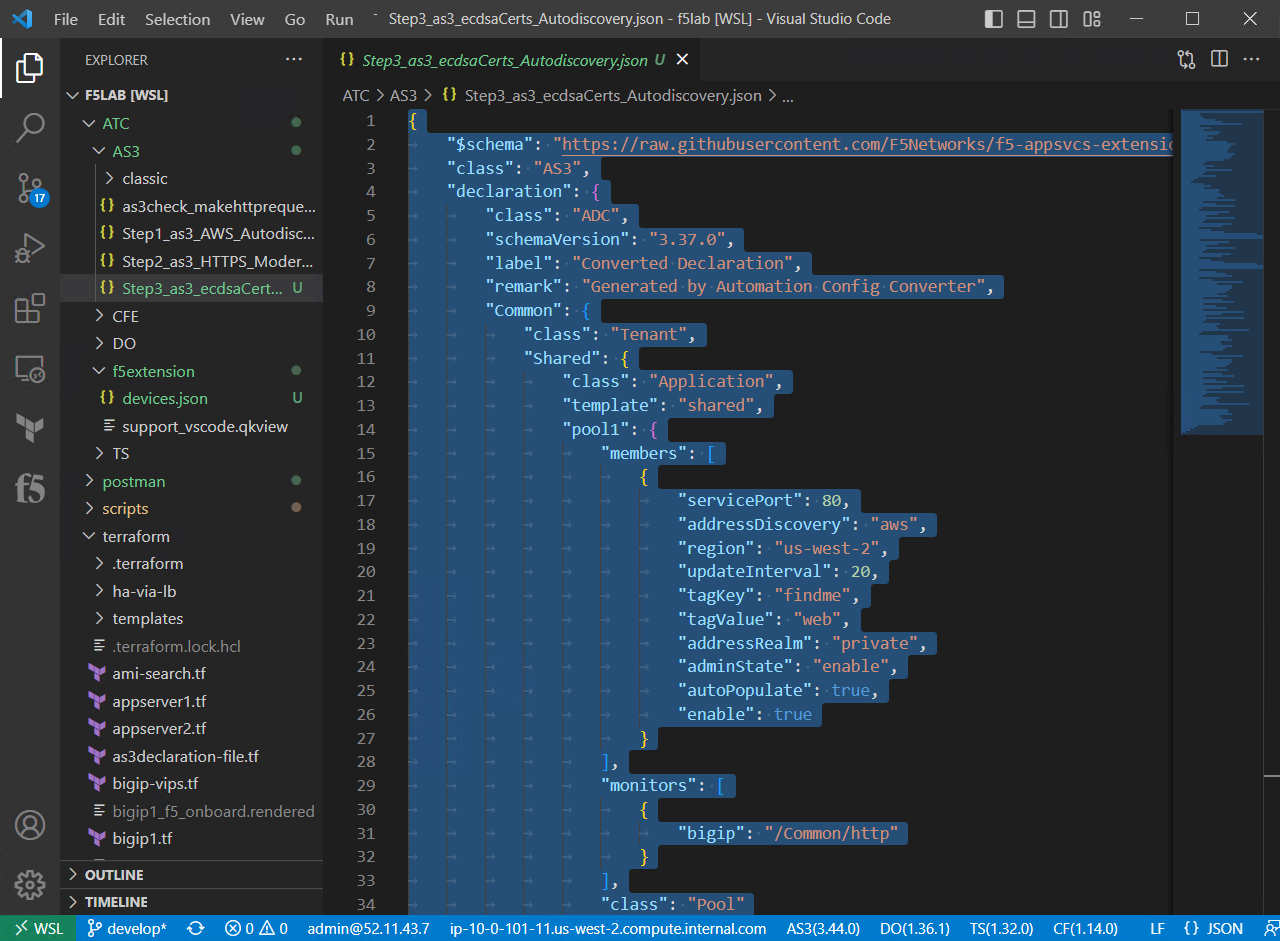
Right click and select POST as AS3 Declaration.
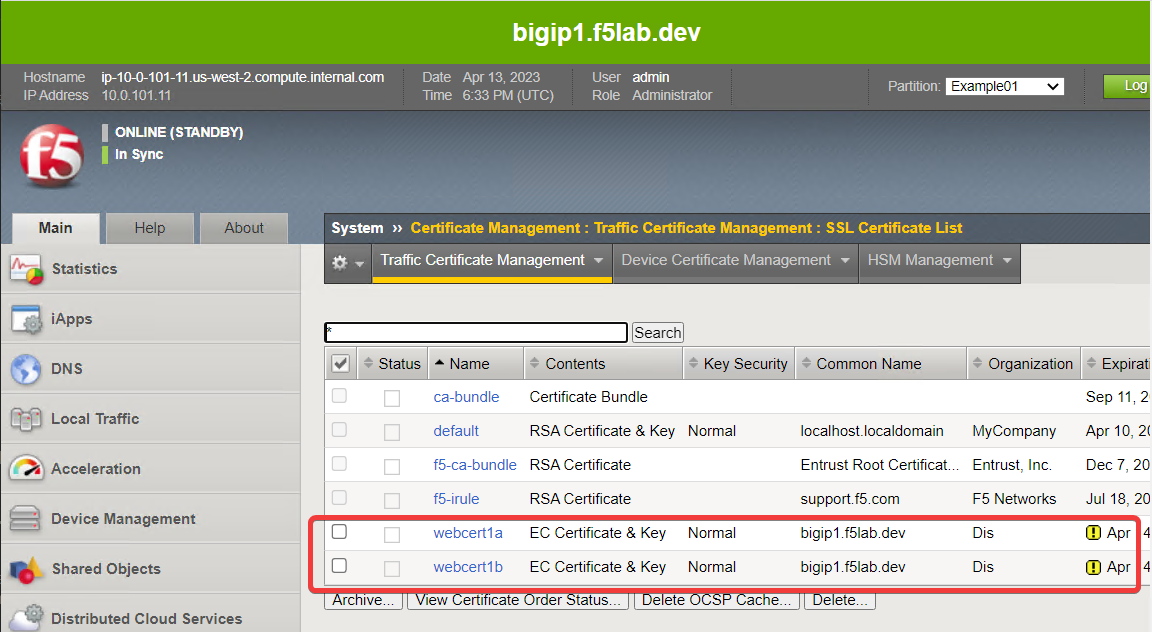
In the TMUI of both BIG-IP devices, confirm the following:
- Two ECDSA certificates were created (System > certificate Management > Traffic Certificate Management > SSL Certificate List)
On the example app web page, use Developer tools to verify that you see the ECC ciphers (ECDHE_RSA with P-256) in use.