F5 Public Cloud Solutions > A&O Toolchain: BIG-IP HA in Public Cloud with Terraform (Agility Labs 2023) > 5. HA Failover via Cloud Load Balancer Source | Edit on
5.4. Test HA Failover
5.4.1. BIG-IP #1 Failover Test
Disable the virtual servers on BIG-IP #1 to simulate a failure.
Keep the AWS console page open on the Target Groups page and use the refresh button to update. The health checks are set to the fastest possible and will reflect status changes in about 10-15 seconds.
In Postman, expand the Failover Test > BIG-IP #1 folder.
Send the NLB-1-A [bigip1] Check For Virtual Server Example01a request and then check for a 200 OK status code with the name showing example01a.
Send the NLB-2-A [bigip1] Disable Virtual Server Example01a request to disable the application virtual server and then check for a 200 OK status code.
Send the NLB-3-A [bigip1] Check For Virtual Server Example01b request and then check for a 200 OK status code.
Send the NLB-4-A [bigip1] Disable Virtual Server Example01b request to disable the second application virtual server and then check for a 200 OK status code.
In the TMUI of BIG-IP #1, select the example01 partition and then navigate to Local Traffic > Virtual Servers.
Verify that the virtual server statuses are no longer green.
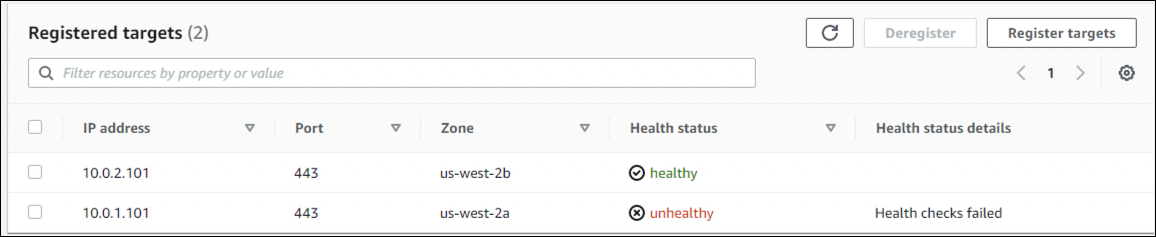
Return to the AWS console Target Groups page. One should be shown as unhealthy.
Browse to the NLB link using the DNS name on the Load Balancers page.
The web page should still load.
5.4.2. BIG-IP #2 Failover Test
Disable the virtual servers on BIG-IP #2 to simulate a failure.
In Postman, expand the Failover Test > BIG-IP #2 folder.
Send the NLB-1-B [bigip2] Check For Virtual Server Example01a request and then check for a 200 OK status code with the name showing example01a.
Send the NLB-2-B [bigip2] Disable Virtual Server Example01a request to disable the application virtual server and then check for a 200 OK status code.
Send the NLB-3-B [bigip2] Check For Virtual Server Example01b request and then check for a 200 OK status code.
Send the NLB-4-B [bigip2] Disable Virtual Server Example01b request to disable the second application virtual server and then check for a 200 OK status code.
In the TMUI of BIG-IP #2, select the example01 partition and then navigate to Local Traffic > Virtual Servers.
Verify that the virtual server statuses are no longer green.
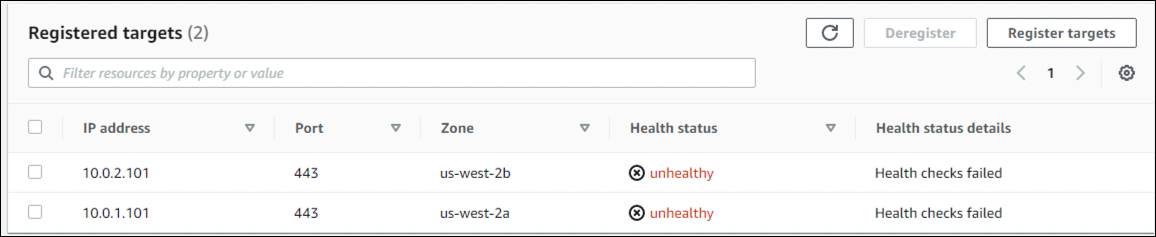
Return to the AWS console Target Groups page. Now, both should be shown as unhealthy.
Browse to the NLB link using the DNS name on the Load Balancers page.
The web page should fail to load (can take a minute or two).

5.4.3. Restore BIG-IP #1 Applications
Enable virtual servers
Send the NLB-5-A [bigip1] Enable Virtual Server Example01a request to enable the application virtual server.
Send the NLB-6-A [bigip1] Enable Virtual Server Example01b request to enable the application virtual server.
Return to the AWS console Target Groups page. One should still be shown as unhealthy.
Browse to the NLB link using the DNS name on the Load Balancers page.
The web page should load again.
5.4.4. Restore BIG-IP #2 Applications
Enable virtual servers
Send the NLB-5-B [bigip2] Enable Virtual Server Example01a request to enable the application virtual server.
Send the NLB-6-B [bigip2] Enable Virtual Server Example01b request to enable the application virtual server.
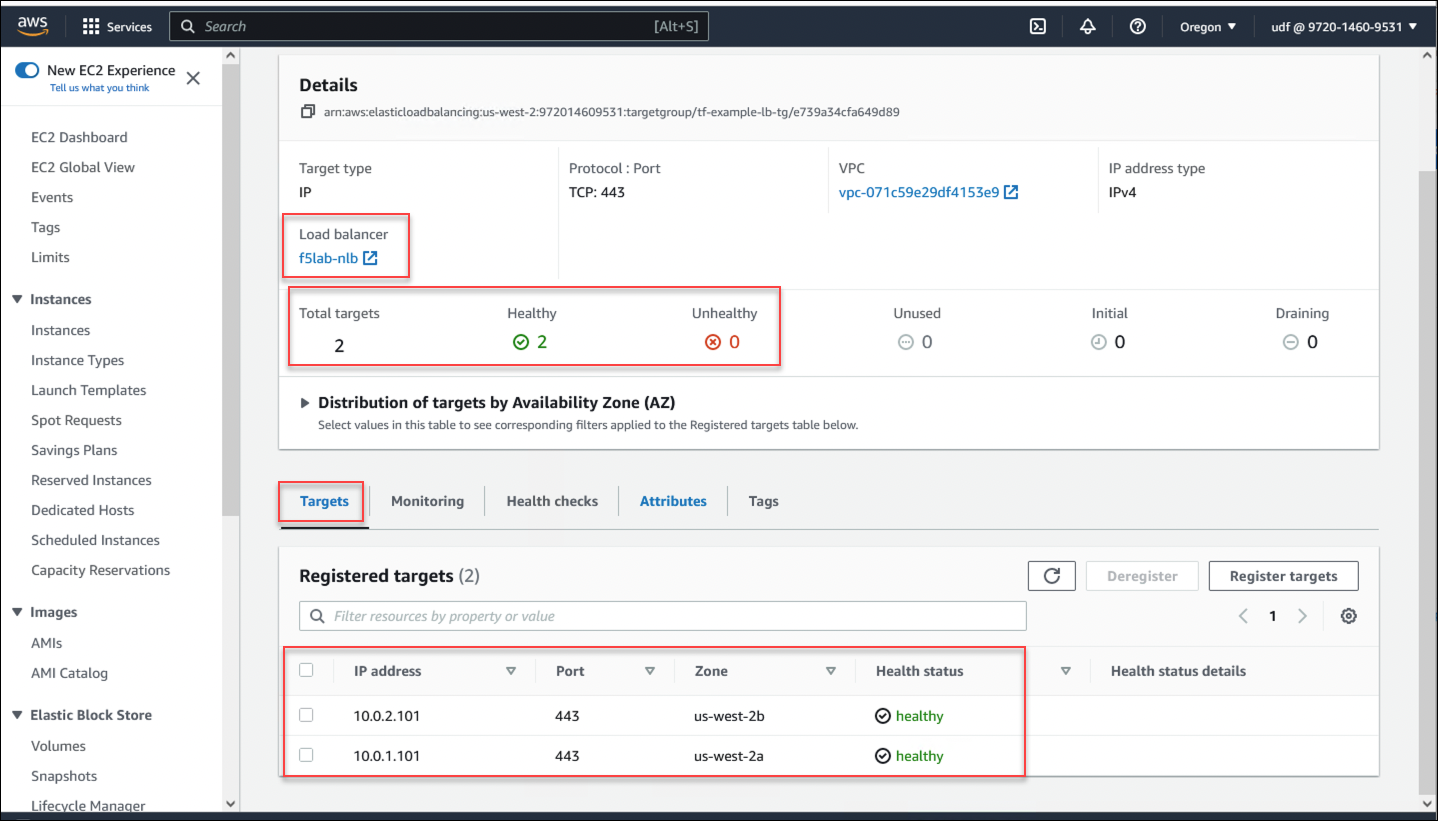
Return to the AWS console Target Groups page. Both should be shown as healthy.
Browse to the NLB link using the DNS name on the Load Balancers page.
The web page should continue to load.
This is the end of the lab module.