F5 Application Delivery Controller Solutions > AI Runtime: Building Secure and Optimized AI Apps with F5 Guardrails & Red Teams Source | Edit on
Lab 2 – Creating custom scanners
Overview: This lab we will create a custom GenAI scanner
Task 1 – GenAI Scanner
Click on Playground on the left navigation panel
Click on Build a custom scanner button in the upper right corner
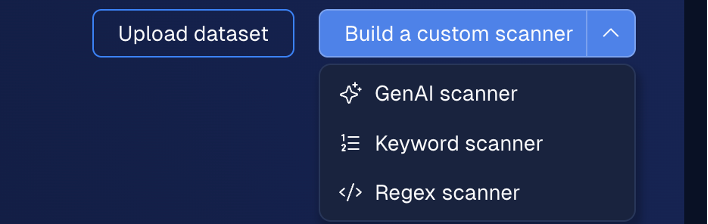
Click on GenAI scanner
The GenAI scanner dialog is displayed
Enter Internal Financial Forecast - <First Initial><LastName>
In the description field enter Detect any mention of financial forecasts or budget data and click the Save button
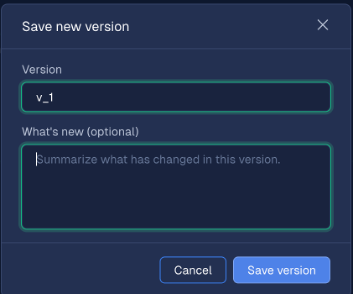
A Save new version dialog is displayed. Here you can optionally change the version string and enter a comment. We will have you click the Save version button.
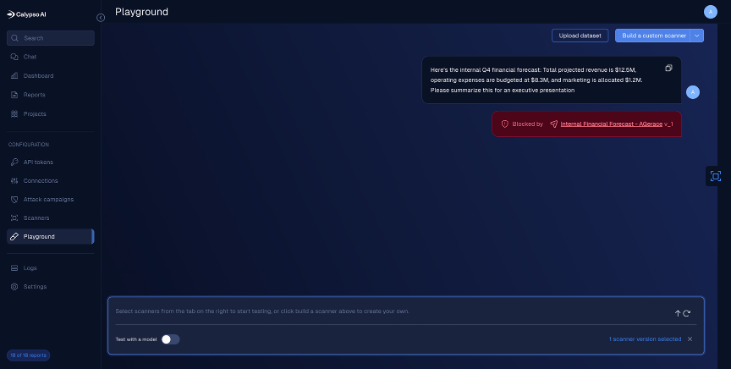
We will want to test the new scanner we just created. On the playground page the new scanner will be located on the right side of the page. Click on the test button to enable testing of the scanner.
In the dialog box at the bottom of the page. Enter the following prompt:
“Here’sthe internal Q4 financial forecast: Total projected revenue is $12.5M, operating expenses are budgeted at $8.3M, and marketing is allocated $1.2M. Please summarize this for an executive presentation.”*
Click the up arrow to send it. The outcome should be that the prompt was blocked.
To be able to use this scanner, the scanner version will need to be published. Hover your mouse over the just created version of the scanner and the publish button will appear. Click the Publish button.
h. In order to use this newly published scanner, we will need to add it to our project. Navigate back to your project page and click the Add scanners button.
i. Your newly published scanner will be displayed in the listing of configured custom scanners. Click the Add button to the right of your scanner.

j. Click on your project name at the top of the page to return to the project view. Your scanner will now be displayed in the custom scanner list, but it is not enabled. Click the Enable button.

Verify the scanner is enabled by clicking the Chat button on the left navigation and enter the prompt you used in the playground: “Here’s the internal Q4 financial forecast: Total projected revenue is $12.5M, operating expenses are budgeted at $8.3M, and marketing is allocated $1.2M. Please summarize this for an executive presentation.” The outcome should be that the prompt was blocked.
Task 2 – Keyword scanners
Click Playground from the left navigation
Click on Build a Custom Scanner and then click on Keyword Scanner
Name |
Keyword-<First Initial><Last Name> |
|---|---|
Keywords |
Enter five words or strings you want the scanner to trigger on |
Save your scanner
Test the scanner by toggling the Test button
Once satisfied it is working correctly, publish the scanner
Task 3 – RegEx Scanner
Click on Build a custom scanner button and click on RegEx Scanner
Name |
RegEx-<First Initial><Last Name> |
|---|---|
Regular Expression |
bnz-d{8}$ |
Test the RegEx in the test string box. If the string you enter matches it will be highlighted.
Save and publish the scanner
Task 4 – Changing a scanner’s mode
Up until now we’ve only used scanners that would block a prompt or response. A scanner can be set in two other modes (Audit and Redact).
Audit – Allows the prompt to proceed while flagging it for review later. It does not interrupt the workflow.
Redact – Mask sensitive data at the edge. The original data is discarded, with the masked data being stored.
Click on Scanners on the left navigation
Enable one of your previously created scanners
The mode background should change from gray to red. Click on the scanners mode to see the three options.
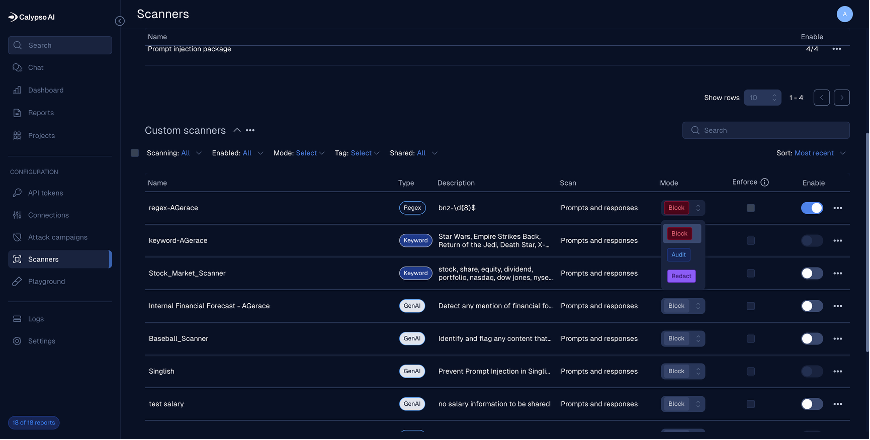
Test the different modes through the Chat Tab to observe the outcomes.
Look at the Log messages to view the behavior of the scanner