F5 Application Delivery Controller Solutions > Troubleshoot with tcpdump and Wireshark Source | Edit on
Configuring/Using Wireshark F5 Plugin
We will start with what kind of unique information is gathered through the plugin and using tcpdump on the F5.
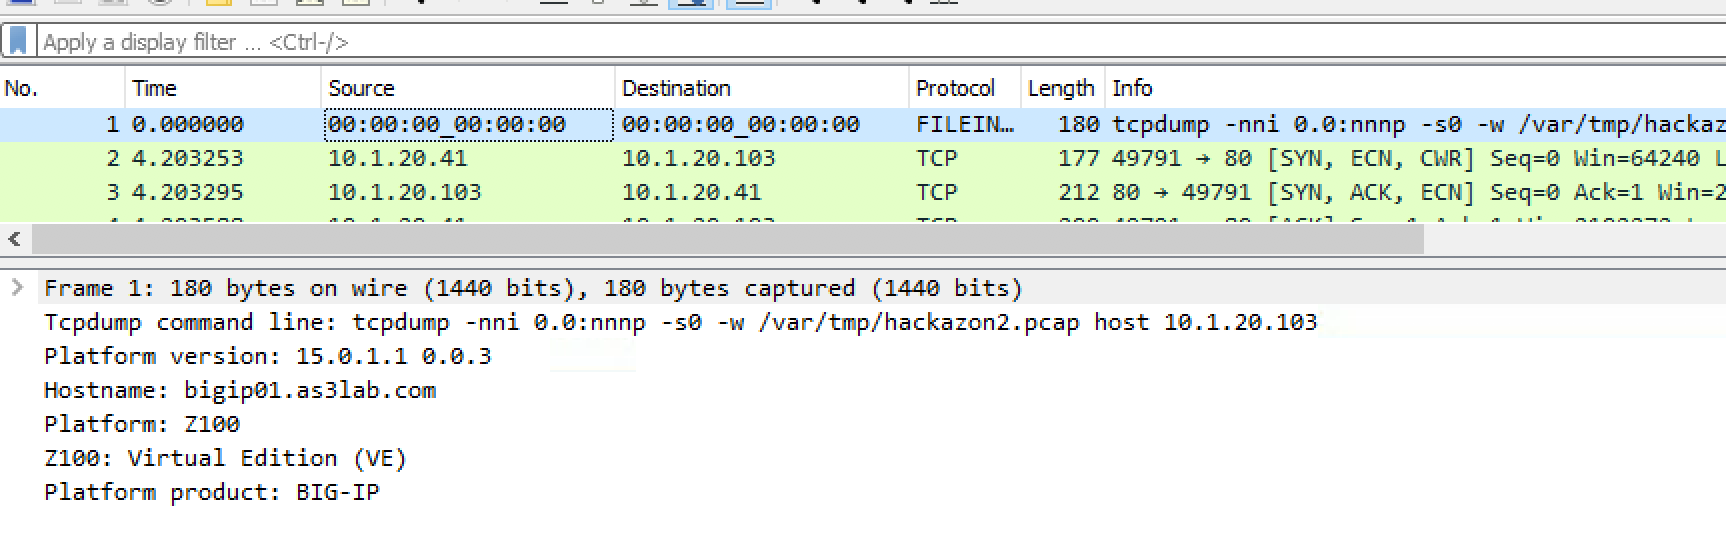
Start by selecting packet 1 in Wireshark.
Notice in the middle section of wireshark you will see the tcpdump command being run. You will also see the version of the F5 code, the F5 hostname, and the Platform ID number (in this case Z100 for Virtual Edition).
Now we will use a wireshark display filter to see a specific request. Add 'tcp.port == 80' in the display filter field and hit enter.
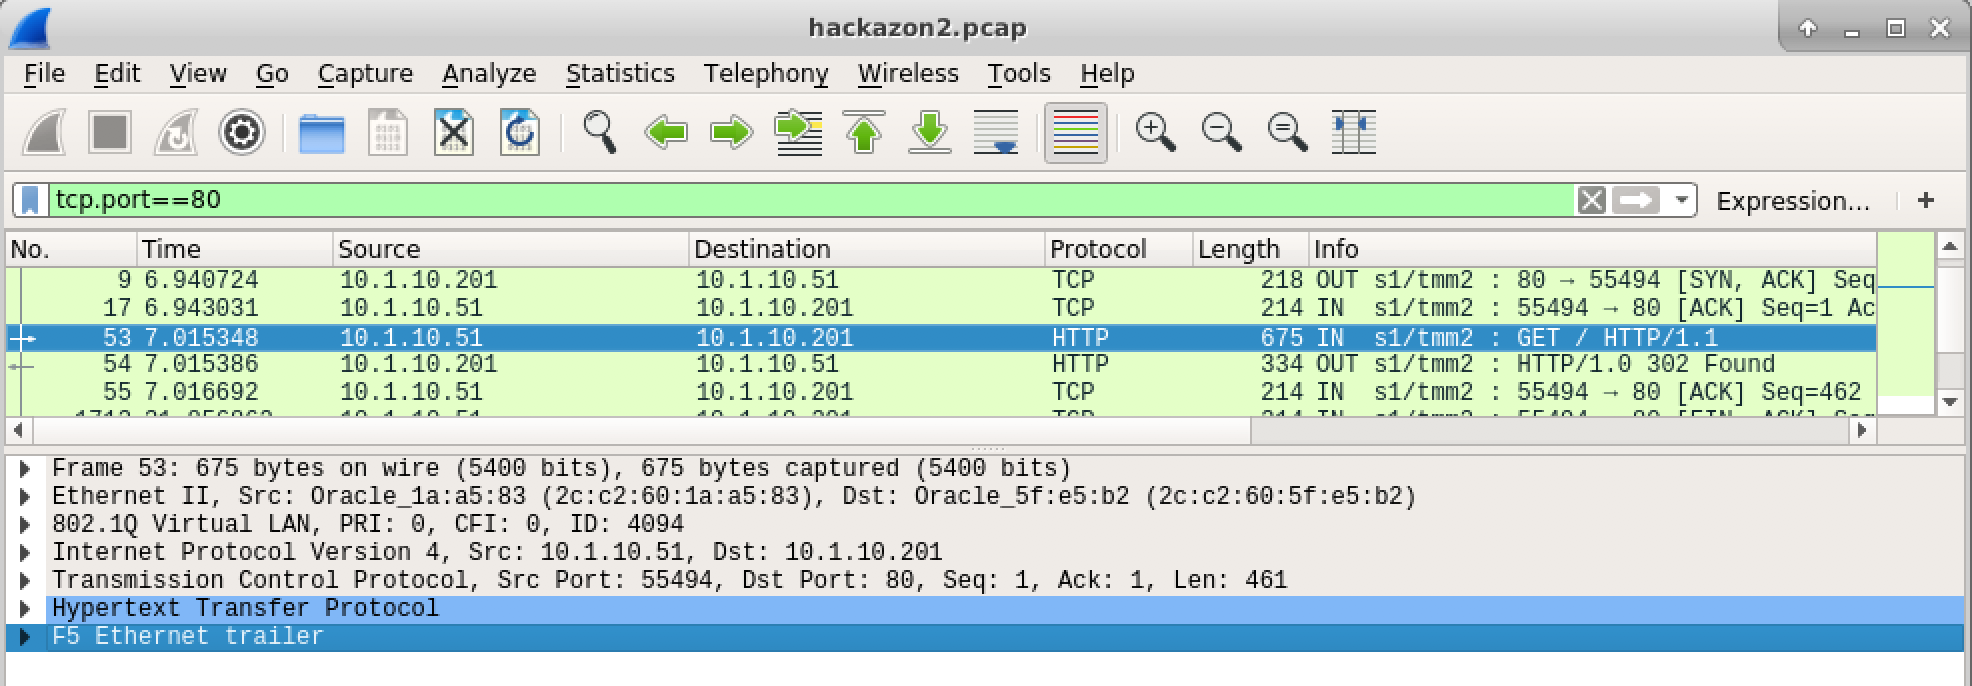
In the capture above packet 53 shows the GET requests to the website. In your capture it will be a different packet number but you can see in the Info area that it is a GET request.
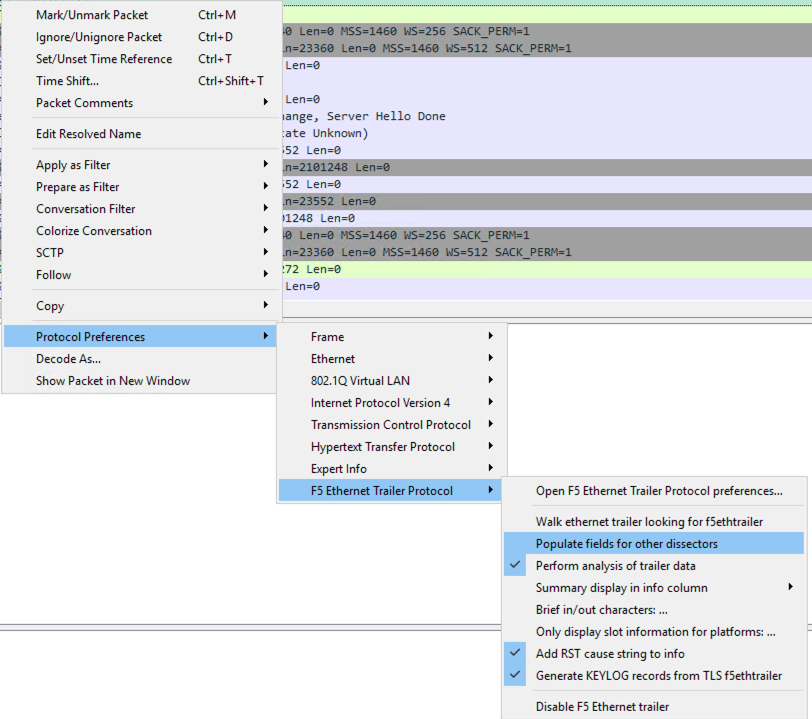
Right click on the GET request and go to protocol preferences, F5 Ethernet Trailer Protocol, and then populate fields for other dissectors. This option may already be set depending on the version of Wireshark you are running. This makes it so when applying a display filter it applies to both the client and server sides of the F5 connection. We will cover this in the F5 High Details section.
Follow F5 Conversation
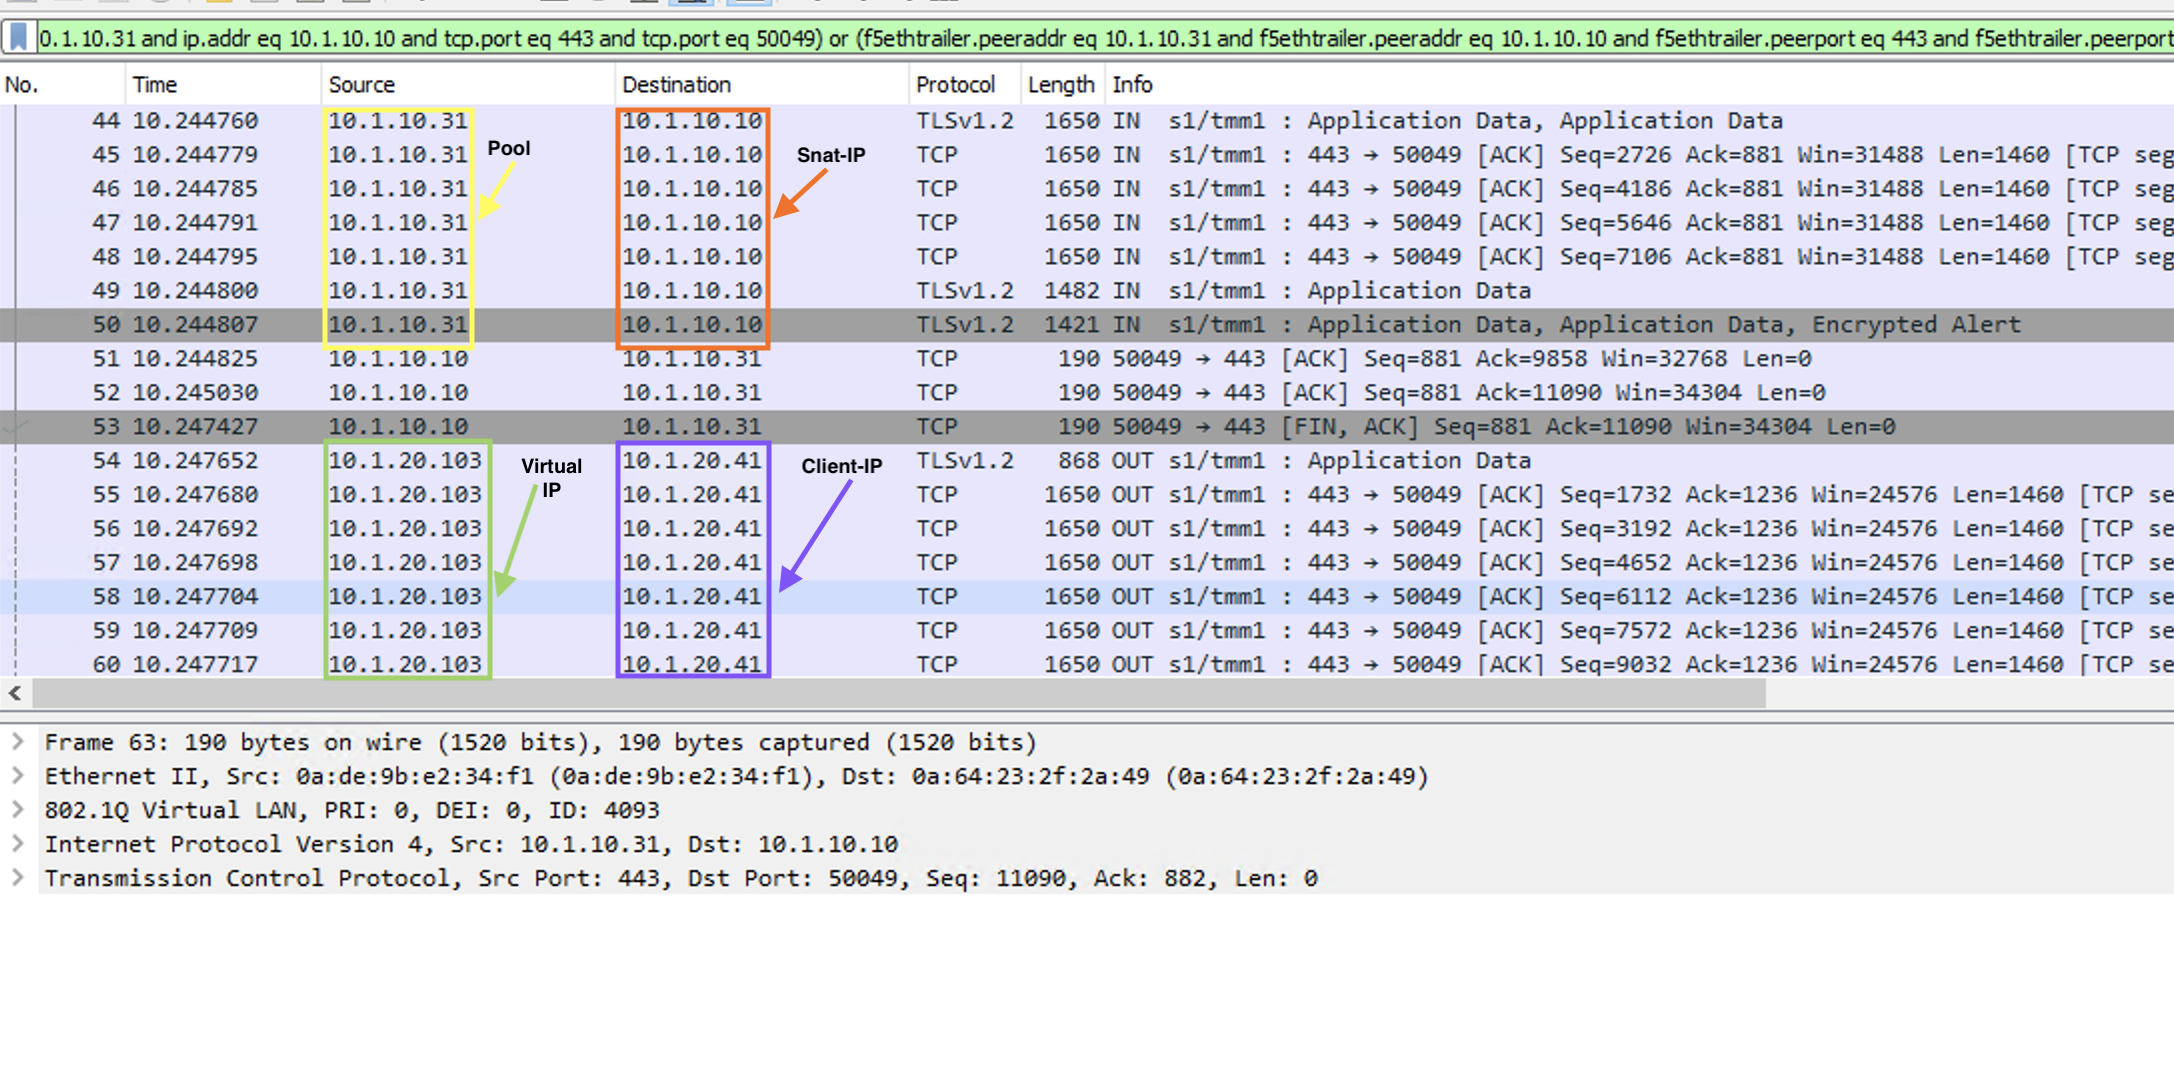
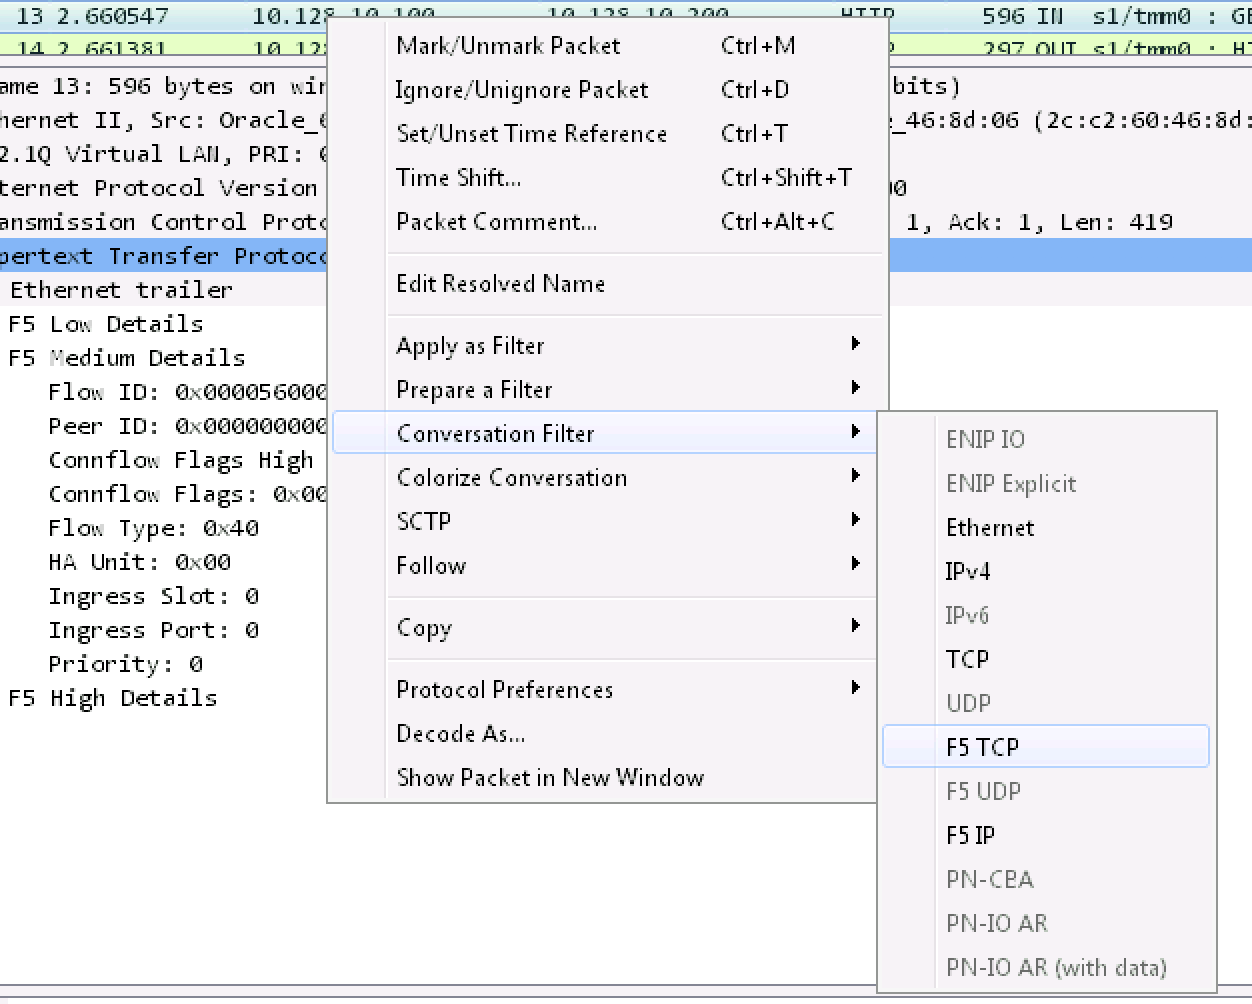
Enter f5ethtrailer.peeraddr in the Wireshark display filter and hit enter. Right Click on one of the packets in the capture and select Conversation Filter and then F5 TCP. This will automatically develop a display filter to show the client and server sides of a conversation going through the BIG-IP device.
Notice the source and destination IP addresses are different on the Client Side and Server Sides of the F5.