F5 Application Delivery Controller Solutions > BIG-IP HA - Do it the Proper Way > Intro to: BIG-IP HA - Do it the Proper Way Source | Edit on
Lab 5: Create & Enable HA Groups
In Lab 4, we observed that basic HA configuration does not take a physical interface link failure into account.
In Lab 5, to address this limitation, we will use the HA Group Failover object.
Lab Tasks:
- Task 1: Create a Gateway Pool
- Task 2: Synchronize BIG-IPs
- Task 3: Create HA Groups
- Task 4: Enable HA Group as the Preferred Failover Method
Task 1: Create a Gateway Pool
In Task 1, we will create a pool that contains the default gateway as the pool member. The function of this pool is to help the BIG-IP identify network related problems upstream.
We will use this pool object as a failover event trigger in Task 2 of our HA Group configuration.
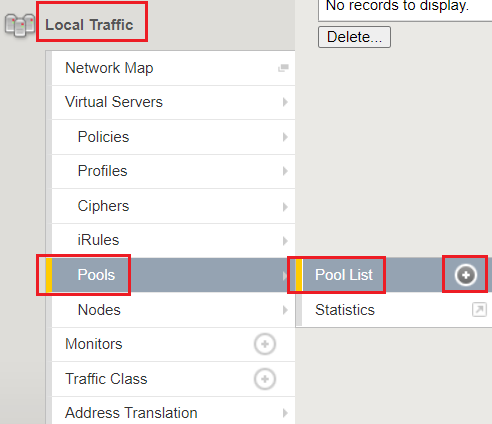
On the ACTIVE BIG-IP, Navigate to: Local Traffic > Pools > Pool List > click the "+" button to create a new pool:
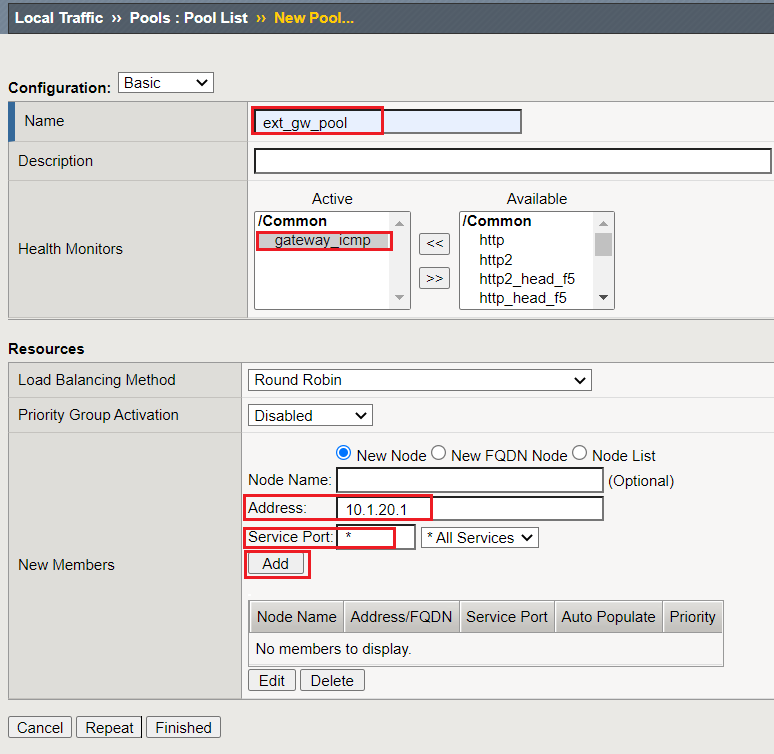
- Create a Gateway Pool with the following settings:
Name: ext_gw_pool
Health Monitors: gateway_icmp
- Within the Resources Section:
New Node Address: 10.1.20.1
Service Port: * All Services
Click the Add button
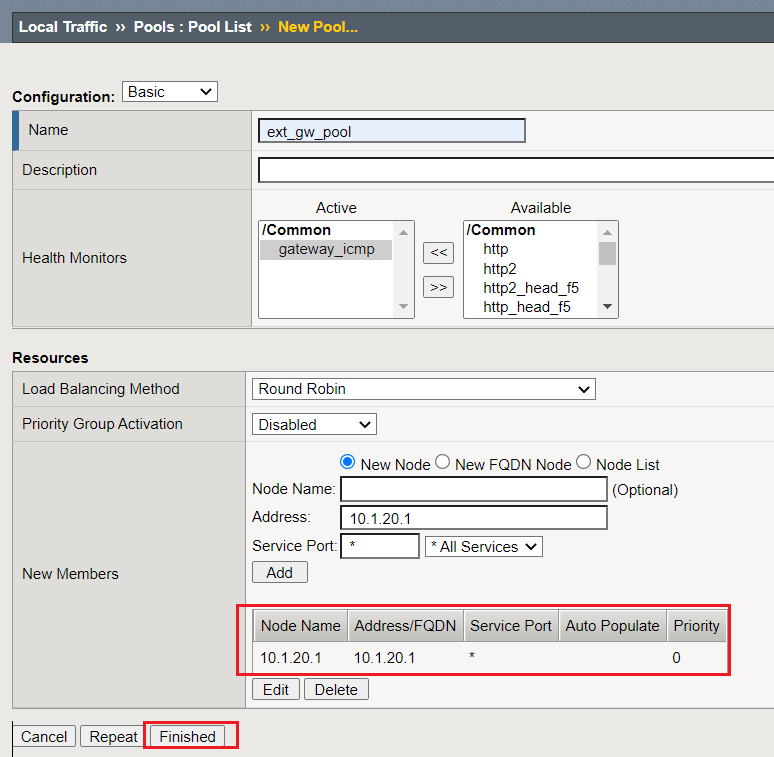
Click the Finished Button:
Task 2: Synchronize BIG-IPs
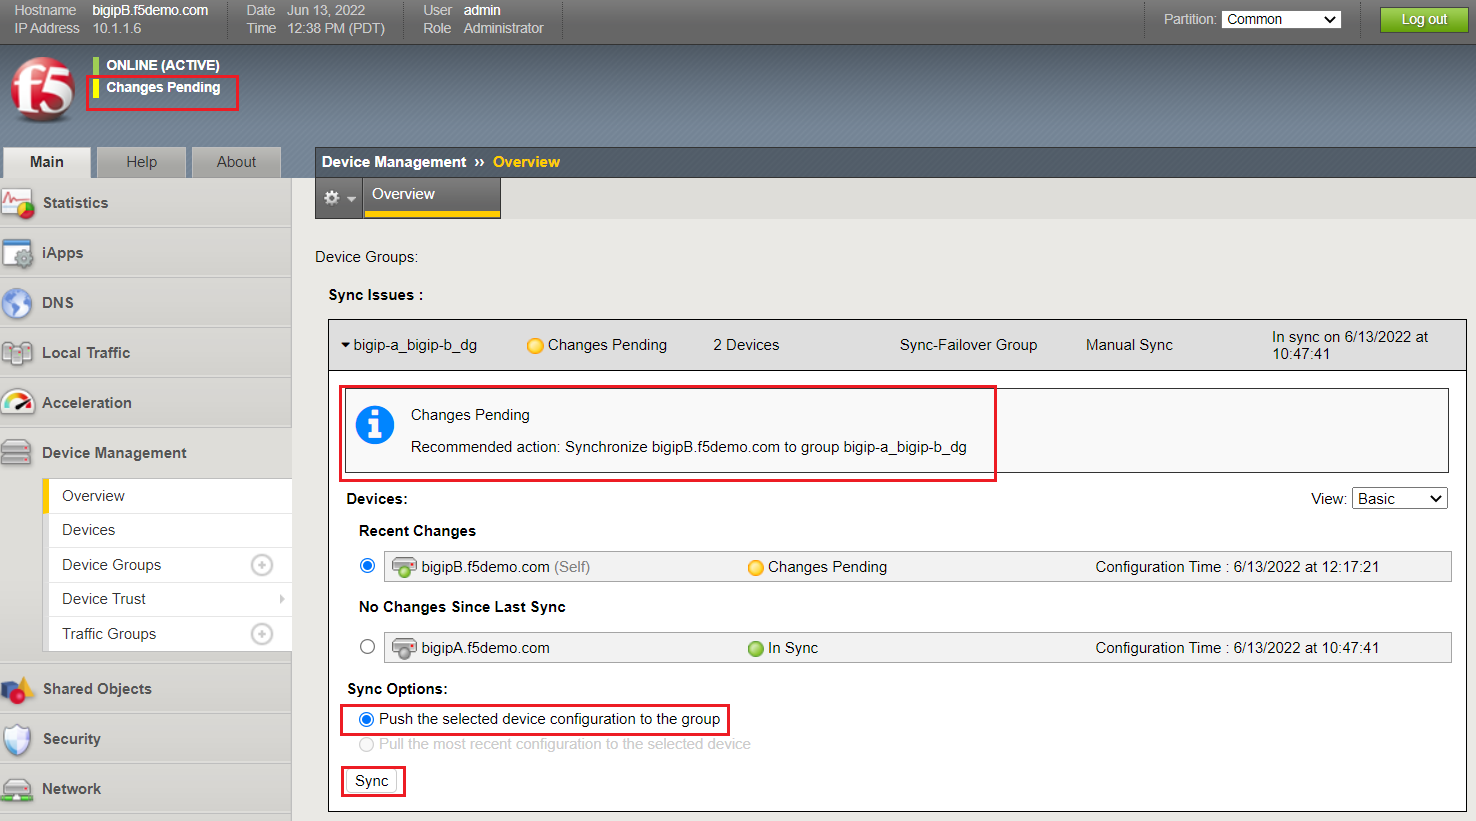
In Task 1, we created a shared pool object which will be used for our HA Group configuration. We must synchronize our BIG-IPs so that the Standby BIG-IP can use this object.
- Synchronize BIG-IPs:
Click the Changes Pending hyperlink, review the recommendations, and click the Sync button:
Task 3: Create HA Groups
In Task 3, we will create HA Group configurations on each BIG-IP.
Note
- HA group configuration is device-specific and is NOT synced between members of a DSC group.
- You MUST create a separate HA group on every device in the device group for this traffic group.
- On each BIG-IP, create an HA Group:
Note
If your TMUI is NOT showing the "HA Group List" in the fan-out, you may Navigate to System > High Availability; you can then select the HA Group List:
Example of TMUI missing this fan-out:
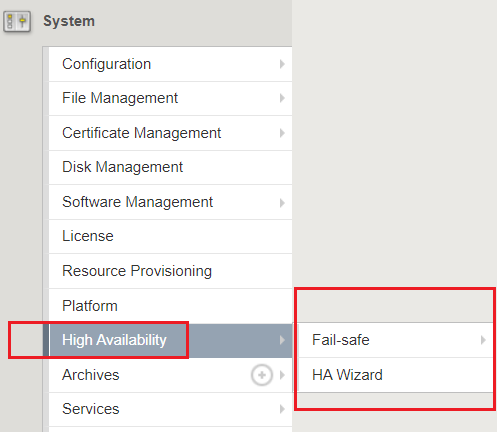
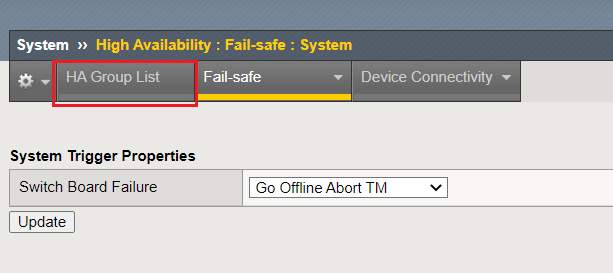
Navigate to: System > High Availability, click the "HA Group List"
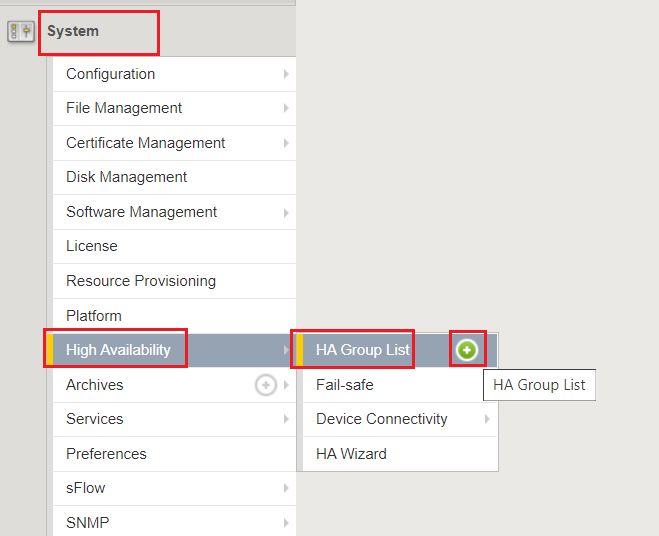
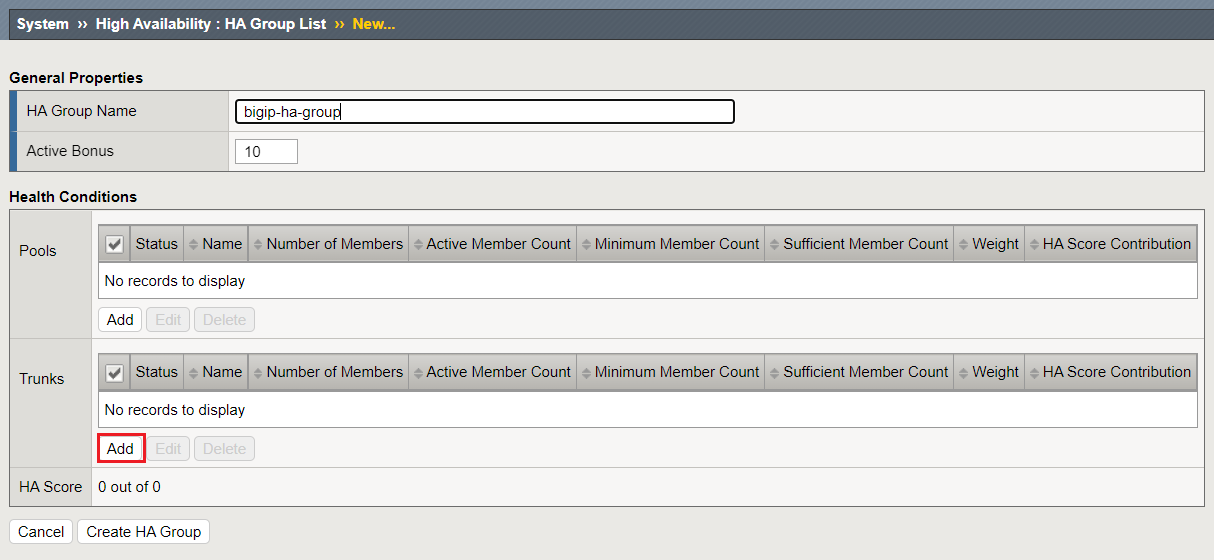
Navigate to: System > High Availability > HA Group List > click the "+" button:
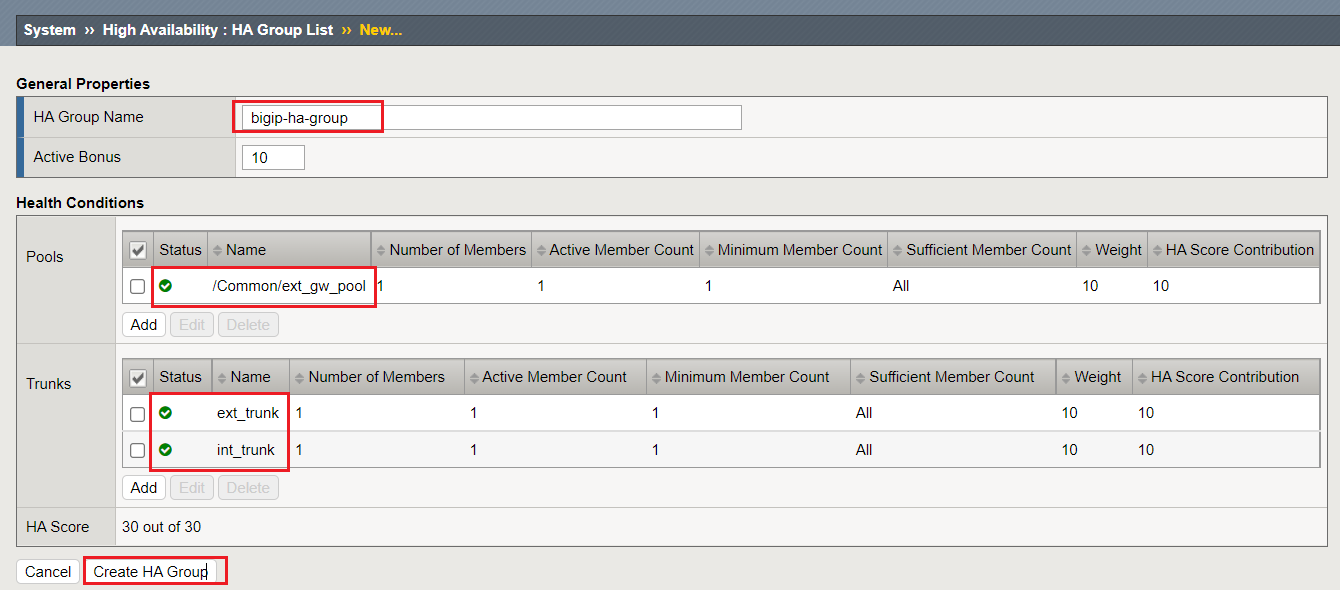
Add an HA Group Name; example: bigip-ha-group
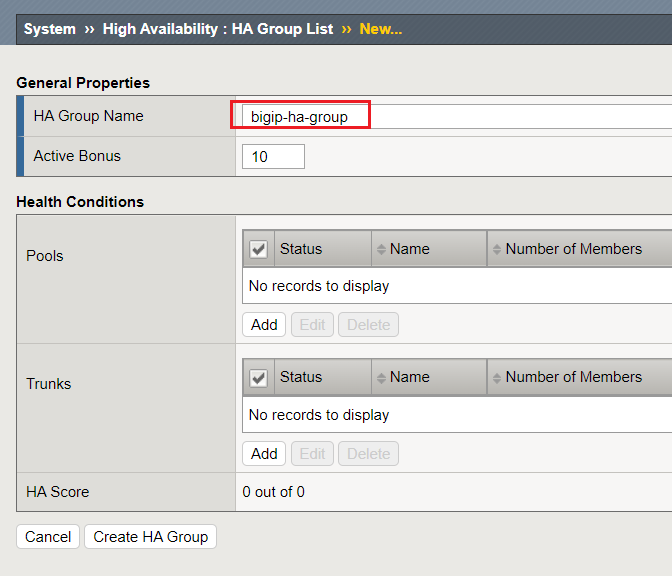
First, we will add our Trunk links to our HA Group Configuration:
Under the Trunks section, click the Add button:
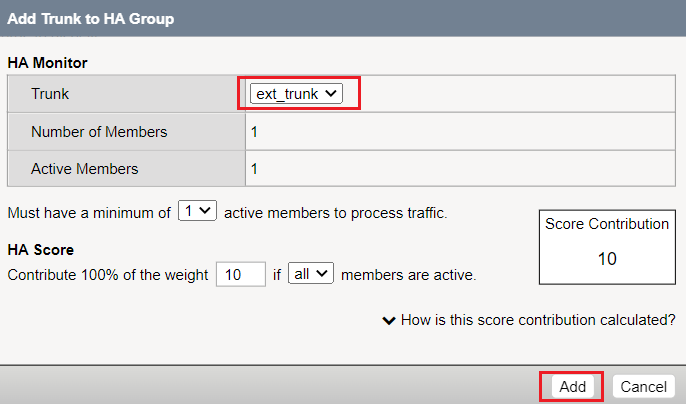
From the drop-down, select the the External Trunk object (ext_trunk), and click the Add button:
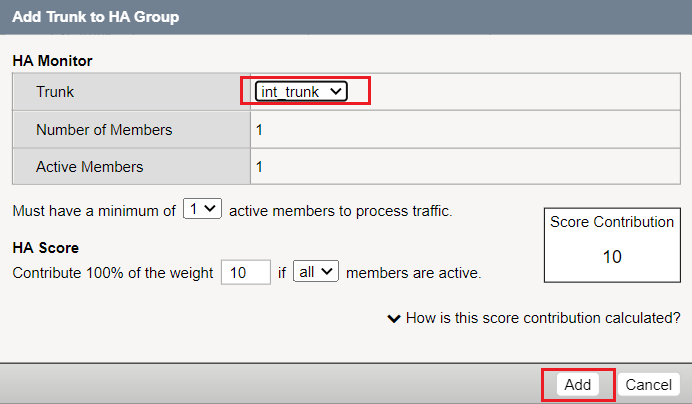
Repeat this step for the Internal Trunk object (int_trunk):
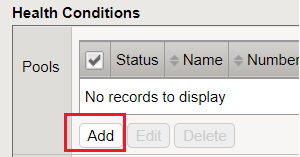
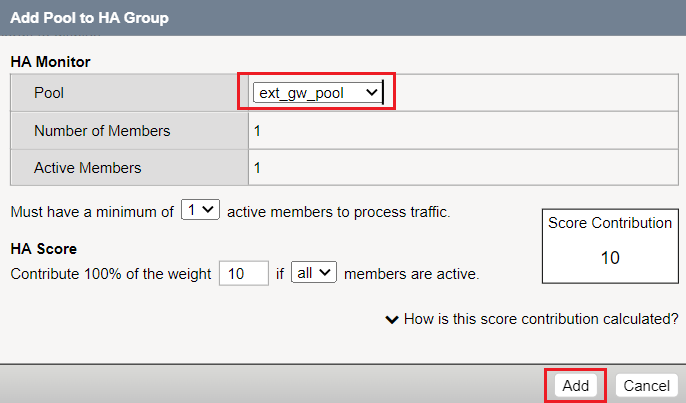
Next, we will add our External Gateway Pool we created earlier to the Pools HA Group Configuration:
Under Pools, click the Add button:
In the Pool drop-down, select "ext_gw_pool," and click the Add button:
Verify that your HA Group Trunk configuration reflects the following, and Click the Create HA Group button:
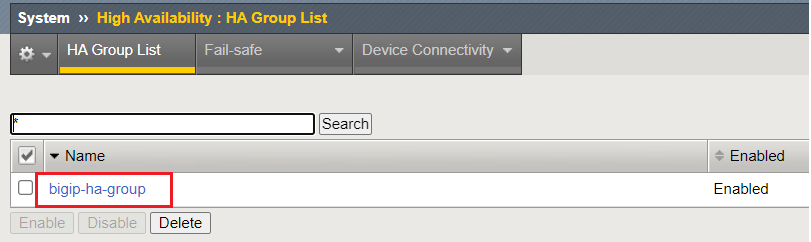
After HA Group Creation, you should be presented with the following screen, showing your HA Group configuration object:
About HA Group Scoring
The BIG-IP with the highest HA Group scoring value will become the active device.
The HA Group score is being calculated by the sum of all active trunks and pool member objects.
In addition, there is an "Active Bonus" value that is added to the Active device, preventing a race-condition of both devices having the same score when all HA objects are "up."
Note
The Active Bonus is added for two reasons:
- To prevent an active-active split-brain scenario
- To allow the active device to stay active in specific use cases.
One use-case is:
- If there are multiple links in the HA trunk and one interface goes down, but the remaining links can still handle the traffic, then the Admin might decide that this is not a reason to failover because of service stability.
For detailed information and HA Best Practices, see following K-article: K16947: F5 recommended practices for the HA group feature
Task 4: Enable HA Group as the Preferred Failover Method
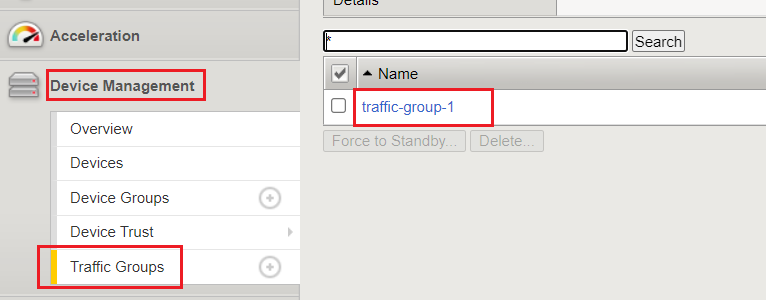
You will complete this task on both BIG-IP devices. Perform this same procedure to setup the HA Group configuration on each BIG-IP.
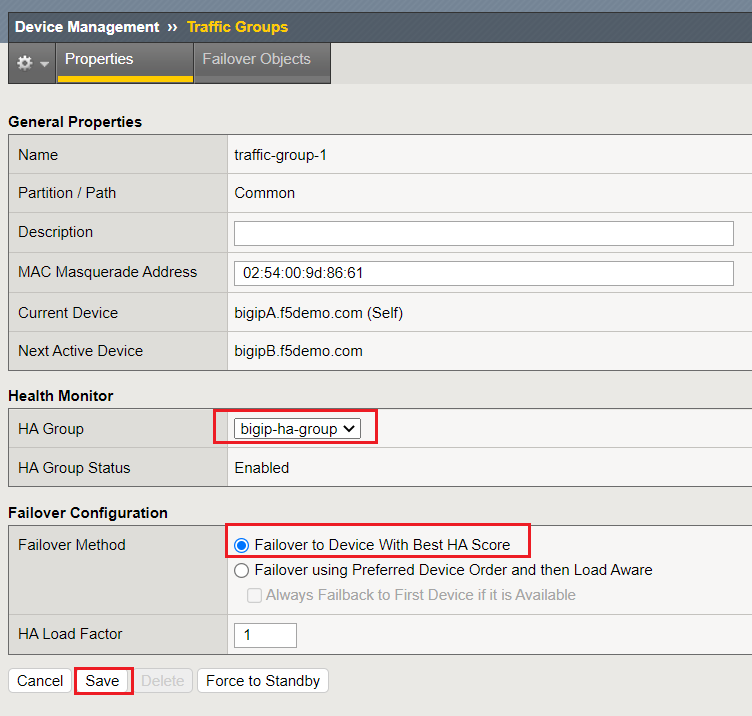
On each BIG-IP, Navigate to: Device Management > Traffic Groups > traffic-group-1 hyperlink:
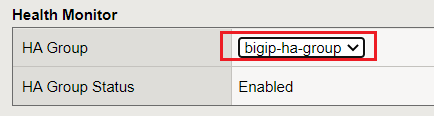
From the Health Monitor Section, select the drop-down for HA Group:

Select our HA Group we created previously:
Under the Failover Configuration section, select the radio button for Failover to Device With Best HA Score, then click the Save button:
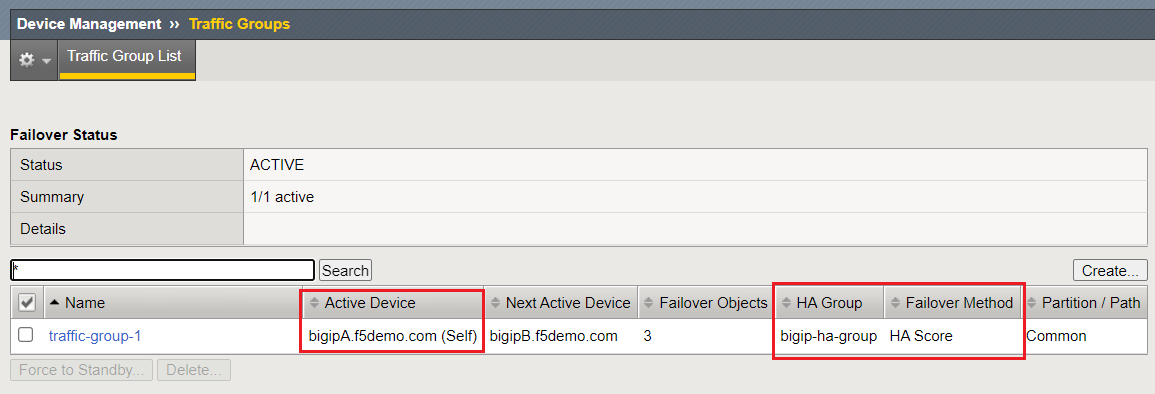
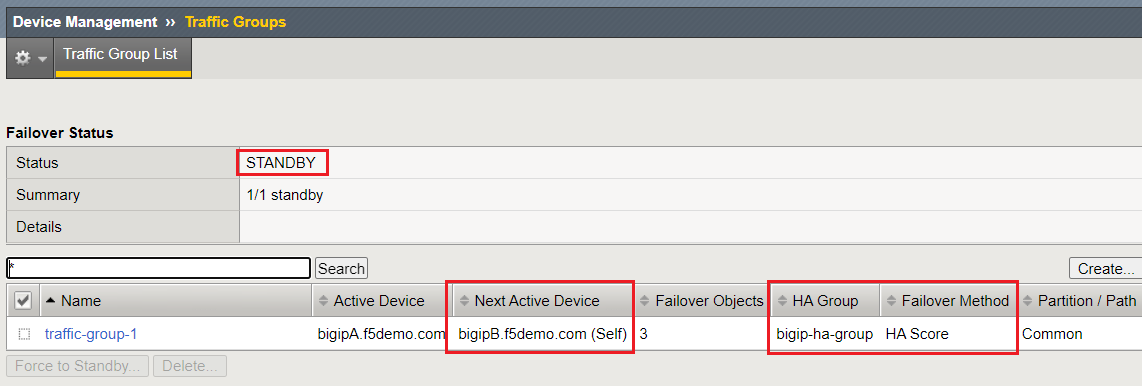
Review the Traffic Groups screen, and verify the Failover Method is set to HA Score:
BIG-IP-A:
BIG-IP-B:
Lab Summary
In this lab, you enhanced your HA configuration to leverage HA Groups. HA Groups provide the ability to monitor an "object" and take action upon an event. An important object is the status of a physical link. This is monitored though the number of trunk members.
After completion of these lab tasks, your BIG-IP should be leveraging HA Groups for Failover. In the following lab, we will test & validate how this configuration enhances the failover timing.
This completes Lab 5.