F5 Solutions for Containers > Appendix > Appendix 6: Build a Mesos / Marathon Cluster Source | Edit on
Lab 2.3 - Setup the Agents
Once the master is setup and running, we need to setup and join our agents to the cluster.
Important
The following commands need to be run on both agent nodes unless otherwise specified.
Install Mesos
Add the mesos/marathon repo
Run the following commands:
apt-key adv --keyserver keyserver.ubuntu.com --recv E56151BF

cat <<EOF >> /etc/apt/sources.list.d/mesosphere.list
deb http://repos.mesosphere.com/ubuntu $(lsb_release -cs) main
EOF
Install the mesos packages
apt update && apt-get install mesos -y
Setup Mesos
Create mesos ip file /etc/mesos-slave/ip
Create mesos hostname file /etc/mesos-slave/hostname (specify the IP address of your node)
Point zookeeper to the master instance. This is done in the file /etc/mesos/zk
# On agent1
echo "10.2.10.22" > /etc/mesos-slave/ip
echo "10.2.10.22" > /etc/mesos-slave/hostname
echo "zk://10.2.10.21:2181/mesos" > /etc/mesos/zk

# On agent2
echo "10.2.10.23" > /etc/mesos-slave/ip
echo "10.2.10.23" > /etc/mesos-slave/hostname
echo "zk://10.2.10.21:2181/mesos" > /etc/mesos/zk
Make the following changes to allow “docker” containers with mesos.
#Add the ability to use docker containers
echo 'docker,mesos' > /etc/mesos-slave/containerizers

#Increase the timeout to 5 min so that we have enough time to download any needed docker image
echo '5mins' > /etc/mesos-slave/executor_registration_timeout

#Allow users other then "marathon" to create and run jobs on the agents
echo 'false' > /etc/mesos-slave/switch_user
Start Services
First we need to make sure that zookeeper and mesos-master don’t run on the agents.
systemctl stop zookeeper
echo manual > /etc/init/zookeeper.override

systemctl stop mesos-master
echo manual > /etc/init/mesos.master.override
Start & enable the agent process called mesos-slave
systemctl start mesos-slave
systemctl enable mesos-slave
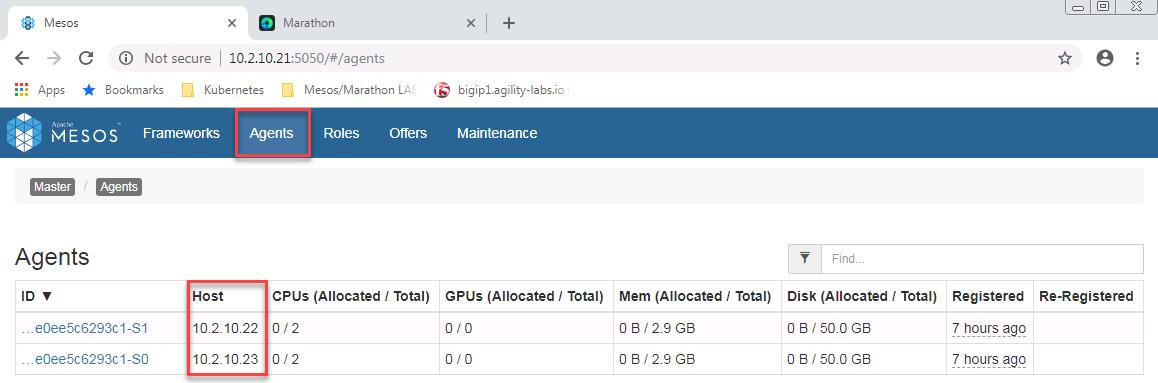
Check on master with mesos interface (port 5050) if your agents registered successfully. You should see both agent1 and agent2 on the agent page.
Test Your Setup
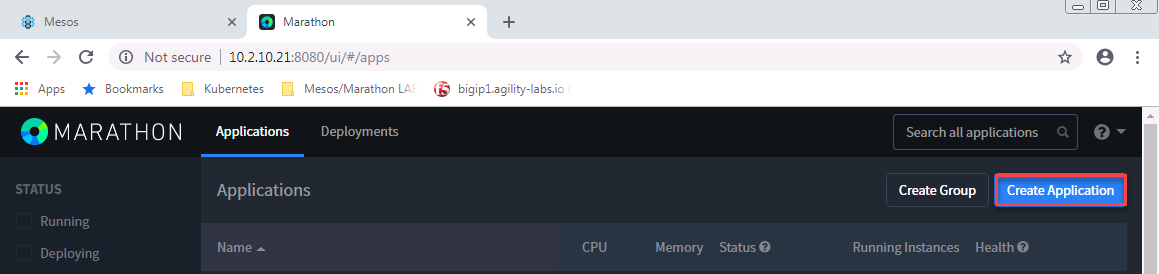
Connect to Marathon through one of the master (8080) and launch an application.
Click on create application
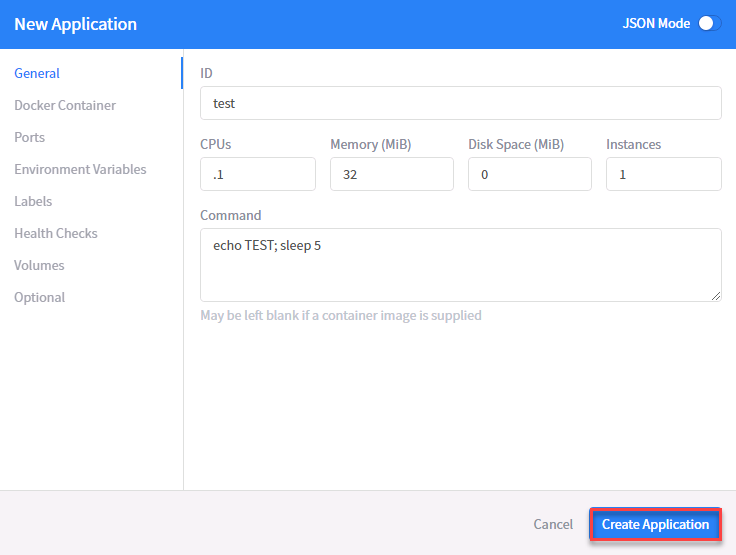
Make the following settings and click “Create Application”
- ID: test
- CPU: 0.1
- Memory: 32M
- Command: echo TEST; sleep 5
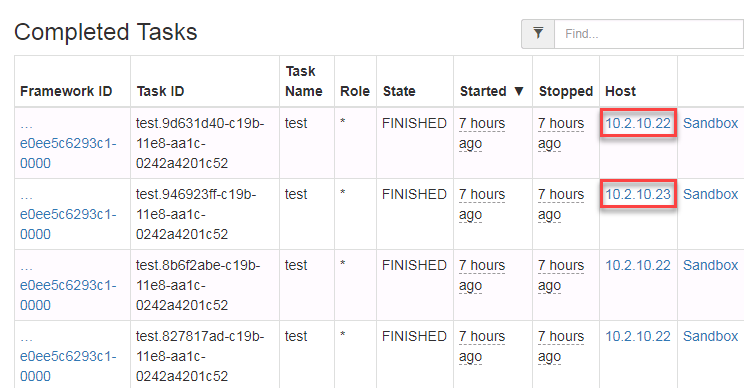
Once it starts, connect to the mesos framework. Here you should see more and more completed tasks. Name of the task should be “test” (our ID).
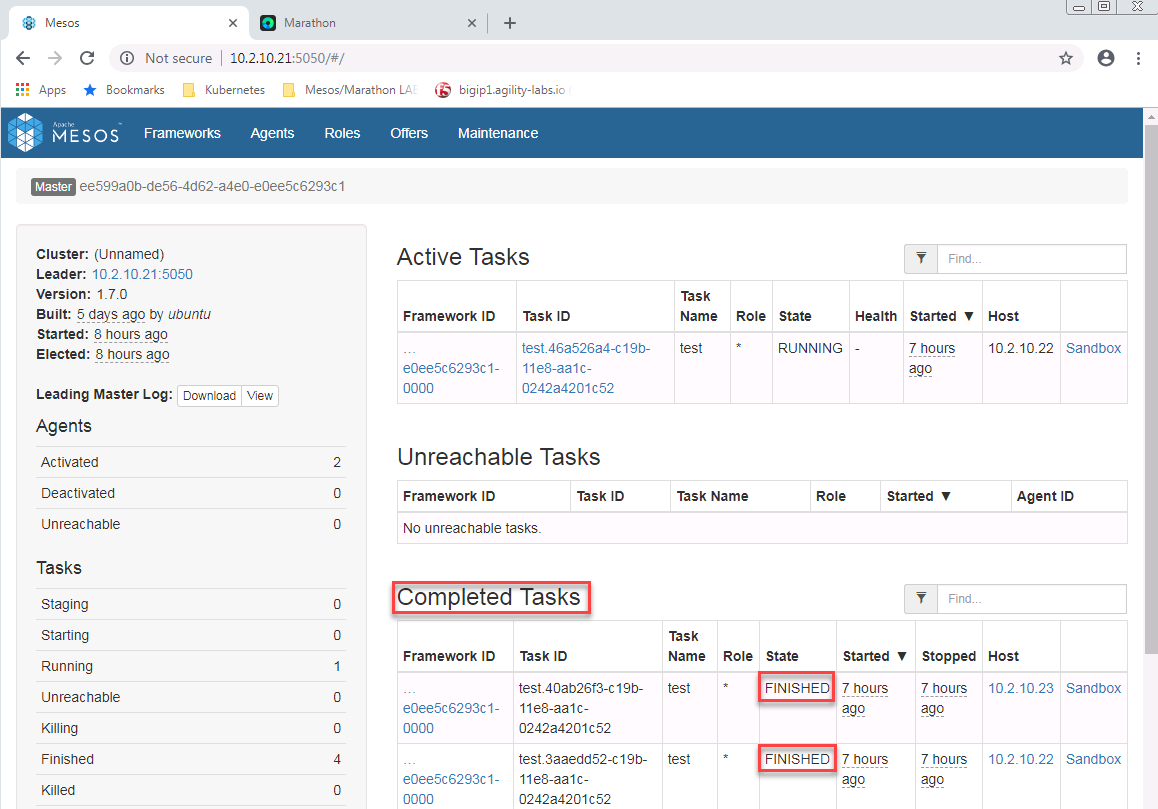
If you let it run for a while, you’ll see more and more “Completed Tasks”. You can see that the Host being selected to run those tasks is not always the same.
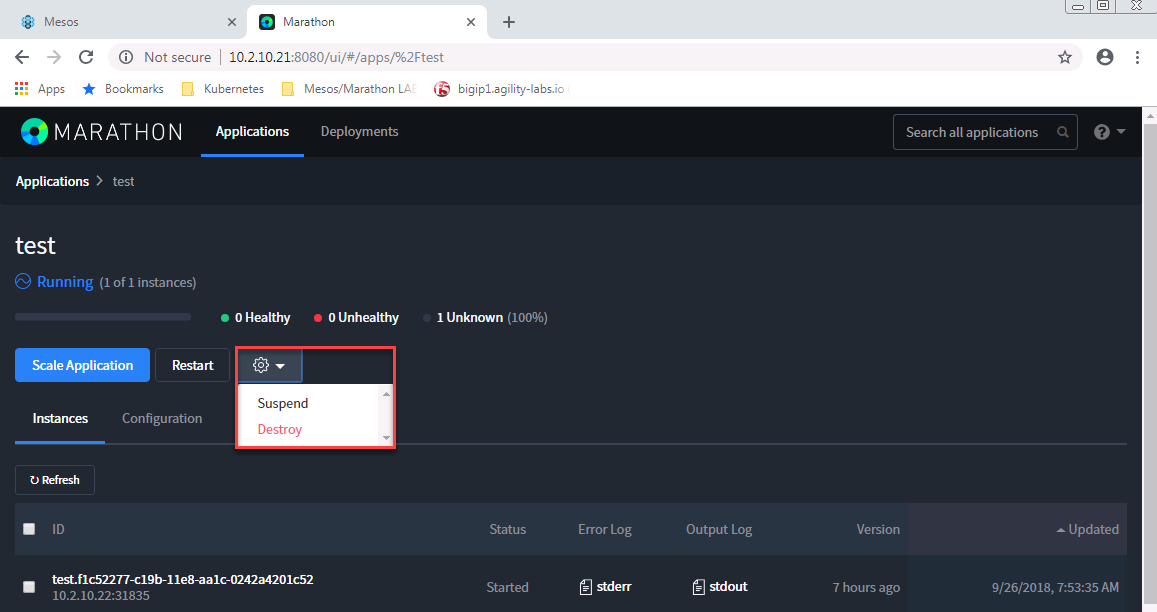
Go Back to Marathon, click on our application test and click on the setting button and select destroy to remove it.
Launch A Container
To test our containers from marathon. We will start a simple apache container.
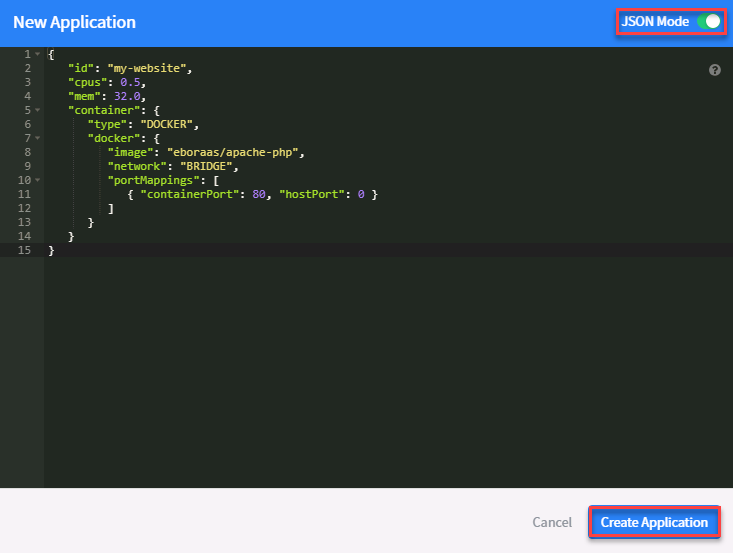
Click on create an application, switch to JSON mode and replace the default 8 lines of json with the following and Click “Create Application”
Note
This may takes some time since we will have to retrieve the image first
{
   "id": "my-website",
   "cpus": 0.5,
   "mem": 32.0,
   "container": {
      "type": "DOCKER",
      "docker": {
         "image": "eboraas/apache-php",
         "network": "BRIDGE",
         "portMappings": [
            { "containerPort": 80, "hostPort": 0 }
         ]
      }
   }
}
It may take some time to switch from
DeployingtoRunning.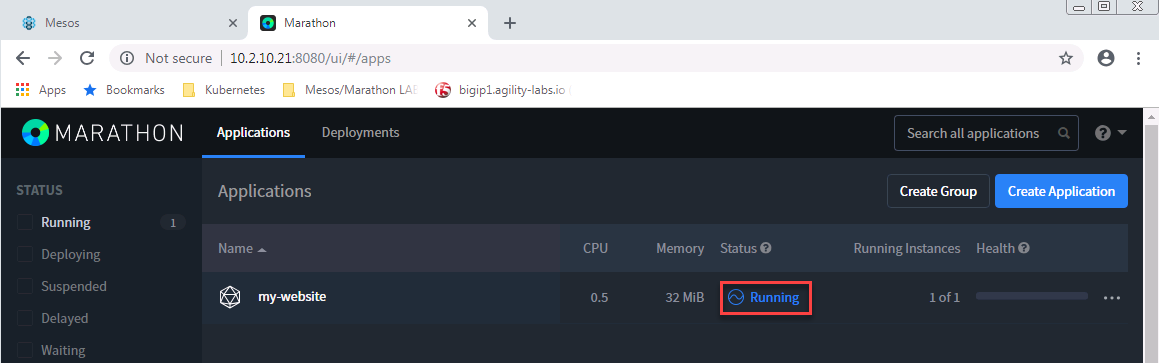
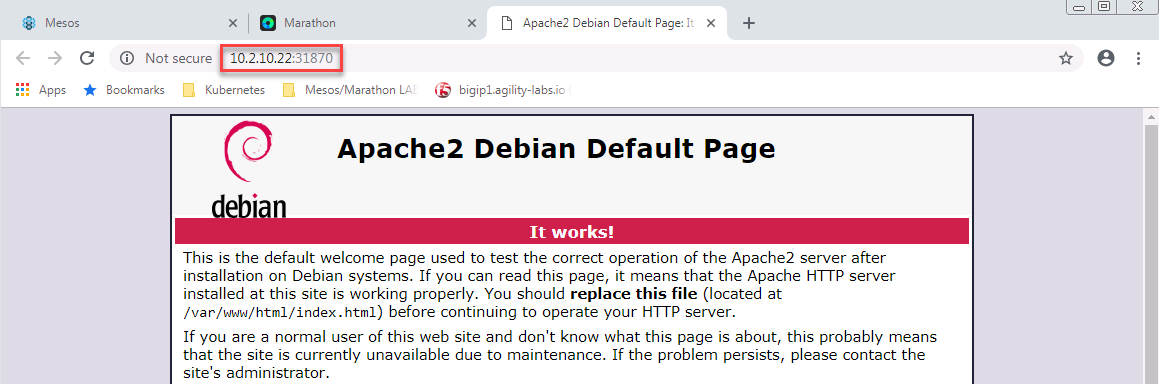
Once it’s in a
Runningstate, find the port used by the container and try to access it at agent IP:port. Click on your application “my-website”. Here you’ll see the port associated to your instance. In this case it’s31870and onagent1 - 10.2.10.22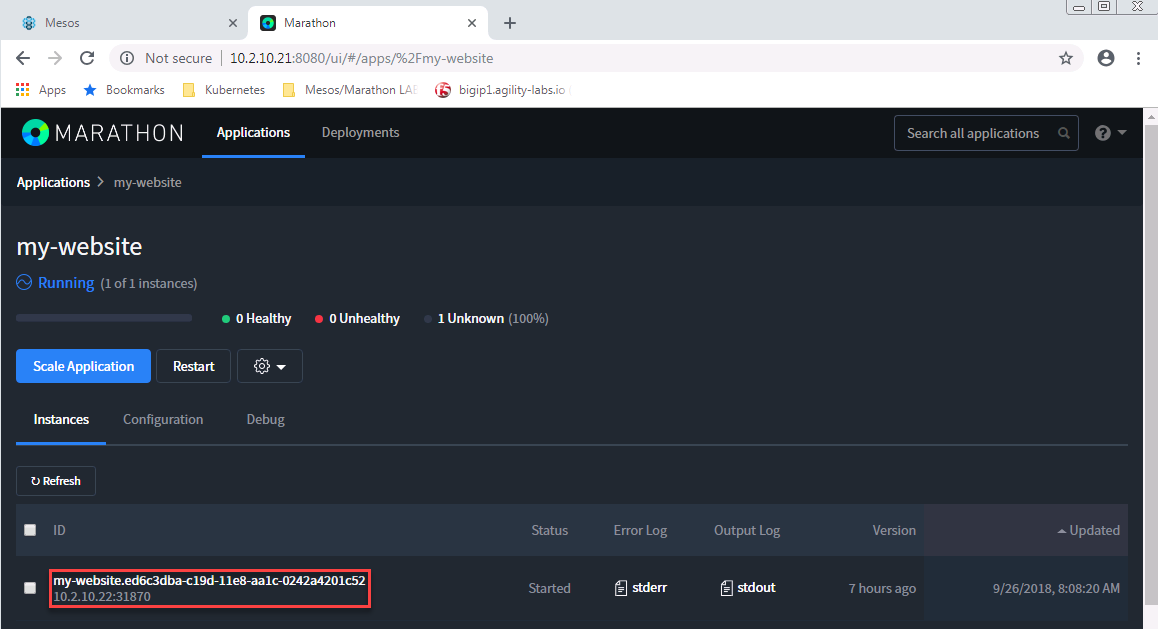
Use your browser to connect to the application: