F5 Solutions for Containers > Class 2: OpenShift with F5 Container Ingress Service > Module 2: CIS Using ClusterIP Mode Source | Edit on
Lab 2.2 - Deploy Hello-World Using Route
Now that CIS is up and running, let’s deploy an application and leverage CIS.
For this lab we’ll use a simple pre-configured docker image called “f5-hello-world”. It can be found on docker hub at f5devcentral/f5-hello-world
App Deployment
On kube-master1 we will create all the required files:
Create a file called
deployment-hello-world.yamlTip
Use the file in ~/agilitydocs/docs/class2/openshift
deployment-hello-world.yaml¶1apiVersion: apps/v1 2kind: Deployment 3metadata: 4 name: f5-hello-world-web 5 namespace: default 6spec: 7 replicas: 2 8 selector: 9 matchLabels: 10 app: f5-hello-world-web 11 template: 12 metadata: 13 labels: 14 app: f5-hello-world-web 15 spec: 16 containers: 17 - env: 18 - name: service_name 19 value: f5-hello-world-web 20 image: f5devcentral/f5-hello-world:develop 21 imagePullPolicy: IfNotPresent 22 name: f5-hello-world-web 23 ports: 24 - containerPort: 8080 25 protocol: TCP
Create a file called
clusterip-service-hello-world.yamlTip
Use the file in ~/agilitydocs/docs/class2/openshift
clusterip-service-hello-world.yaml¶1apiVersion: v1 2kind: Service 3metadata: 4 name: f5-hello-world-web 5 namespace: default 6 labels: 7 app: f5-hello-world-web 8 cis.f5.com/as3-tenant: AS3 9 cis.f5.com/as3-app: A1 10 cis.f5.com/as3-pool: web_pool 11spec: 12 ports: 13 - name: f5-hello-world-web 14 port: 8080 15 protocol: TCP 16 targetPort: 8080 17 type: ClusterIP 18 selector: 19 app: f5-hello-world-web
Create a file called
route-hello-world.yamlTip
Use the file in ~/agilitydocs/docs/class2/openshift
route-hello-world.yaml¶1 apiVersion: v1 2 kind: Route 3 metadata: 4 labels: 5 f5type: hello-world 6 name: f5-hello-world-web 7 name: f5-hello-world-web 8 namespace: default 9 annotations: 10 virtual-server.f5.com/balance: round-robin 11 virtual-server.f5.com/health: | 12 [ 13 { 14 "path": "mysite.f5demo.com/", 15 "send": "HTTP GET /", 16 "interval": 5, 17 "timeout": 10 18 } 19 ] 20 spec: 21 host: mysite.f5demo.com 22 path: "/" 23 port: 24 targetPort: 8080 25 to: 26 kind: Service 27 name: f5-hello-world-web
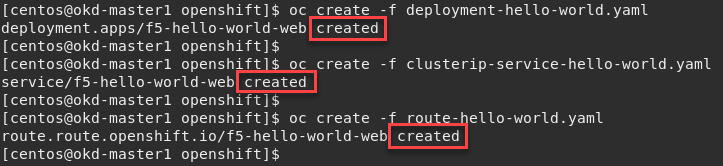
We can now launch our application:
oc create -f deployment-hello-world.yaml
oc create -f clusterip-service-hello-world.yaml
oc create -f route-hello-world.yaml
To check the status of our deployment, you can run the following commands:
oc get pods -o wide

oc describe svc f5-hello-world
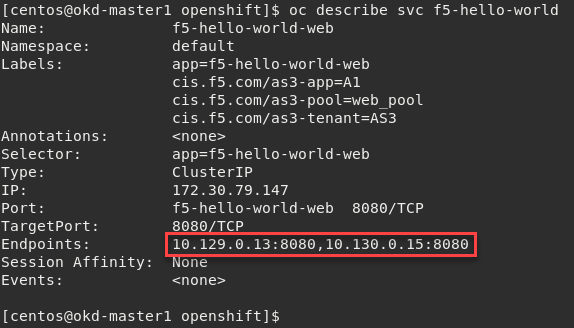
Attention
To understand and test the new app pay attention to the Endpoints value, this shows our 2 instances (defined as replicas in our deployment file) and the overlay network IP assigned to the pod.
Now that we have deployed our application sucessfully, we can check the configuration on BIG-IP1. Switch back to the open management session on firefox.
Warning
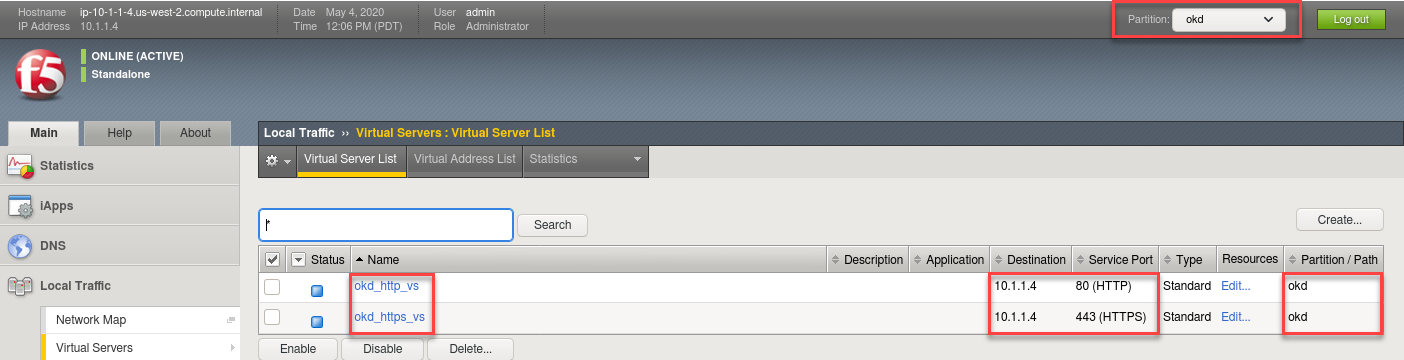
Don’t forget to select the “okd” partition or you’ll see nothing.
Browse to
With “Route” you’ll seee two virtual servers defined. “okd_http_vs” and “okd_https_vs”, listening on port 80 and 443.
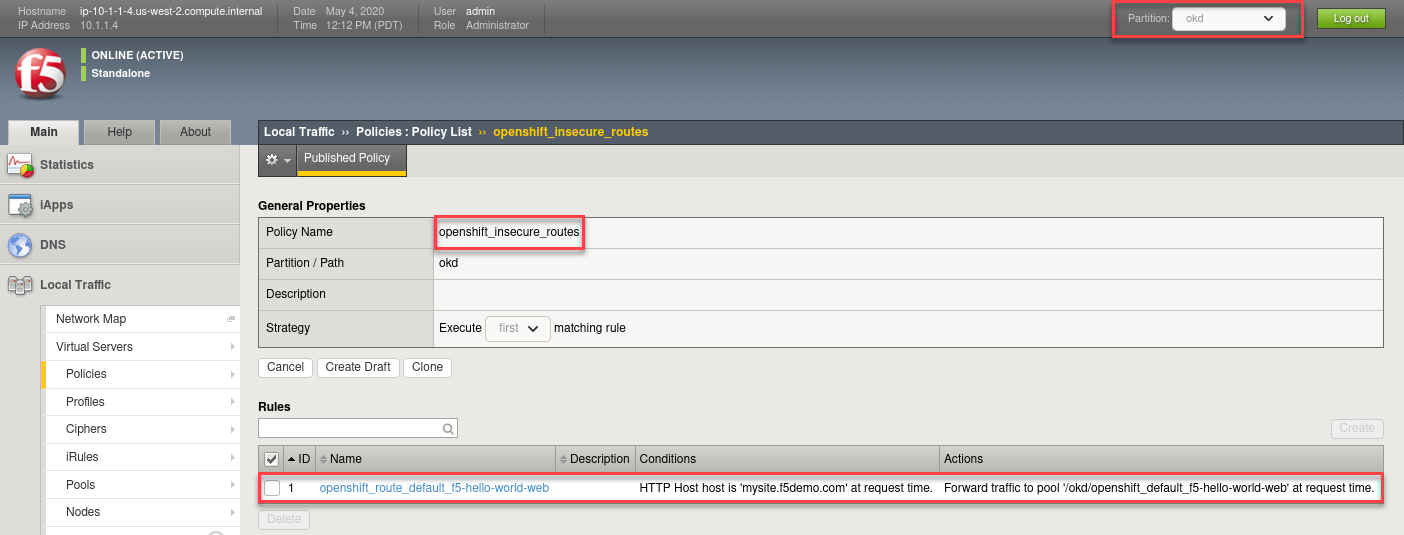
These Virtuals use an LTM Policy to direct traffic based on the host header. You can view this from the BIG-IP GUI at and click
Check the Pools to see a new pool and the associated pool members:
Browse to: and selec the “openshift_default_f5-hello-world-web” pool. Click the Members tab.
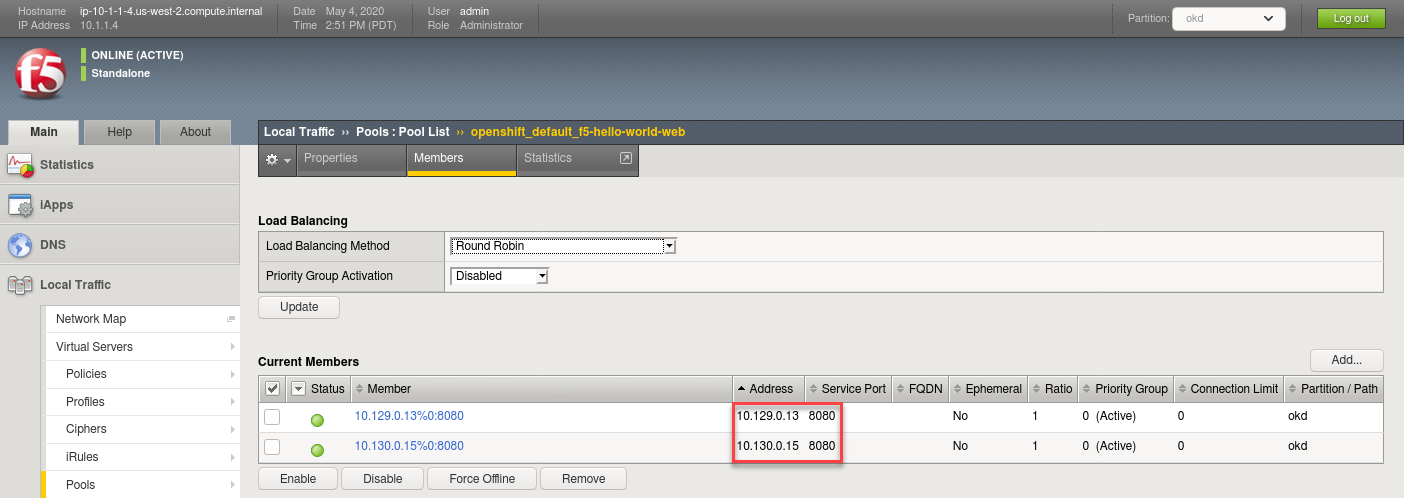
Note
You can see that the pool members IP addresses are assigned from the overlay network (ClusterIP mode)
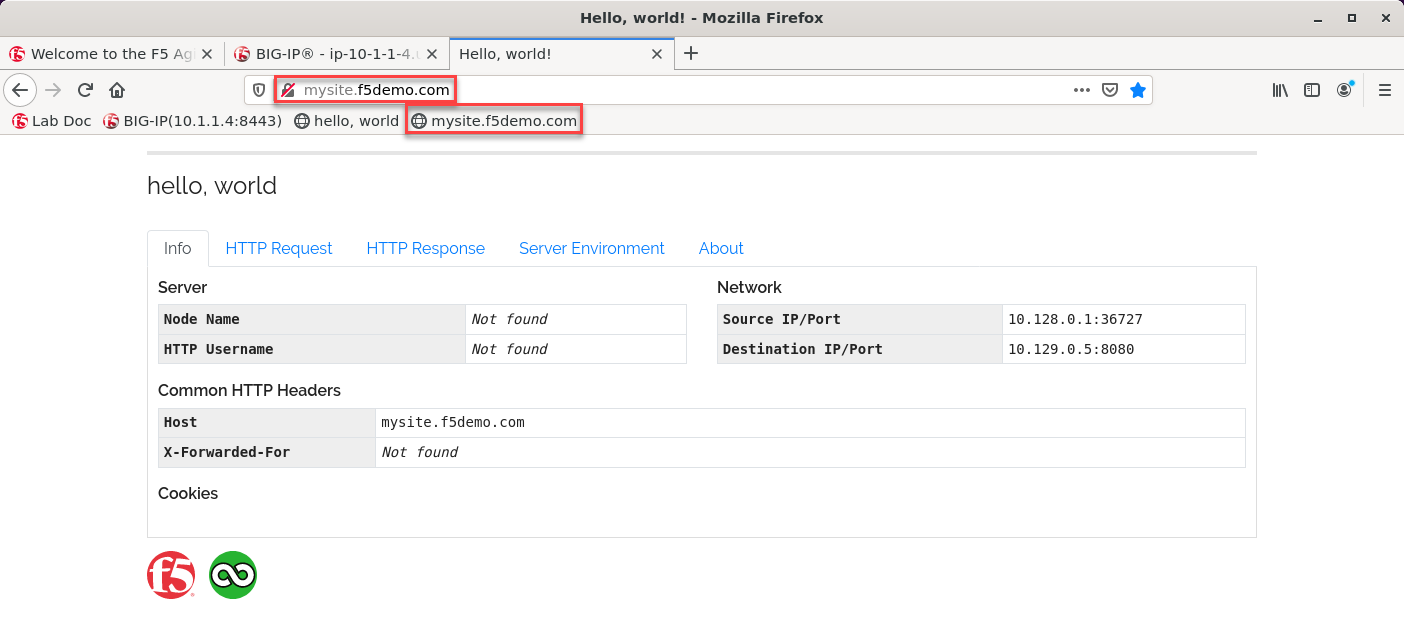
Access your web application via Firefox on the superjump.
Note
Select the “mysite.f5demo.com” shortcut or type http://mysite.f5demo.com in the URL field.
Note
Why can’t we use http://10.1.1.4 to open the web server?
Delete Hello-World
Important
Do not skip this step. Instead of reusing some of these objects, the next lab we will re-deploy them to avoid conflicts and errors.
oc delete -f route-hello-world.yaml
oc delete -f clusterip-service-hello-world.yaml
oc delete -f deployment-hello-world.yaml
Attention
Validate the objects are removed via the management console.