F5 Solutions for DDoS > Multilayer DDoS Protection > Module - Network Level DoS Protection Source | Edit on
Lab - Preventing DNS DoS Attacks
Use a protected object to mitigate DNS query floods.
Use a Protected Object to Mitigate a DNS Query Flood
In the Protected Objects section click Create.
Configure a protected object using the following information, and then click Create.
Name: DNS_Server IP Address: 10.1.20.14/32 Port: 53 Protocol UDP Protec. Settings Action: Log and Mitigate Protec. Settings DDoS: DNS In the DNS row click the + icon, and then click DNS A Query.
On the right-side of the page configure using the following information, and then click Create.
Detection Threshold PPS: Specify: 75 Rate Limit Specify: 100
Establish a DNS Baseline
Use a script to establish a DNS baseline on the BIG-IP DHD.
From the goodclient terminal session run the following commands:
sudo ~/tools_agility_183/dnsbaseline.shLet the baseline run until you get the following results:
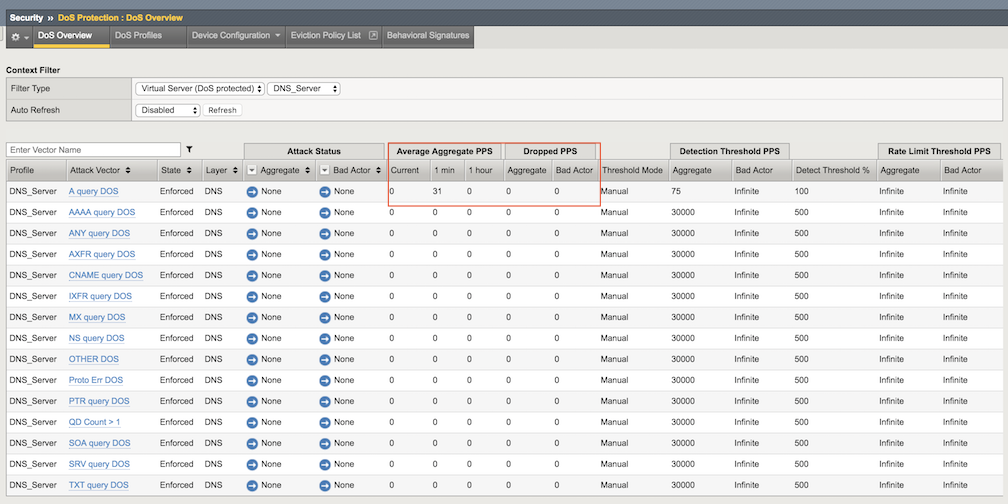
[Status] Testing complete (time limit)

Statistics:

Queries sent:         6000
Queries completed:    6000 (100.00%)
Queries lost:         0 (0.00%)

Response codes:       NXDOMAIN 6000 (100.00%)
Average packet size:  request 41, response 116
Run time (s):         120.000552
Queries per second:   49.999770

Average Latency (s):  0.005793 (min 0.003970, max 0.020681)
Latency StdDev (s):   0.001383
In the Configuration Utility, go to Security-> DoS Protection-> DoS Overview.
In the Filter Type select Virtual Server with DNS_Server protected object, then examine the a statistics for DNS A Query.
Initiate a DNS Attack
Run a script to generate a DNS DoS alert. This script will send 80 pps of “A” queries just above our detection threshold PPS setting of 75. This is just the threshold that we are alerting at. It has not reached a high enough threshold to determine that we should do something about it.
From the attacker terminal session run the following commands:
sudo ~/tools_agility_183/dnsdosattack.shWait for the attack to run for about 30 seconds before moving on.
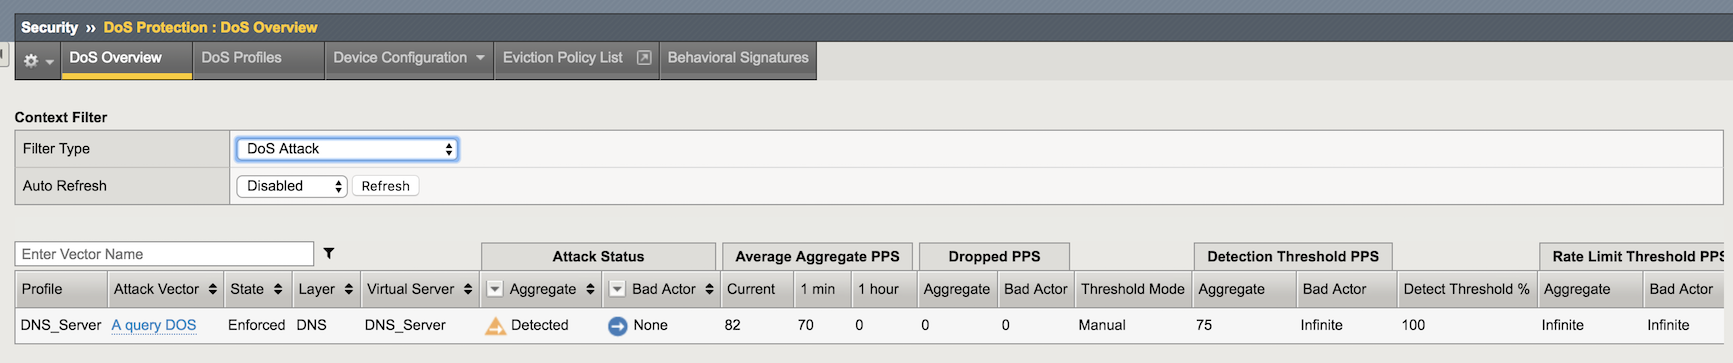
In the Configuration Utility, open the Security-> DoS Protection-> DoS Overview page.
In the Filter Type select DoS Attack.
Note
The A query DOS attack vector will be detected, but not yet blocked. It will take up to a couple minutes to display as Detected.
Wait for the attack to complete (if not done yet). Verify the results of the DNS attack from the attacker terminal session:
[Status] Testing complete (time limit)

Statistics:

Queries sent:         28800
Queries completed:    27217 (94.50%)
Queries lost:         1583 (5.50%)

Response codes:       NXDOMAIN 27217 (100.00%)
Average packet size:  request 41, response 116
Run time (s):         360.000538
Queries per second:   75.602665

Average Latency (s):  0.004487 (min 0.002909, max 0.036921)
Latency StdDev (s):   0.001372
Initiate a DNS Attack that Exceeds the Rate Limit
Run another script that initiates a DNS DoS attack that exceeds the rate limit we set earlier.
From the attacker terminal session run the following commands:
sudo ~/tools_agility_183/dnsdosrate.shWait for the attack to run for about 30 seconds before moving on.
In the Configuration Utility Review the DoS Overview page -> Security-> DoS Protection-> DoS Overview.
Note
The A query DOS attack vector is now dropping attack traffic.
Also take a look at the script which will record the number of drops if any as a result of the attack rate limit being hit. You should be able to correlate the drops registered with the script with the drops recorded by the Hybrid Defender.
Statistics:

Queries sent:         5899
Queries completed:    3504 (59.40%)
Queries lost:         2395 (40.60%)

Response codes:       NXDOMAIN 3504 (100.00%)
Average packet size:  request 41, response 116
Run time (s):         120.000642
Queries per second:   29.199844

Average Latency (s):  0.006696 (min 0.002080, max 0.087619)
Latency StdDev (s):   0.003606
In the Configuration Utility open the Statistics-> DoS Visibility page.
View the attack details in the Attacks section.
