F5 Distributed Cloud > F5 Distributed Cloud: Foundations of Delivery & Security Source | Edit on
Lab 1: Deploying F5 Distributed Cloud Proxy Services to Securely Deliver a Public Endpoint
You just landed a new role and your company needs you to deploy an application. They want to use F5 Distributed Cloud (F5 XC) for its access and availability globally. The developers inform you that the application lives in both AWS and in Azure.
In this lab you will be creating a global application load balancer with an ingress endpoint on a F5 XC Regional Edge (RE) and will configure it with an origin server using the application’s public IP in Azure. Additionally, as you test the application, you’ll use the F5 XC Console to view telemetry data. The final task will be to add a Web Application Firewall (WAF) policy to protect the application from malicious attacks, and then observe the security events generated by the WAF.
This lab focuses on the deployment and security of an existing hosted application using F5 XC Platform and Services. This lab will be deployed in a SaaS-only configuration with no on-premises (public or private datacenter) elements. All configuration will be made via the F5 XC Console.
For the tasks that follow, you should have already noted your individual namespace. If you failed to note it, return to the Introduction section of this lab, and follow the instructions provided and note your namespace accordingly. The DNS Domain and the F5 XC Tenant are listed below for your convenience as they will be the same for all lab attendees.
DNS Domain: *.lab-sec.f5demos.com
F5 Distributed Cloud Tenant: https://f5-xc-lab-sec.console.ves.volterra.io

Following the tasks in the prior Introduction Section, you should now be able to access the F5 Distributed Cloud Console, having set your Work Domain Roles and Skill levels. If you have not done so already, please login to your tenant for this lab and proceed to Task 1.
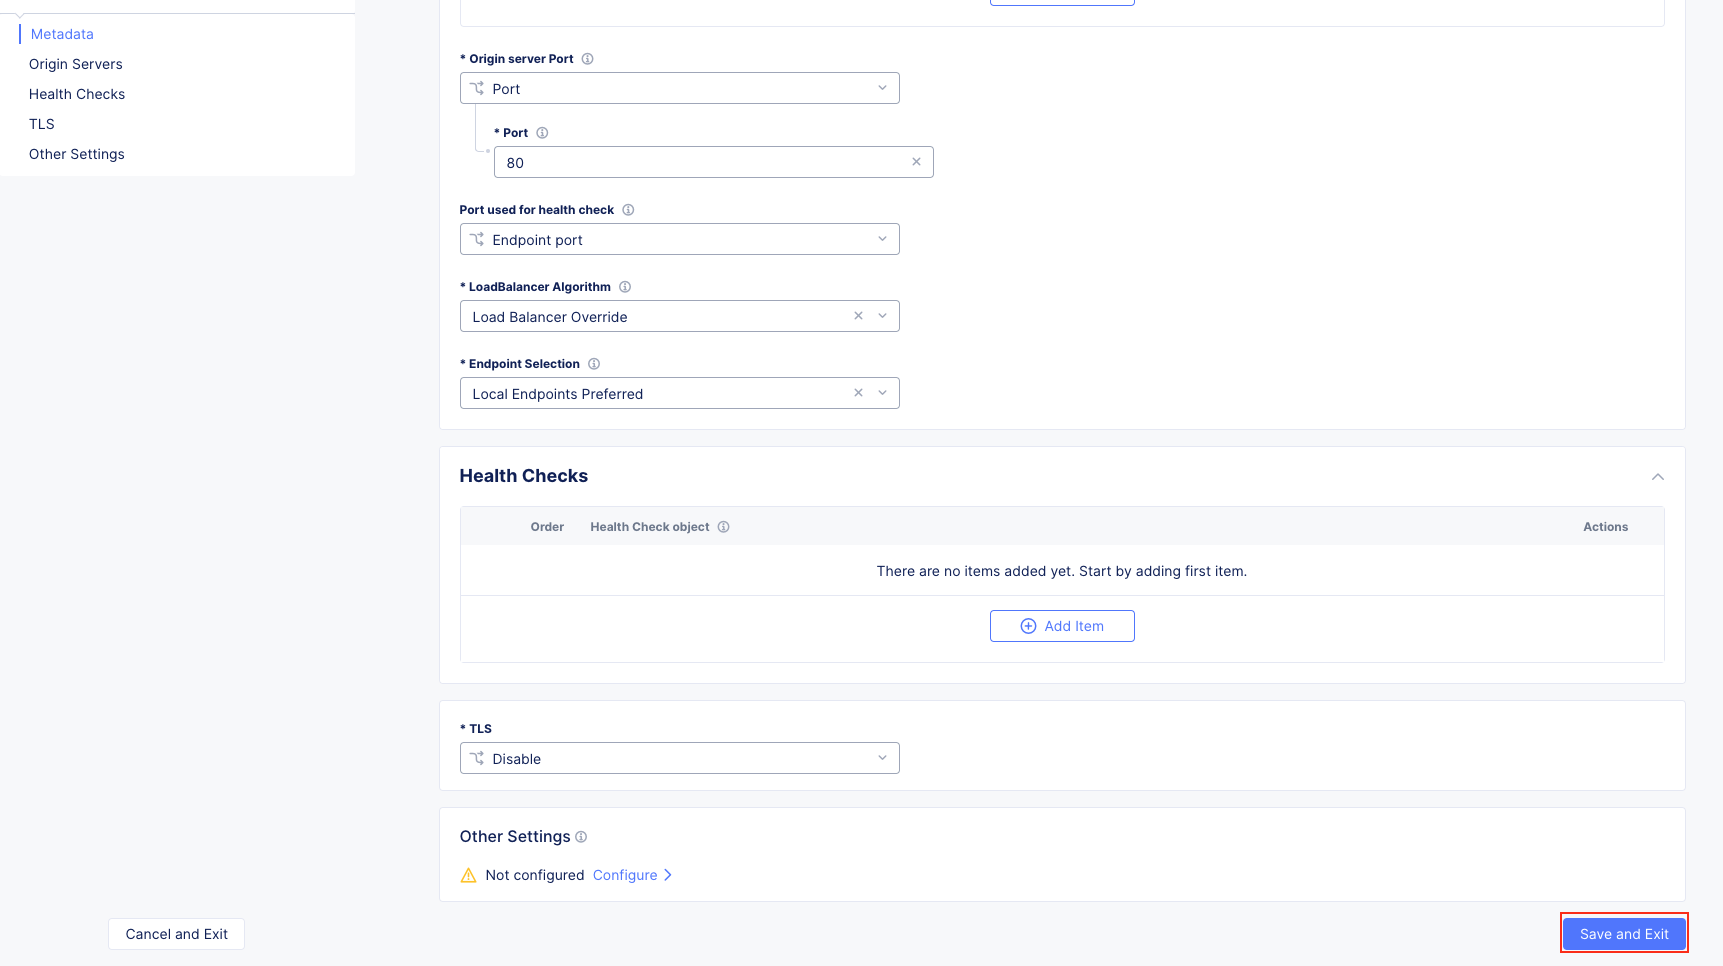
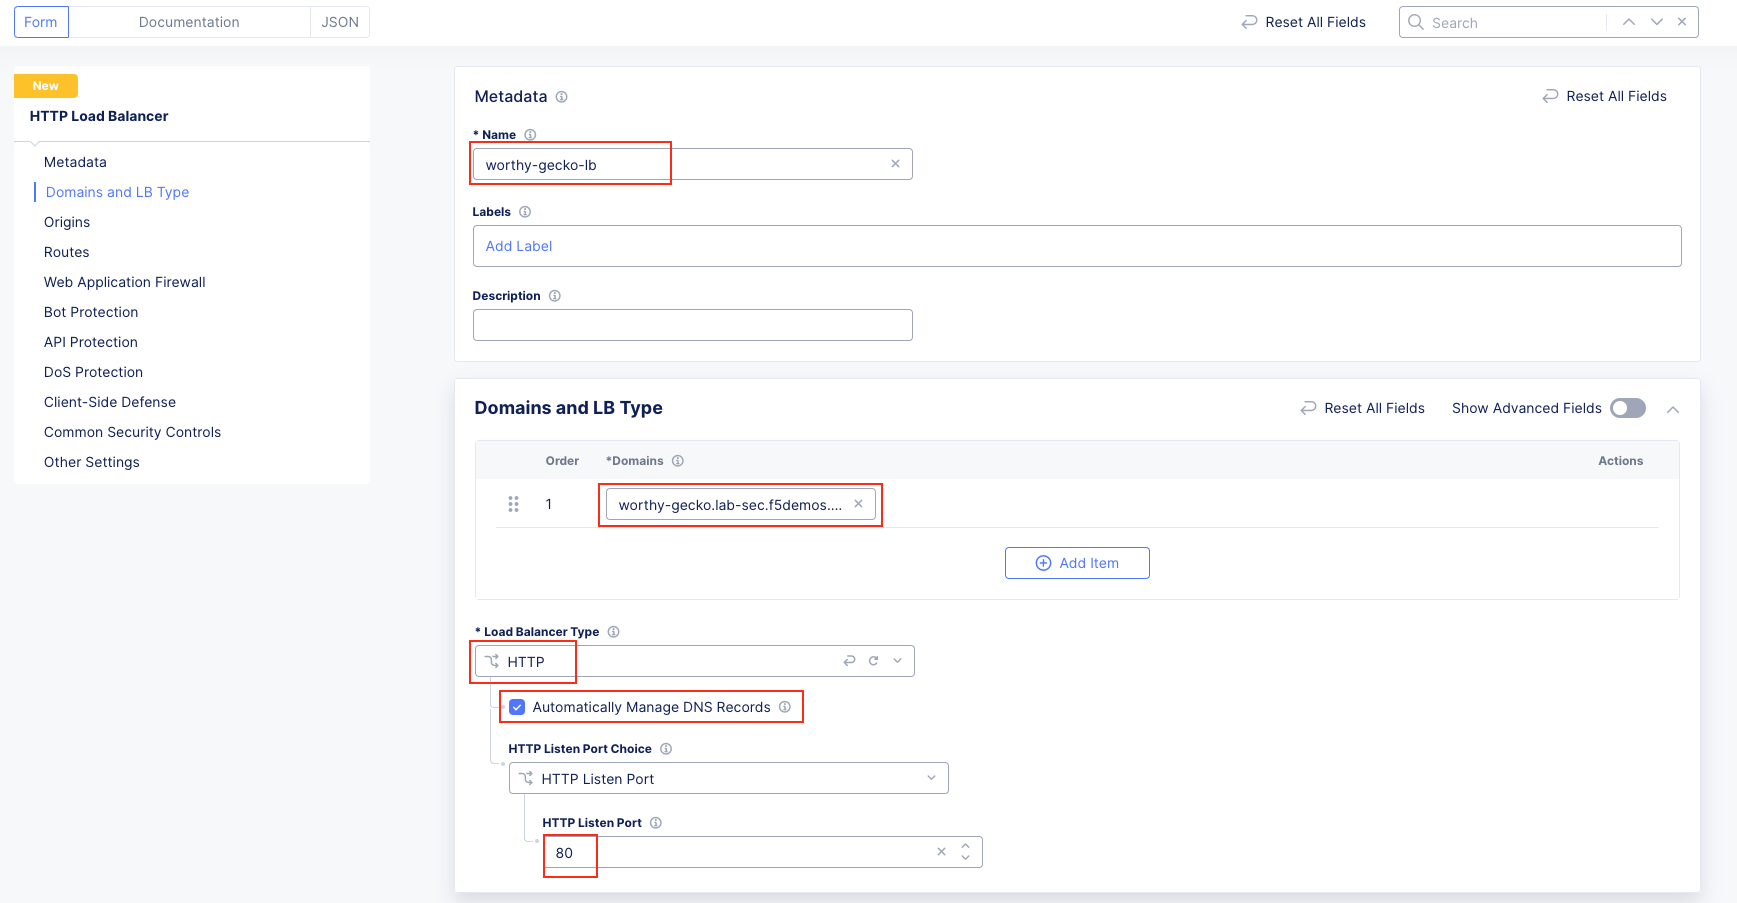
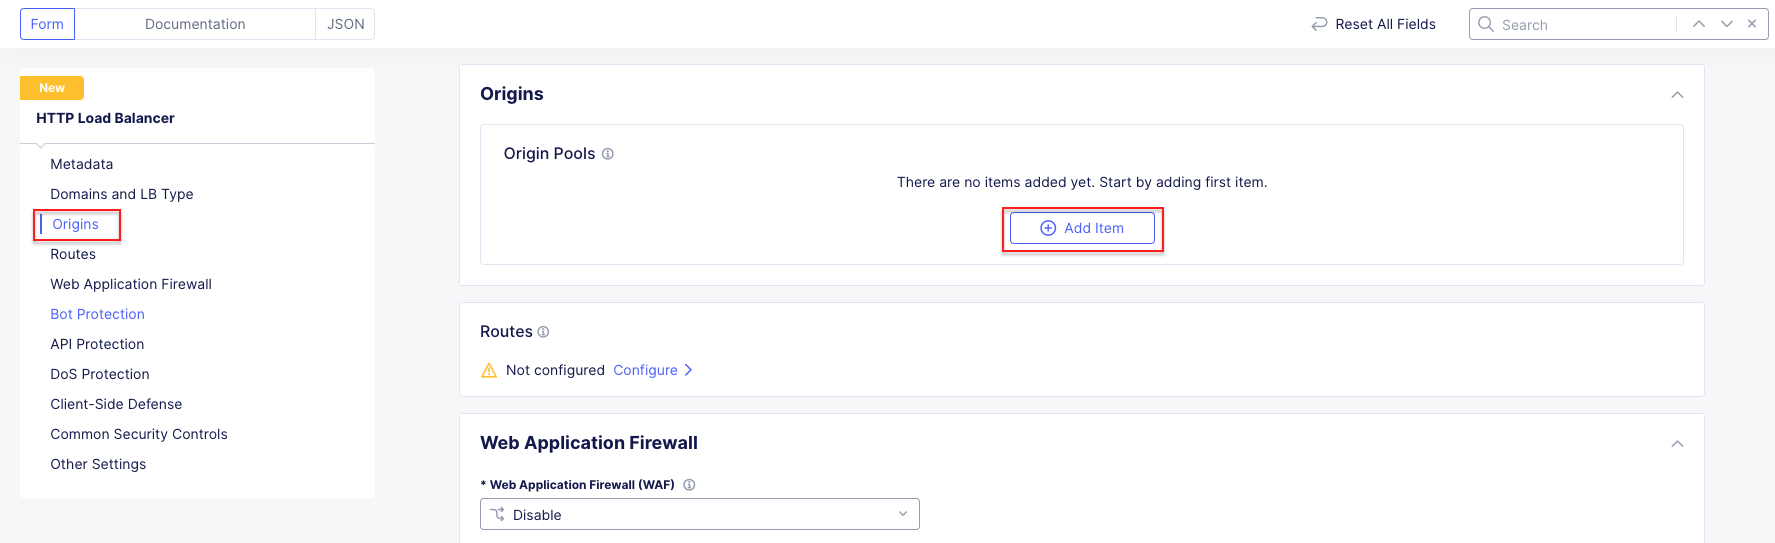
Task 1: Configure Load Balancer and Origin Pool
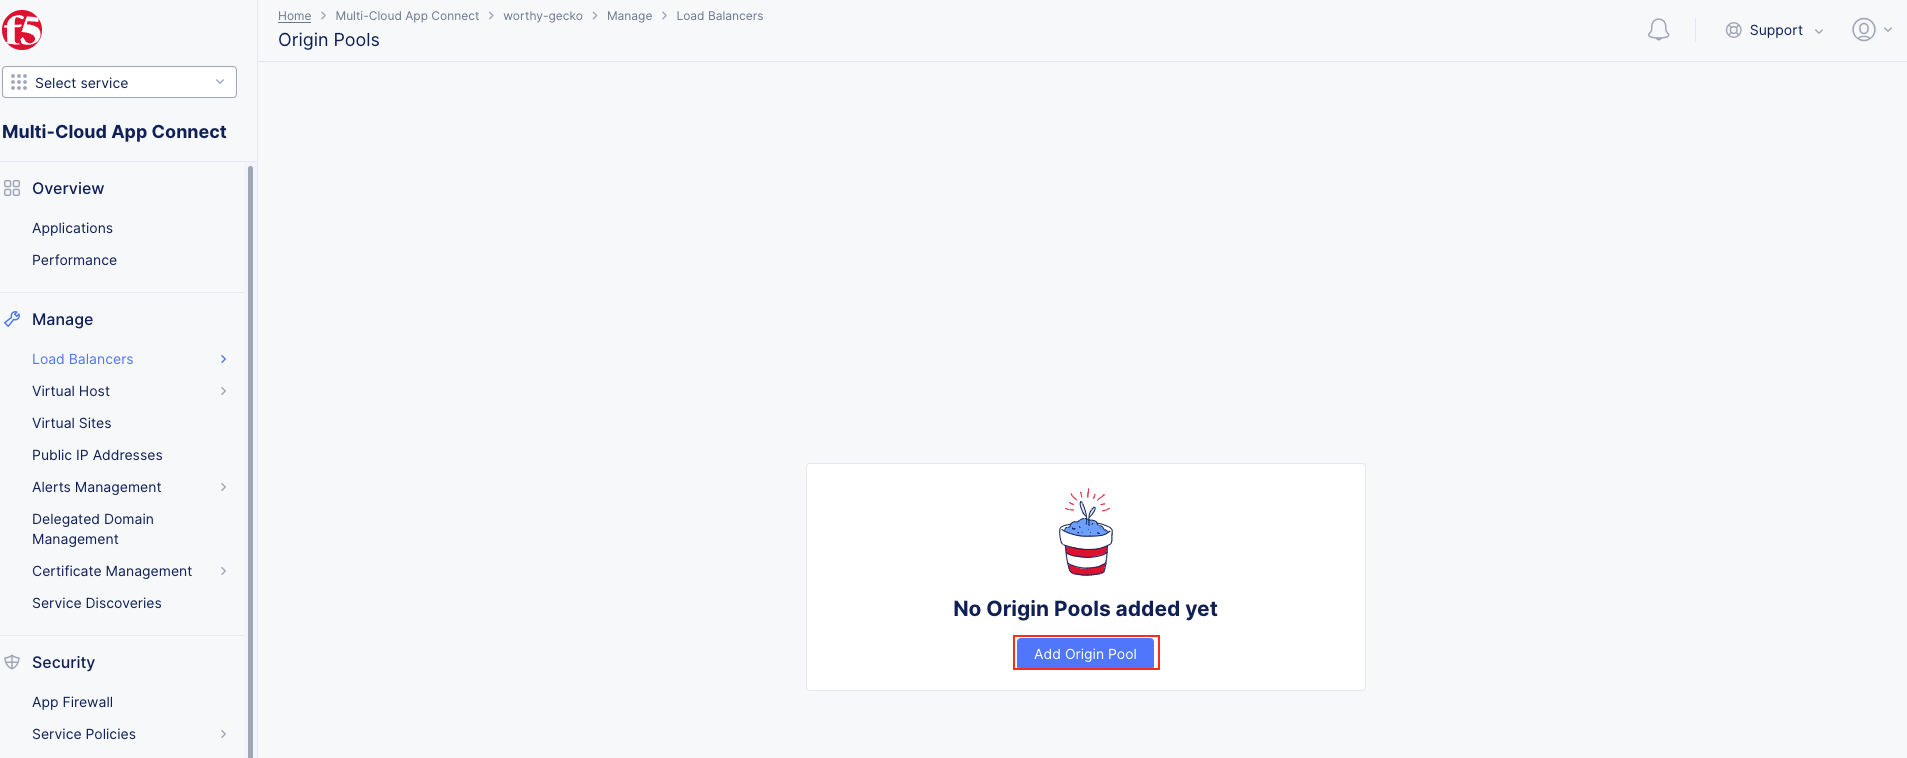
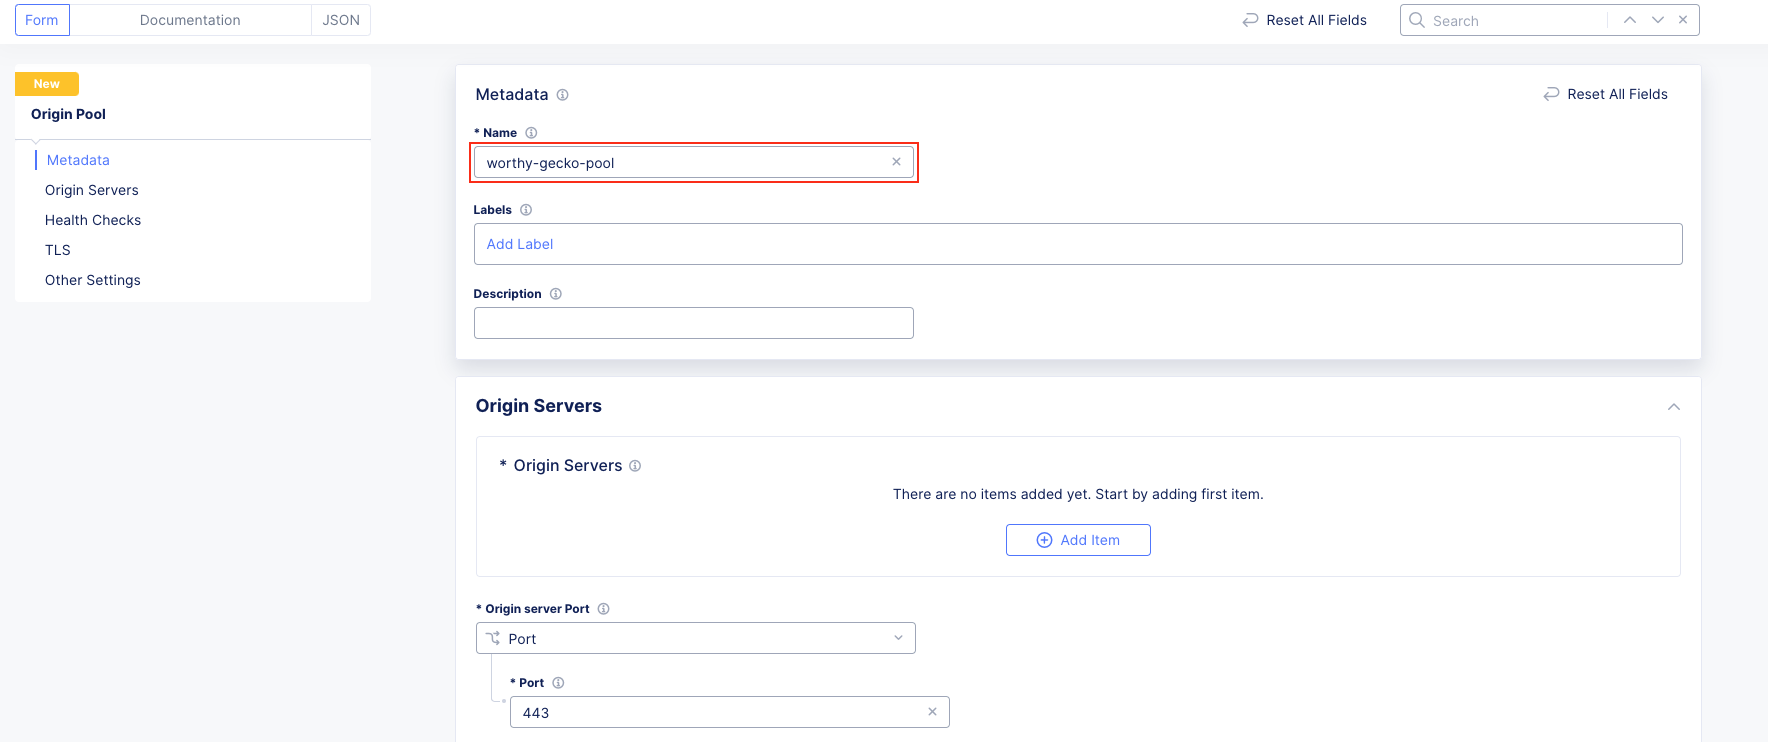
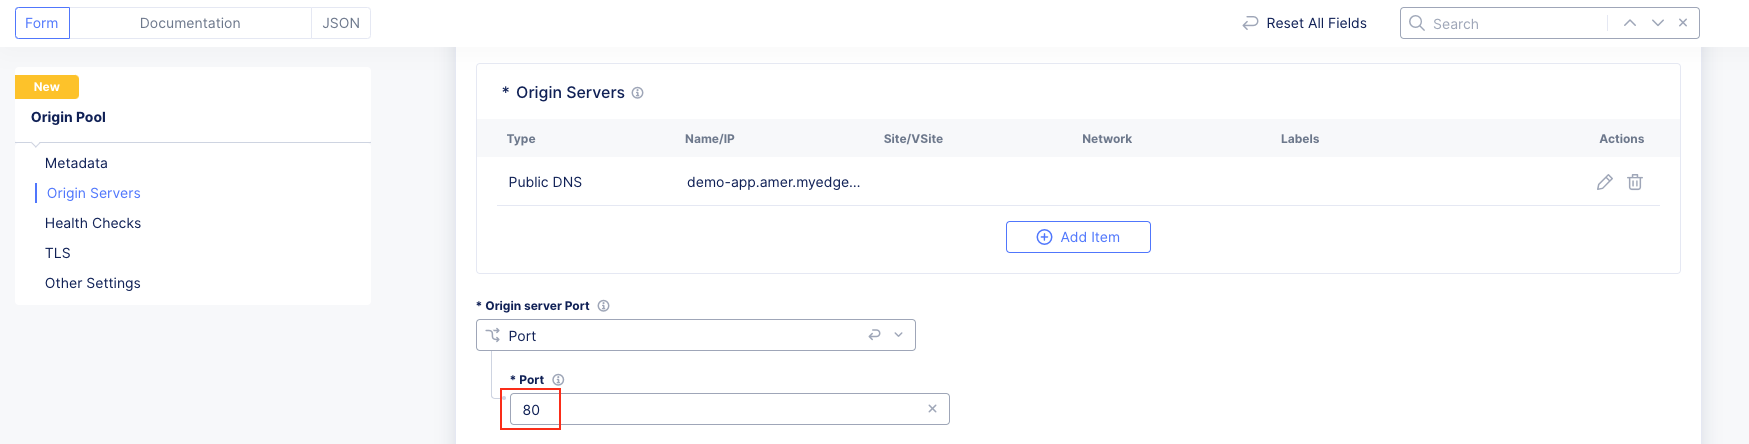
The following steps will allow you to deploy and advertise a globally available application. These steps will create an origin pool, add a health monitor, define an application, register its DNS, and advertise the application on the Internet using the F5 Distributed Cloud Global Network.
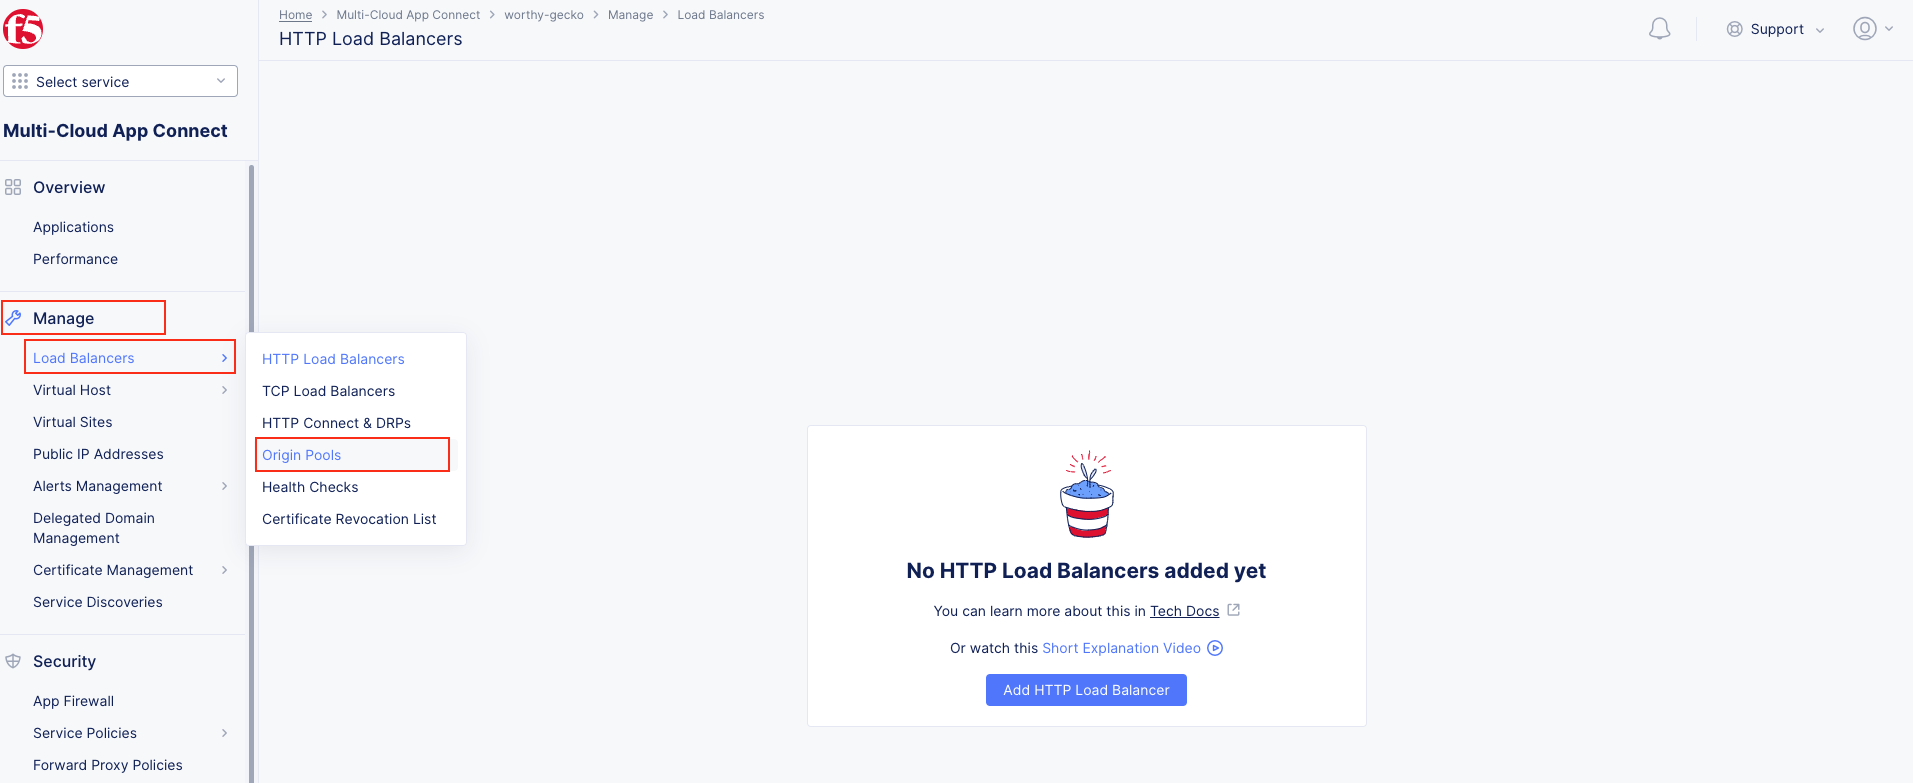
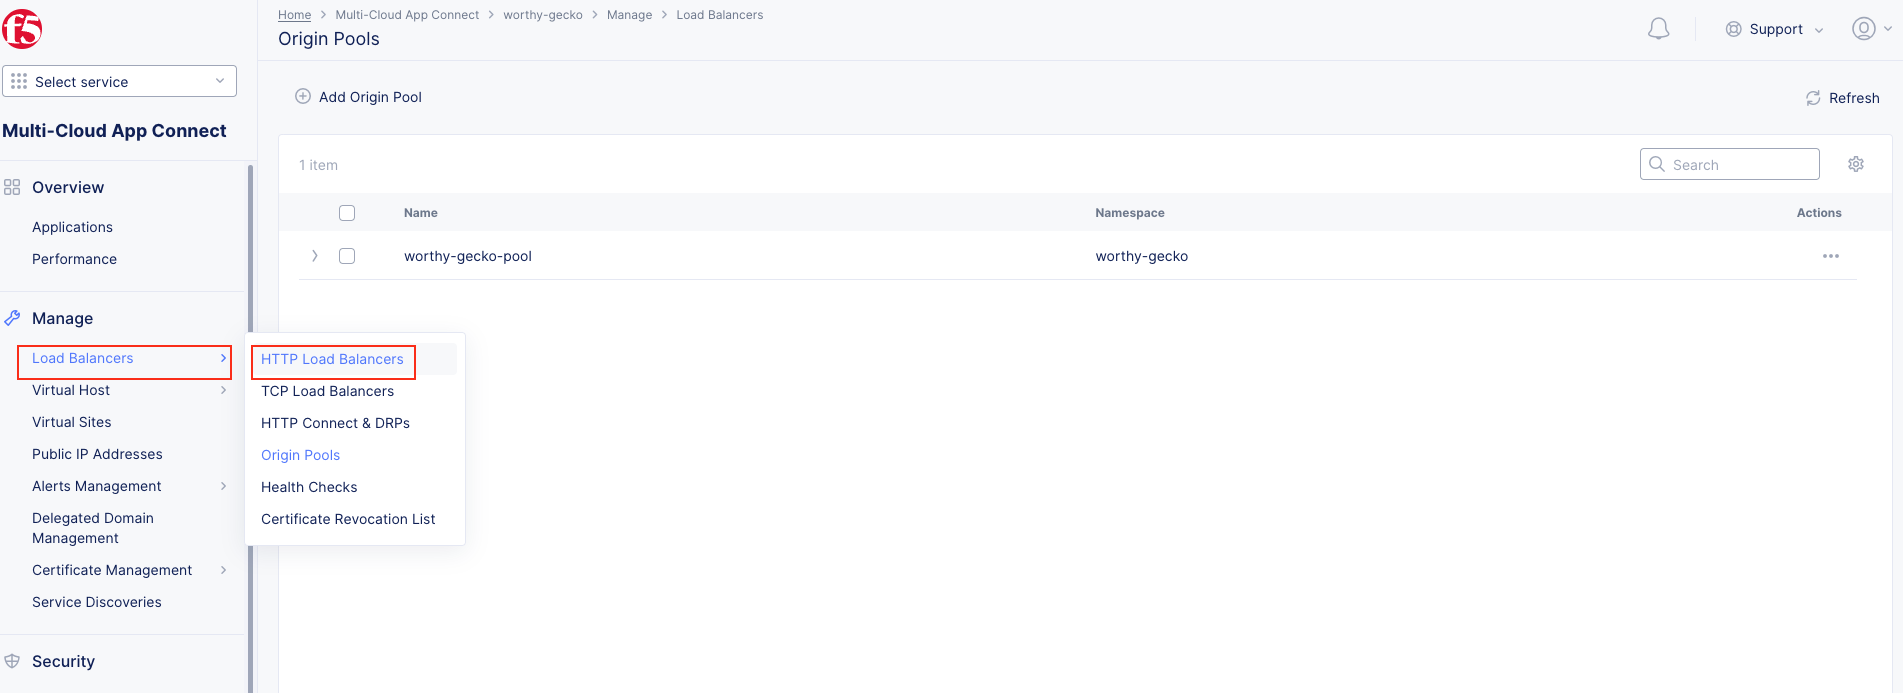
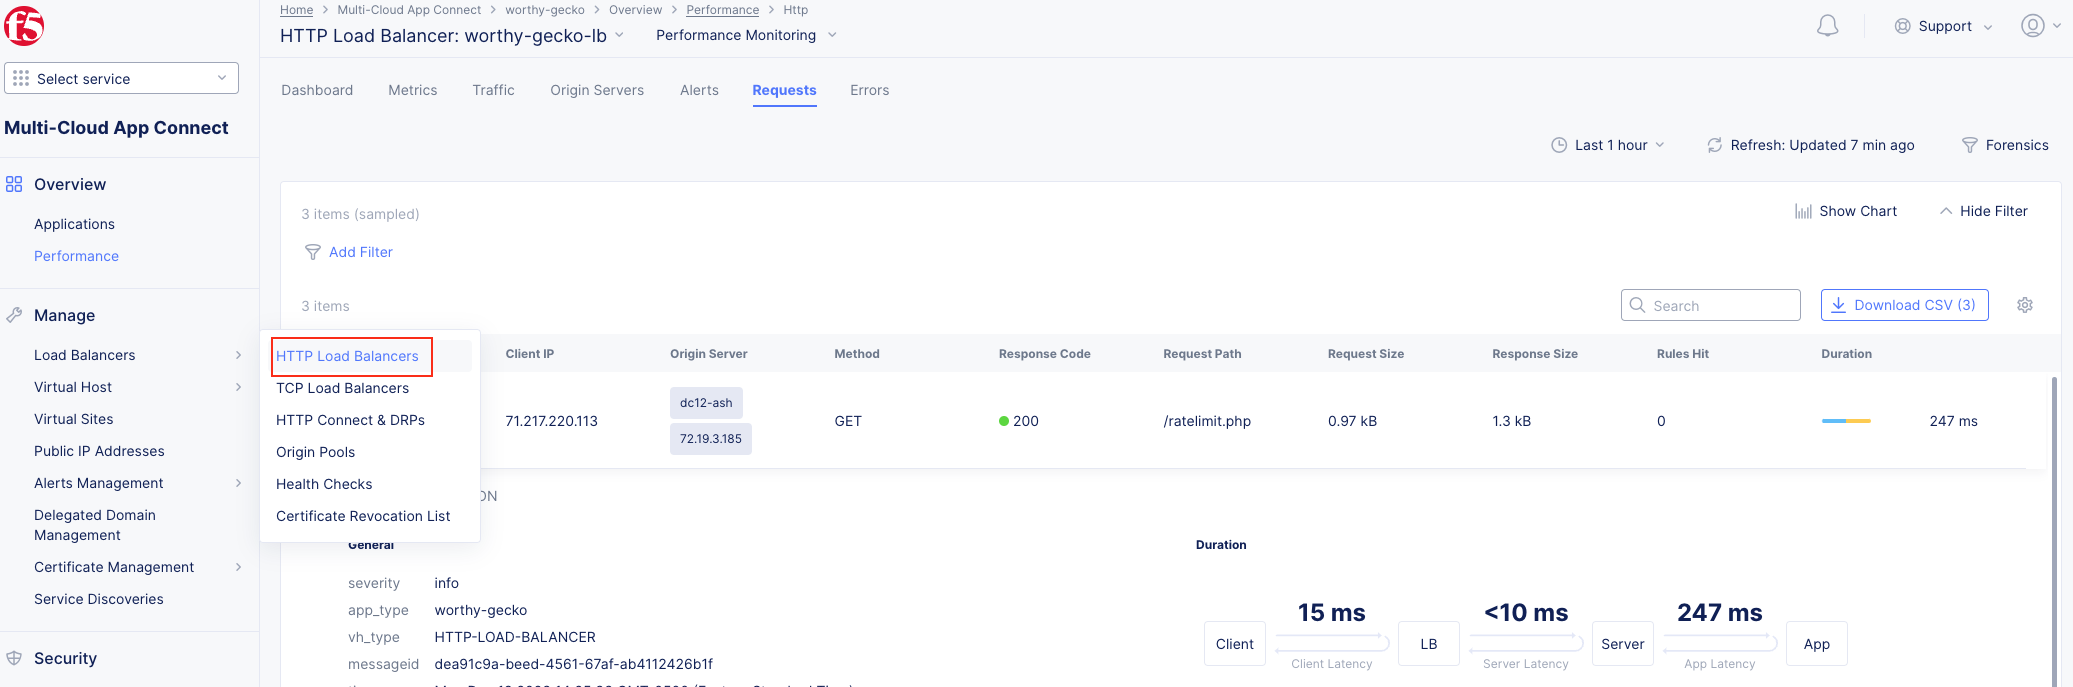
1. Following the Introduction section instructions, you should now be in the Multi-Cloud App Connect workspace. If for some reason you are not in Multi-Cloud App Connect, use Select Workspace in the left-hand navigation, and choose Multi-Cloud App Connect as shown in the Introduction section, Task 2, Step 9.
Note You have been defaulted to your specific namespace as this is the only namespace to which you have administrative access. |
|
|
|
|
|

|
|
|
|

|
|
|
|
|
|

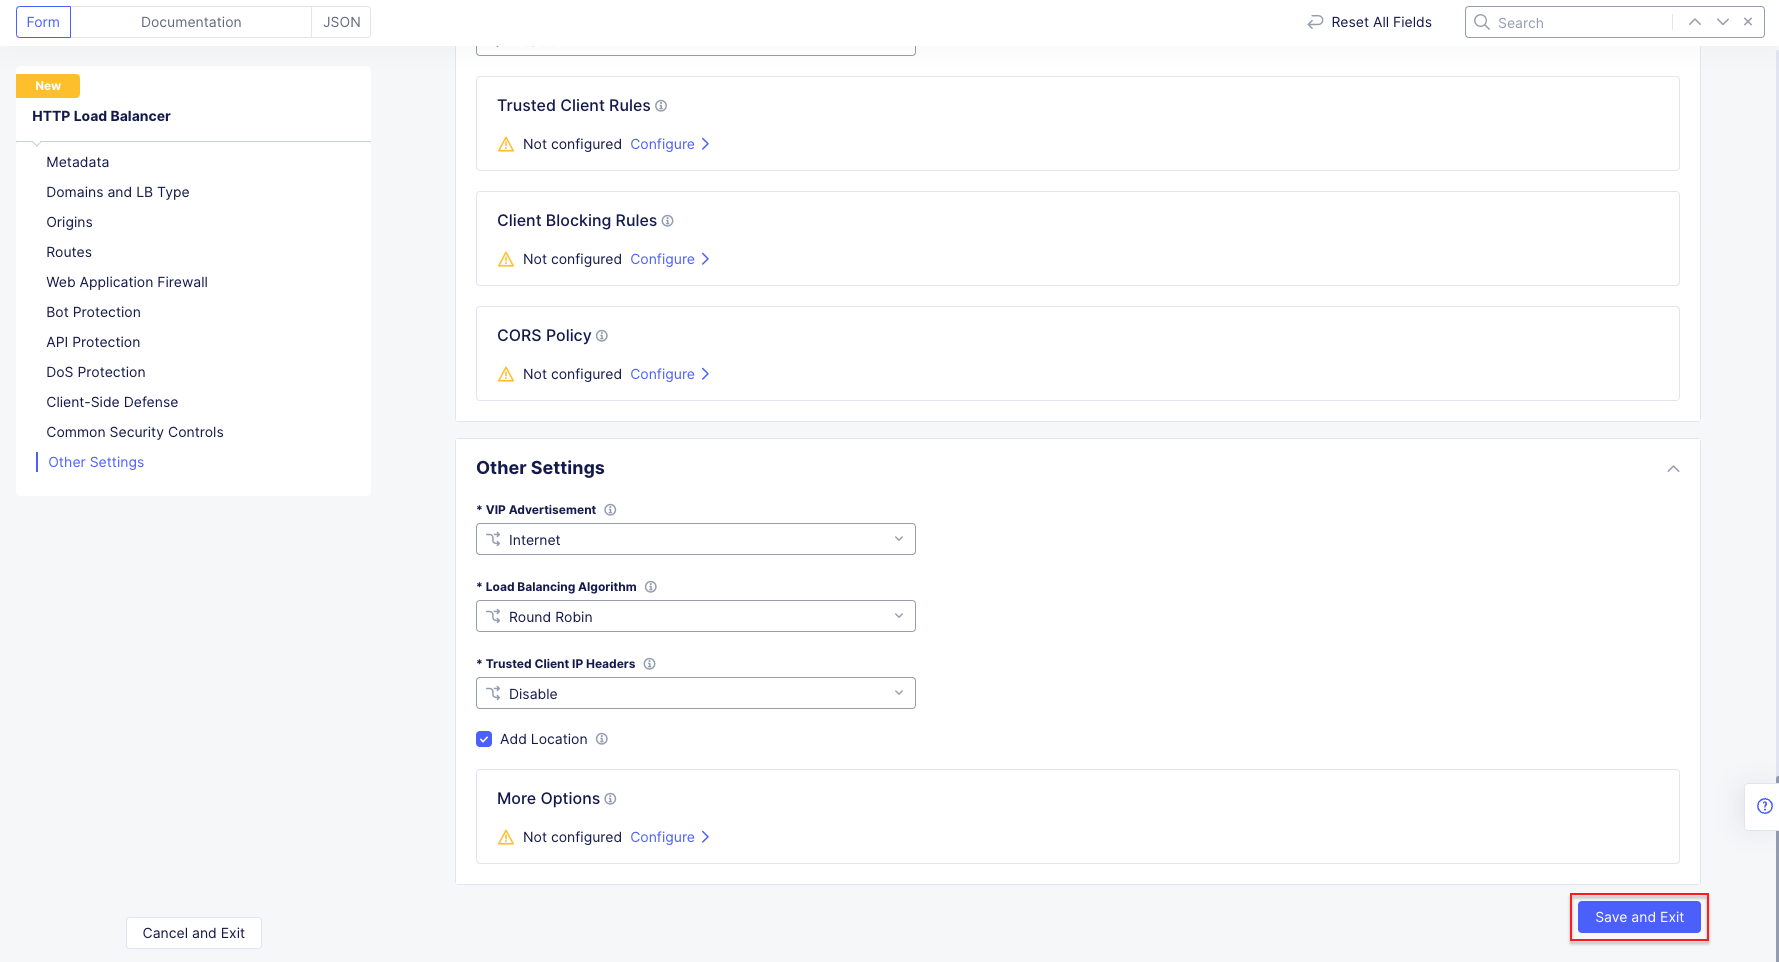
Note The VIP Advertisement selection controls how/where the application is advertised. The “Internet” setting means that this application will be advertised globally using the F5 Distributed Cloud Global Network utilizing Anycast.
|
|
|
|
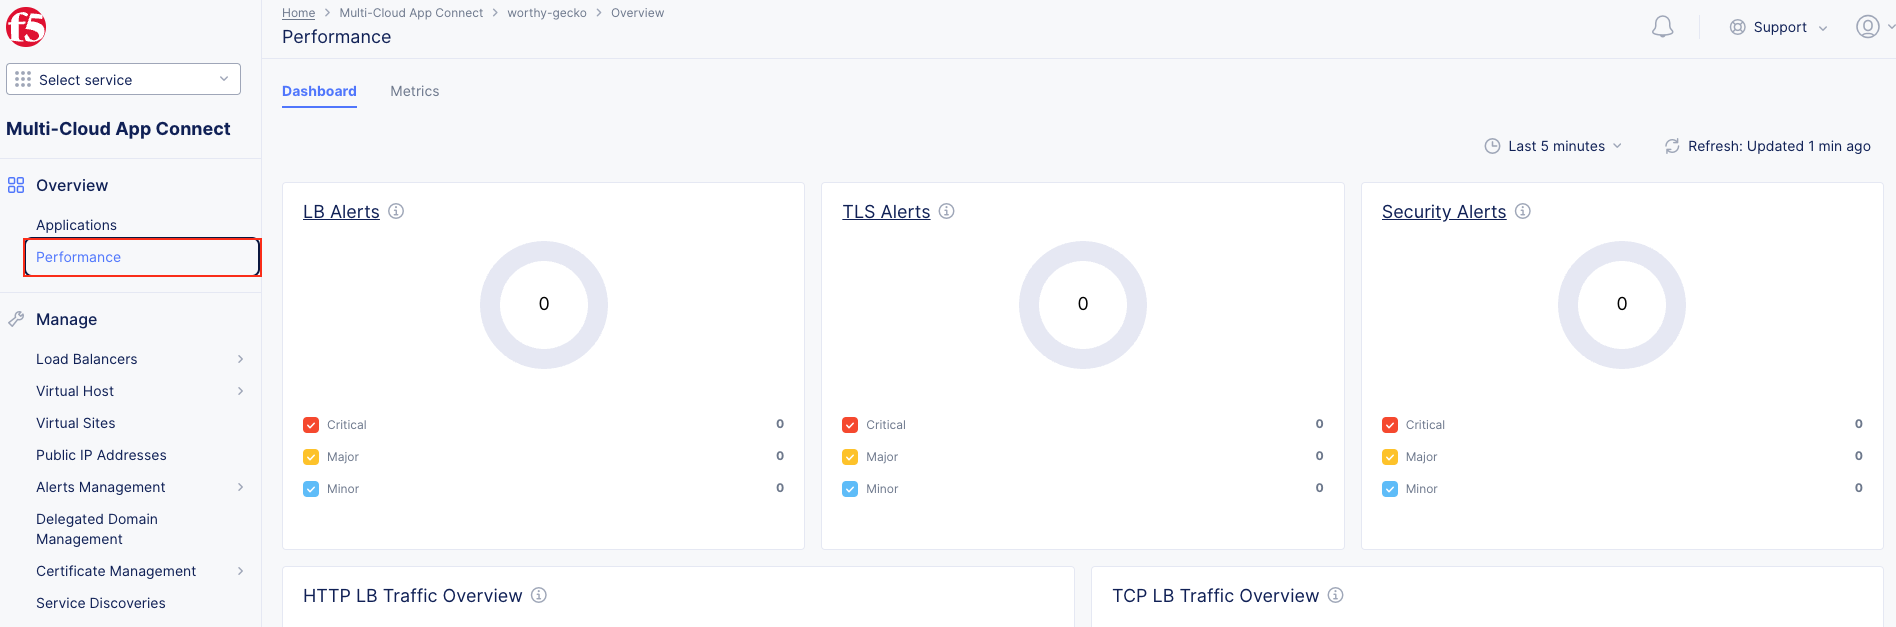
Task 2: Testing the Application and Viewing Telemetry Data
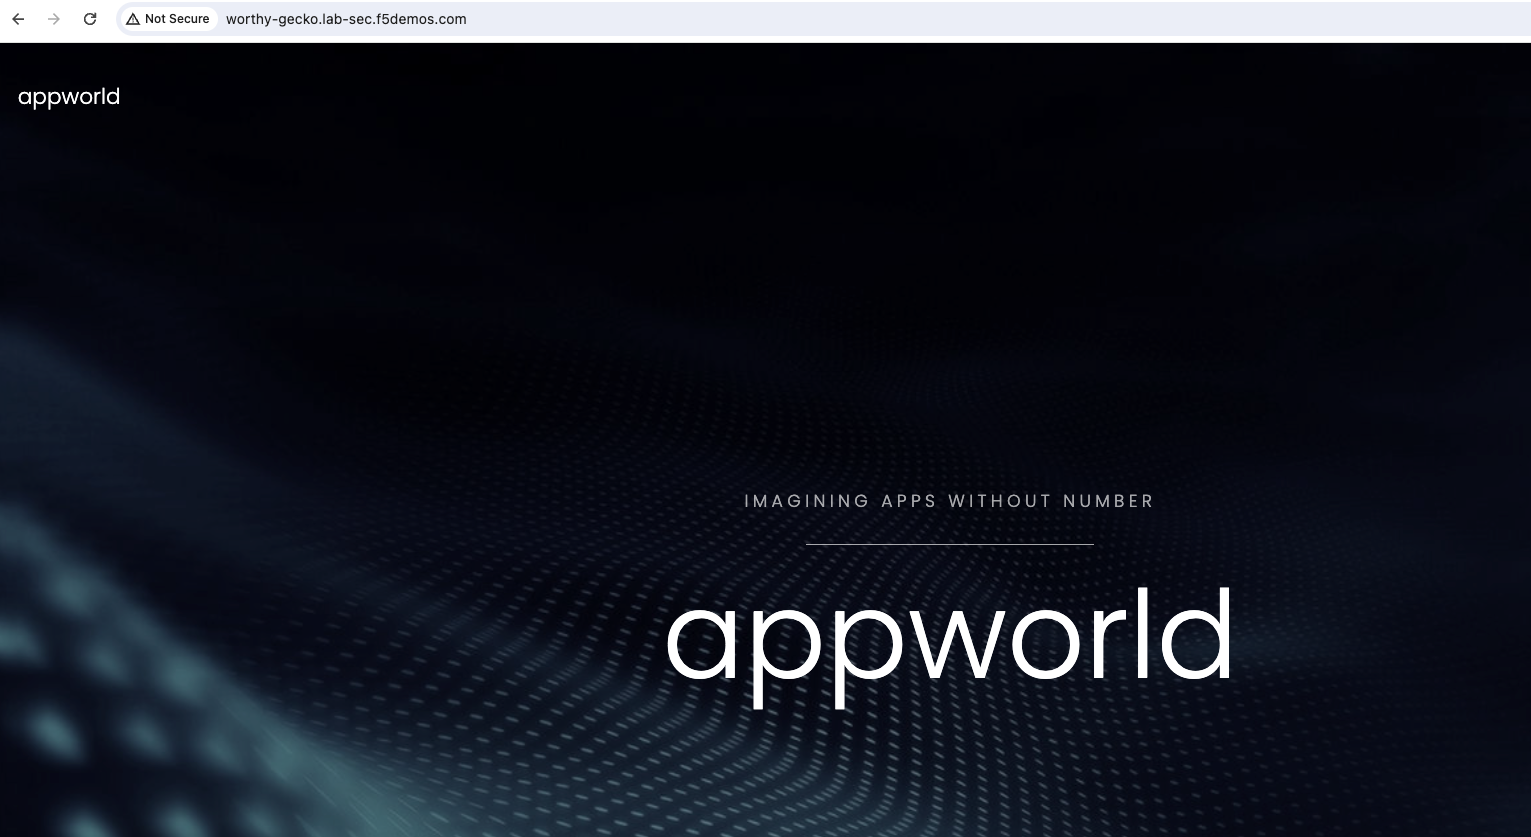
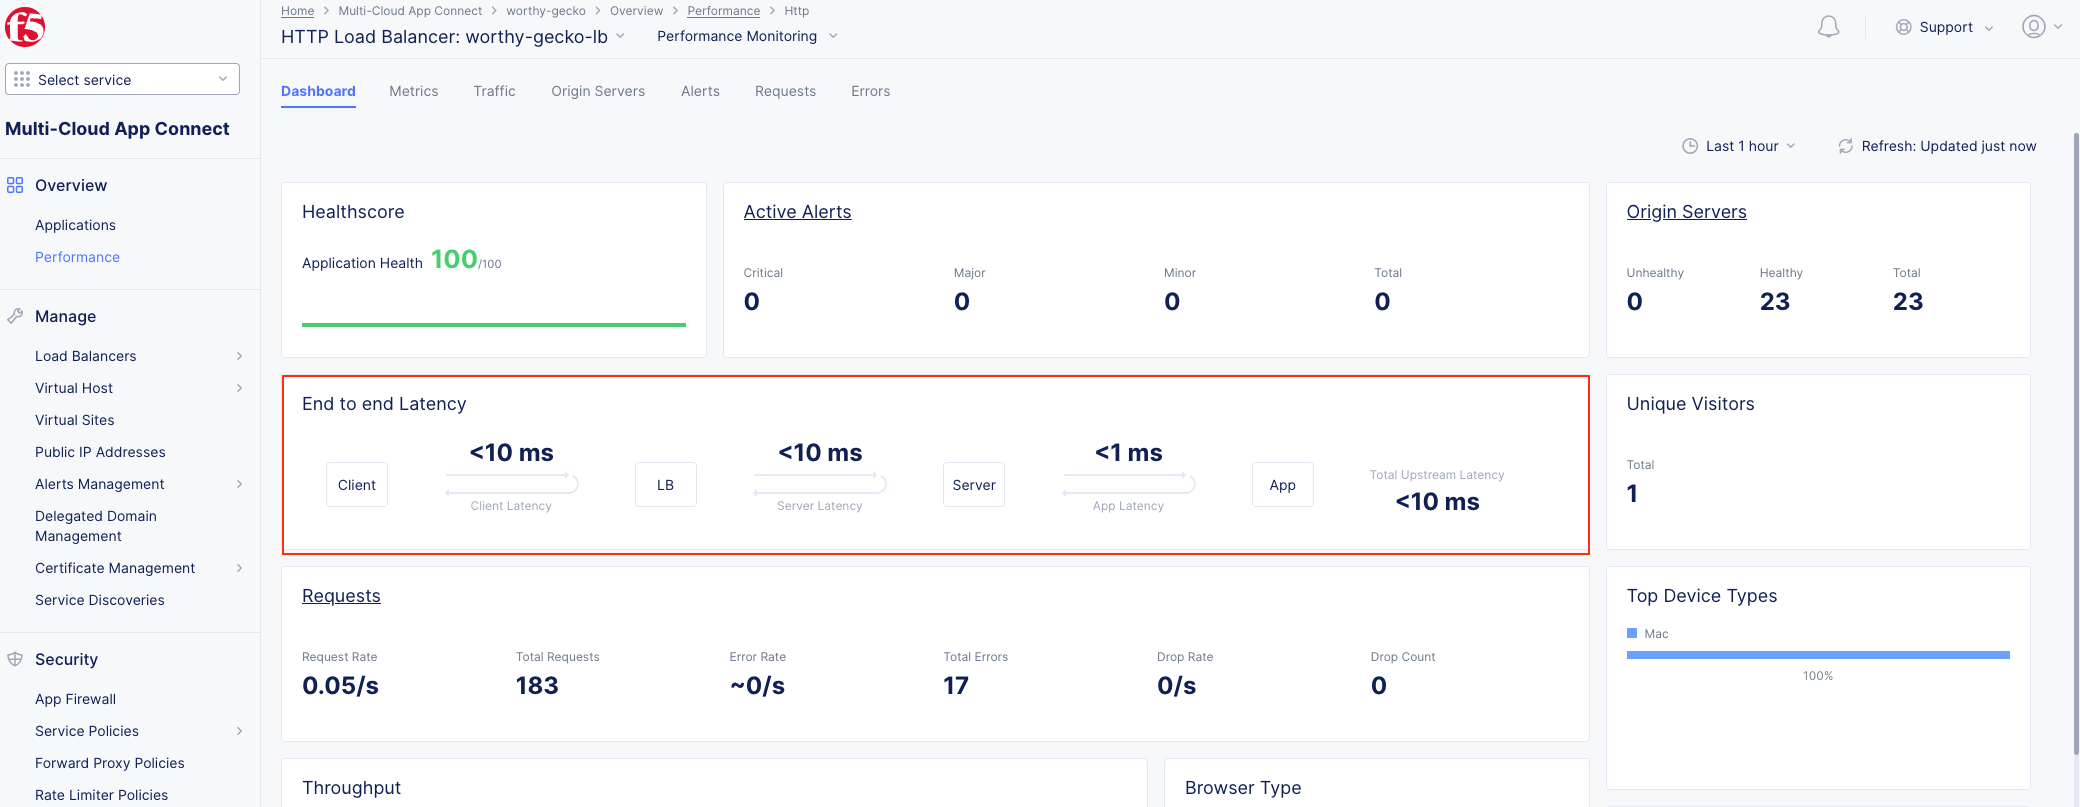
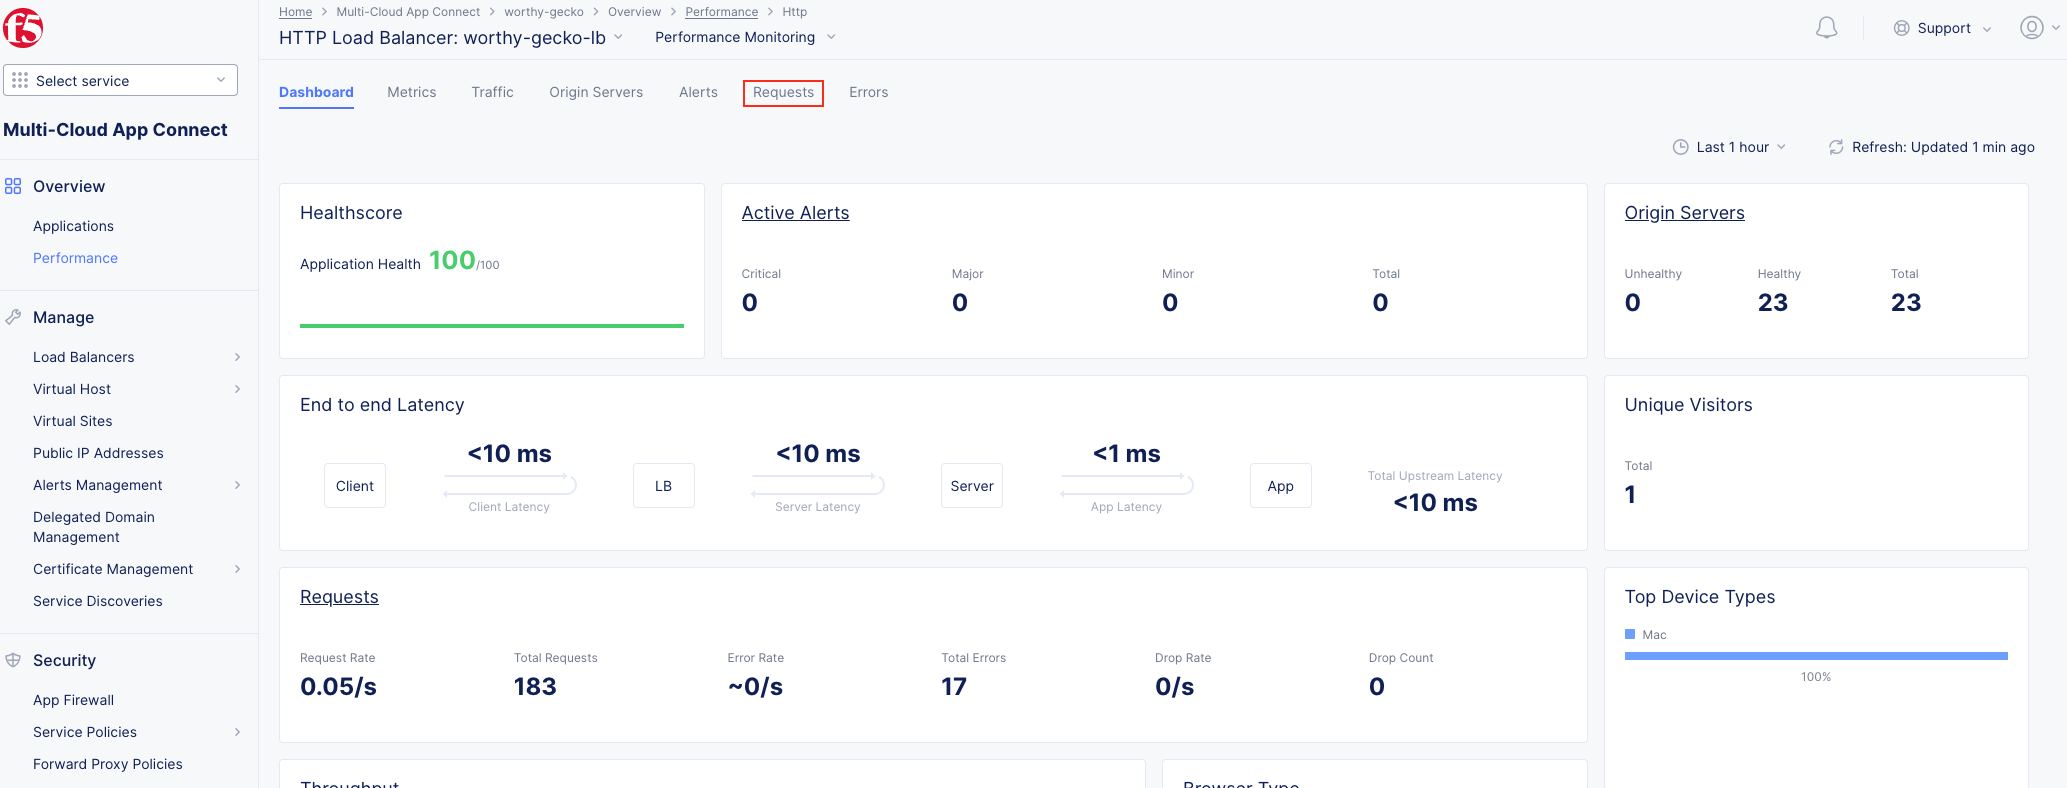
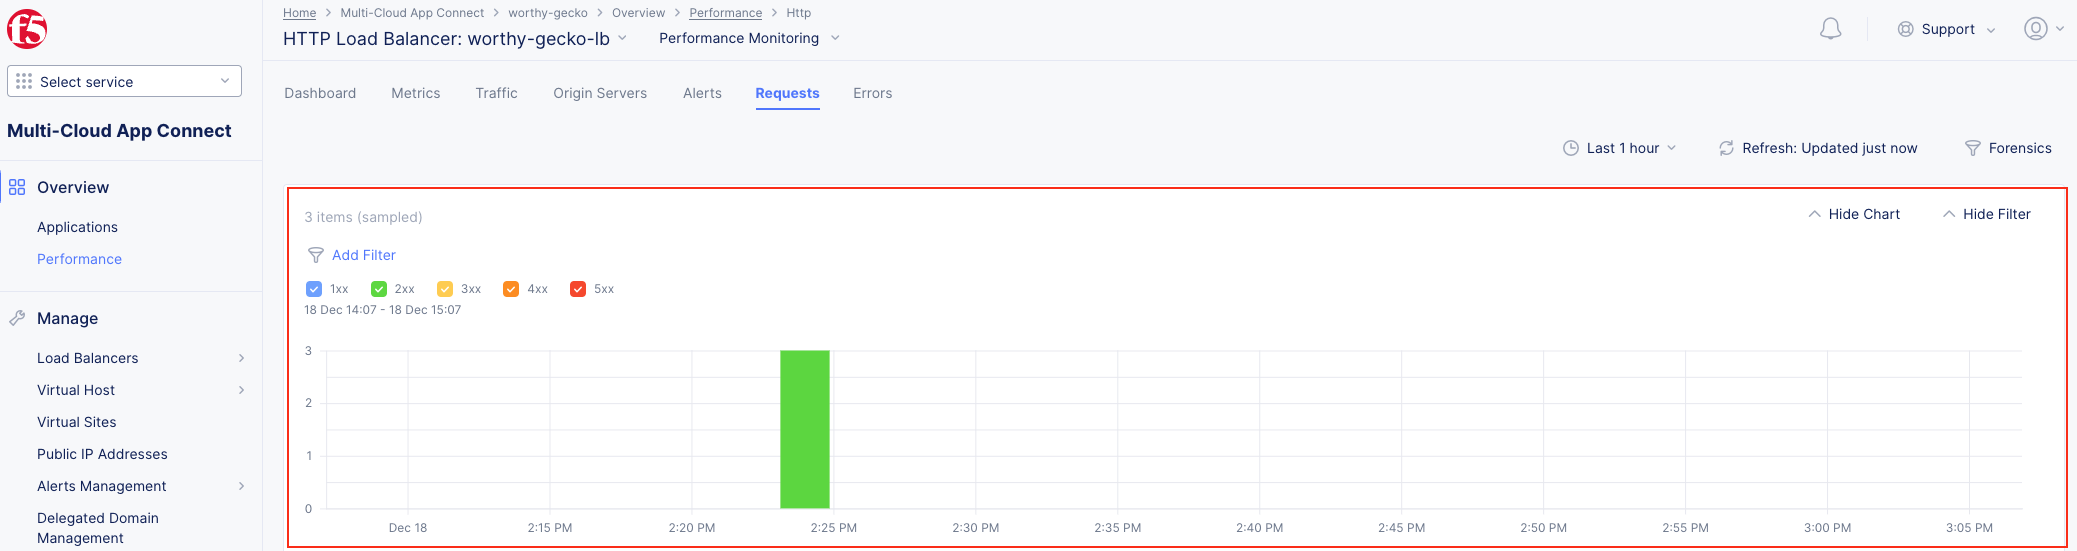
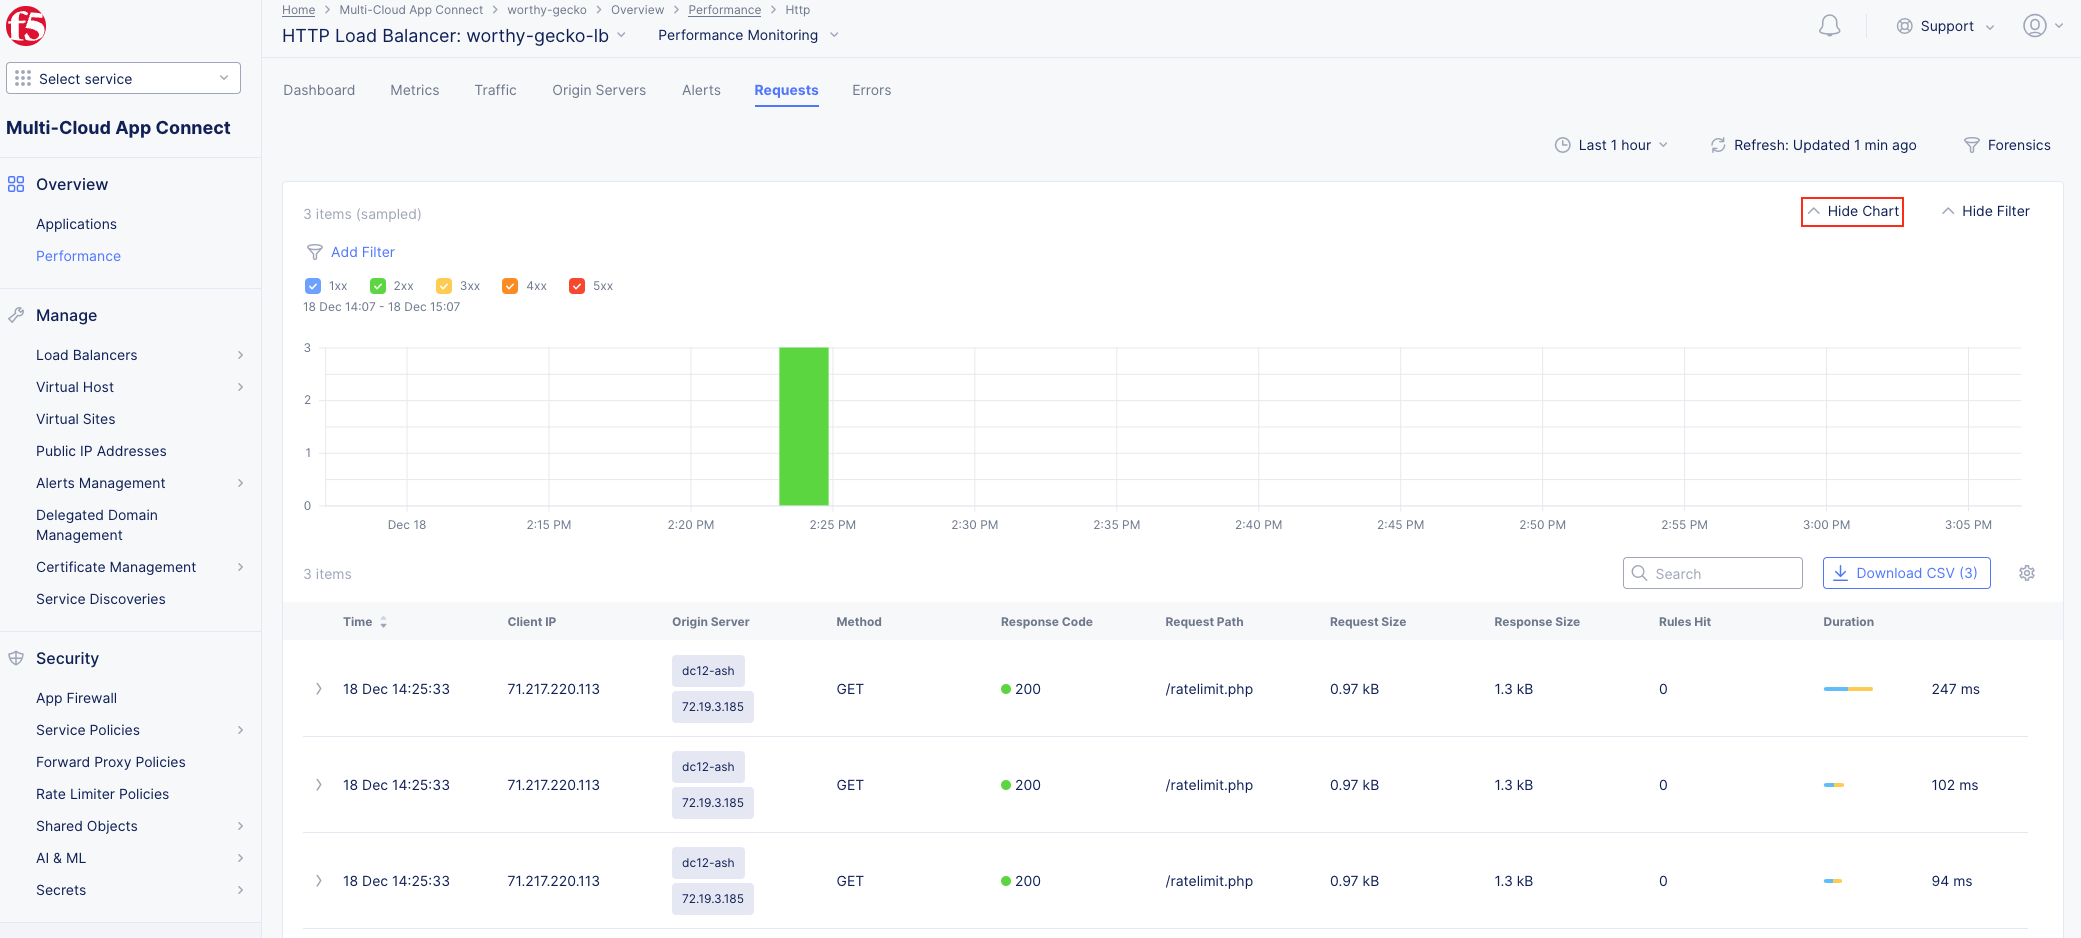
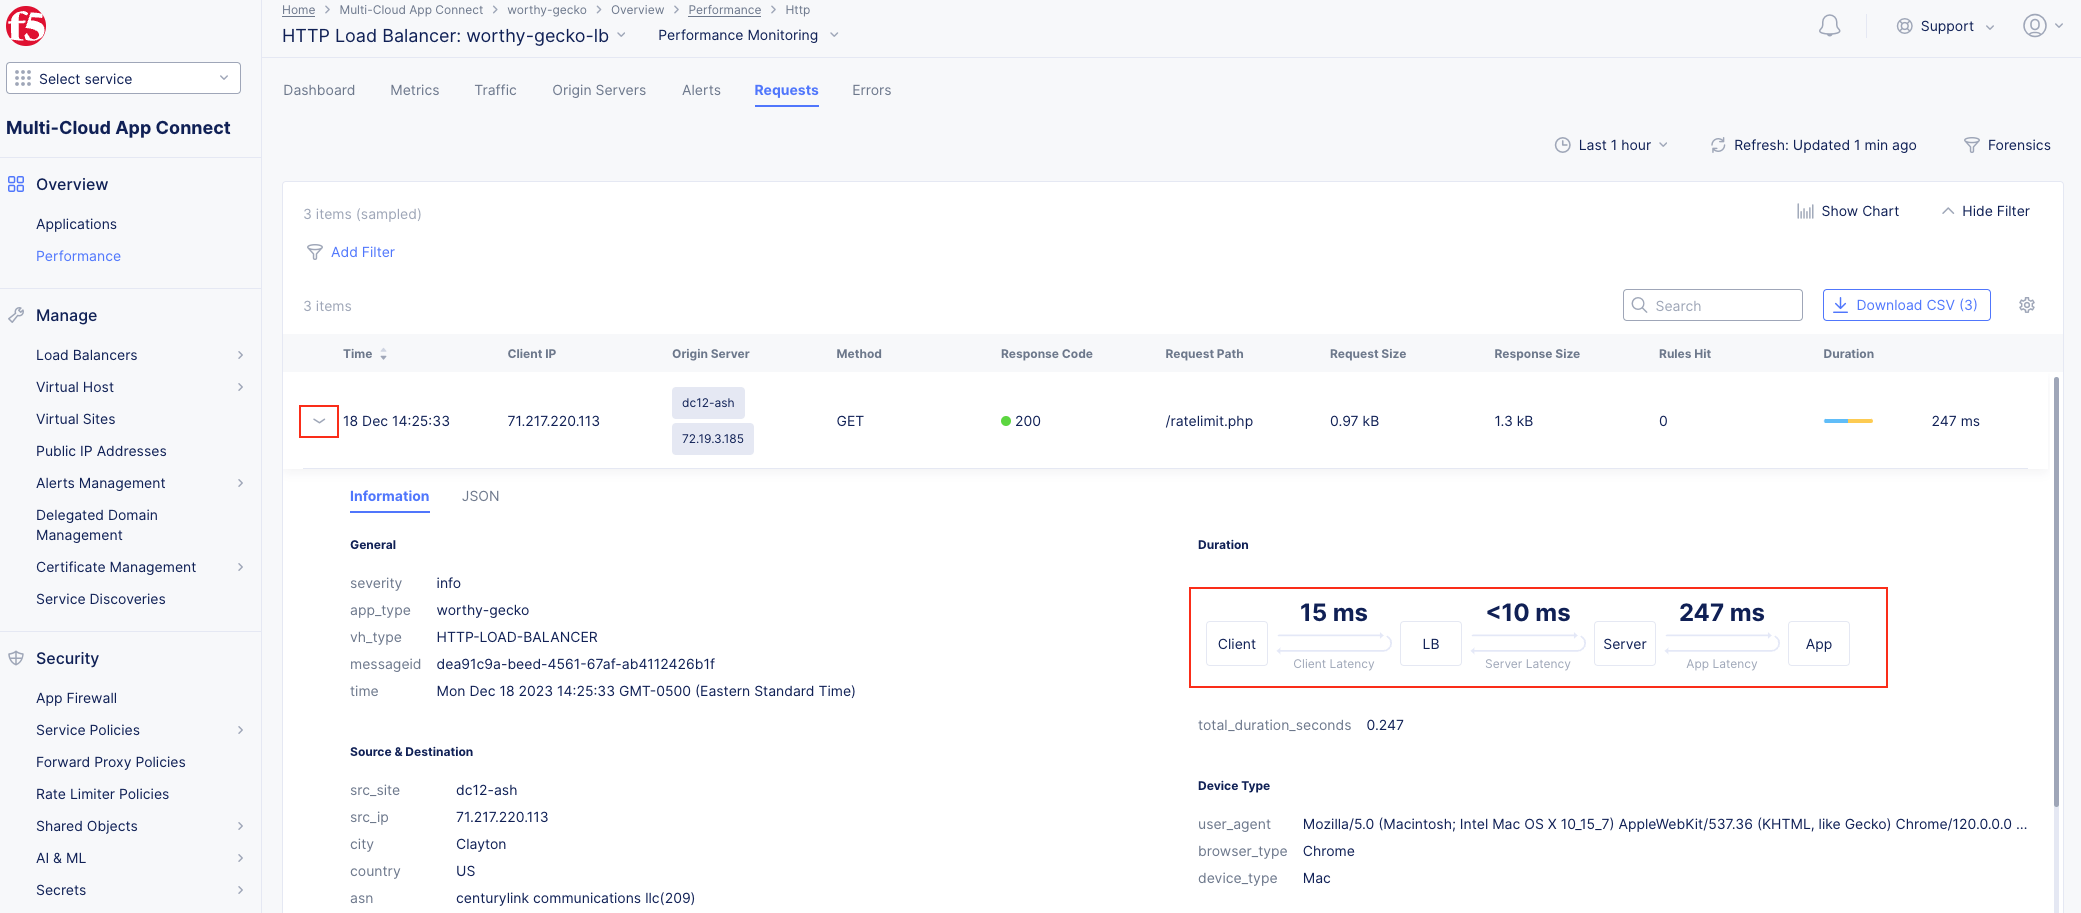
The following steps will validate access to the application via web browser, review the Performance Monitoring dashboard, and gather request details.
|
|
|
|

Note As you have not run many requests, summary analytics may not be available in the dashboard view yet. |
|
Note This data can be filtered to quickly narrow in on points of interest. |
|
|
|
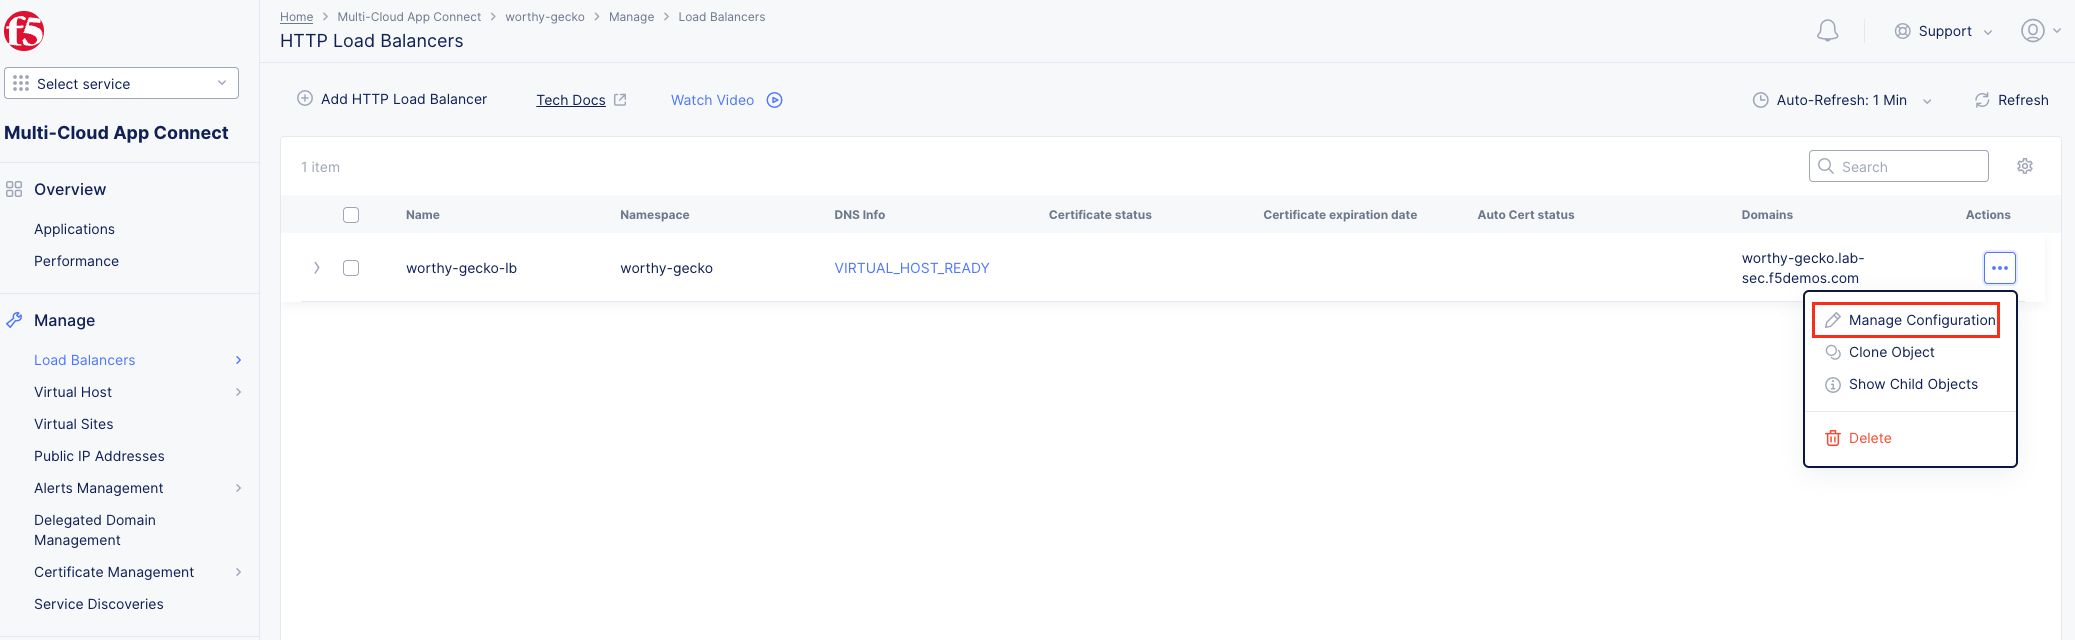
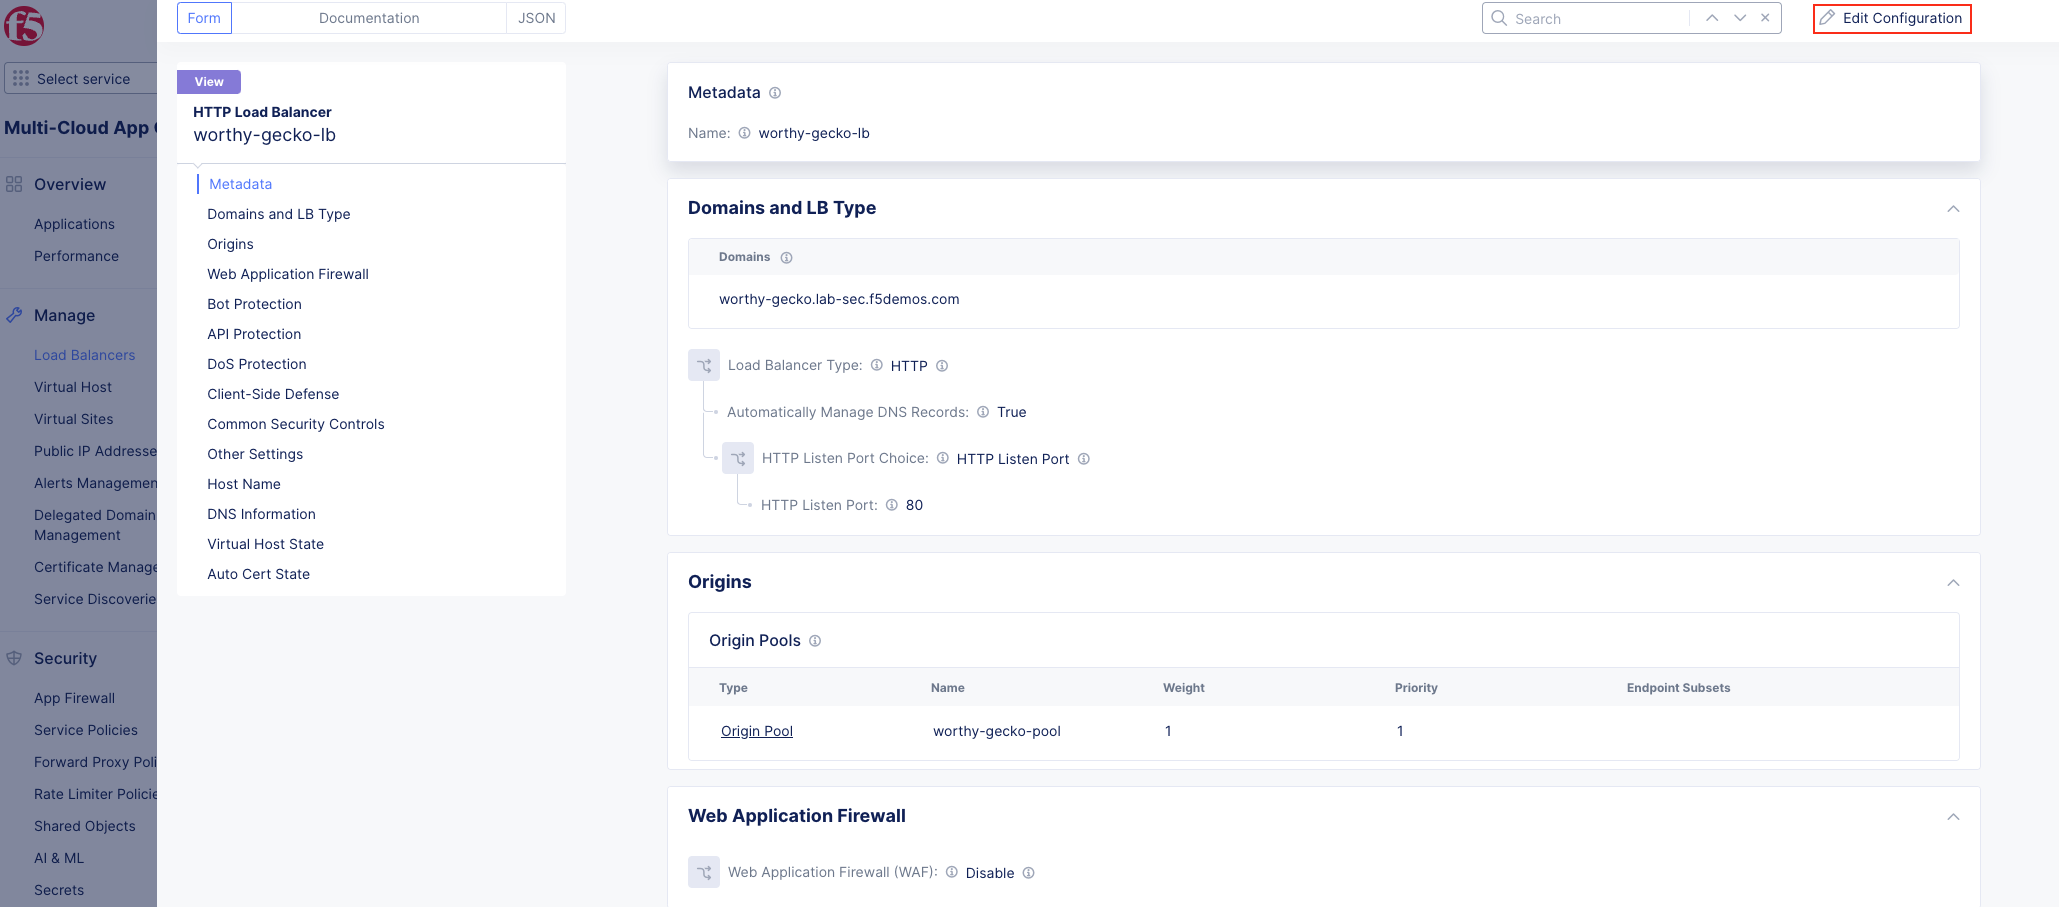
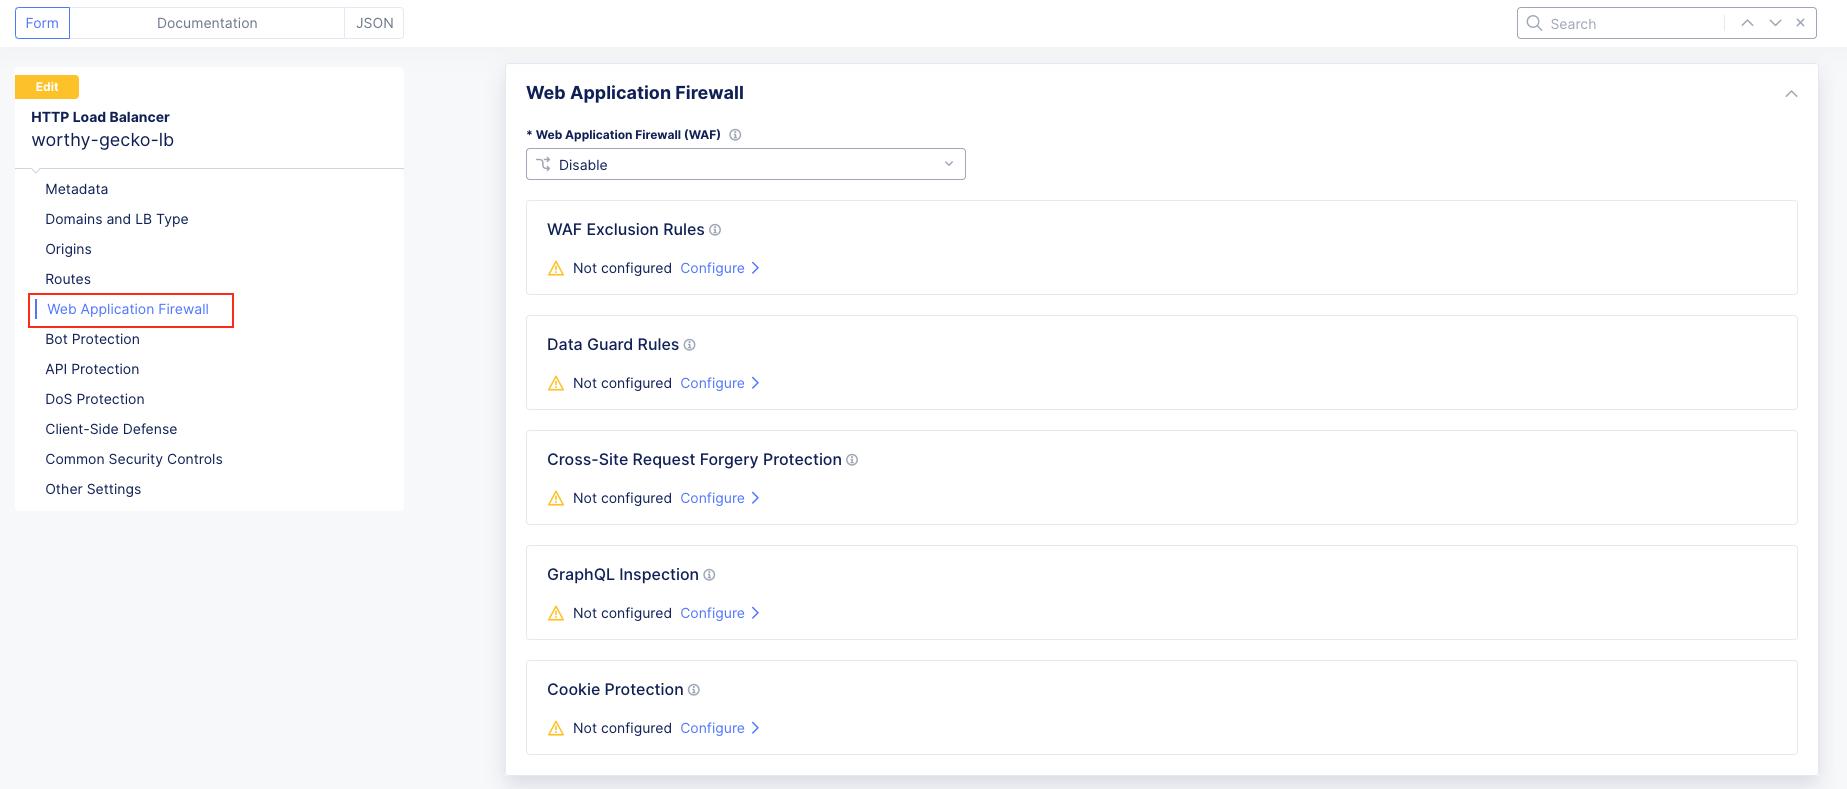
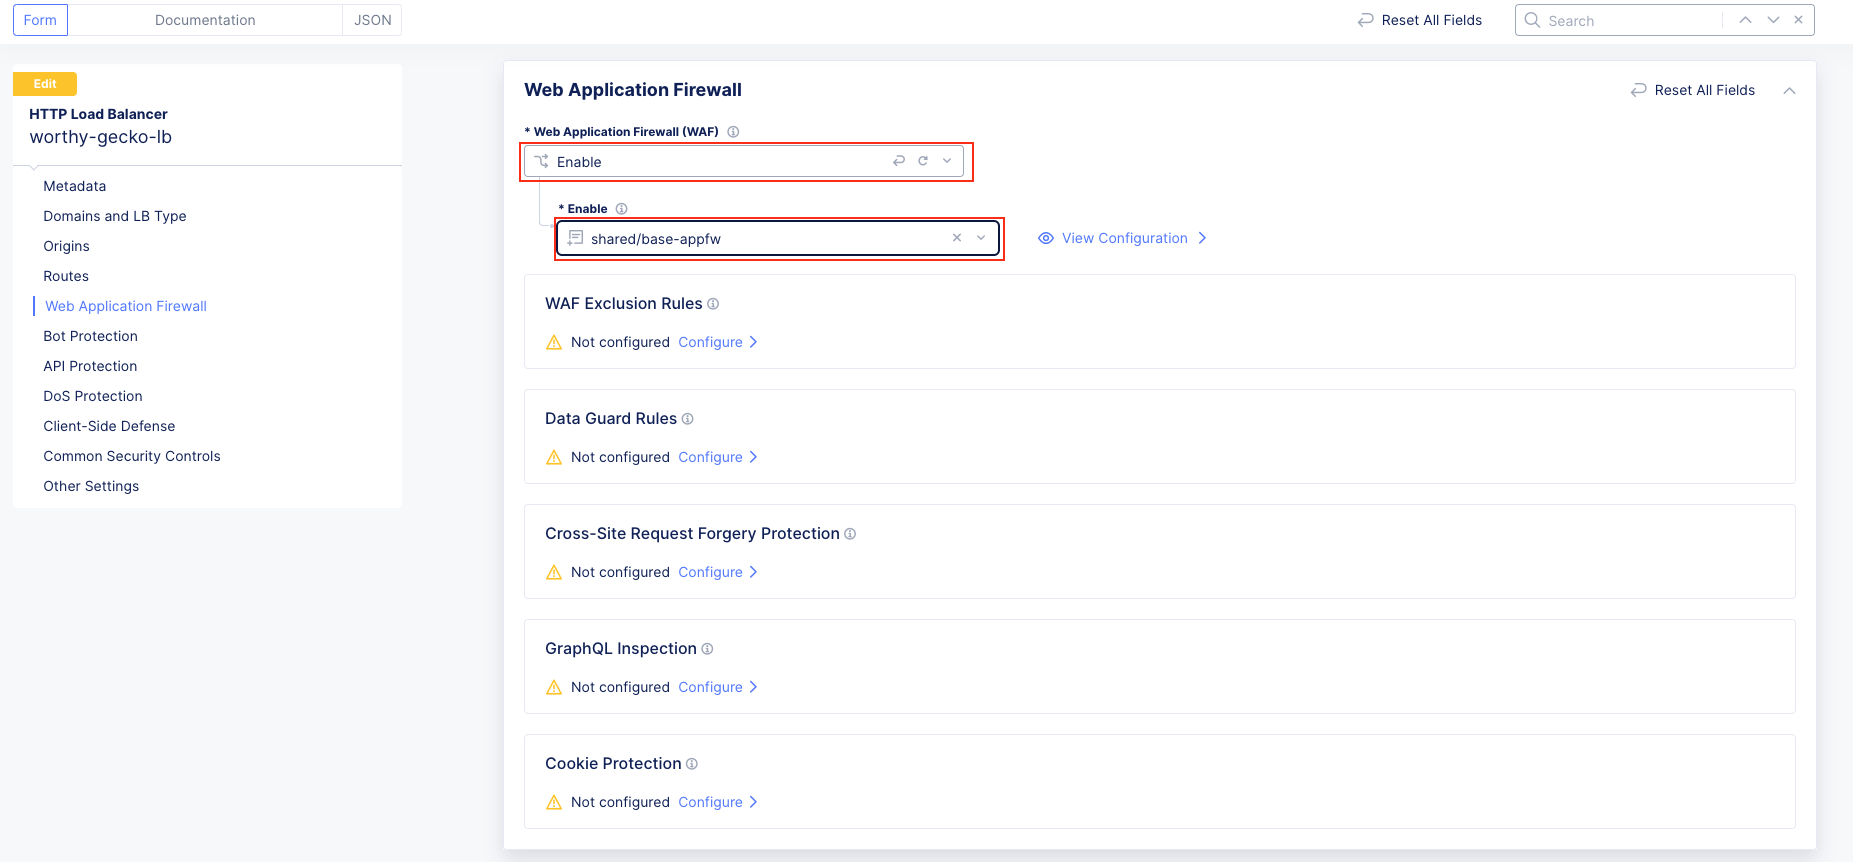
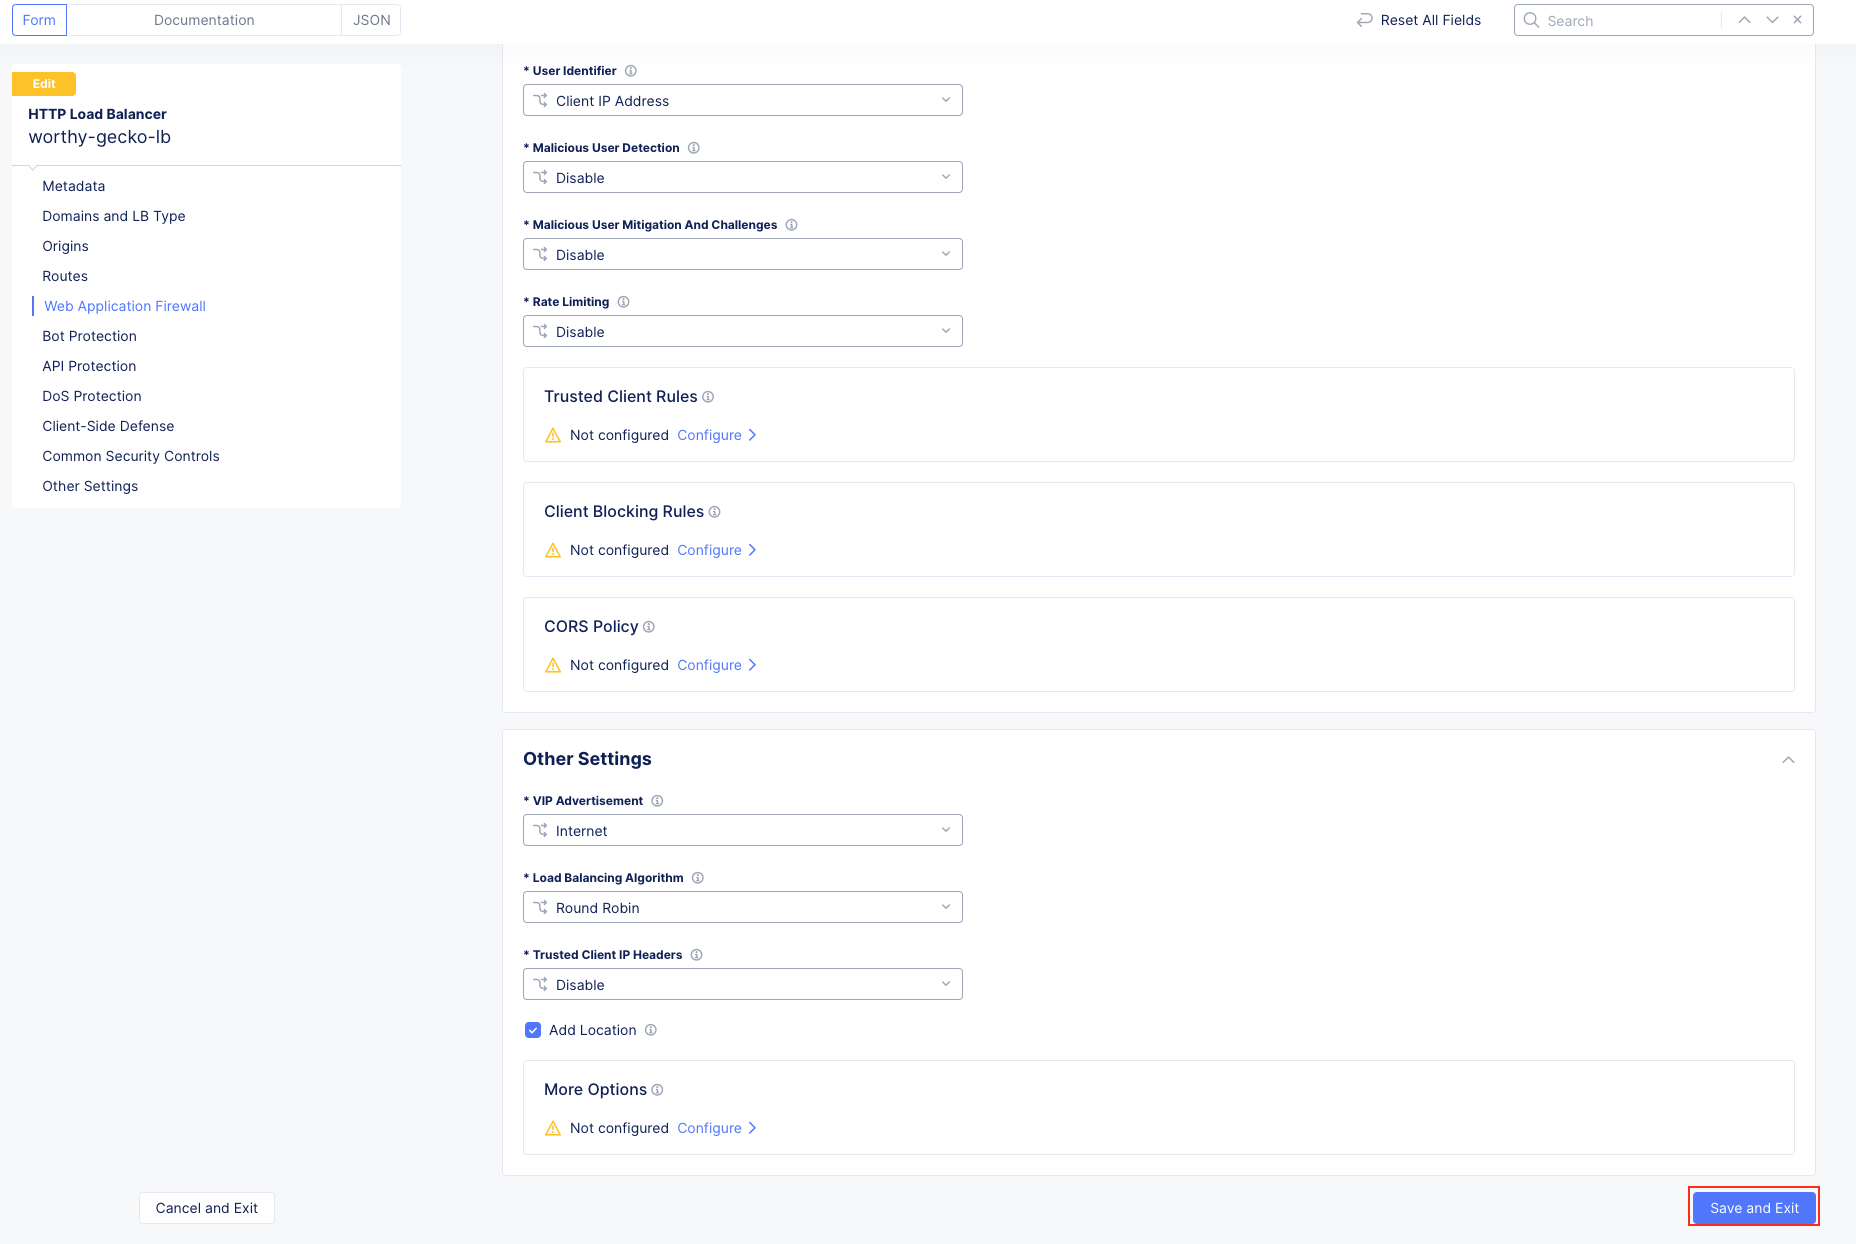
Task 3: Add an Application Firewall Policy to Protect the Application
The following steps will guide you through adding a Web Application Firewall (WAF) Policy.
These steps will apply a preconfigured WAF policy to the load balancer created in Task 1.
|
|
|
|
|
|
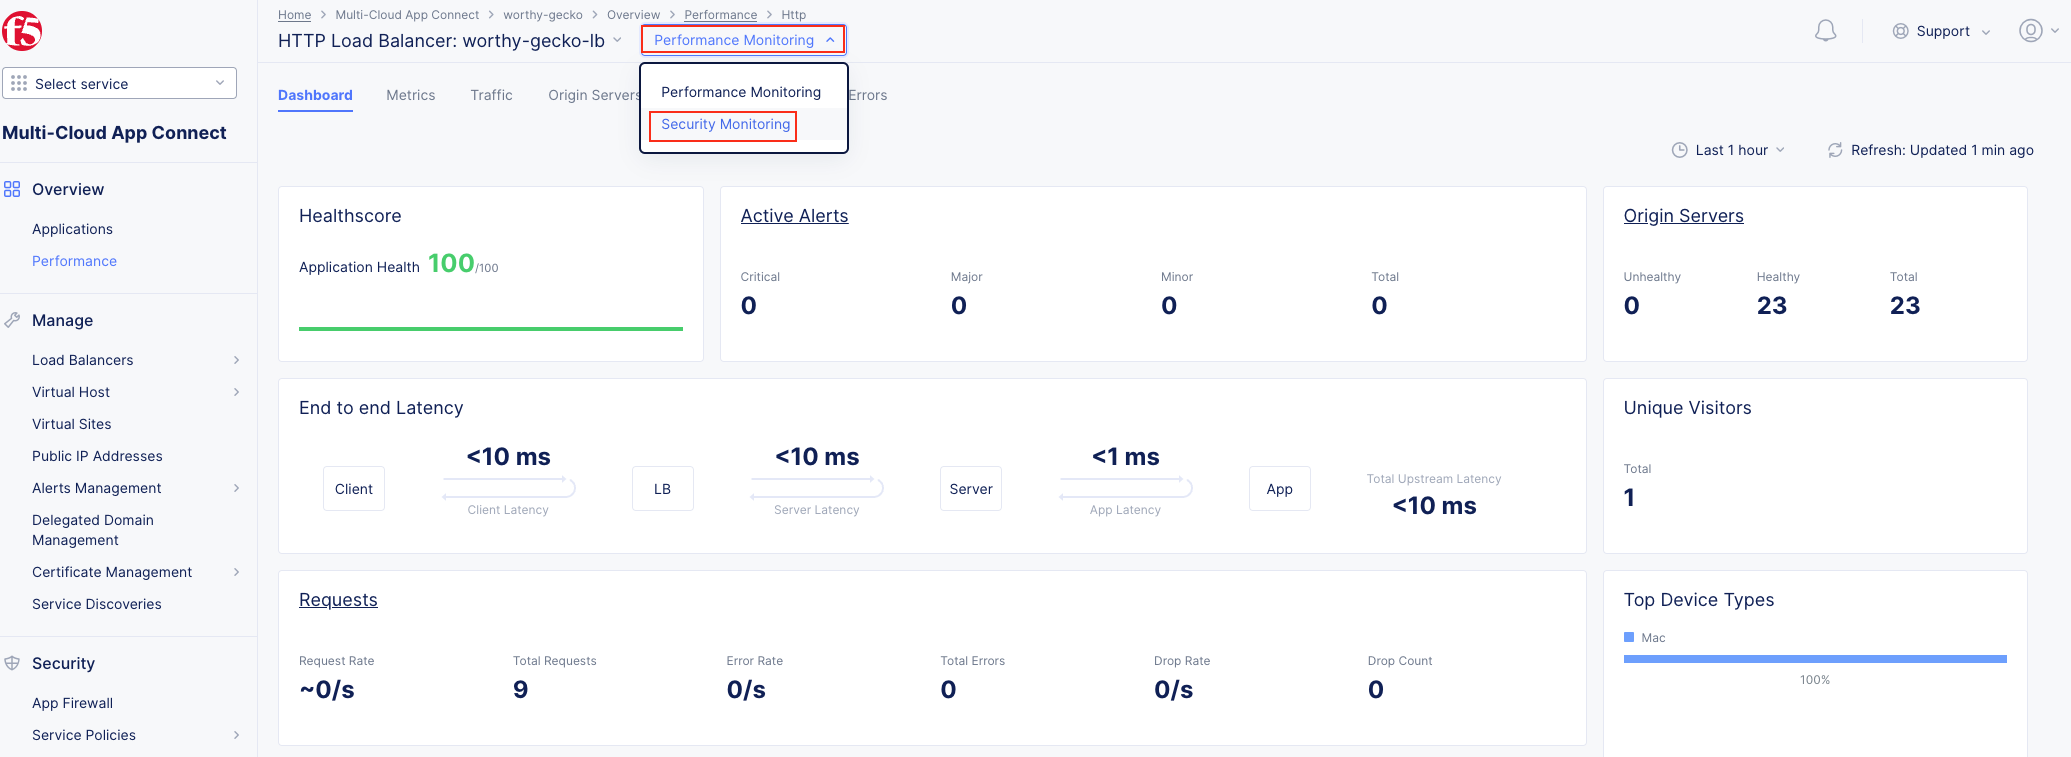
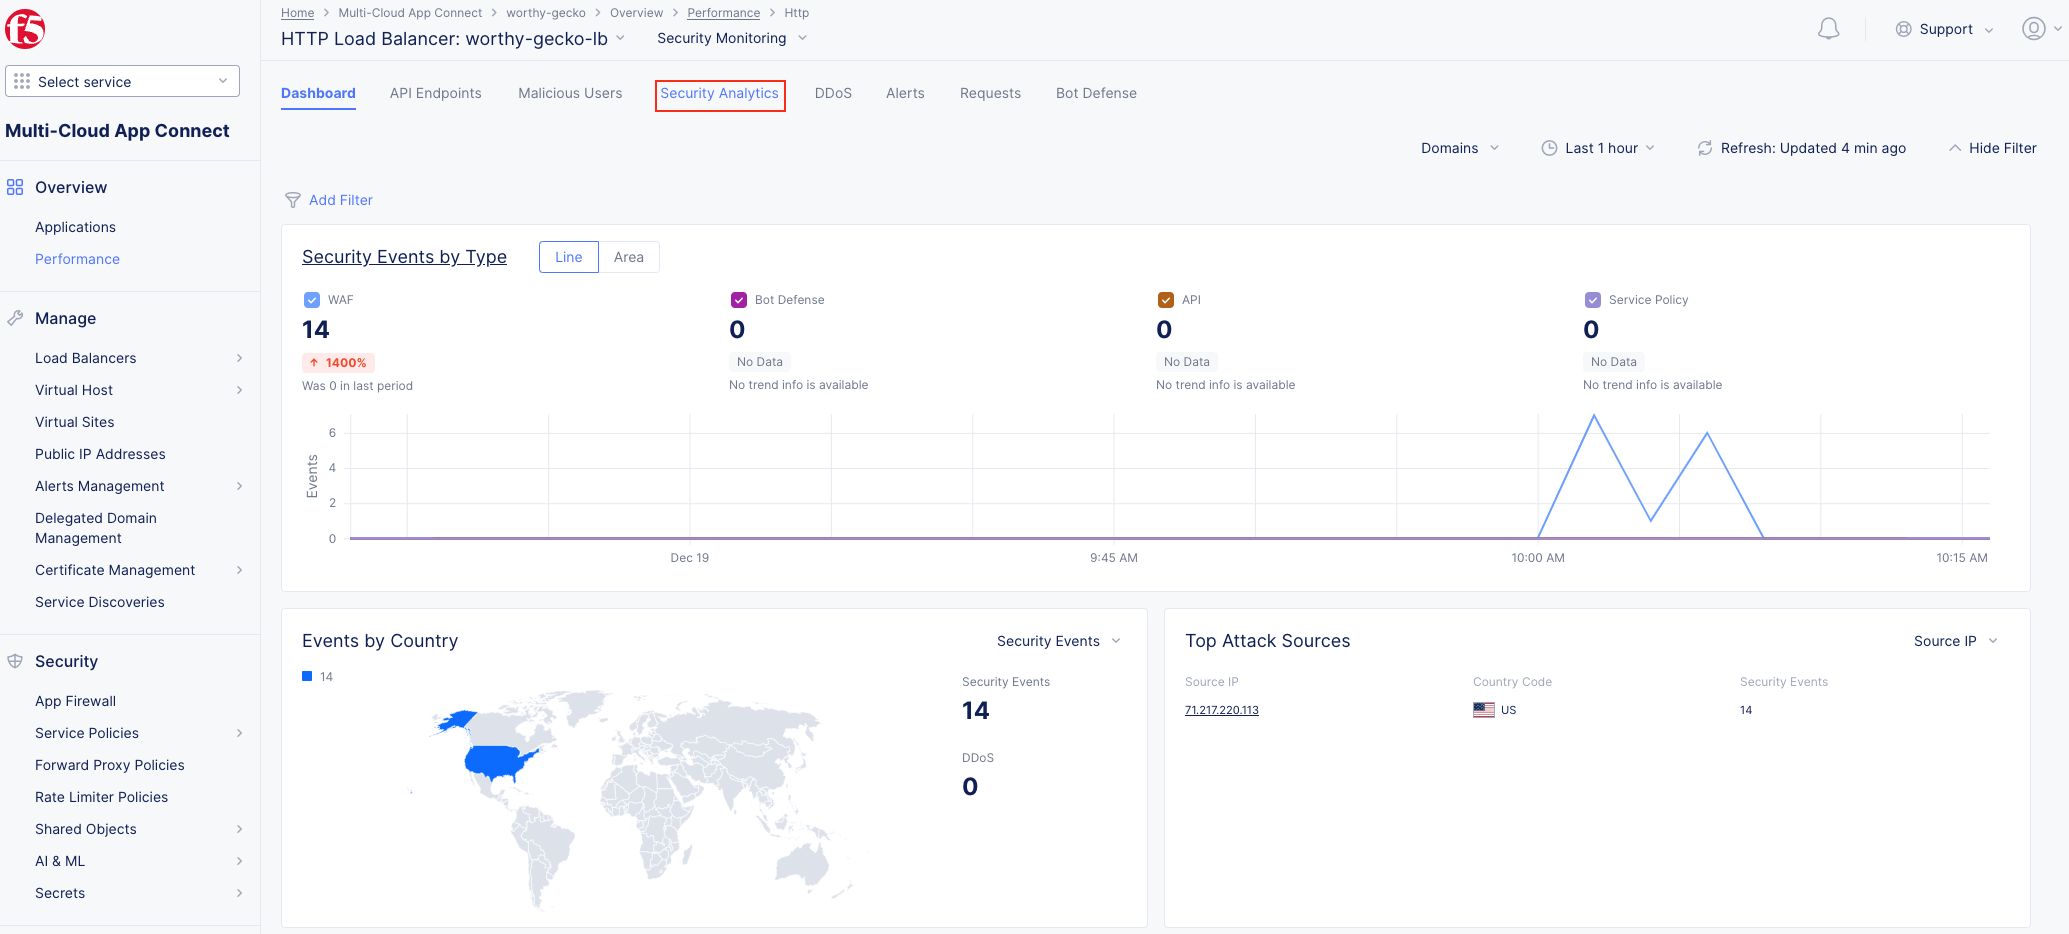
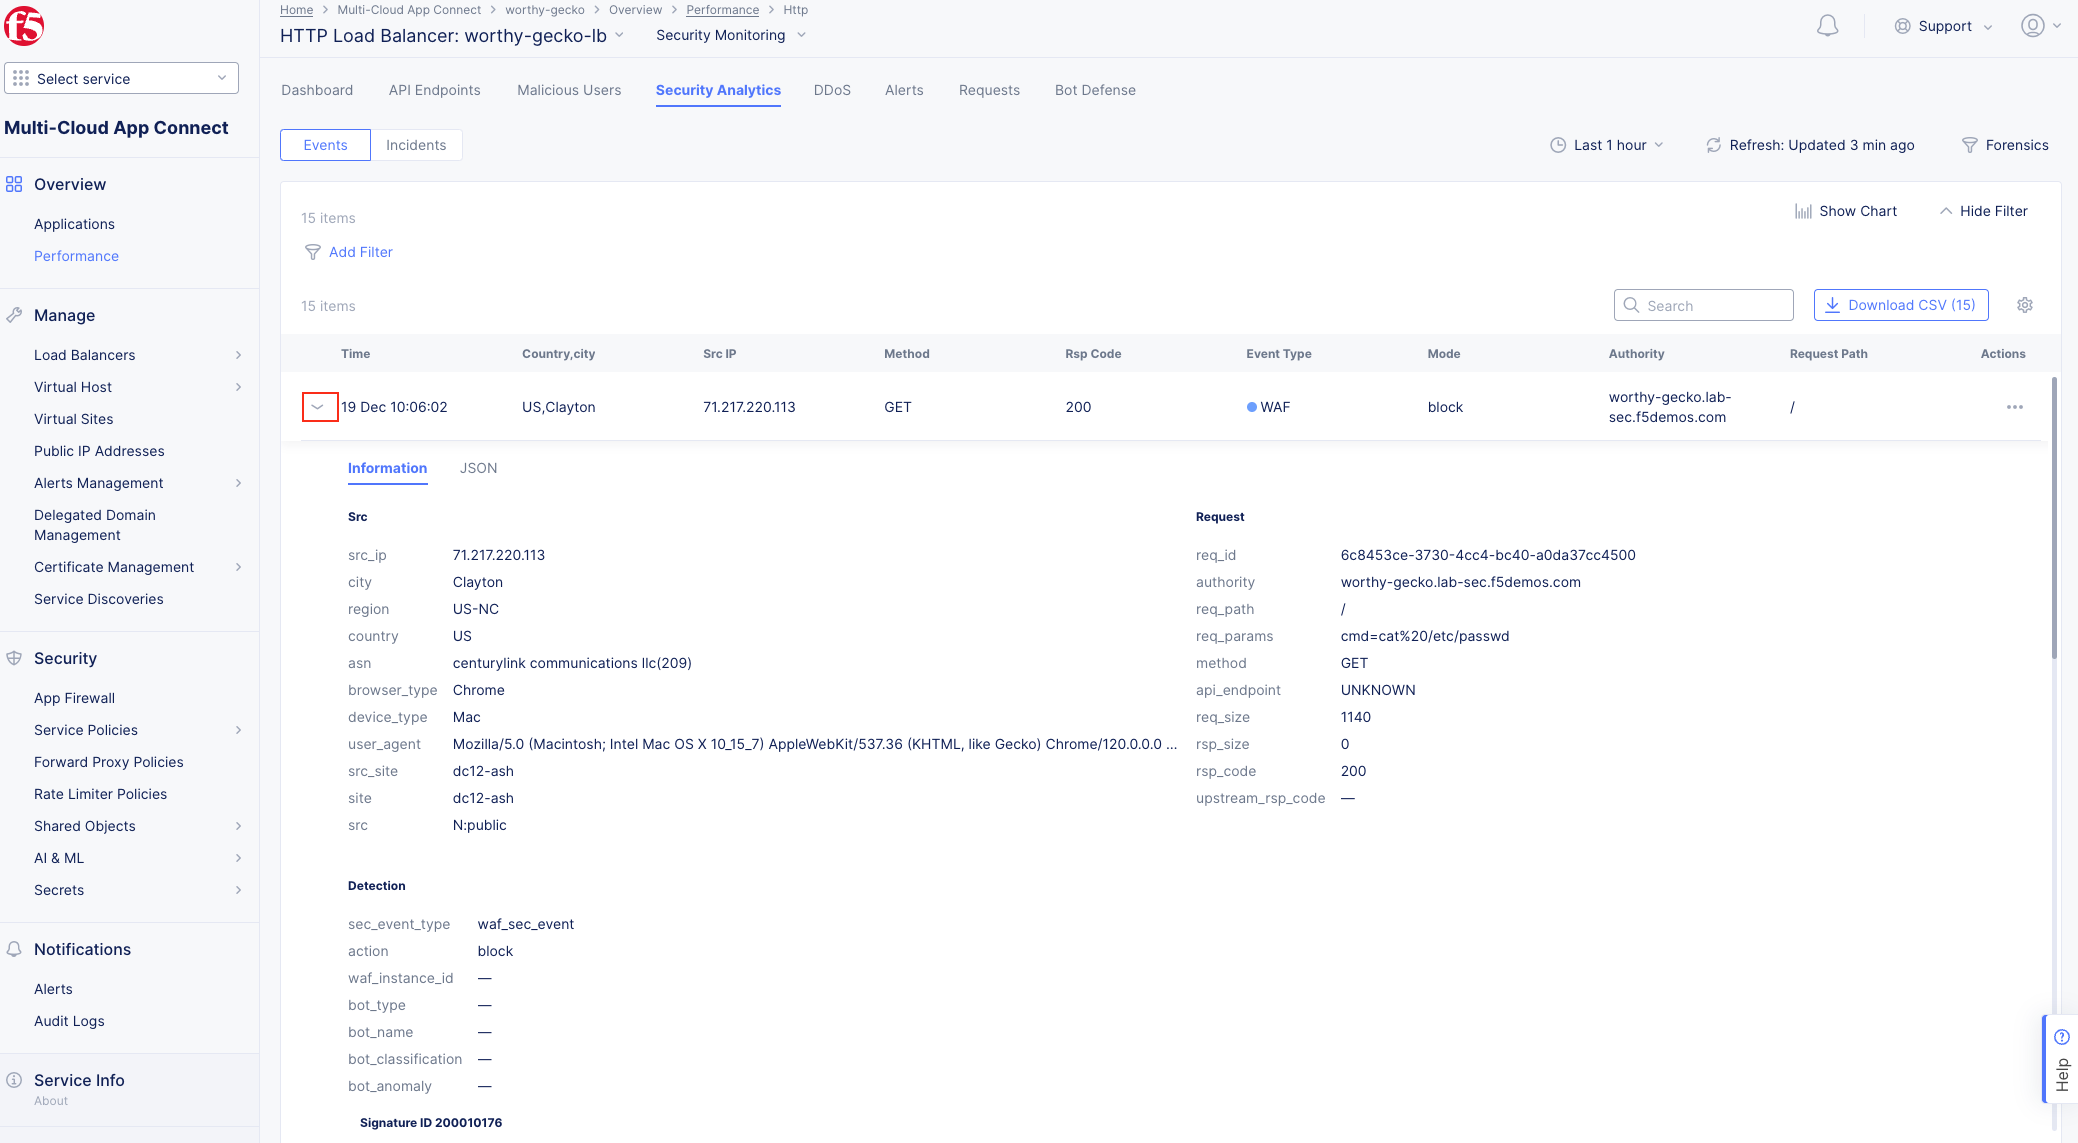
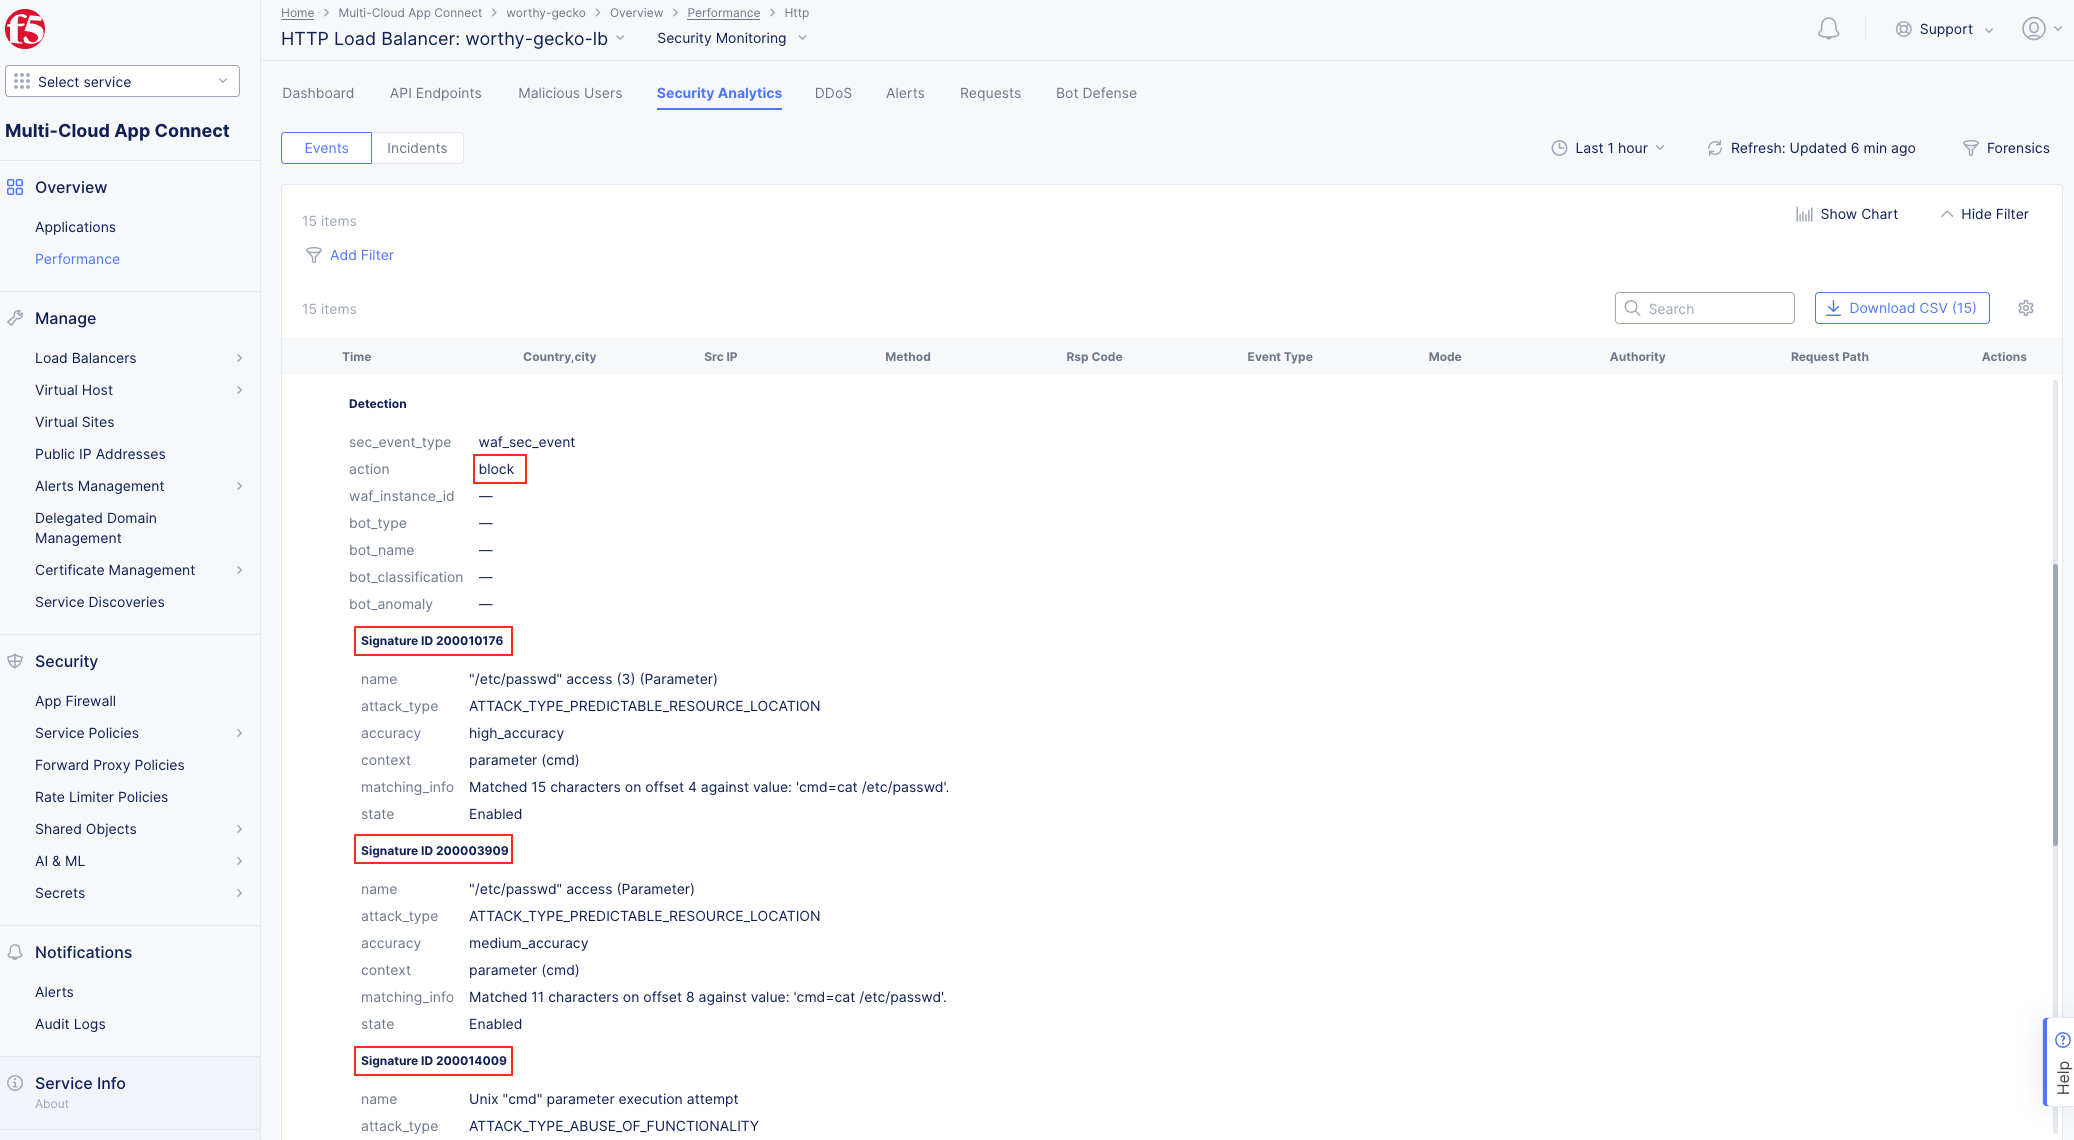
Task 4. Test the Application Firewall and View Security Events
The following steps will test and validate the Web Application Firewall, review the Security
Monitoring dashboard, and gather security event details.
Note The web application firewall is blocking these requests to protect the application. The block page can be customized to provide additional information. |
|

|
|
|
|
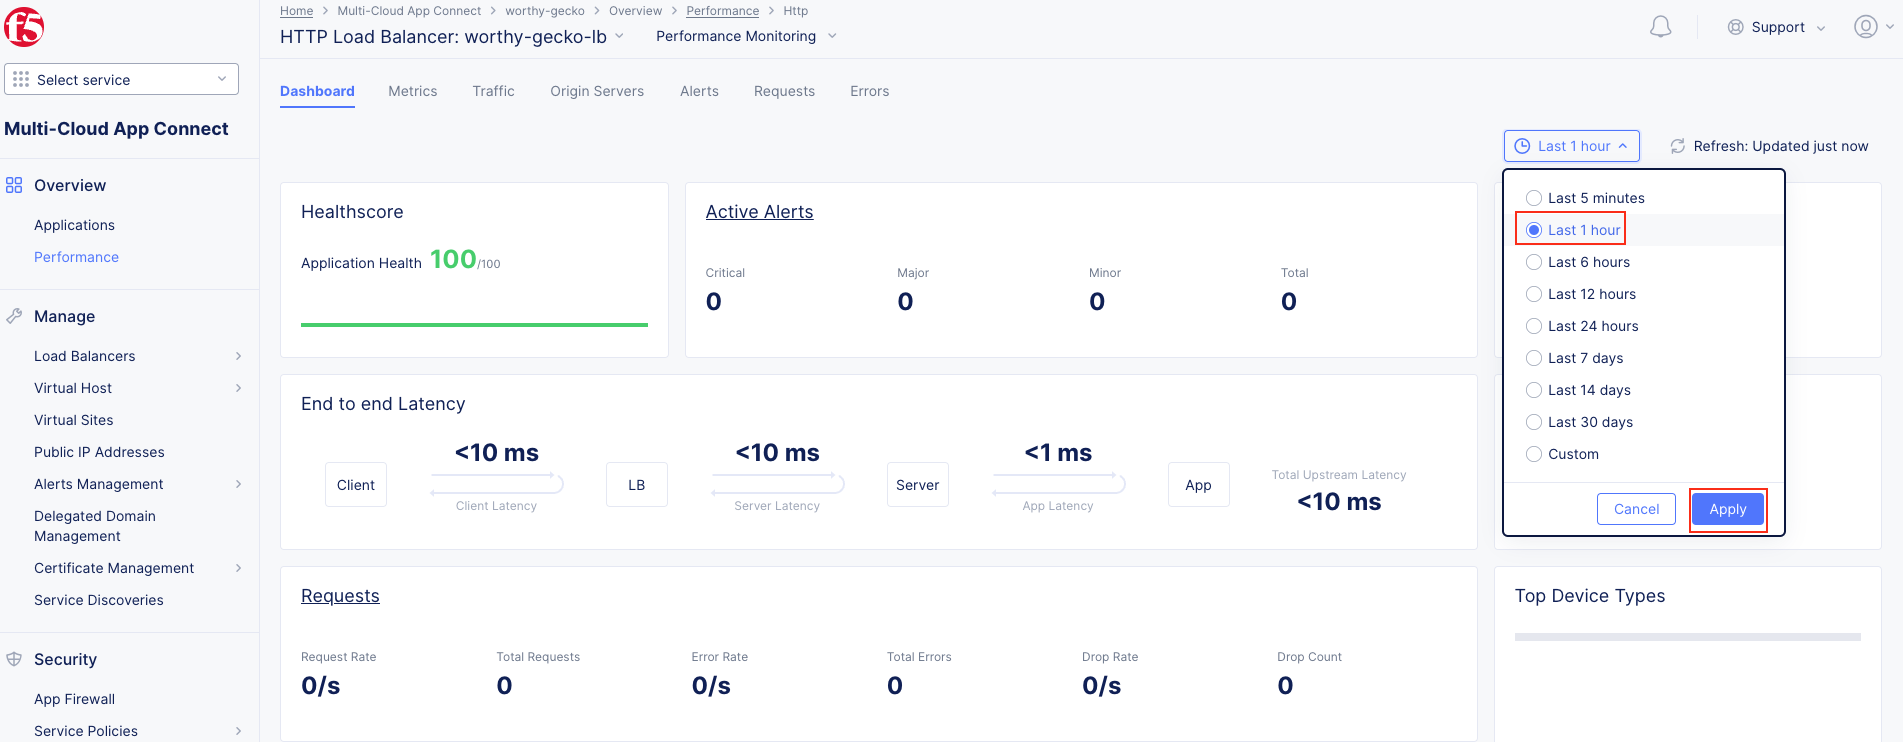
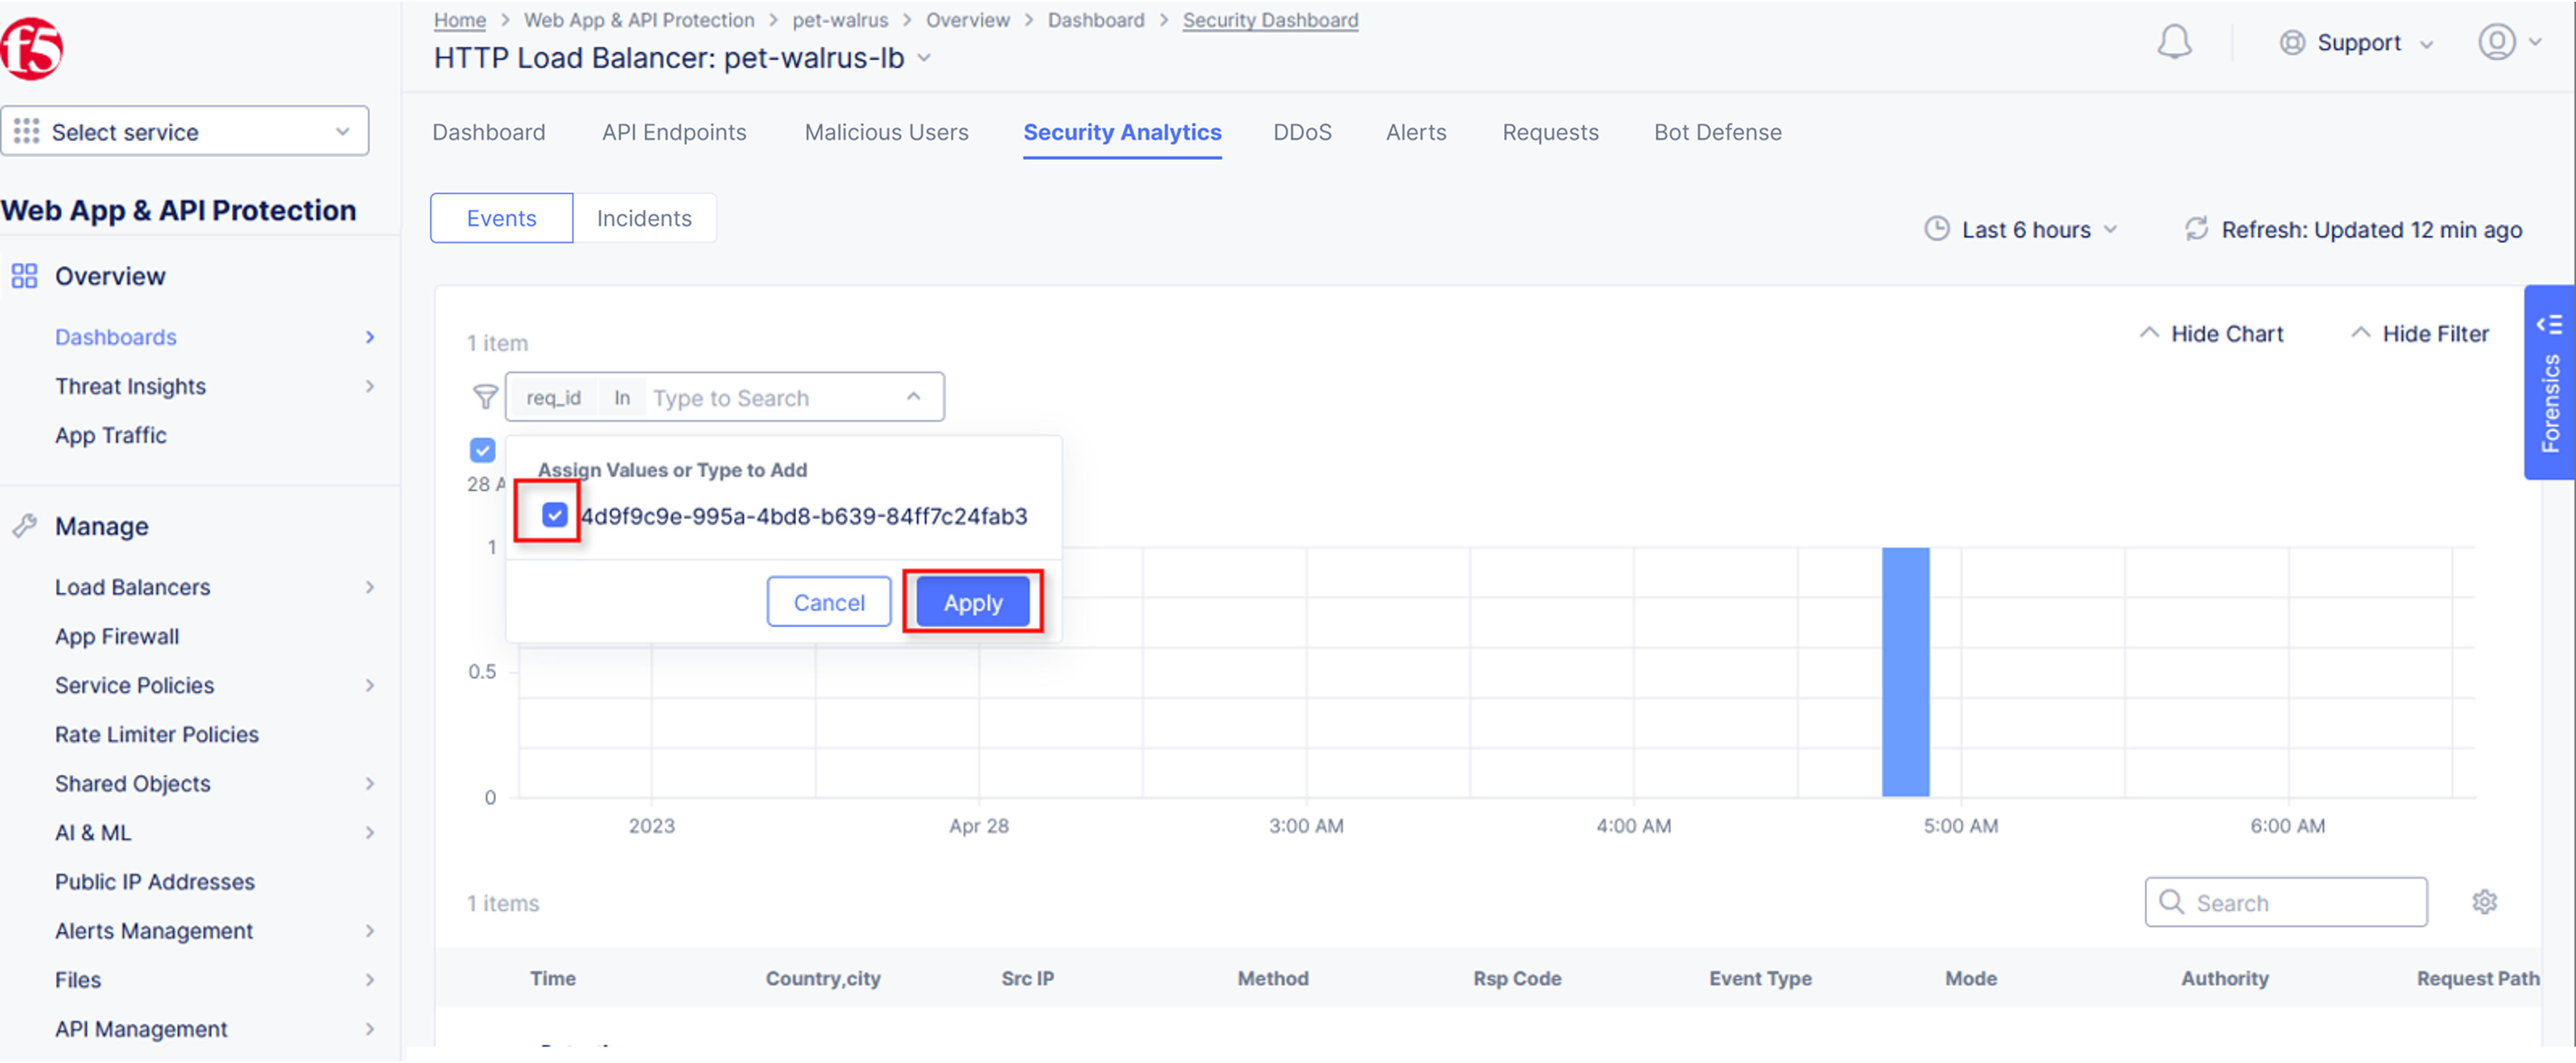
Note If you lost your 1 Hour Filter, re-apply using Task 2: Step 5 |
|

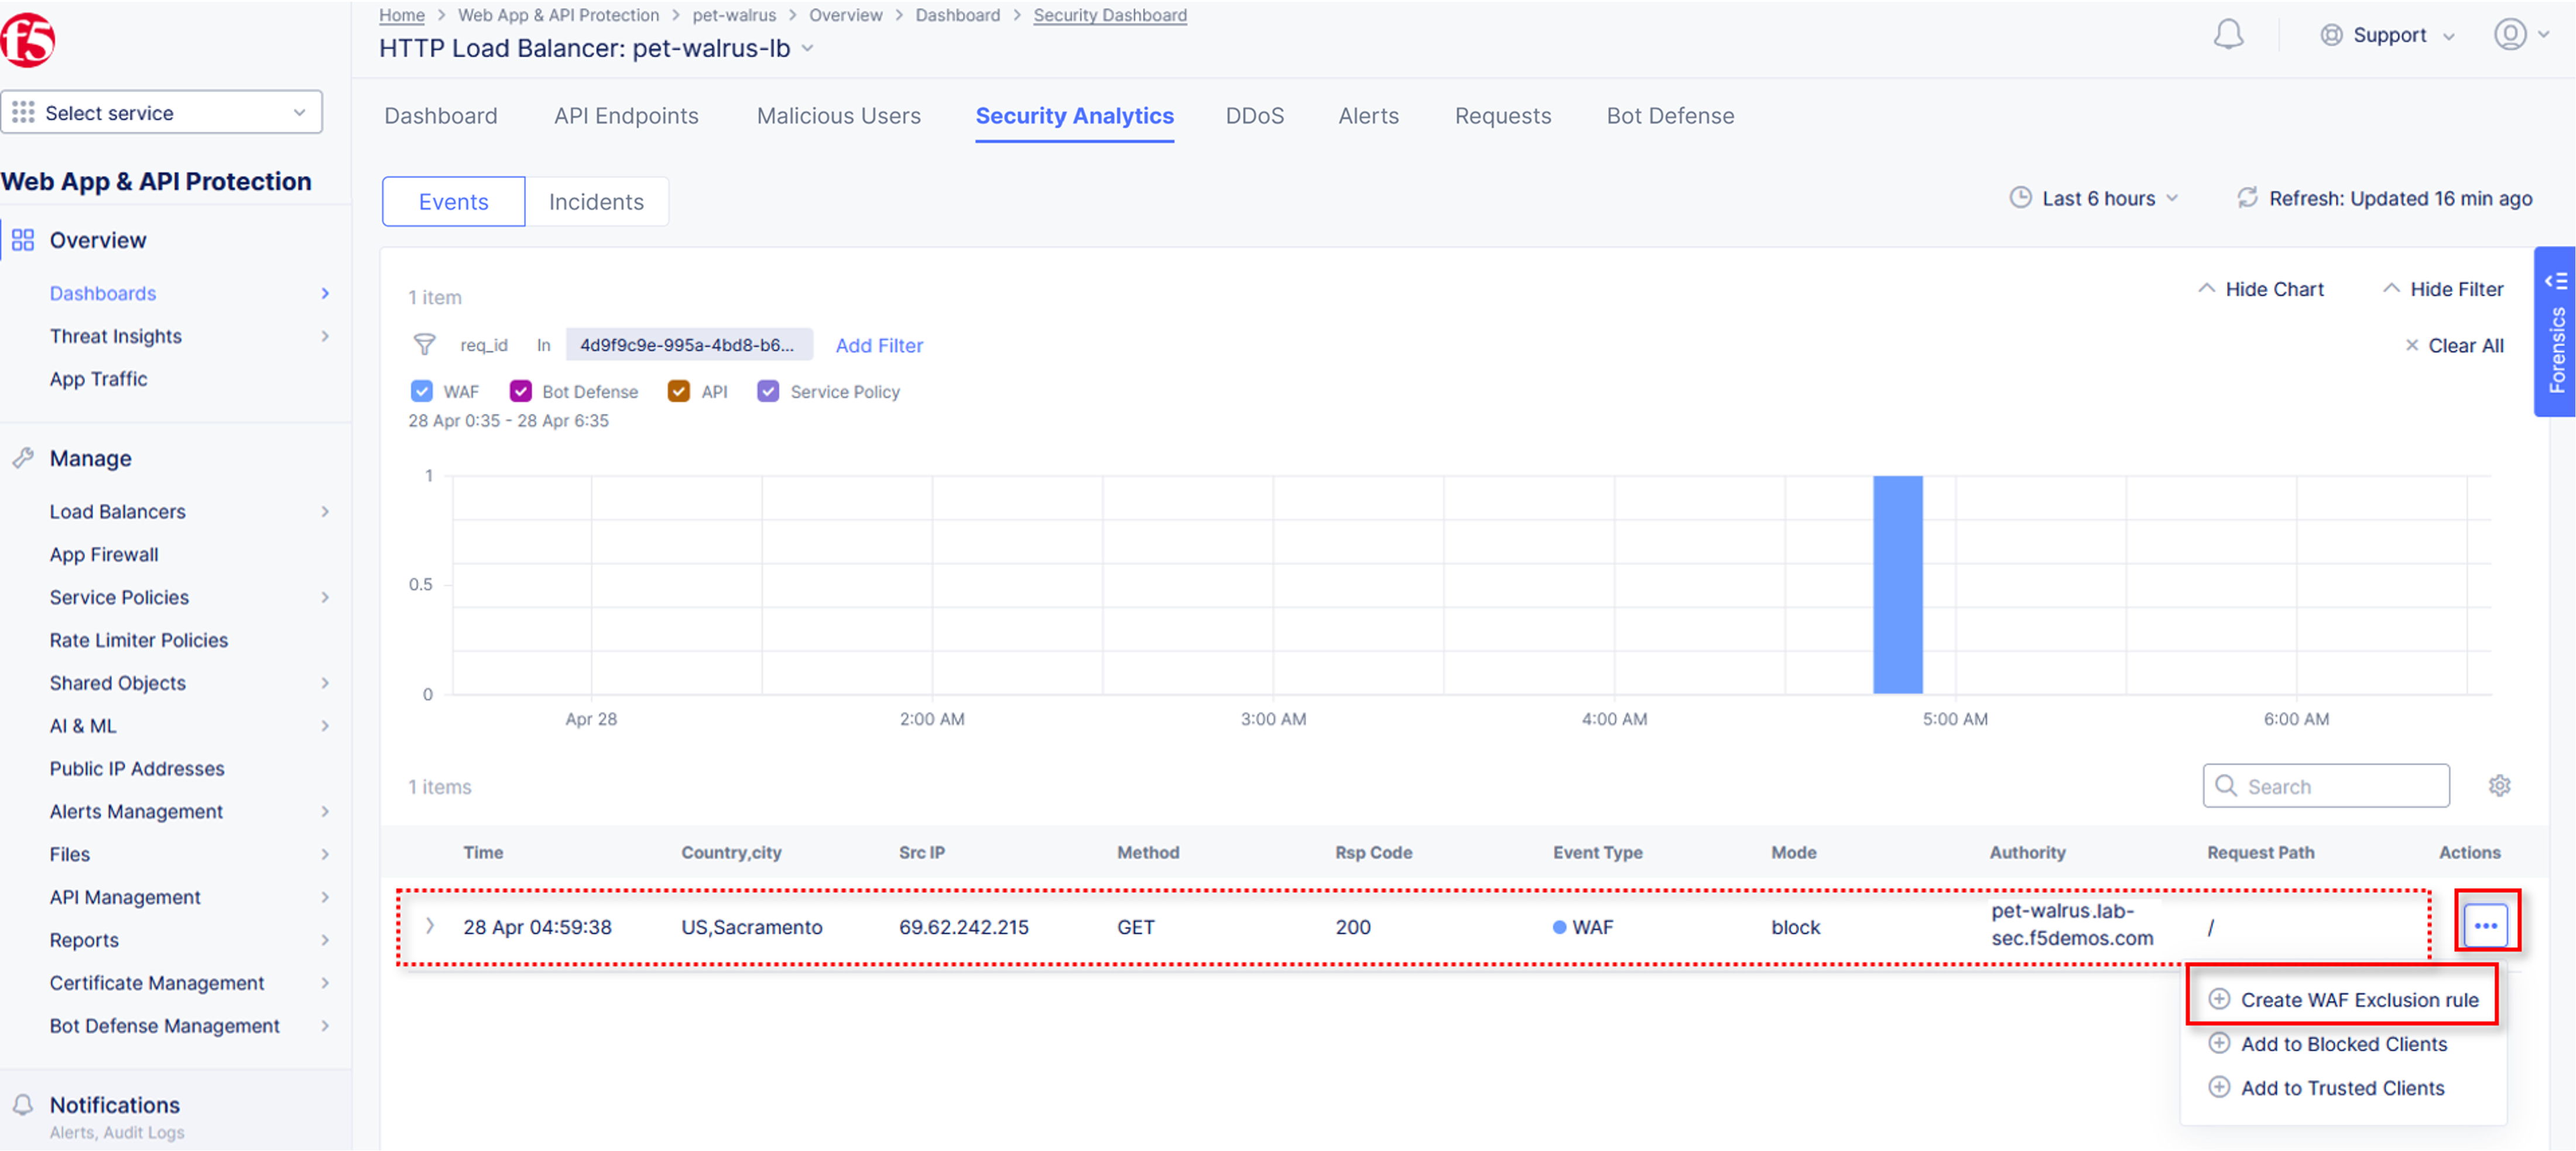
Note Note that Requests have additional detail in JSON format |
|

|
|
End of Lab 1: This concludes Lab 1. In this lab you created an origin pool to connect to the application, you then created a load balancer and associated the origin pool to the load balancer. This allowed the application to be advertised via the F5 Distributed Cloud Global Network. The Distributed Cloud Console was then used to review telemetry data gathered for the application. Next an Application Firewall policy was assigned to protect the application. Finally a sample attack was run against the application and the security event data was reviewed within the Distributed Cloud Console. |
|