F5 Identity and Access Management Solutions > 300 Series: Advanced Use Cases & Solutions Source | Edit on
Lab 2: Deploy PUA Alternate Webtop
Overview
In this lab, we will focus on configuring and testing an ALT webtop with F5 APM (Access Policy Manager).
The ALT webtop creates a single tile (webtop link), that launches a portal containing more endpoints specified from a .csv configuration file. This will allow us to configure multiple endpoints faster and more efficiently.
We will also leverage the Smartcard Client Authentication (created in Lab 1) for authentication to the webtop.
We will begin the lab by adding the .csv file as a resource and deploying the ALT webtop. Next, we will need to update the Access Policy to include the new ALT webtop tile (webtop link) to the webtop.
This lab will commence with testing and validating user access.
Expected time to complete: 15 minutes
Note
This is an add-on playbook that works with an existing PUA deployment (such as Lab 1: Deploy PUA with Client Certificate Authentication)
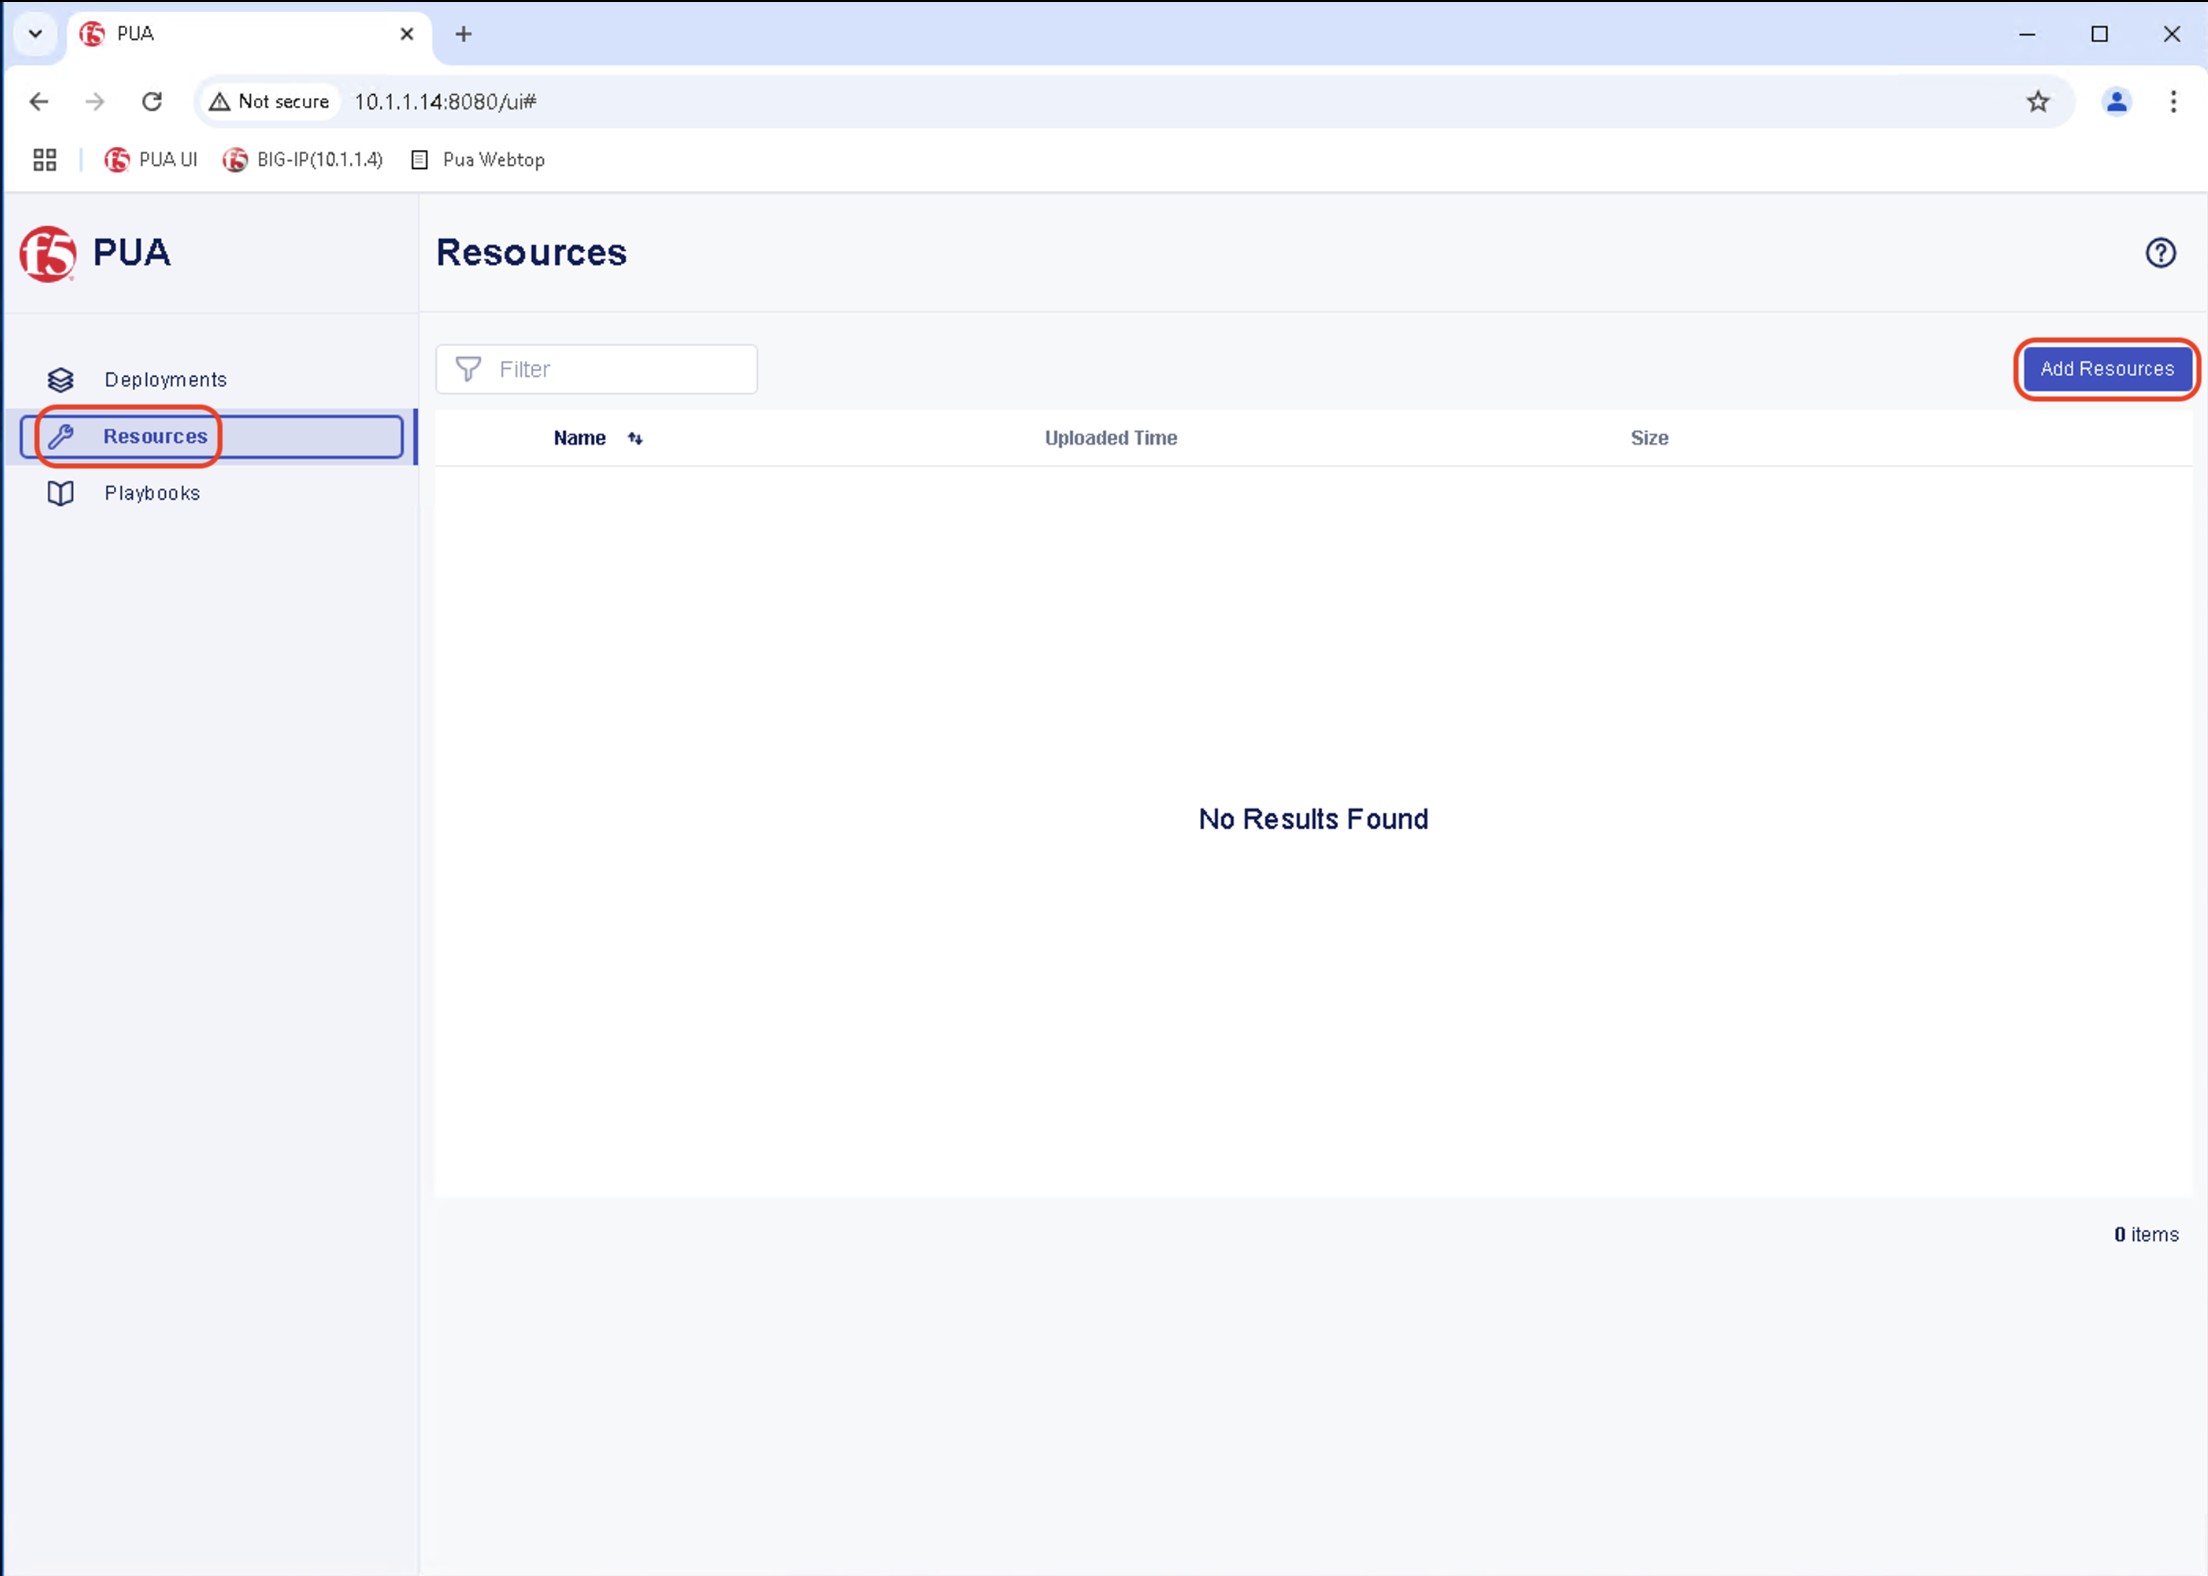
Add PUA Ressources
Task 1 - Add Ressource
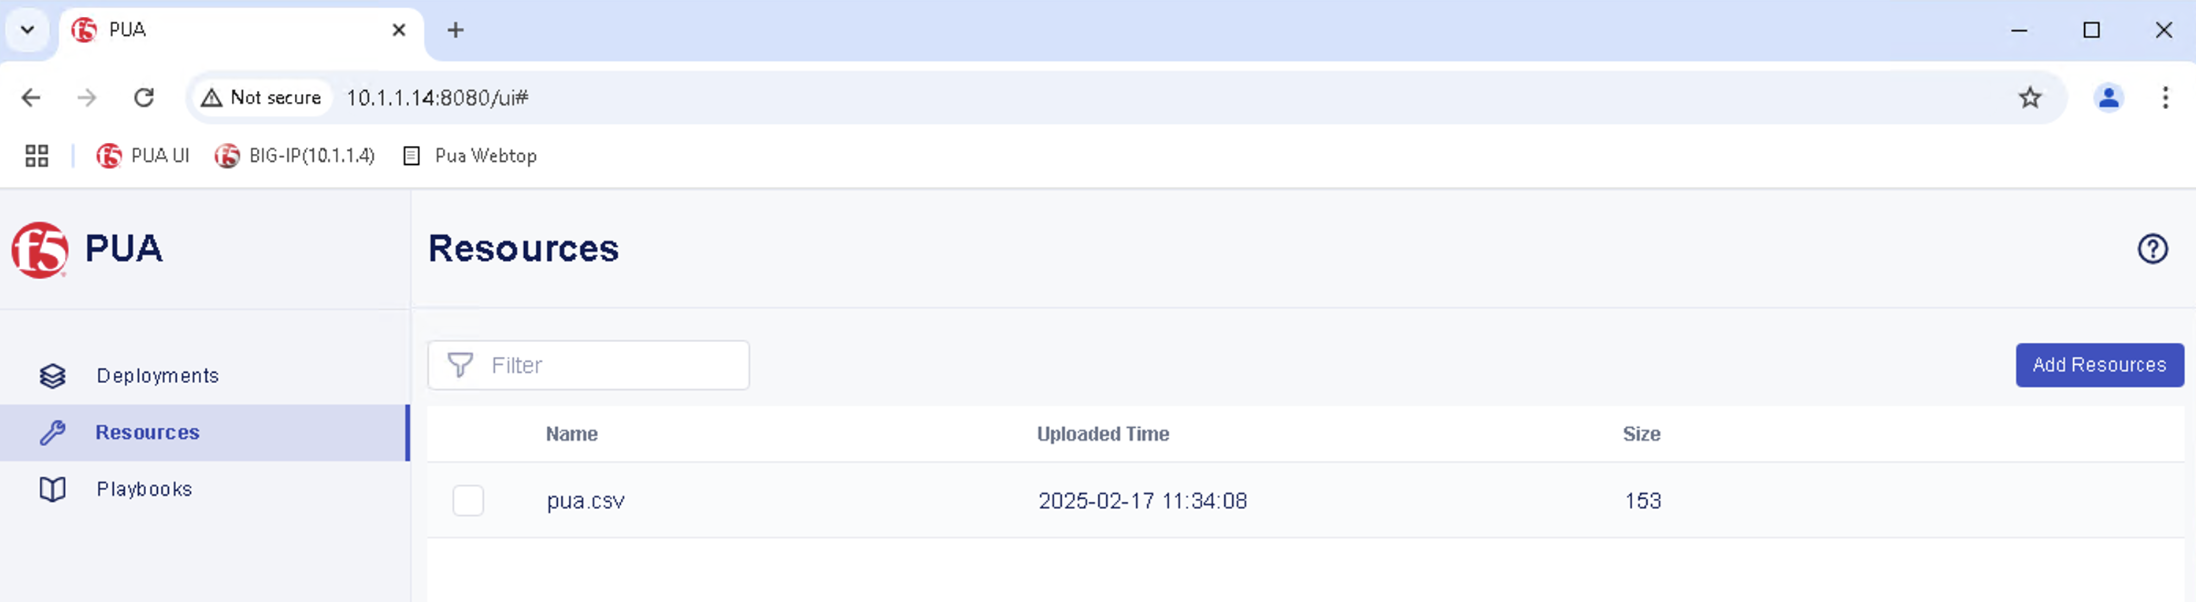
In PUA UI, Click Ressources in left hand navigation bar and in the main panel, Click Add Ressource button.
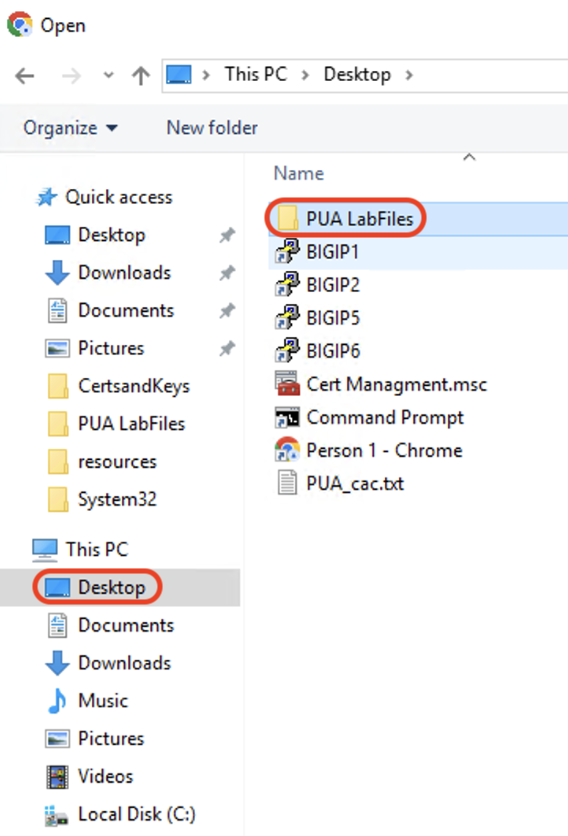
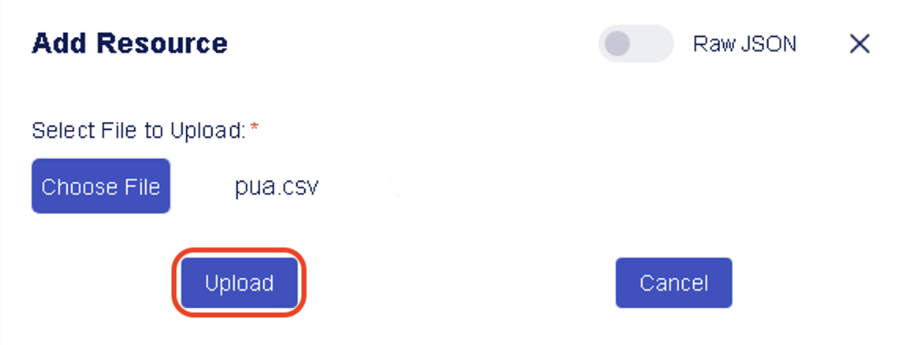
In the resulting window, click Choose File button.

In the File explorer that window, Under This PC select Desktop and double click on PUA LabFiles
Select pua.csv file and click Open
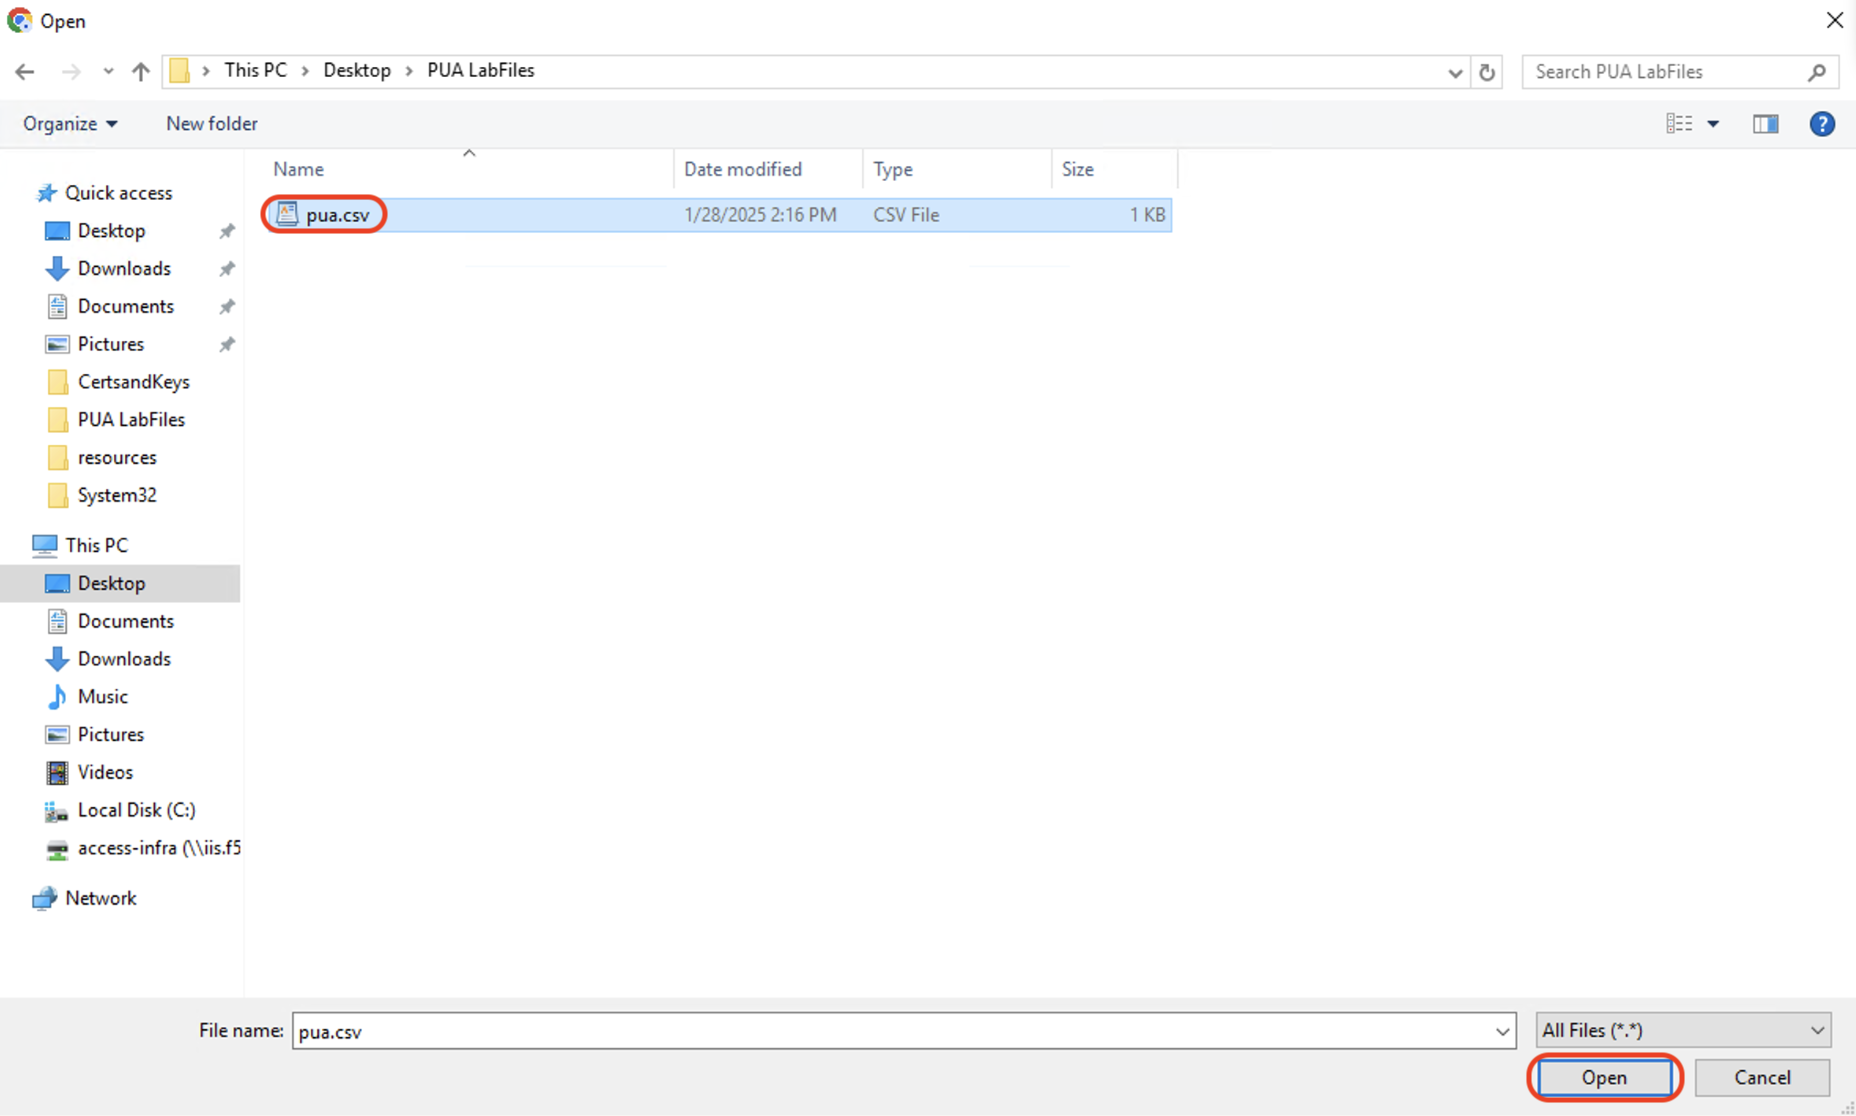
Click Upload
Confirm pua.csv is listed in Ressources table.
Warning
If you don’t see the pua.csv in PUA UI Ressources go back to Task 1 - Add Ressource.
Deploy PUA ALT Webtop
Task 1 - Add Deployment
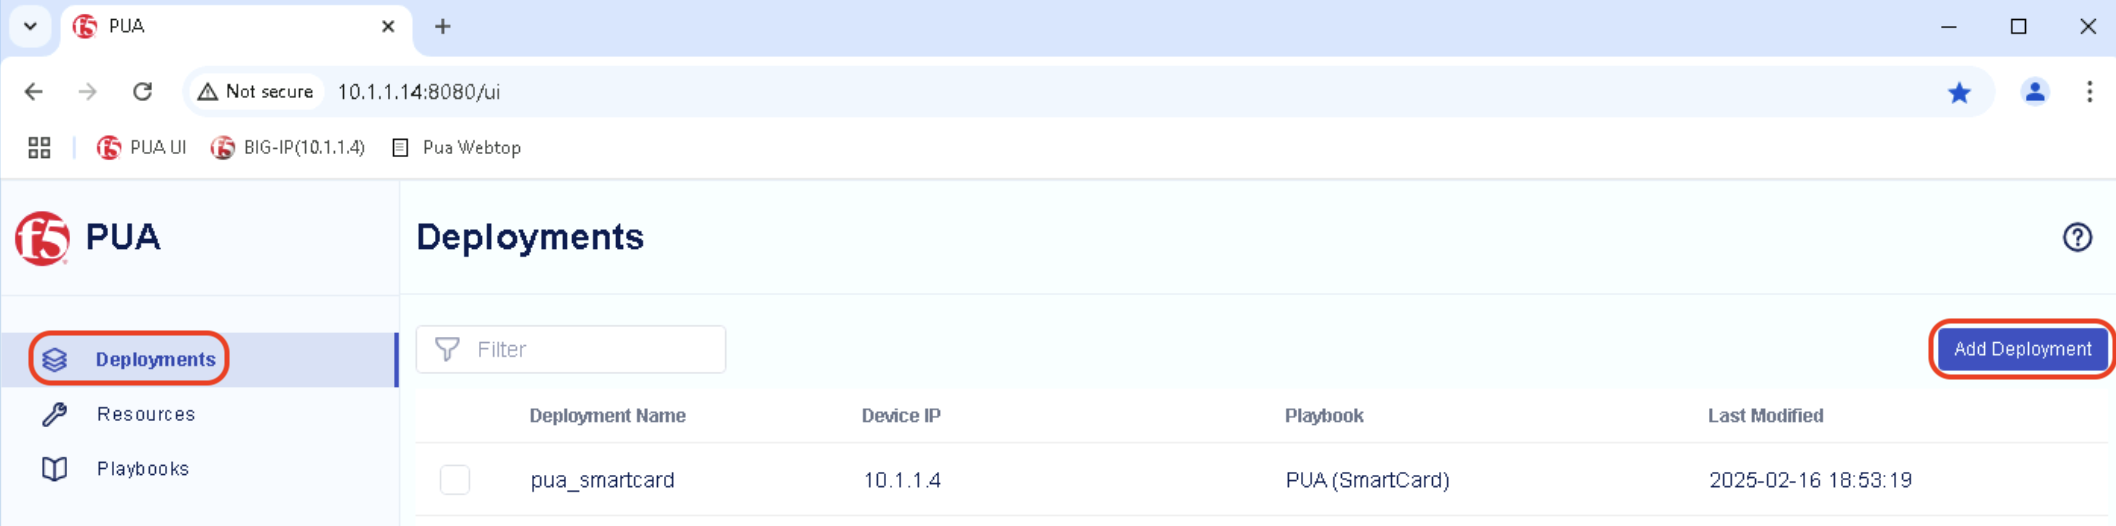
In PUA UI, Click Deployments in left hand navigation bar and in the main panel, Click Add Deployment button.
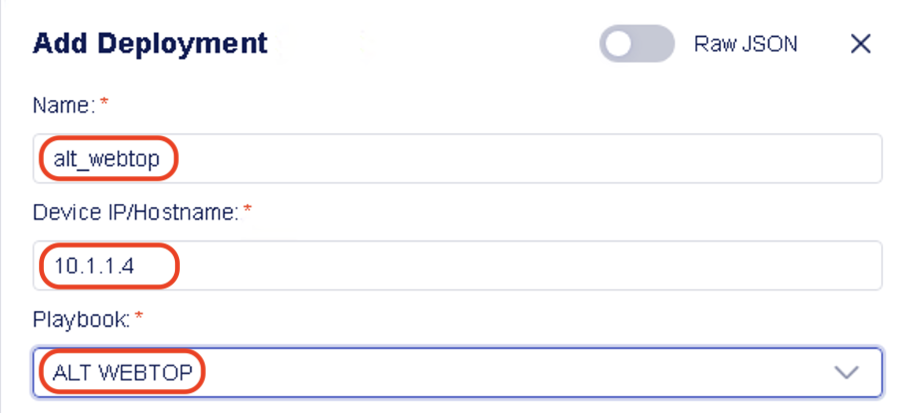
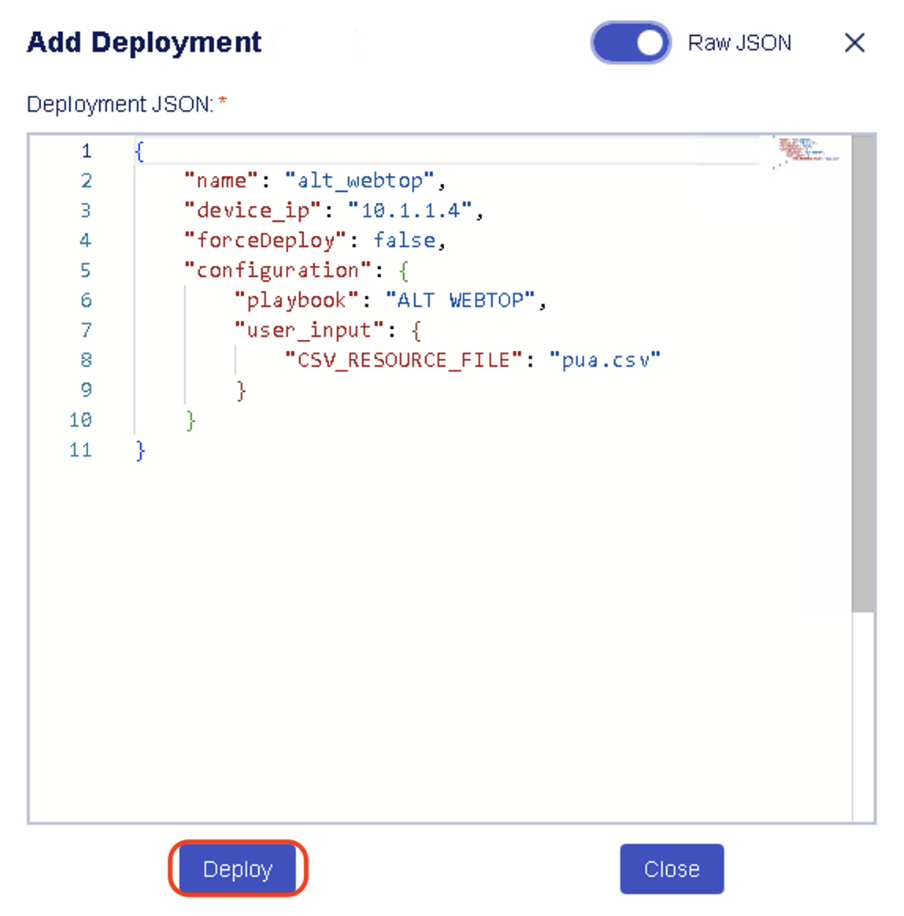
In the resulting window, enter the following data:
- Add Deployment
- Name : alt_webtop
- Device IP/Hostname : 10.1.1.4
- Playbook: ALT WEBTOP
Task 2 - Enter Deployment details
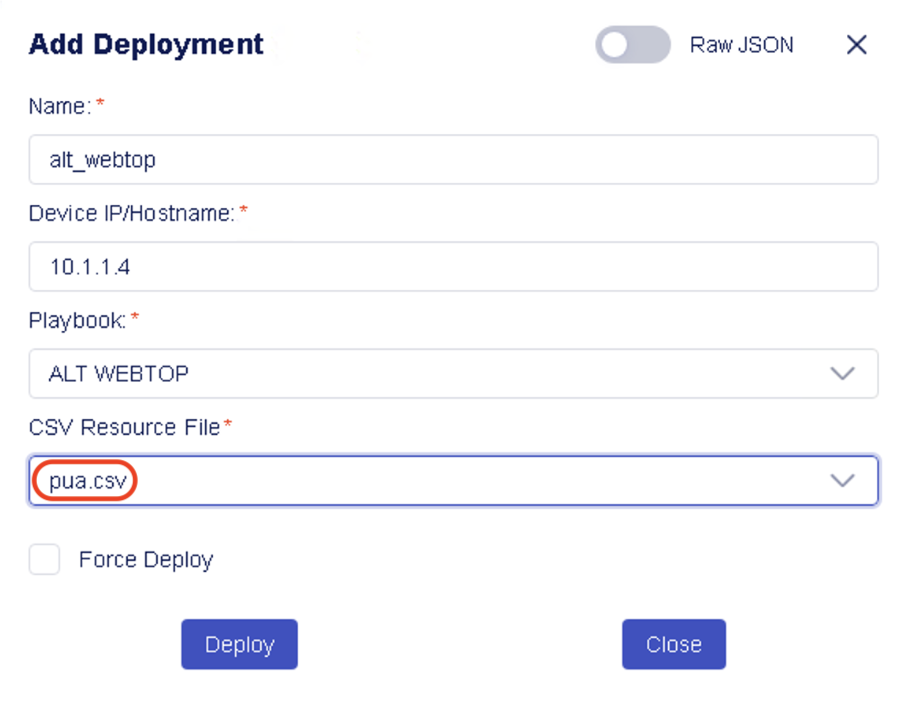
- When the ALT WEBTOP playbook is selected, the editor values are updated to show the following inputs (Enter the associated values as specified below)
- Add Deployment
- CSV Ressource File: pua.csv
Note
You can also switch to Raw JSON input and paste this JSON object to get the input fields populated.

{
   "name": "alt_webtop",
   "device_ip": "10.1.1.4",
   "forceDeploy": false,
   "configuration": {
      "playbook": "ALT WEBTOP",
      "user_input": {
         "CSV_RESOURCE_FILE": "pua.csv"
      }
   }
}
Task 3 - Review Deployment details and Deploy
Review Deployment details and Click Deploy
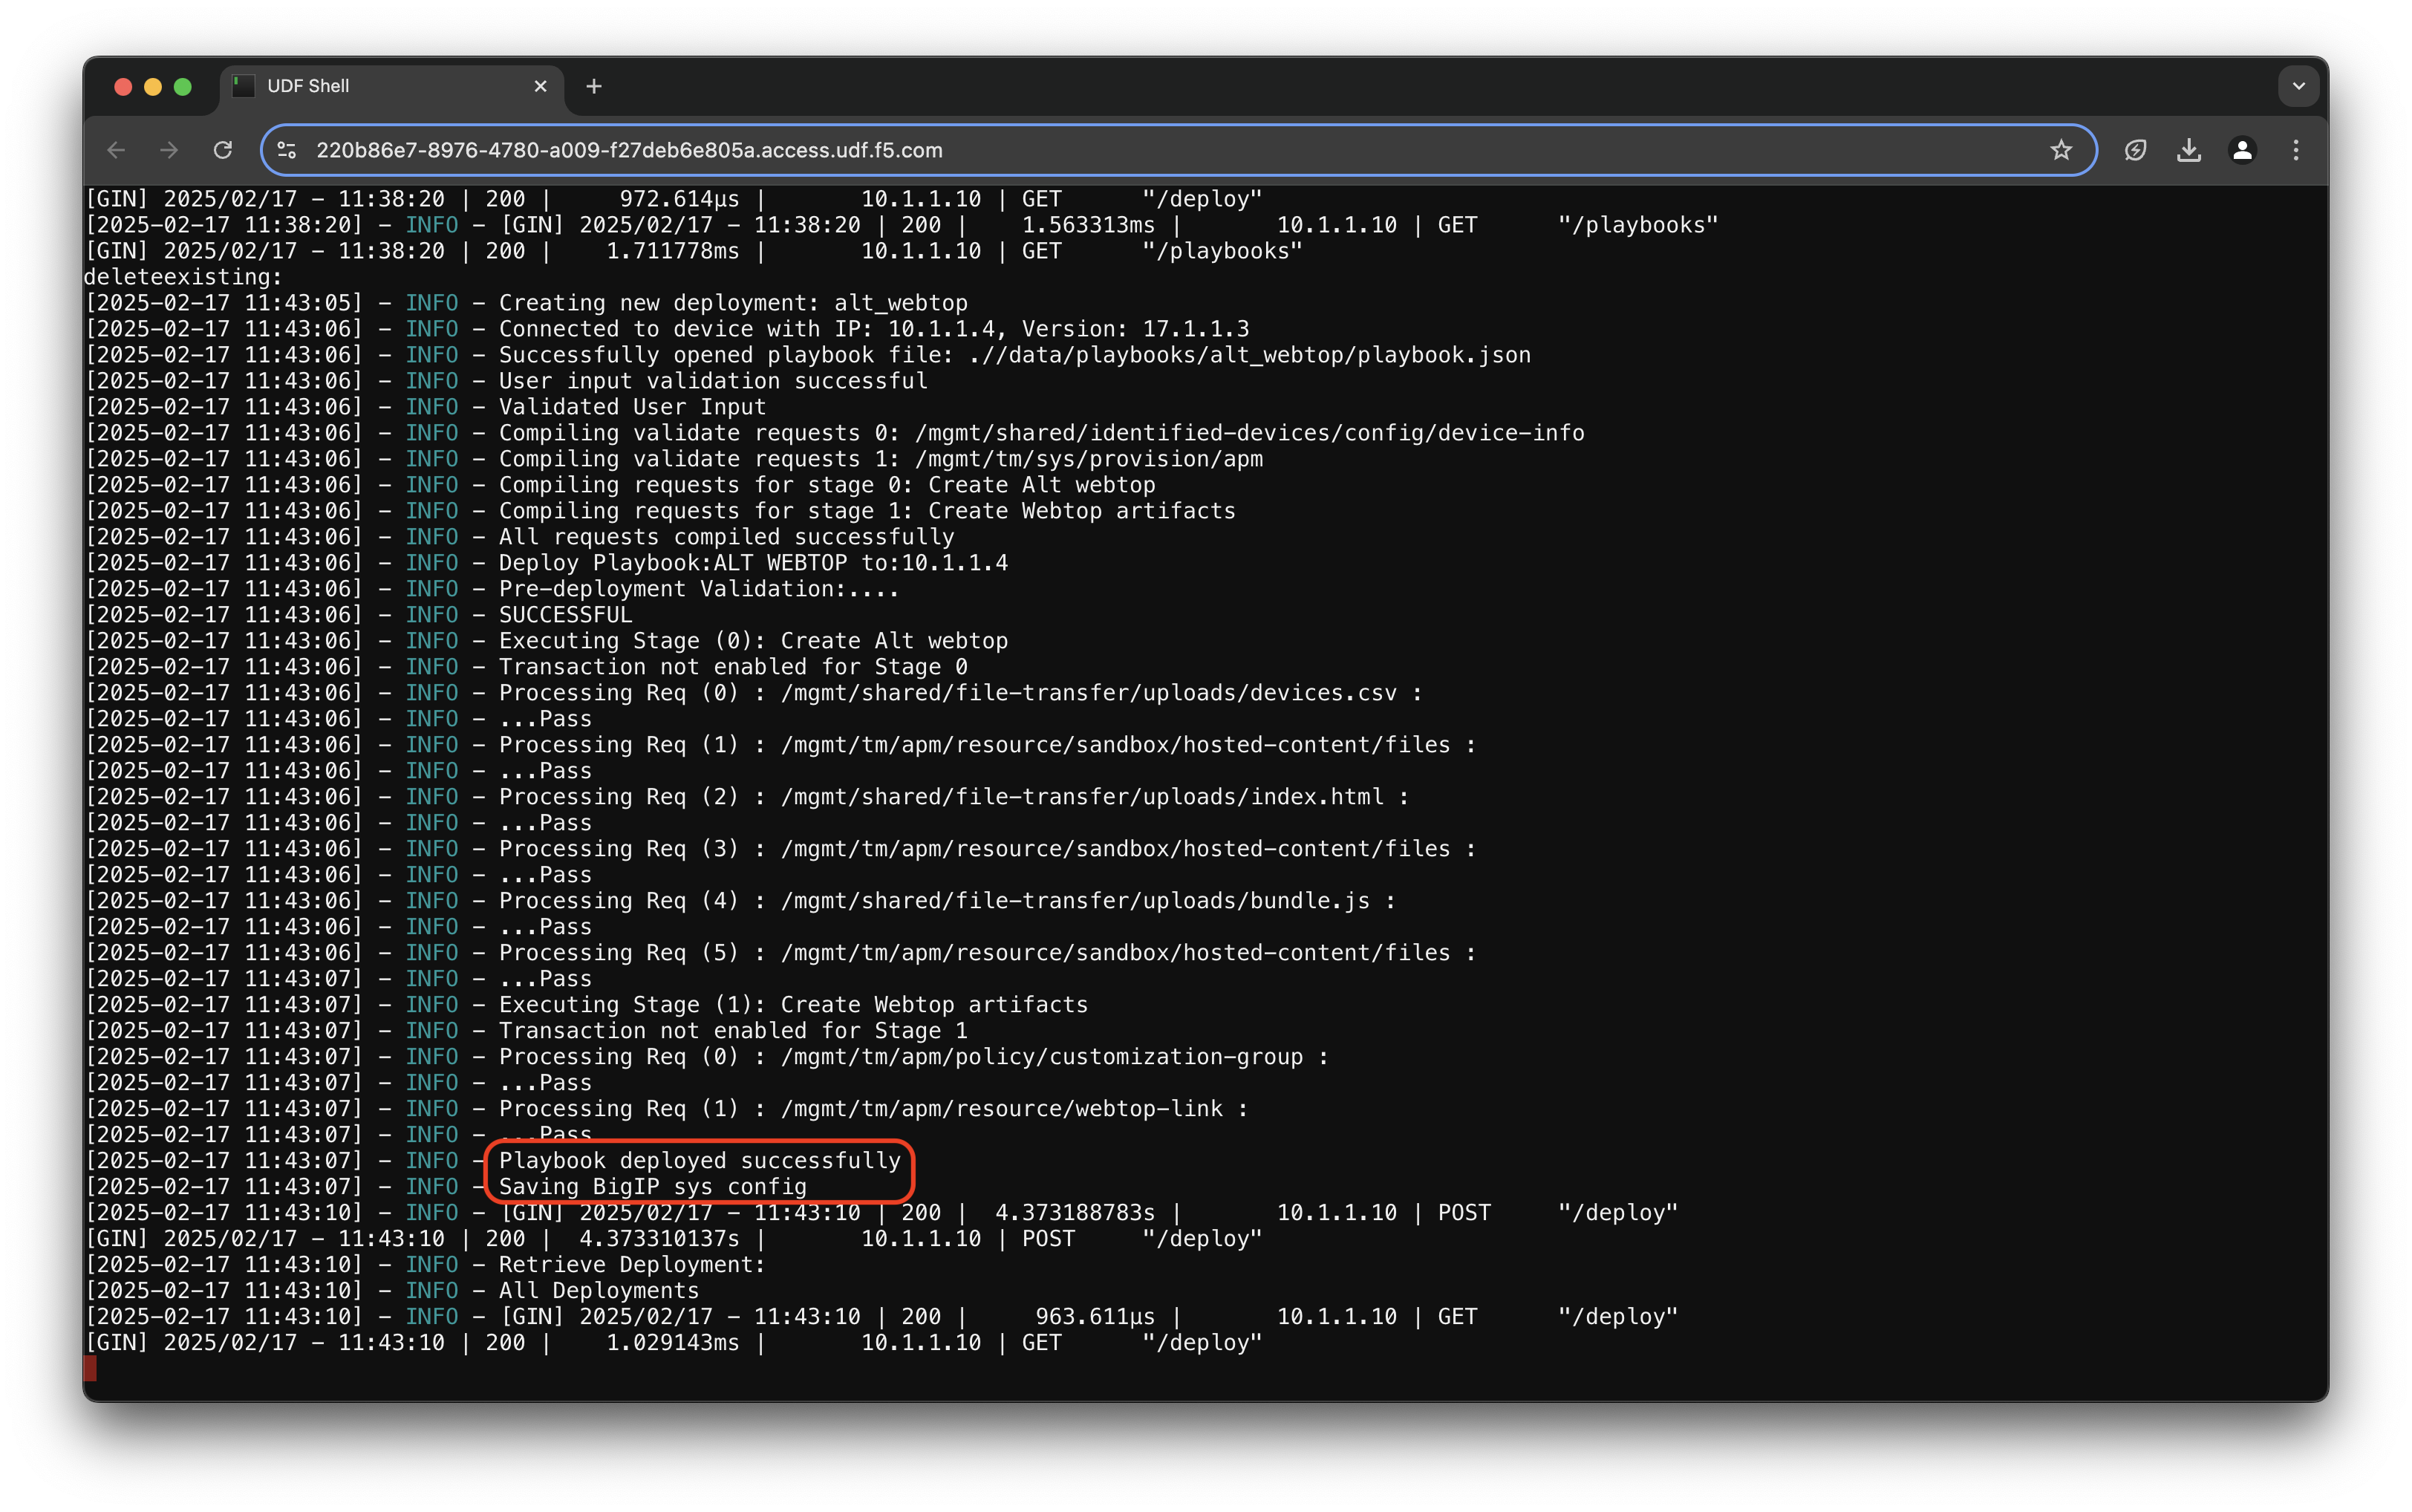
Task 4 - Track Deployment progress
If you go back to the PUA Deploy Agent WebSSH tab in your local browser, you should see the logs generated by the deployment of the PUA ALT WEBTOP Playbook.
Confirm that the deployment is successful by looking for Playbook deployed successfully log.
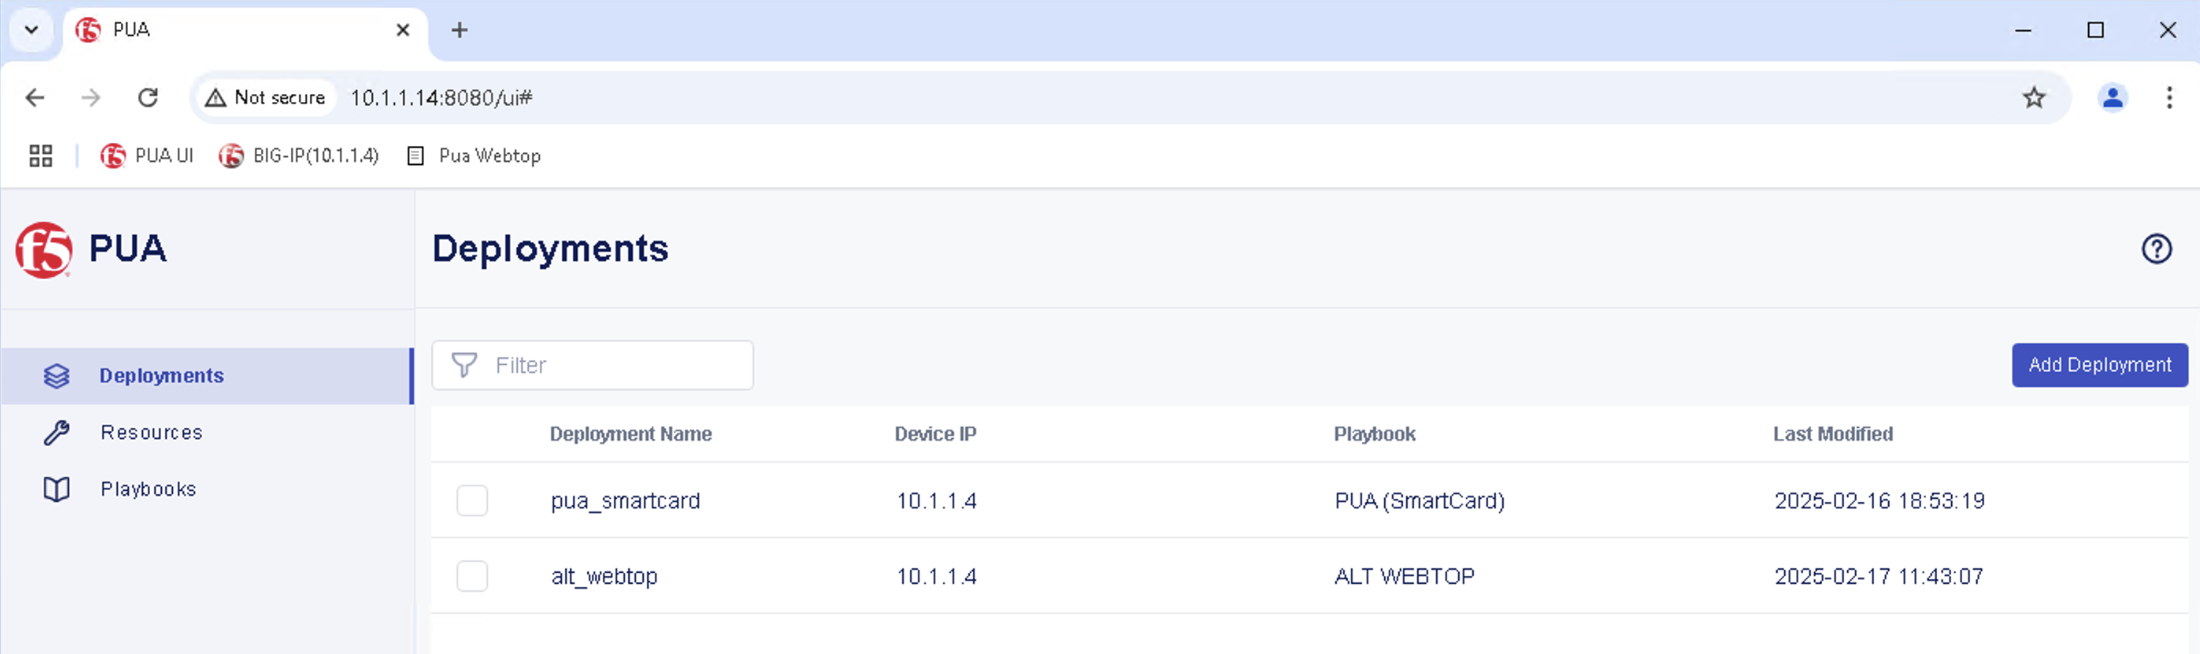
Confirm that alt_webtop is listed in the PUA UI Deployments.
Warning
If you don’t see the Playbook deployed successfully in the logs and the alt_webtop does not appear in PUA UI Deployments go back to Task 2 - Enter Deployment details.
Connect PUA Alternate Webtop to PUA Smartcard
Task 1 - Access BIG-IP 1
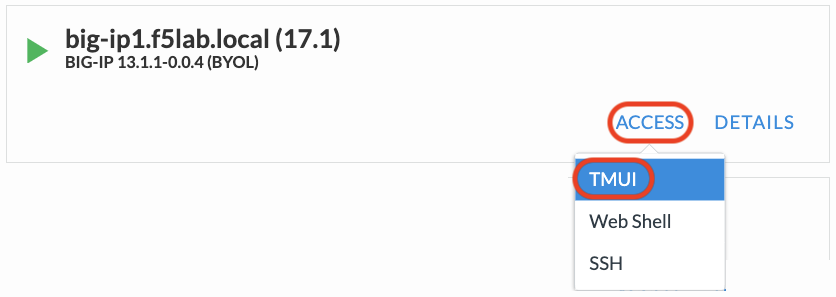
Access BIG-IP 1 TMUI
Click ACCESS next to big-ip1
Select TMUI from the lists
In the new browser Tab, Login with the following credentials:
- User: admin
- Password: admin
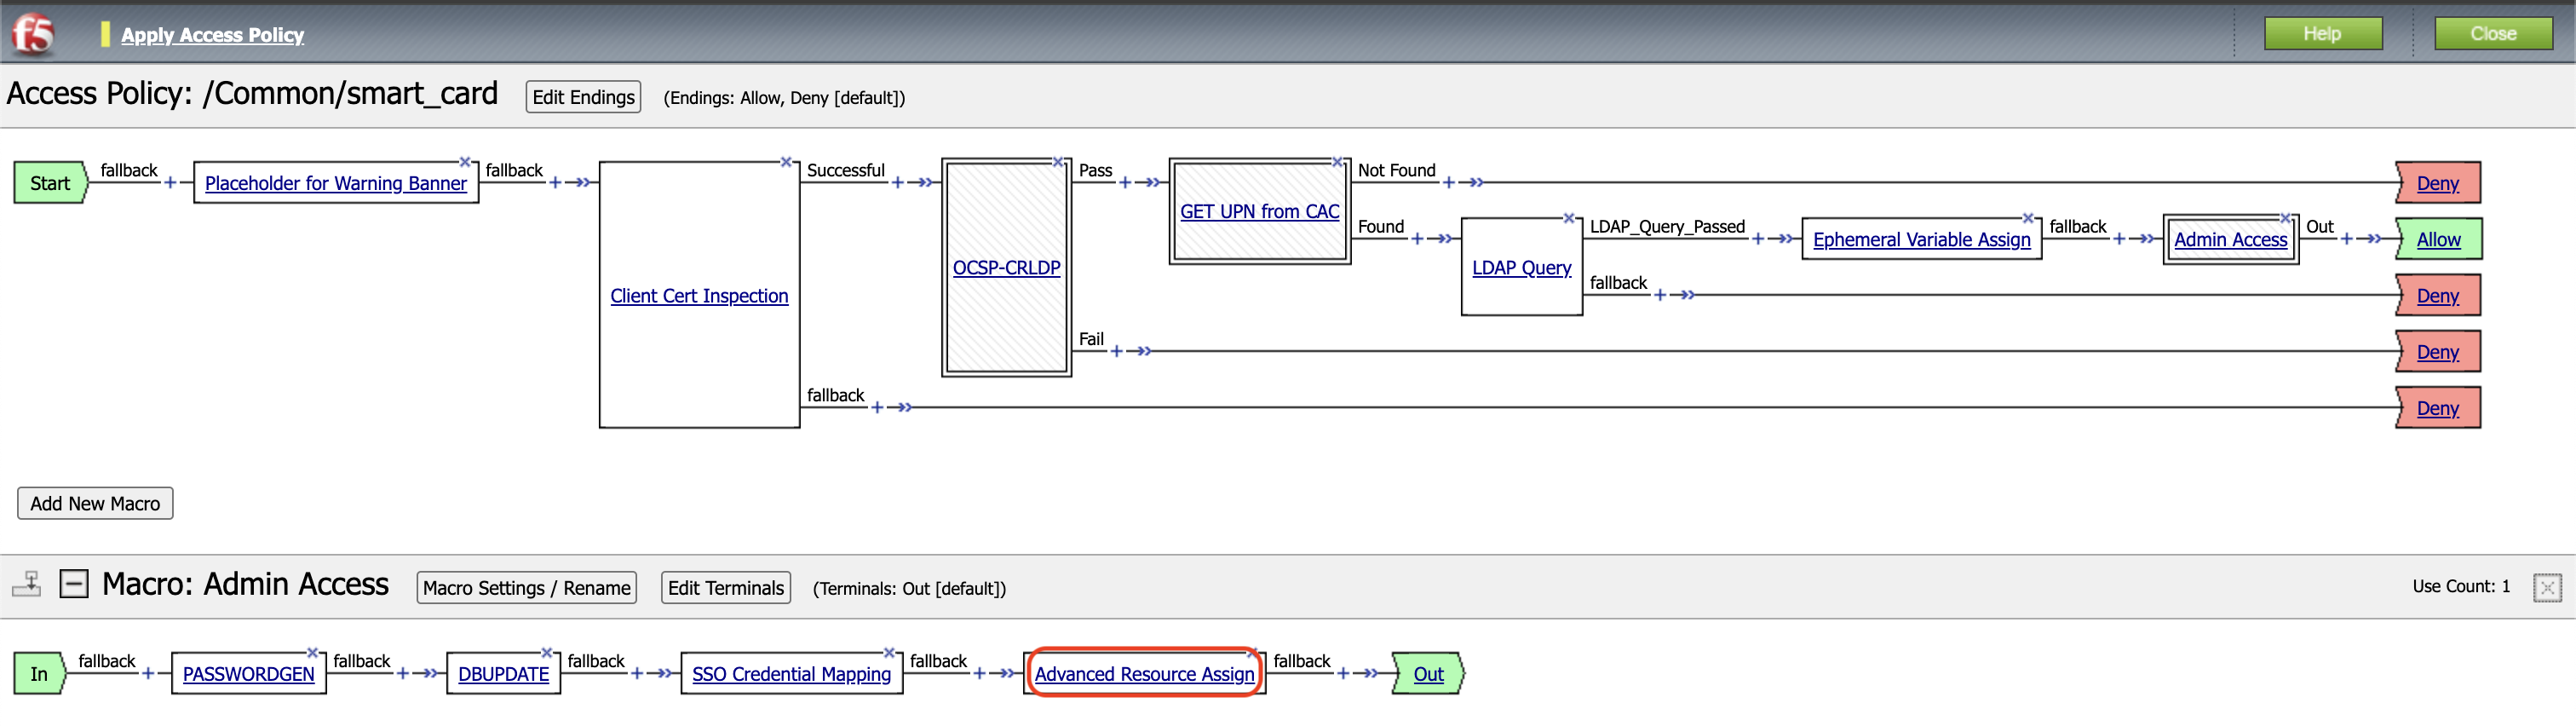
Task 2 - Edit PUA Smartcard Access Policy
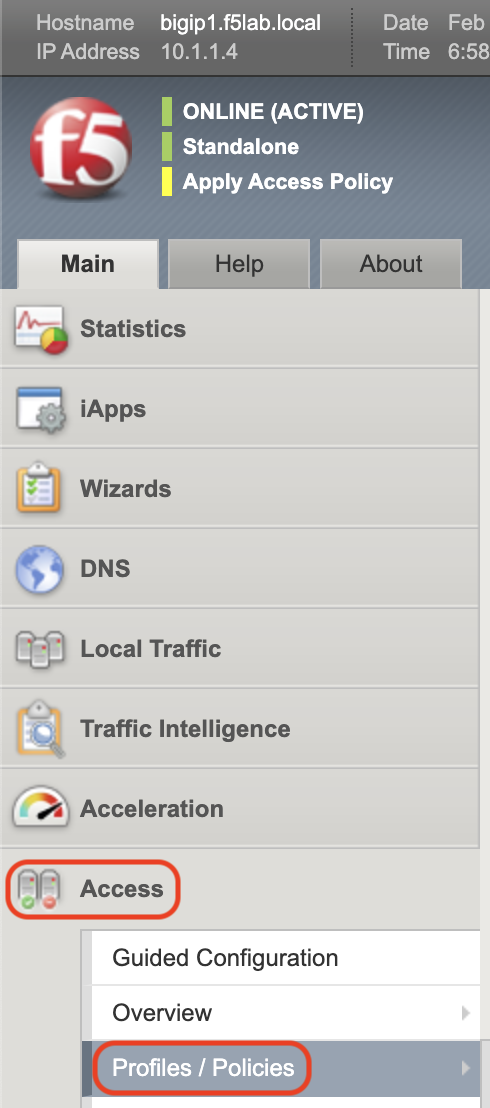
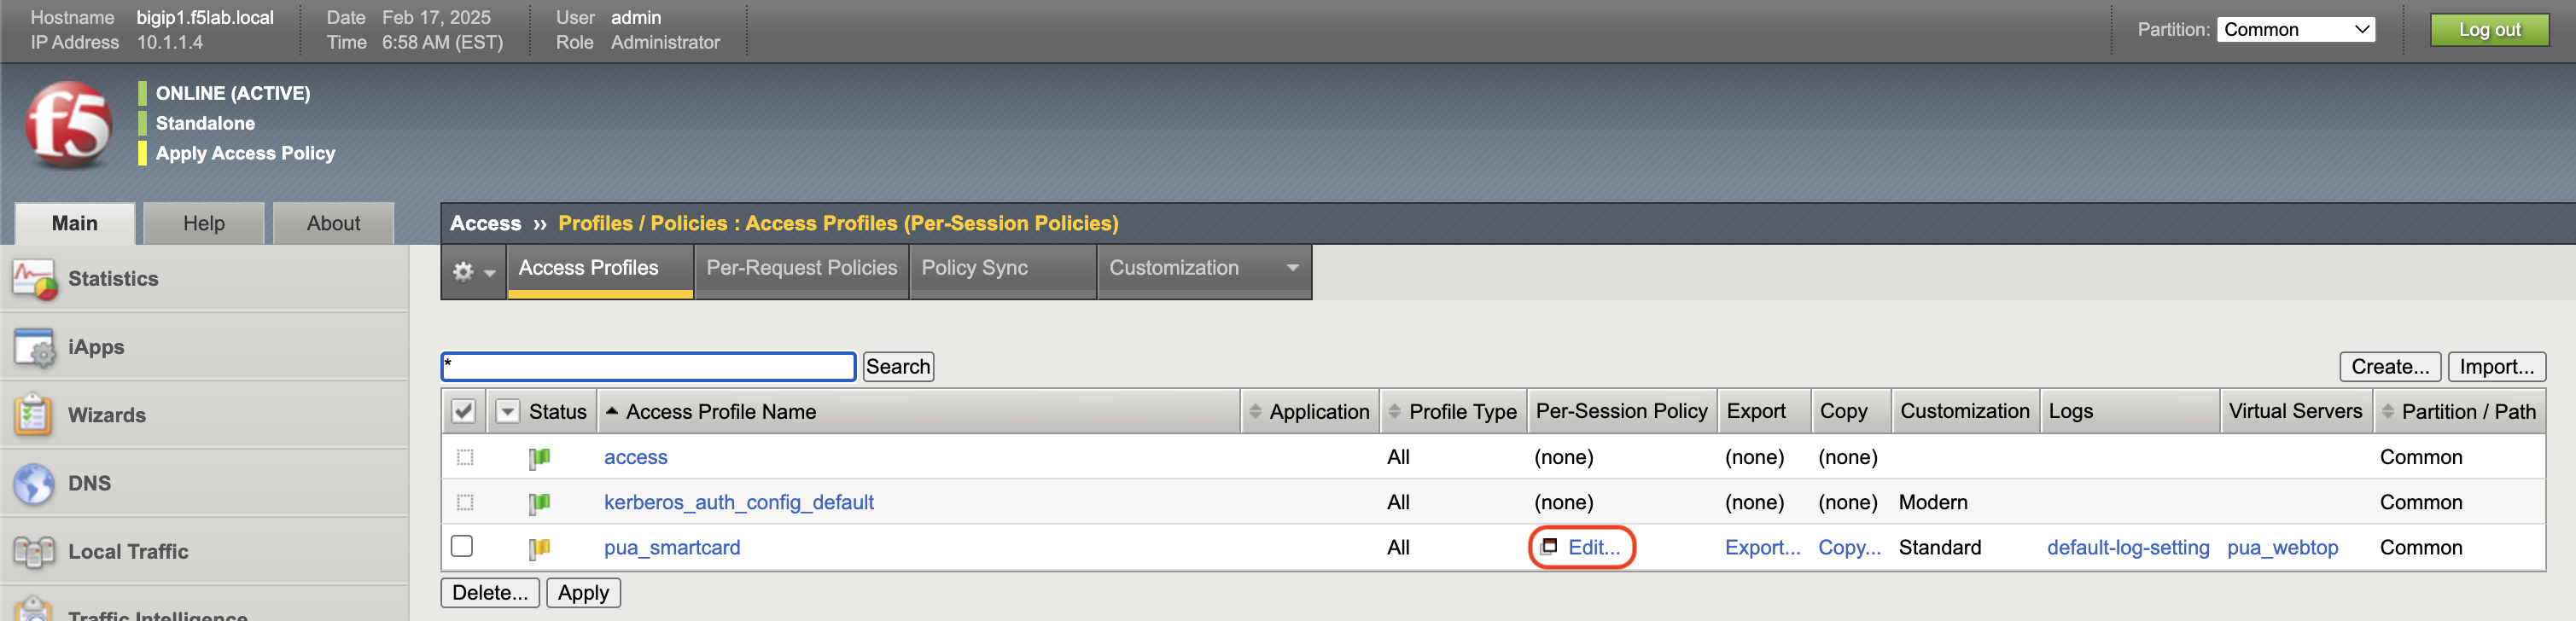
Navigate to Access, Profiles/Policies.
Click the Edit link for the pua_smartcard Access Profile to open the Visual Policy Editor.
Task 3 - Add Alternate Webtop to the Webtop Links
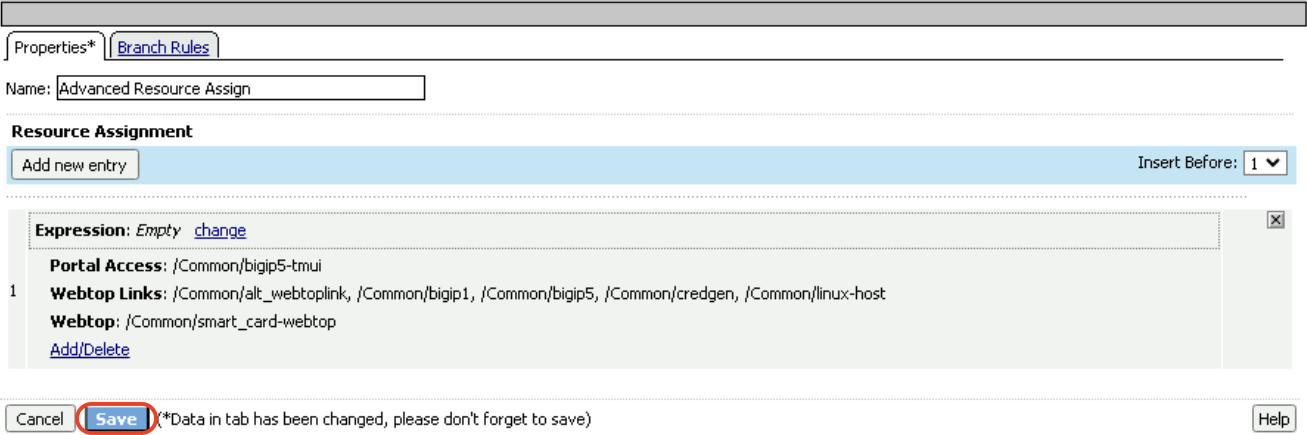
Click the plus sign beside Macro: Admin Access
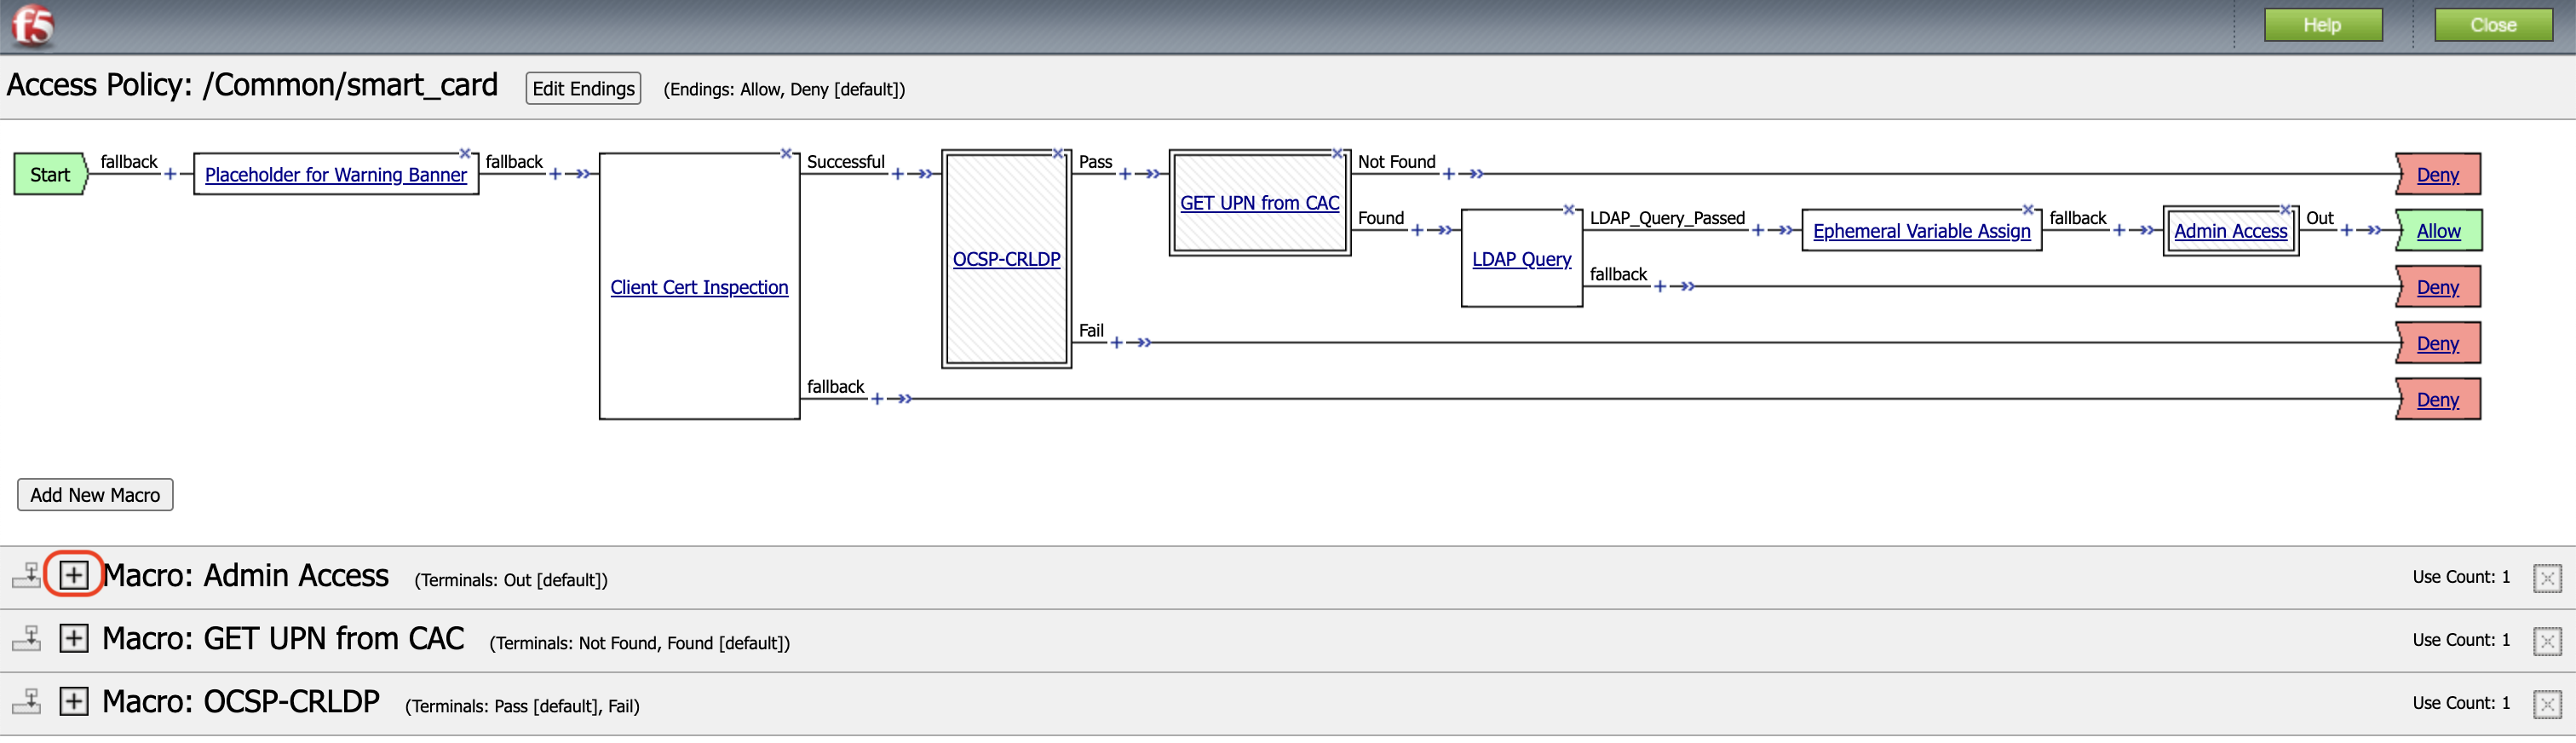
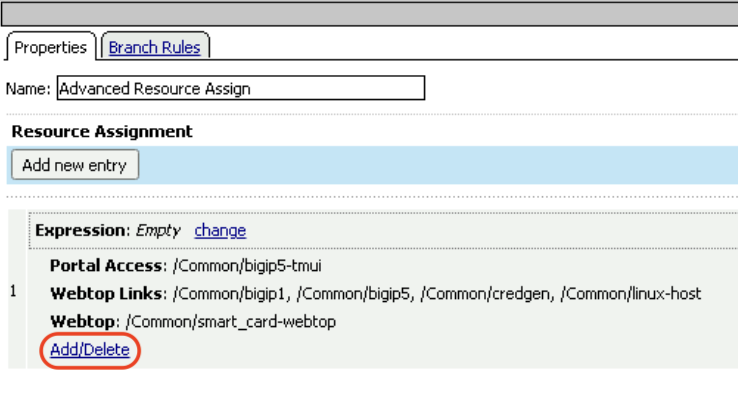
Click Advanced Resource Assign.
In the pop-up, click the Add/Delete link.
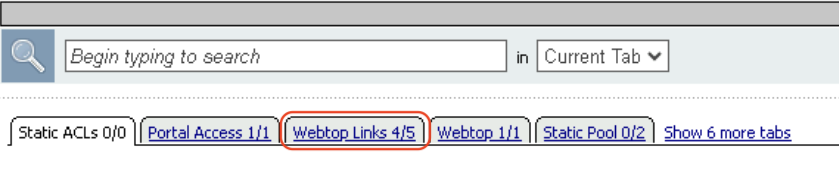
Click the Webtop Links 4/5 tab.
Tick the checkbox beside /Common/alt_webtoplink.
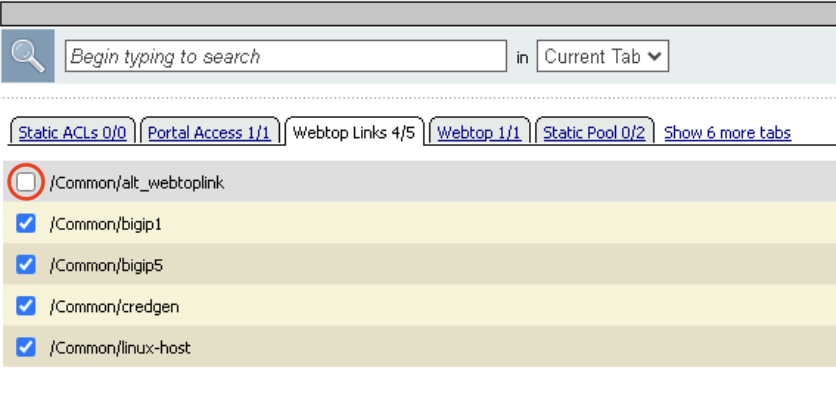
Click Update.

Click Save.
Task 4 - Apply Access Policy
- Click Apply Access Policy
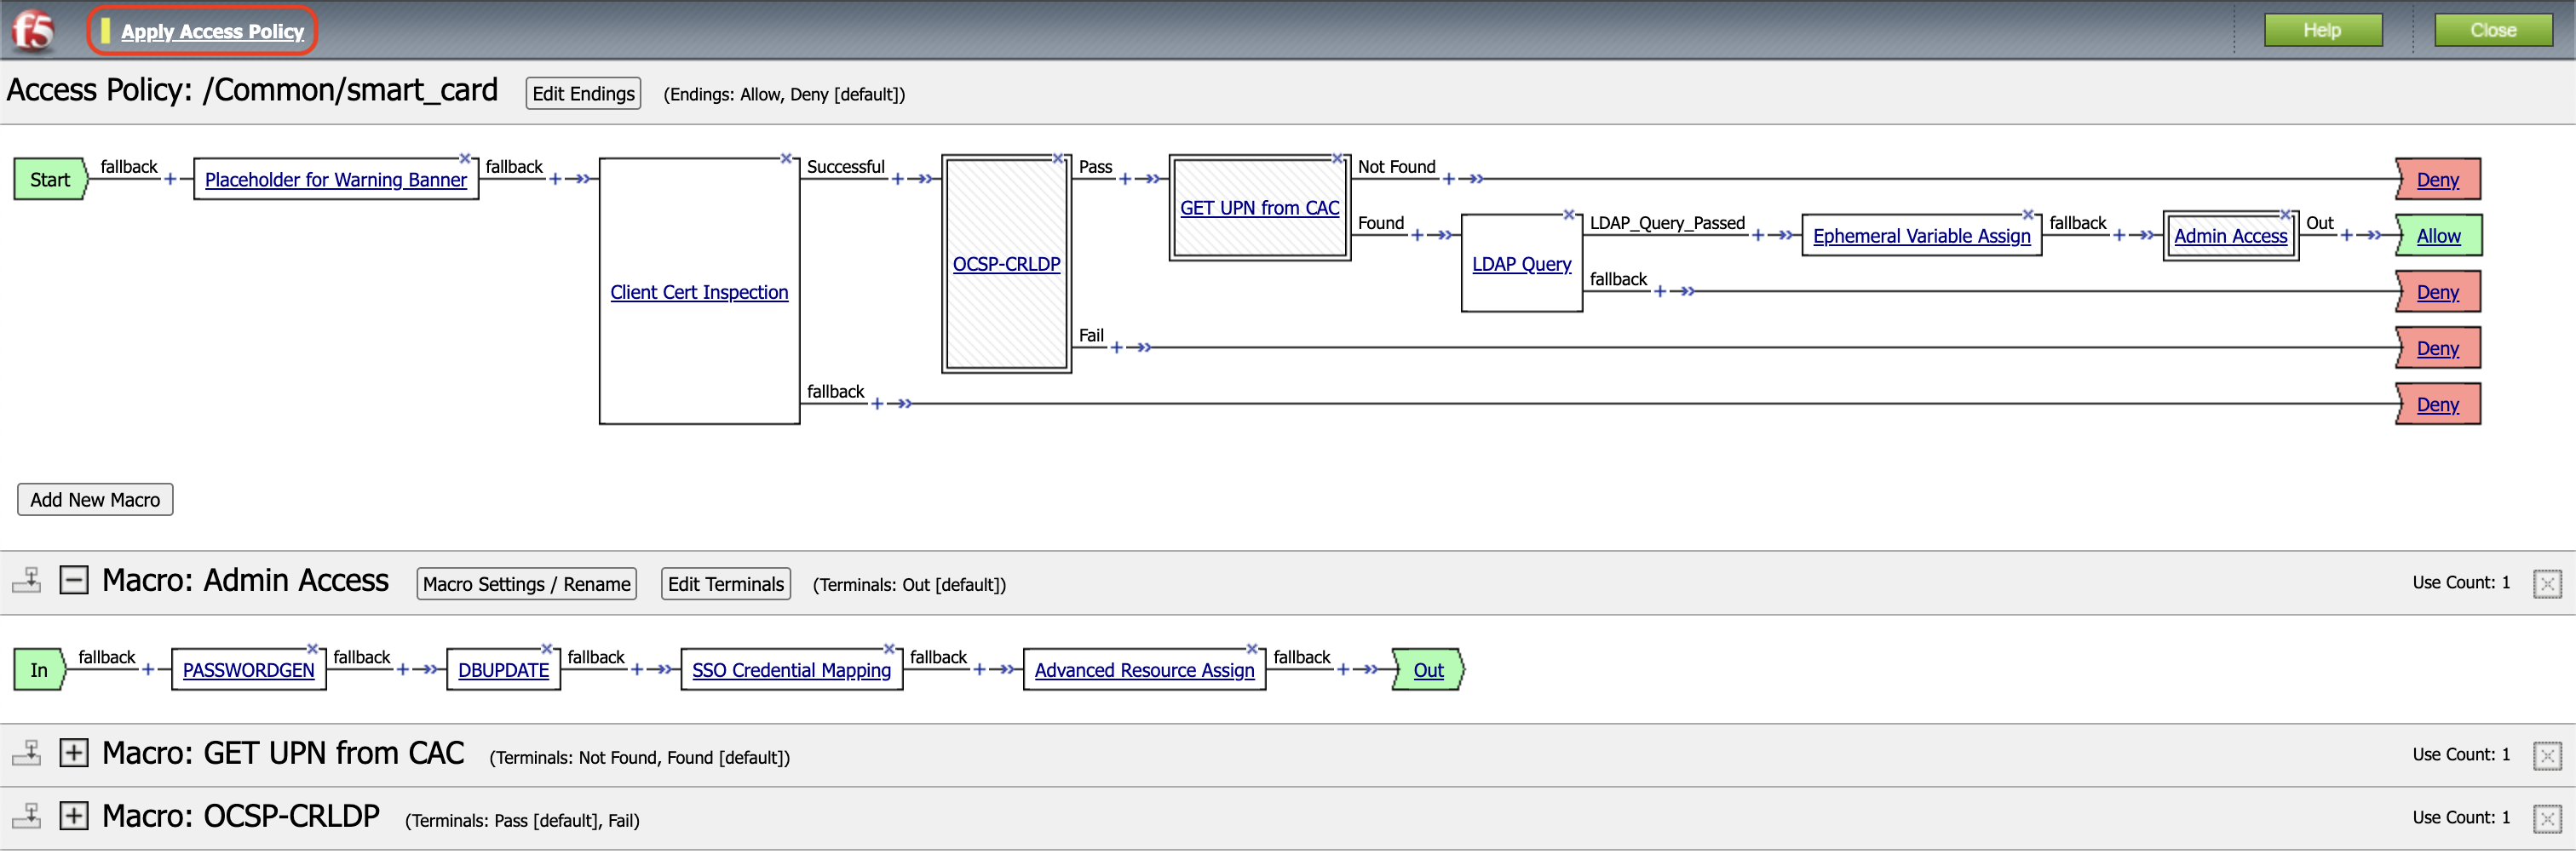
Warning
Don’t forget to click on Apply Access Policy.
Test PUA ALT Webtop
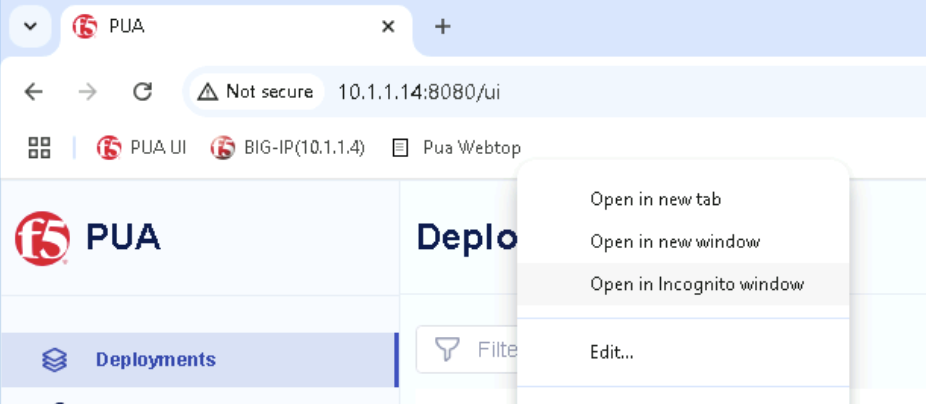
Task 1 - Acces PUA Webtop as user1
Right click on the PUA Webtop Bookmark and click on Open in Incognito window
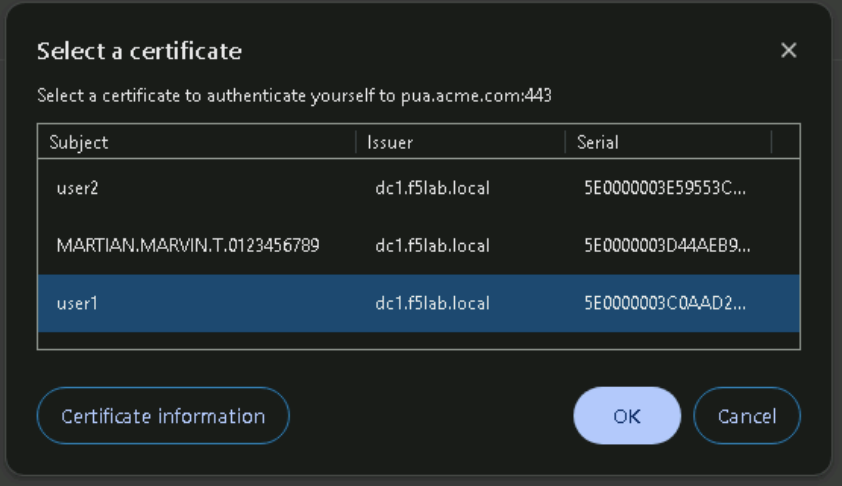
Select certificate associated with User1 in the Select a certificate dialog box and Click Ok.
Click Click here to continue
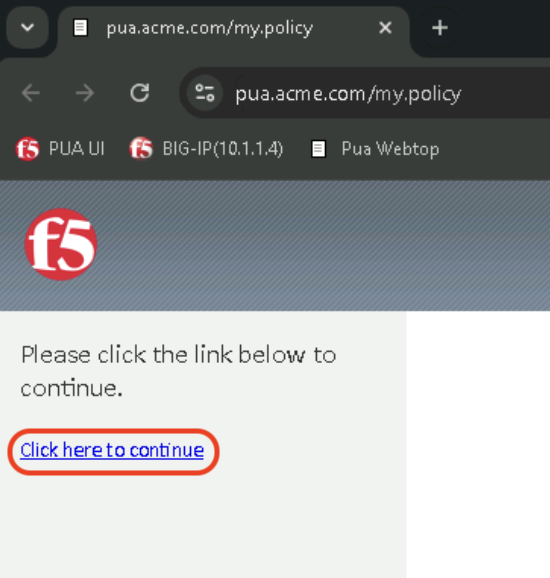
The Alternate Webtop link should now be listed in the Applications and Links section of the Webtop.

Task 2 - Validate user1 Access
In the Applications and Links section of the Webtop
Click on alt_webtoplink to launch the updated Privileged User Access Web Application.
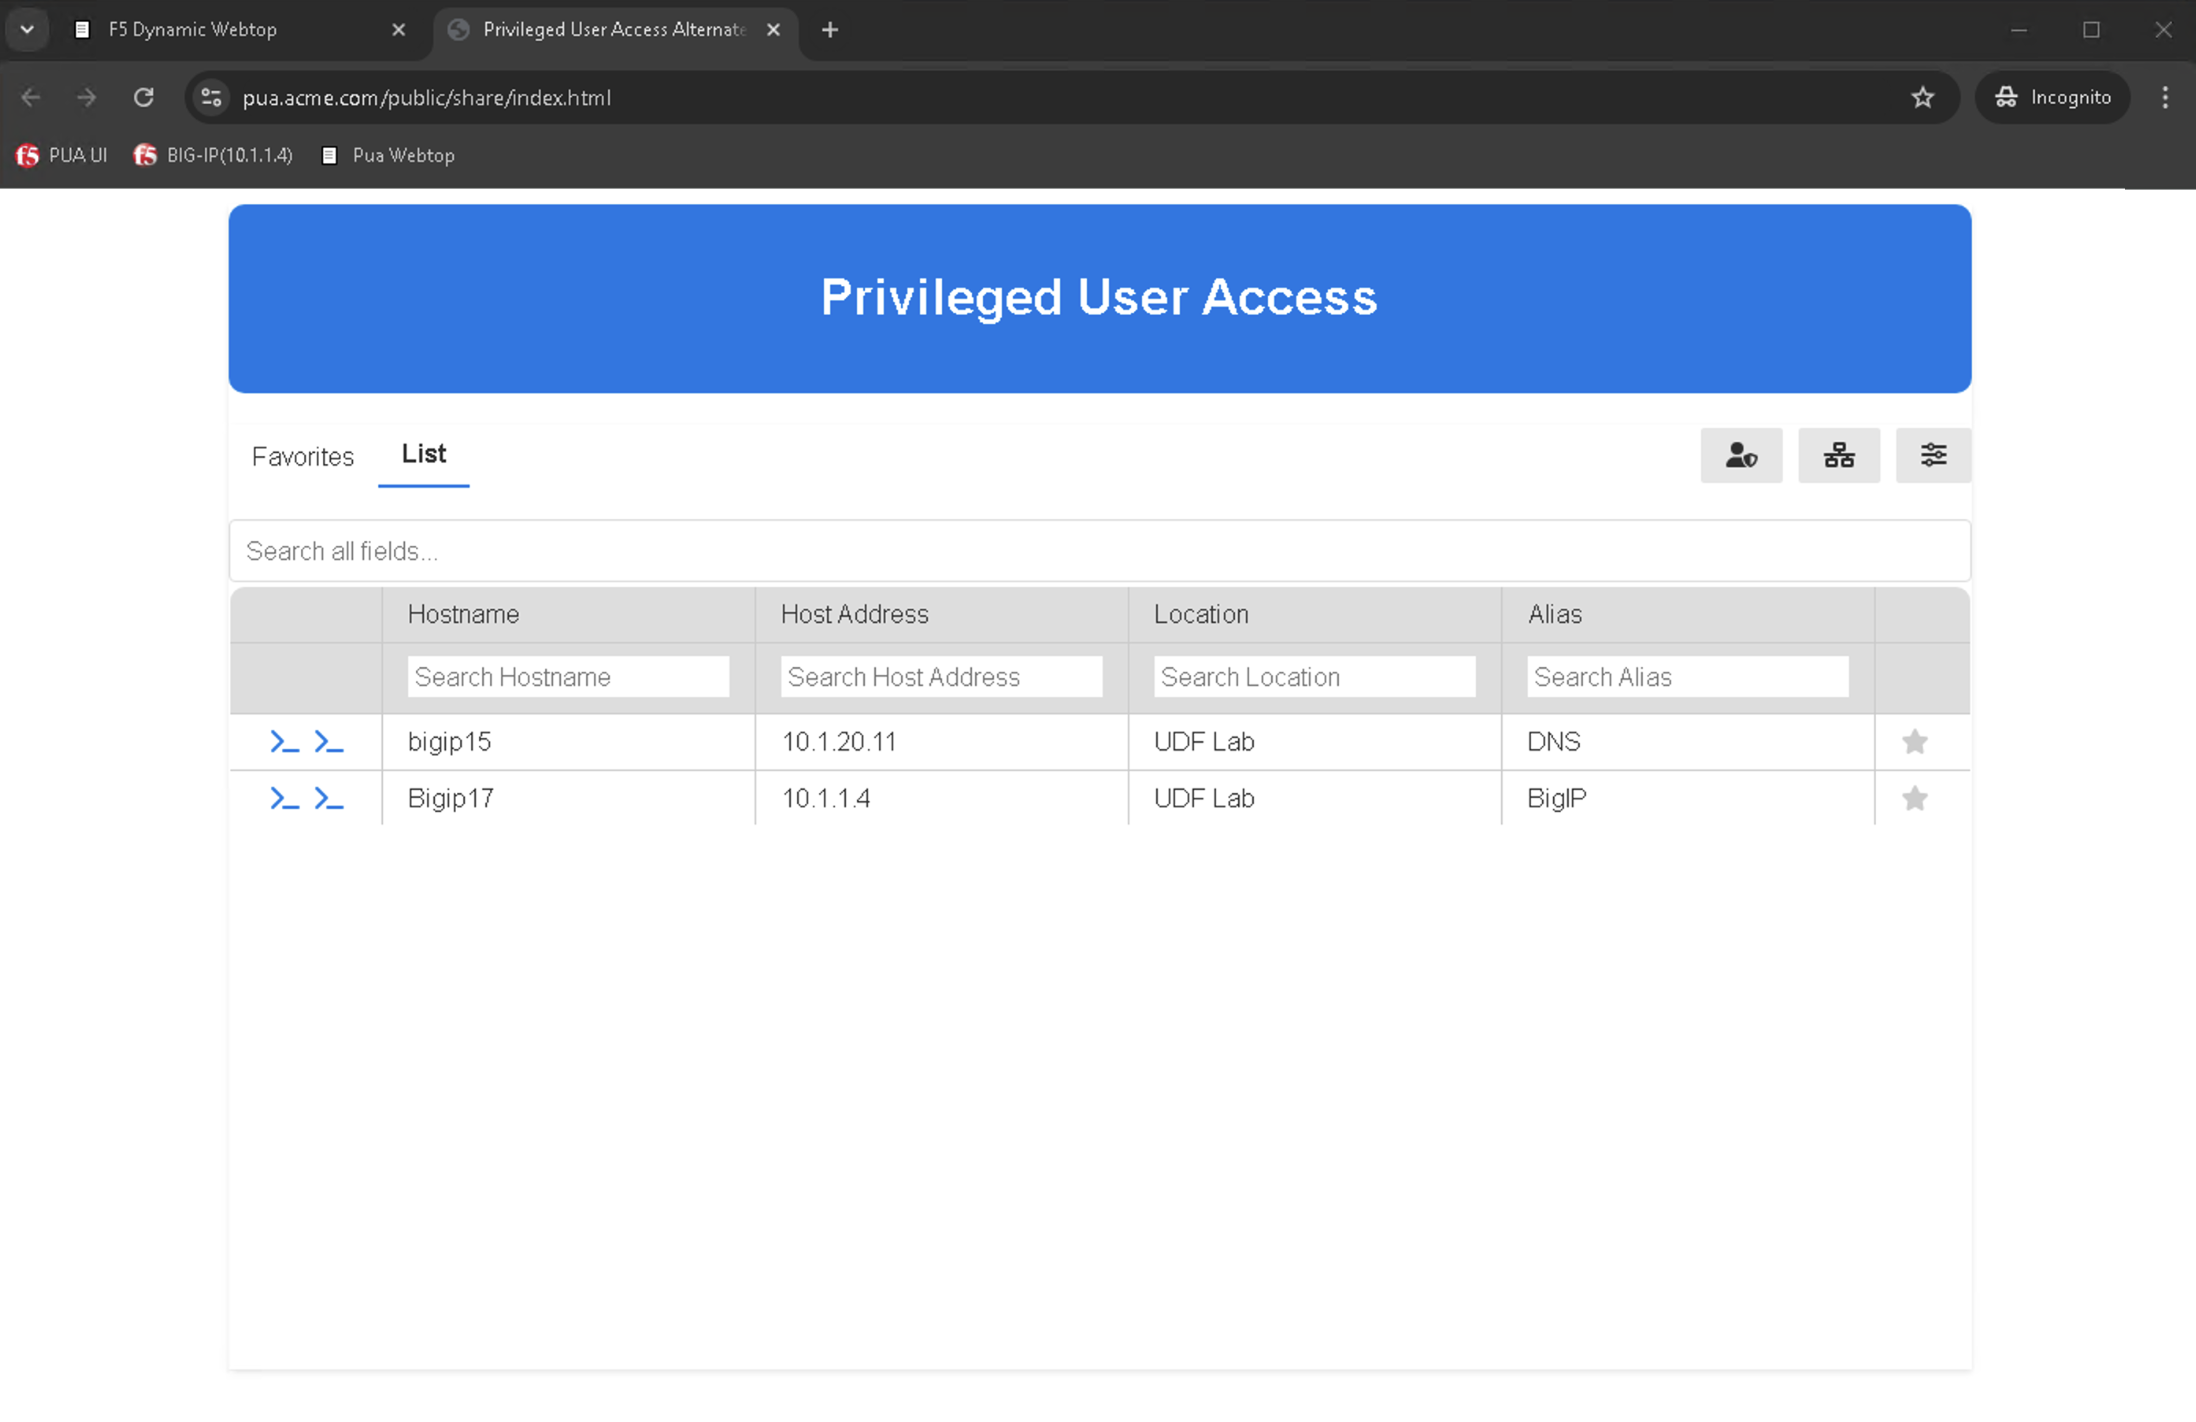
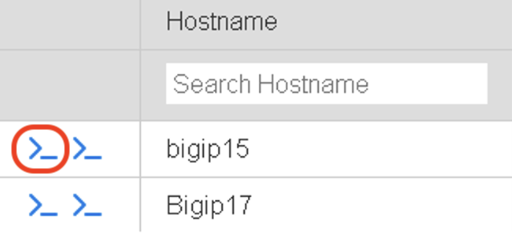
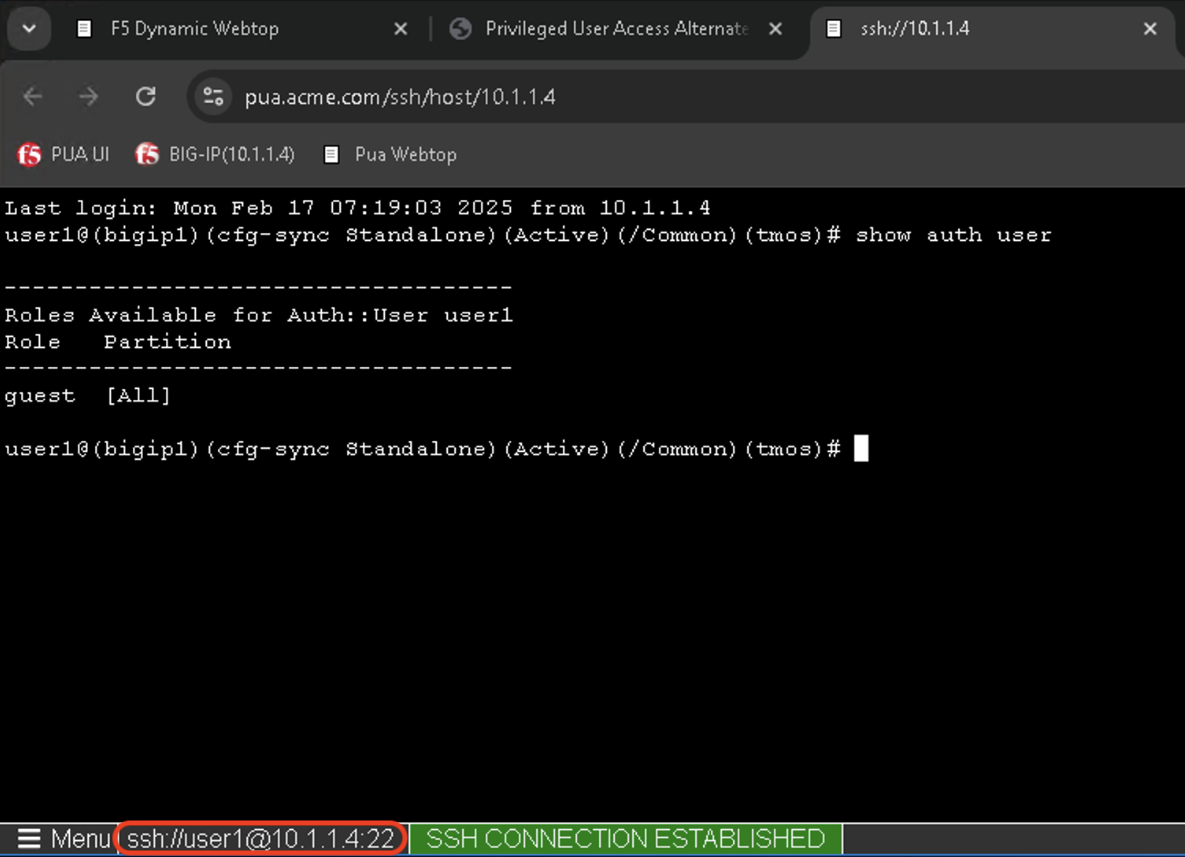
Click on the >_ icon of bigip15 and observe the username at the bottom left corner

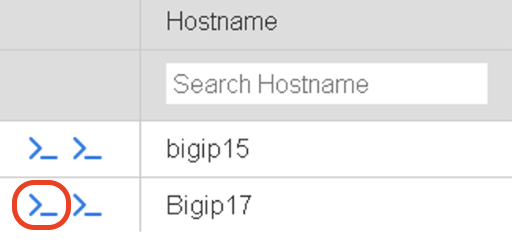
Click on the >_ icon of bigip17 and observe the username at the bottom left corner
Warning
Close the Incognito window before going to the next task.
Delete PUA Smartcard
Task 1 - Delete Deployment
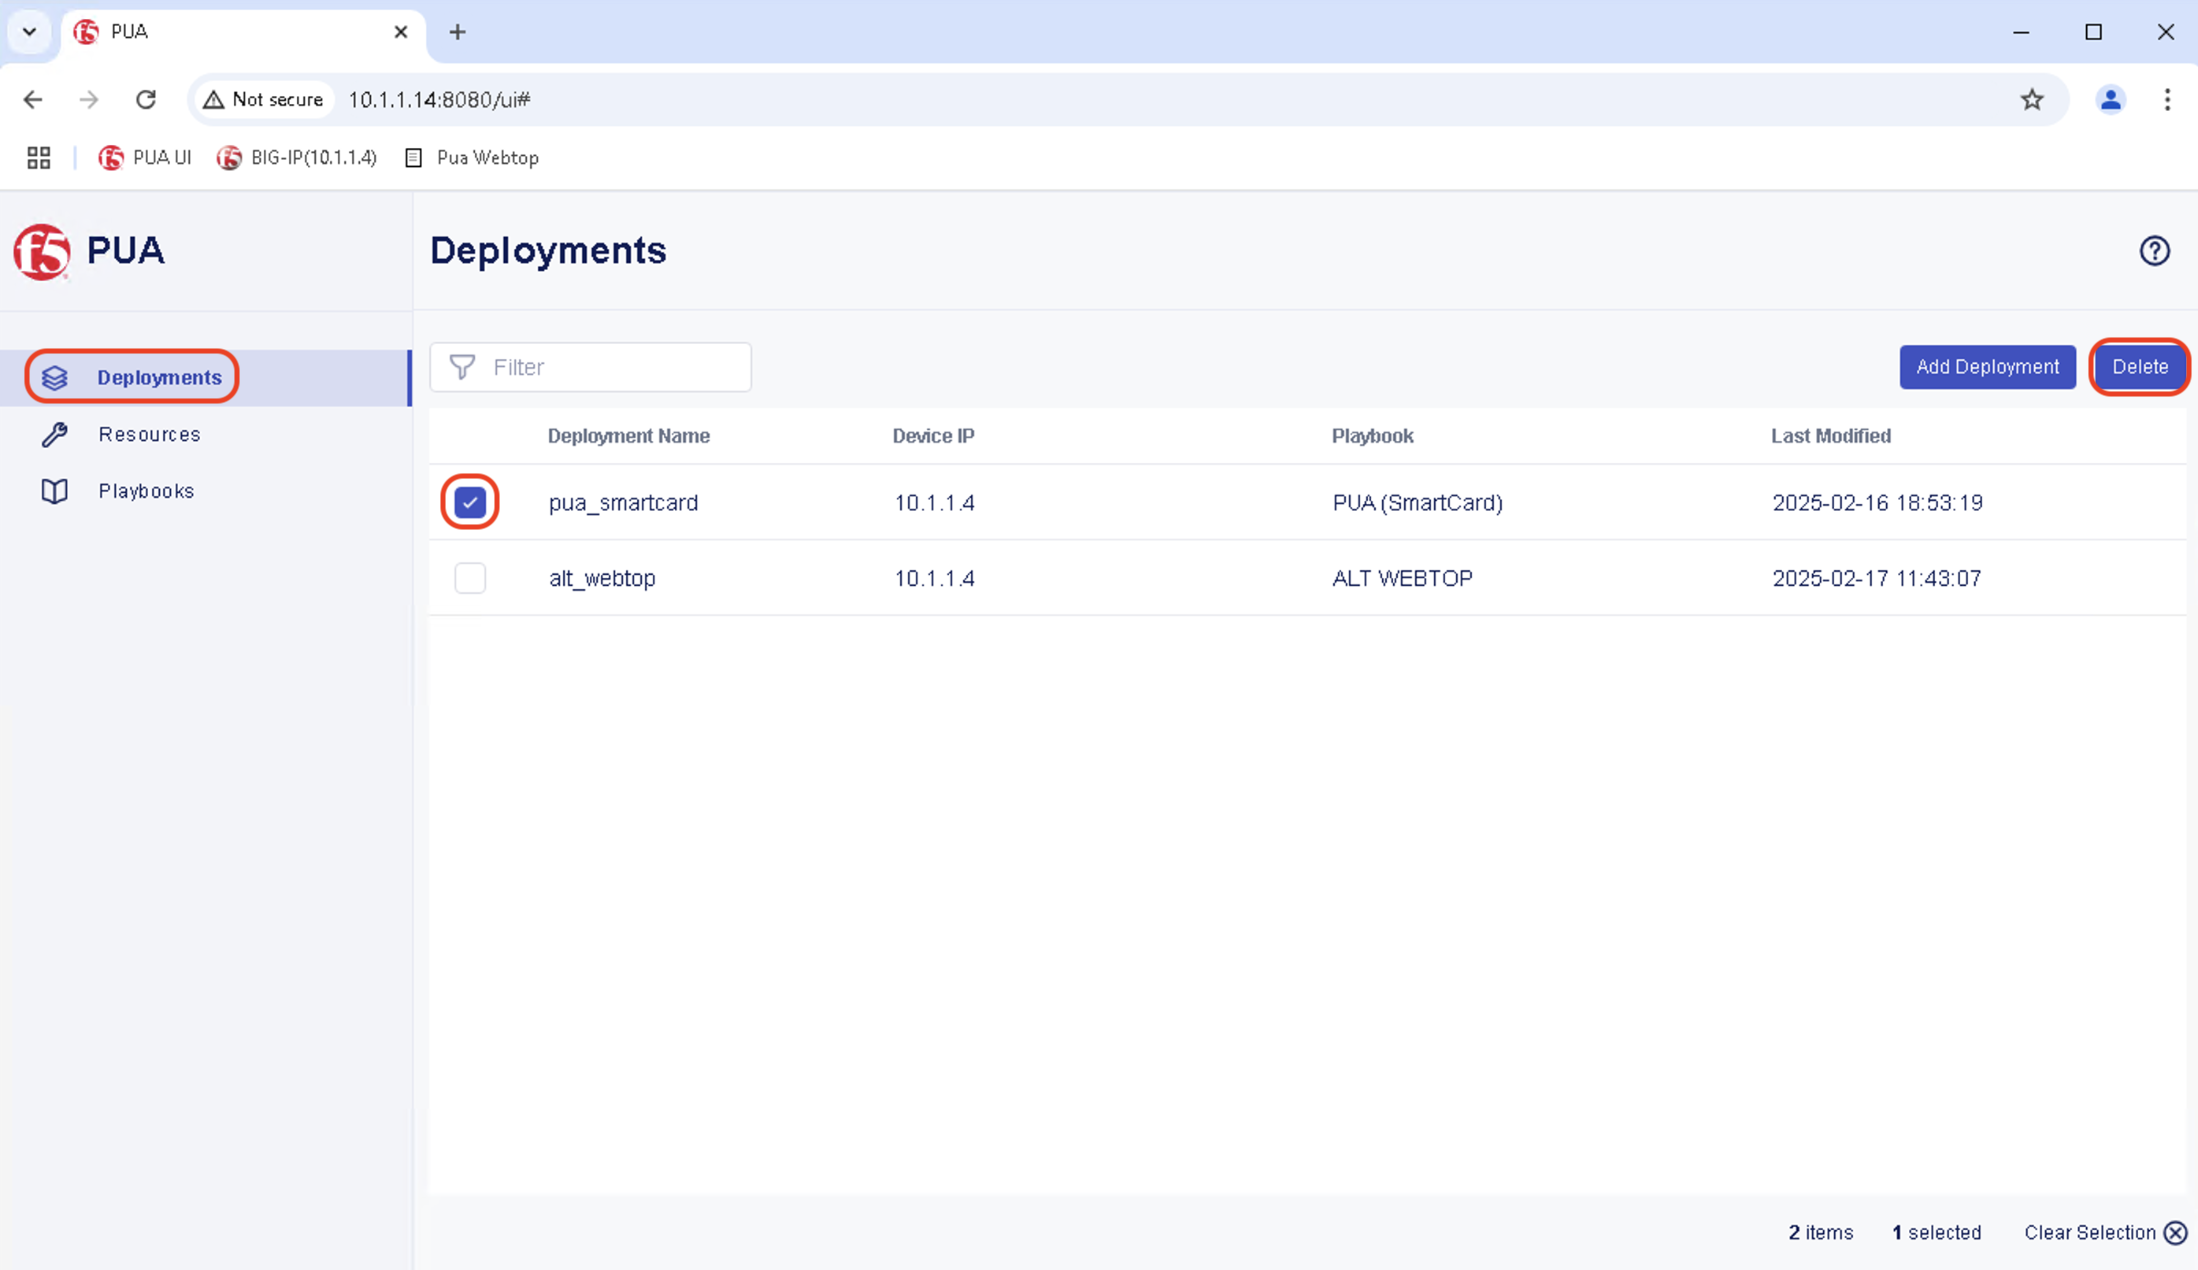
In PUA UI, Click Deployments in left hand navigation bar, then in the main panel :
- tick the checkbox beside pua_smartcard and
- click Delete button.
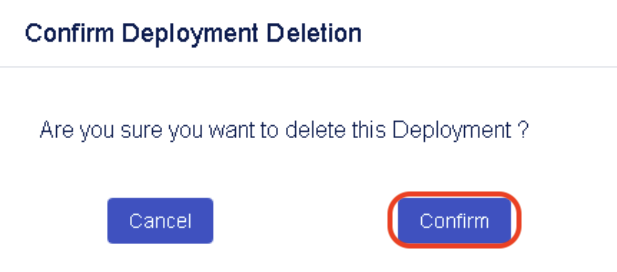
Click Confirm.
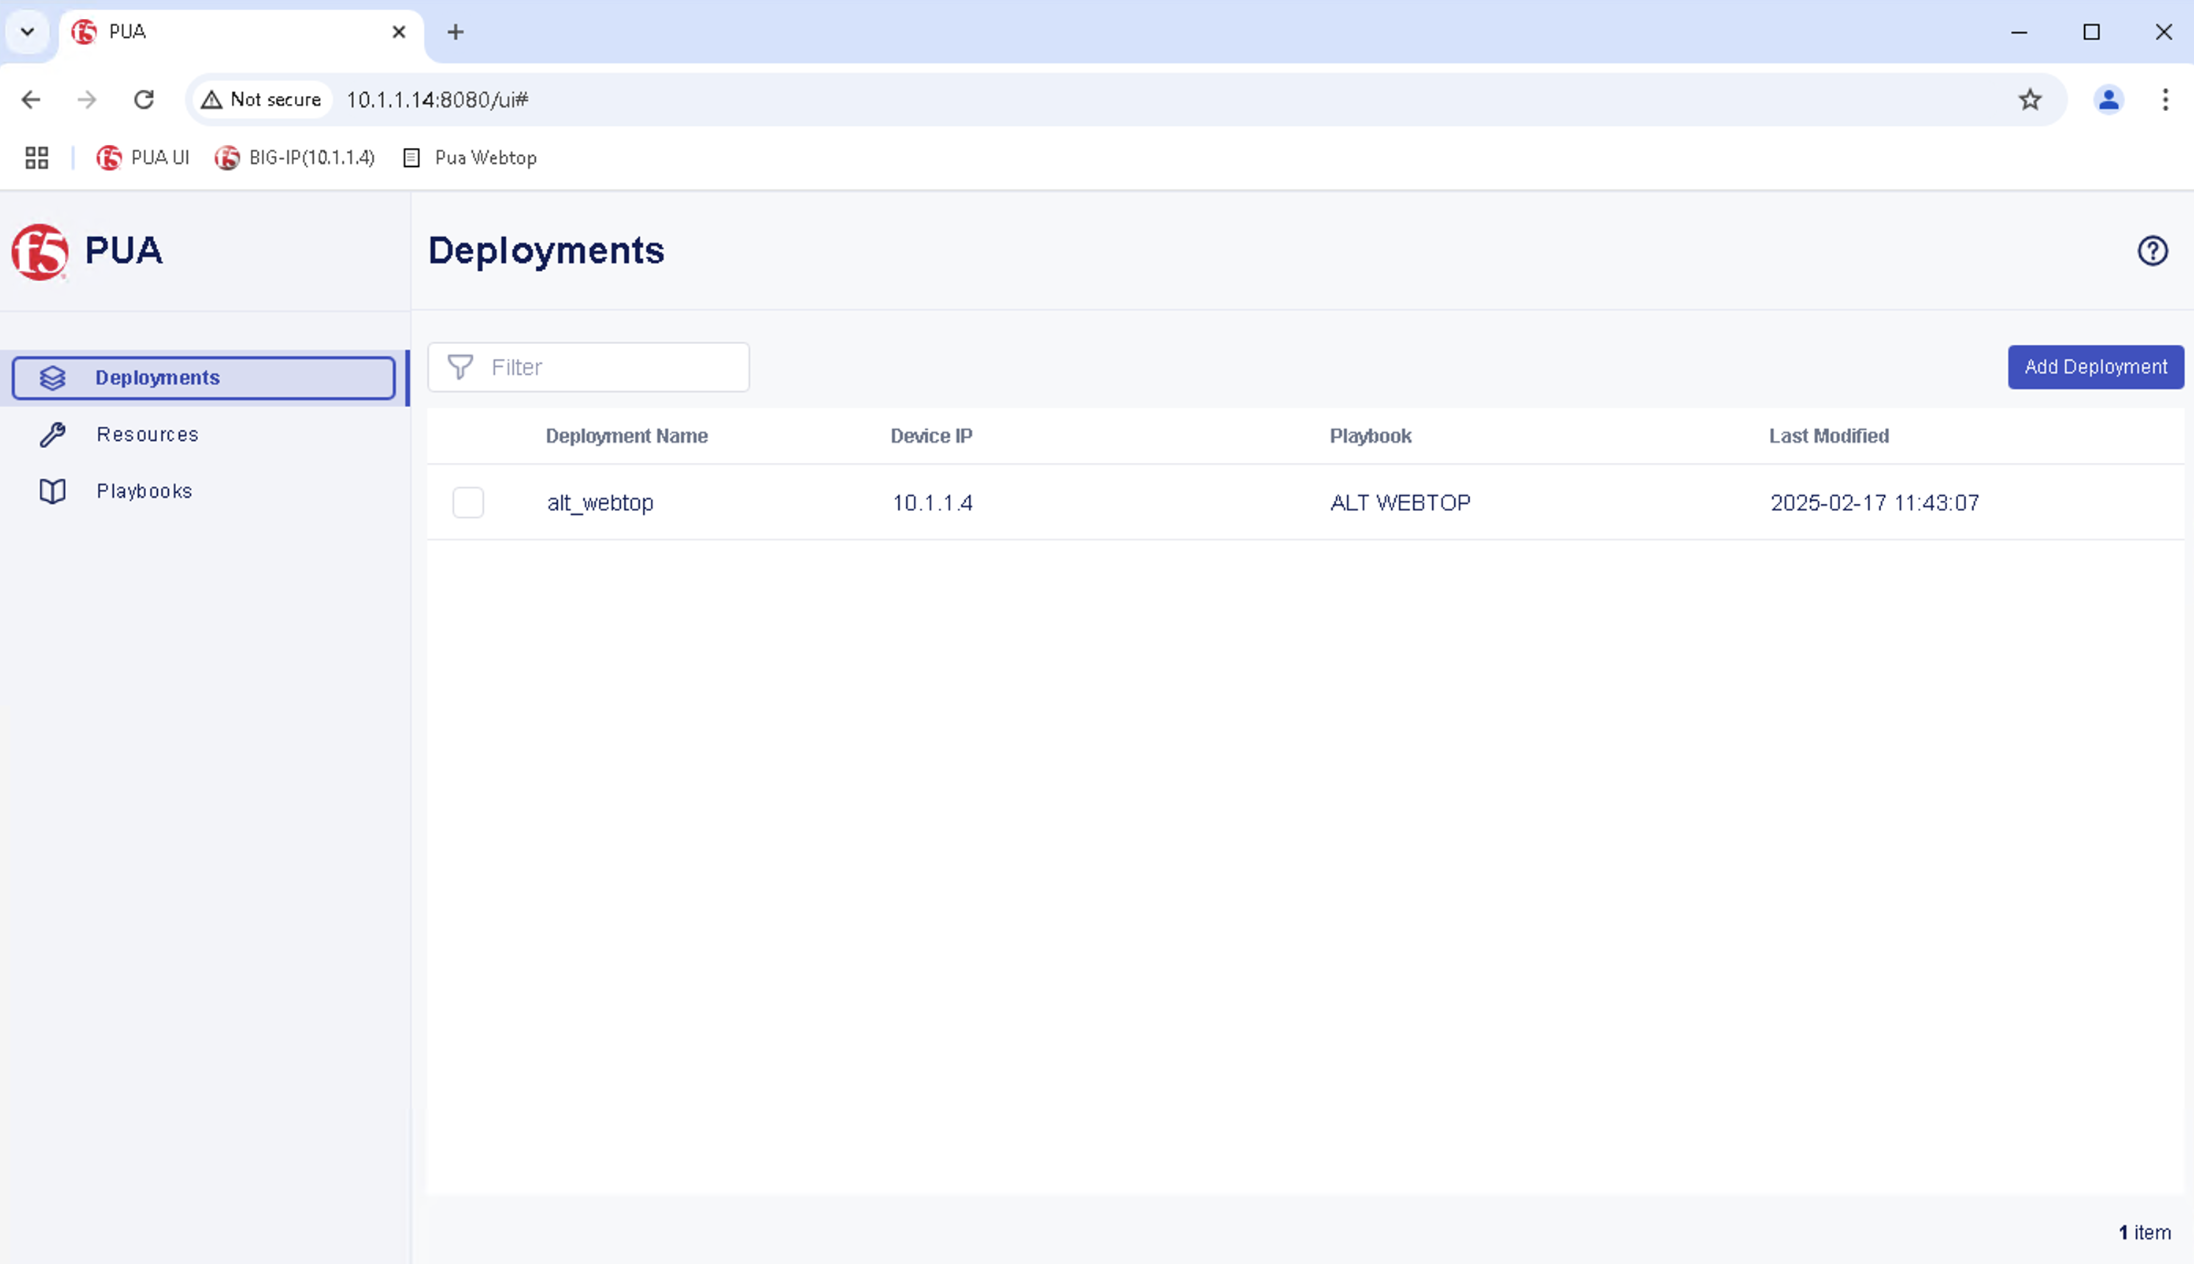
After a few moment, pua_smartcard deployment should have been deleted successful.
Attention
The PUA Smartcard deployment need to be deleted before going to the next lab.