NGINX Modern Apps > Class 10 - NMS API Connectivity Manager > Module 2 - Infrastructure team - Deploy Nginx instances Source | Edit on
Step 3 - Link the API GW and Dev Portal
It is time to link the API-GW and Dev-Portal instances with NMS.
To do so, we will execute the Nginx Agent installer on both instances.
Link the API-GW instance
In NMS UI, click on the
API Cluster Gatewayrow (not the name link) to pop out the right frame with the commands to execute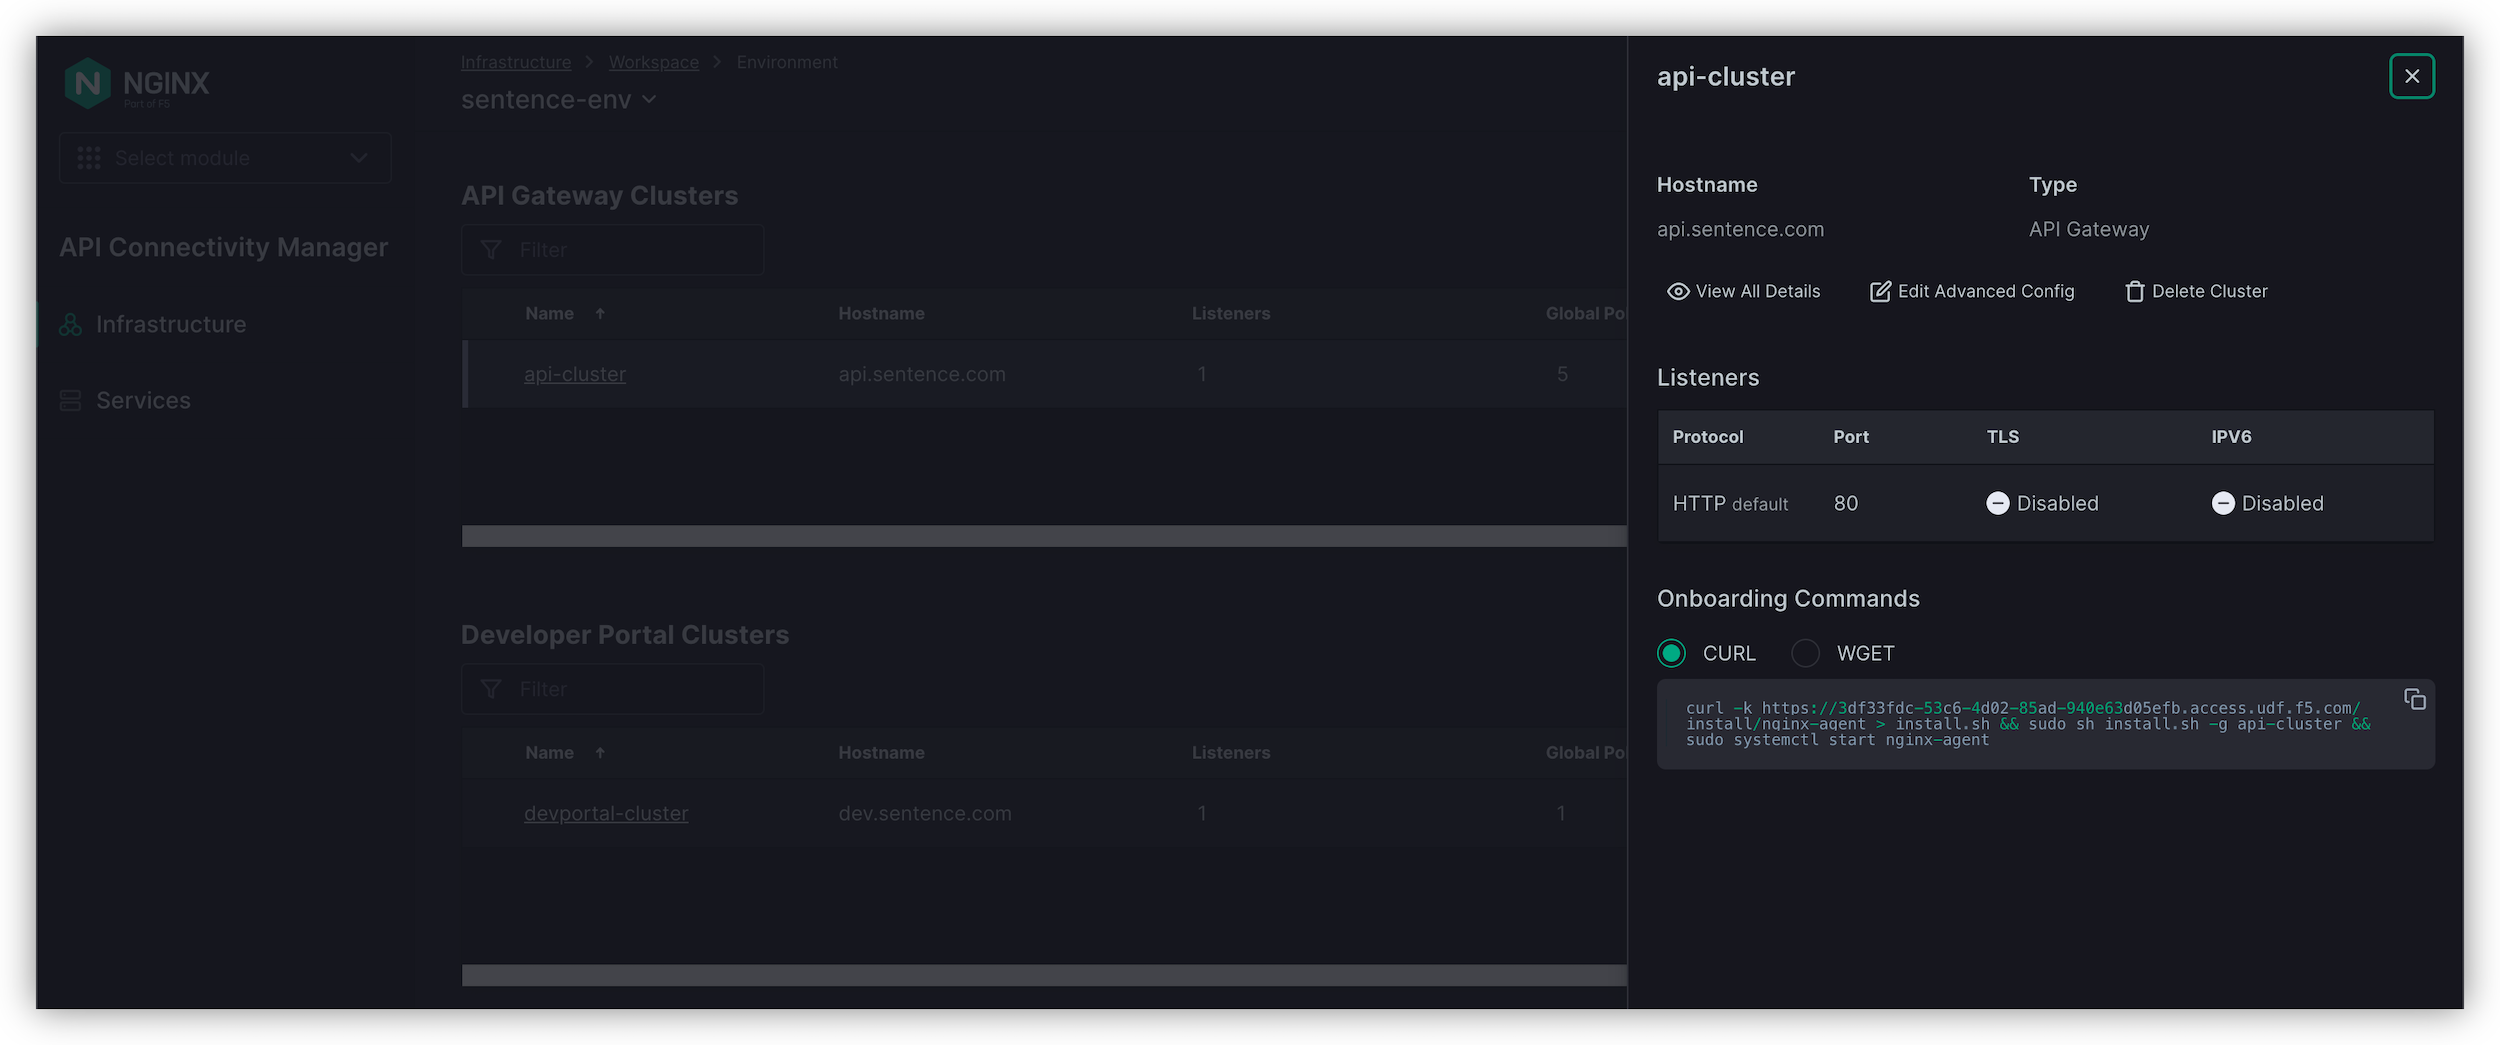
Copy the cURL command; it should look like this
curl -k https://10.1.1.6/install/nginx-agent > install.sh && sudo sh install.sh -g api-cluster && sudo systemctl start nginx-agent
Warning
check the FQDN is 10.1.1.6 and not the UDF public proxy FQDN
In UDF, SSH or WEBSSH to
NGINX Plus APIGW-1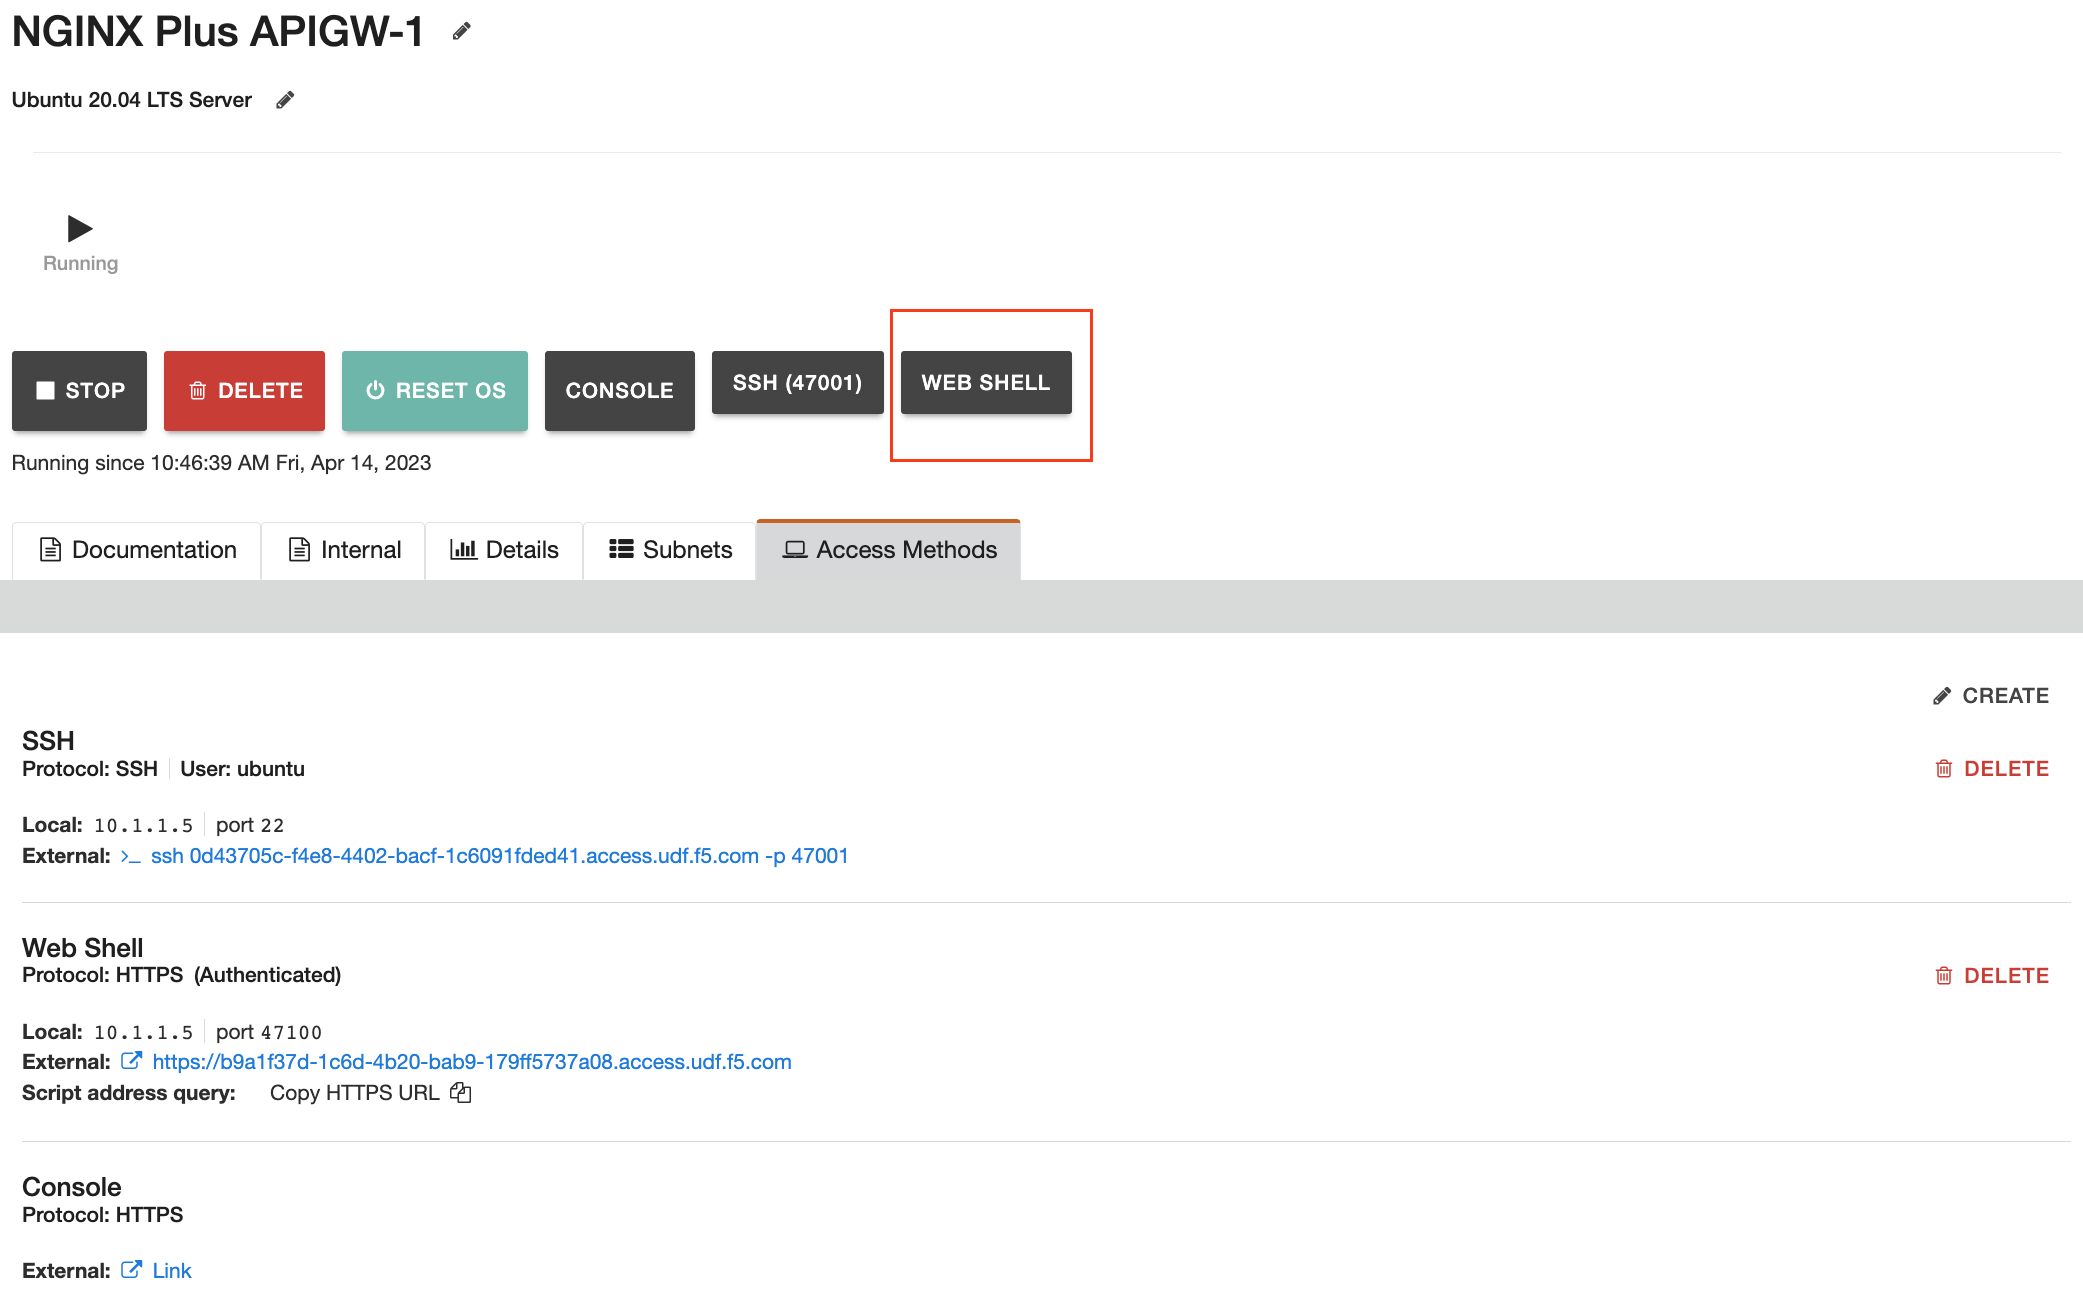
In the
NGINX Plus APIGW-1SSH session, issue thenginx -Tcommand to get a dump of the full NGINX configuration. Note the relative lack of configuration on the data plane. (If you are seeing permission issues, you may need to utilize SUDO priviliges to execute the nginx -T command.)nginx -T
In the
NGINX Plus APIGW-1SSH session, paste and execute the cURL command copied from NMS. You will see the below outcome at the end of the installation.---------------------------------------------------------------------- NGINX Agent package has been successfully installed. Please follow the next steps to start the software: sudo systemctl start nginx-agent Configuration settings can be adjusted here: /etc/nginx-agent/nginx-agent.conf ---------------------------------------------------------------------- Installing nginx-agent package ... done. Updating /etc/nginx-agent/agent-dynamic.conf ... Setting existing instance_group: api-cluster Successfully updated /etc/nginx-agent/agent-dynamic.conf
Link the Dev-Portal instance
In the NSM UI, Like the API-GW instance, click the
Developer Portal Clustersrow and copy the cURL command.Warning
DO NOT CLICK ON
Developer Portal Internal Clusters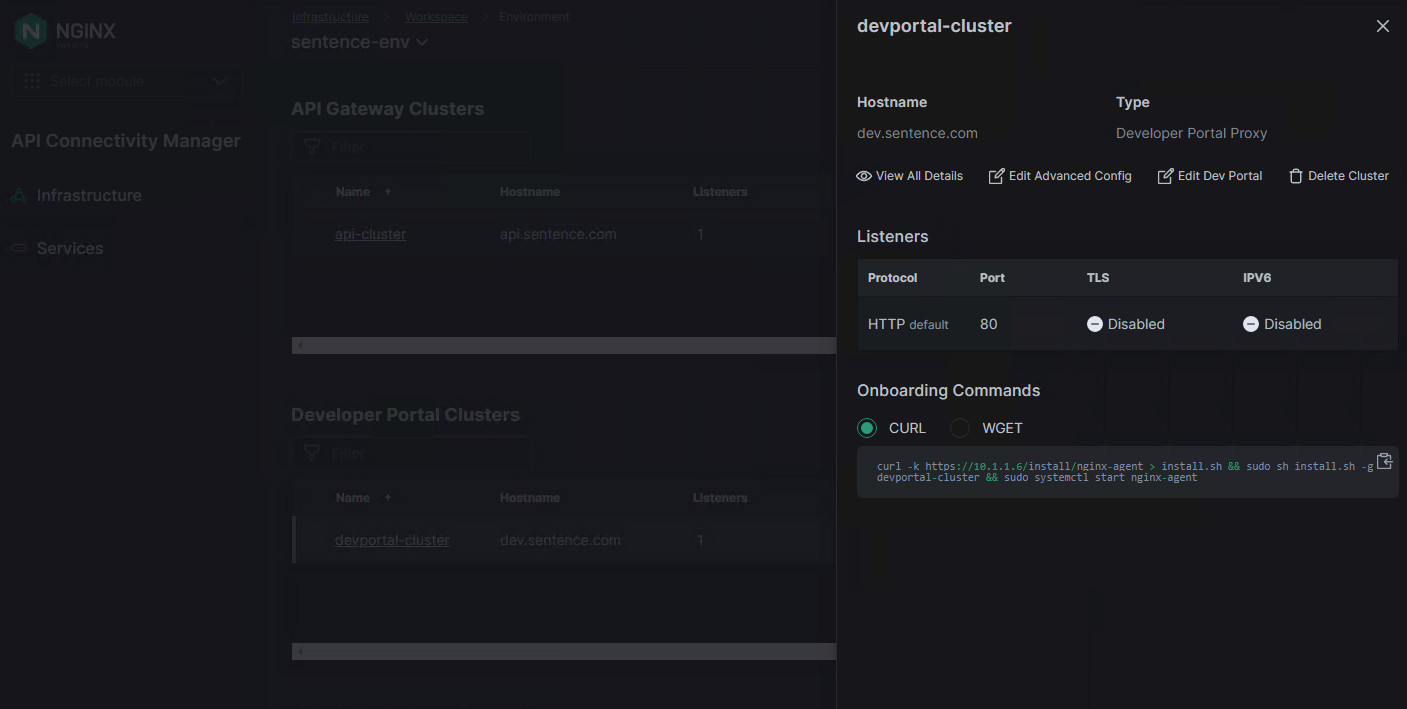
The cURL command should look like this
curl -k https://10.1.1.6/install/nginx-agent > install.sh && sudo sh install.sh -g devportal-cluster && sudo systemctl start nginx-agent
Warning
Check that the FQDN is 10.1.1.6 and not the UDF public proxy FQDN
In UDF, SSH or WEBSSH to
Dev Portal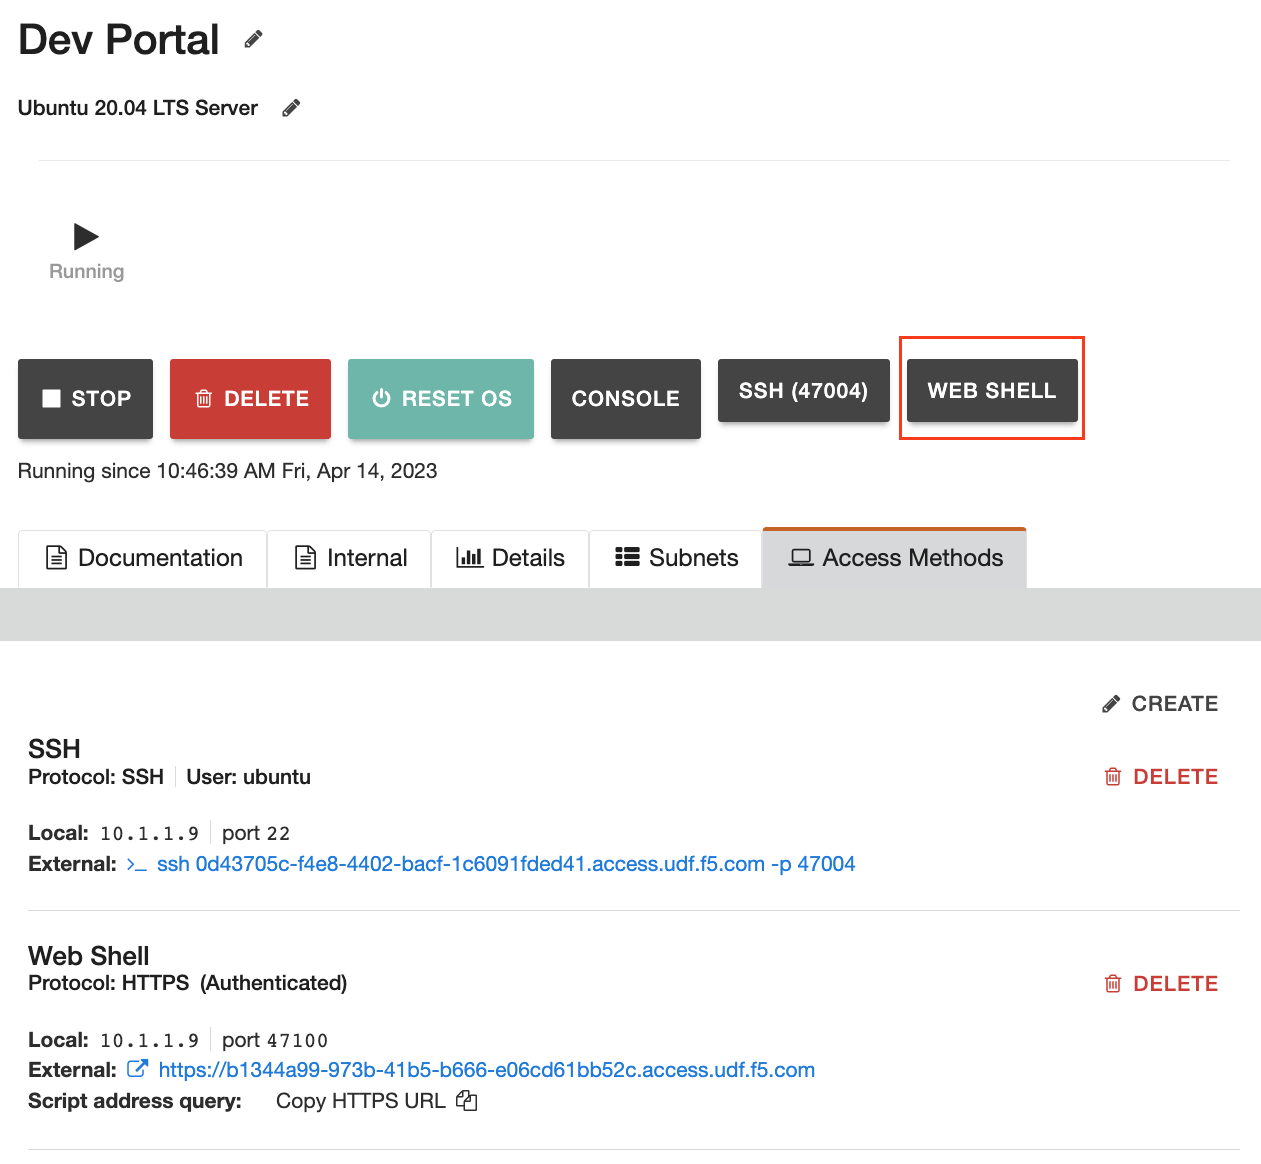
In the
NGINX Dev-PortalSSH session, again issue thenginx -Tcommand to get a dump of the full NGINX configuration.nginx -T
On the
NGINX Dev-PortalSSH session, paste and execute the cURL command. You will see the below outcome at the end of the installation.---------------------------------------------------------------------- NGINX Agent package has been successfully installed. Please follow the next steps to start the software: sudo systemctl start nginx-agent Configuration settings can be adjusted here: /etc/nginx-agent/nginx-agent.conf ---------------------------------------------------------------------- Installing nginx-agent package ... done. Could not find /etc/nginx-agent/agent-dynamic.conf ... Creating file Successfully created /etc/nginx-agent/agent-dynamic.conf Updating /etc/nginx-agent/agent-dynamic.conf ... Setting instance_group: devportal-cluster Successfully updated /etc/nginx-agent/agent-dynamic.conf
Check instances connectivity with NMS
In
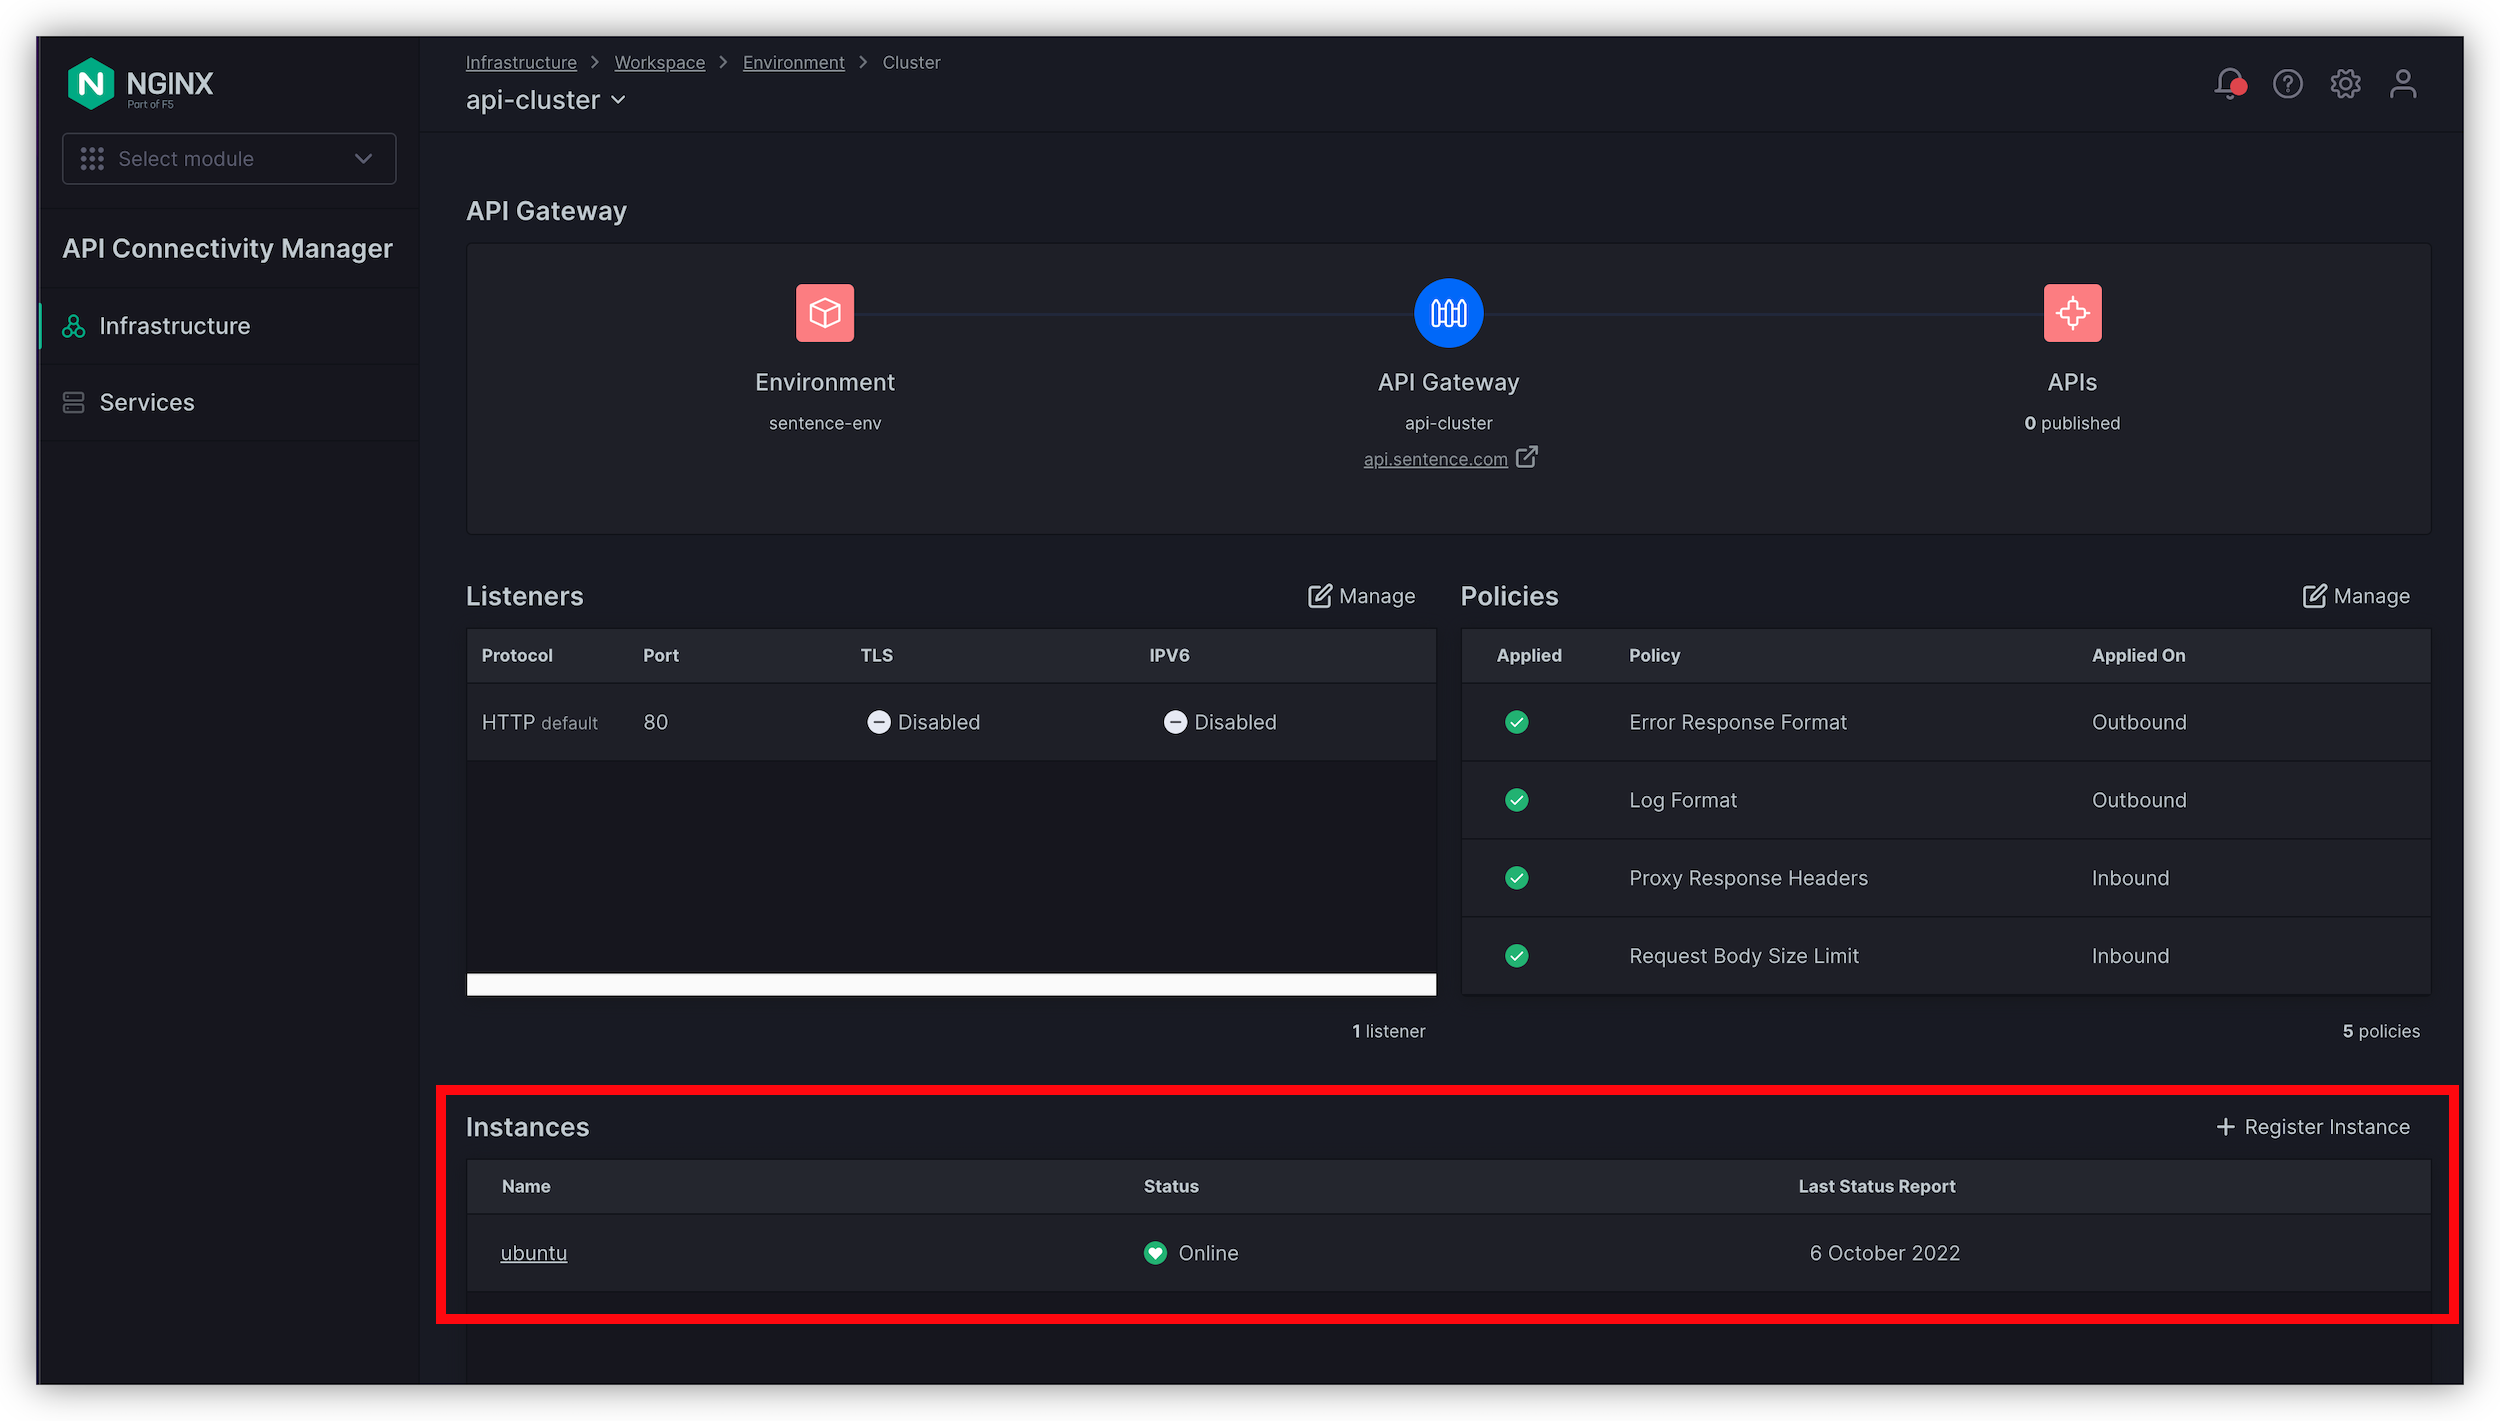
API Gateway Clusterssection, click on nameapi-cluster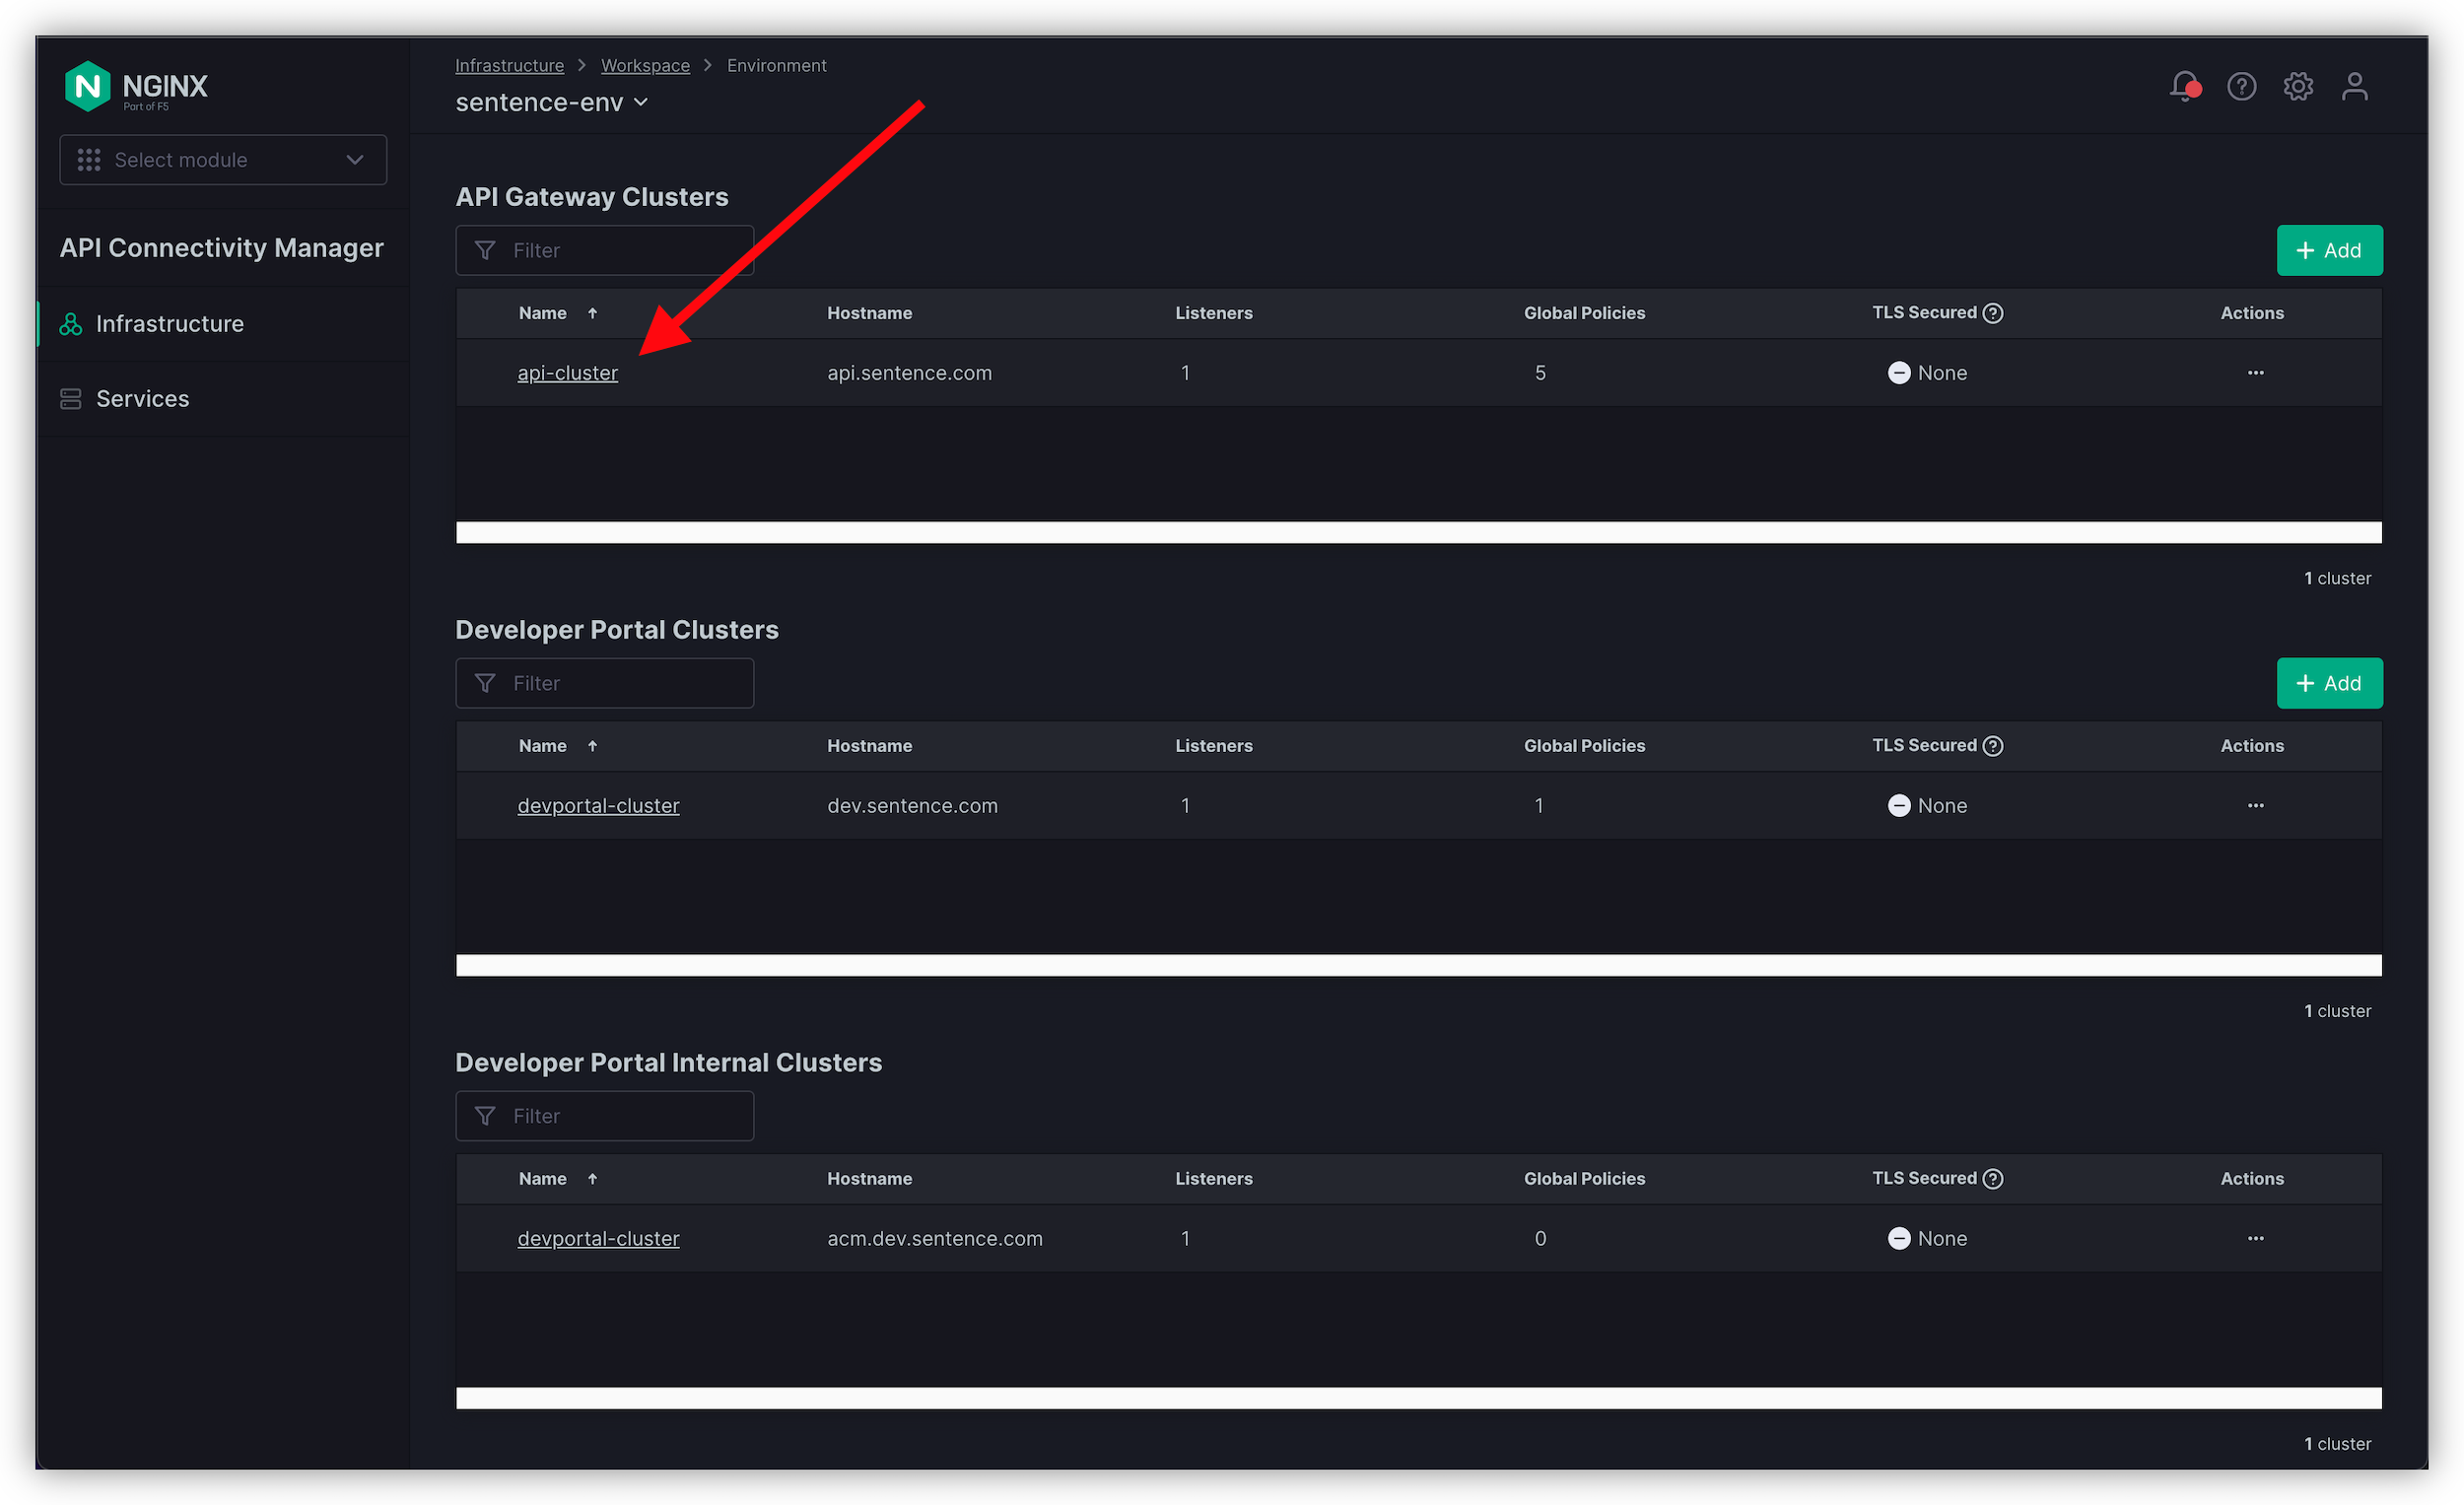
Scroll down and check your API-GW instance is linked and green
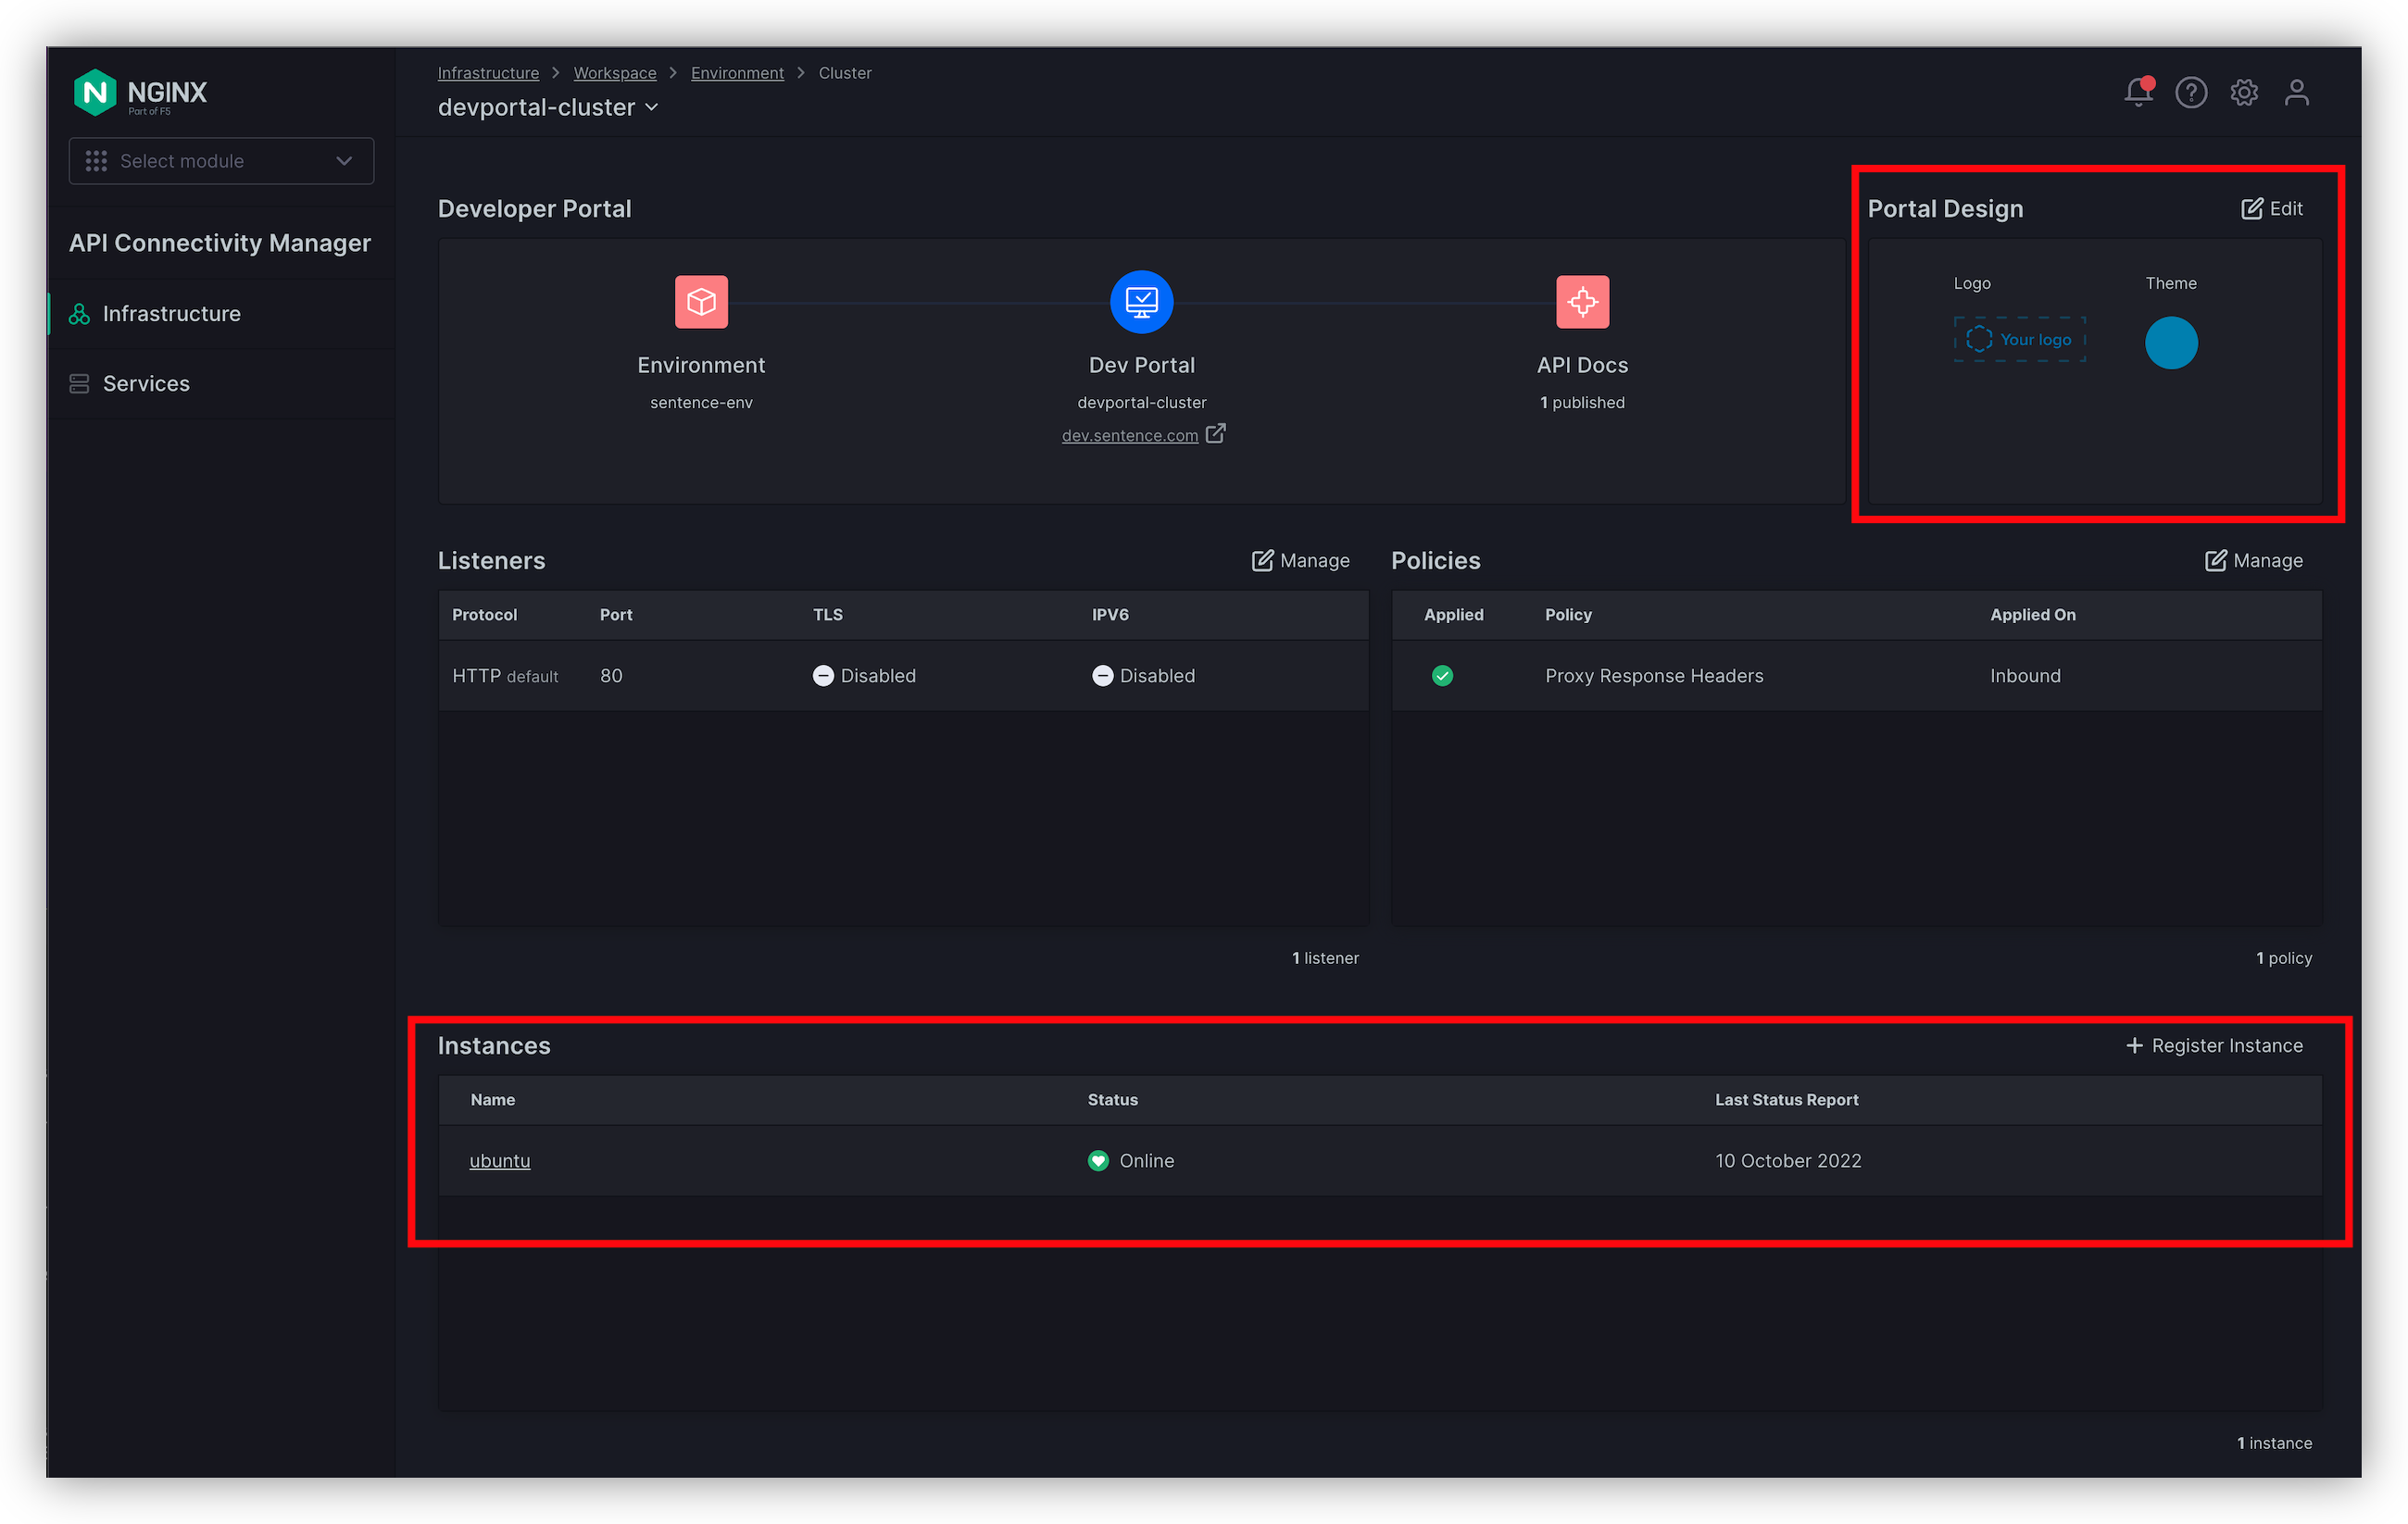
Switch to the
Dev-Portalby clicking on the cluster top menu
You can see your Nginx DevPortal instance GREEN, but also a way to customize the DevPortal
Wait for the environment to be GREEN
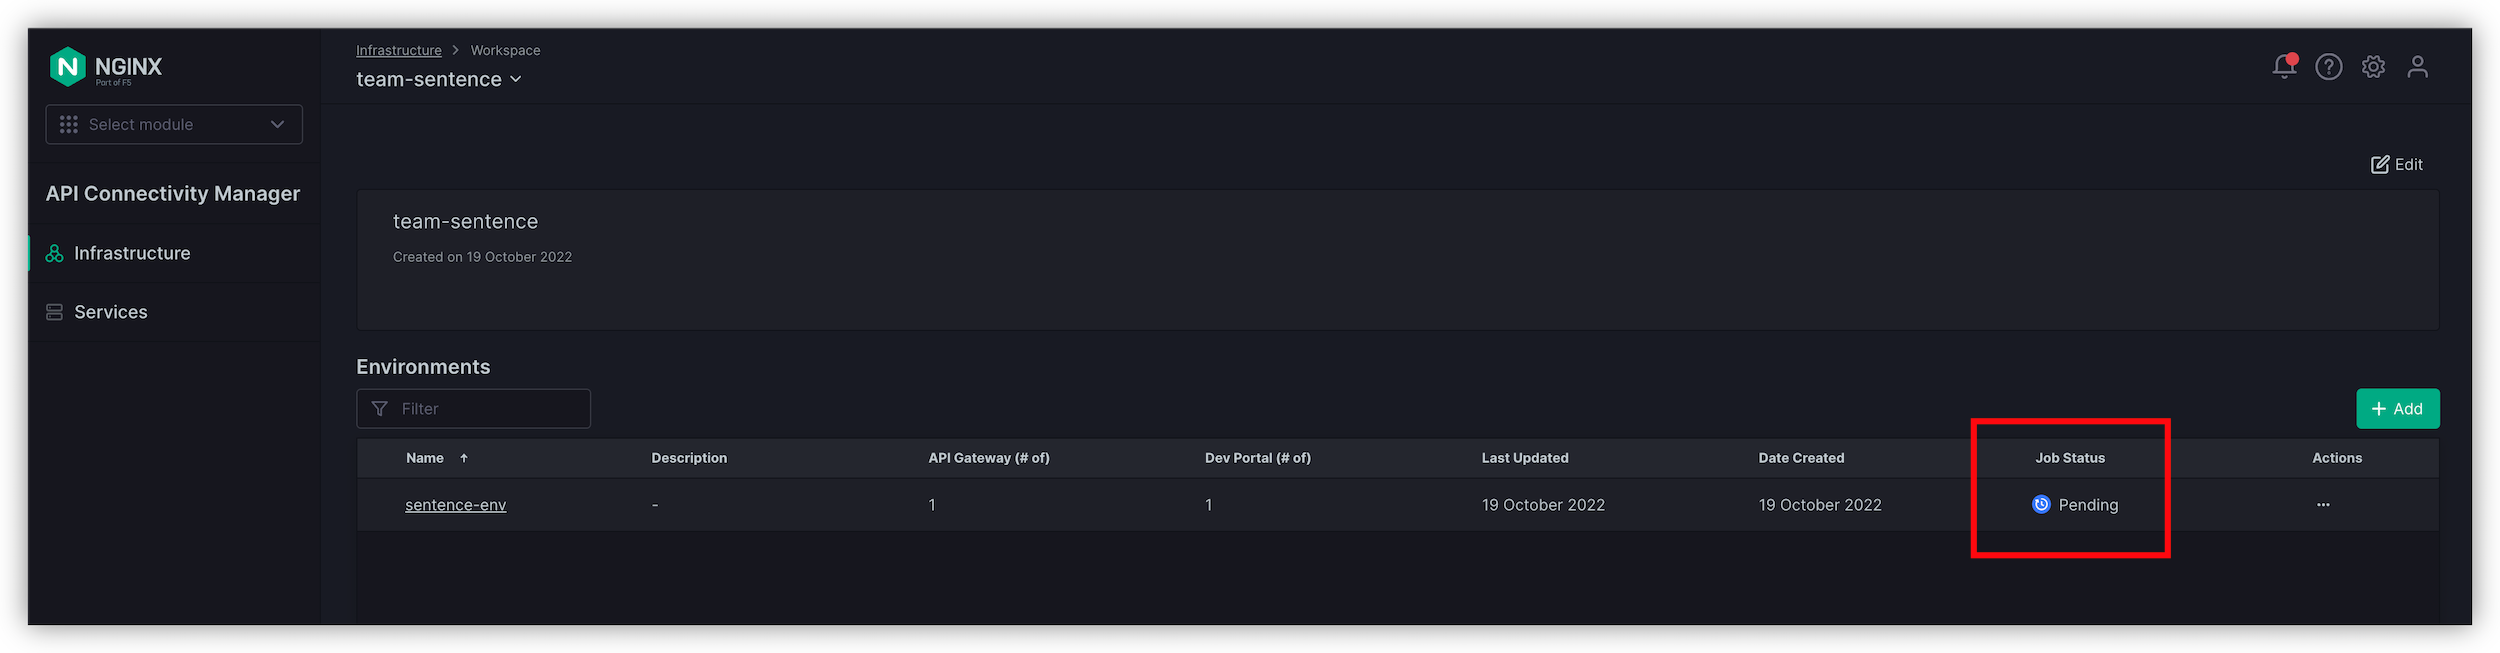
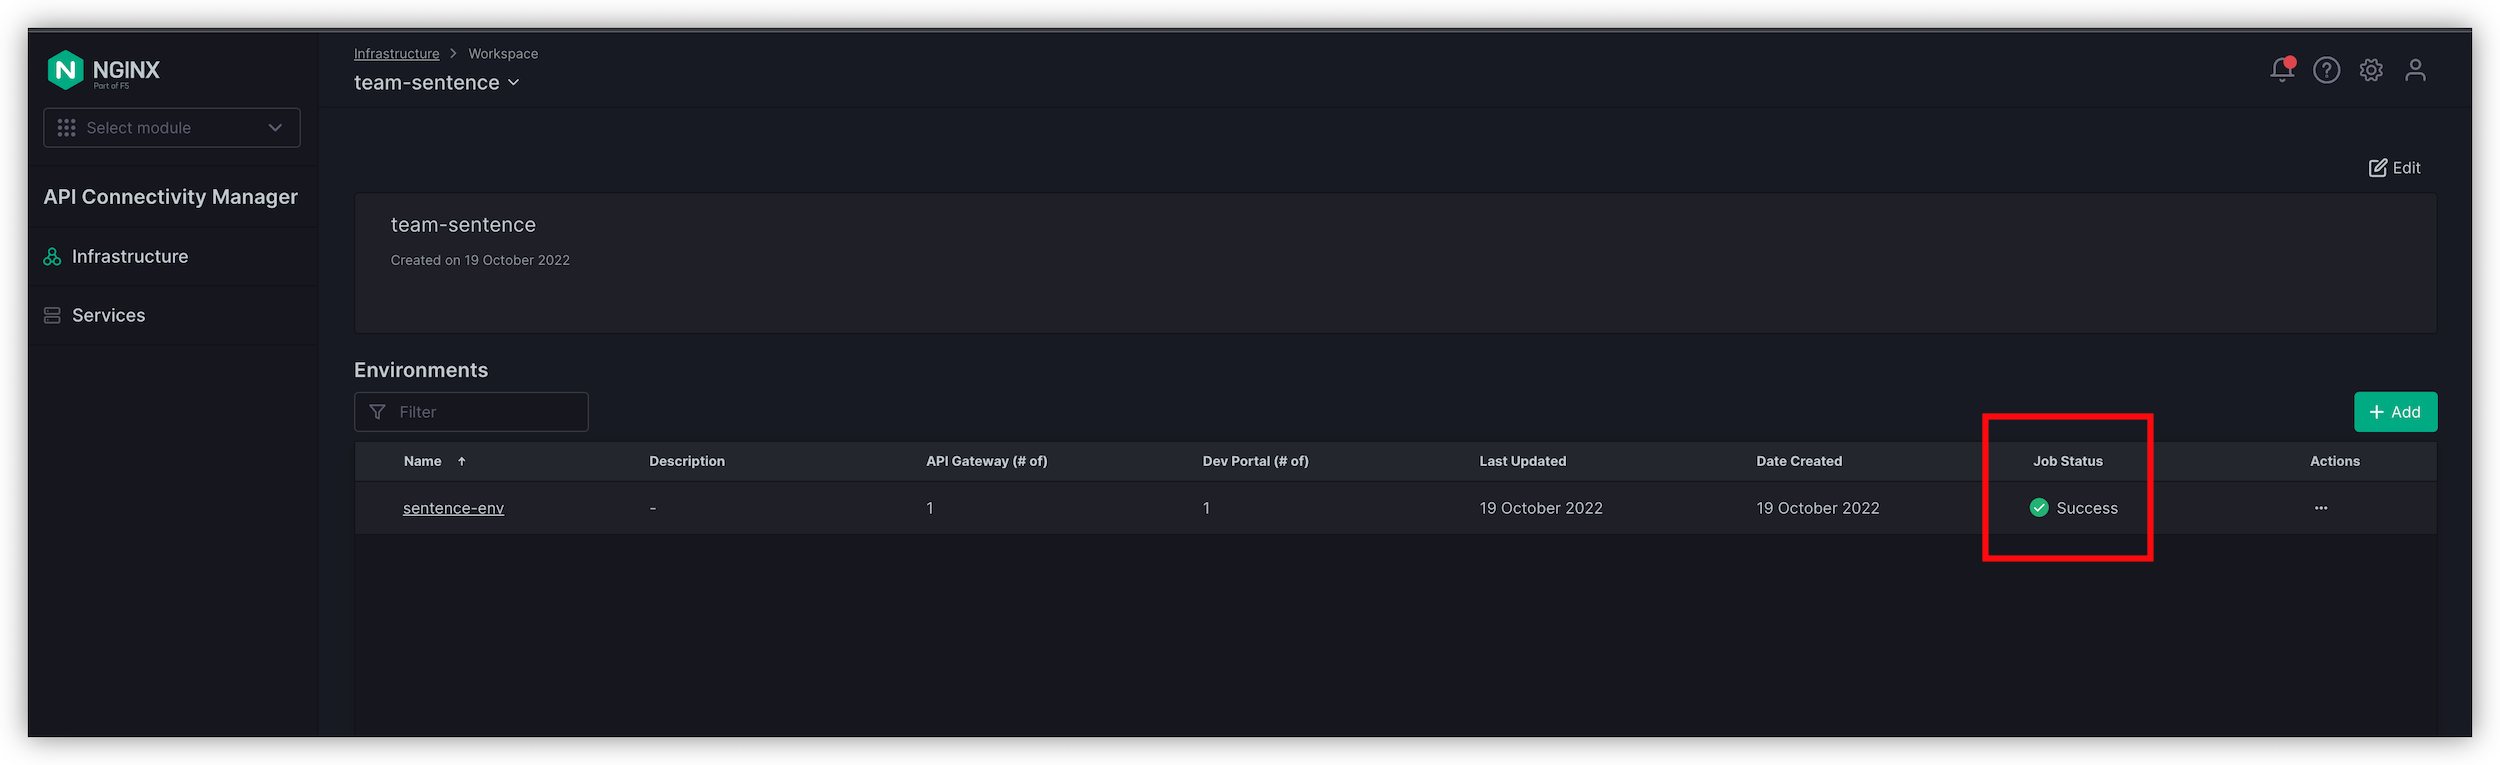
Switch back to your Infrastructure team-sentence Workspace screen. And check the
Job StatusNote
If you don’t see the column
Job Status, scroll to the right; the column is hidden because of the Win10 RDP low resolution.Wait till it passes to
Success. This can take several minutes.