NGINX Modern Apps > Class 10 - NMS API Connectivity Manager > Module 4 - Dev Team - Consume API v1.0 Source | Edit on
Step 7 - Onboard as a Dev API
The goal of a Developer Portal is not only to provide API Documentation. In addition, a Developer Portal offers the possibility to try out the API directly from it.
It means the Developers will ask for API Keys from this portal and use these keys to try out APIs. Then, the Developer Portal will send a request to the API Gateway with the API-KEY generated.
In this lab, the Infrastructure and API teams will modify the NMS ACM configurations to:
Infrateam action : Enable Authentication for developers on the Dev Portal with OIDC (Keycloak as Identity Provider)APIteam action : Enable API-Key authentication on the Sentence API proxy (so far, there is no authentication on the API Gateway). So that a Developer can use the API-KEY created by the Developer Portal.
Infrastructure team - Steps
The infrastructure team must enable OIDC on the DevPortal instance. To do so, follow these steps.
In NMS ACM, in
Infrastructuresection, go into yourteam-sentenceworkspace, thensentence-envenvironmentClick on your
devportal-clusterobjectIn the
Policiessection, click onManage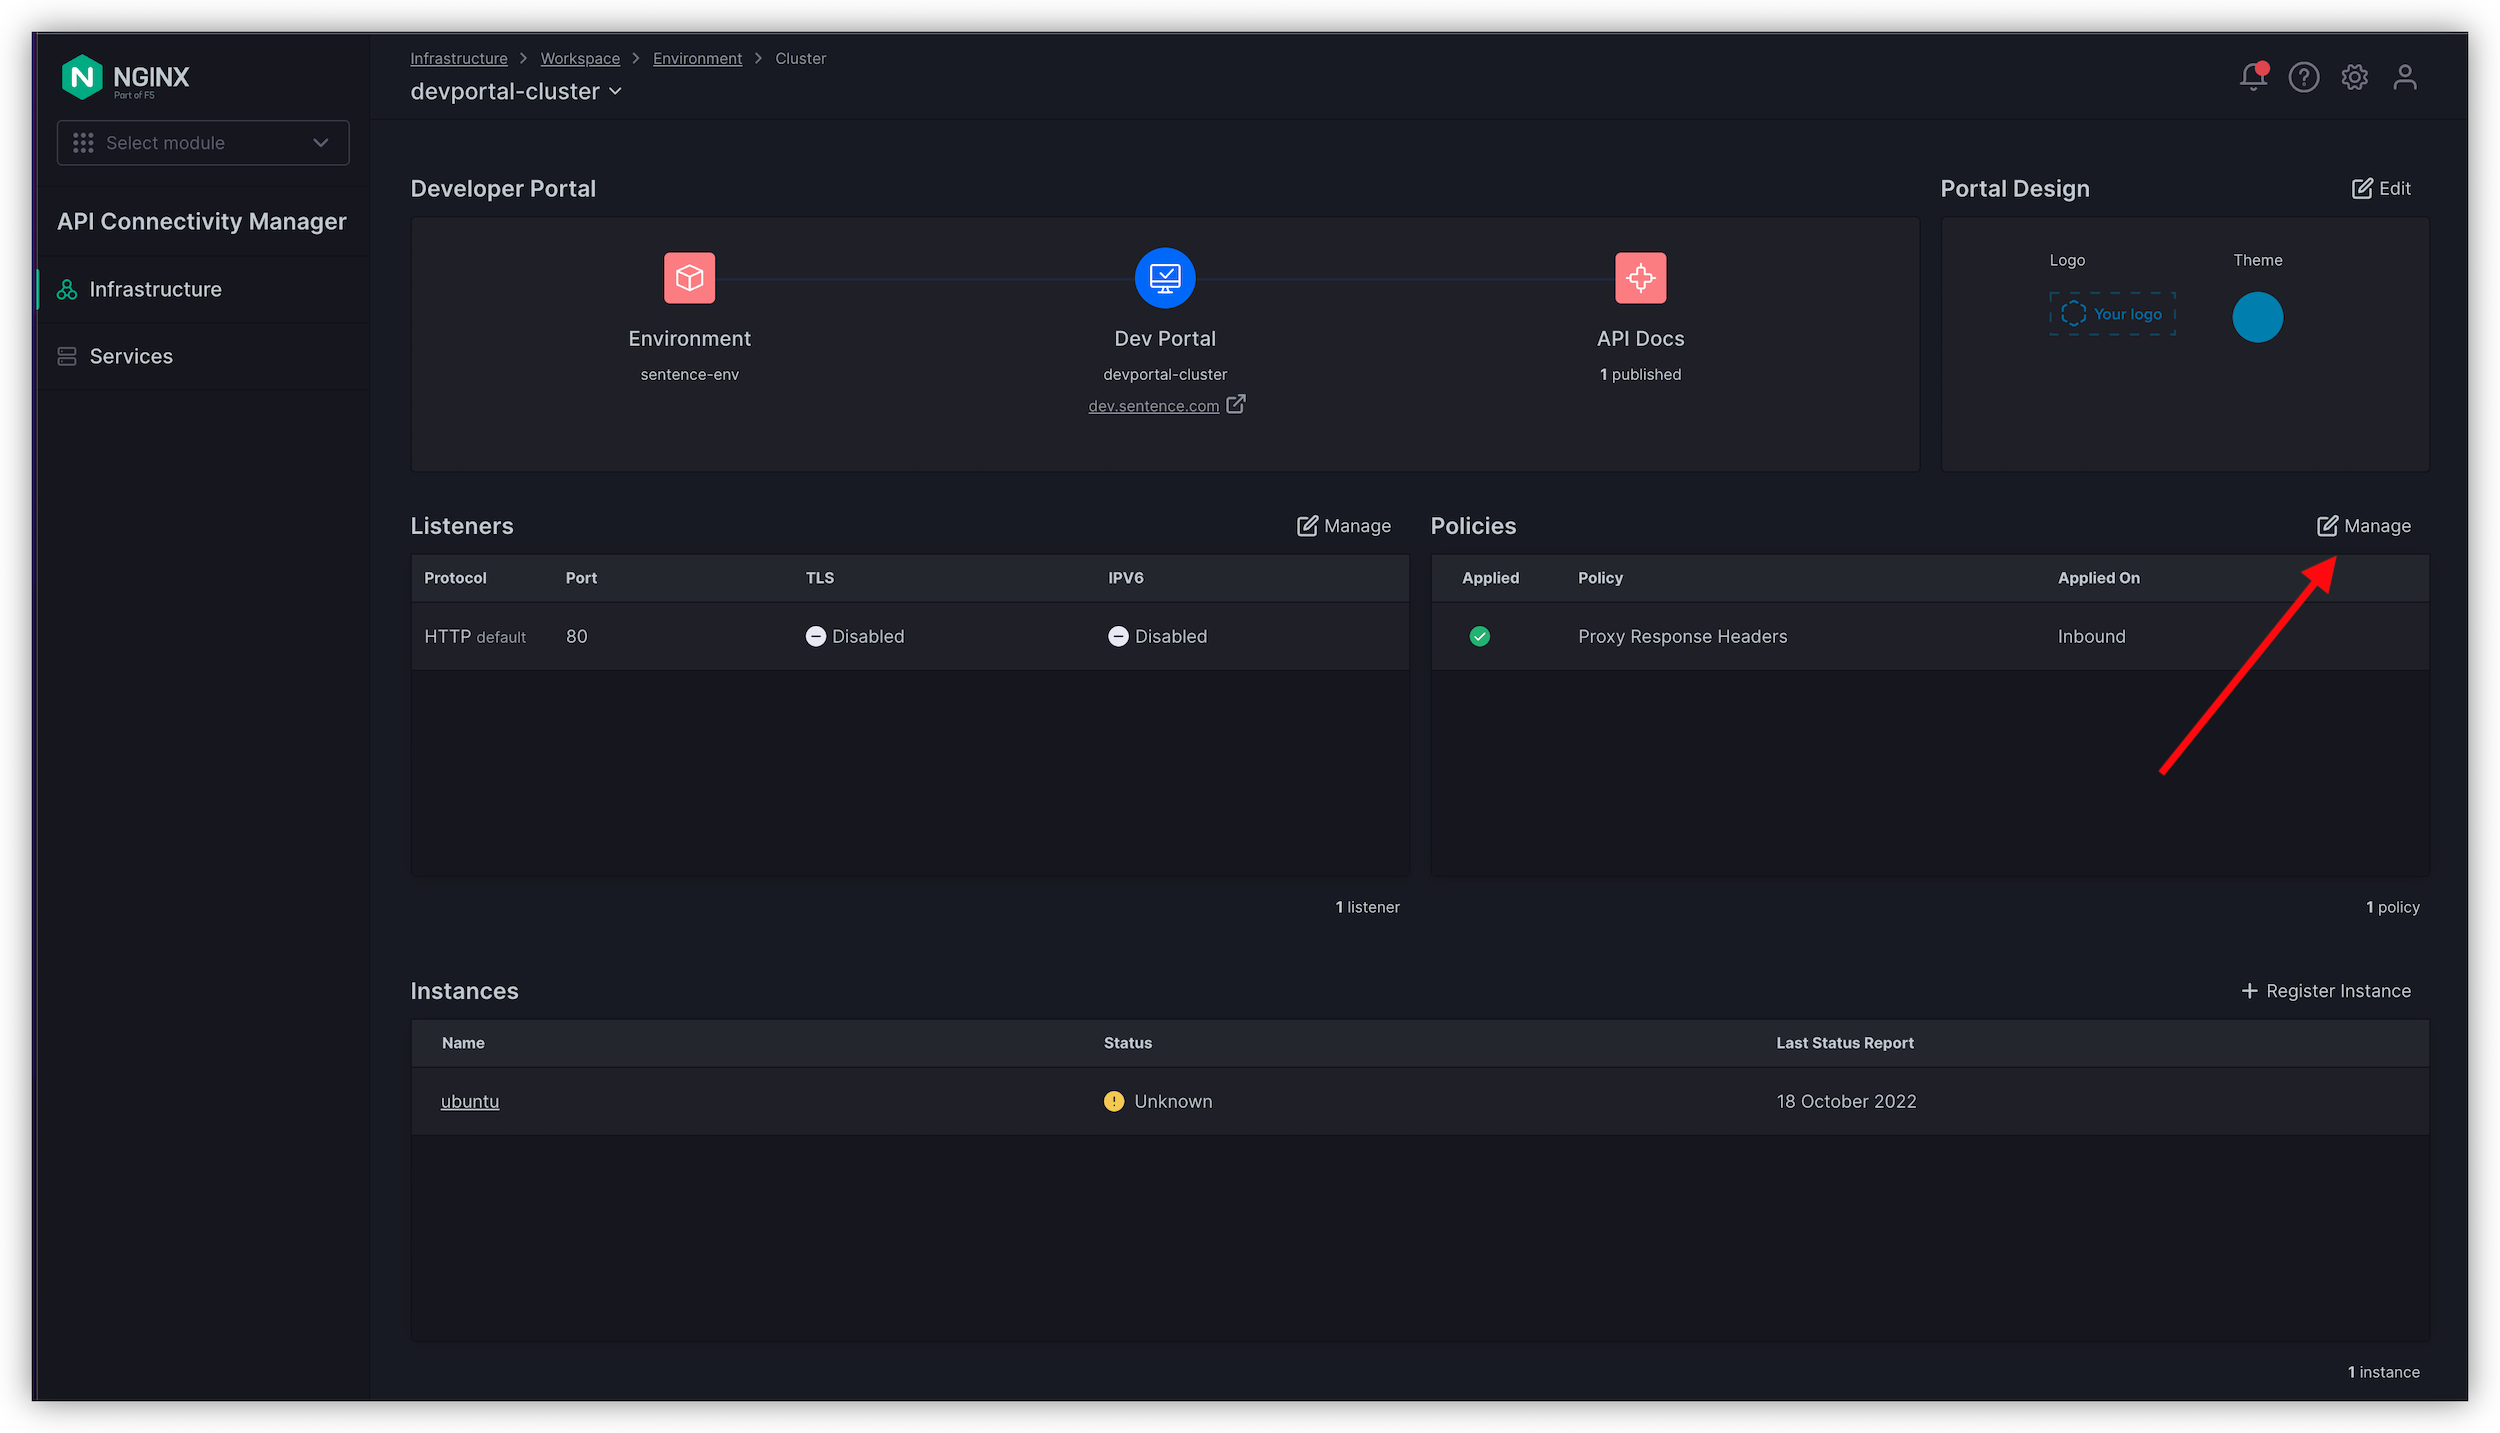
On the row
OpenID Connect Relying Party, click on the three dots on the top right andAdd Policy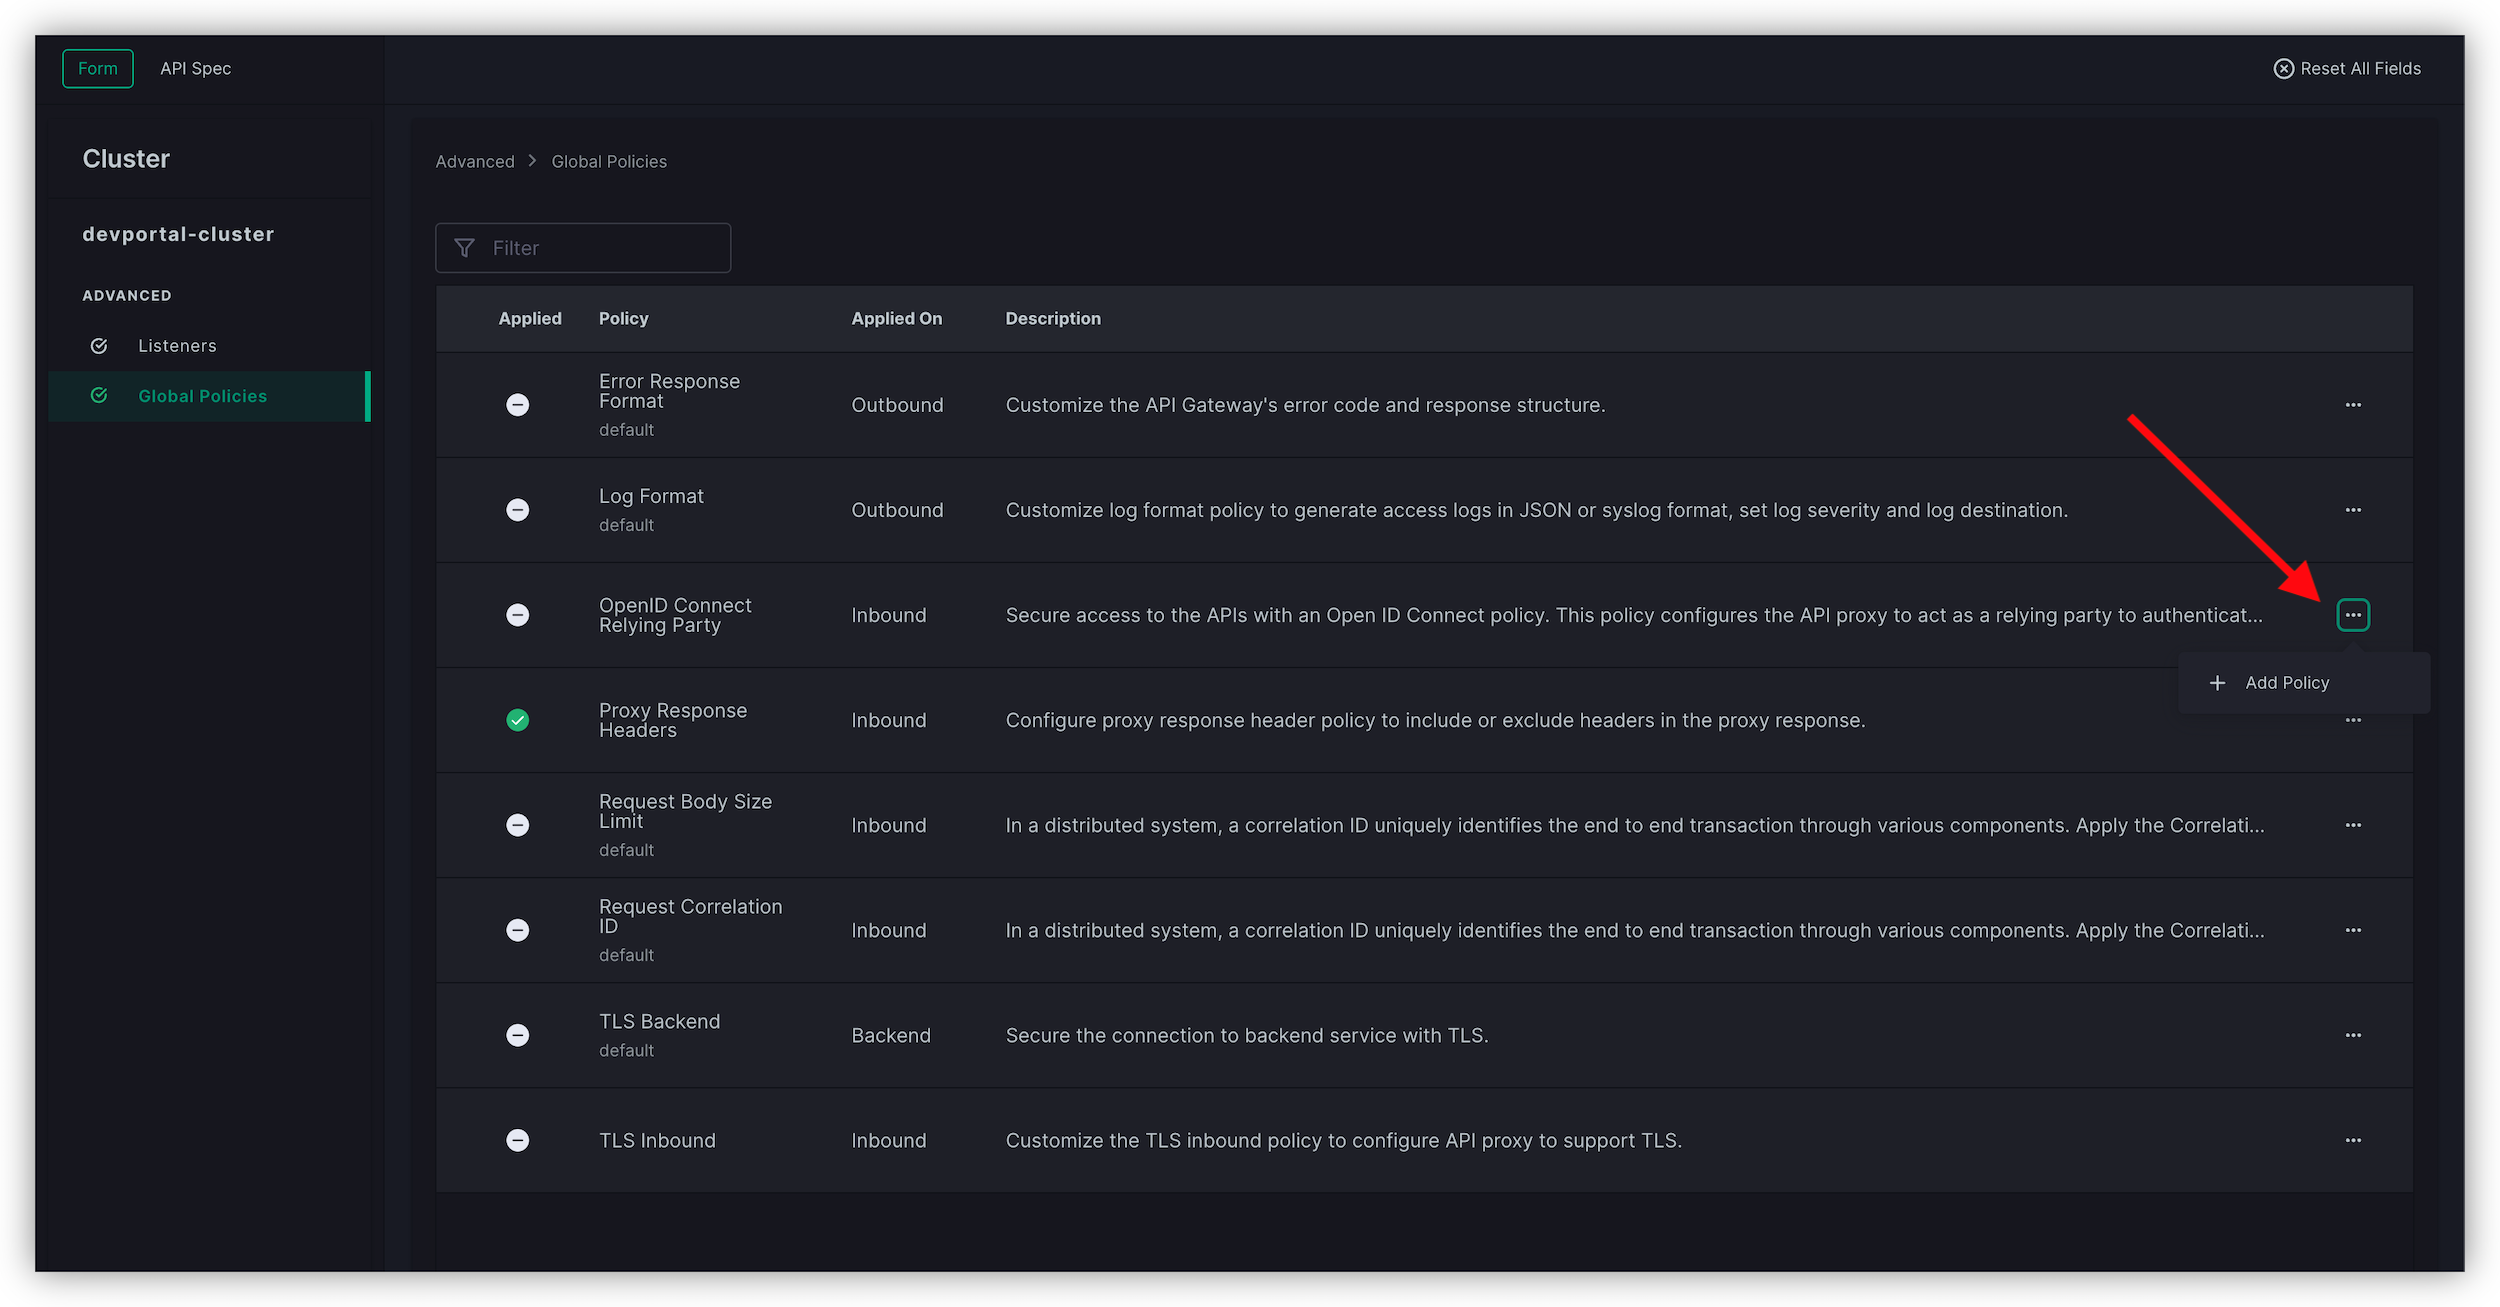
Keycloak is already configured to authenticate Developers with your Developer Portal listening on http://dev.sentence.com. Configure the policy as below:
- Choose an OAuth Flow :
PKCE - App Name :
devportal - Client ID :
devportal - Client secret : empty as we are using PKCE (no secret)
- Scopes : keep only
openid - Keys :
http://10.1.1.4:8080/realms/devportal/protocol/openid-connect/certs - Token :
http://10.1.1.4:8080/realms/devportal/protocol/openid-connect/token - Authorization :
http://10.1.1.4:8080/realms/devportal/protocol/openid-connect/auth - User Info :
http://10.1.1.4:8080/realms/devportal/protocol/openid-connect/userinfo - Logout URI :
http://10.1.1.4:8080/realms/devportal/protocol/openid-connect/logout
Note
The Keycloak configuration console provides all those endpoints. These Keycloak configurations have already been completed.
- Choose an OAuth Flow :
Click
AddClick
Save and Submit
Note
Now, the Developer Portal instance is ready to authenticate Developers against Keycloak as Identity Provider. Developers are already onboarded in Keycloak.
Note
When a developer is authenticated, they can request their API-Keys
API Team - Steps
The API team must enable API-Key authentication on top of the exposed Sentence API Version 1 so that Developers can use the API Keys requested in the Developer Portal.
Switch to
Serviceson the left menu, go to yoursentence-appworkspace, and edit yoursentence-apiAPI proxy (click on the three dots, thenEdit Proxy).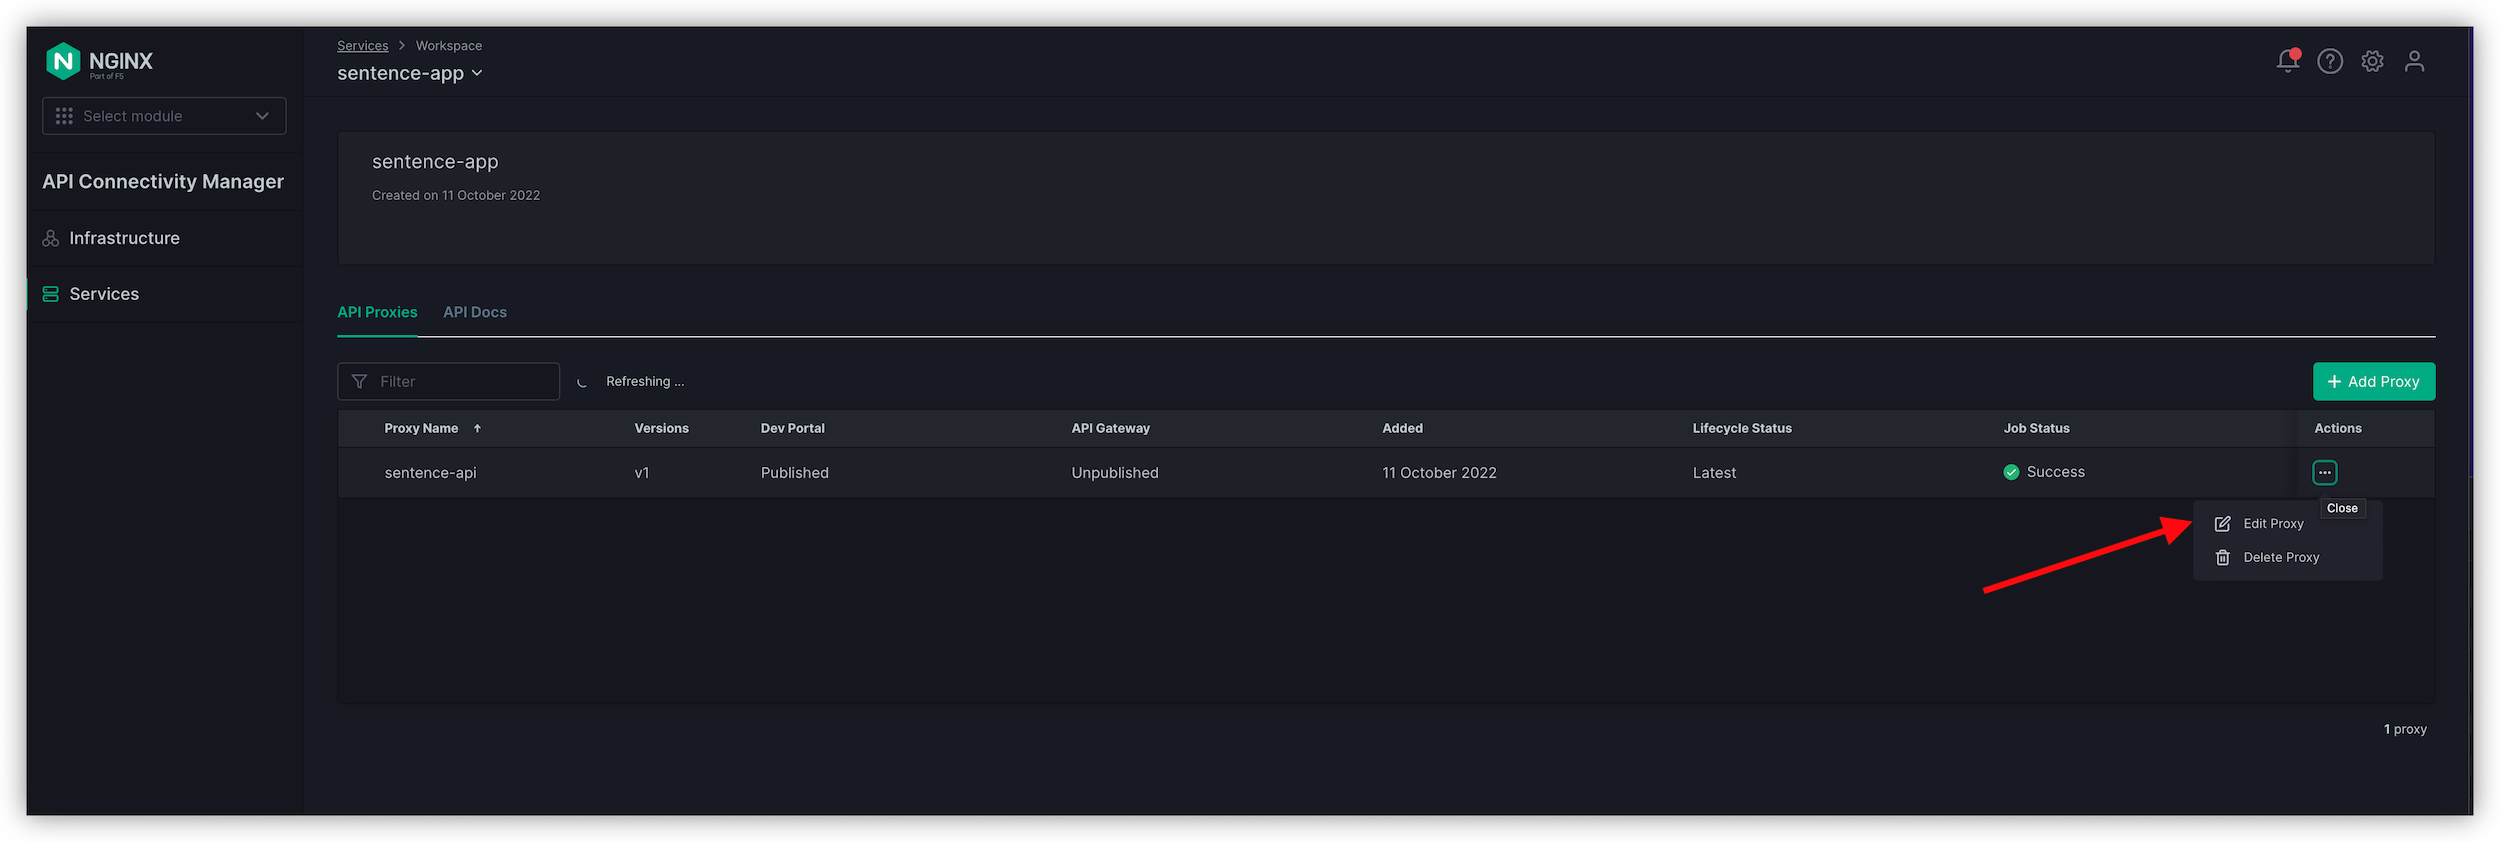
In the
Policiessection,Add policyforAPIKey AuthenticationDon’t make any changes; click
AddClick
Save & Publish
Note
Now, the API is protected by APIKey authentication. Every request to the API http://api.sentence.com requires an APIKey header and value.
Developer Team - Test the protected API
Request API keys
In Win10, connect to the Developer Portal
You should now see a
Loginbutton on the top right corner (thanks to the infrastructure team who enabled OIDC)Login as dev1/dev1 on the Keycloak login page. You will be redirected to the DevPortal and authenticated.

A new menu will appear
App Credentials, click on it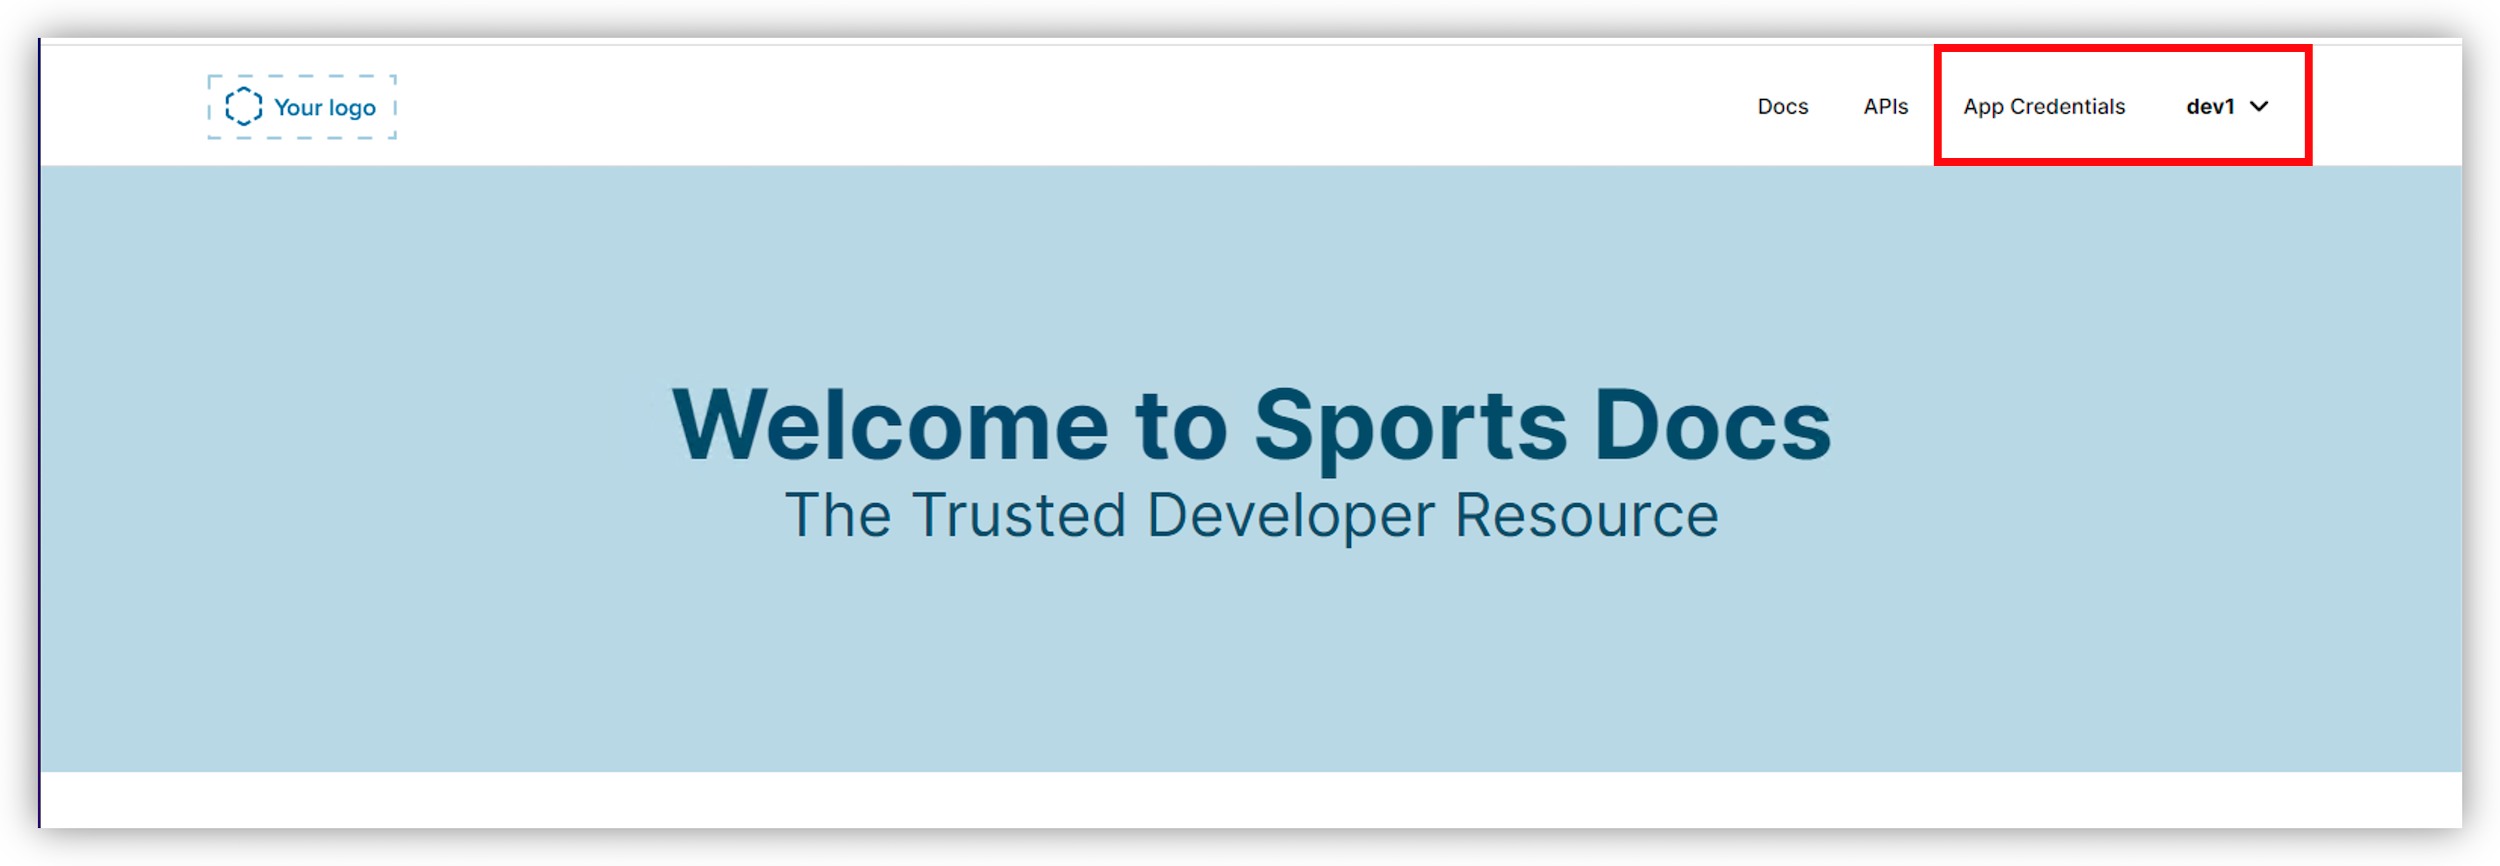
And click on
Create org. Name itnginxand clickCreateNotice there aren’t any credentials. Let’s create one:
- Click
Create credential - App name :
sentence1 - API : select
sentence-api v1- This is the version v1 exposed on the API Gateway. - Click
Generate
- Click
Note
You may need to refresh the page to see the newly generated key.
You can now expand your
sentence1APIKey to see the value (if not, refresh the page). Copy the value.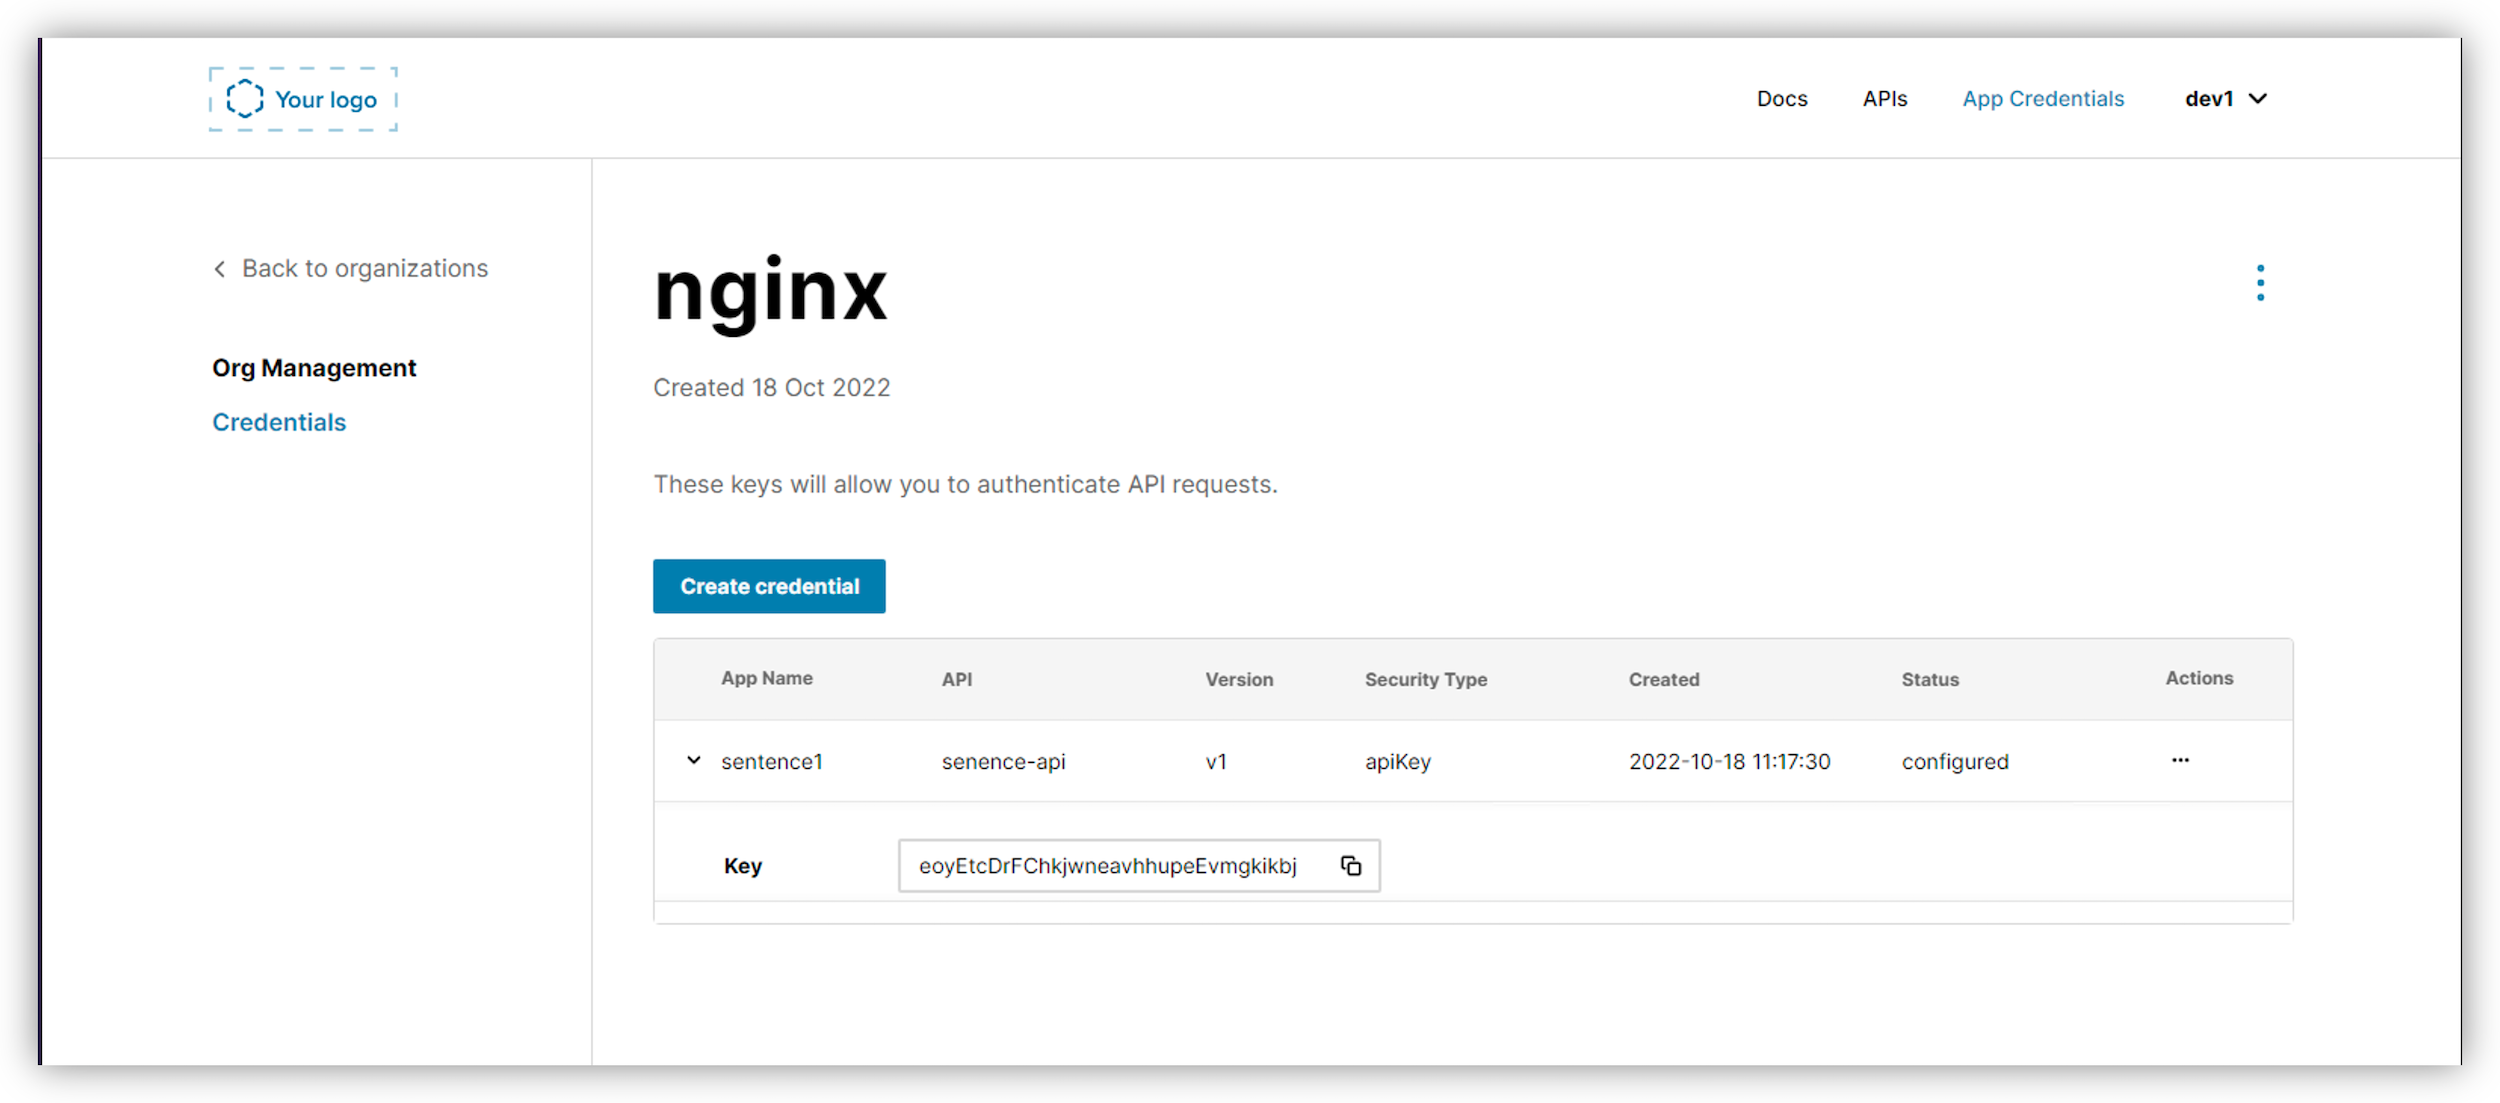
Test with Postman
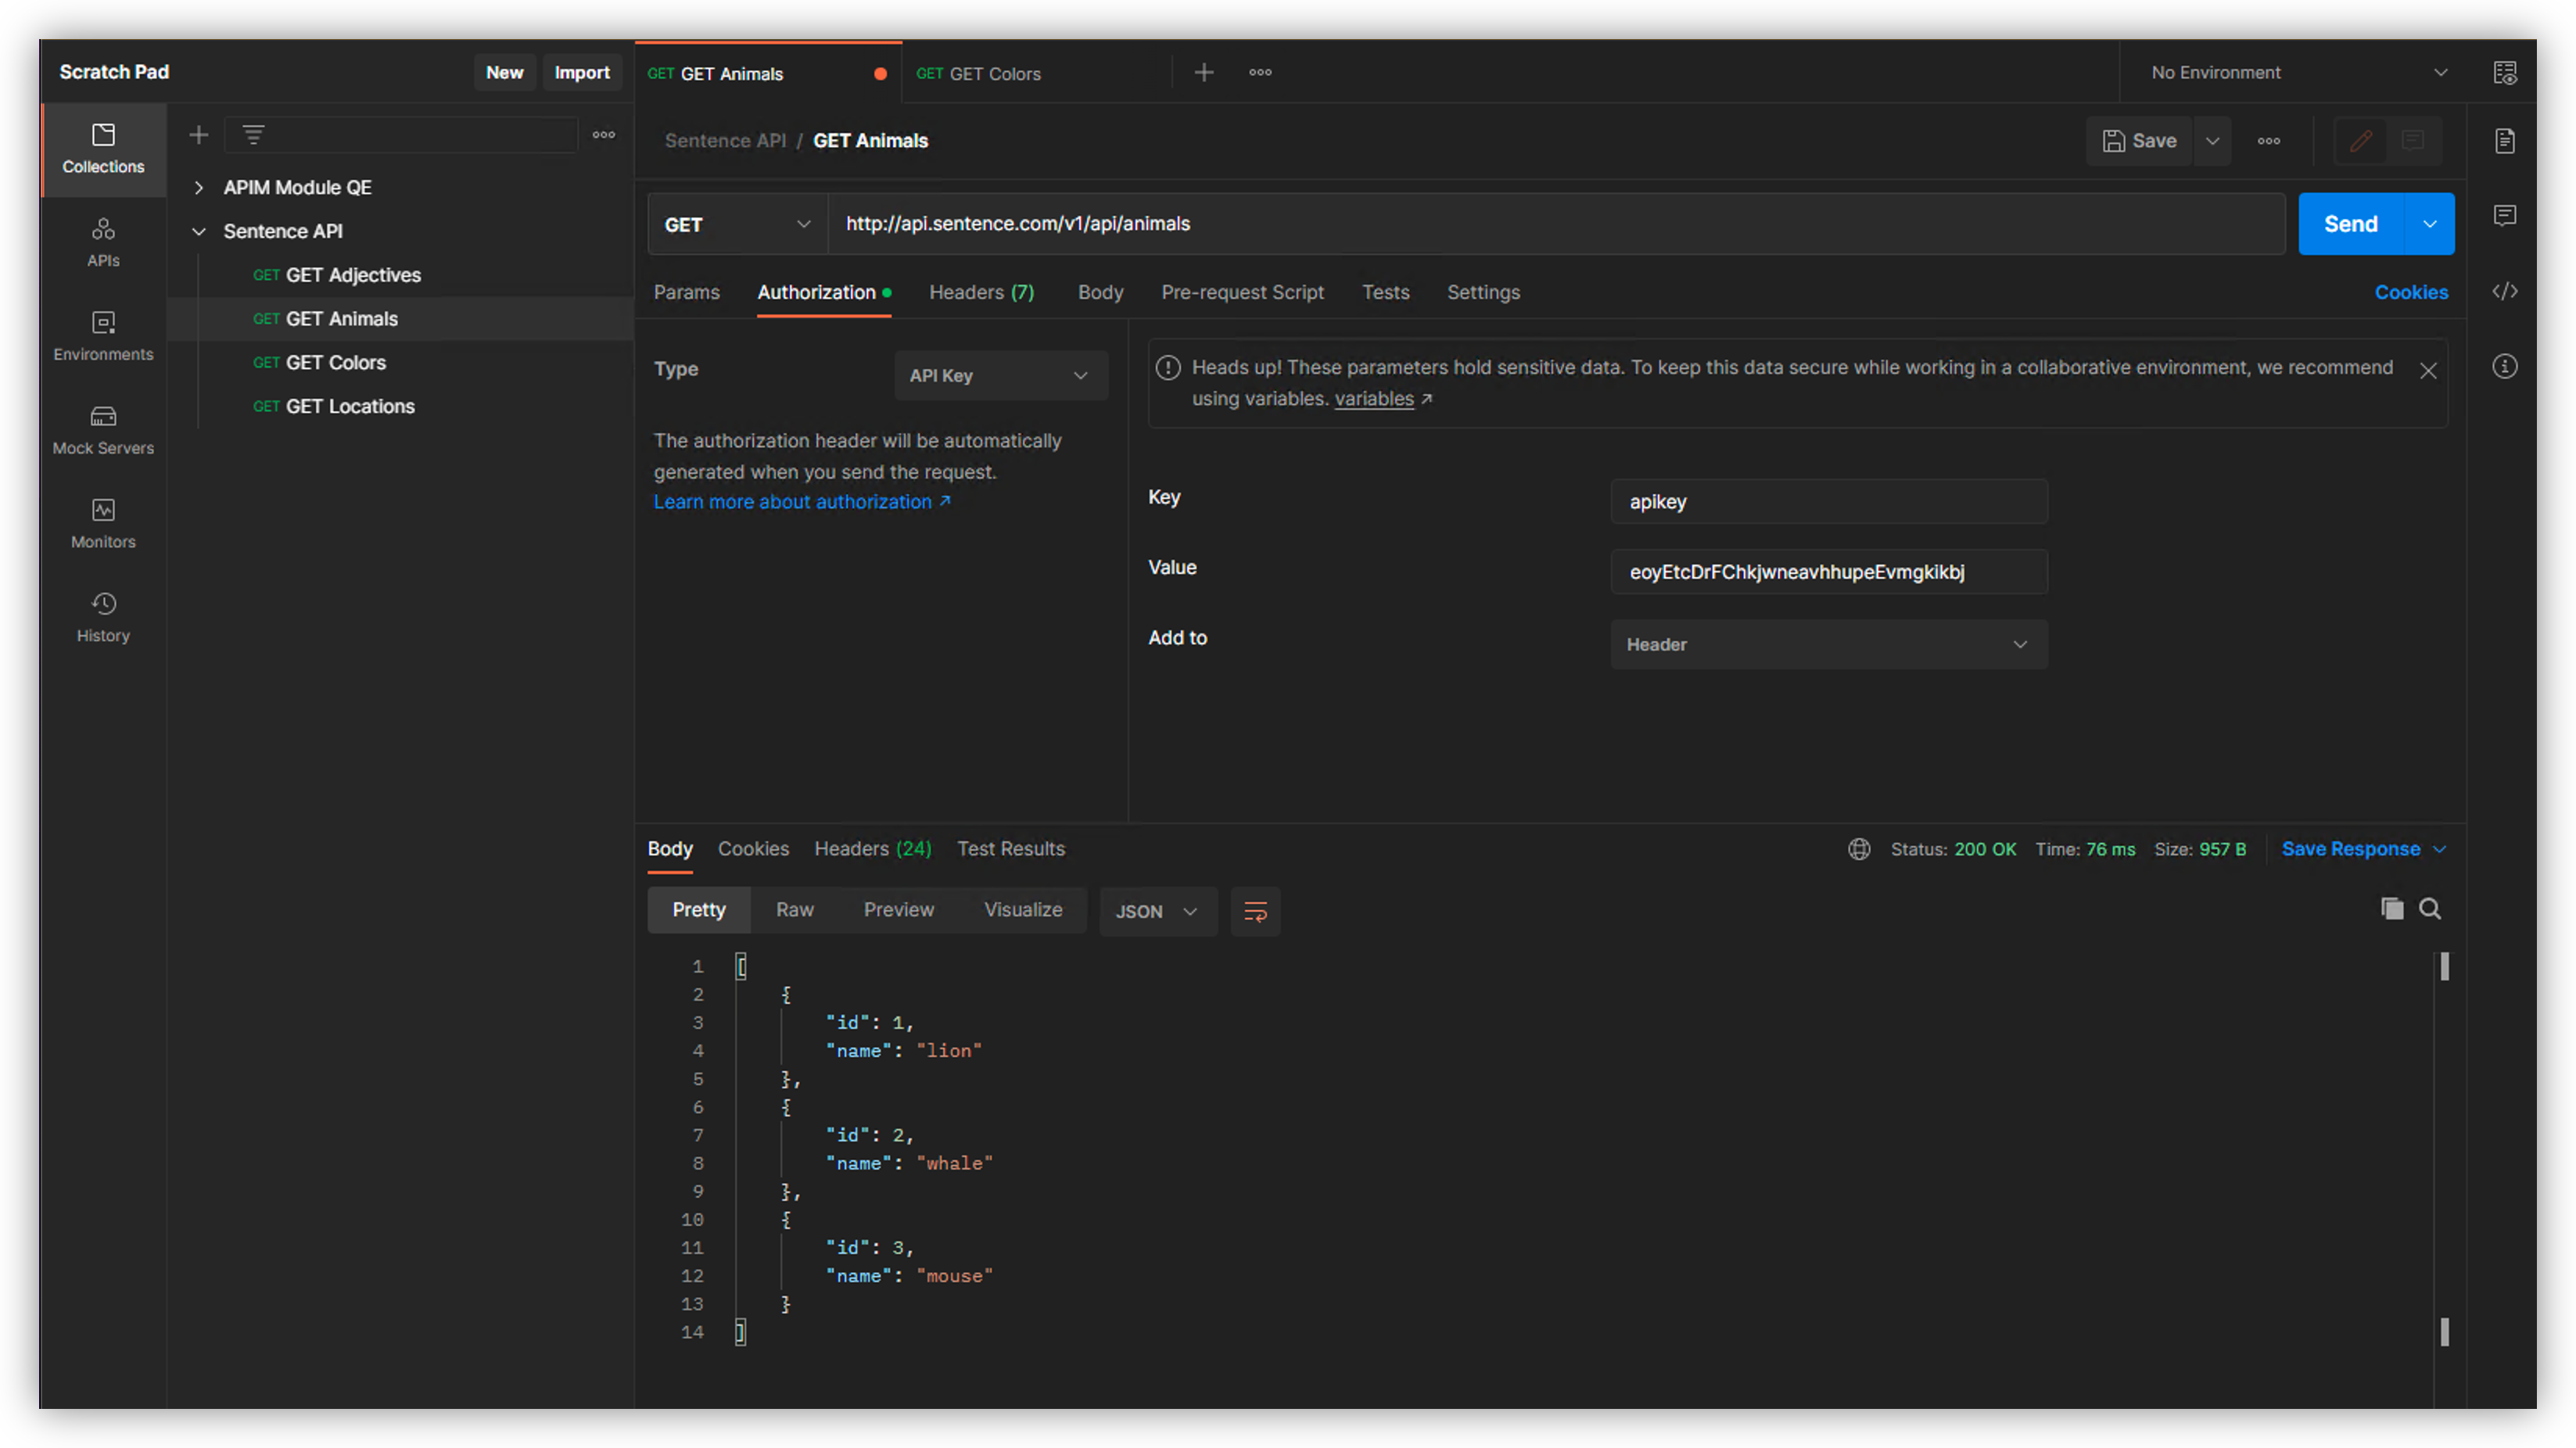
Open Postman, and select any API GET Call (except for
GET Colors). For instanceGET AnimalsSend the request, and you can notice a
401 - Unauthorized. The APIKey is required.{ "message": "Unauthorized", "status": "401" }
In the
Authorizationtab, selectAPI Keyand paste the value copied from the Developer Portal into theValuefield.Send the request
Note
The API Gateway accepts the request. The API Gateway has been automatically updated with the new API Key created by the Developer. Each time a developer creates a new API Key, all API Gateways are updated.
Test with the Developer Portal
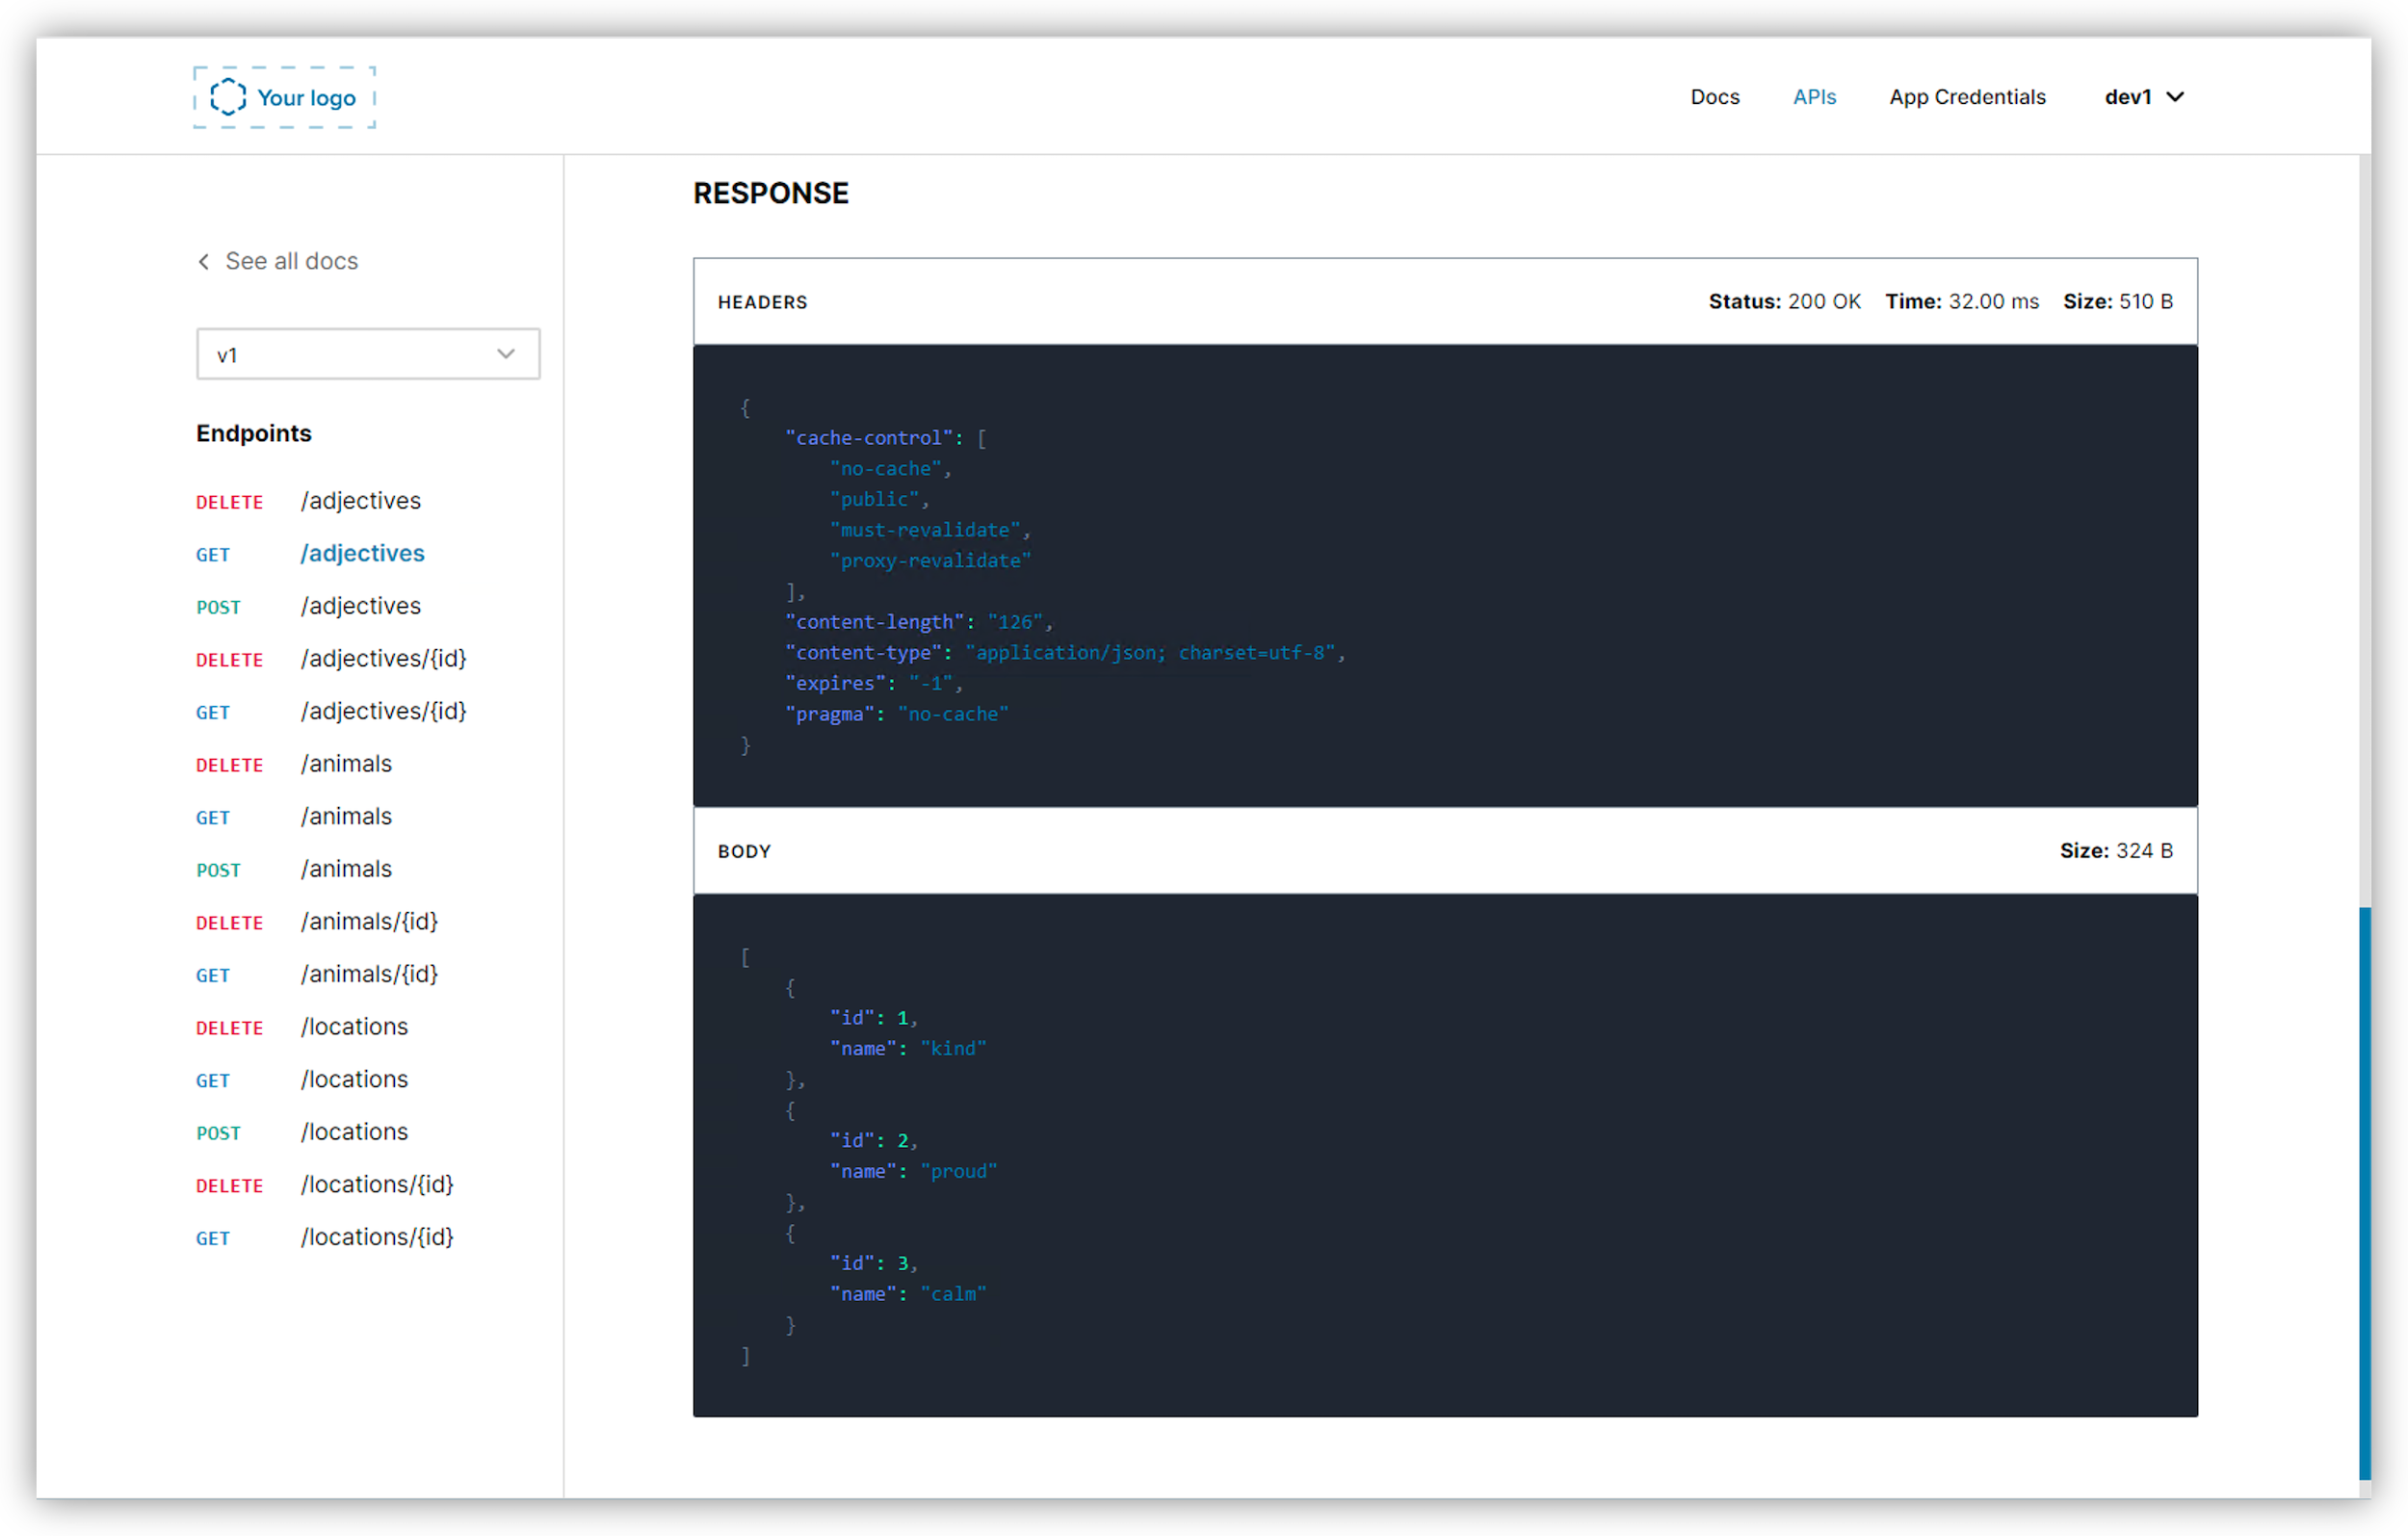
The developer portal has one more capability. They can test/try out the API.
In the developer portal, click on the
APIsmenu. If you are logged out, re-login.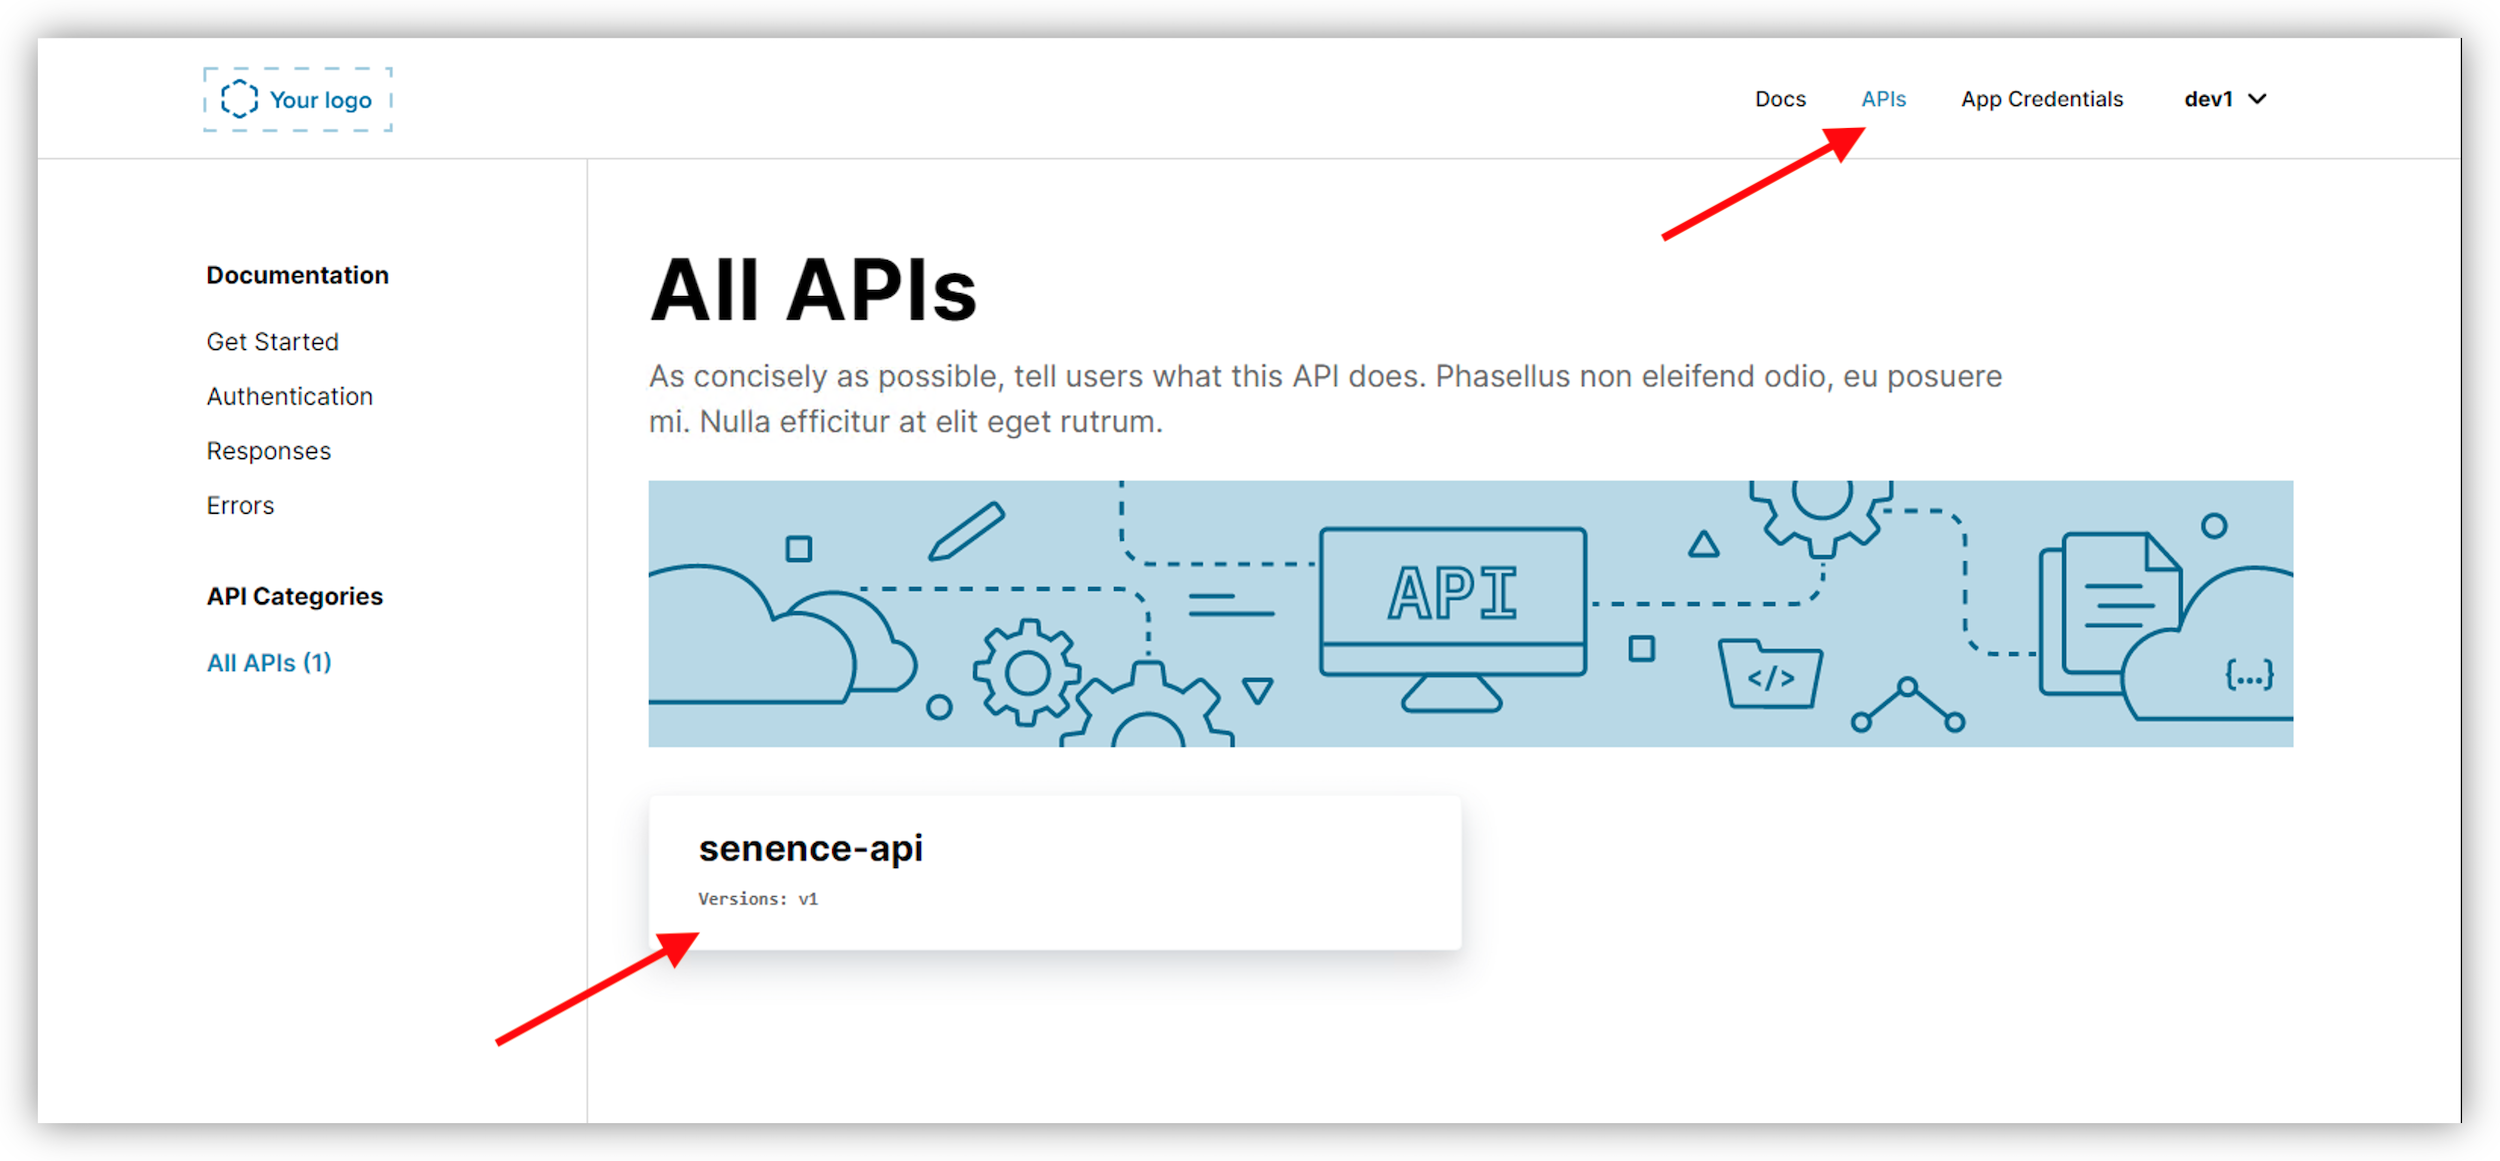
Click on
sentence-apidoc, then select a GET call from the left side pane (GET /adjectives, for example)Click on
Try it outand select the API Key created previouslyClick
Send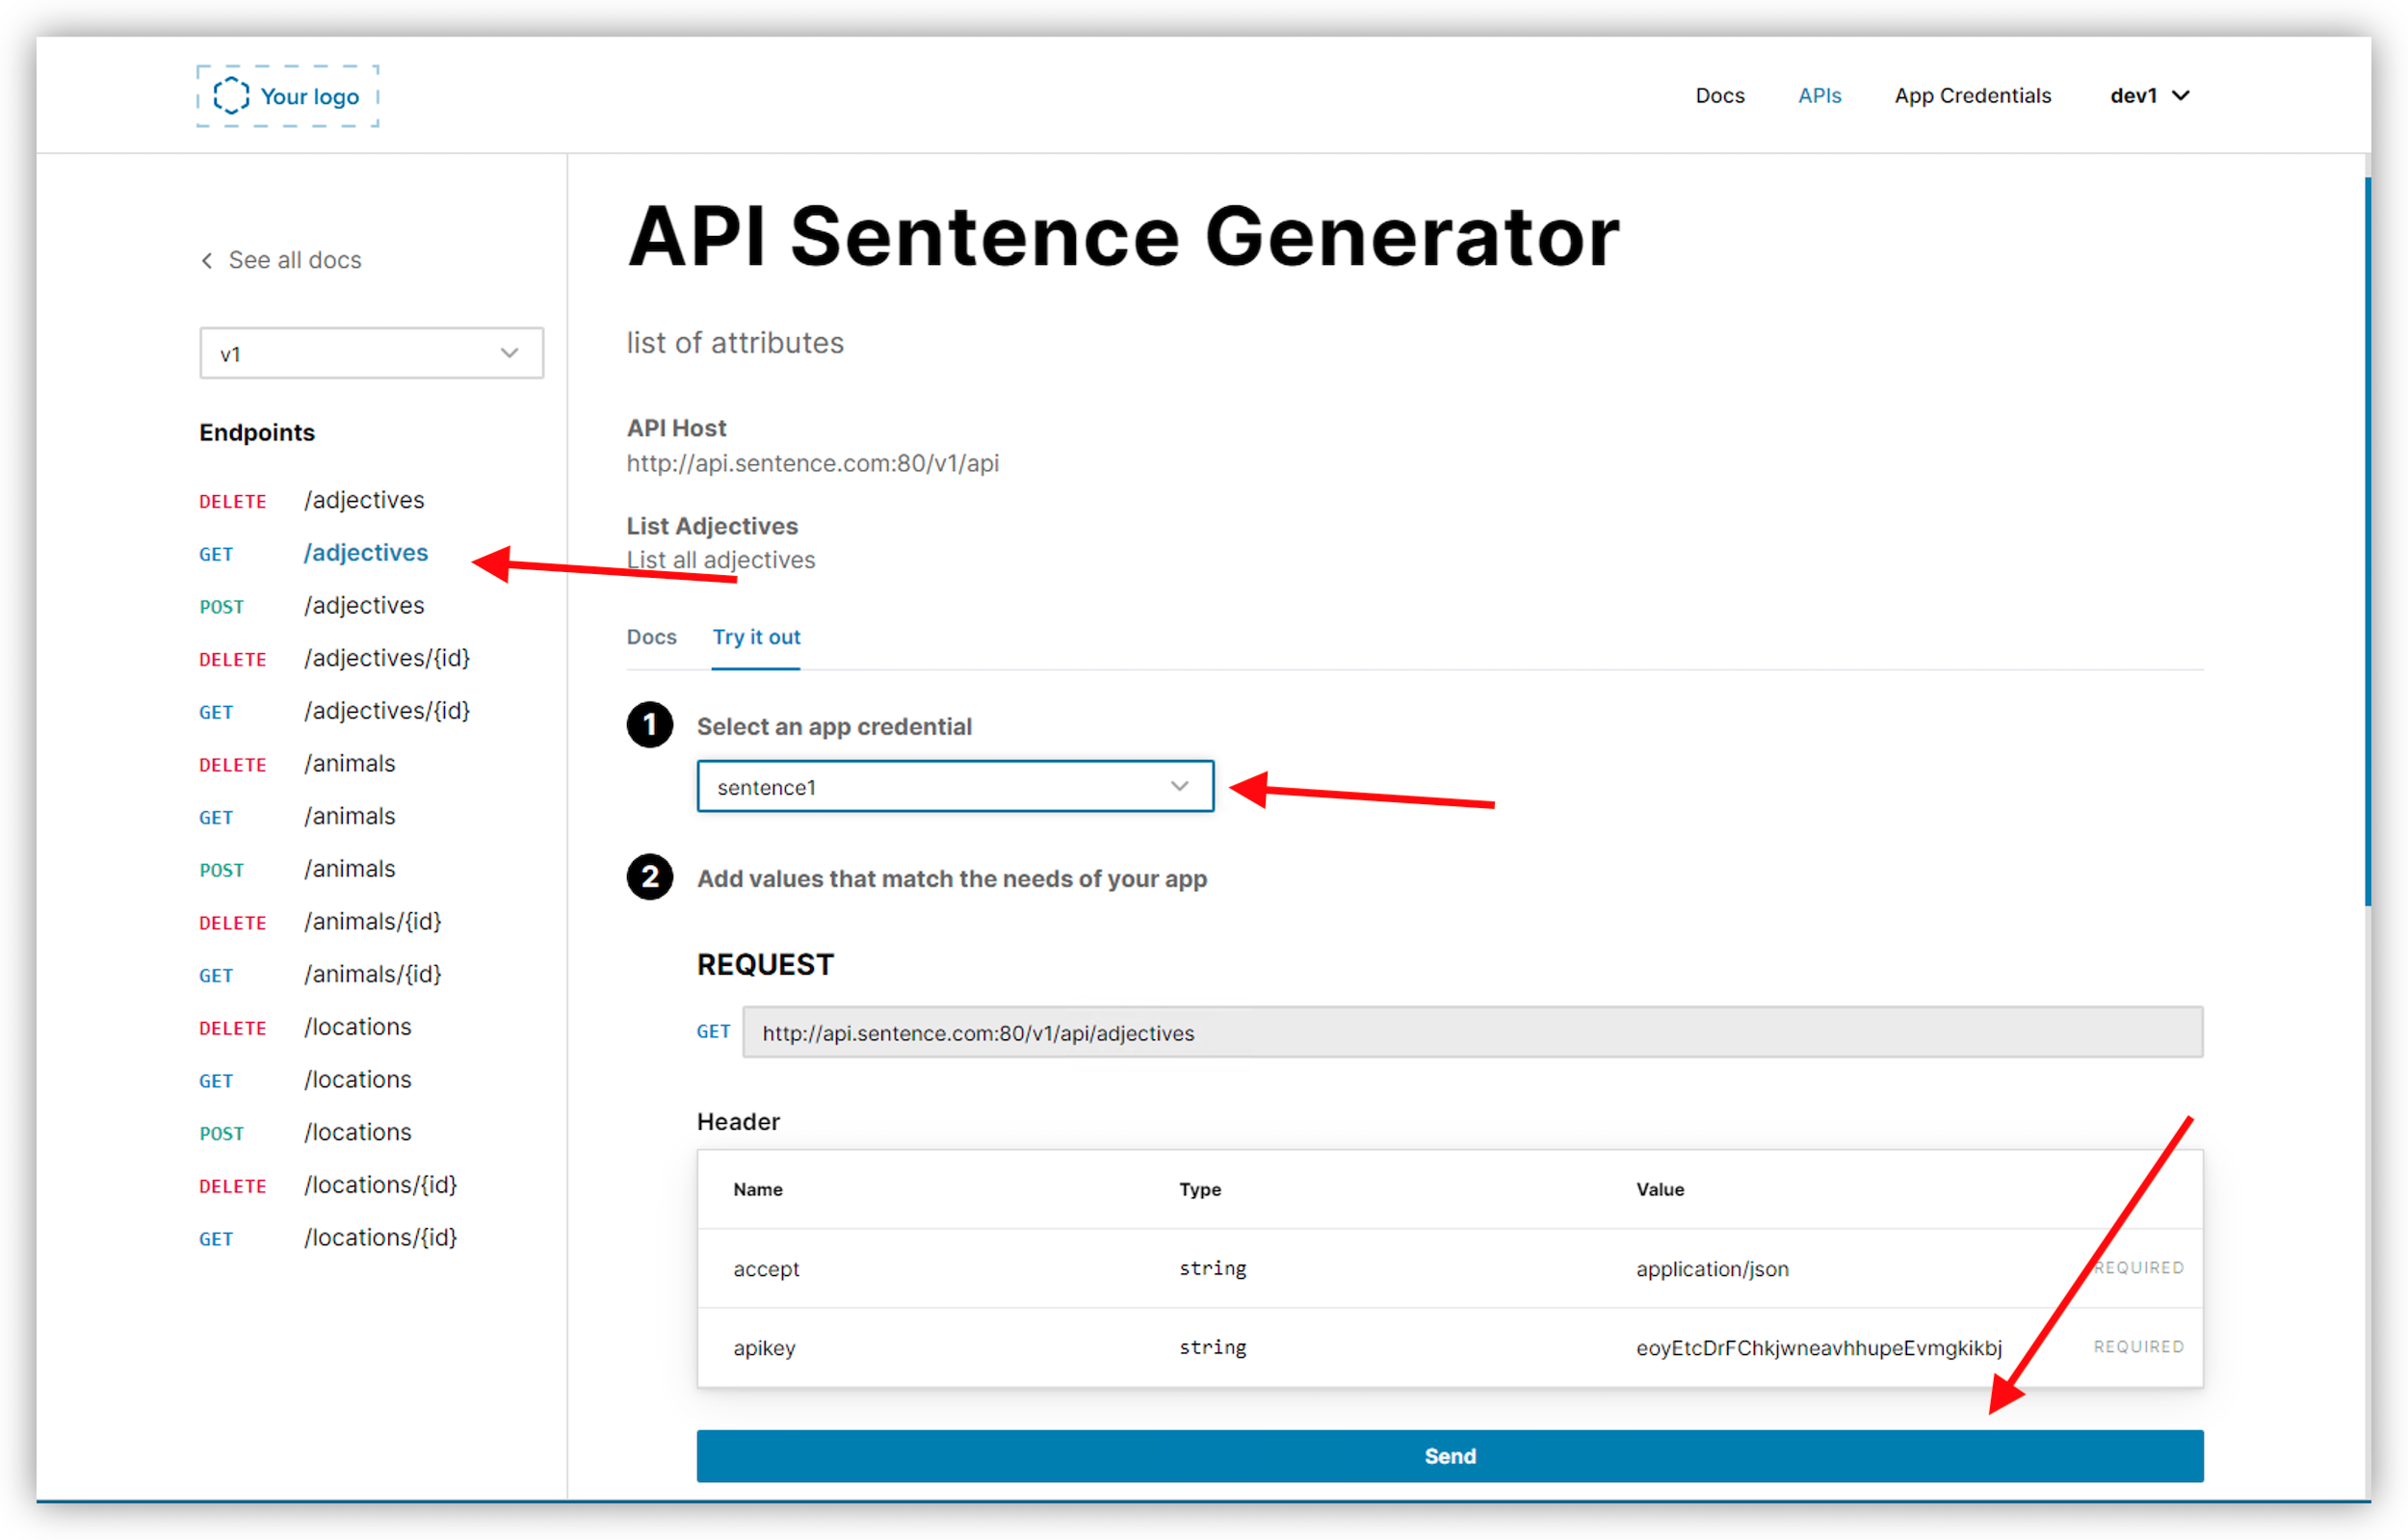
Warning
It should not work. Nothing should happen. The reason is the Developer Portal inserts a CORS header. So we have to enable the CORS policy on the API Gateway.
Connect to NMS ACM and edit our API Proxy (in the Services menu)
In
Policies, onCORSclick onAdd policy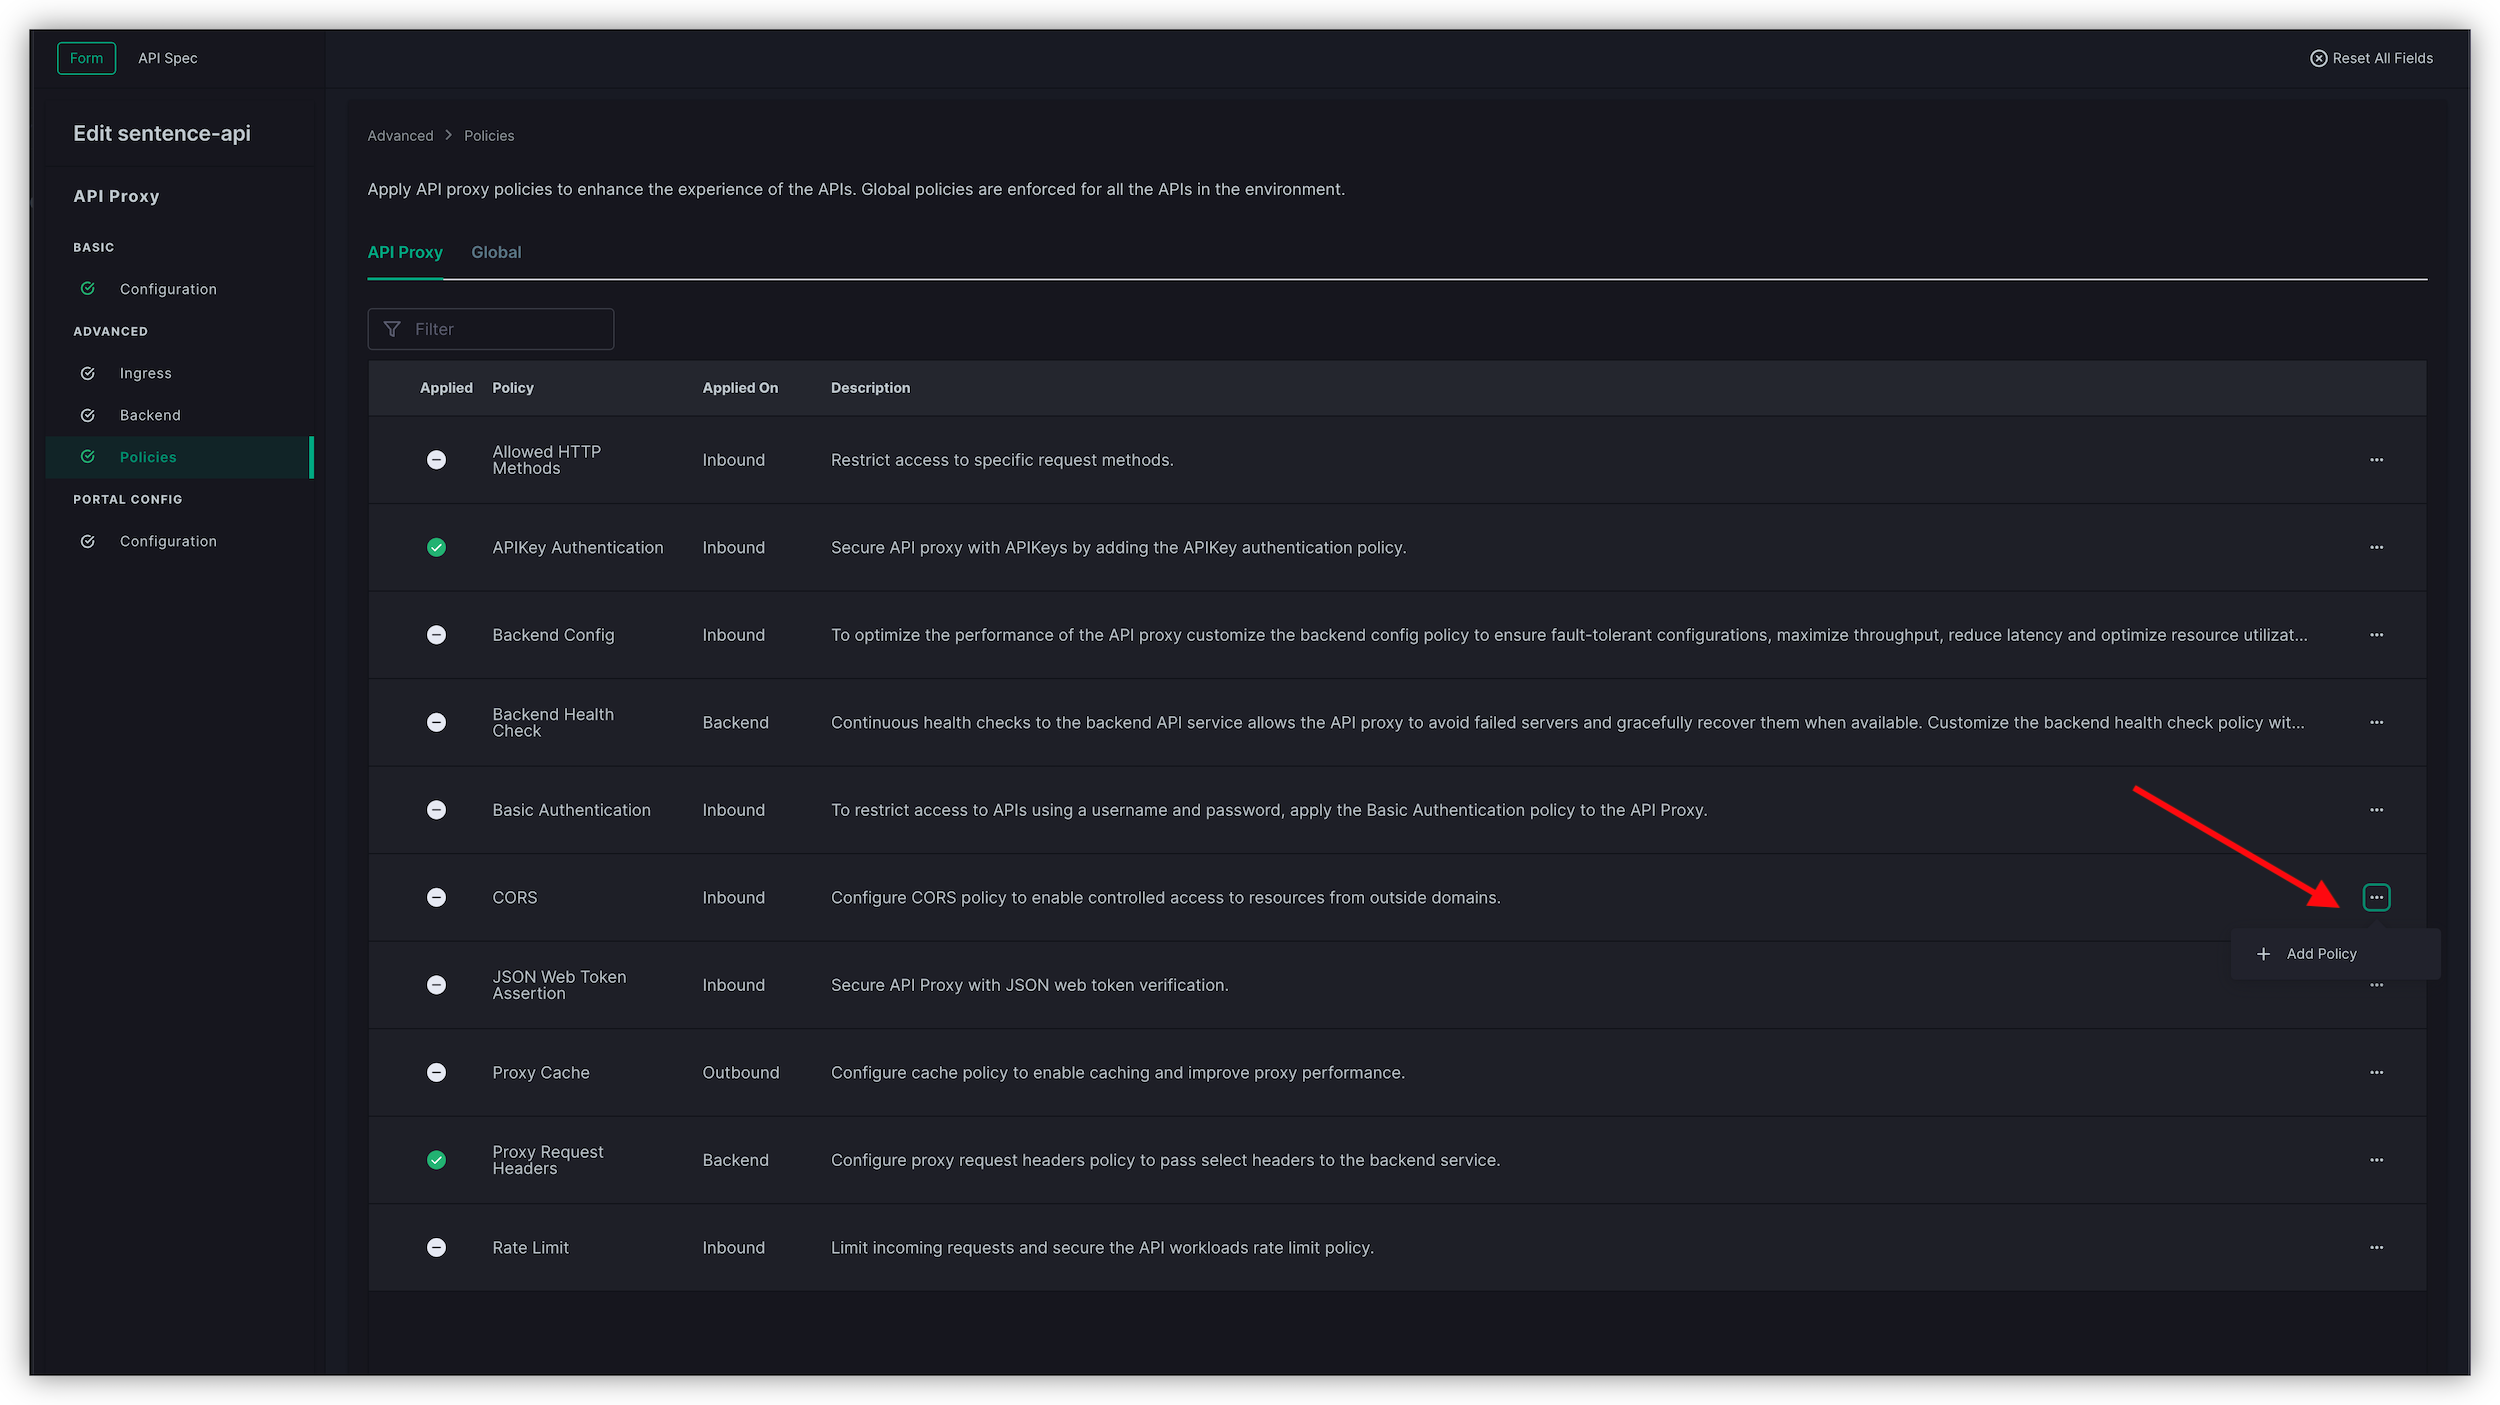
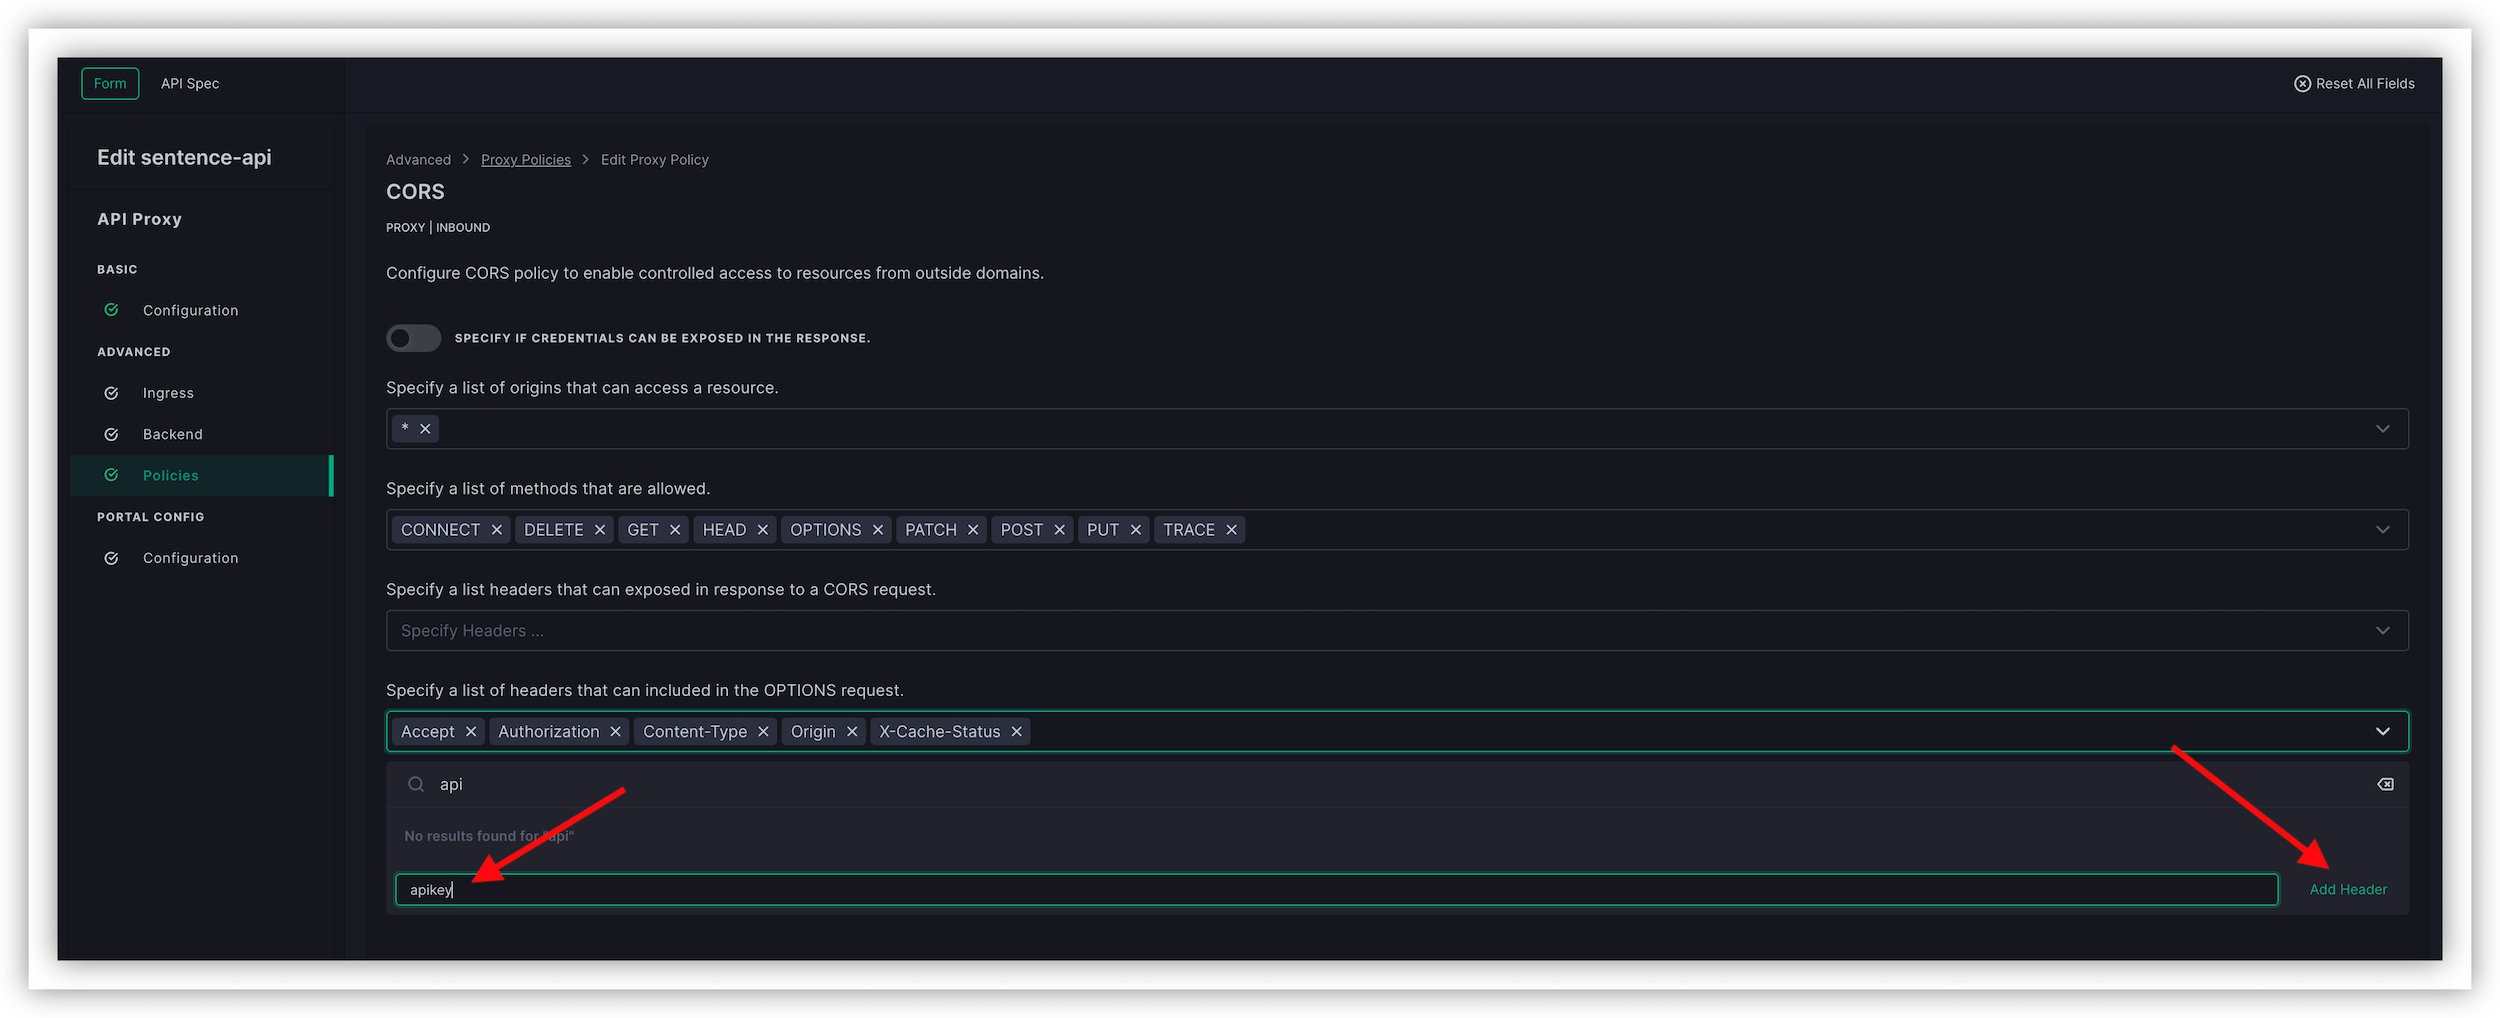
In the
OPTIONSfield, add the headerapikeyinto the allow list. Scroll down till the end, and then in the field, enterapikeyand clickAdd HeaderWarning
It is easy to mistakenly add the header to the CORS list, the OPTIONS list is at the bottom.
Click Add, Save & Publish
Note
Now, the API Gateway will accept requests from the Developer Portal
Reconnect and re-login into the Developer Portal, and re-test.
You will see the response from the API Gateway in the Developer Portal