NGINX Modern Apps > Class 6 - NGINX API Management > Module 2 - Deploy the API Gateway instance Source | Edit on
Step 2 - Install the NGINX Controller agent software on the NGINX instance
In order to link an NGINX Plus instance to NGINX Controller, we need to run the NGINX Controller agent installer.
Steps:
Login to the NGINX Controller instance
Controller v3.16.1by selectingController UIin UDF Access menu, useadmin@nginx-udf.internalas your email andadmin123!as your password.Select
Add an existing instance.Note
Your NGINX Plus instance already exists, we just need to link it with NGINX Controller.
Enter a
Name, e.g.nginx1.Check the box
Allow insecure server connections to NGINX Controller using TLS.Copy the
curlcommand in the command box: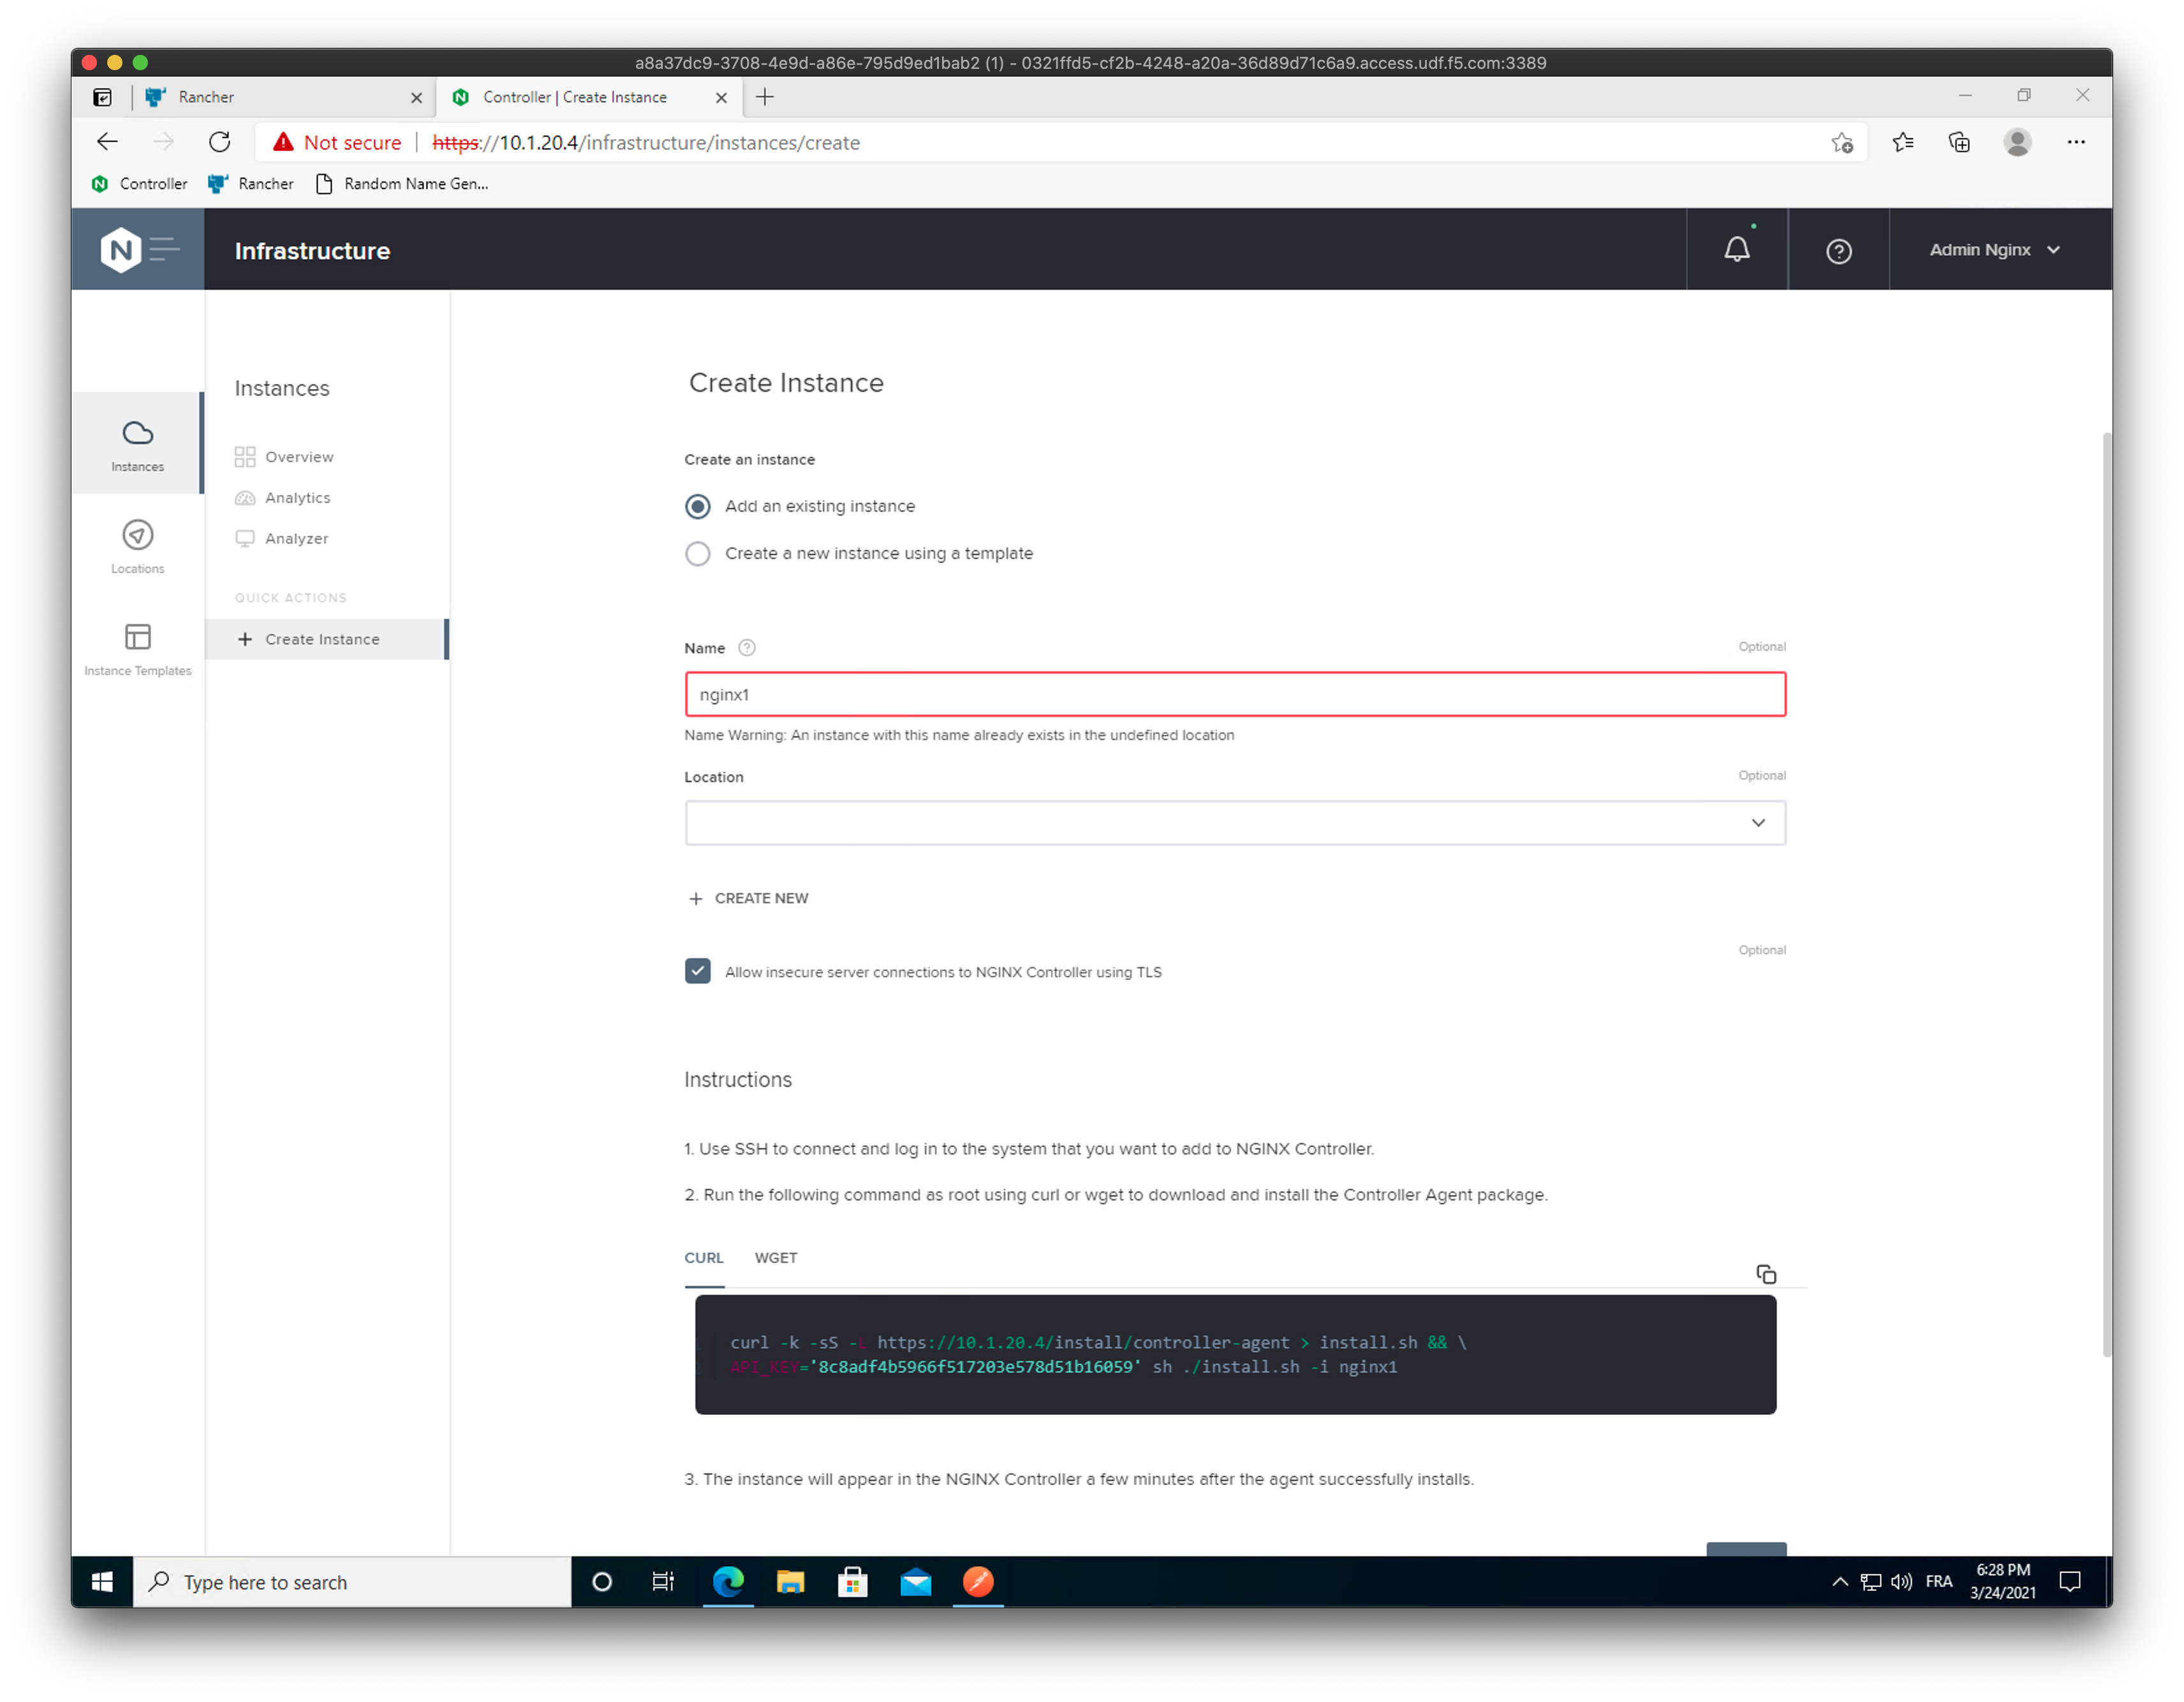
SSH (or WebSSH) to the
Nginx-1 - API Gwinstance.Paste the
curlcommand and execute it. Enteryat every confirmation prompt.After few seconds, the command will succeed and the instance will appear in NGINX Controller.
In NGINX Controller, click
closeif you are still in the instance creation page, and look at your first instance linked within NGINX Controller: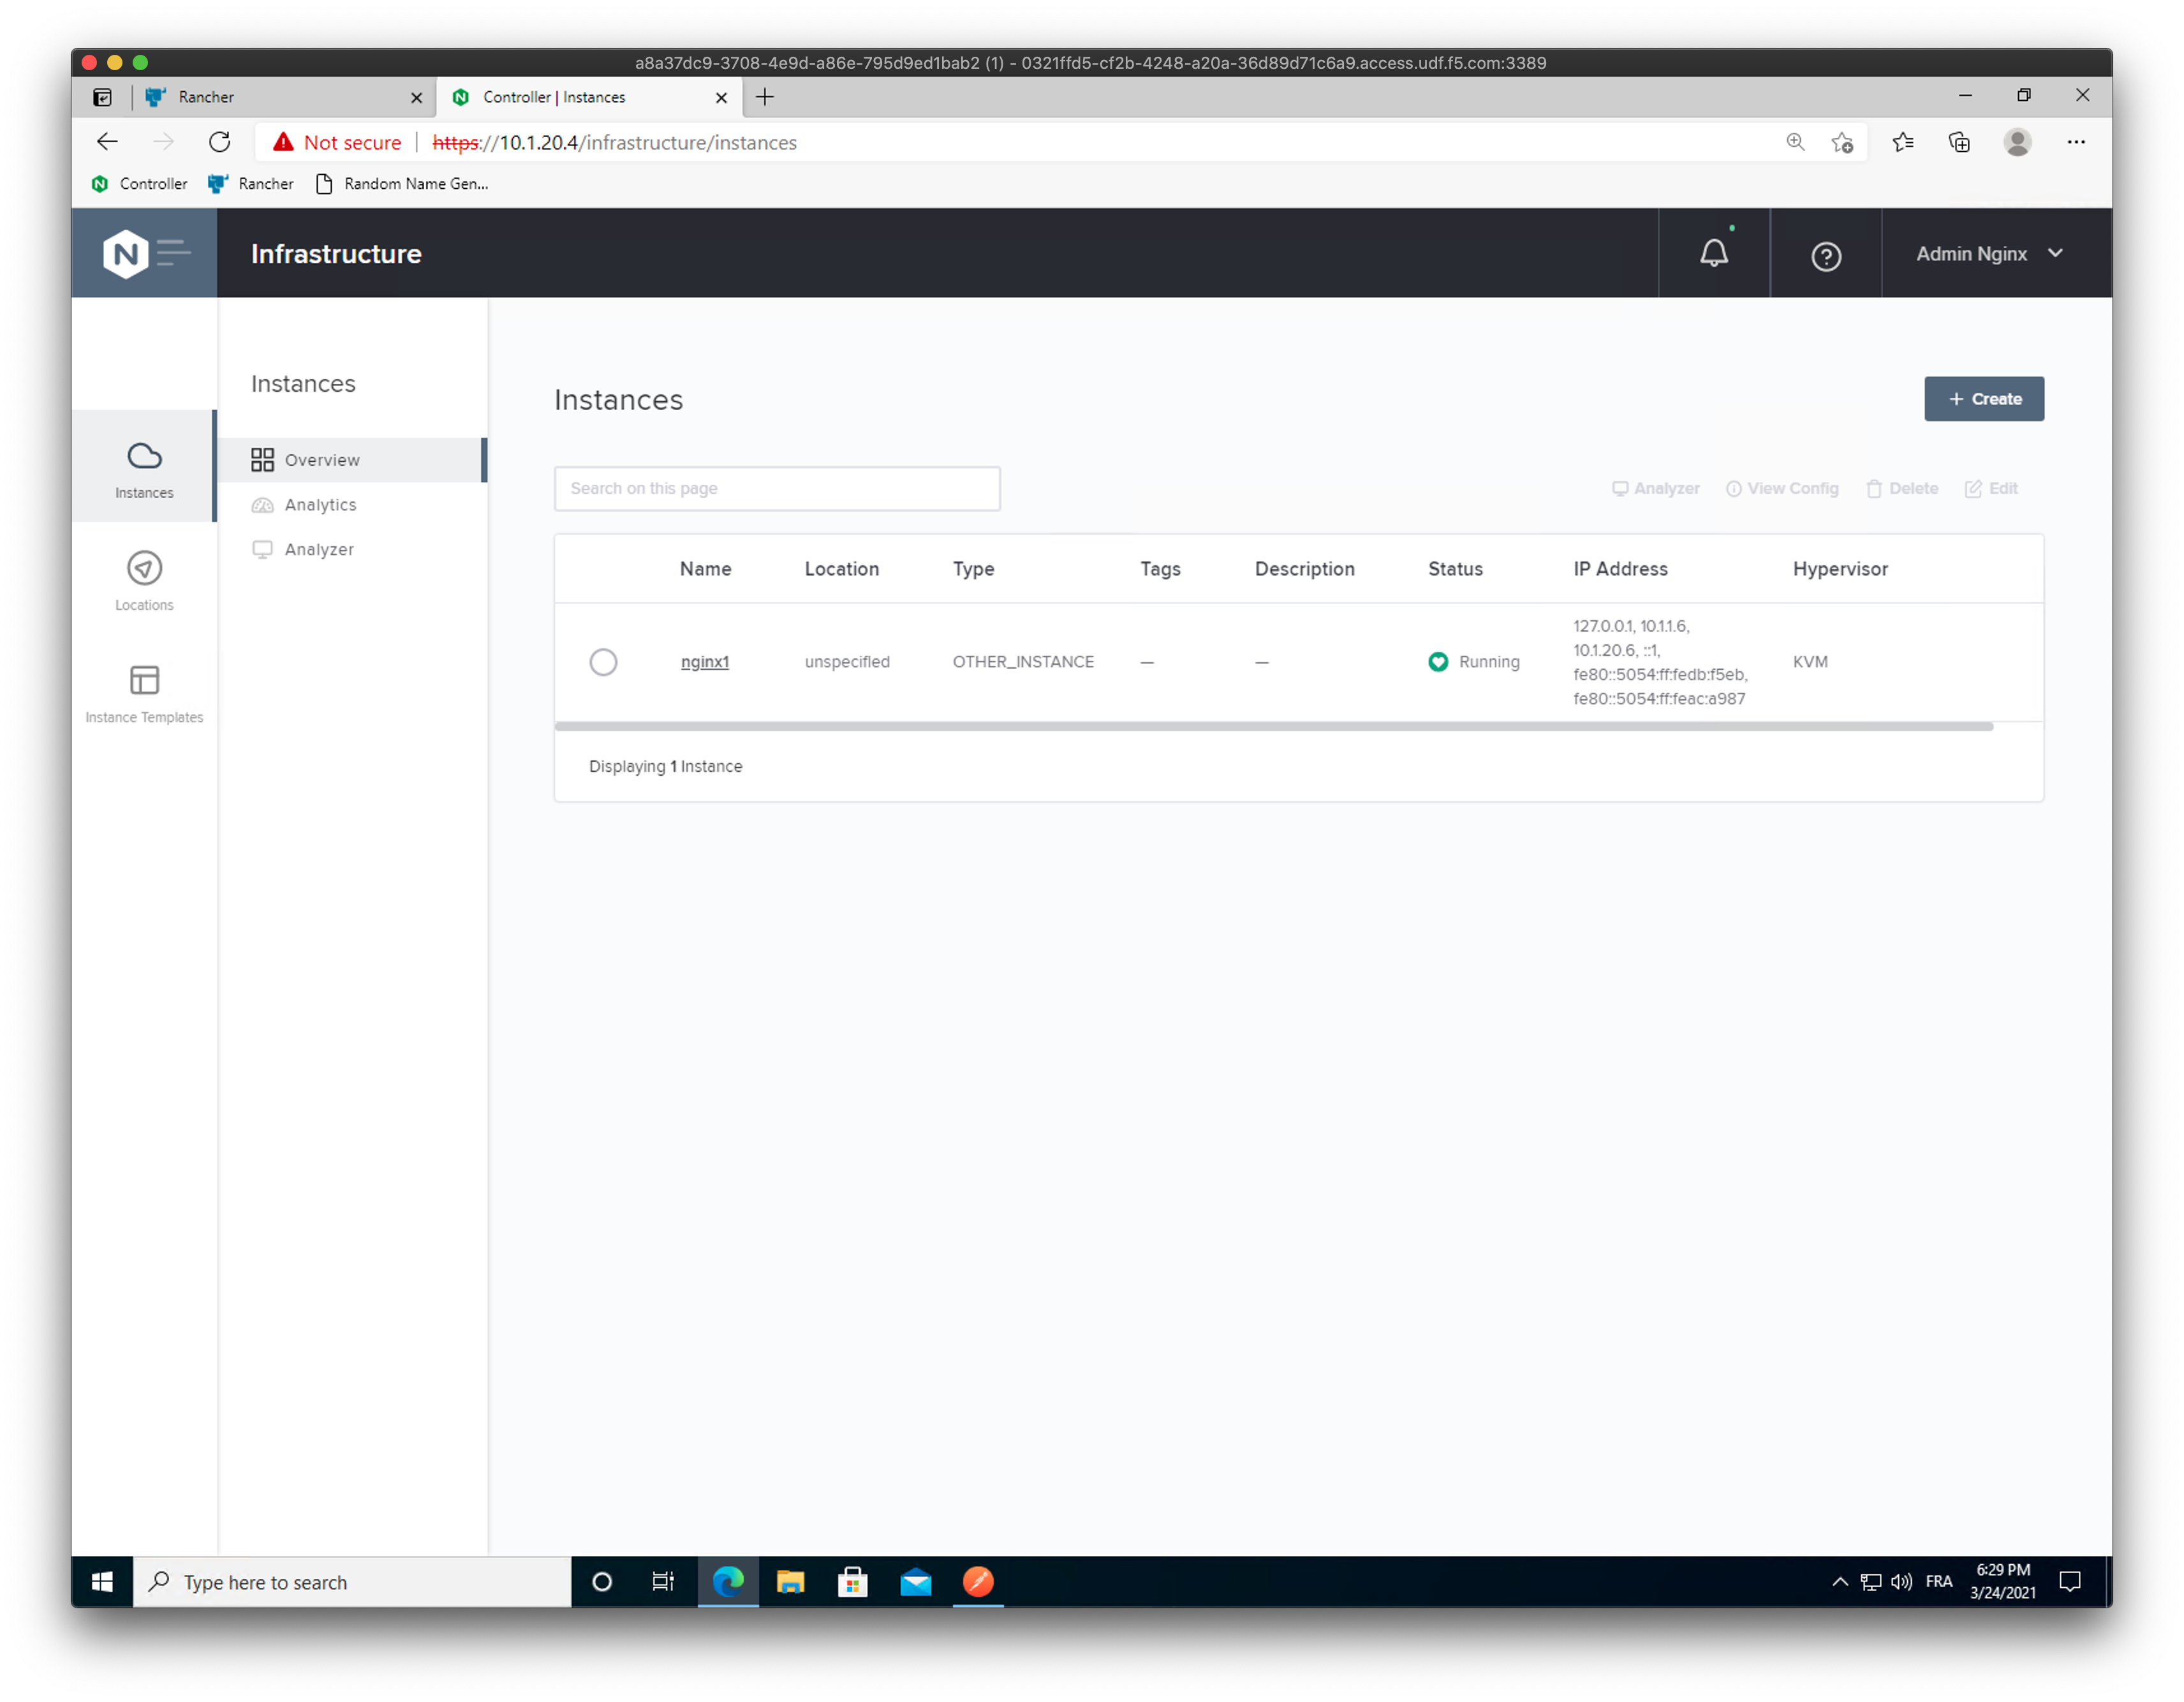
Warning
Wait till the status changes from
ConfiguringtoRunning. If the status is stuck in theConfiguringstate, force the NGINX Controller agent to restart in theNginx-1instance as below:sudo service nginx restart sudo service controller-agent restart
Note
This instance can now be used as an NGINX Controller gateway.