NGINX Modern Apps > Class 6 - NGINX API Management > Module 4 - Add security controls Source | Edit on
Step 8 - Set up a rate limiting policy
In this lab, we will protect the API endpoint with a rate limiting policy. To do so, we will limit the endpoint per authenticated user.
Steps to enable rate limiting protection on the /colors API endpoint
- In NGINX Controller -> Select
APIs->api-sentence-> Edit theapi-sentence-v3published API. - In
Routing, edit the security settings for thecp-colors-v3component. - Select
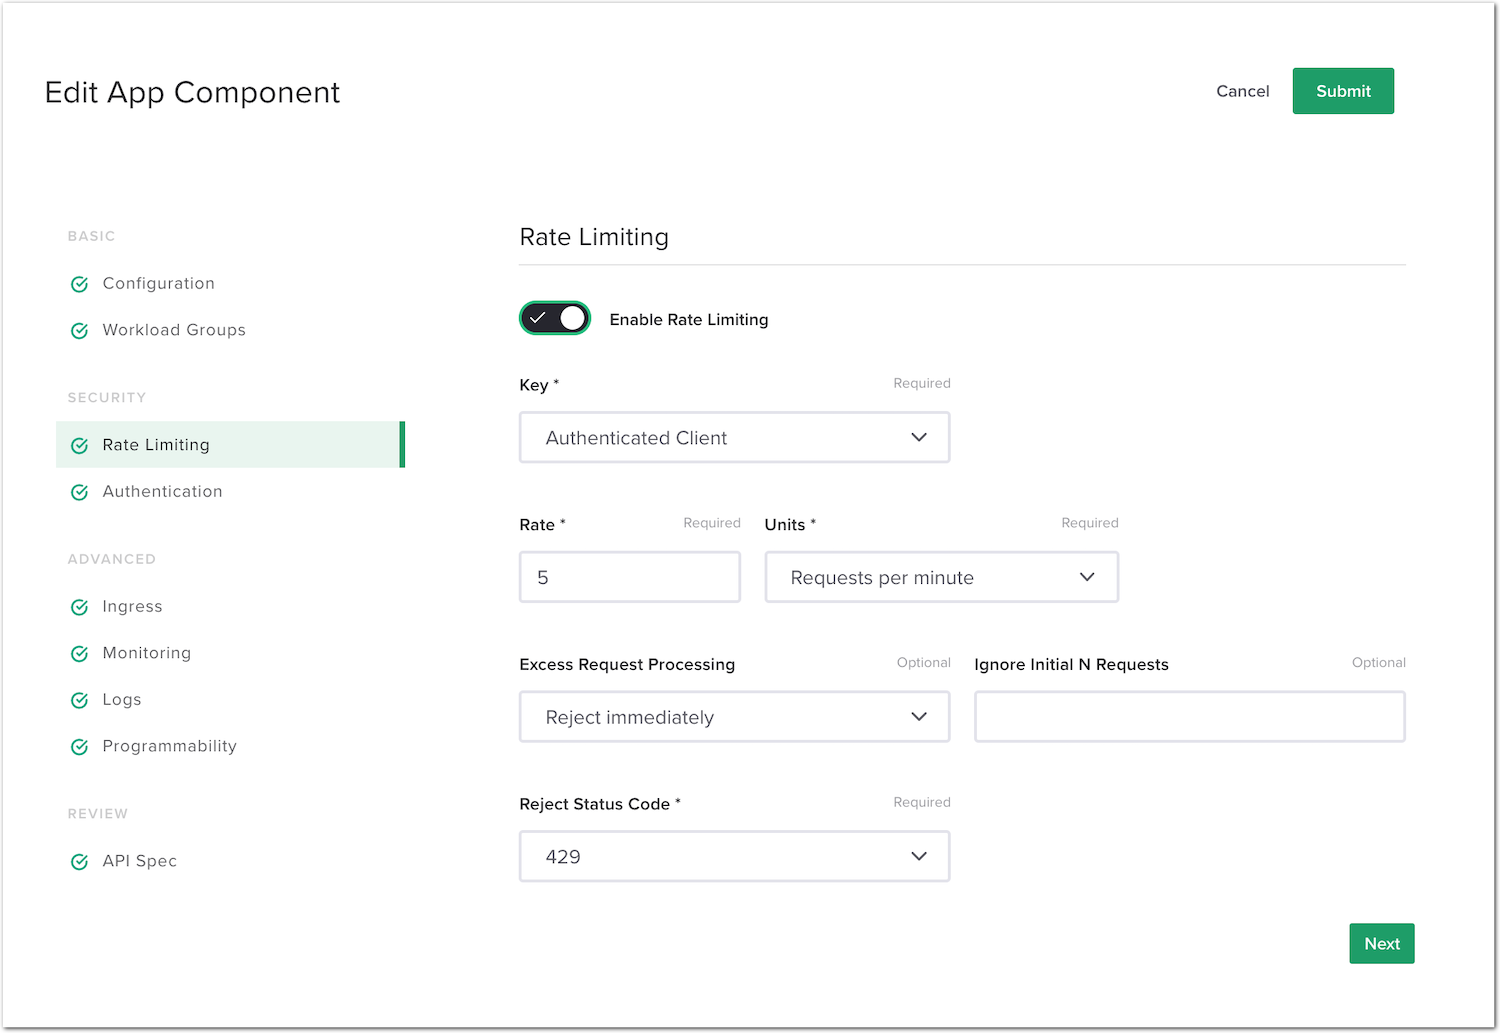
Rate Limiting. - Turn on
Enable Rate Limiting. Use the following values: - Key:
Authenticated Client - Rate:
5 requests per minute.. note:: 5 req/min does not mean that the client can send 5 requests during the first 5 seconds and then wait 55 seconds. Instead, 5 req/min means the client will be allowed to send a request every 12 seconds (60 / 5 = 12). - Excess Request Processing:
Reject Immediately
- Key:
- Turn on
- Click
Submit->Submitagain to validate the config and push it to the NGINX instance.
Simulate too many requests from the client
RDP to the
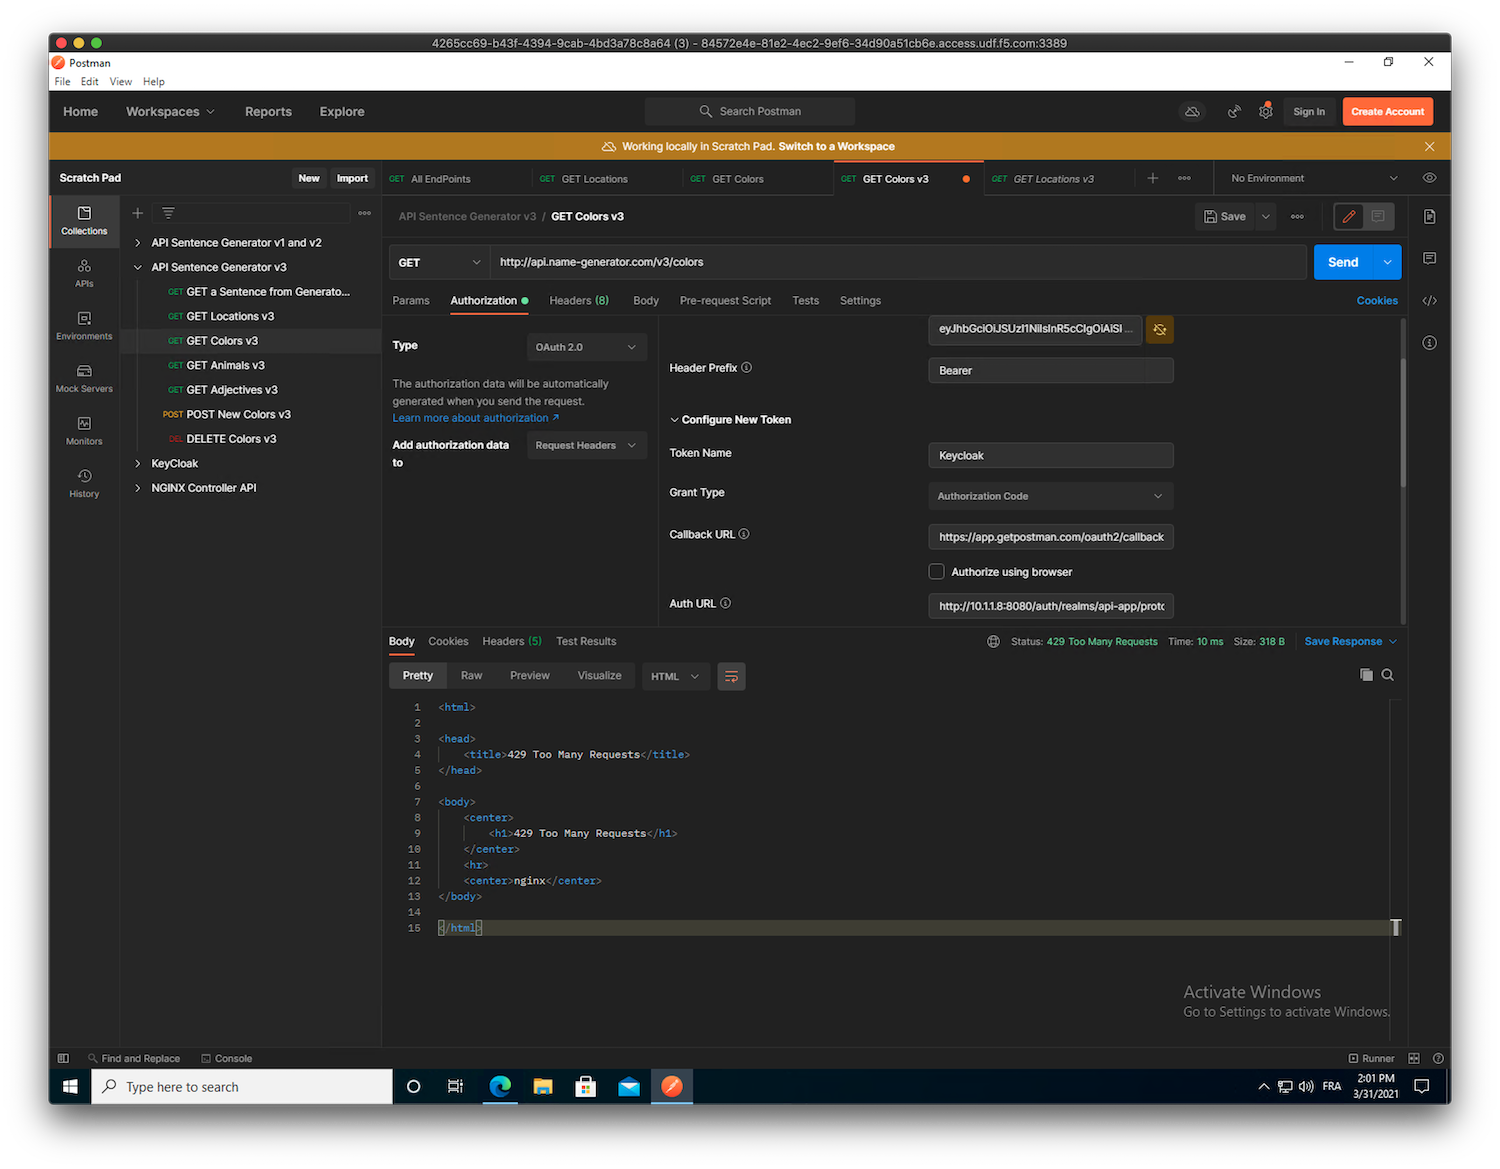
Win10VM (user/user).Open
Postman, select theAPI Sentence Generator v3collection, and select theGET Colors v3request. If necessary, request a new token for usermatt(passwordmatt).Send the request, and instantaneously send a second request. Your request is blocked because you are only allowed to send one request every 12 seconds (5 req/min).
Re-do the test, but this time wait 12 seconds between each request. Your requests should succeed.
Improve the user experience with a delay
Note
As you noticed, the second request sent is immediately rejected. There is an option to delay the response when the client sends too many request, and thus provide the client a better experience. You can find more info here: https://www.nginx.com/blog/rate-limiting-nginx/
In NGINX Controller -> Select
APIs->api-sentence-> Edit theapi-sentence-v3published API.In
Routing, edit the security settings for thecp-colors-v3component.Select
Rate Limiting.Modify
Excess Request ProcessingfromReject ImmediatelytoDelay. ModifyIgnore Initial N requestsfrom 0 to 5.Click
Submit->Submitagain to validate the config and push it to the NGINX instance.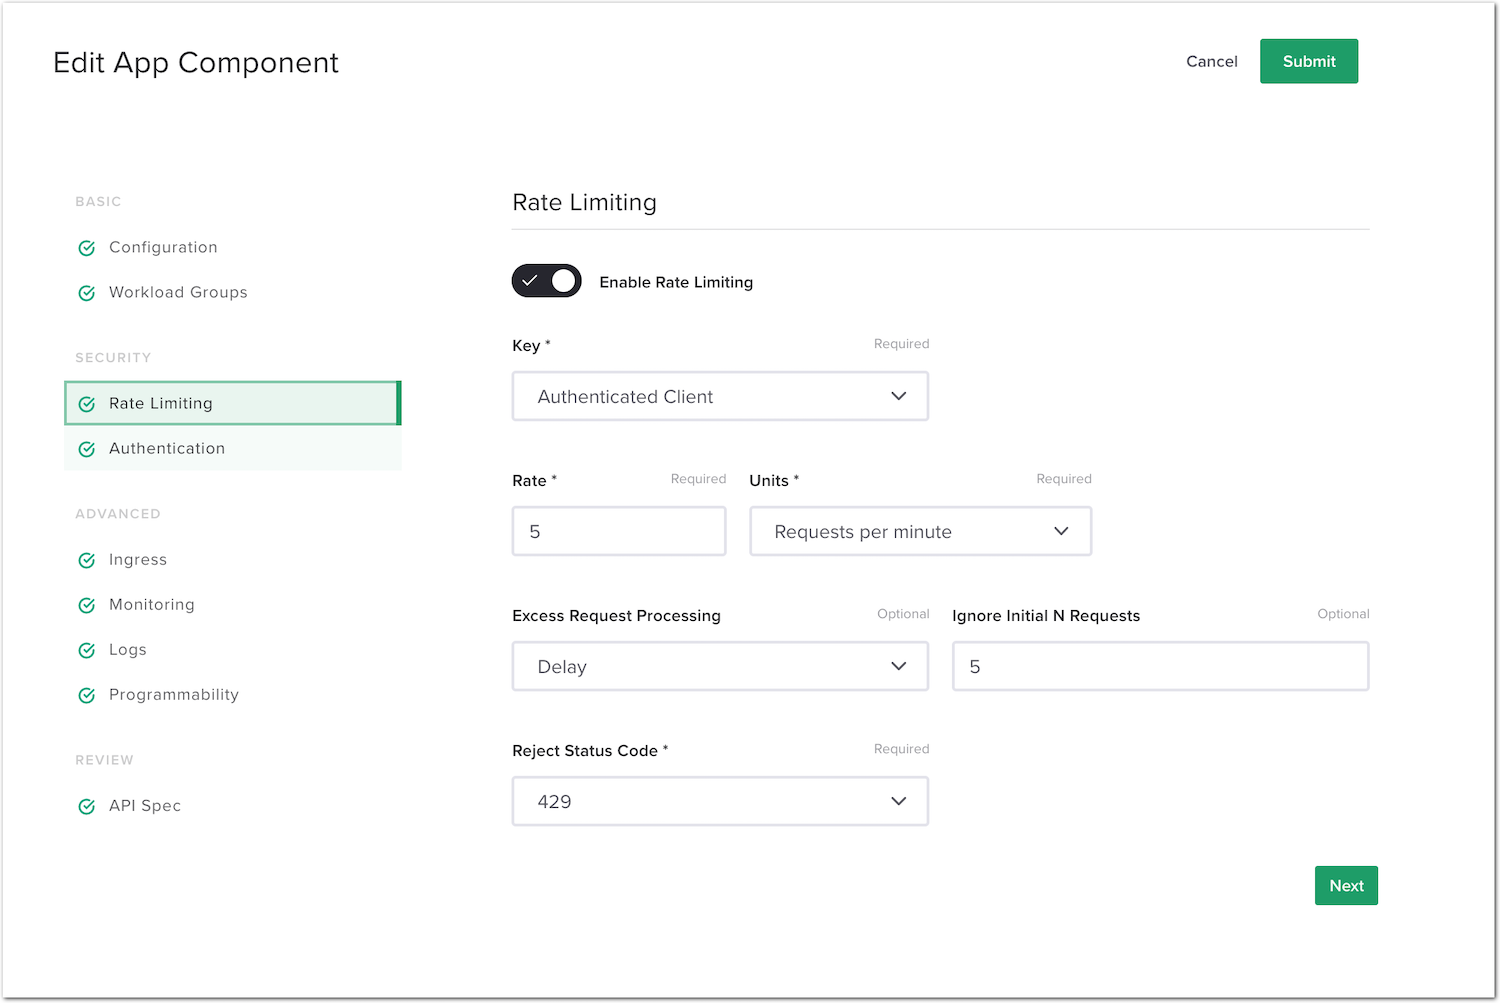
Send two requests back to back in Postman. This time around, the second request is delayed but not dropped.