F5 BIG-IP SSL Orchestrator Training Lab > All SSL Orchestrator Lab Guides > SSLO 102: Diving into SSL Orchestrator for BIG-IP Next (AppWorld 2024 | 2 hours) > 4. Lab 2 - Inbound Application Mode Deployment Source | Edit on
4.2. Defining an Inspection Service
The first step in this journey is to create the SSL Orchestrator inspection services. As previously noted, an inspection service will have network attributes that are specific to a BIG-IP Next instance (i.e., interfaces, VLANs, self-IPs). When creating an inspection service in CM, you will deploy these direct to the BIG-IP Next instance before the application is defined.
4.2.1. Create an Inline L3 Inspection Service
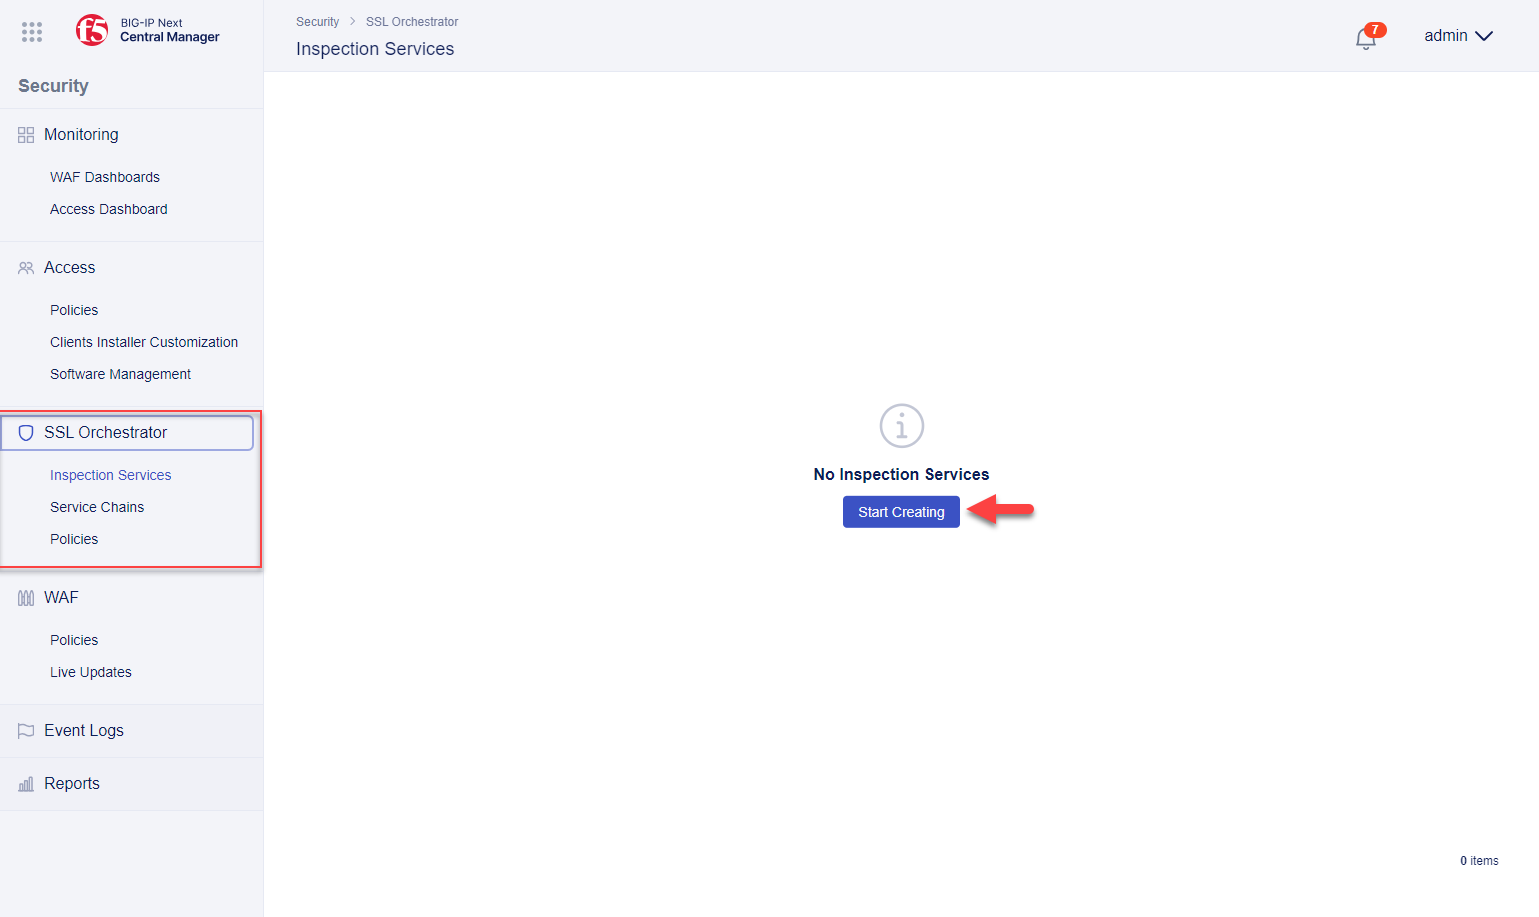
In the top left corner of the BIG-IP Central Manager GUI, click on the Workspace icon to show the Workspace Menu.
Click on Security to navigate to the Security workspace.
In the SSL Orchestrator menu, click on Inspection Services.
Click the Start Creating button.
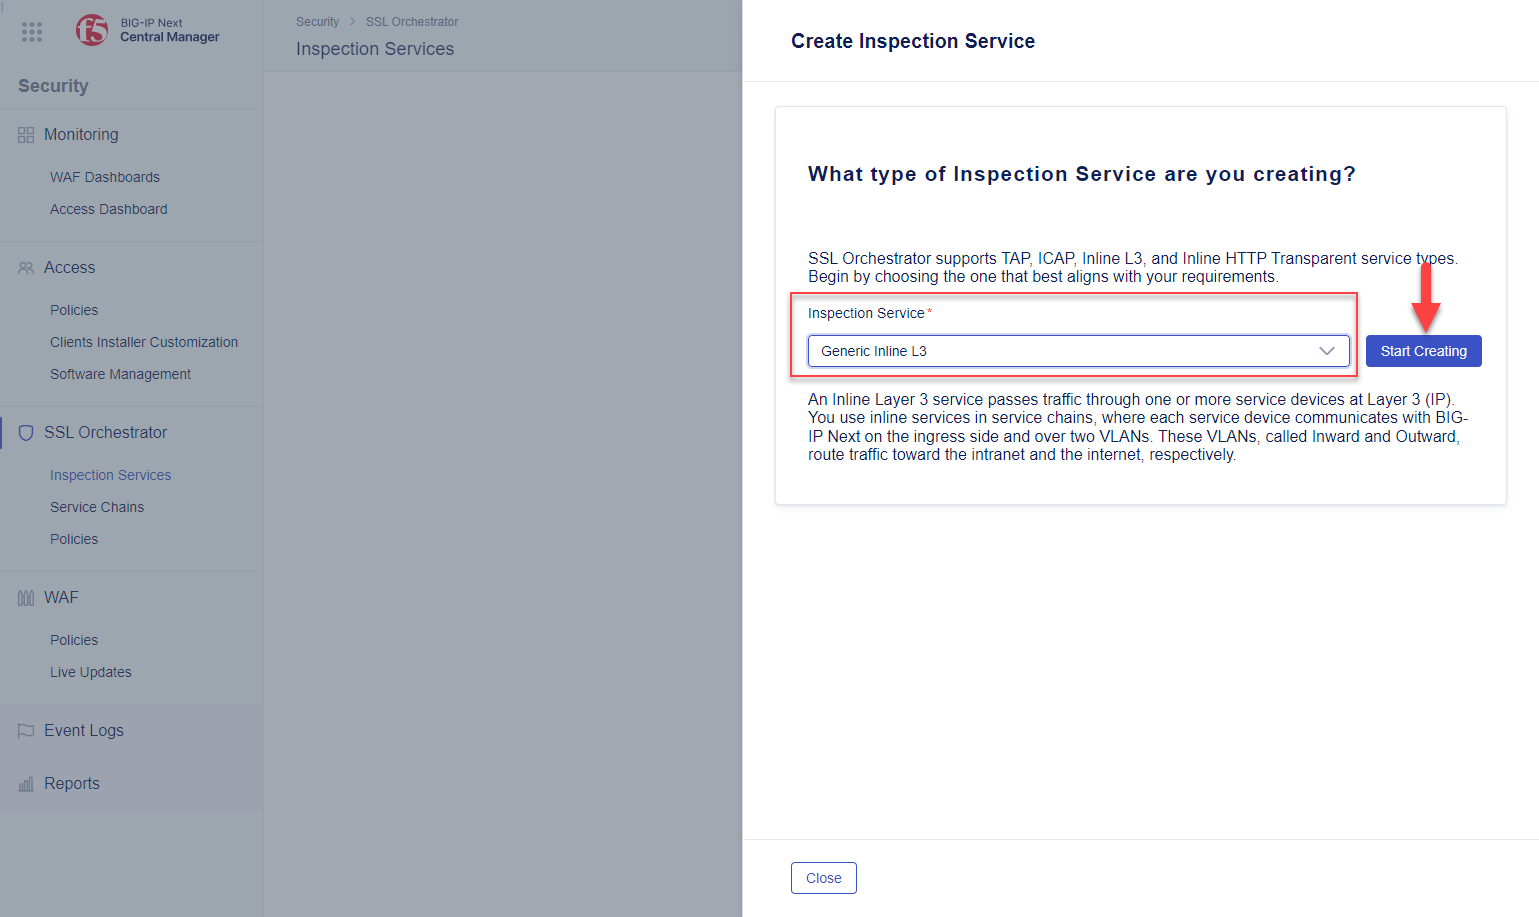
In the Create Inspection Service panel, select Generic Inline L3 and then click the Start Creating button.
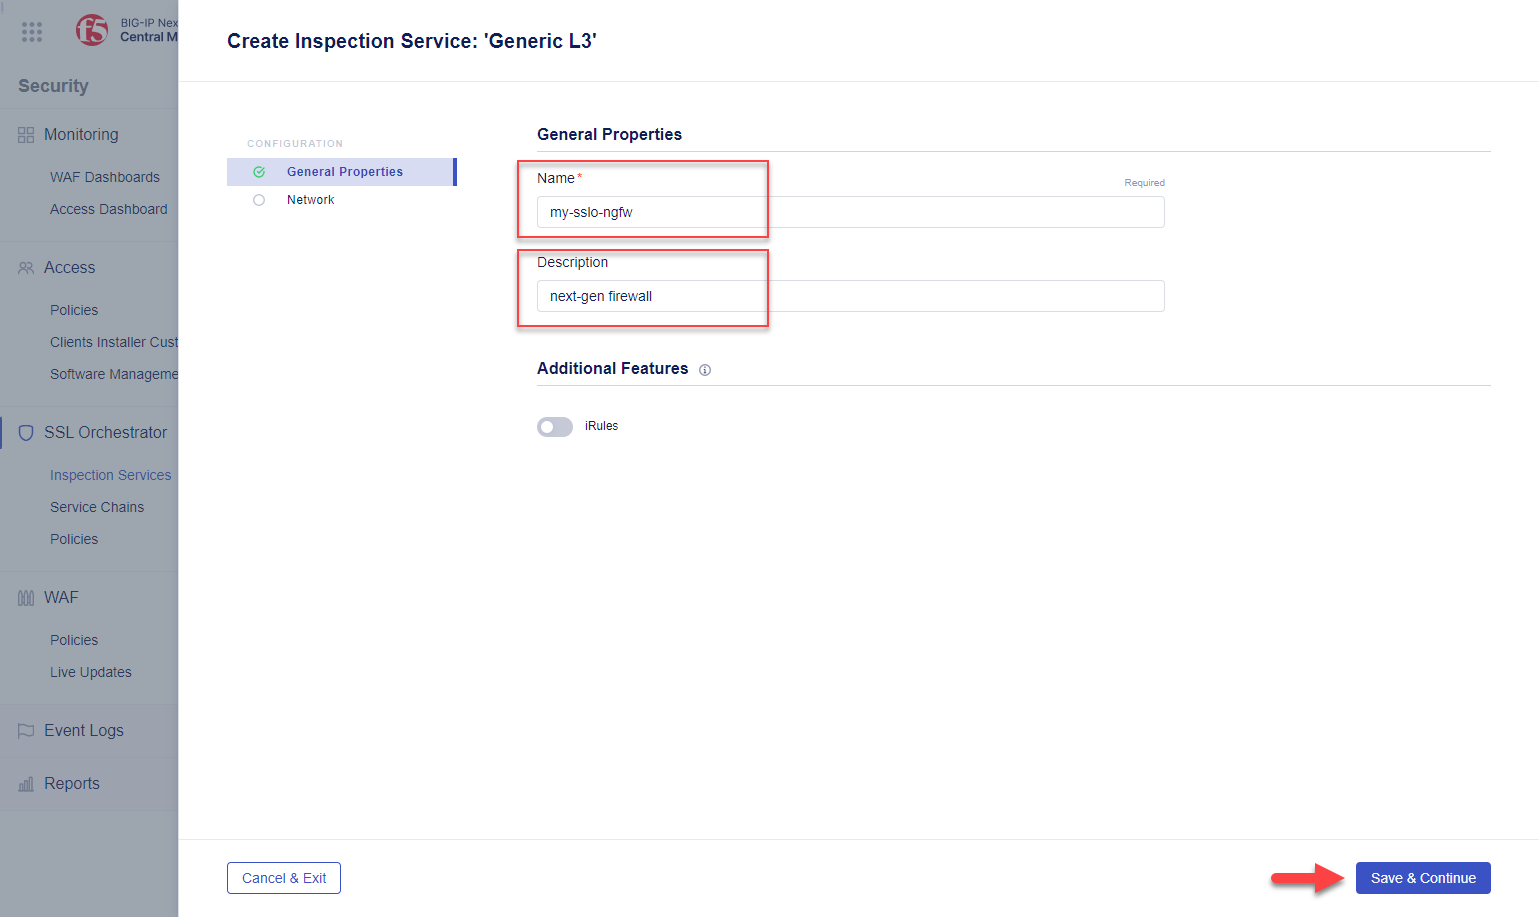
In the General Properties section of the Create Inspection Service: 'Generic L3' panel:
Enter
my-sslo-ngfwin the Name field.Enter
next-gen firewallin the Description field (optional).Click the Save & Continue button.
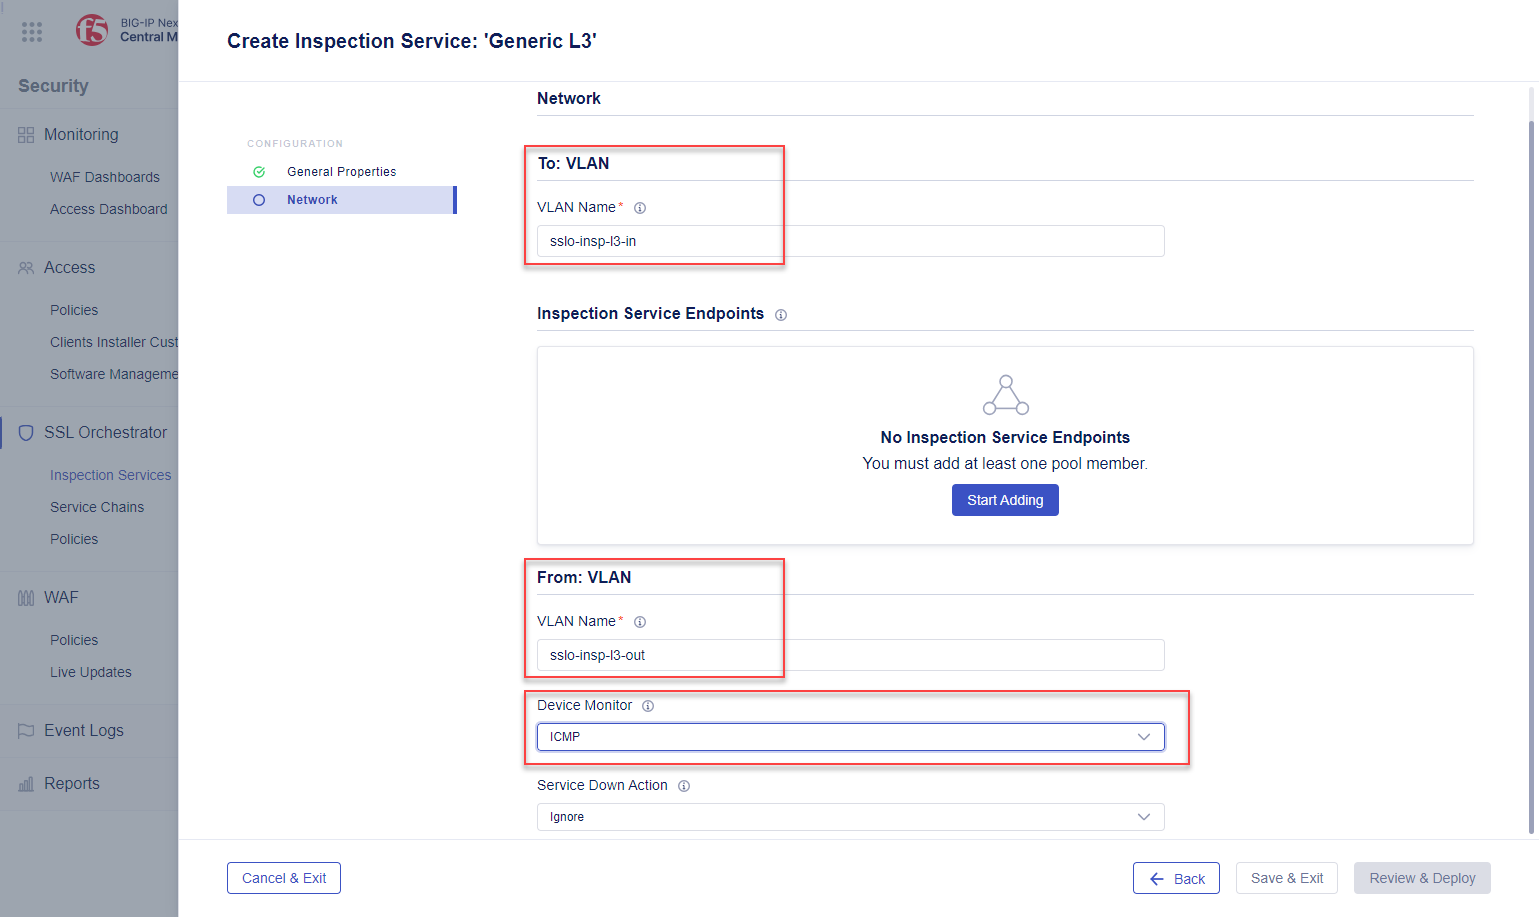
In the Network settings:
Enter
sslo-insp-l3-inin the To: VLAN > VLAN Name field.Enter
sslo-insp-l3-outin the From: VLAN > VLAN Name field.
Note
VLAN names are 'SSLO-INSP-L3-IN' and 'SSLO-INSP-L3-OUT' (but lowercase).
In the future, the VLAN names will be selectable from a list.
Select ICMP for the Device Monitor.
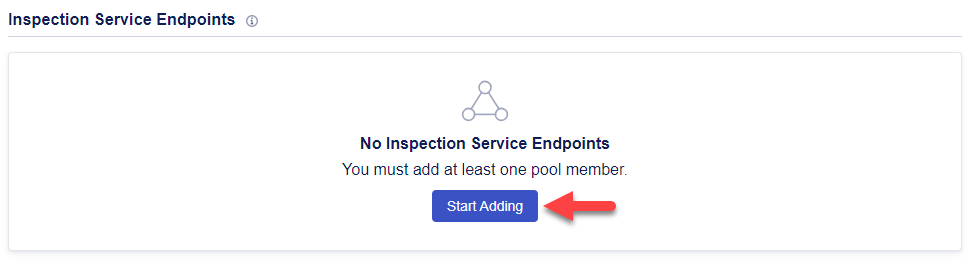
In the Inspection Service Endpoints section (between the To: VLAN and From: VLAN sections), click the Start Adding button.
Enter
198.19.64.30in the Server Address field.
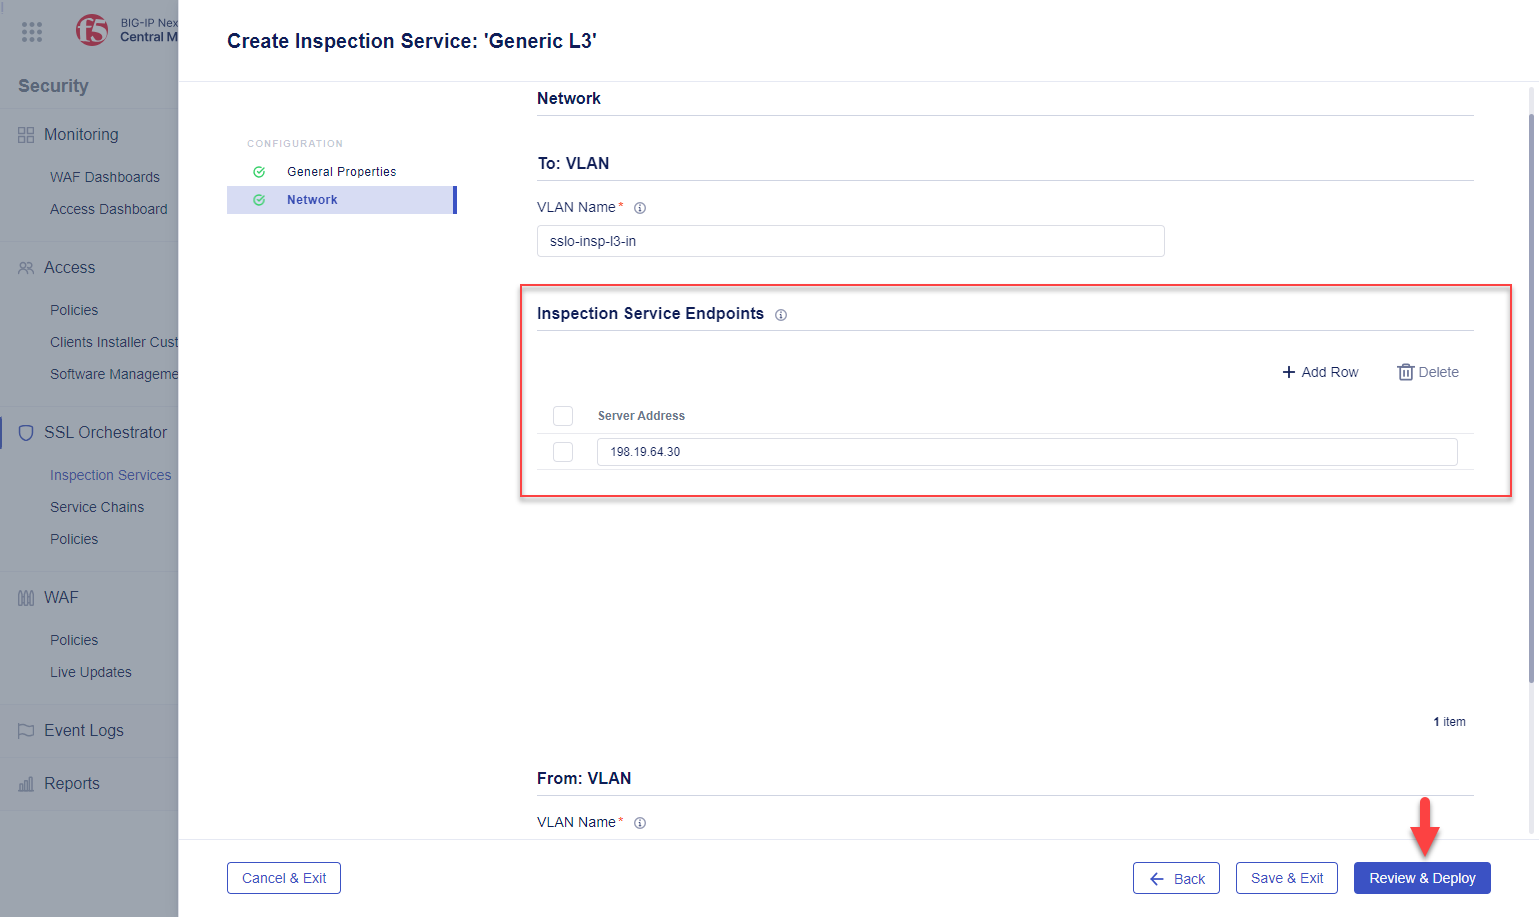
Click the Review & Deploy button.
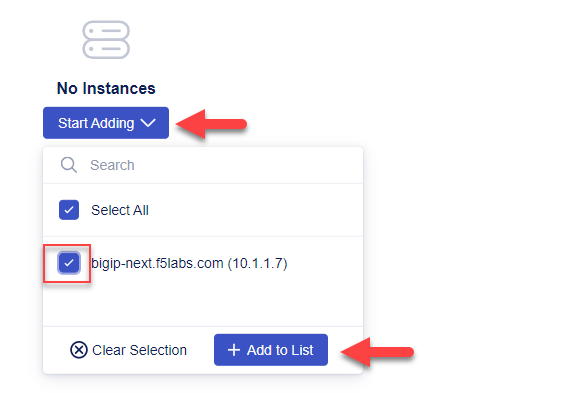
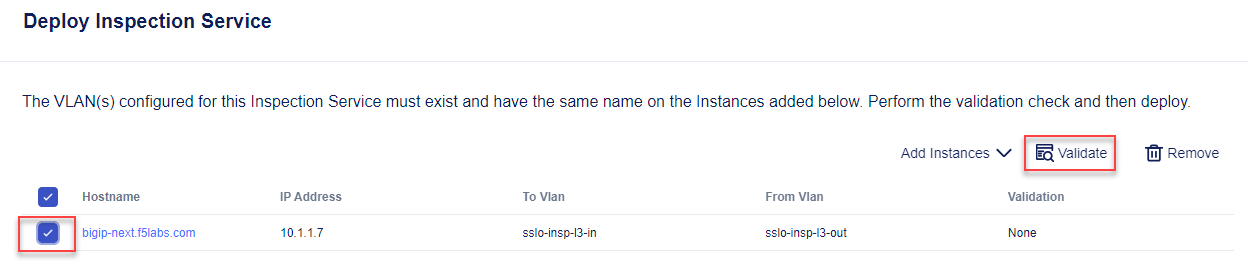
In the Deploy Inspection Service panel, add the BIG-IP Next instance.
Click the Start Adding button
Select the instance named bigip-next.f5labs.com.
Click on the + Add to List button.
Click the checkbox to the left of the assigned instance and then click the Validate button.
If Validation is successful, click the Deploy Changes button to push this inspection service configuration to the BIG-IP Next instance.
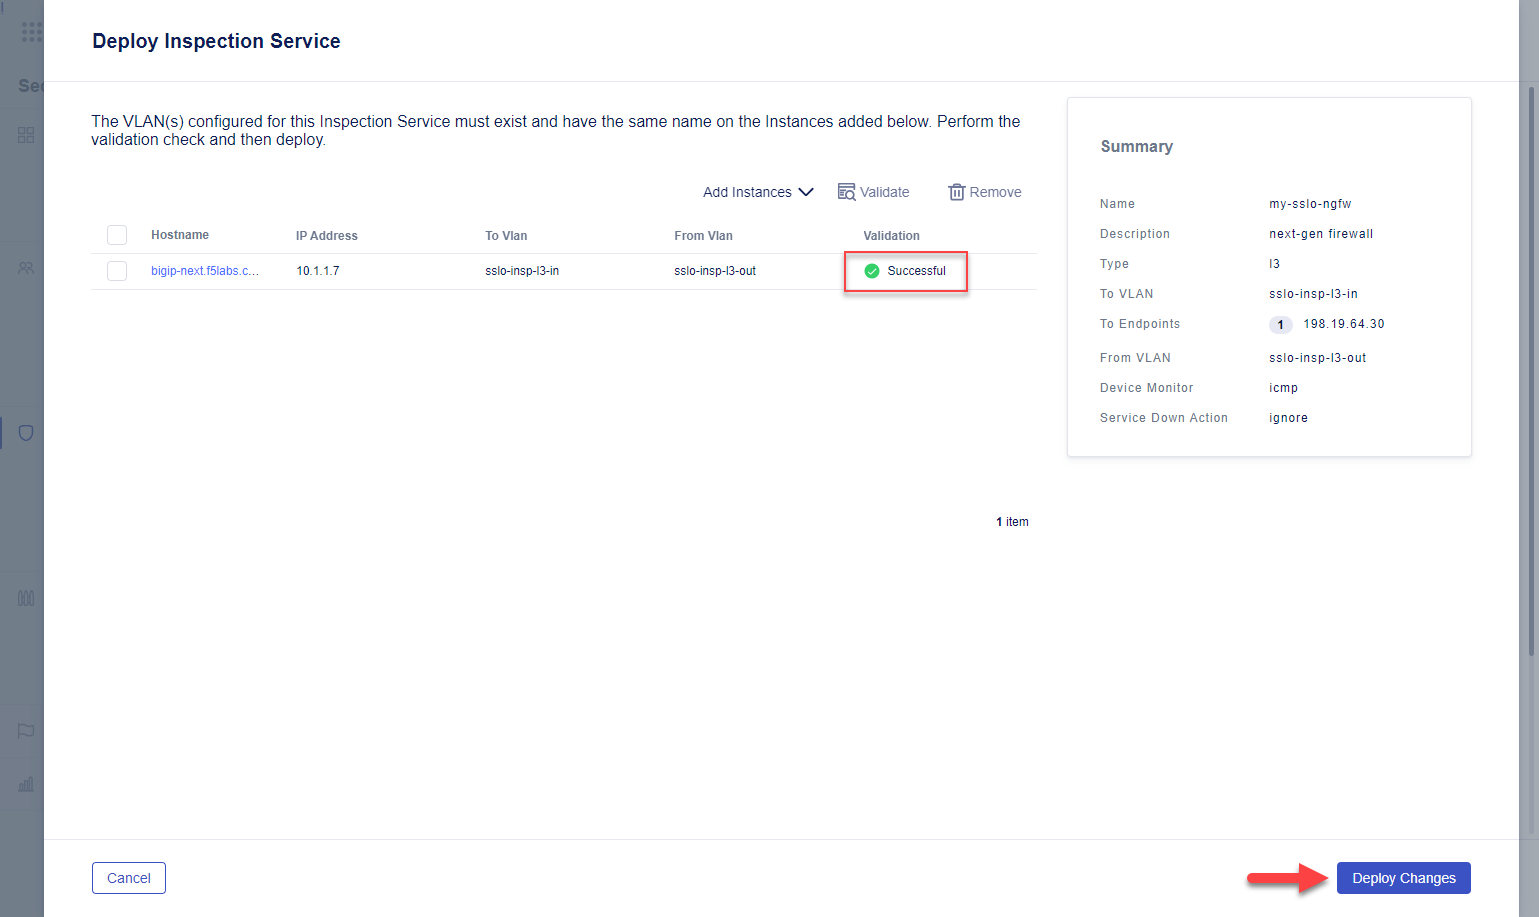
At the Deploy Inspection Service? prompt, click on the Yes, Deploy button and wait for the task to complete.
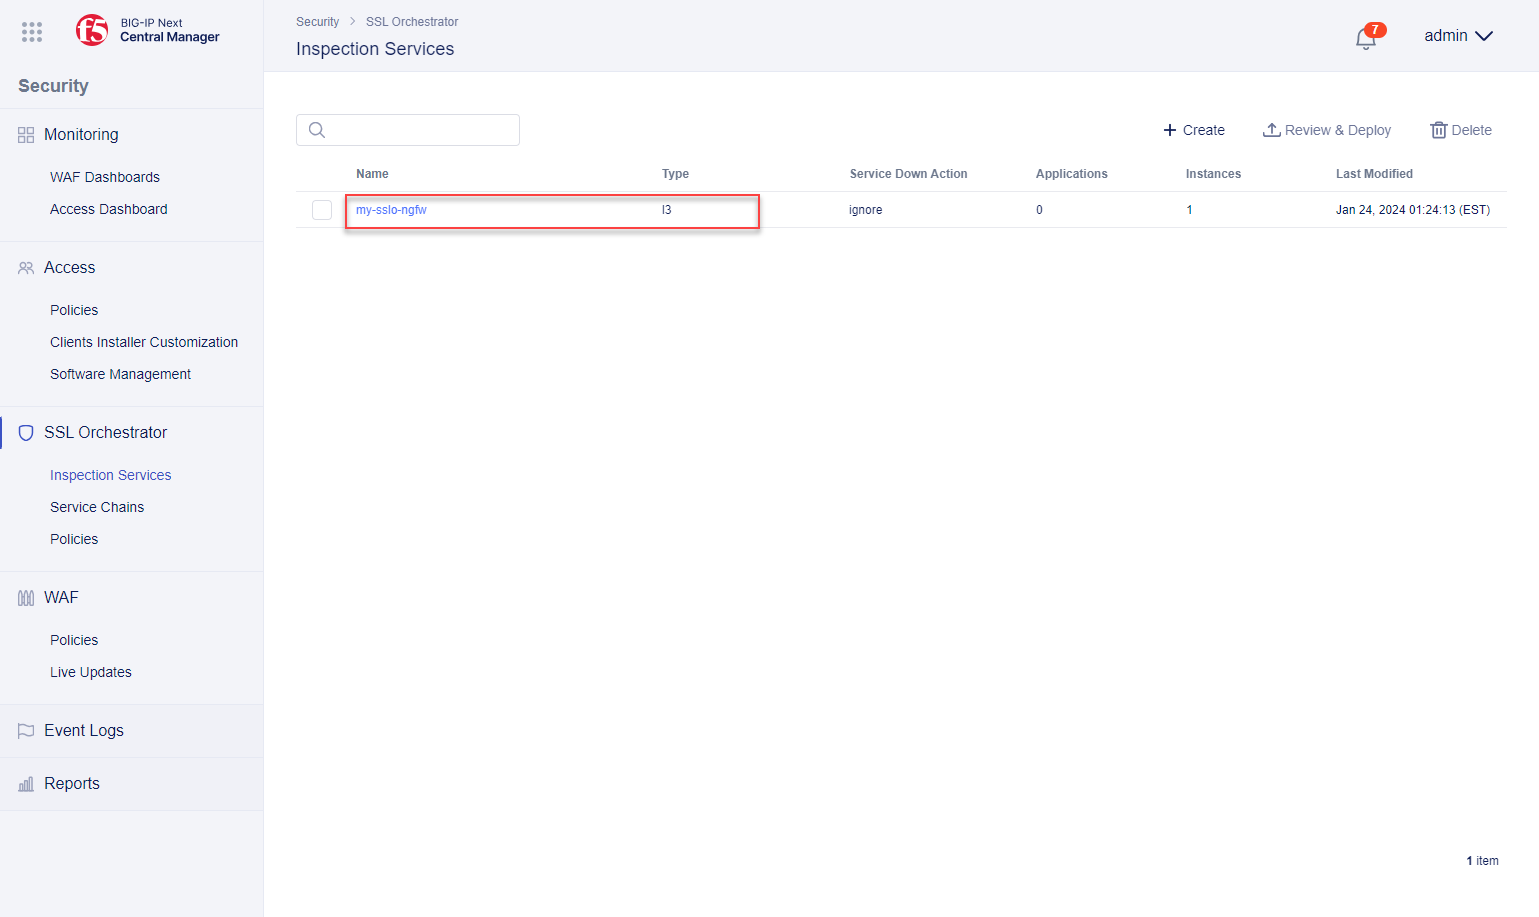
After deployment, the new inspection service will appear in the list.