F5 BIG-IQ Centralized Management Lab > BIG-IQ All Labs > Class 4: BIG-IQ Platform > Module 2: Role Base Access Control (RBAC) Source | Edit on
Lab 2.2: Create a resource group and associate it with a role type
Note
Estimated time to complete: 5 minutes
Lab environment access
If you have not yet visited the page Getting Started, please do so.
Tasks
Create a resource group with all of the BIG-IP objects you want to provide access to, and assign a role type to it.

Steps for Module 2:
Click ROLE MANAGEMENT > Resource Groups on the left navigation area.
Near the top of the screen, click the Add button.
In the Name field, type a name to identify this group of resources, from the Role Type list, select the role type you want to provide access to for this group of resources.
Name: NsresGroup
Description: Network Security Resource GroupRole Type: MyNetworkSecurityRole
From the Select Service list, select the service(s) you want to provide access to for this group of resources. From the Object Type list, select the type of object you want to add to this group of resources.
Select Service: Network Security (AFM)Select Object Type: Firewall PoliciesFor the Source setting, leave the default “Source: Selected Instances” unchanged.
- Selected Instances - Select this option to put only the source objects you selected into this resource group. If you select this option, the associated role will not have access to any new objects of the same type added in the future unless you explicitly add it to this resource group.
- Any Instance - Select this option if you want the associated role to have any instance of the specified object type, including future instances (newly configured objects of this type).
Select the check box next to the name of each object you want to add to this group of resources and click the Add Selected button.
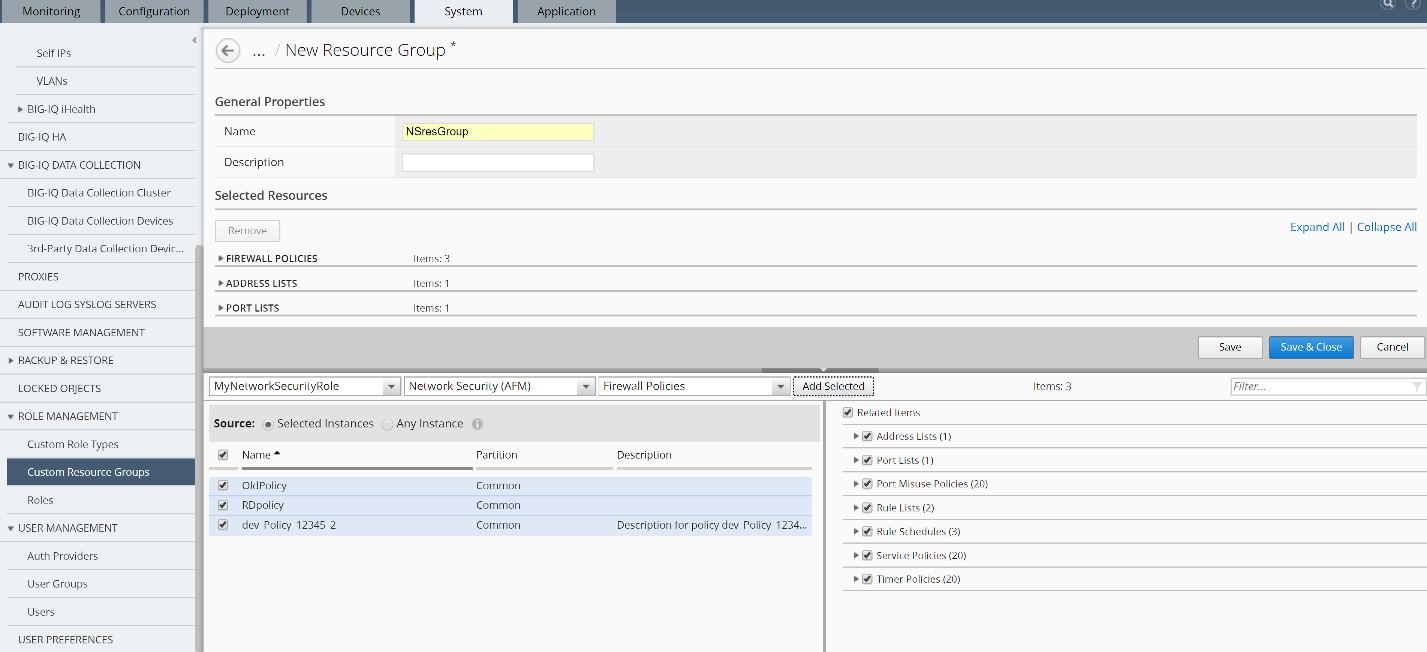
- Click the Save & Close button.
Next, you can create a custom role and associate this role type and resource group to the new role.