F5 BIG-IQ Centralized Management Lab > BIG-IQ All Labs > Class 4: BIG-IQ Platform > Module 2: Role Base Access Control (RBAC) Source | Edit on
Lab 2.3: Add new custom role
Note
Estimated time to complete: 5 minutes
Lab environment access
If you have not yet visited the page Getting Started, please do so.
Tasks
In addition to the built-in roles that ship with BIG-IQ, you can create a custom role with specific privileges to particular areas of BIG-IQ and BIG-IP devices.

On the left, click ROLE MANAGEMENT > Roles.
Under CUSTOM ROLES > Service Roles, click the Add button.
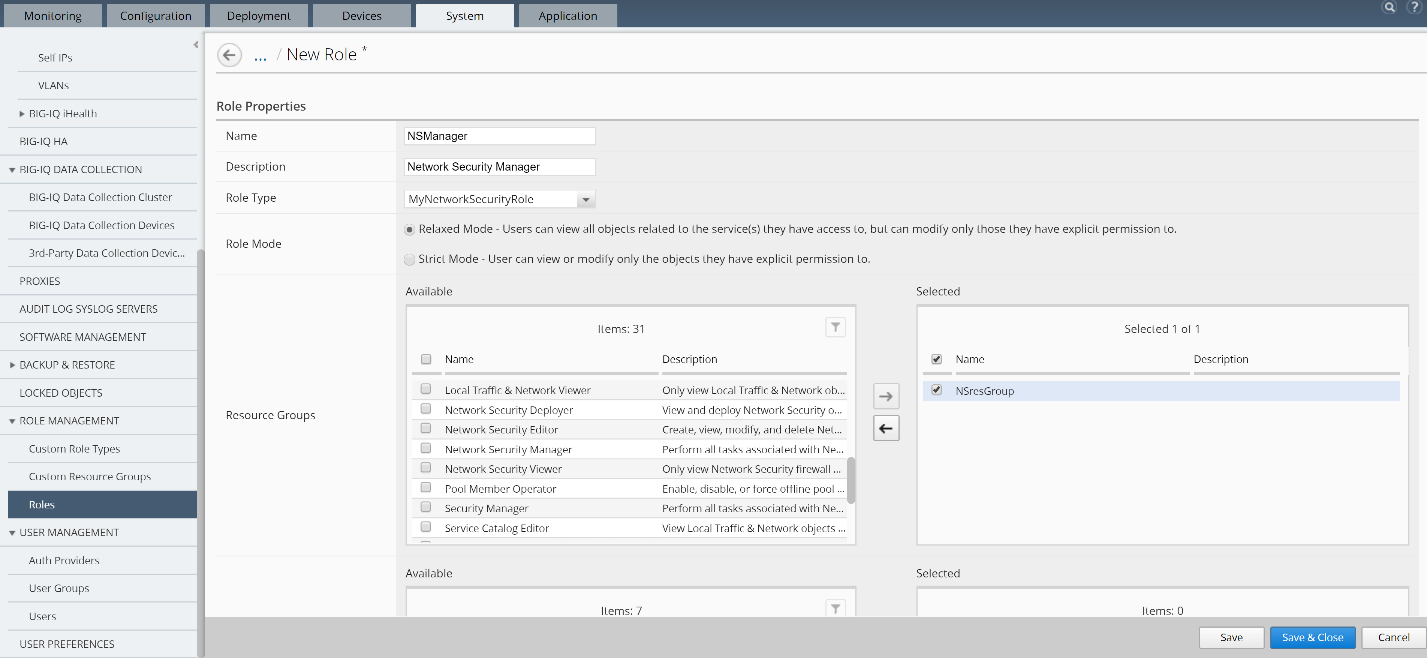
In the Name field, type a name to identify this new role. From the Role Type list, select the kind of role you want to add.
Role Name: NSManager
Description: Network Security Manager
Role Type: MyNetworkSecurityRole
You might have to resize the bottom half of the screen to see all of the following options.
- For the Role Mode setting,
- Relaxed Mode – If you select this option, the role can view and manage all objects you’ve given explicit permission to, and it can see (but won’t be able to manage) related objects for associated services.
- Strict Mode – If you select this option, this role can view and manage only the specific objects you’ve given explicit permission to.
Leave this in Relaxed Mode so you don’t unintentionally limit an associated user’s ability to see related objects.
Select the Resource Groups from the Available area and add them to the right Selected area.
Resource Groups: NsresGroup
- To view the type of user access granted for the custom resource group associated with this role, click the View Permissions button.
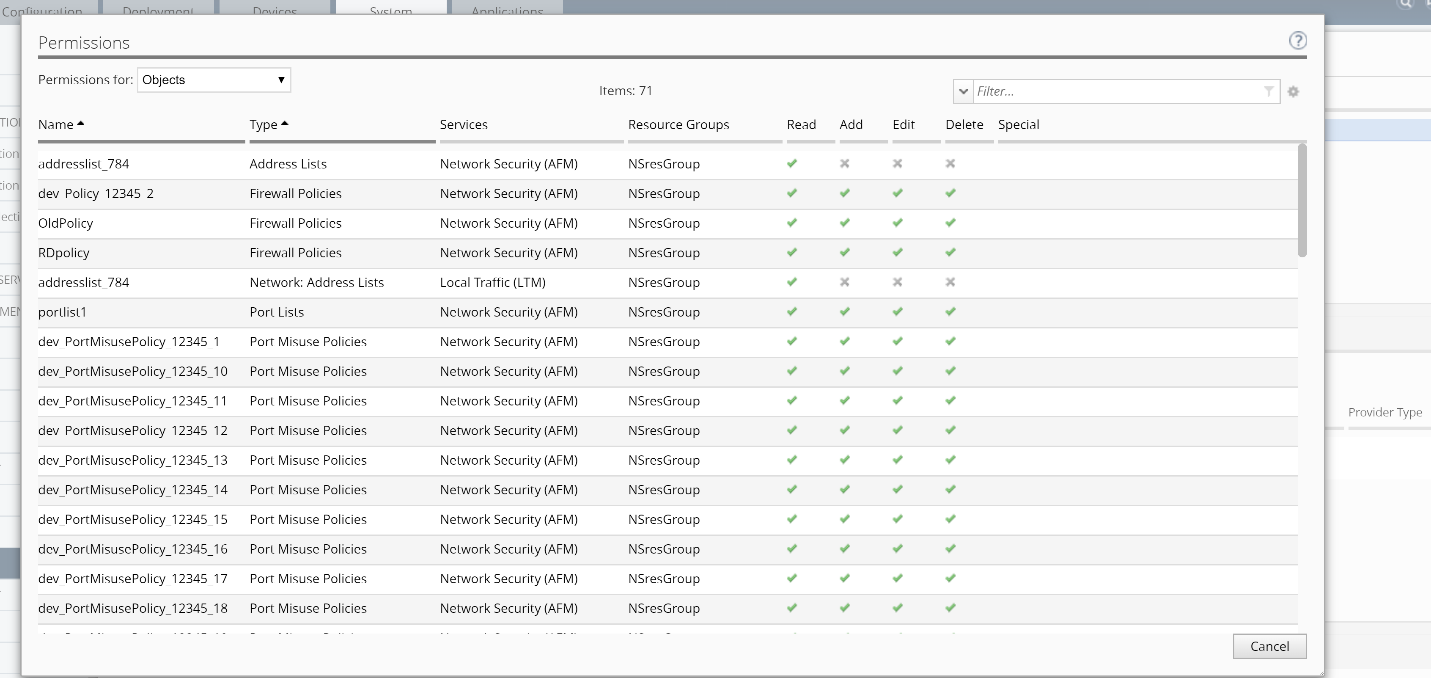
Pay attention to the Type, Services and Resource Groups columns and note the previously customized permissions for Address Lists and Rule Lists.
Cancel the screen and click the Save & Close button at the bottom of the screen.
Next, you will be able to add a user to this custom role to give the user specific permissions to a resource group.