F5 Solutions for DDoS > F5 Agility 2018: DDoS Attack Protection > DDoS Hybrid Defender Attacks and Mitigations Source | Edit on
Lab 3 – Using Auto Thresholding
This exercise will simulate a newly configured Protected Object where the Security Administrator is unsure what values to assign to a few common vectors. Note that auto-thresholding is useful at both the Device and Protected Object levels.
Note
This demo may place significant stress on the demo environment. This may make the DHD UI less responsive. This is unavoidable since for auto-thresholding to block, the attack must be damaging enough to cause stress, which will push the CPU on the Virtual Environment very high. Remember that this is a virtual environment with minimal resources for lab under high stress and that the Hybrid Defender appliances mitigate these attacks in dedicated hardware.
Task 1 – Create Protected Objects that the baseline traffic will be targeting
The DHD device wide protection is enforced for all traffic flowing through the device. For more granular control, we use Protected Objects and configure mitigation settings for those objects to be enforced.
In this task you will configure object-level DoS protection, and then issue an attack and review the results.
- In the BIG-IP Configuration Utility, open the DoS Configuration >> Protected Objects page and in the Protected Objects section click the Create dropdown and select Protected Object
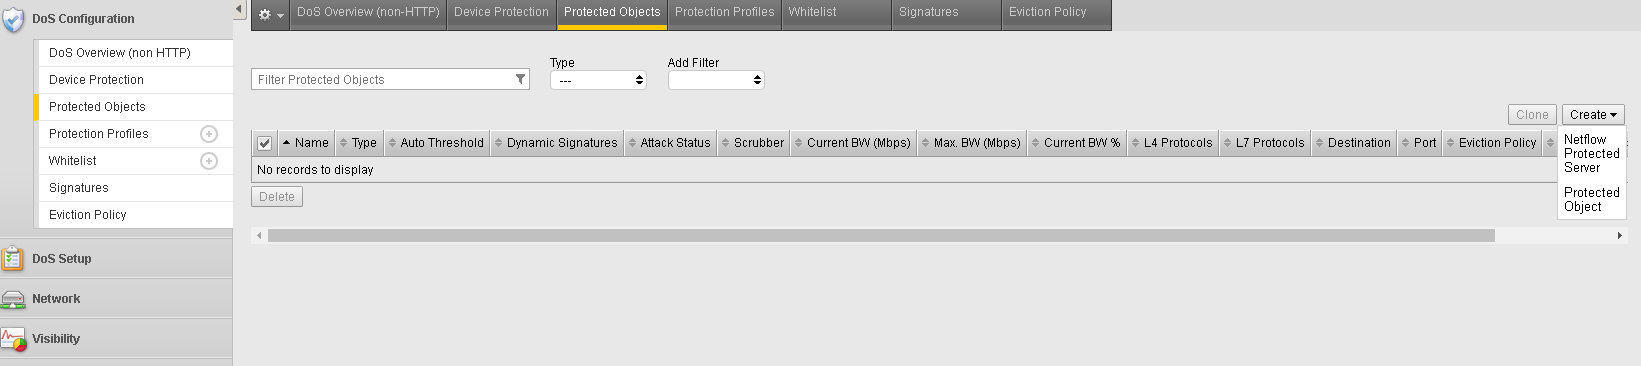
Configure the Protected Object using the following information, and then click Create.
Name Server15 Destination Address 10.1.20.15 Port *All Ports Protocol TCP Protection Profile: dos Eviction Policy: Blank VLAN(s): defaultVLAN Logging Profiles: local-dos Click Save
This Protected Object will be used for the Auto-Thresholding lab.
Task 2 – Run Scripts to start L4 traffic generation – Good Traffic
- Putty SSH (use the desktop shortcut) to open a shell to the good client system.
- Accept the SSH Warning.
- Enter “ubuntu” as the user. The session is preconfigured to authenticate with a certificate.
- This script will generate baseline traffic against both 10.1.20.14 and 10.1.20.15 (Your Protected Object)
- Start the auto-threshold base-lining script with:
# sudo su
# cd ~/scripts
# ./baseline_l4.sh
- In the Hybrid Defender UI, in Dos Configuration >> Device Protection, Click in the AutoThreshold Section Start Relearning

In the Hybrid Defender Web UI, Navigate to Dos Configuration >> Protection Profiles Select the dos profile and Click the Network box. We will enable auto-thresholding for the following vectors: ICMPv4 Flood, TCP SYN Flood, TCP Push Flood, TCP RST Flood, TCP SYN ACK Flood. If not set to Fully Automatic select each vector and clicking the Set Threshold Mode drop down and selecting Fully Automatic. When all vectors are configured, Go back to the top and Select Commit Changes to System.
- In the Hybrid Defender Web UI, view the Auto Threshold event log by navigating to Visibility >> Event Logs >> DoS >> Network >> Auto Threshold.
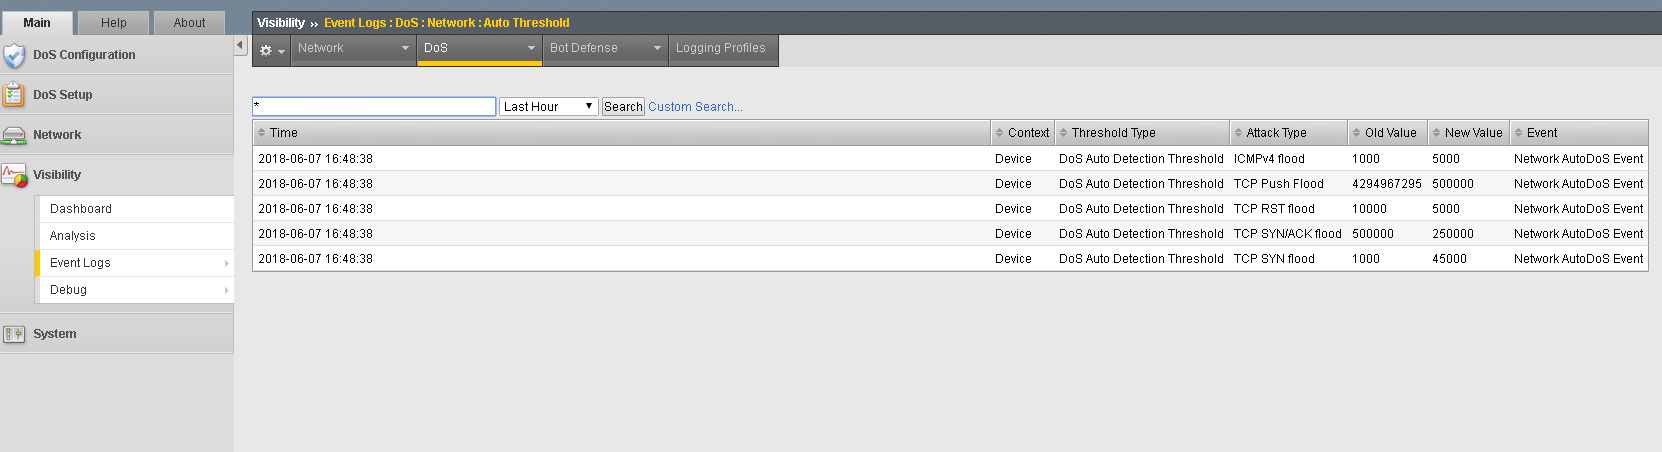
Note
The system is updating the detection thresholds. With auto-thresholding, the system adjusts the detection thresholds based on observed traffic patterns. However, mitigation rate limits are always dynamic based on detected system or protected object stress. If anomalous levels of traffic are running, but there is no stress, the Hybrid Defender will generate alerts but will not block traffic. Under stress, the rate limits are automatically created and adjusted dynamically.
- In the Hybrid Defender UI, navigate to Dos Configuration >> Dos Overview, view in Dos Attack or Device Dos, the device sees no attacks.
Task 3 – Create Stress to trigger Auto Thresholding and view Reports
- Let’s create some stress with a Flood attack. In the Attacker CLI start the auto-threshold flood:
# sudo su
# cd ~/scripts
# ./autot_flood.sh
This is a long duration attack. You can terminate it with Ctrl+C when finished.
- In the Hybrid Defender Web UI, view the Dos Configuration >> DoS Overview. Note that the ICMP Flood attack is being mitigated and the rate limit thresholds for each of the auto-threshold vectors have been adjusted based on stress, including vectors that are not detecting or blocking an attack.
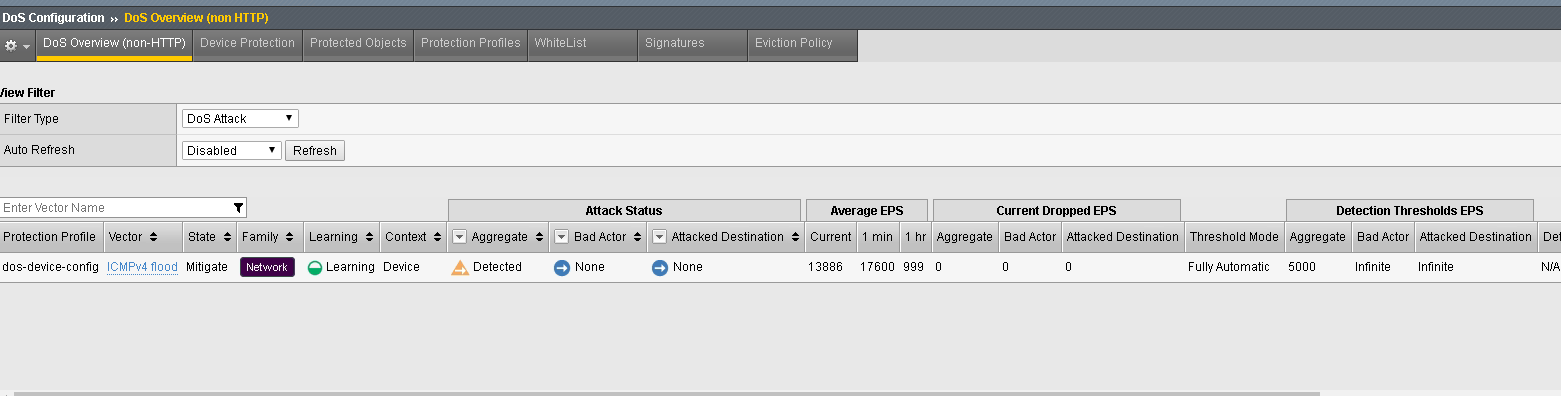
- Select the filter type to Protected Object and then Select the Virtual Server Server15 and view how various thresholds are dynamically adjusted based on the stress. But all the blocking is still being handled by the device-dos.
- Terminate the attack in the Attacker CLI with Ctrl+C.
- After the attack has ended, in the Hybrid Defender Web UI, navigate to the DoS Visibility page. Click the Network filter. Under Vectors, select ICMPv4 Flood. View the various details.
Attention
If you want to run other attacks and see the UI and logging, adjust settings so you can mitigate attacks. Please do so. This will also be done in the Advanced Class.
- Clean-up: On the Attacker CLI, if the attack is still running be certain to end it with Ctrl-C.
- Clean-up: After stopping the attack, clear the learning on the Hybrid Defender CLI with:
# tmsh run security dos device-config auto-threshold-relearn
# tmsh run security dos virtual name Server15 auto-threshold-relearn
- Clean-up: Stop the baseline traffic generation from the good-client if still running using CTRL+C