F5 Distributed Cloud > F5 Distributed Cloud: Security Automation & Zero Day Mitigation Source | Edit on
Lab 1: Building a Service Policy for Negative Enforcement
Objective:
Explore and become familiar with the Distributed Cloud Console
Review the F5 Distributed Cloud (XC) Load Balancer that has been provisioned
Create a negative enforcement policy to provide initial protection for your application
Narrative:
After consulting with your trusty F5 Solutions Engineer, you decide to adopt security services from F5 Distributed Cloud Web by leveraging service policies. The lab provisioned for you has already deployed a F5 XC load balancer and been setup to route to your Azure application. The F5 Distributed Cloud Application Delivery Network (ADN) will provide network connectivity for clients to first route to F5’s nearest Regional Edge(RE) location on the ADN utilizing IP Anycast. Once the client is connected to the their nearest F5 RE, security controls can now be applied so that unwanted traffic can be dropped at the F5 RE and valid traffic can than be passed to ACME Azure environment. This lab will be deployed in a SaaS only configuration with no on-premises (public or private cloud) elements.
Note
You will not have direct access to the Azure environment where the application is hosted.
Warning
If you are using multiple labs in one course, understand that some steps below may be redundant depending on labs deployed. To gain full benefits from this lab, please delete any objects created in your prior lab and continue with this lab as all necessary objects will be recreated.
Following the tasks in the prior Introduction Section, you should now be able to access the F5 Distributed Cloud Console, having set your Work Domain Roles and Skill levels. If you have not done so already, please login to your tenant for this lab using the Accept Inivitation link from your second email and proceed to Task 1.
Expected Lab Time: 40 minutes
Task 1: Exploring the F5 Distributed Console
The following steps will allow you to review the F5 Distributed Cloud Load Balancer that was deployed and is currently advertising a globally available application. These steps will allow you to review the application, its DNS entry and the Azure target that is configured as the origin.
Following the Introduction section instructions, you should now be the Home page of the F5 Distributed Cloud Console. Let’s first review the F5 Distributed Load Balancer that was configured for you via automation. Select Web App & API Protection.
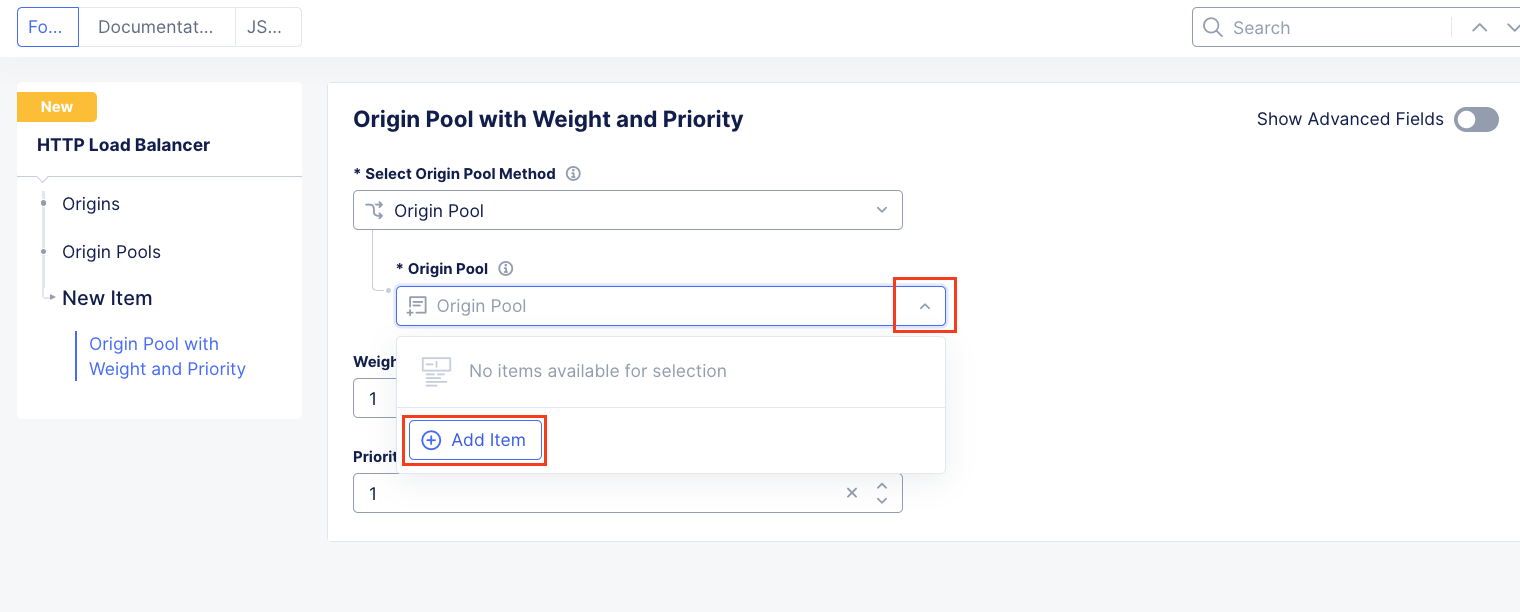
On the Web App & API Protection page, note the identifier of your namespace. The namespace will be follow a format of adjective-animal. The example in this guide uses the namespace ‘pet-walrus’. Your namespace will be different. In the left-hand navigation expand Manage and click Load Balancers > Origin Pools
In the resulting screen expand the Actions Menu and click Manage Configuration for the origin pool configured in your namespace. Here you will see the origin server public FQDN of the application running in ACME’s Azure environment. Copy the domain name so you can visit the site directly from your web browser. Click Cancel and Exit to return to the Origin Pools page since you will not need to make any updates to the configuration.
Using your browser, visit this application directly utilizing its public FQDN. Select the Menu on the top right-hand side and select Header.
Note the Remote Address field. This will match the IP address of your endpoint. You can verify that it matches by looking up your IP address at https://ipinfo.io/.
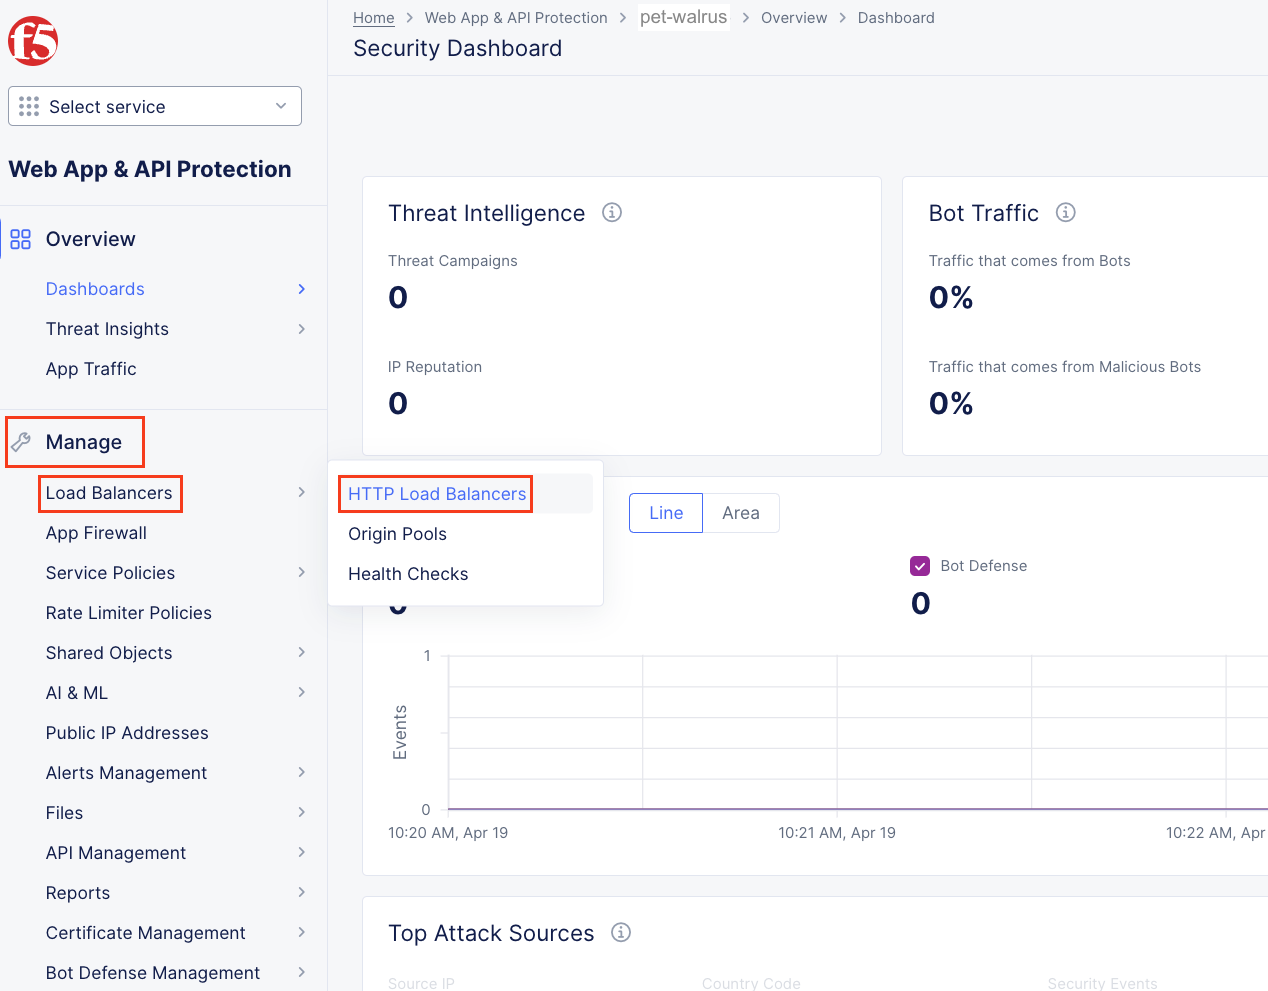
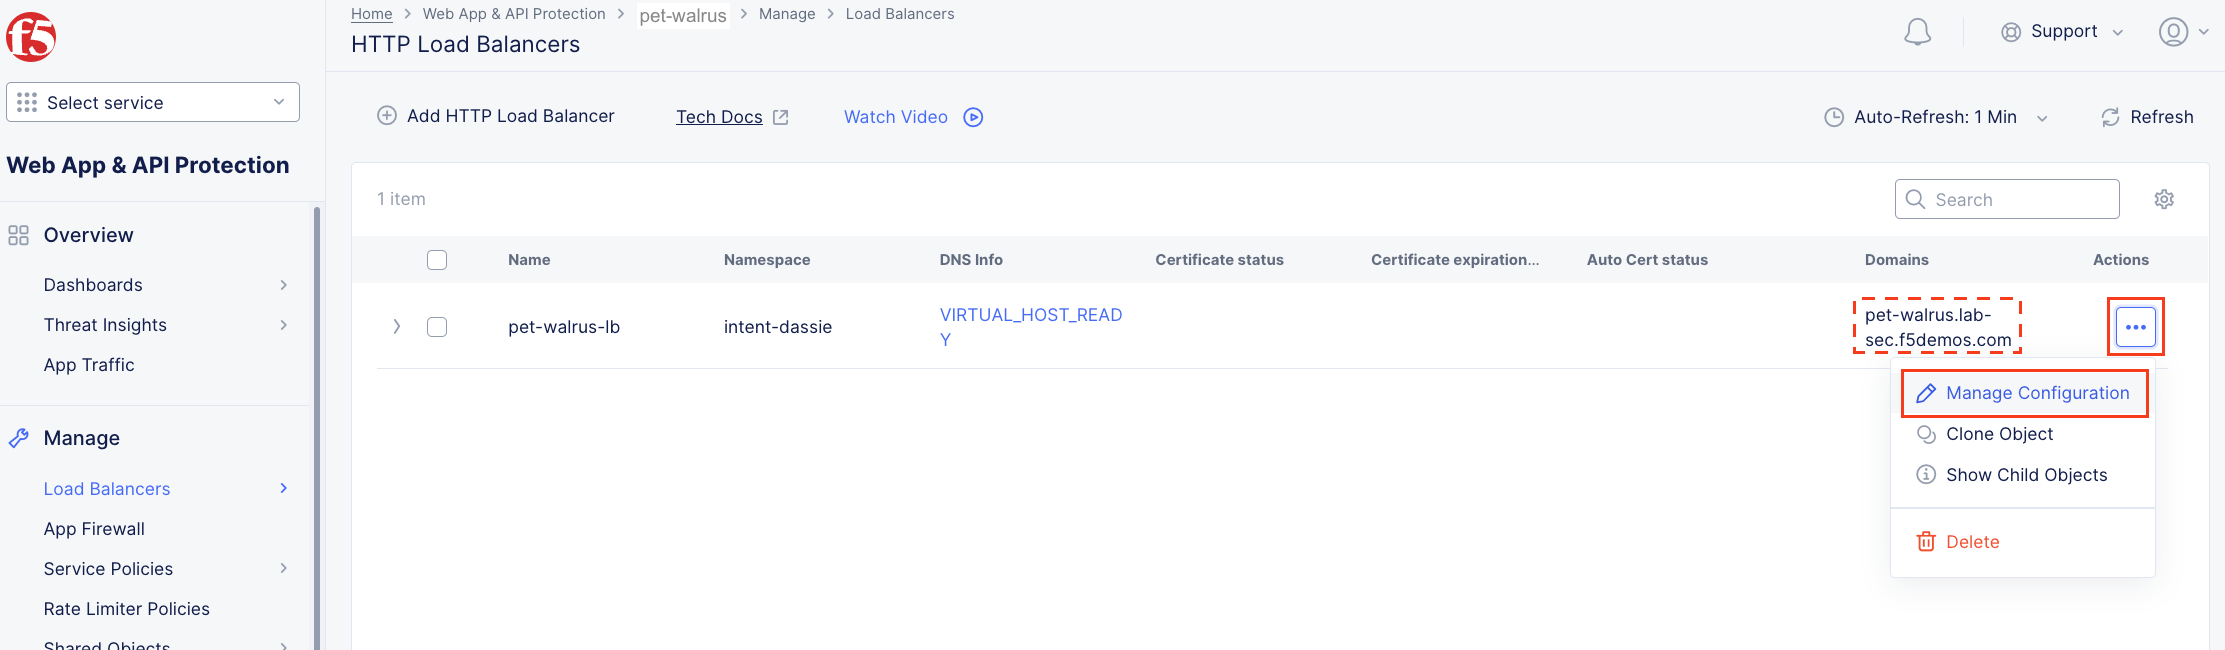
Next, let’s return to the F5 Distributed Cloud console and take a look at the F5 Distributed Cloud Load Balancer configured for you. In the left-hand navigation expand Manage and click Load Balancers > HTTP Load Balancers
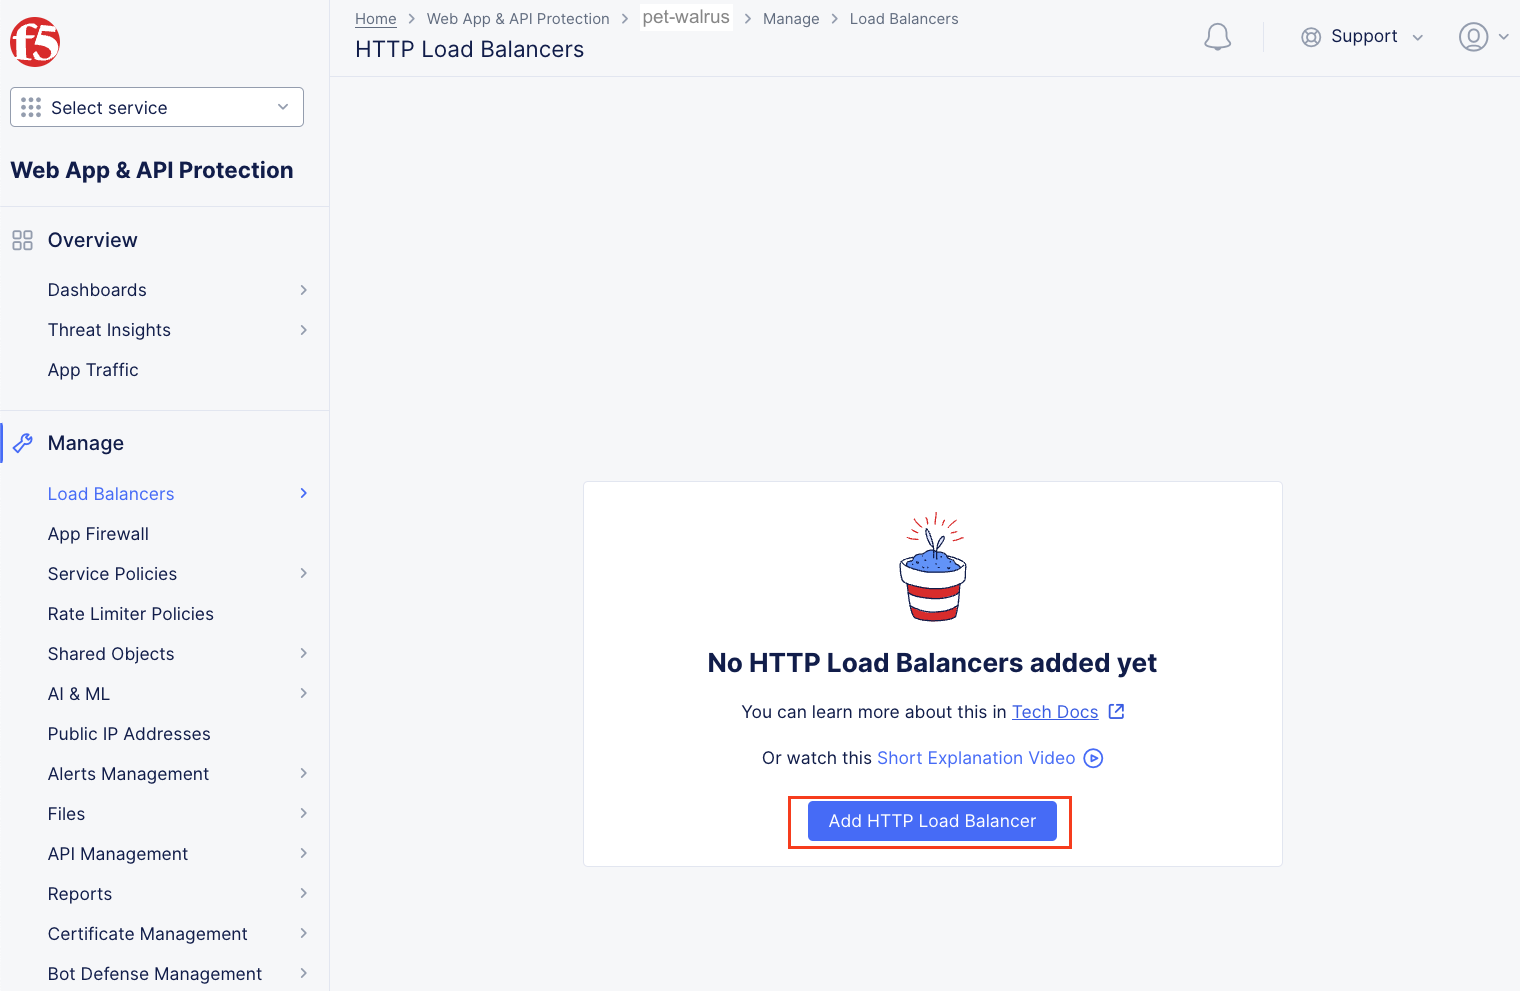
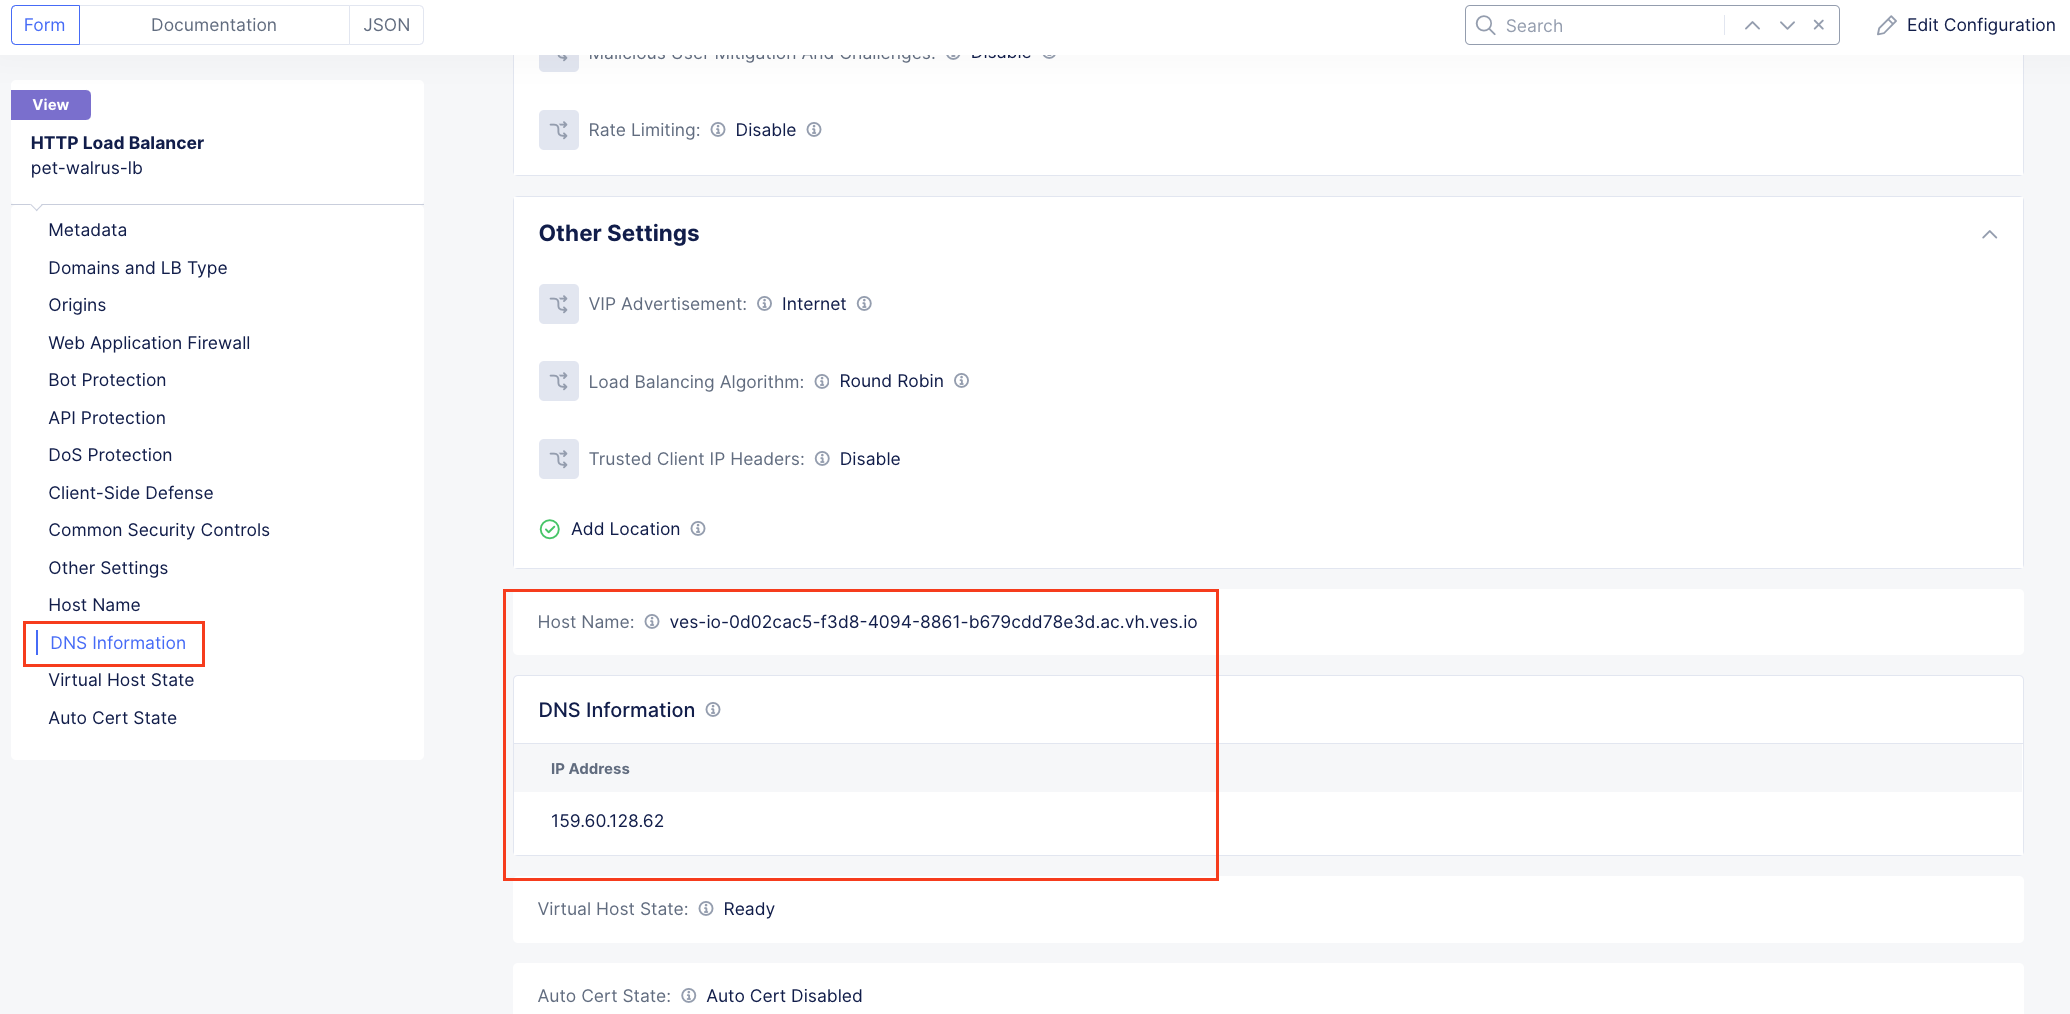
In the resulting screen expand the Actions Menu and click Manage Configuration for the load balancer configured in your namespace. The graphic below is an example. Your environment will have a different load balancer name but it should follow a similar naming convention adjective-animal.
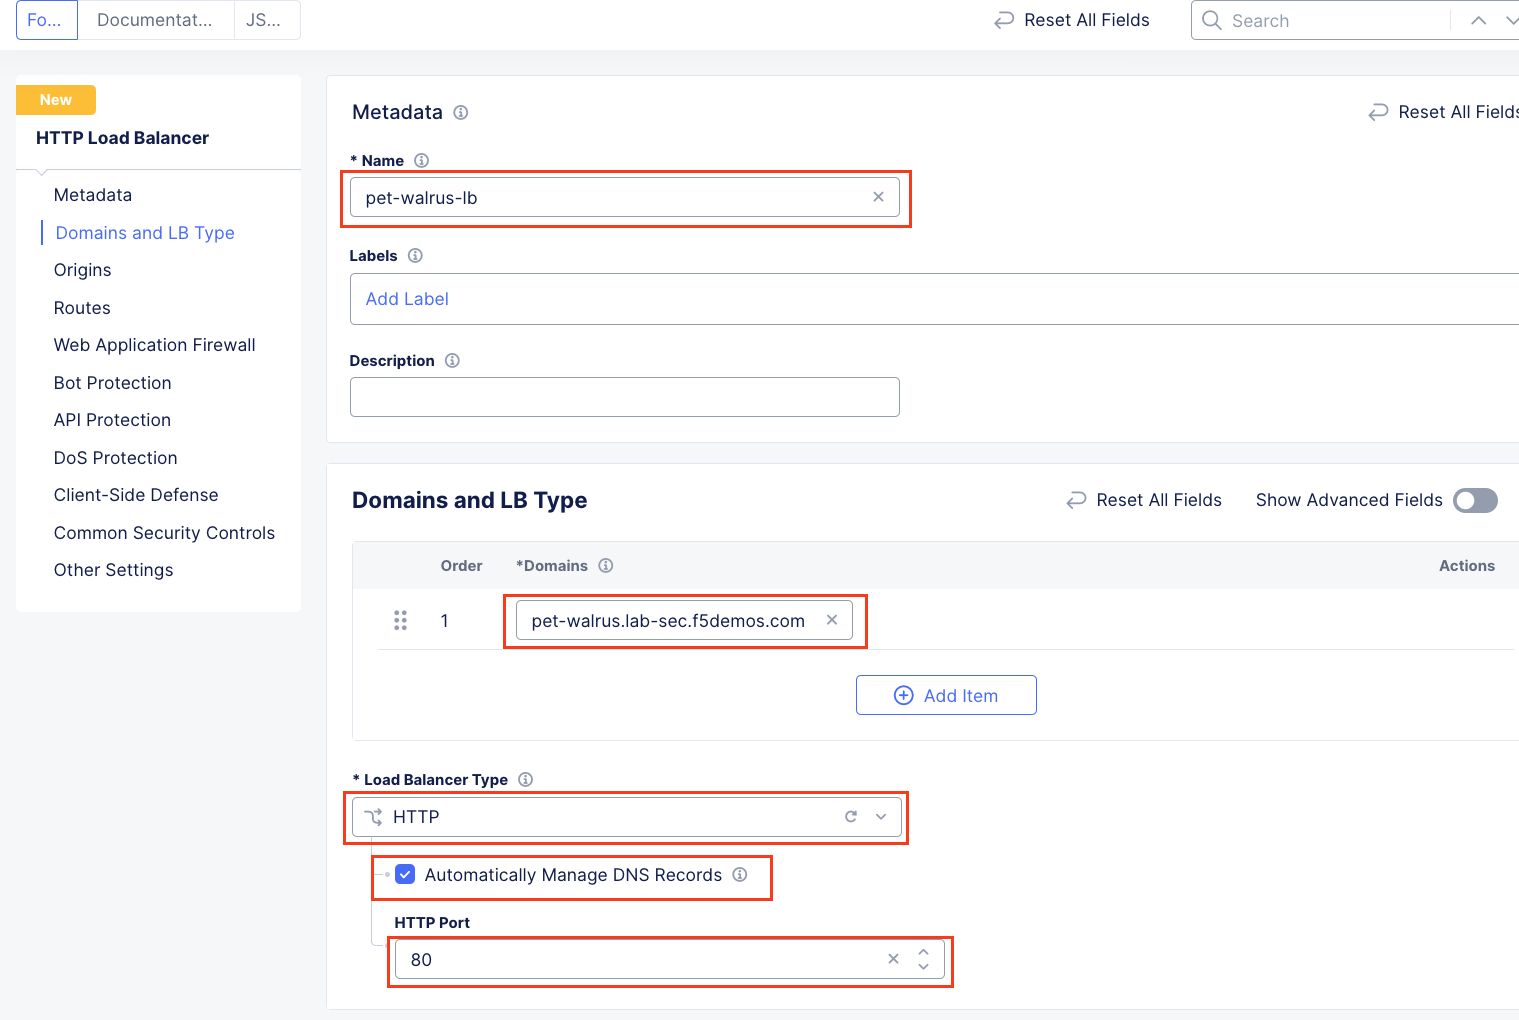
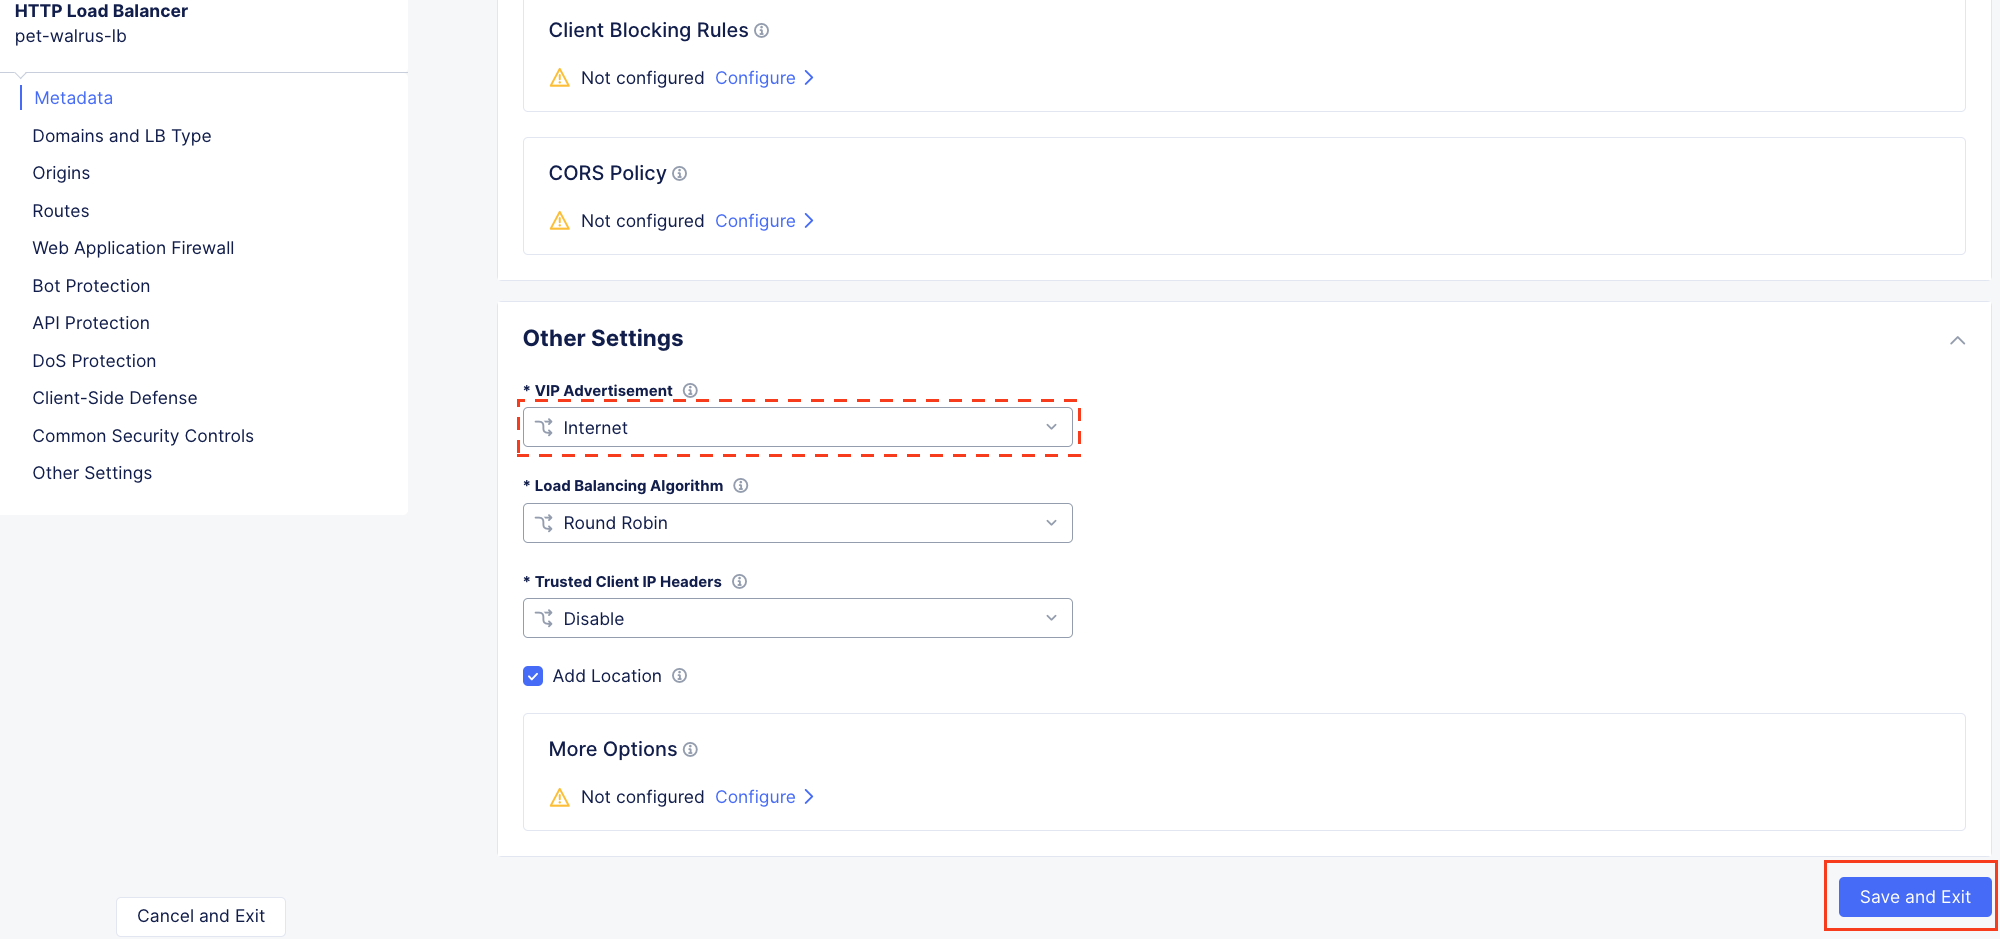
Using the left-hand navigation and in the sections as shown, review the following data. Values where <namespace> adjective-animal is represented, the configuration will be the name of your provisioned namespace. Note the FQDN of the F5 Distributed Cloud load balancer.
Metadata <namespace>-lb
Domains and LB Type <namespace>.lab-sec.f5demos.com
Other Settings VIP Advertisement
Note
The VIP Advertisement selection controls how/where the application is advertised. The “Internet” setting means that this application will be advertised globally from the F5 Distributed Cloud Global Network utilizing Anycast.

Using your web browser, access the application via the F5 Distributed Cloud FQDN. Click on Menu > Header
Note that the Remote Address has changed as well as the presence of a new X-Forwarded-For header. The client information should have changed as you are now connecting first through the F5 ADN Regional Edge before being proxied the the application running the ACME Corp Azure environment. X-Forwarded-For details should match your client IP address.


Narrative Check
With your application now proxied through the F5 Distributed Cloud Regional Edge, ACME Corp’s security edge for this application can now be extended globally across F5’s ADN and be used to scrub unwanted traffic before reaching ACME Corp’s environment. The Application and Security teams have requested that some geo-fencing rules be put in place to decrease the application’s attack surface. ACME Corp would like to block all traffic coming from Fiji since ACME Corp has a subsidary with exclusive rights locally. ACME Corp would also like to block known bad IP address coming from TOR Networks and Spam Networks from accessing the application.
Task 2: Negative Enforcement
The following lab tasks will guide you through the configuration of various Service Policies which can be used to implement a variety of security controls. The goals of this section of the lab will be to create specific policies to enforce negative enforcement rules based on geo-location, IP addresses, and known bad IP ranges.
Returning to the F5 Distributed Cloud Console, you will edit the F5 HTTP Load Balancer for your application. From the Web App & API Protection workspace, Click Load Balancers > HTTP Load Balancers.
In the resulting screen expand the Actions Menu and click Manage Configuration for the load balancer configured in your namespace.

Select Common Security Controls in the left hand menu, and then click Edit Configuration. This will enable you to enable IP Reputation controls. The IP reputation service analyzies IP threats and publishes a dynamic data set of millions of high-risk IP address to protect inbound traffic from malicious IPs.

Click the dropdown for IP Reputation and select Enable.
From the List of IP Threat Categories to choose, select Spam Sources and Tor Proxy.

Next, click the dropdown for Threat Mesh and select Enable. Threat Mesh provide F5 Distributed Cloud applications and additional layer of protection against web application attacks. Threat Mesh leverages cross-customer correlation to identify malicious intent of a client. Whenever a client is flagged due to malicious entent by F5 Distributed Cloud decision engines, that client will be added to the the ThreatDB. Enabling Threat Mesh means that requests that come to an application from an IP in the ThreatDB will be automatically blocked.
Note that Service Policies is set to Apply Namespace Service Policies. This means that this application load balancer will follow the active service policies defined for the namespace. By default, all new HTTP load balancers built in the namespace will follow the same set of rules. This shared set of policies assist with the rapid deploment of security updates for incidence response since the ruleset can be updated in one spot and all applications in the namespace will be updated. Scroll down and click Save and Exit.
Within Web App & API Protection, under the Manage section in the left-hand navigation menu, click Service Policies. In the flyout menu, click the Service Policies link.
Observe the existing Service Policies and note they are source from the shared namespace which means they could be used within any other namespace.
Click Add Service Policy in the top left area as shown.
Note
Using shared namespace Service Policies provides the ability to use API-updated policy controls to implement common service security across multiple resources in multiple namespaces.

In the Metadata section enter geo-filter for the Name and then click Rules in the left-hand navigation.
Select Denied Sources from the dropdown for Select Policy Rules.

Locate the Country List input field and begin typing Fiji and then select it from the list that appears.
Click the dropdown for Default Action. Observe the available options and select Next Policy then click Save and Exit.

Observe the resulting added geo-filter Service Policy added in your namespace and note the Rule Count of 1 for the block of Fiji.

Under Manage, click Service Policies > Active Service Policies.

Click Select Active Service Policies in the upper-left hand area to add the geo-filter service policy you just created.

Select the geo-filter service policy just created. It will be placed in your namespace (adjective-animal). Click Save and Exit

Let’s test access to the website. The access failed with a 403 Forbidden error. Copy the support ID to a notepad for future reference. The reason the access failed is because we only attached the geo-filter Service Policy and the Default Action was Next Policy. In our namespace, there is no other or next policy to “Allow” traffic, therefore, all other traffic is denied producing the 403. Let’s review F5 Distributed Cloud to review the observability capabilities.

Narrative Check
ACME Corps’ application is now protected against known bad IPs based on threat categories and also with F5 Distributed Cloud Threat Mesh solution. Your task will now be to proceed to block traffic coming from Fiji.
Task 3: Observability
You will review the performance and security observability capabilities of the F5 Distributed Cloud platform.
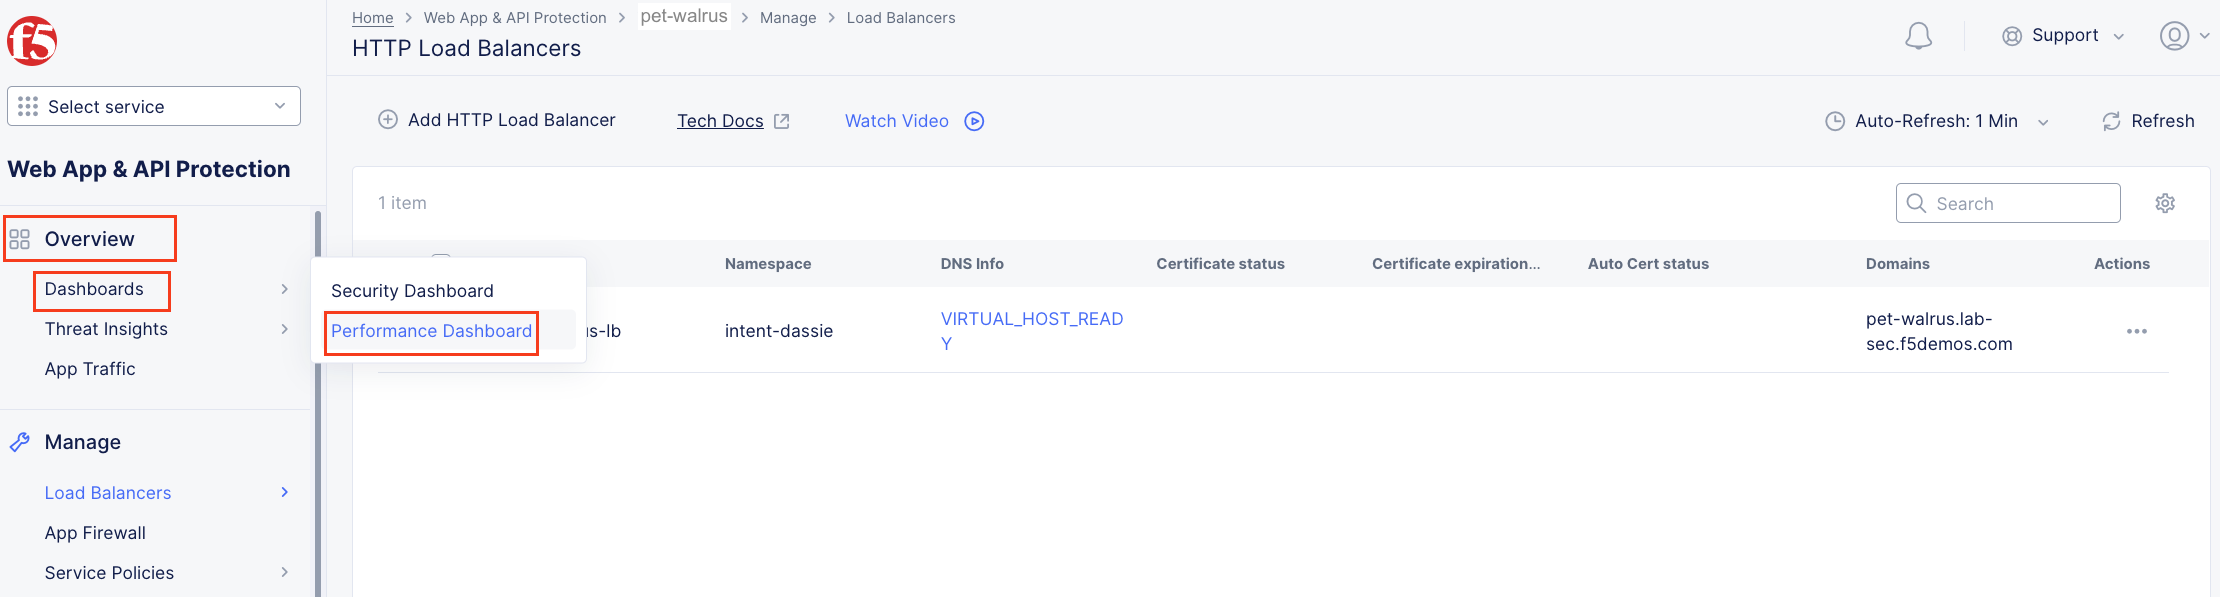
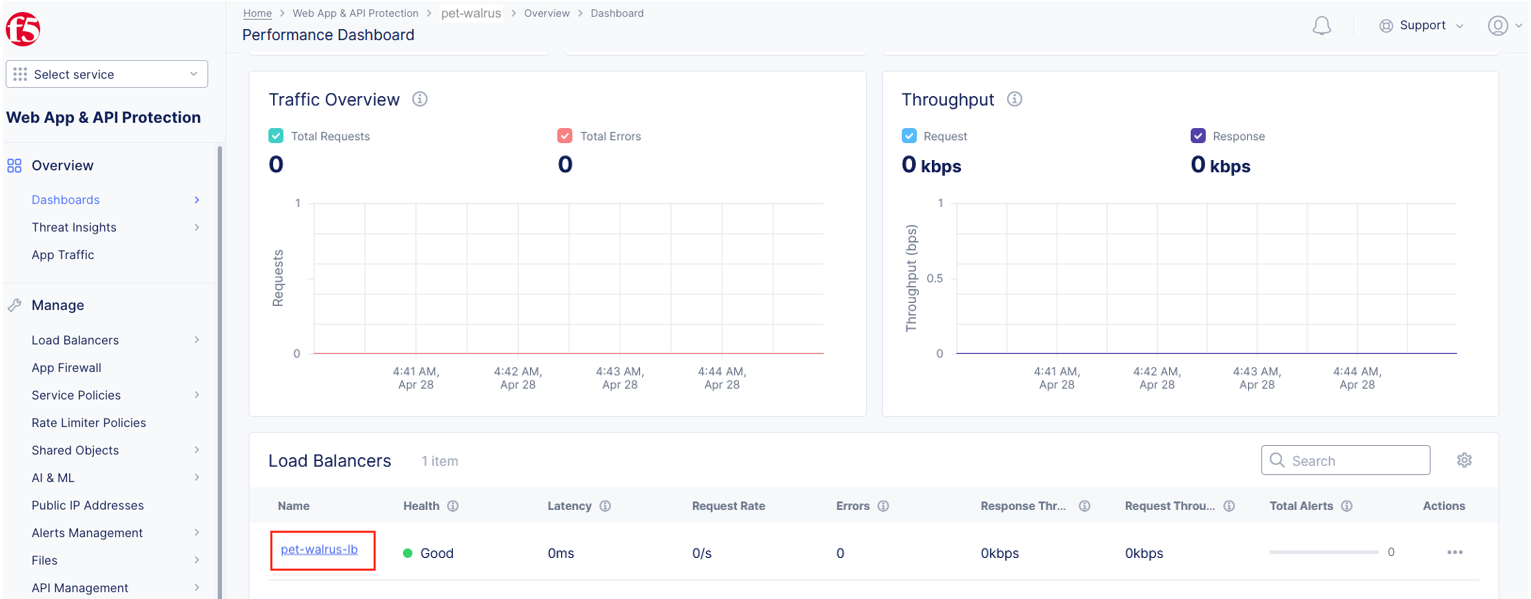
Returning to the F5 Distributed Cloud Console, use the left-hand menu to select Overview > Performance section. This dashboard will provide a summary view for all of the configured Load Balancers.
Note
As you have not run many requests, summary analytics may not be available in the dashboard view yet.
Scroll to the bottom and select your load balancer.
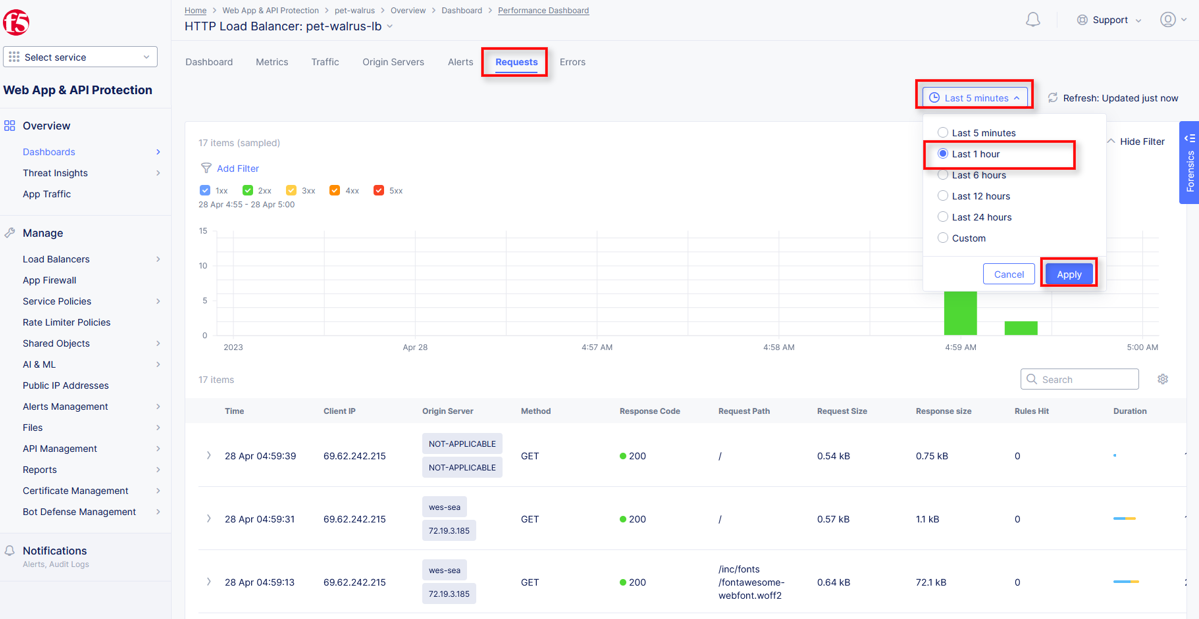
From the Performance Dashboard view, using the horizontal navigation, click Requests.
Change the viewable time period from 5 minutes (default) to 1 hour by selecting the dropdown shown, click Last 1 hour then click Apply.
Note
Security Event data may take 15-20 seconds to populate in the Console. Please force a refresh using the Refresh icon next to the Time Period selection in step 6.
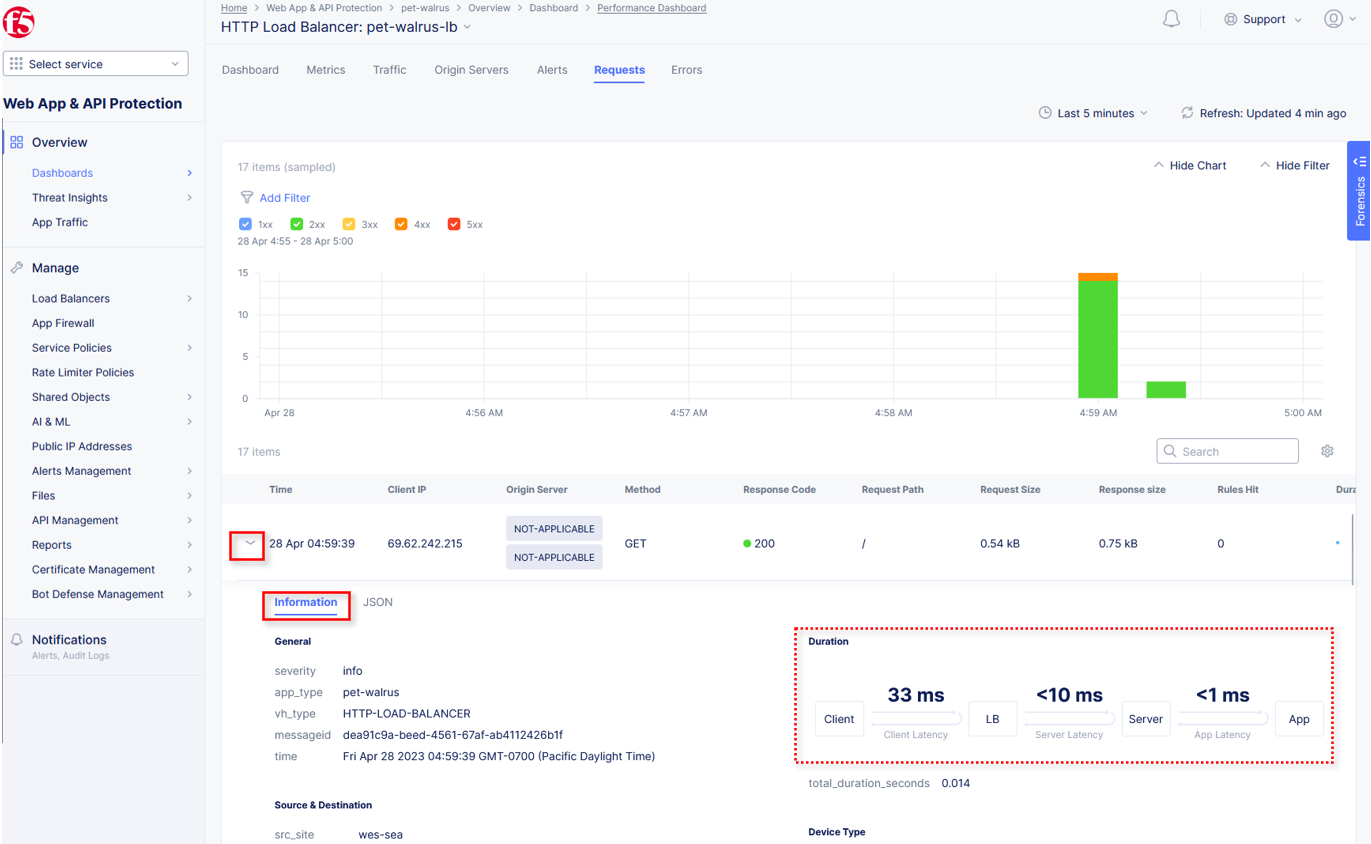
Expand one of the requests and note the Information tab link. This summarizes request details and provides request duration timing.
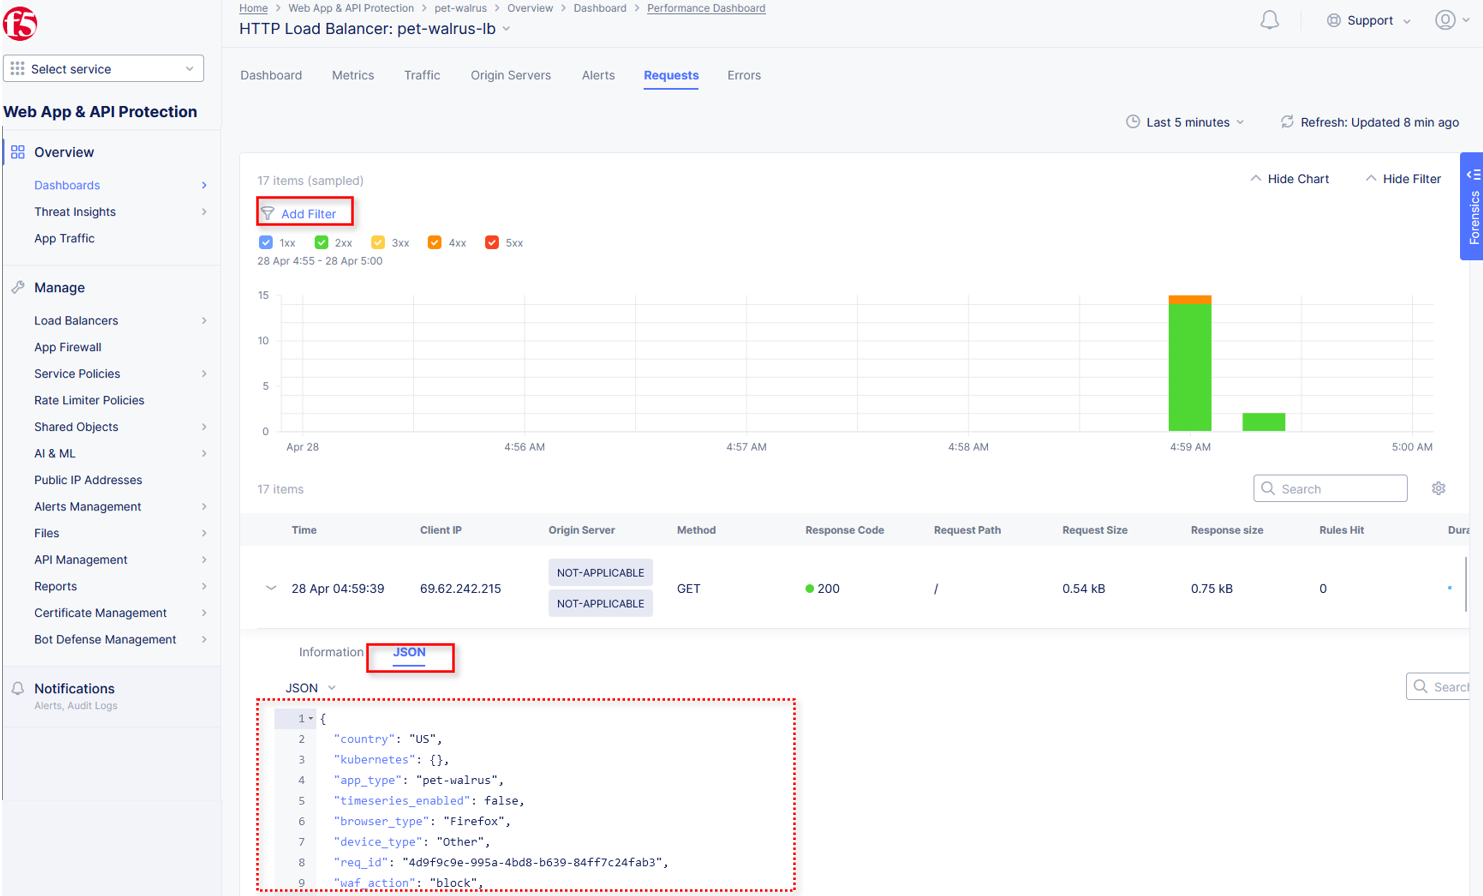
Click on the JSON link to get more data about the request.
Click Add Filter as shown to see how you can filter by key identifiers.
The resulting Search input field and listed Keys, can be used to filter requests in this view.
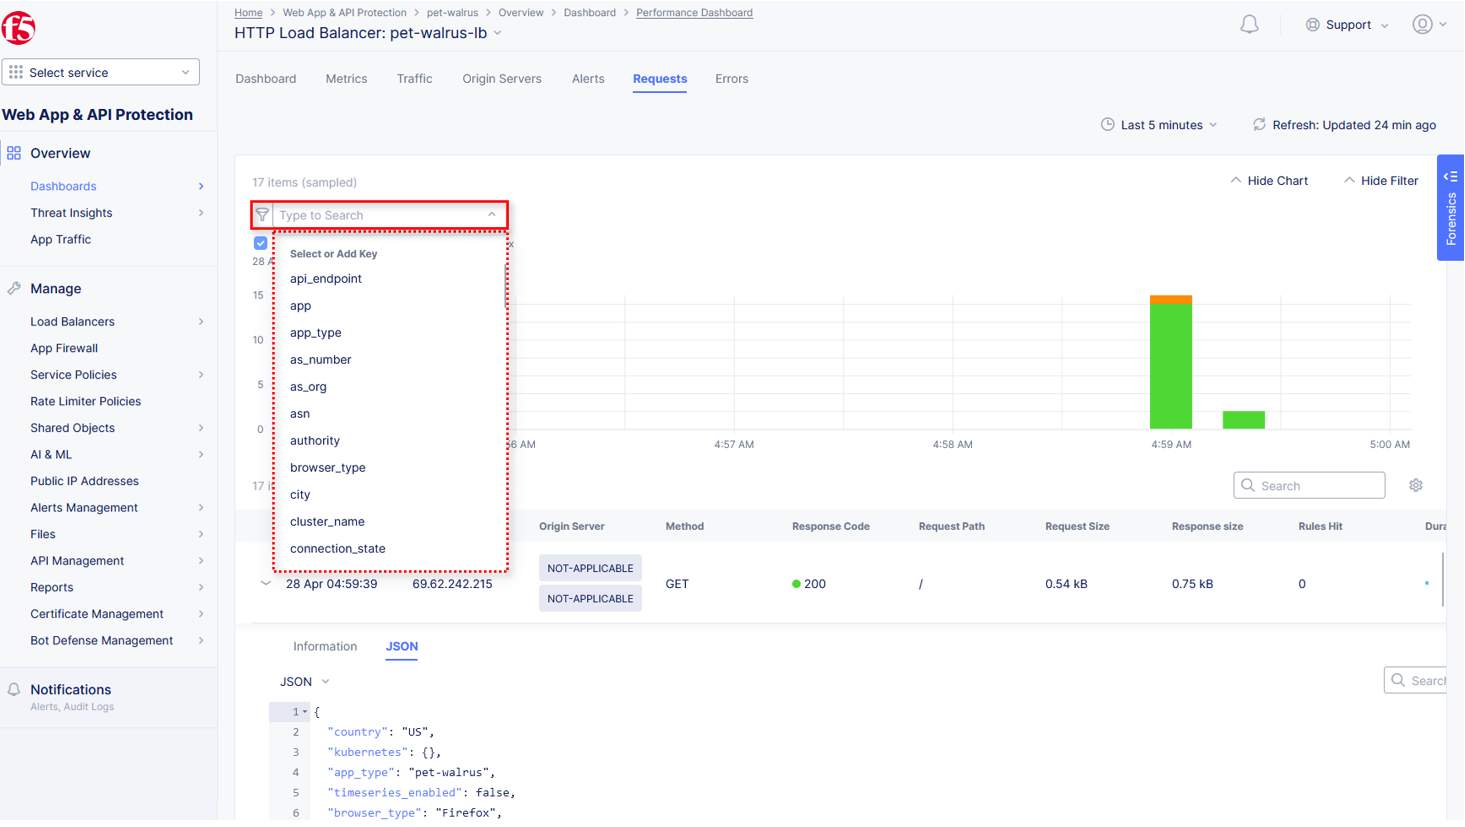
Note
The available Key list to search is dynamically updated based on the requests in the selected time view.
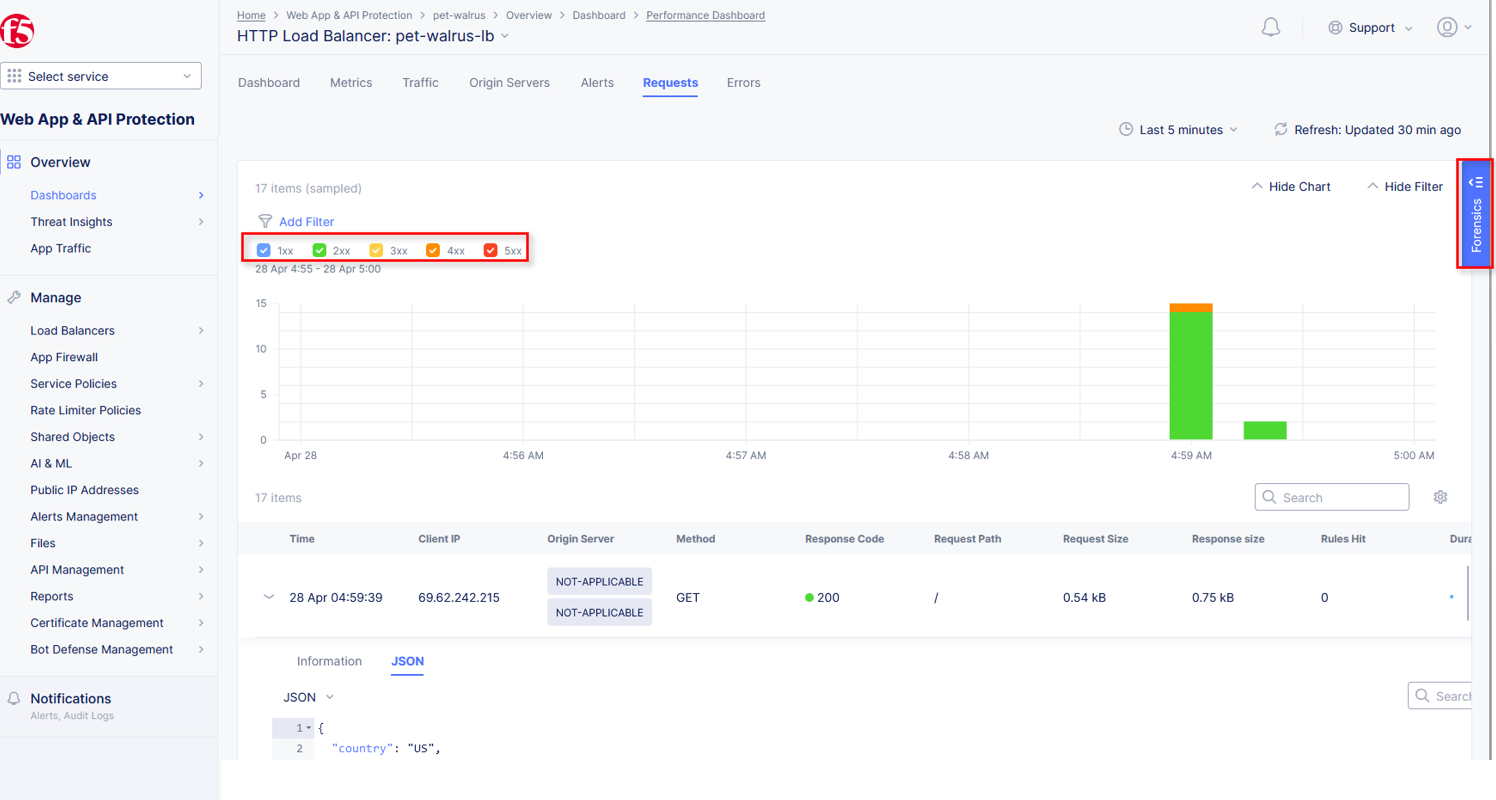
Closing the filters view, note the available Quick Filters for Response Codes which allows quickly filtering the requests by toggling on or off each response code category.
Click the Forensics tab on the right side of the view as shown.
The Forensics Filter provides summarized top categories which provides quicker analysis of the request log data. Collapse the Forensics view when done using the indicated arrow.
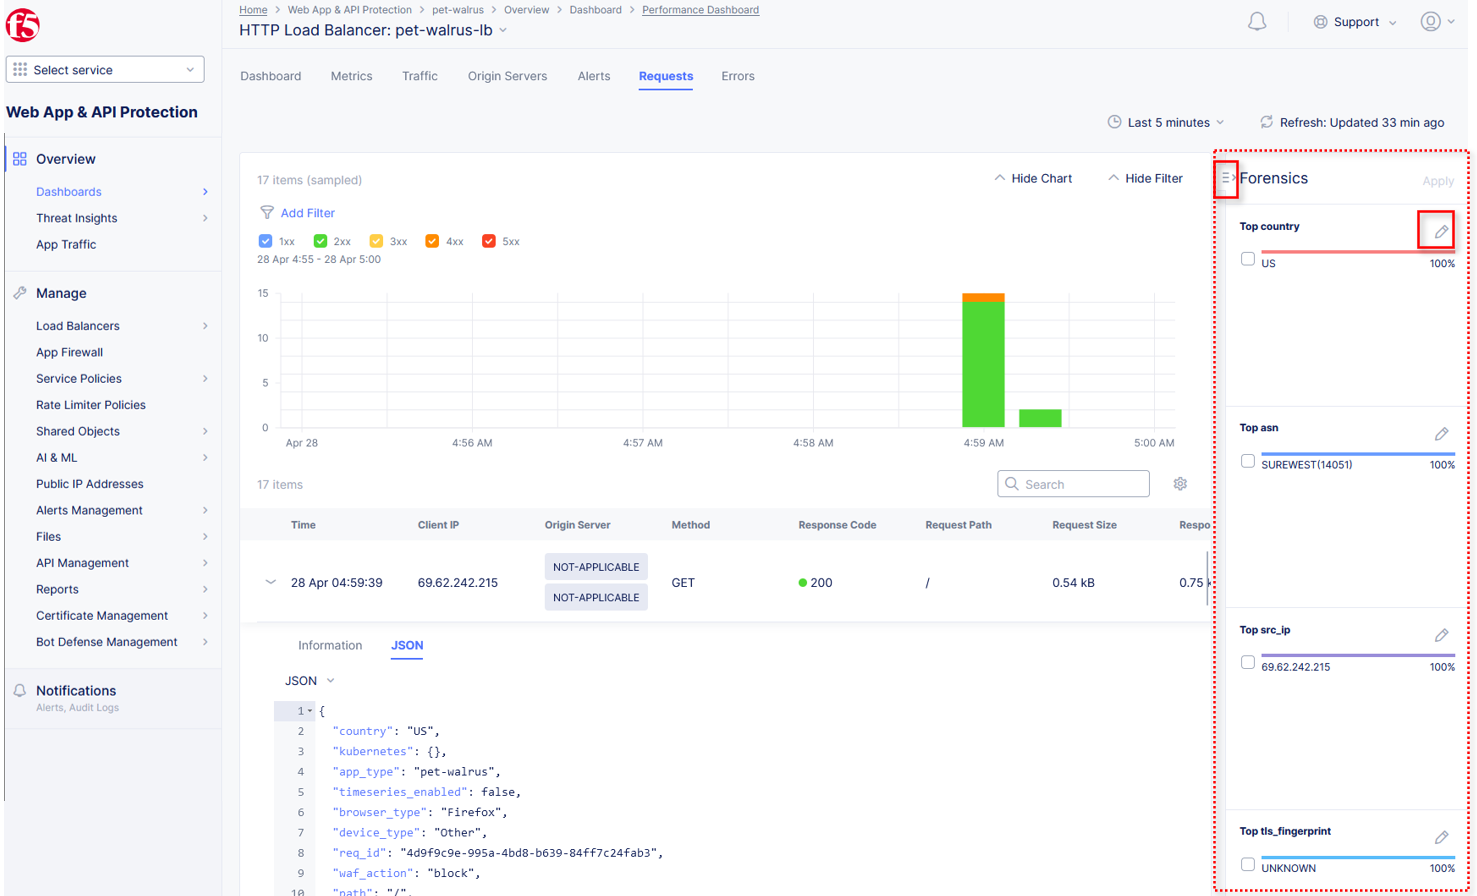
Note
Individual forensic categories can be changed using the noted pencil icon to surface additional top data details.
Using the left-hand navigation, under Overview select Security.

Review the Security Dashboard display (you may have limited data) and identify that Service Policy events have increased. NOTE: You may need to update the variable time period.

Scroll to Application Delivery section and click the <namespace>-lb object.

Note
This is a multi-application view. Here you could get the summary security status of each application (iw Threat Level, WAF Mode, etc) and then click into one for more* specific details.
From the Security Dashboard view, using the horizontal navigation, click Security Analytics.

Expand your latest security event as shown.
Note
If you lost your 1 Hour Filter, re-apply using following the method described in the earlier task
The summary detail provided Information link and identify the Request ID which is synonymous with Support ID (filterable) from the Security Event Block Page. You will also notice that the result of the service policy event was a default_deny.

For more information, select the Actions menu and click Explain with AI. This enables the F5 Distributed Cloud AI Assistant. The AI assistant brings several intelligent capabilities to simplify management and security of apps and APIs using a natural language interface, including summaries to allow teams to better understand complex information and advanced security events to make more informed decisions without sifting through overwhelming amounts of data.

Review the last statement from the AI Assistant. It is necessary to establish an explicit “allow all” rule that should be positioned as the last rule of the service policy sequence. Let’s return back to the Active Service Policies in the namespace. Note: you may need to hide the AI Assistant.


Click Select Active Service Policies.
Click Add item to add a new Service Policy as the last rule in the sequence.
Click Add item to create a new Service Policy definition.
Name the rule allow-all and select Allow All Requests. Click Continue when complete.
Click Save and Exit.


Reload your web browser accessing <namespace>.lab-sec.f5demos.com It should now successfully load.

Narrative Check
You have now completed your first service policy deployment on F5 Distributed Cloud. This policy can be re-used for other applications in the ACME environment as all new load balancers deployed in this namespace will by default be blocking traffic to Fiji. IP address blocking performed based on categories or from the F5 ThreatMesh database can be configured on a per application basis. You also interacted with the F5 Distributed Cloud AI Assistant to help simplify troubleshooting.
End of Lab 1: This concludes Lab 1, feel free to review and test the configuration. A brief presentation will be shared prior to the beginning of Lab 2. |
|