F5 Identity and Access Management Solutions > Archived Identity & Access Management Labs > 300 Series: Advanced Use Cases & Solutions Source | Edit on
Lab 2: Custom Per Request Policy
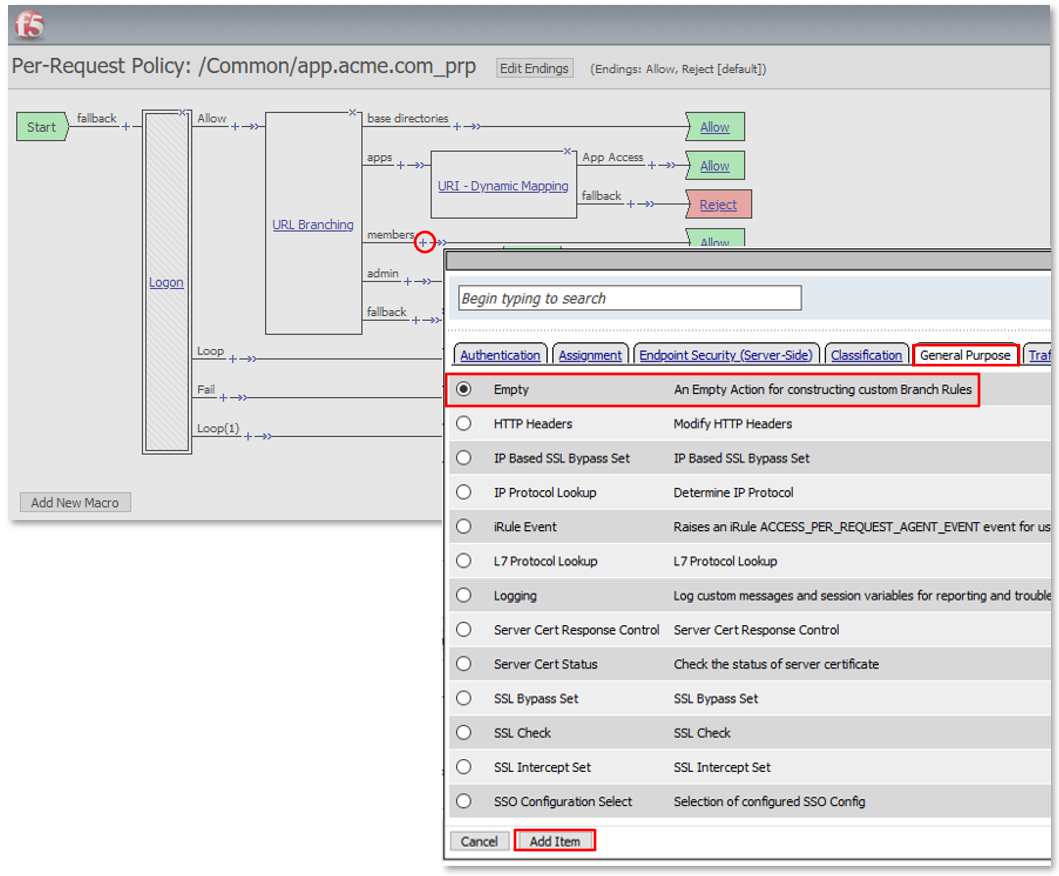
The purpose of this lab is to build a custom Per Request Policy (PRP) flow and then extend that policy with additional subroutines to perform dynamic updates to access controls and authentication requirements. Per Request Policies will restrict or grant access based on dynamic queries of AD Group Membership and the URI accessed. Step-up authentication will also be leveraged. Students will configure the various aspects using the Visual Policy Editor, review the configuration and perform tests of the deployment.
Objective:
- Gain a deeper understanding of Per Request Policies and their applicability in various delivery and control scenarios
- Gain a further understanding of Per Request Policy subroutines and their use in dynamic queries and step-up authentication.
Lab Requirements:
- All Lab requirements will be noted in the tasks that follow
- Estimated completion time: 30 minutes
Lab 2 Tasks:
TASK 1: Prepare Lab Environment
|
 |
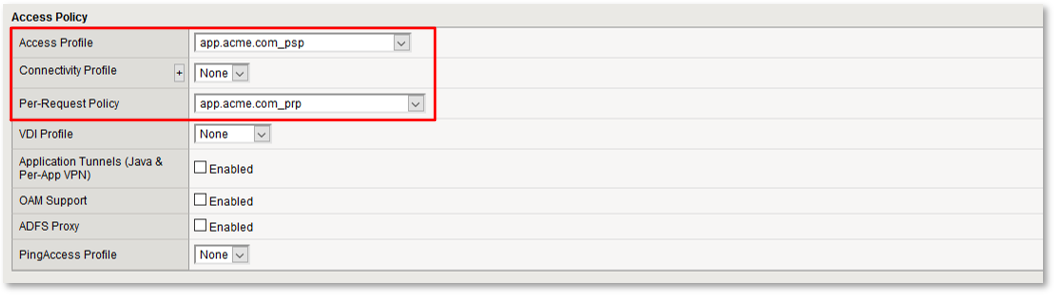
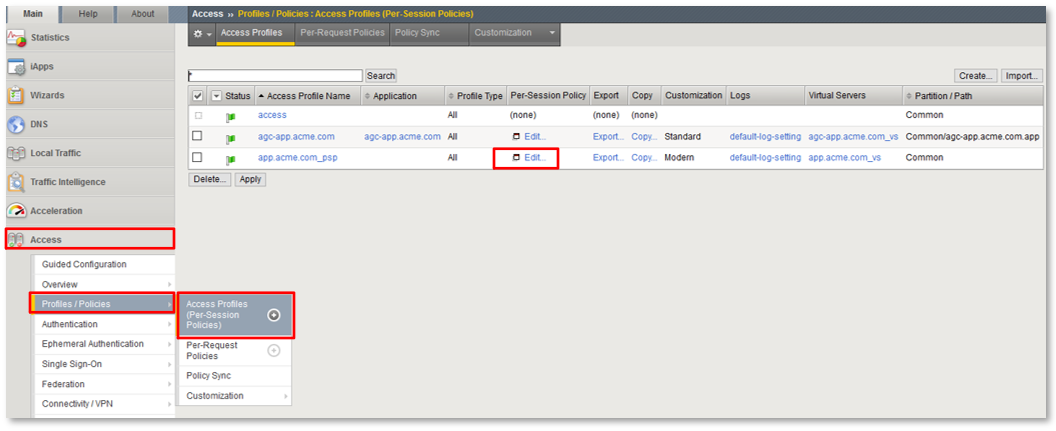
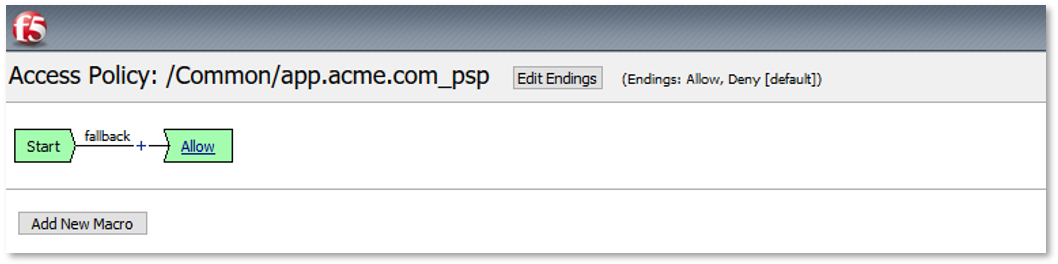
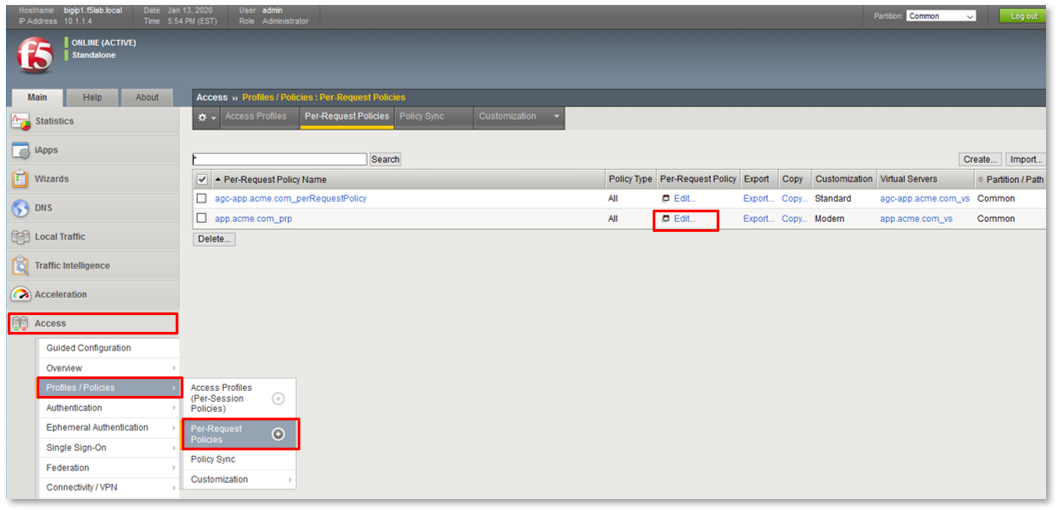
TASK 2: Review Existing Configuration
|
 |
|
 |
|
 |
|
 |
|
 |
|
 |
|
 |
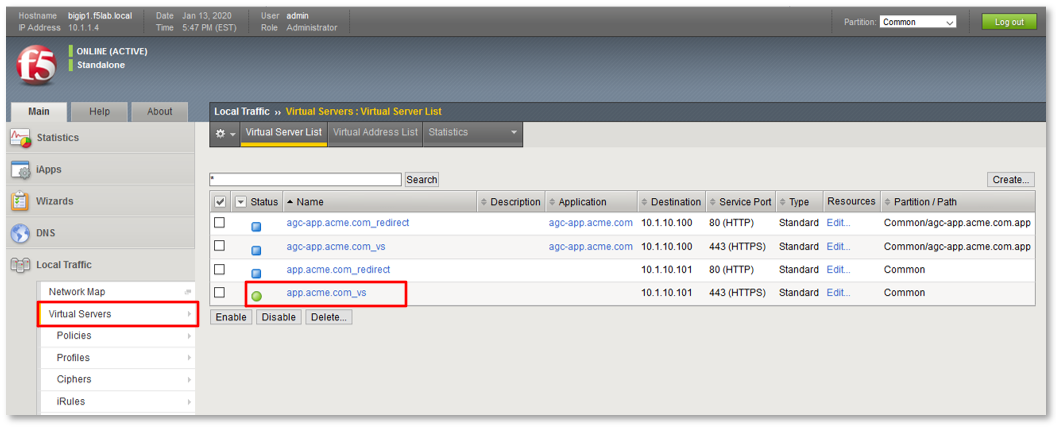
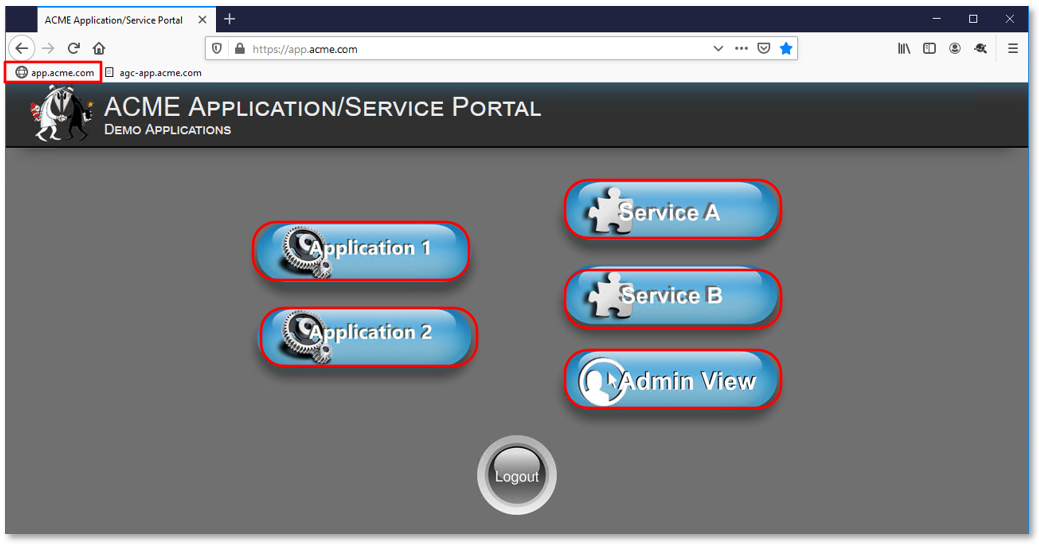
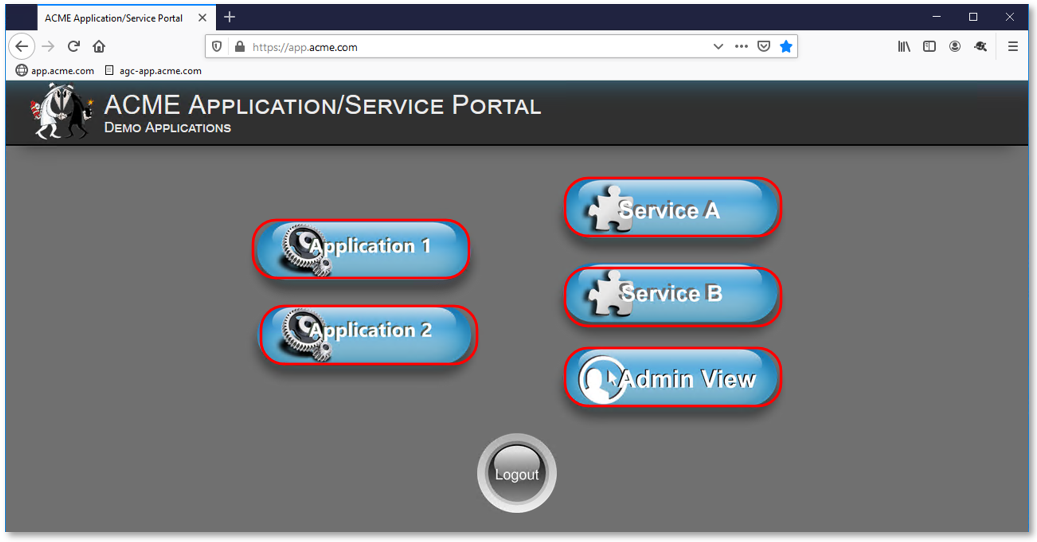
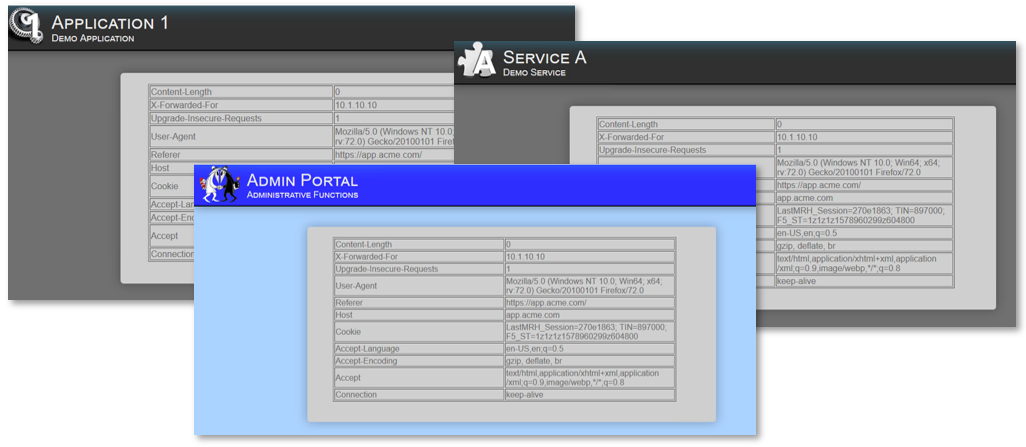
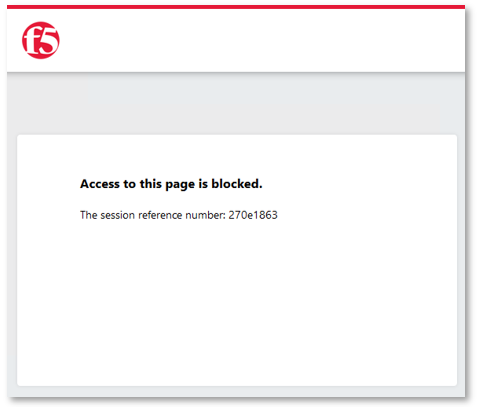
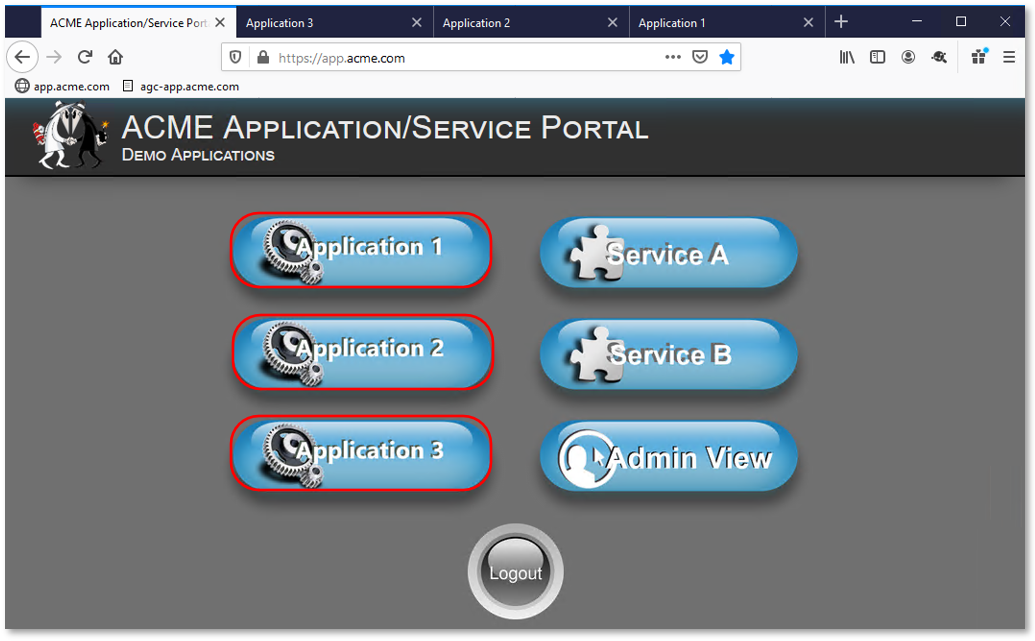
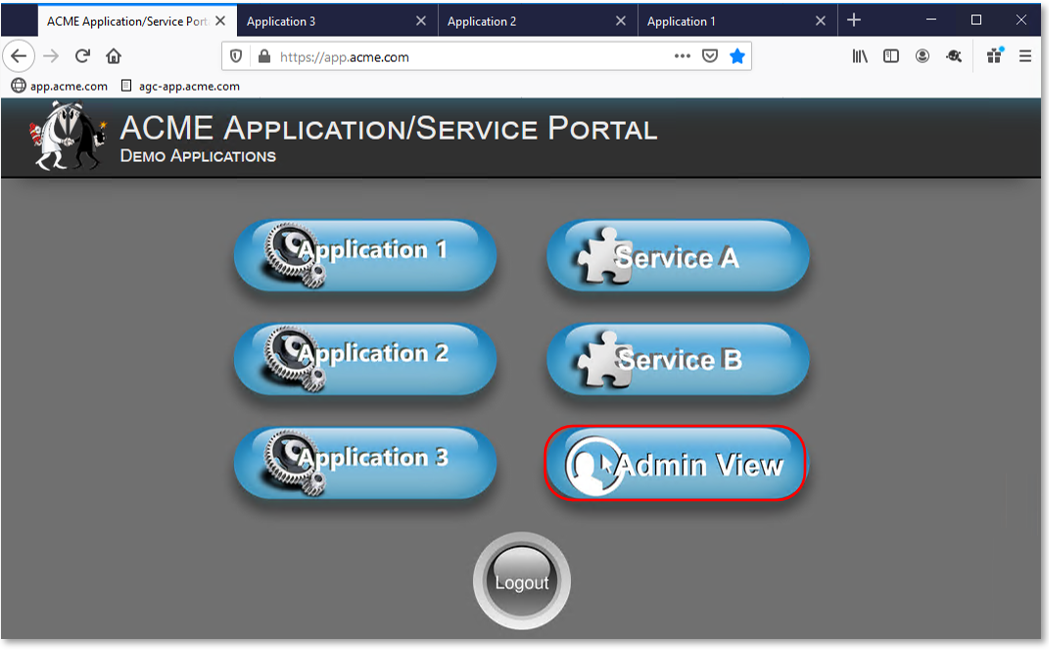
Note: User1 has buttons to all applications even though user1 does not currently have the necessary group access for all applications. |
|

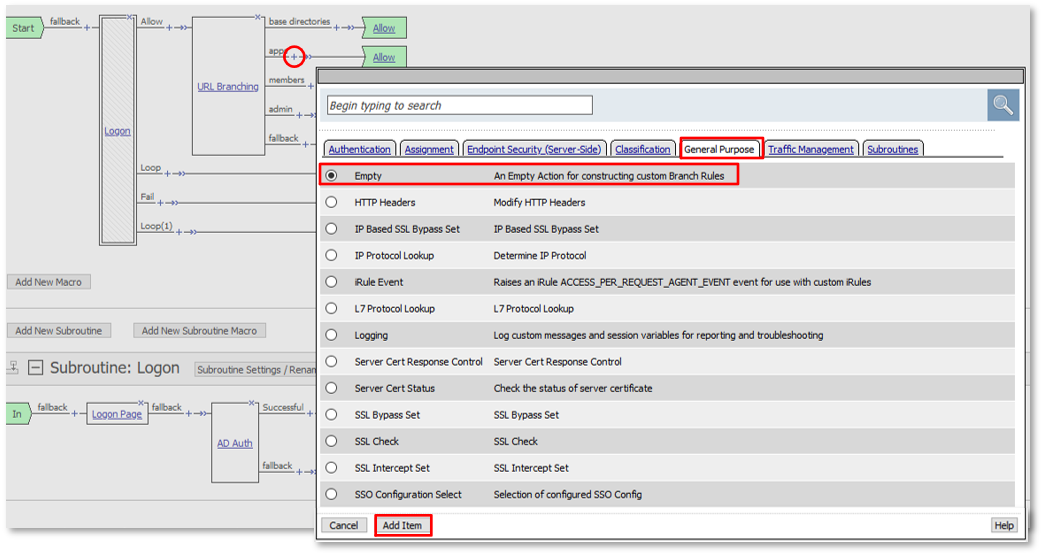
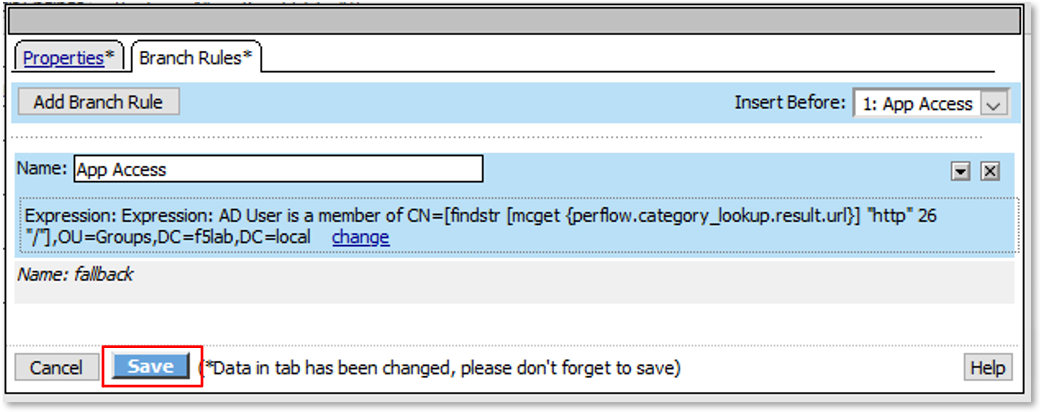
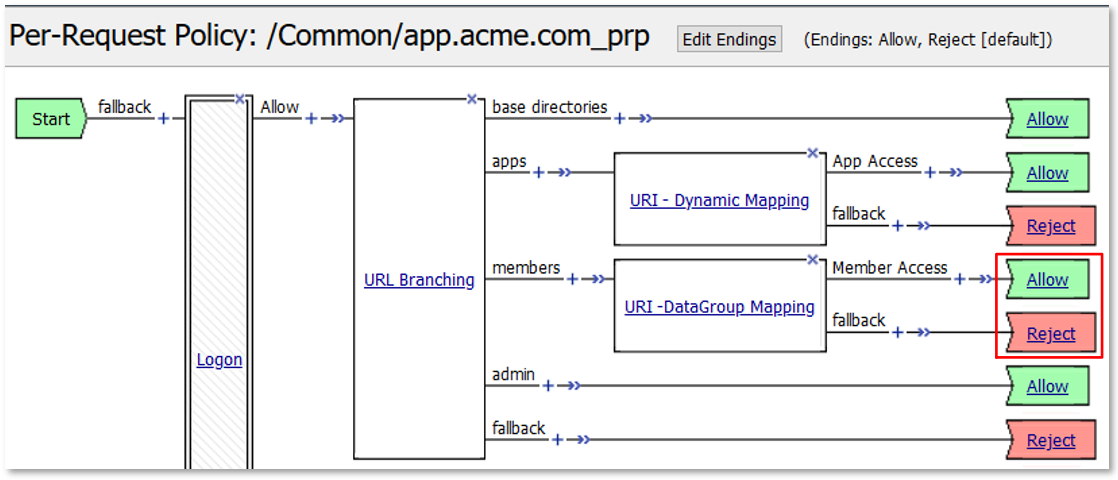
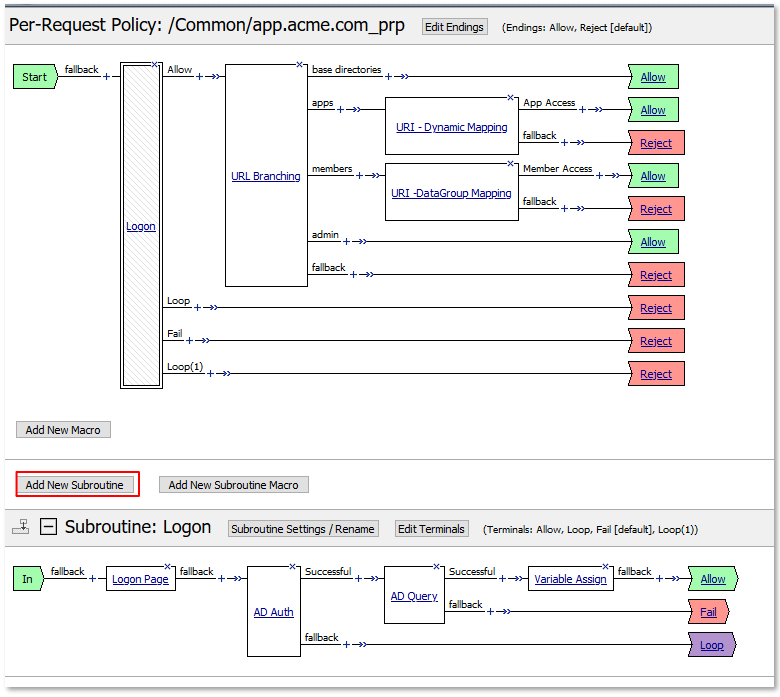
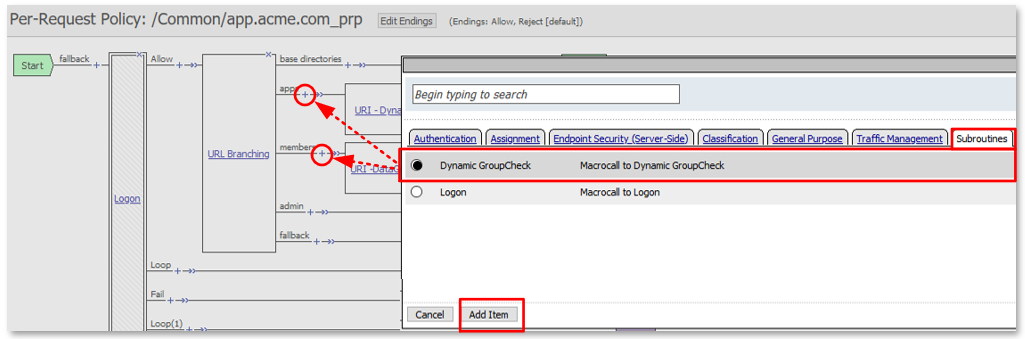
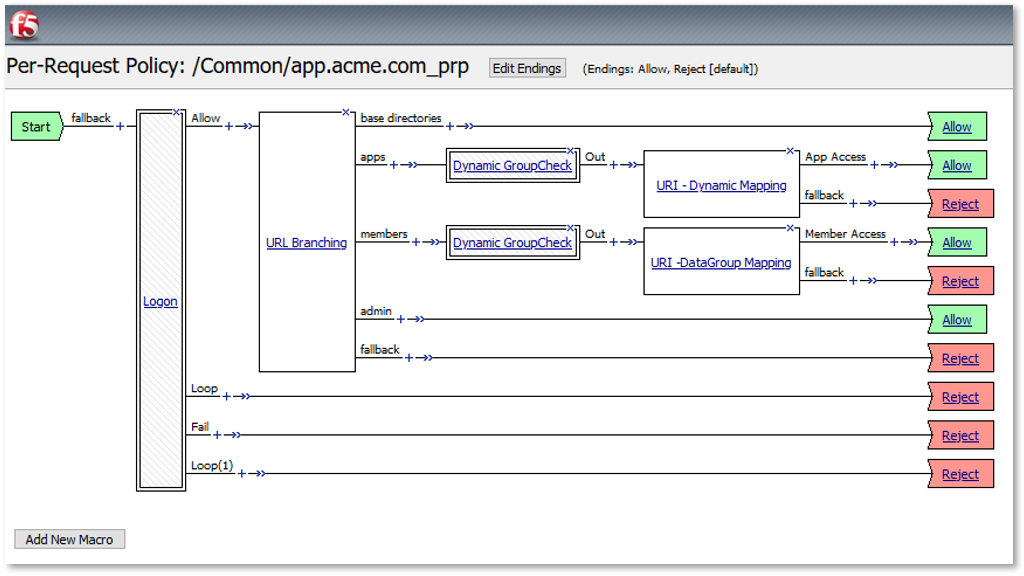
TASK 3: URI Dynamic Filtering (via AD Group Membership)
Note: This provides the ability to dynamically deploy new applications based on standardized URI paths and control access to those applications (via group membership) without needing to re-entrantly edit the Per Request Policy again.
|
 |
|
 |
|
 |
Explanation: The expression shown parses the incoming URI to extract a portion of the URI to use as a variable in determining an AD Group Name dynamically. |
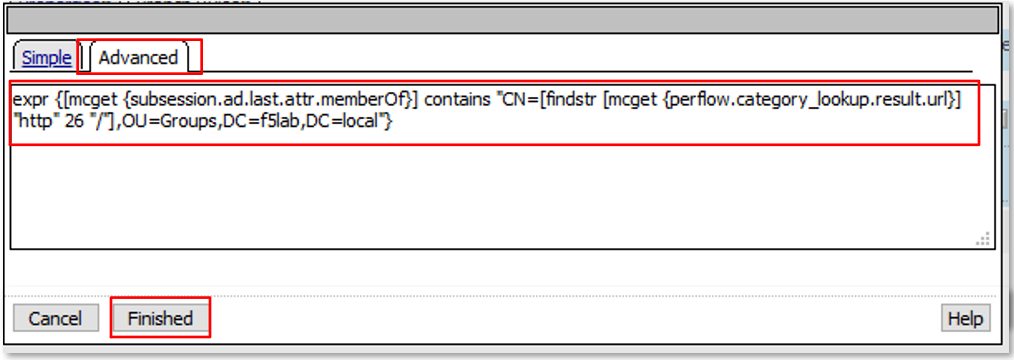 |
Expression is shown below for copy and paste convenience
expr {[mcget {subsession.ad.last.attr.memberOf}] contains "CN=[findstr [mcget {perflow.category_lookup.result.url}] "http" 26 "/"],OU=Groups,DC=f5lab,DC=local"}
|
 |
|
 |
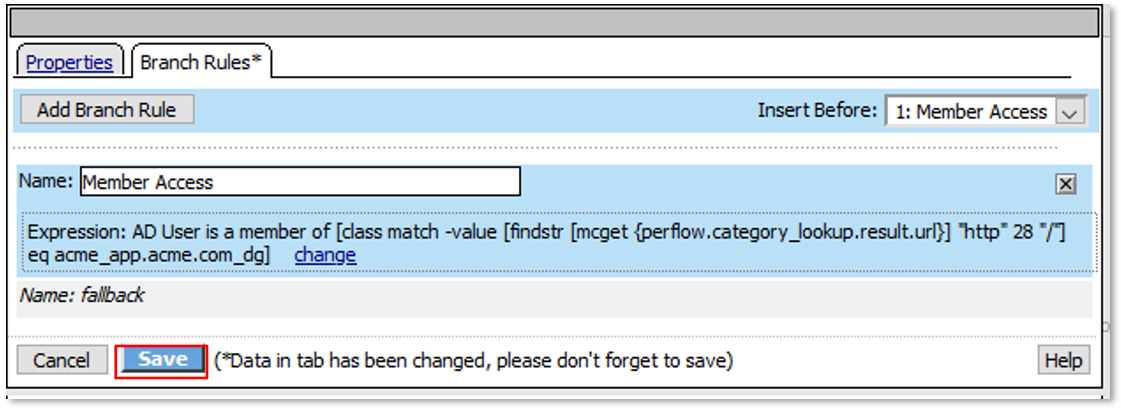
TASK 4: URI DataGroup Filtering (via AD Group Membership)
Note: This provides the ability to dynamically deploy new applications based on standardized URI paths defined in DataGroups and control access to those applications (via group membership) without needing to re-entrantly edit the Per Request Policy again.
|
 |
|
 |
|
 |
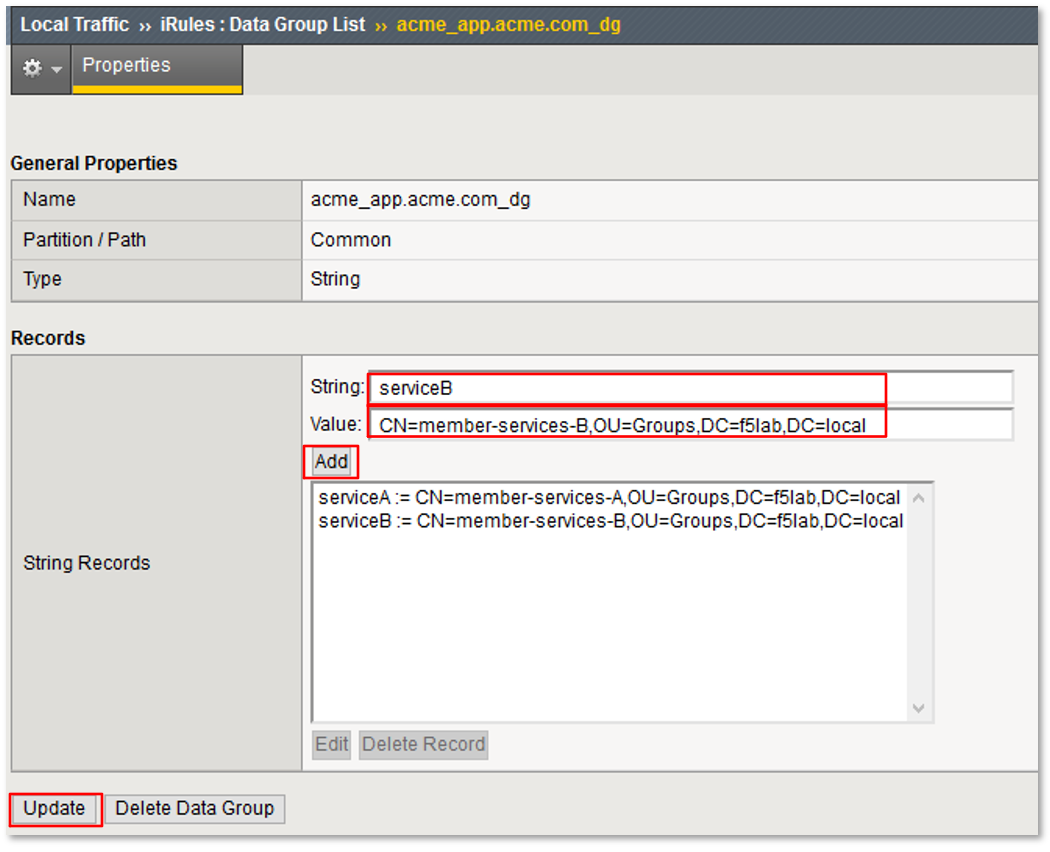
Explanation: For environments in which URI’s and AD Groups may not be standardized, parsing the URI and then leveraging a Data Group match allows for non-standard matching between URI and AD Groups. (Data Groups can be updated via REST (AS3 Declarations) calls. |
 |
Expression is shown below for copy and paste convenience
expr {[mcget {subsession.ad.last.attr.memberOf}] contains "[class match -value [findstr [mcget {perflow.category_lookup.result.url}] "http" 28 "/"] eq acme_app.acme.com_dg]"}
|
 |
|
 |
|
 |
|
 |
TASK 5: Testing URI Dynamic & DataGroup Filtering
|
|
|
 |
TASK 6: Adding a new Application (App3)
|
 |
Note: No policy changes were required due to the dynamic URI mapping configured. |
|


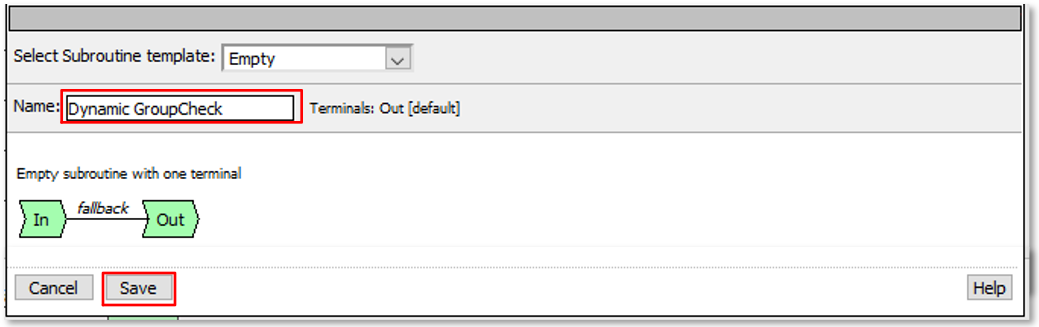
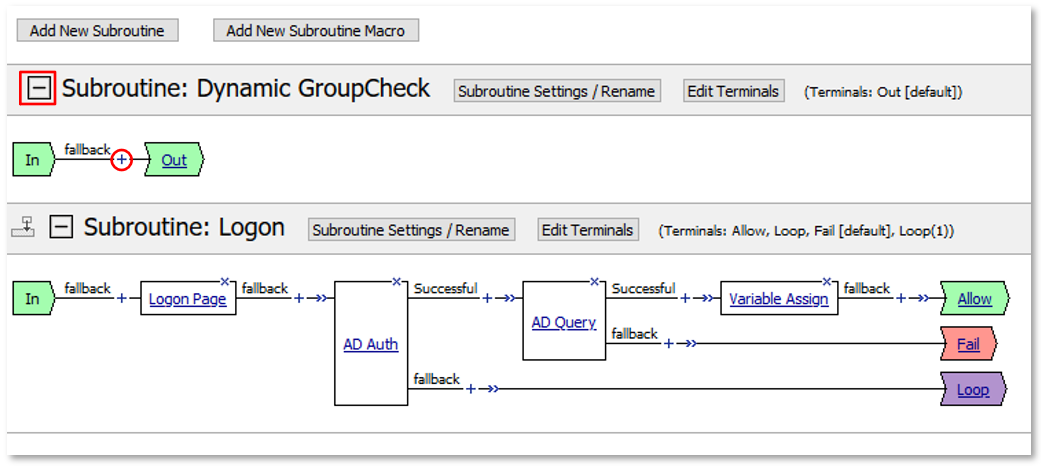
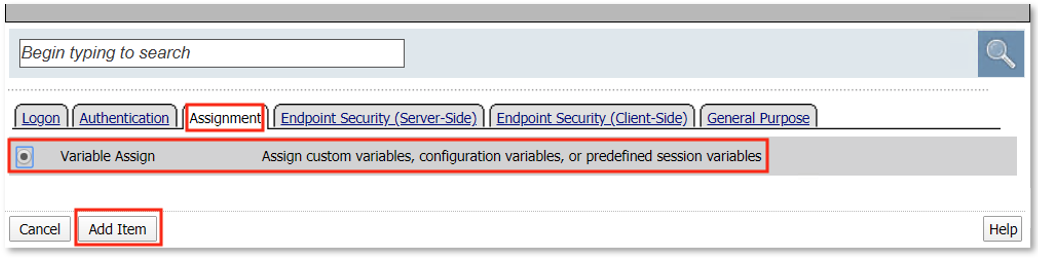
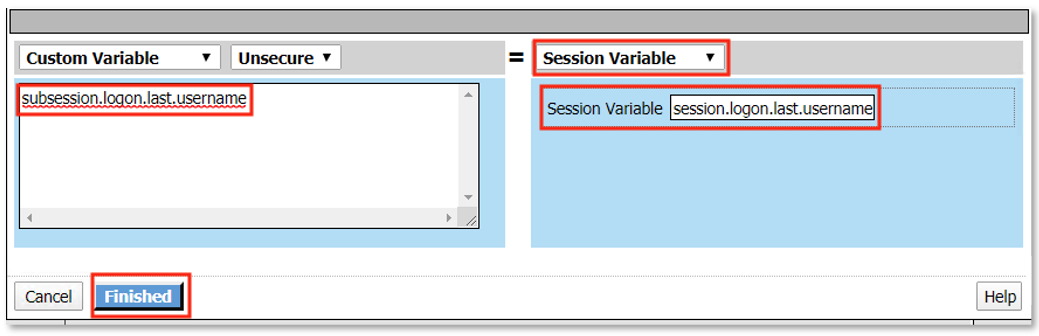
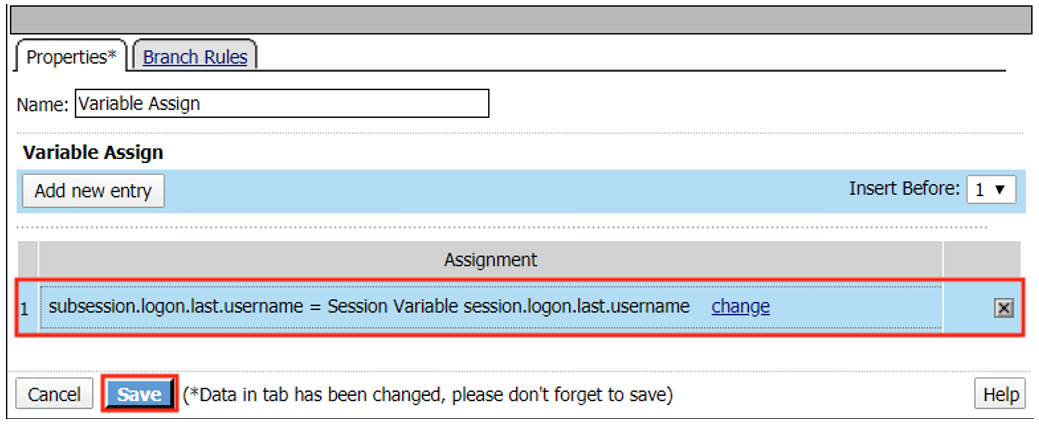
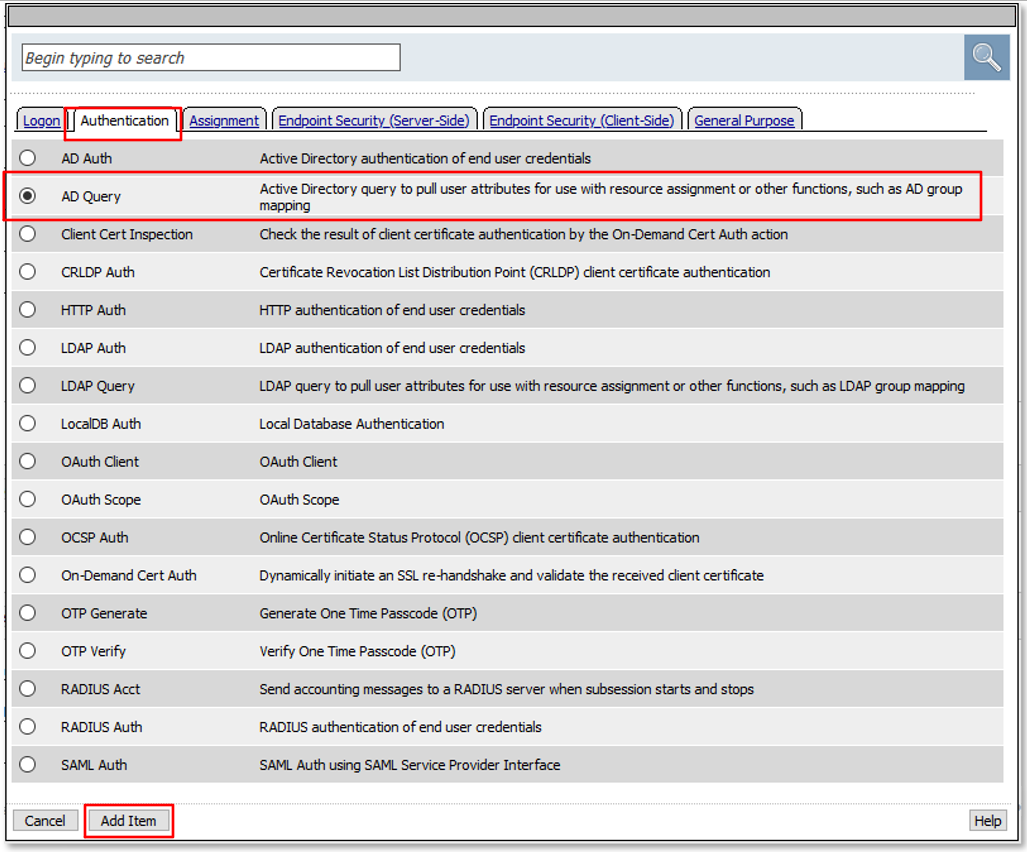
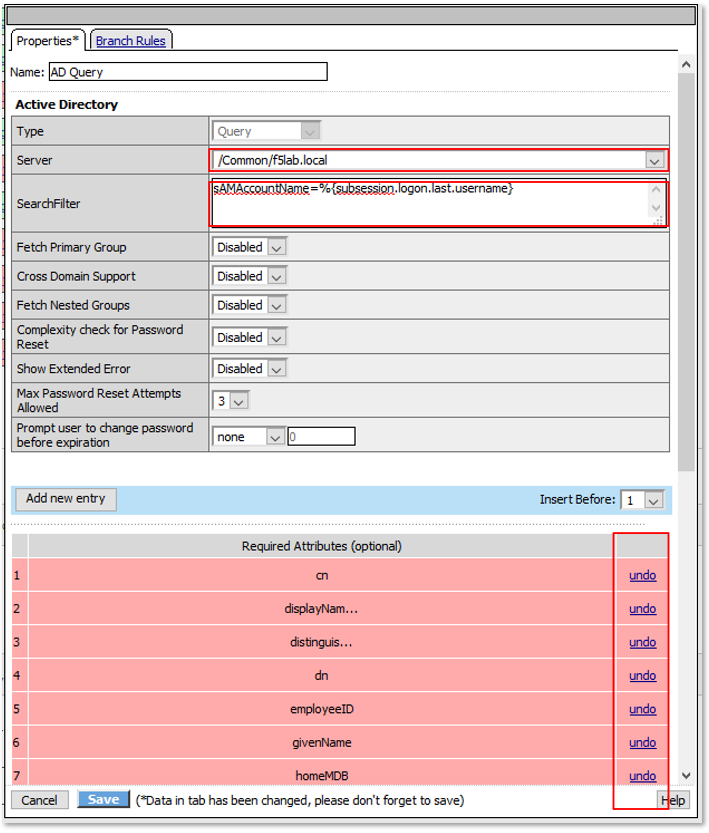
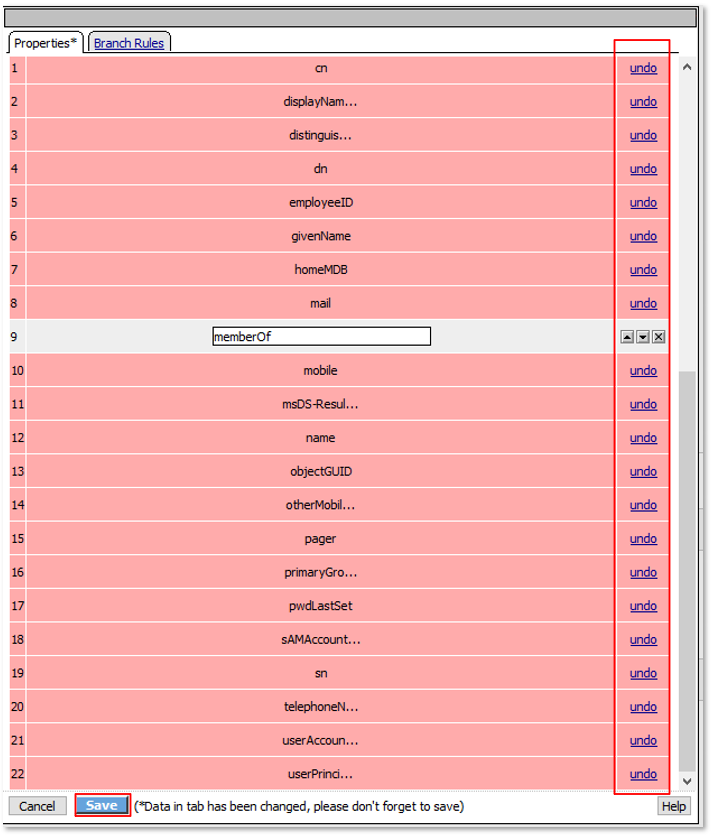
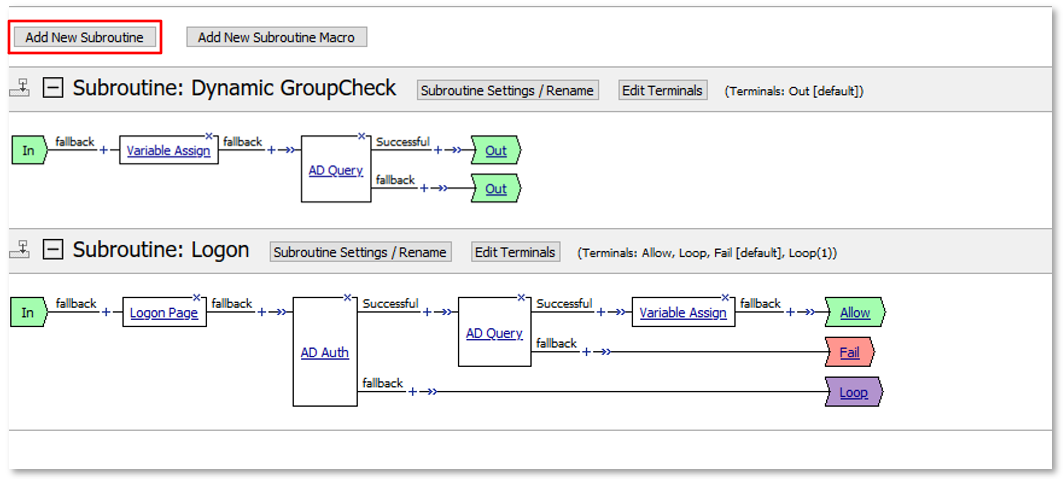
TASK 7: Dynamic Group Checks
Note: This provides the ability to dynamically enforce controlled application access without requiring the user to logon/logoff to acquire new permissions or restrictions.
|
 |
|
 |
|
 |
|
 |
|
 |
|
 |
|
 |
|
 |
|
 |
|
|
|
 |
|
 |
|
 |
|
 |
|
 |
TASK 8: Testing Dynamic Group Checks
|
 |
|
 |
|
|
Note: No user logon/logoff event needed to occur to change application access! |
 |
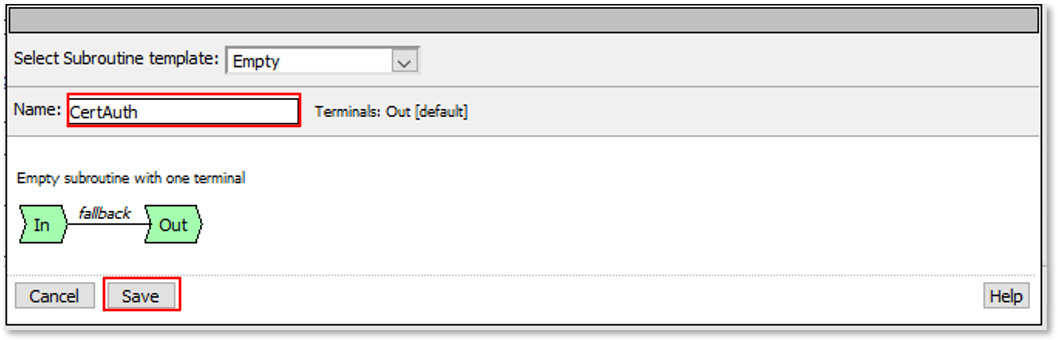
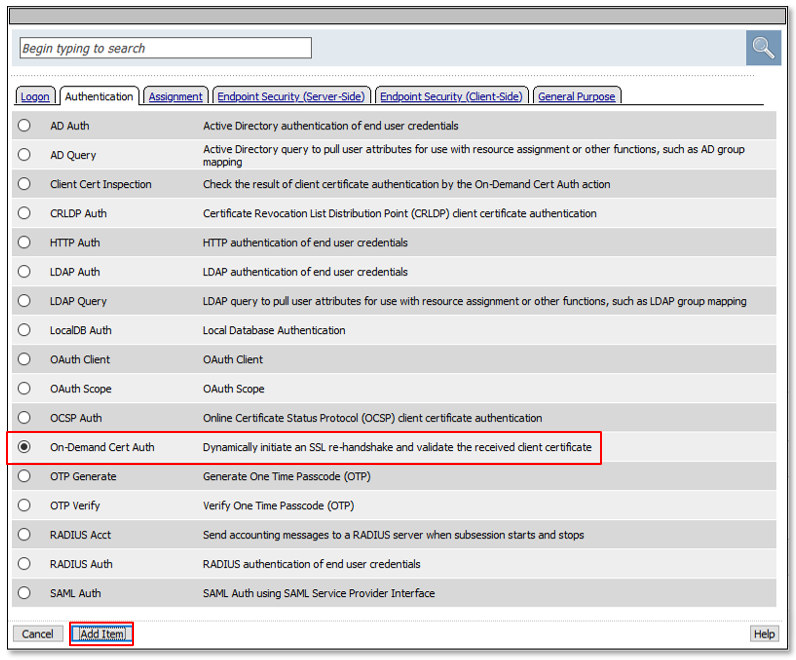
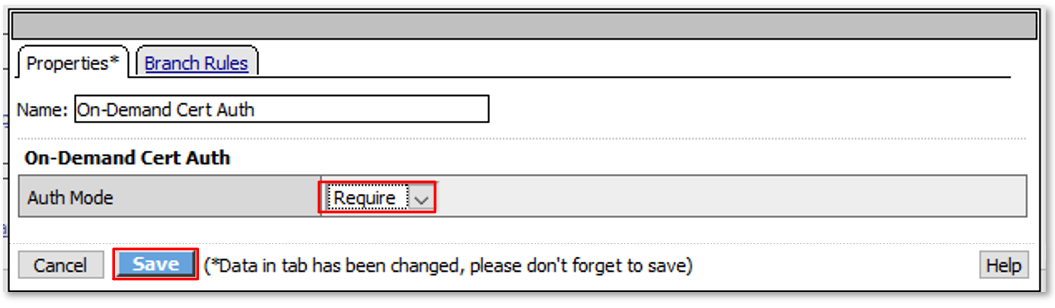
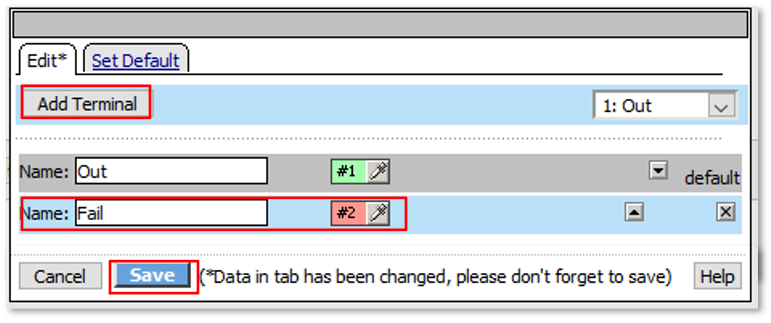
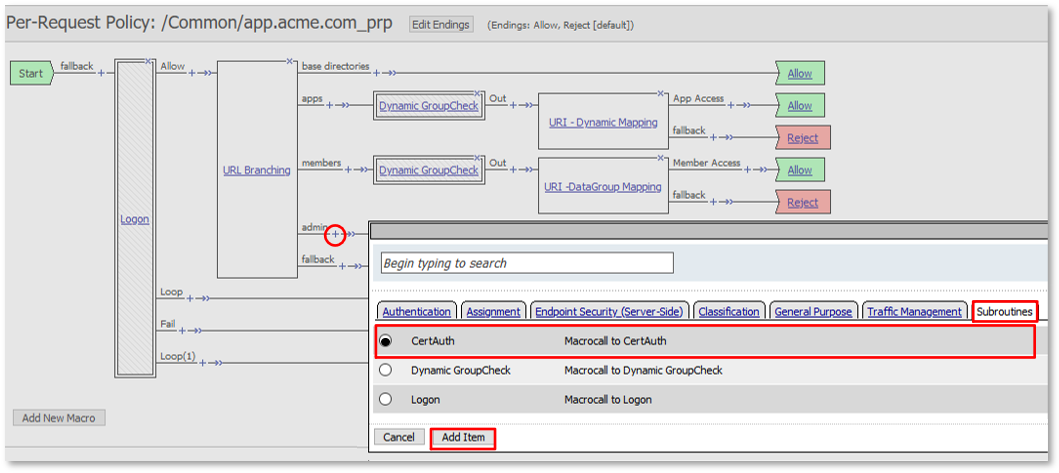
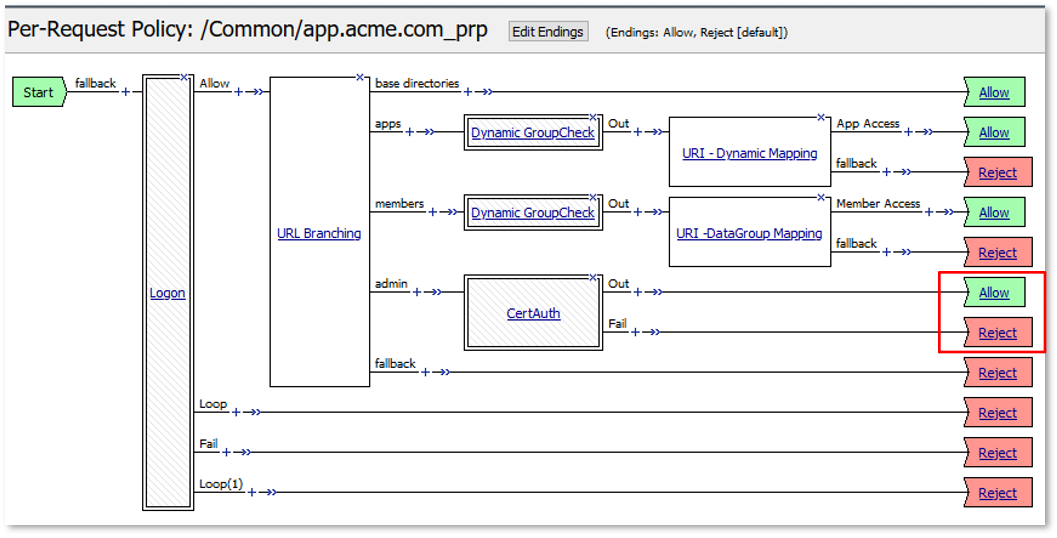
TASK 9: Step-Up Authentication (Client Cert Auth)
Note: This provides the ability to require additional authentication/authorization to priviledged pages or resources.
|
 |
|
 |
|
 |
|
 |
|
 |
|
 |
|
 |
|
 |
|
 |
|
 |
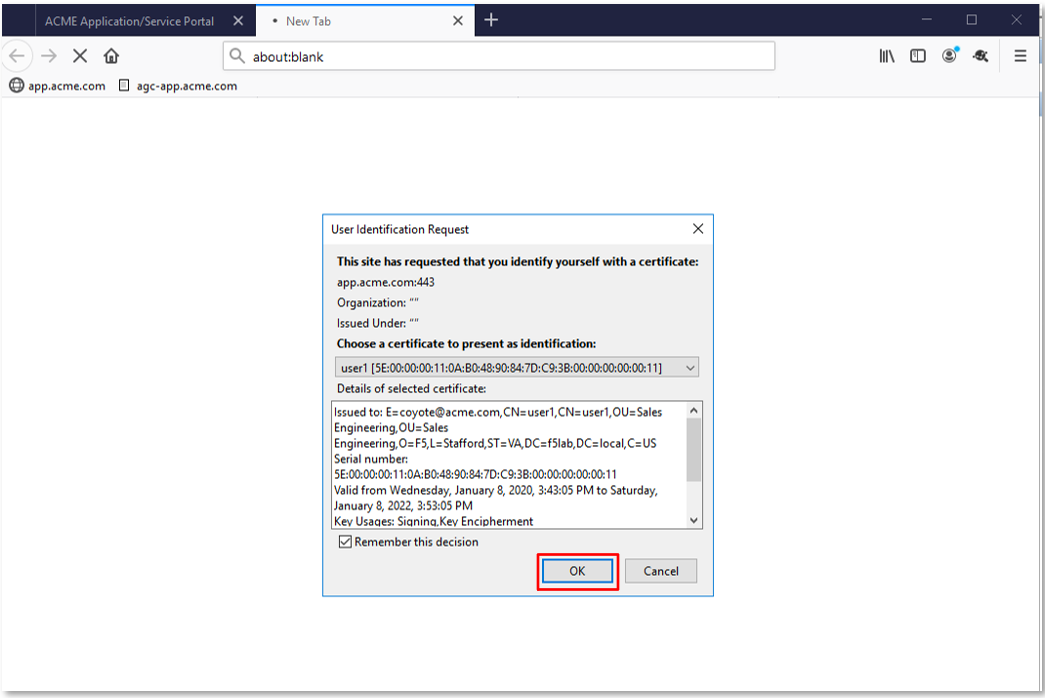
TASK 10: Testing Step-Up Authentication (Client Cert Auth)
|
 |
|
 |
|
 |
TASK 11: End of Lab2
|
 |