NGINX Modern Apps > Class 2 - NGINX Plus CI/CD Lab > Module 1: Creating docker images for NGINX Plus Source | Edit on
Lab 1: Run a pipeline to build NGINX Plus images
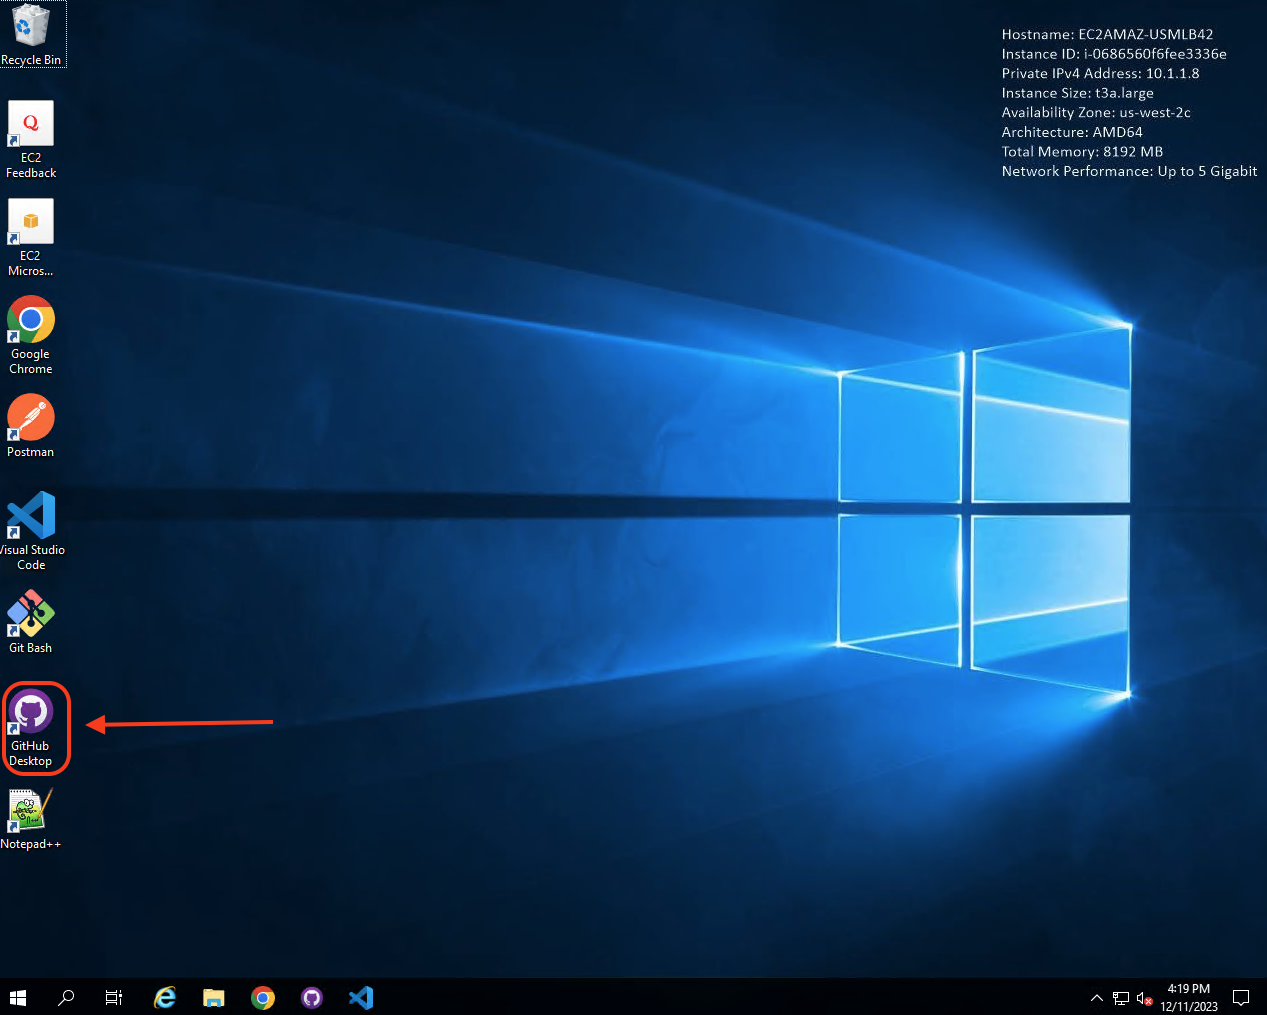
Double-click on the GitHub Desktop shortcut on the desktop. It will open up the GitHub Desktop Client application. GitHub Desktop client is an excellent easy to use tool to manage your code on git repositories. GitHub Desktop is developed by GitHub, Inc. but can be used on any git-based project
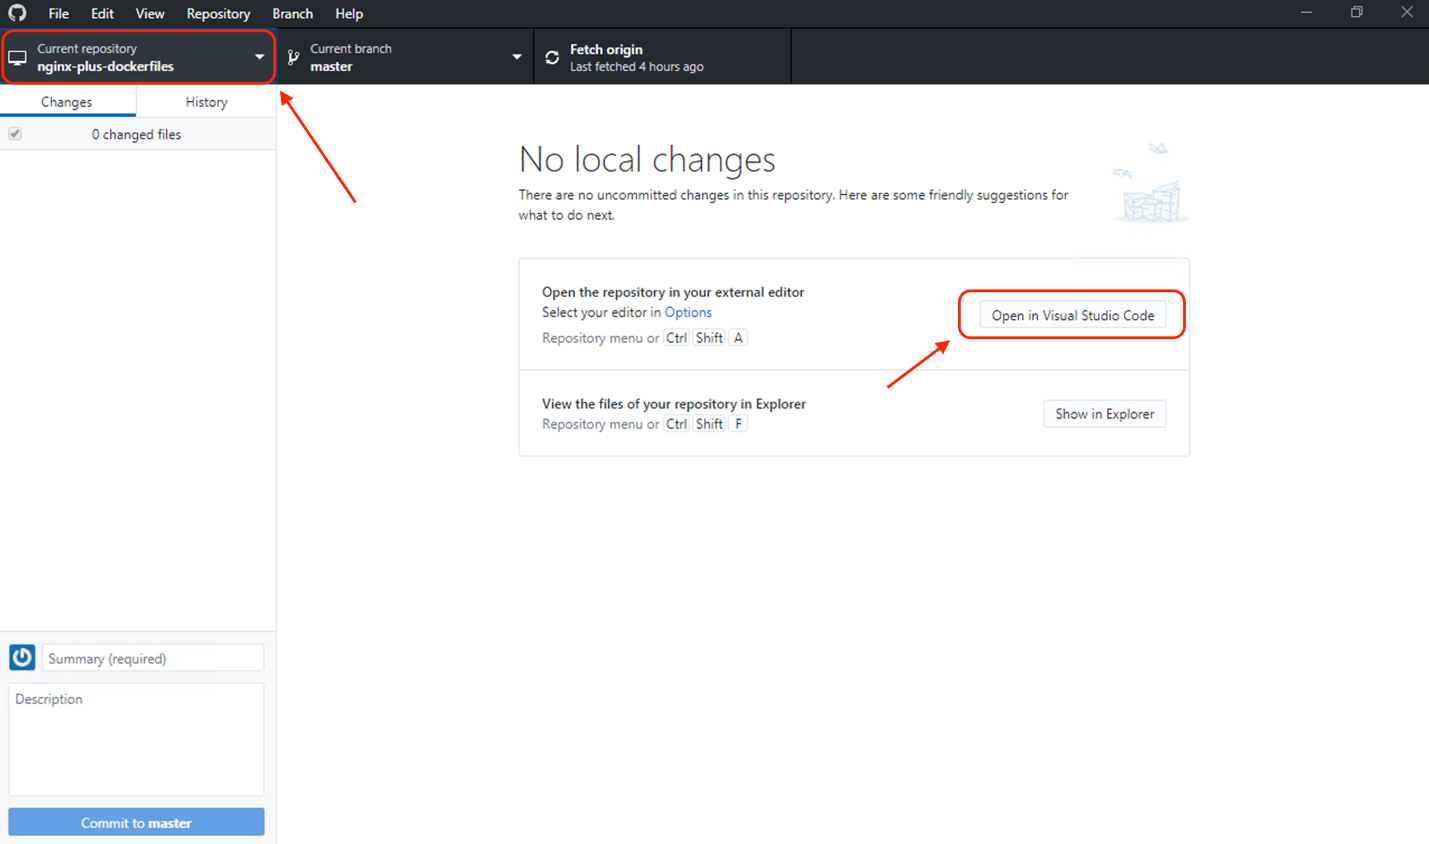
Once GitHub Desktop Client is open, verify in the upper left corner that nginx-plus-dockerfiles is selected as the current repository. If it is not, click the drop-down button, and select nginx-plus-dockerfiles. Once you have the correct repository selected, click on Open in Visual Studio Code on the right side of the application
Inside the project folder, you will see many subfolders containing Dockerfiles to various builds of NGINX Plus on supported Linux distributions. Take some time to inspect the Docker files in different folders found in the project
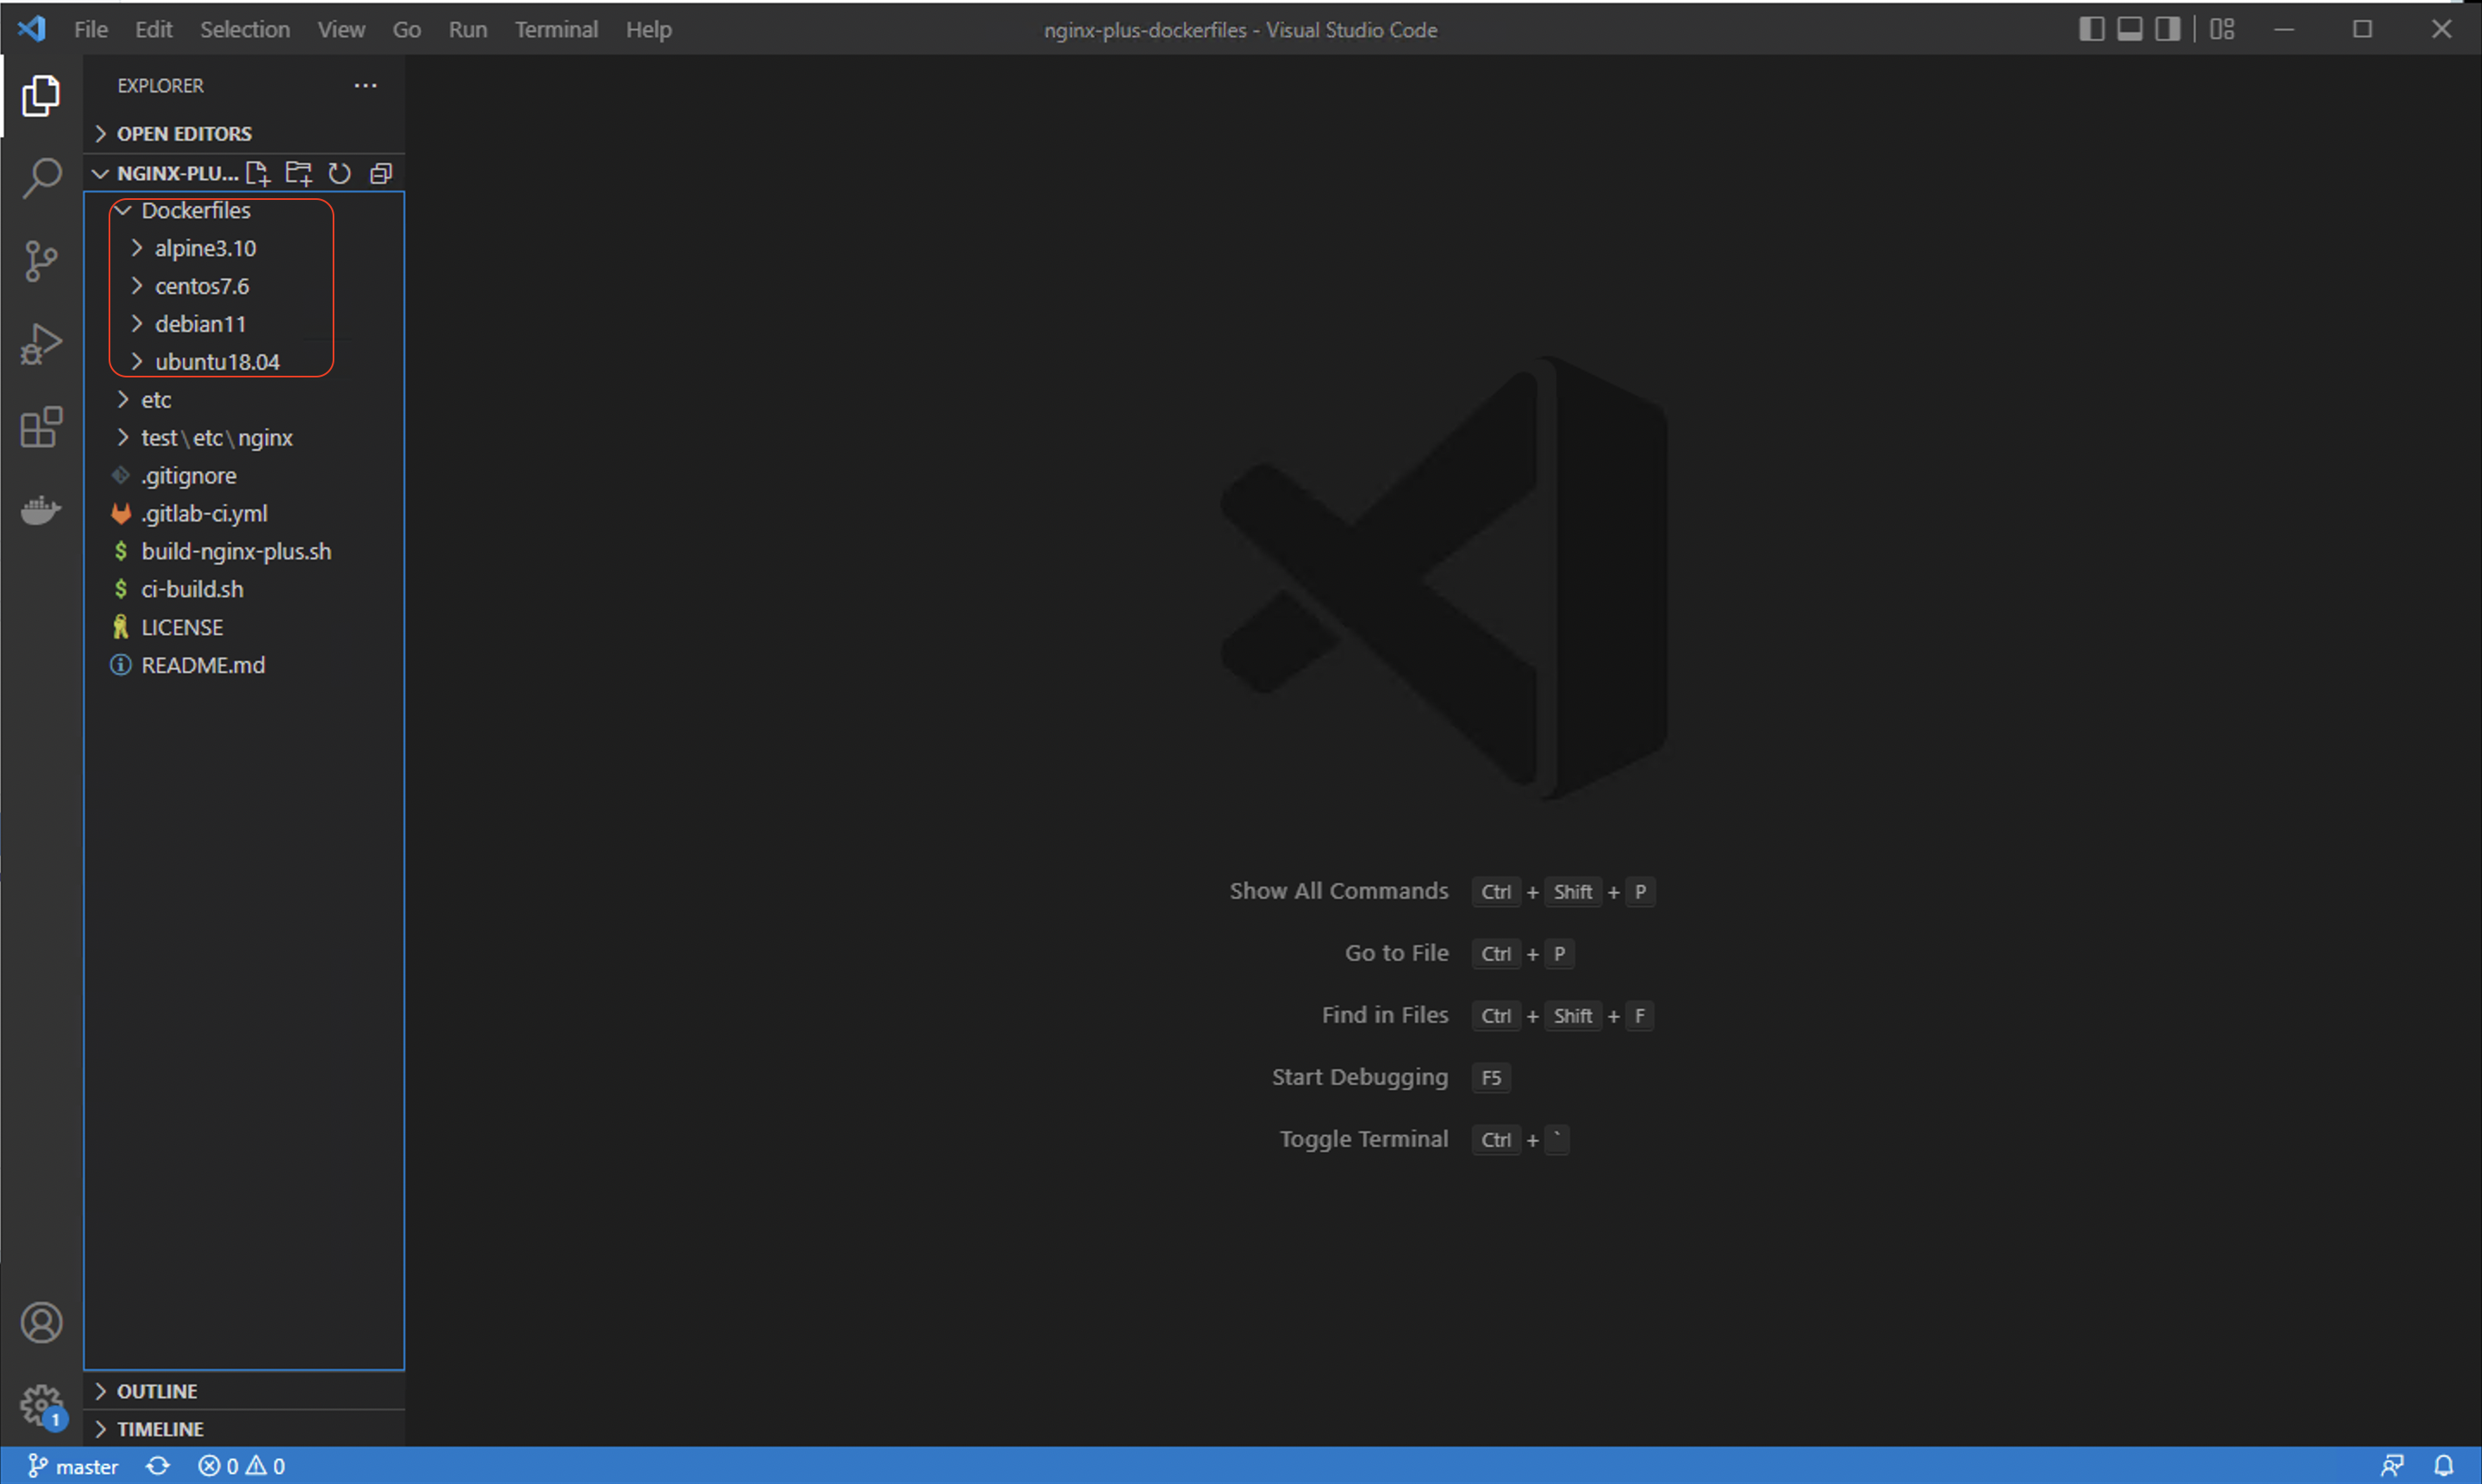
Lets take a look at a
Dockerfile. For example, look at the alpine3.10 folder, and in here, you will find theDockerfilefor a NGINX Plus build for Alpine Linux version 3.10. At the top of eachDockerfile, there is a line starting with the commandFROM. The firstFROMcommand is a critical Docker command that allows you to pull dependencies from other images. You typically find the next command sets themaintainerof the image, for reference and information. For more details onDockerfile, check out Dockerfile Reference.Note
NGINX Plus now supports the newer
3.17version of Alpine linux. Let’s add the NGINX Plus build for Alpine Linux version 3.17 to our CI/CD pipeline.Create a new folder called
alpine3.17in this project under theDockerfilesroot folder by copying thealpine3.10folder: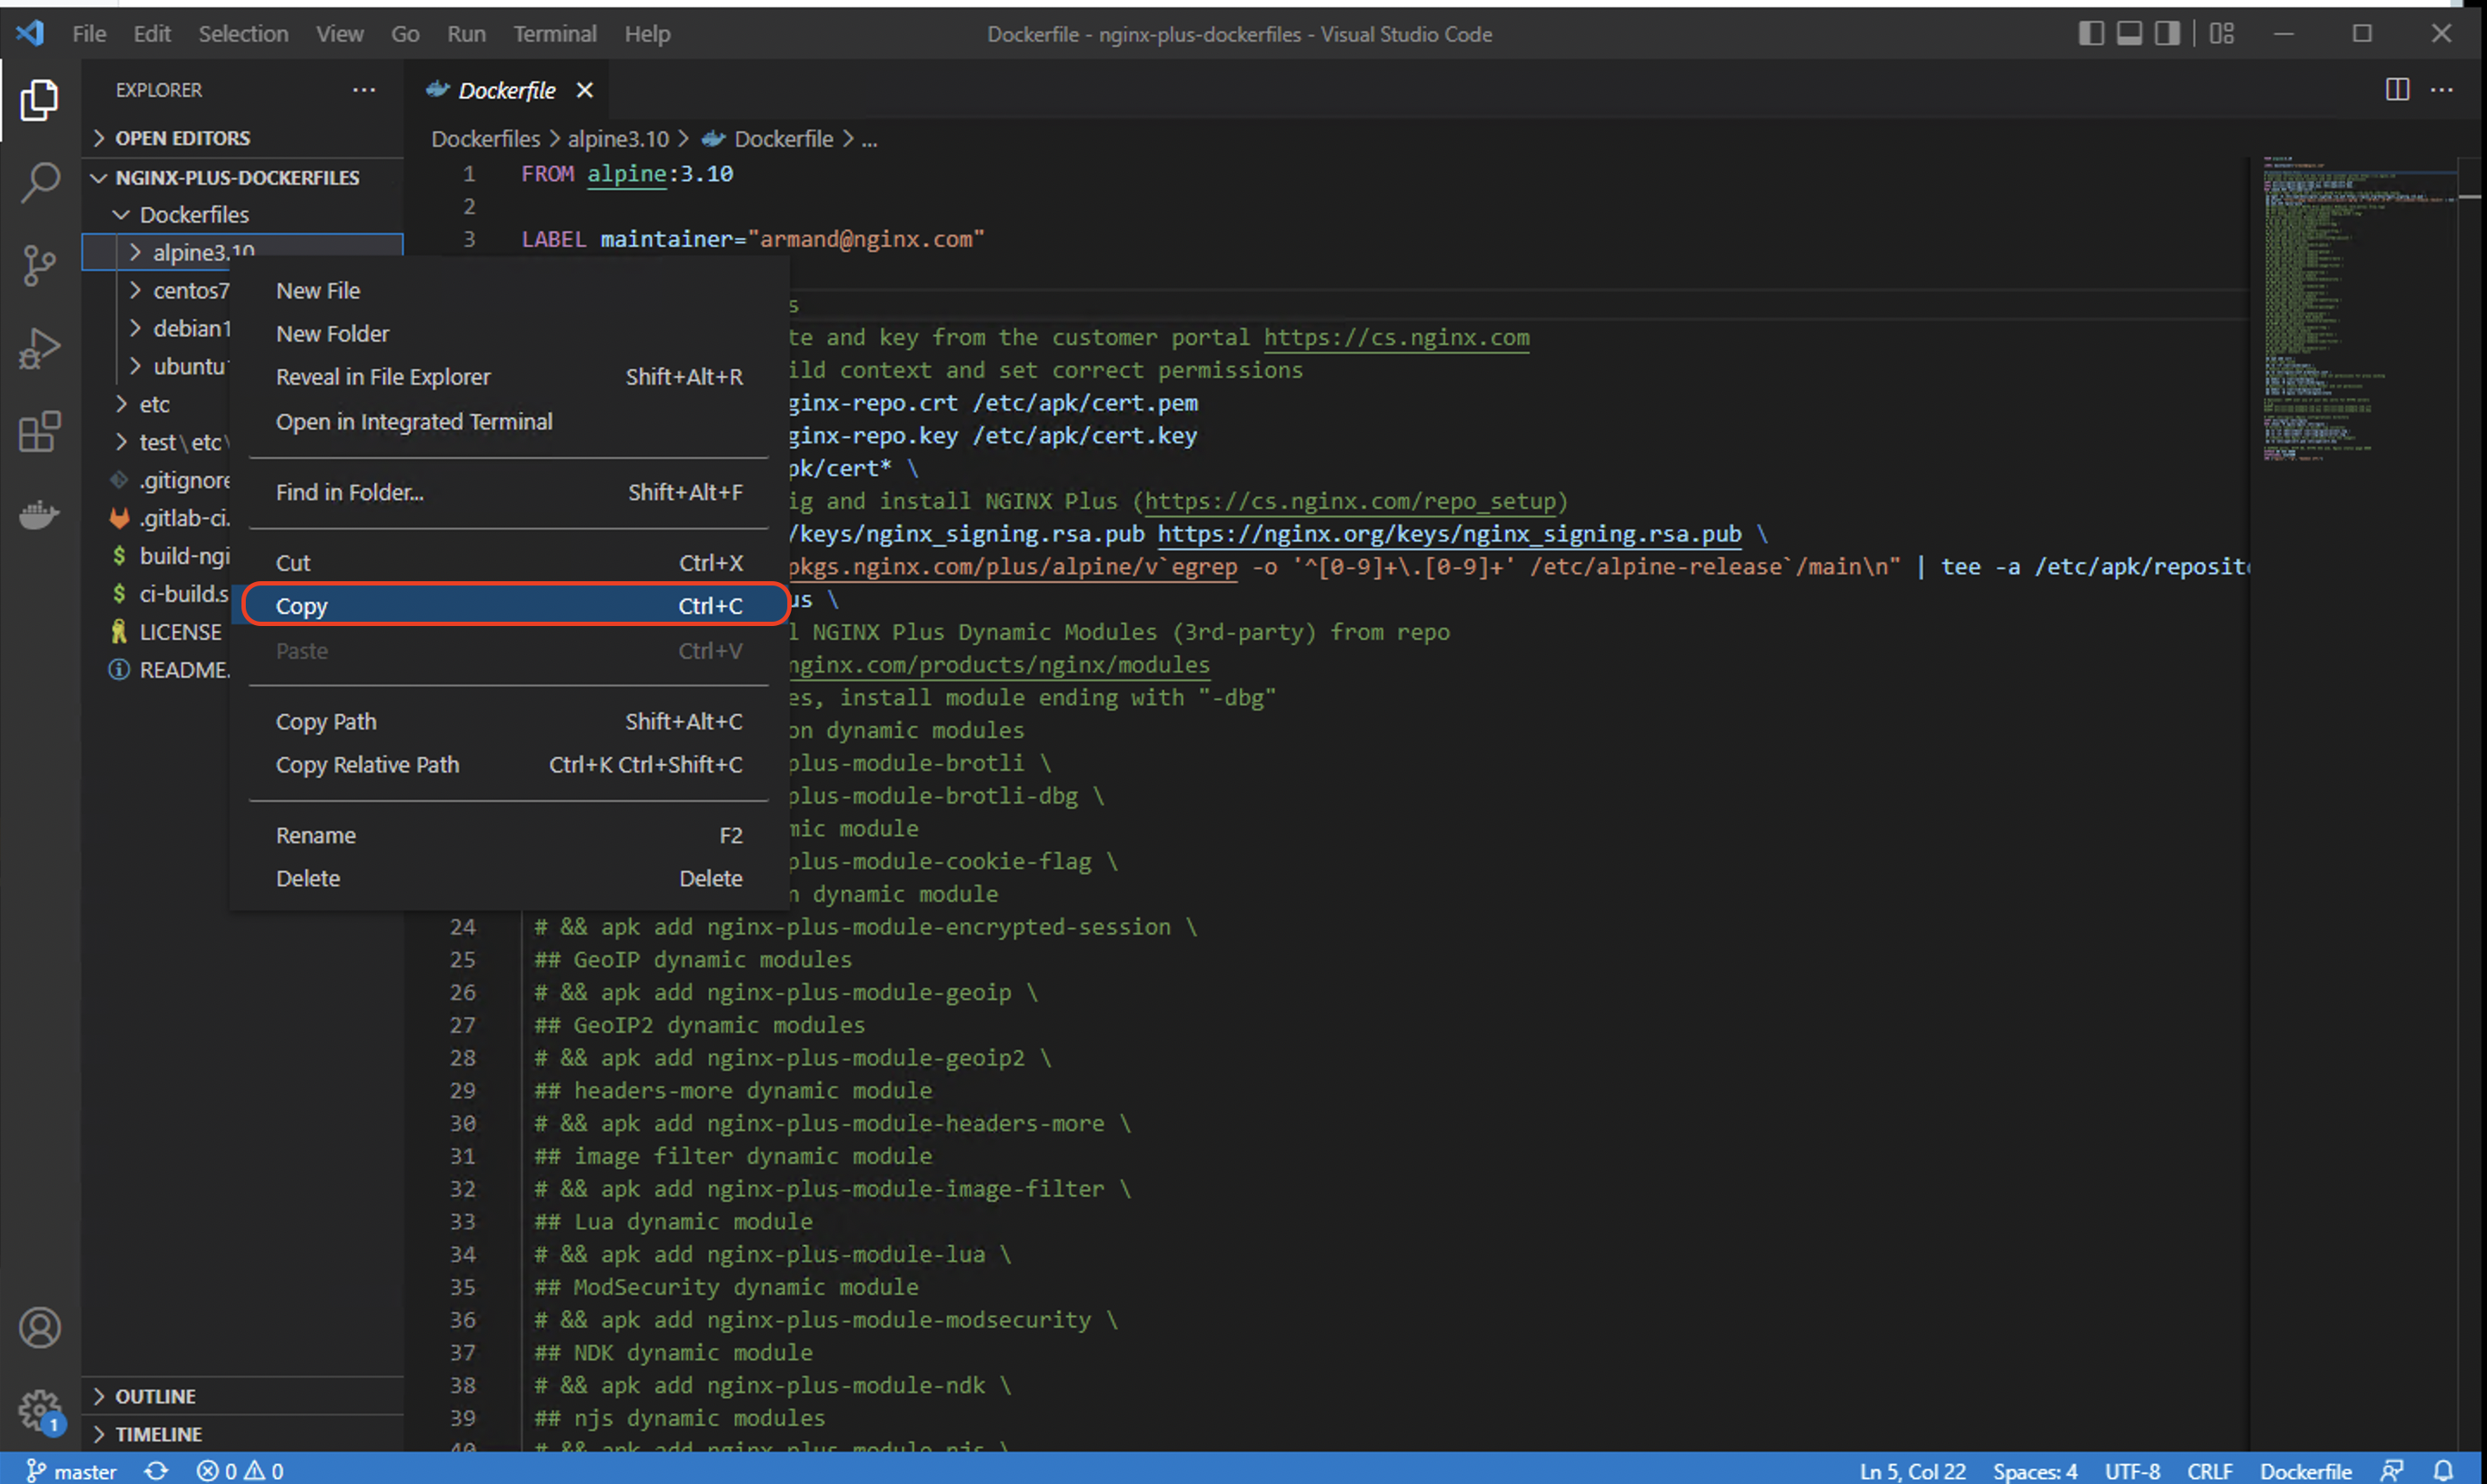
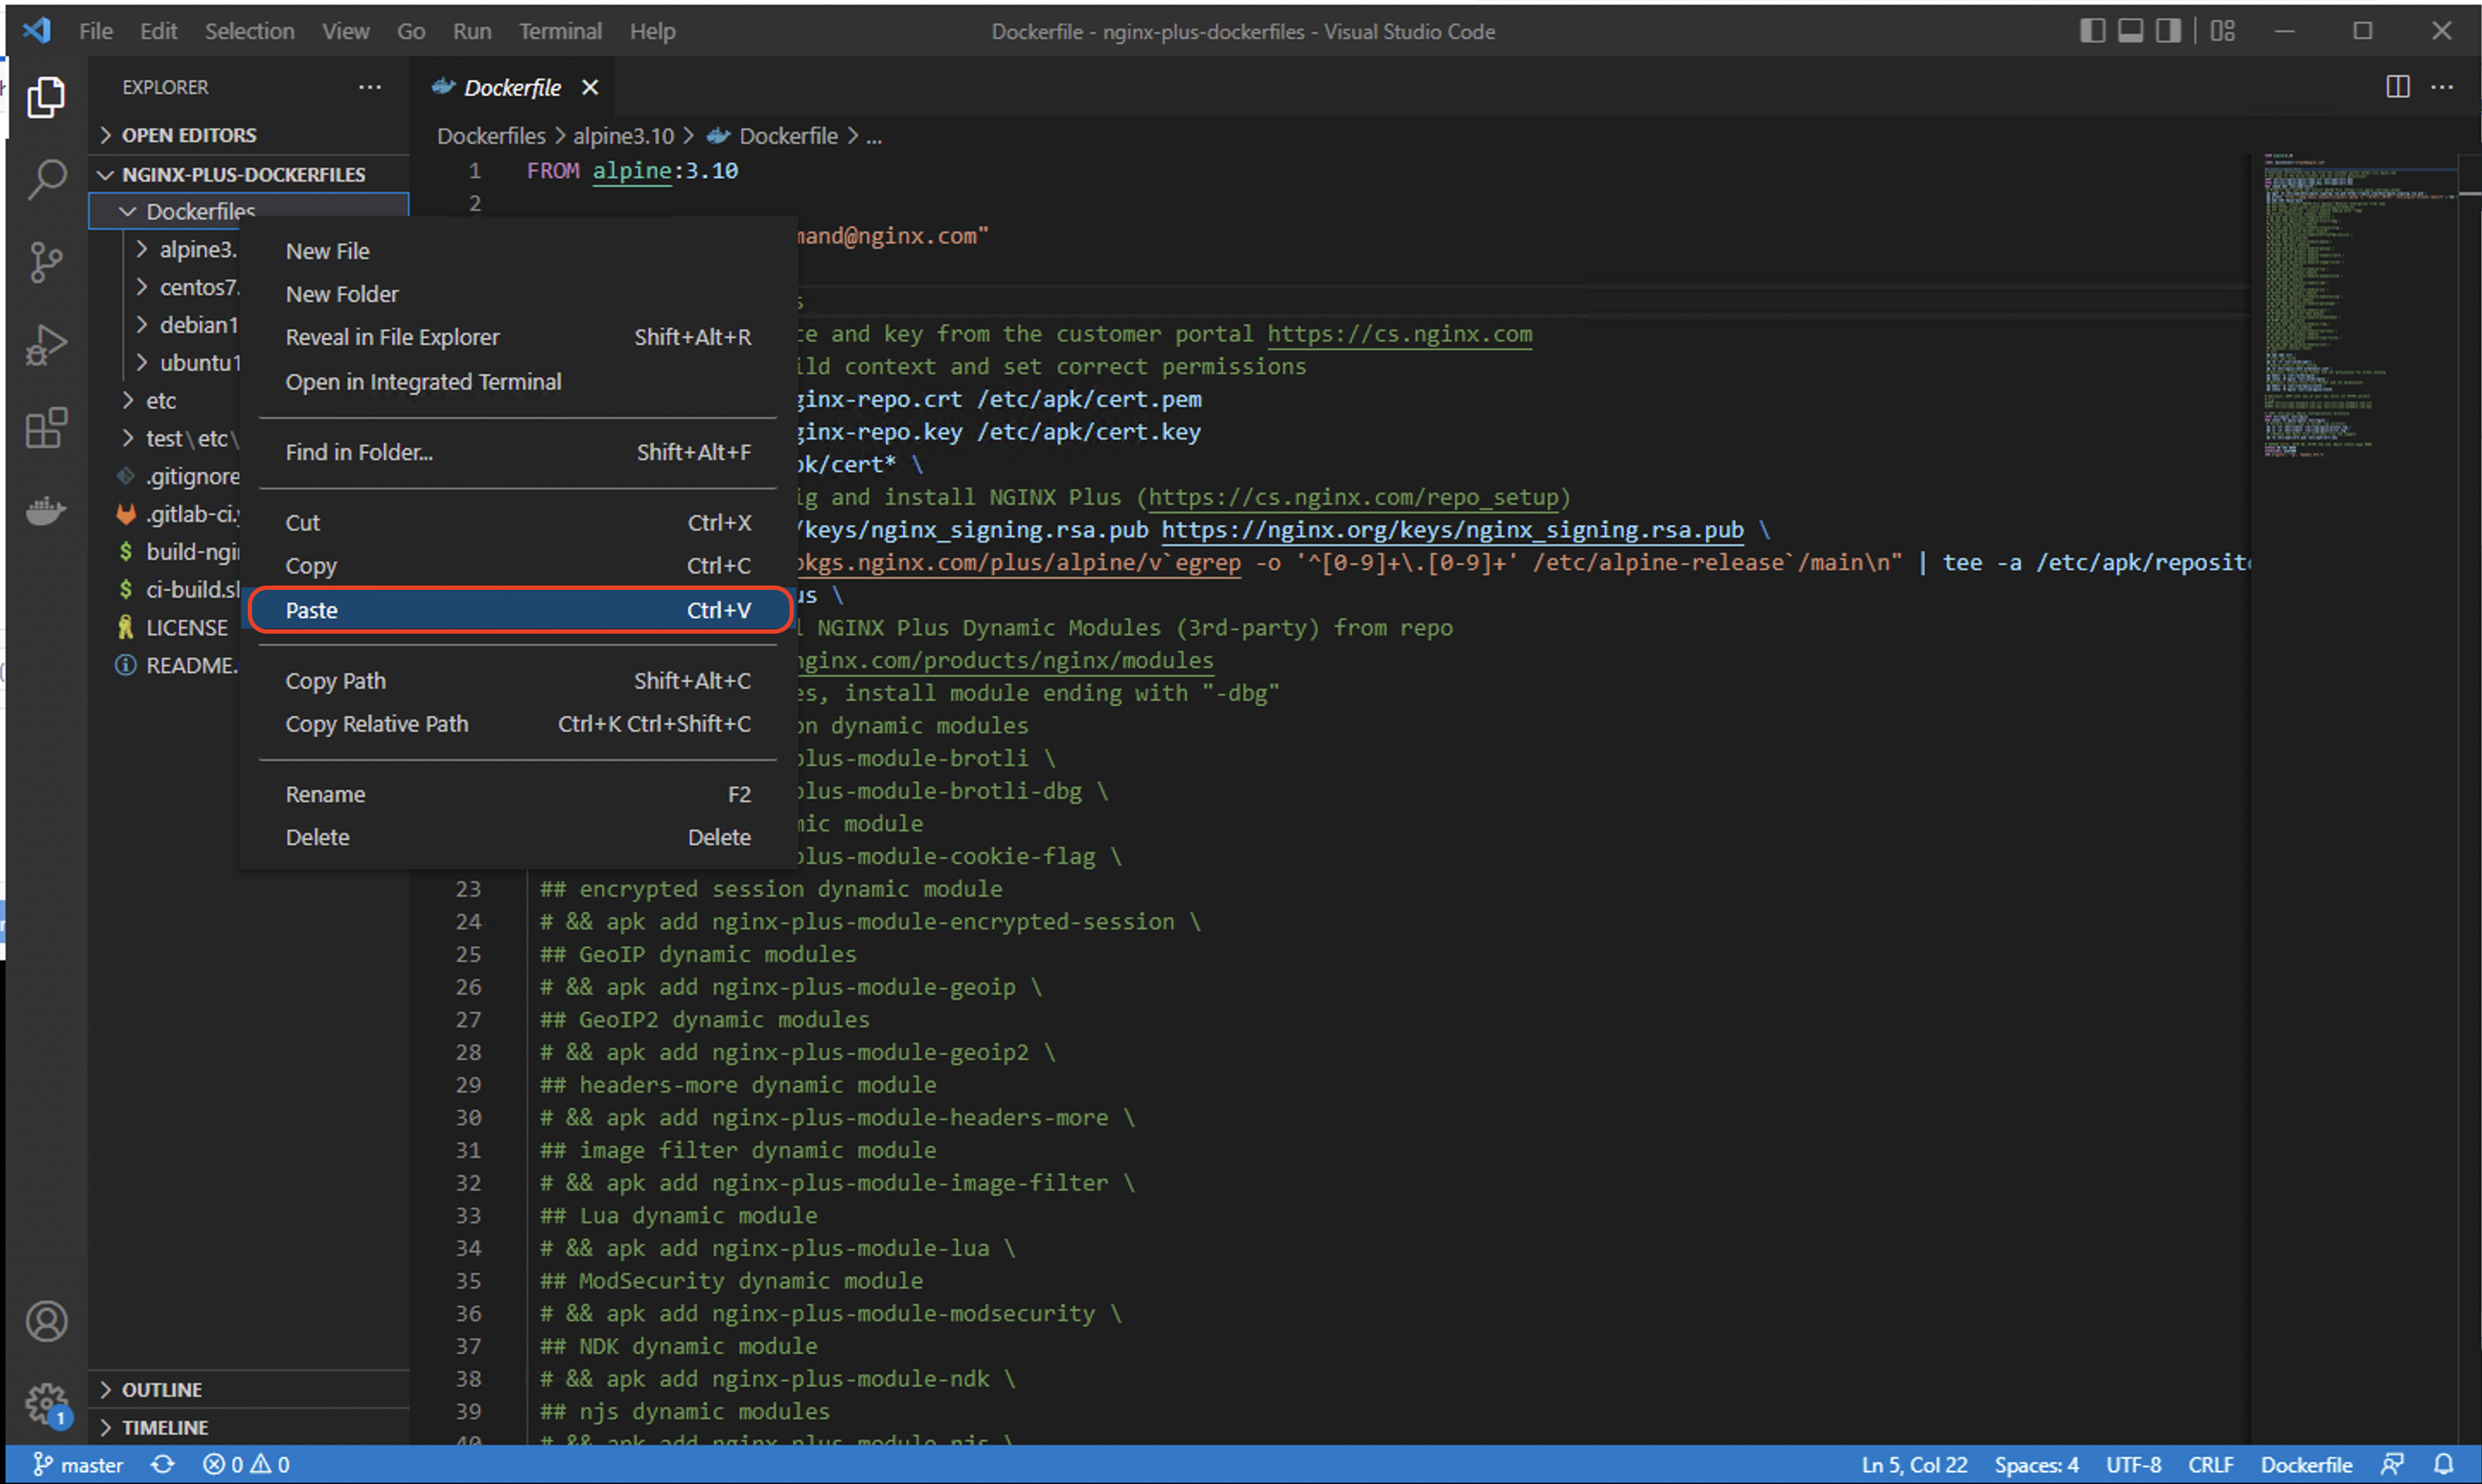
right click on the Dockerfiles folder to paste the copy:
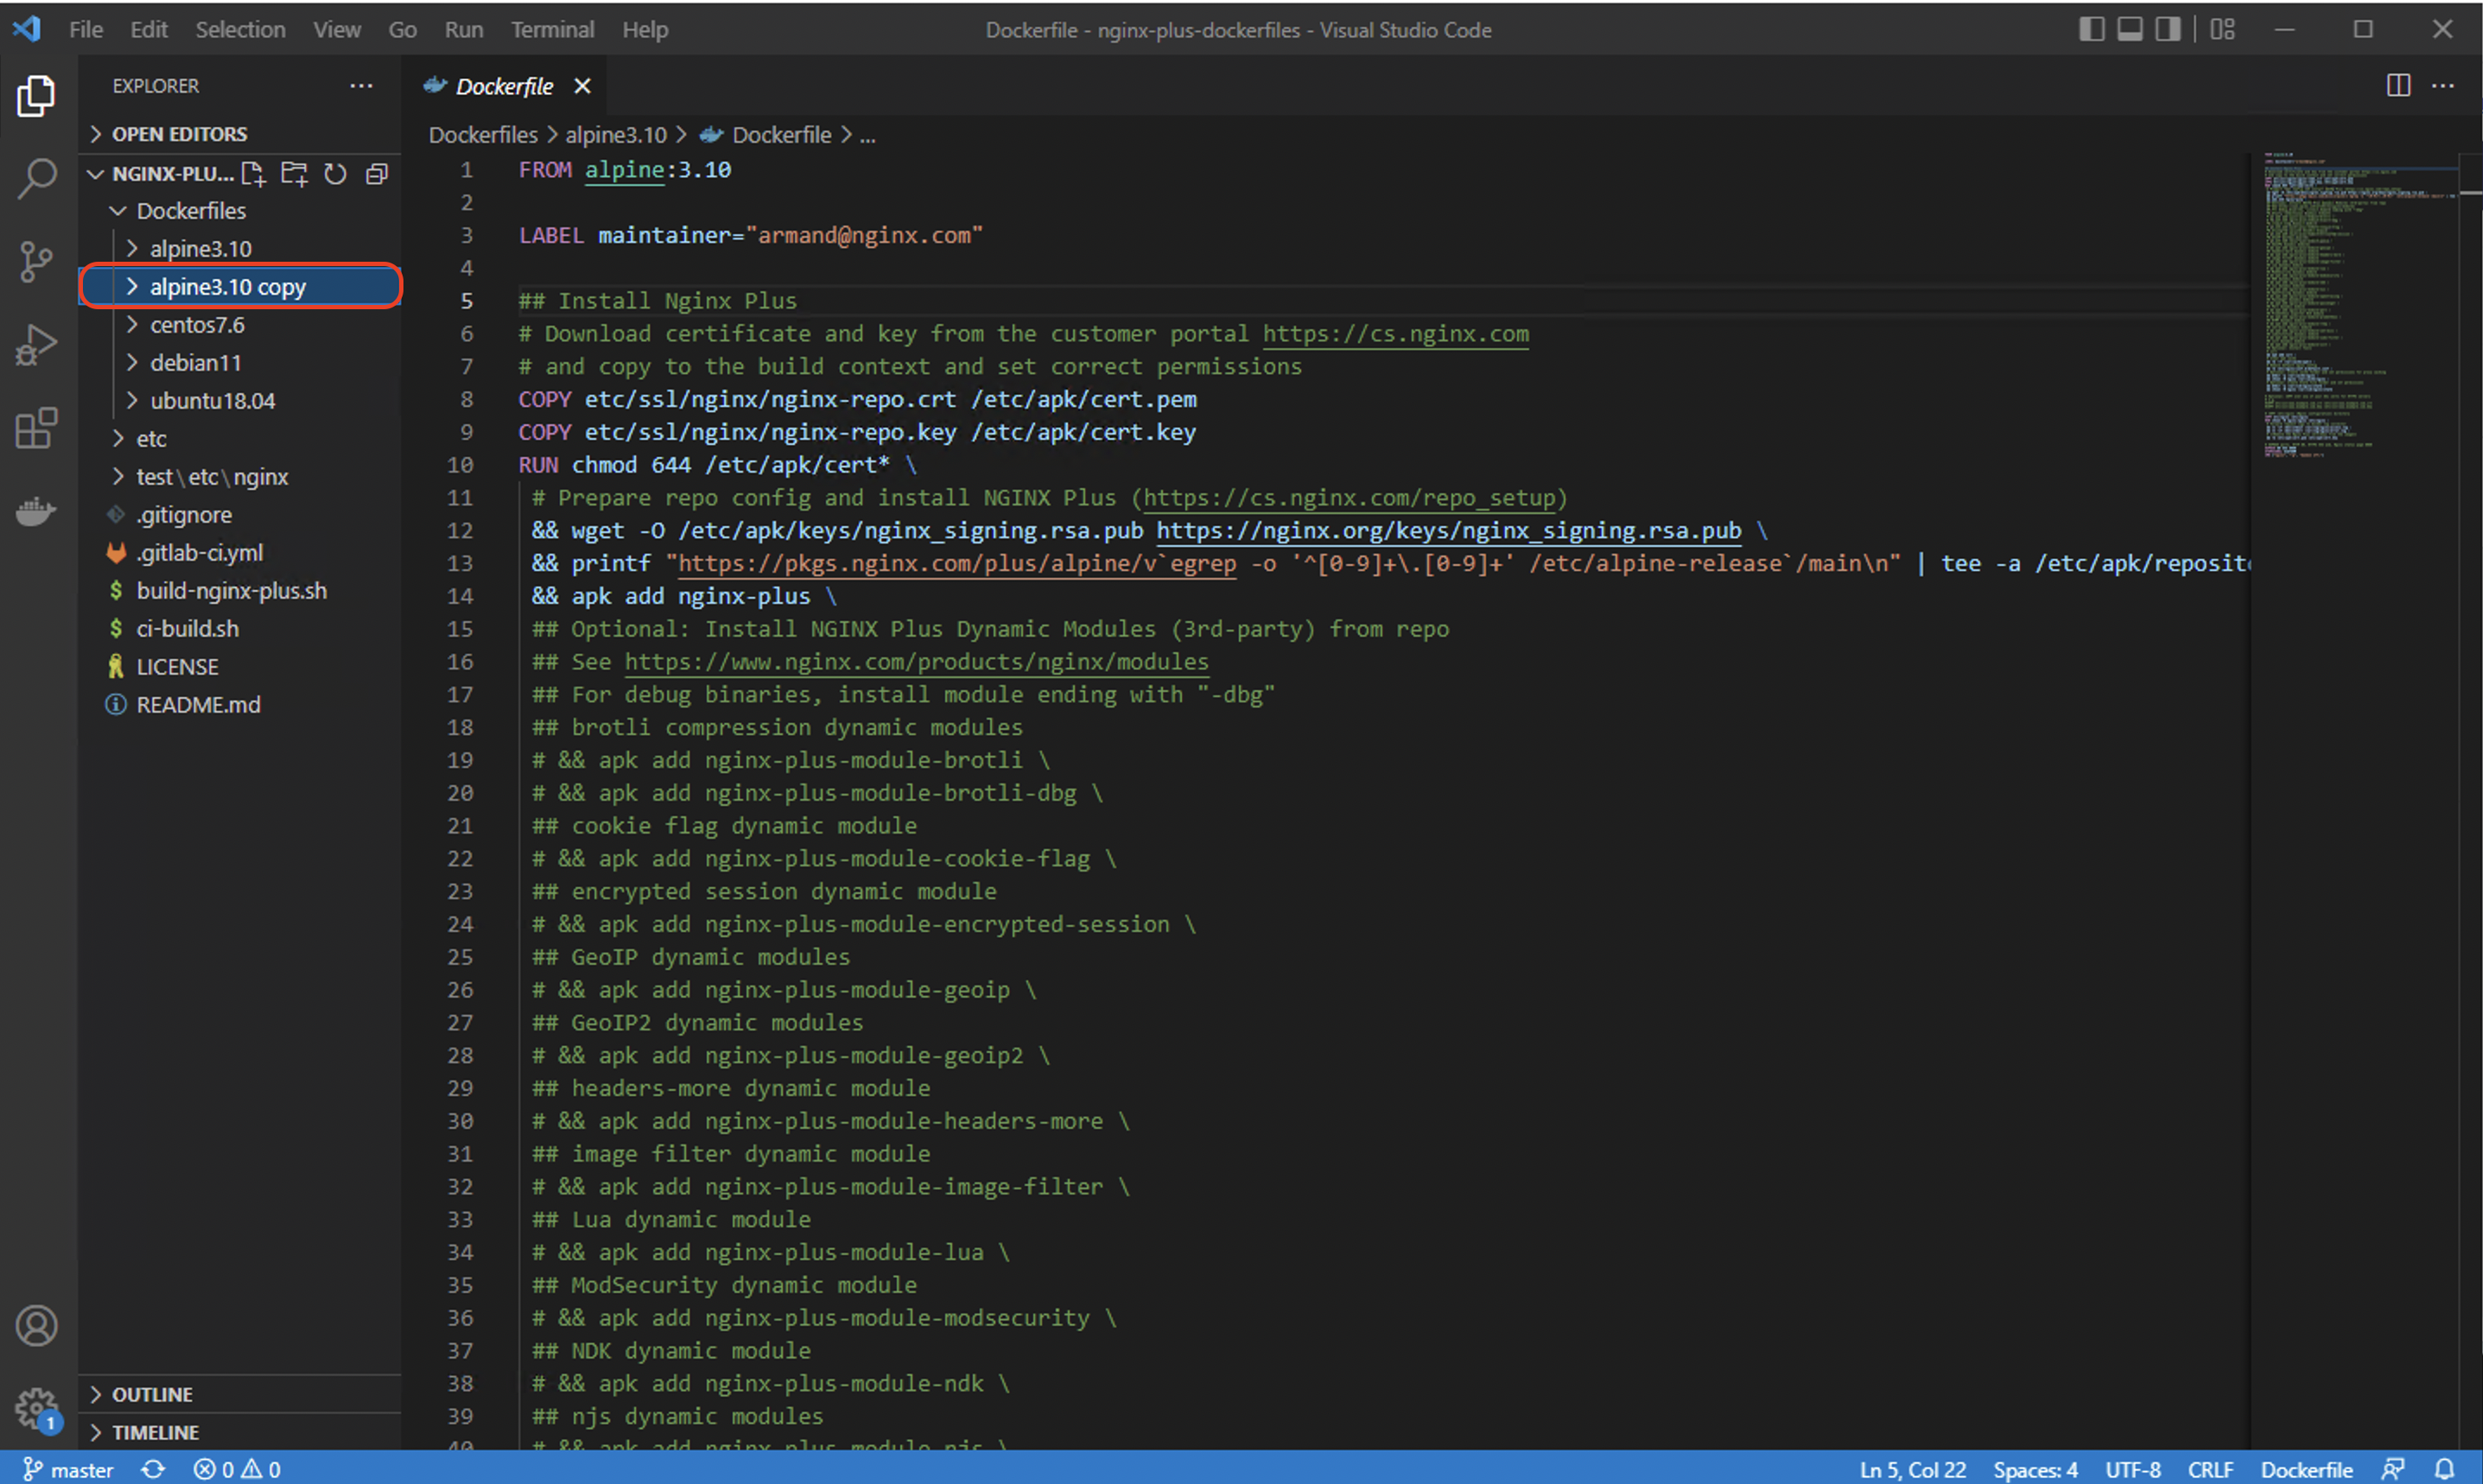
after pasting you should see an alpine3.10 copy folder:
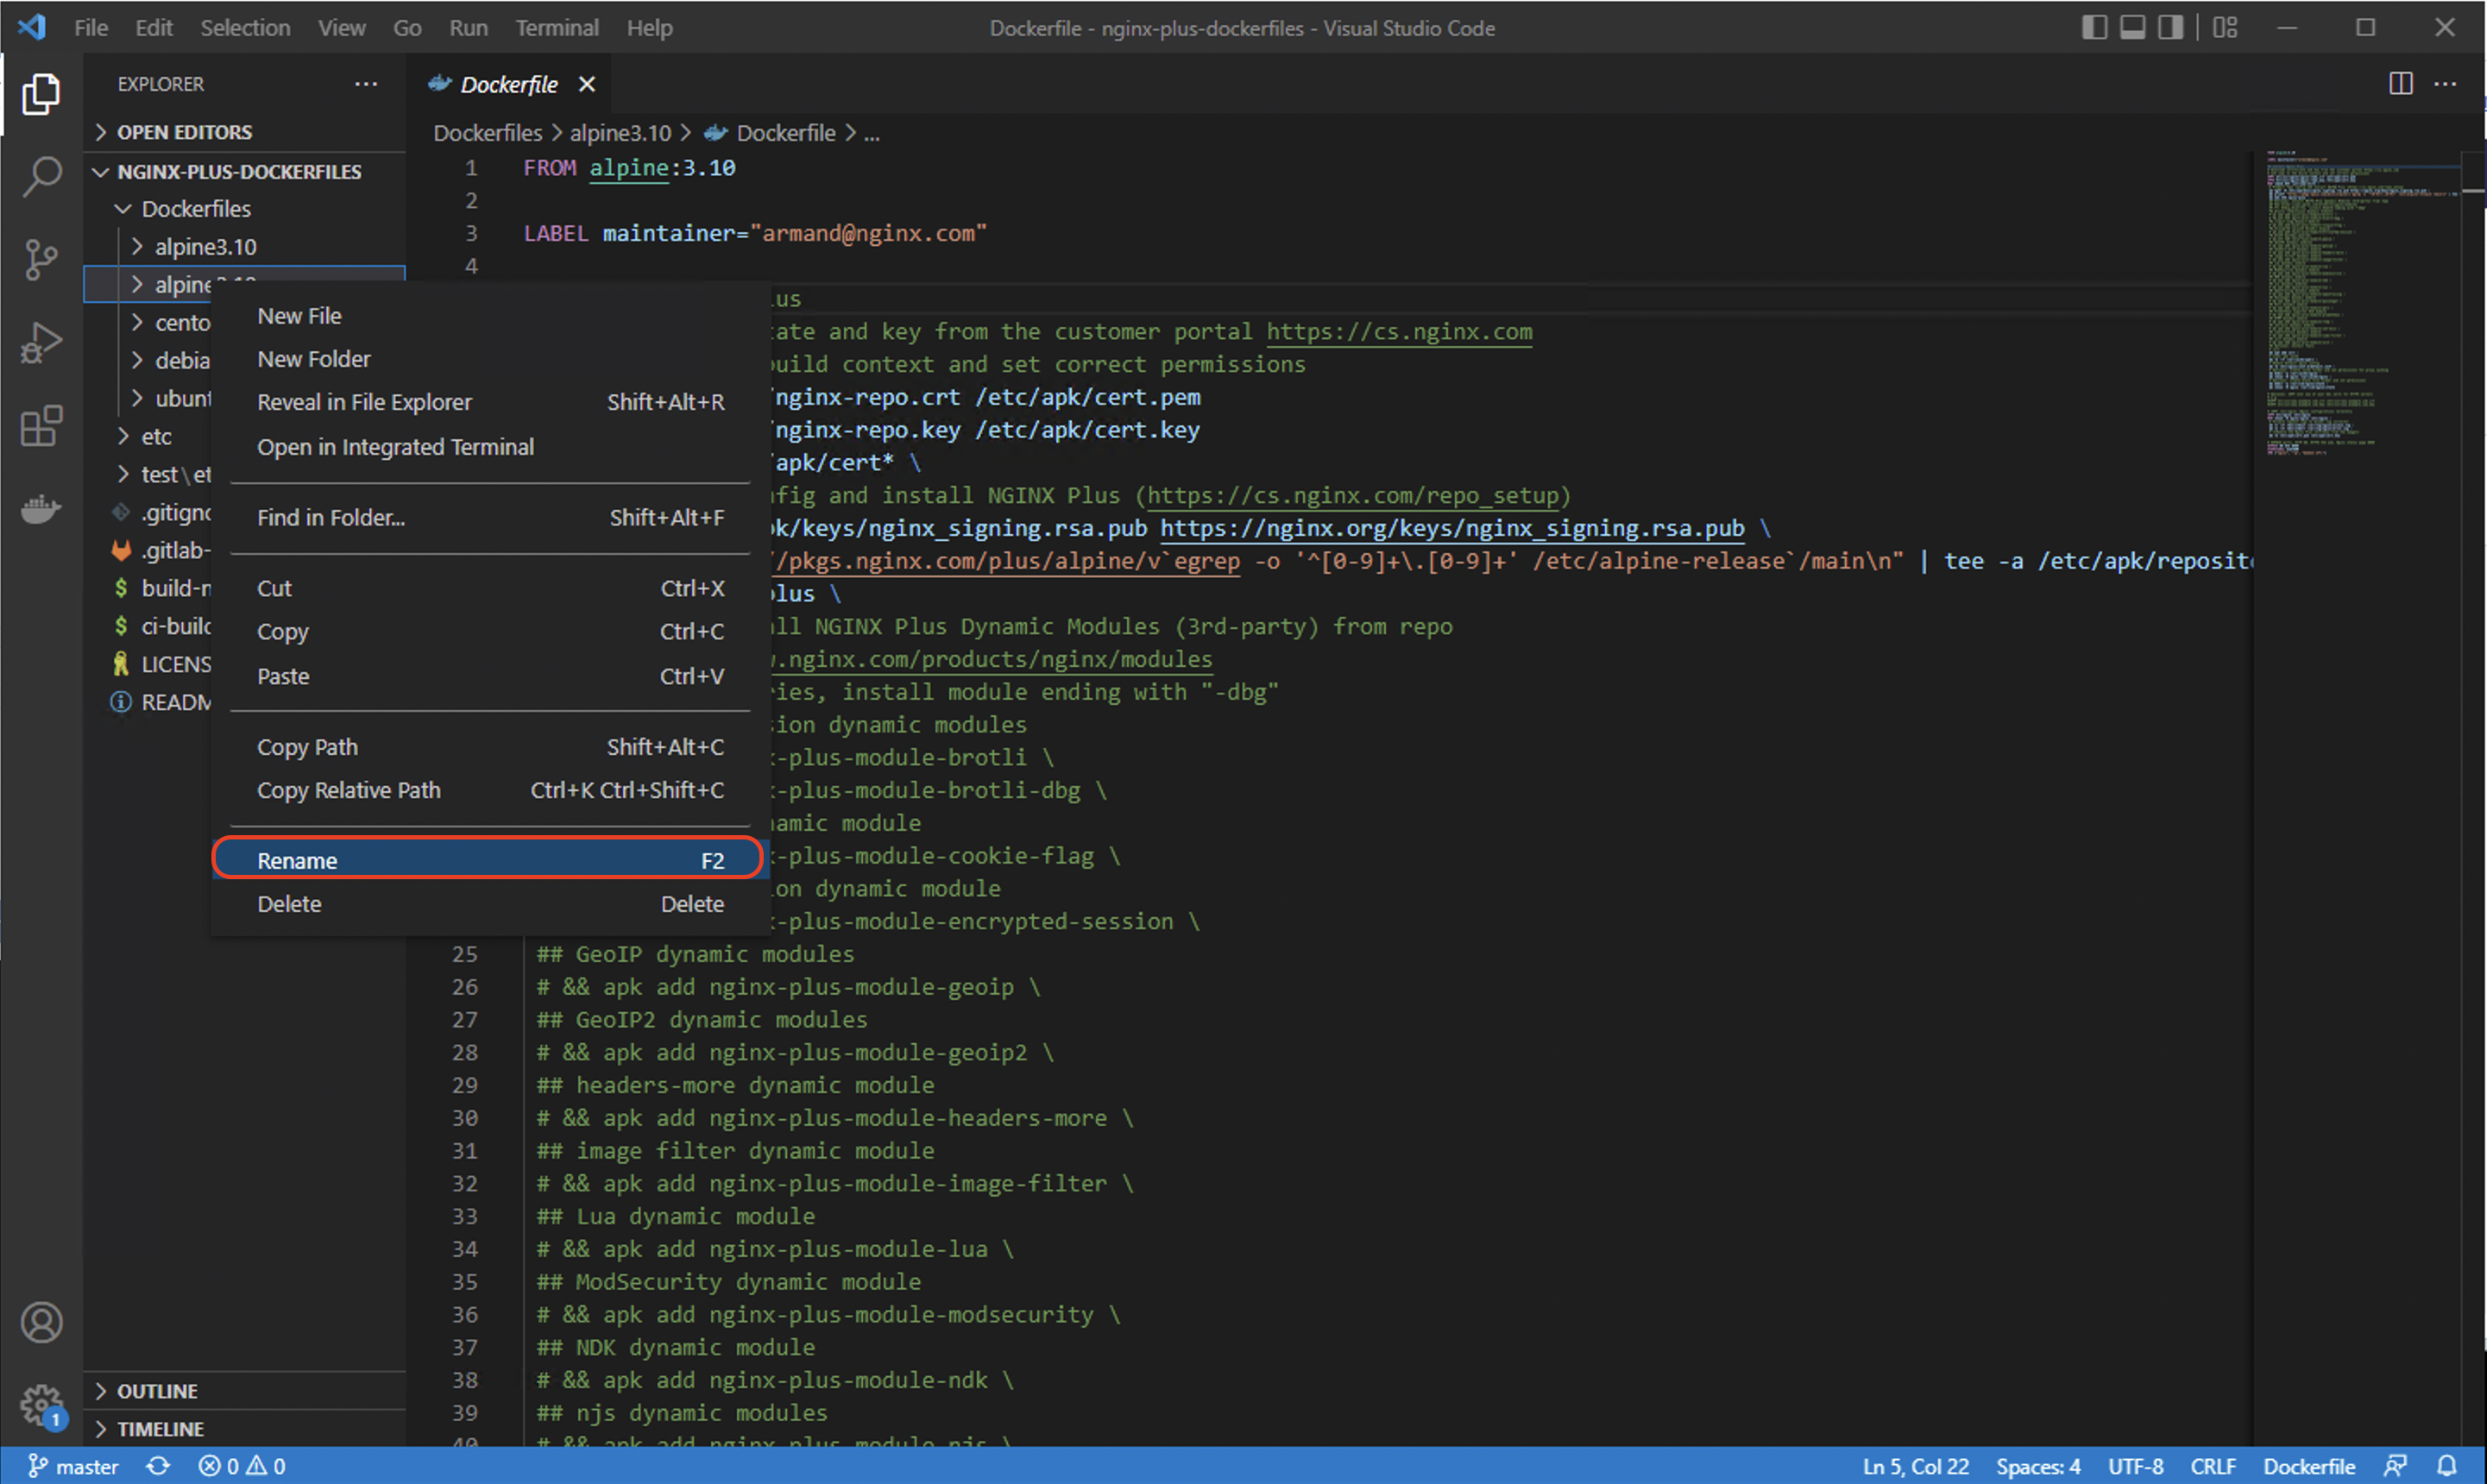
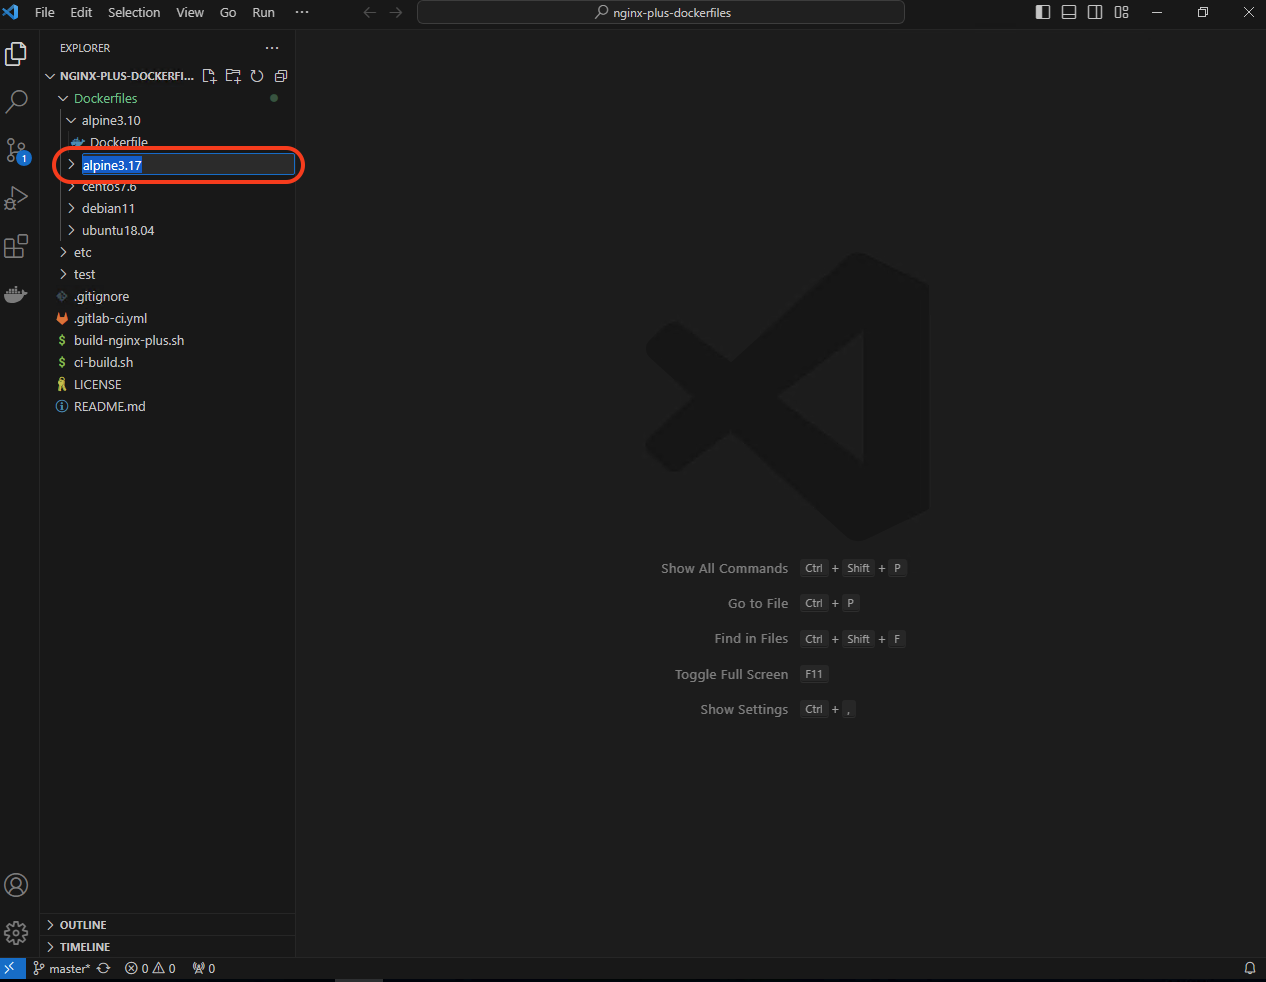
right click on that folder and rename it to alpine3.17:
Let’s use the Alpine 3.10
Dockerfilecopy as a template for our new Alpine 3.17 build. Go ahead and edit theDockerfilein in ouralpine3.17folder, and update theFROM alpine:3.10command toFROM alpine:3.17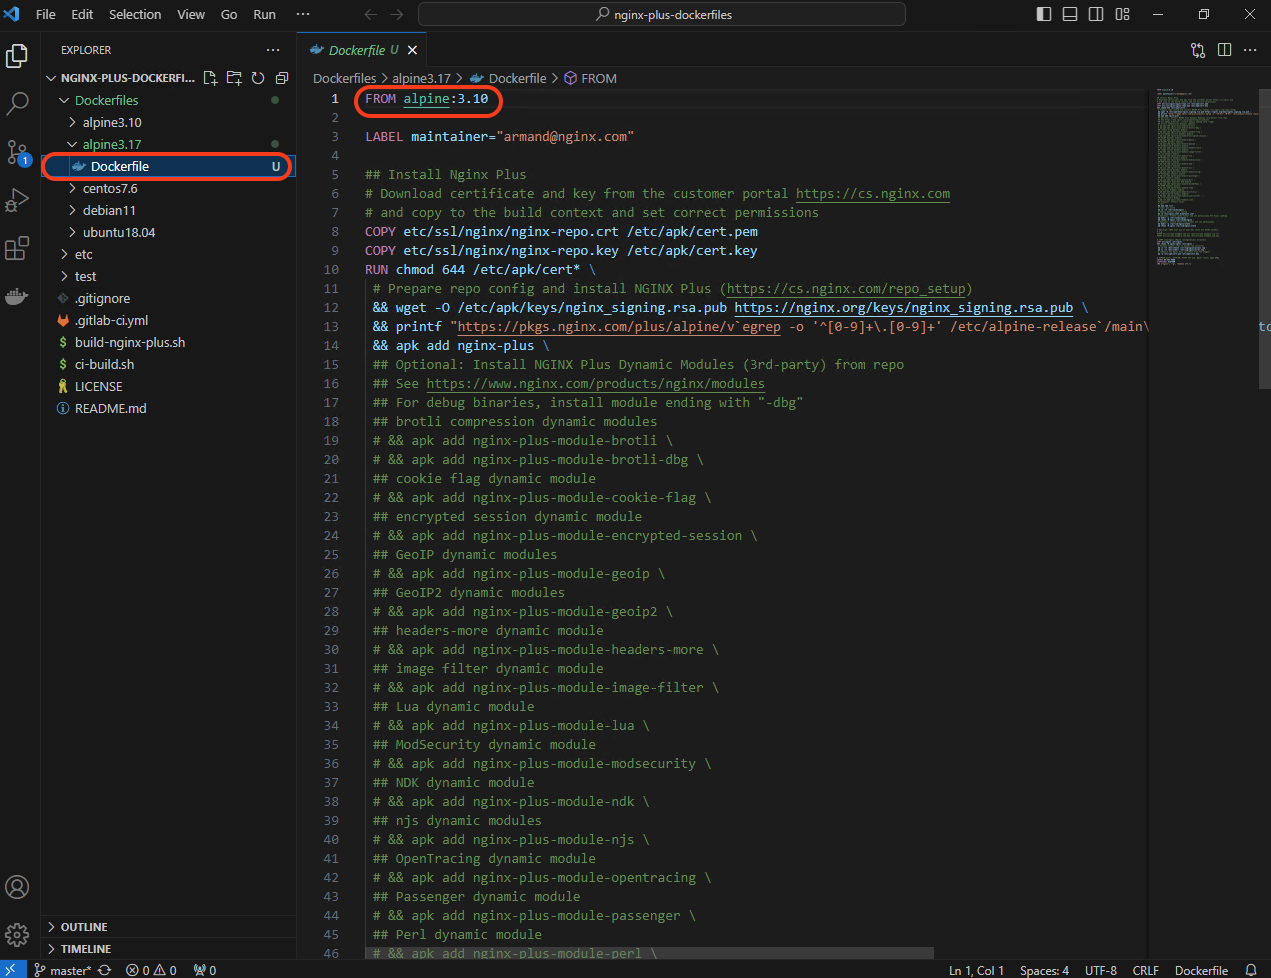
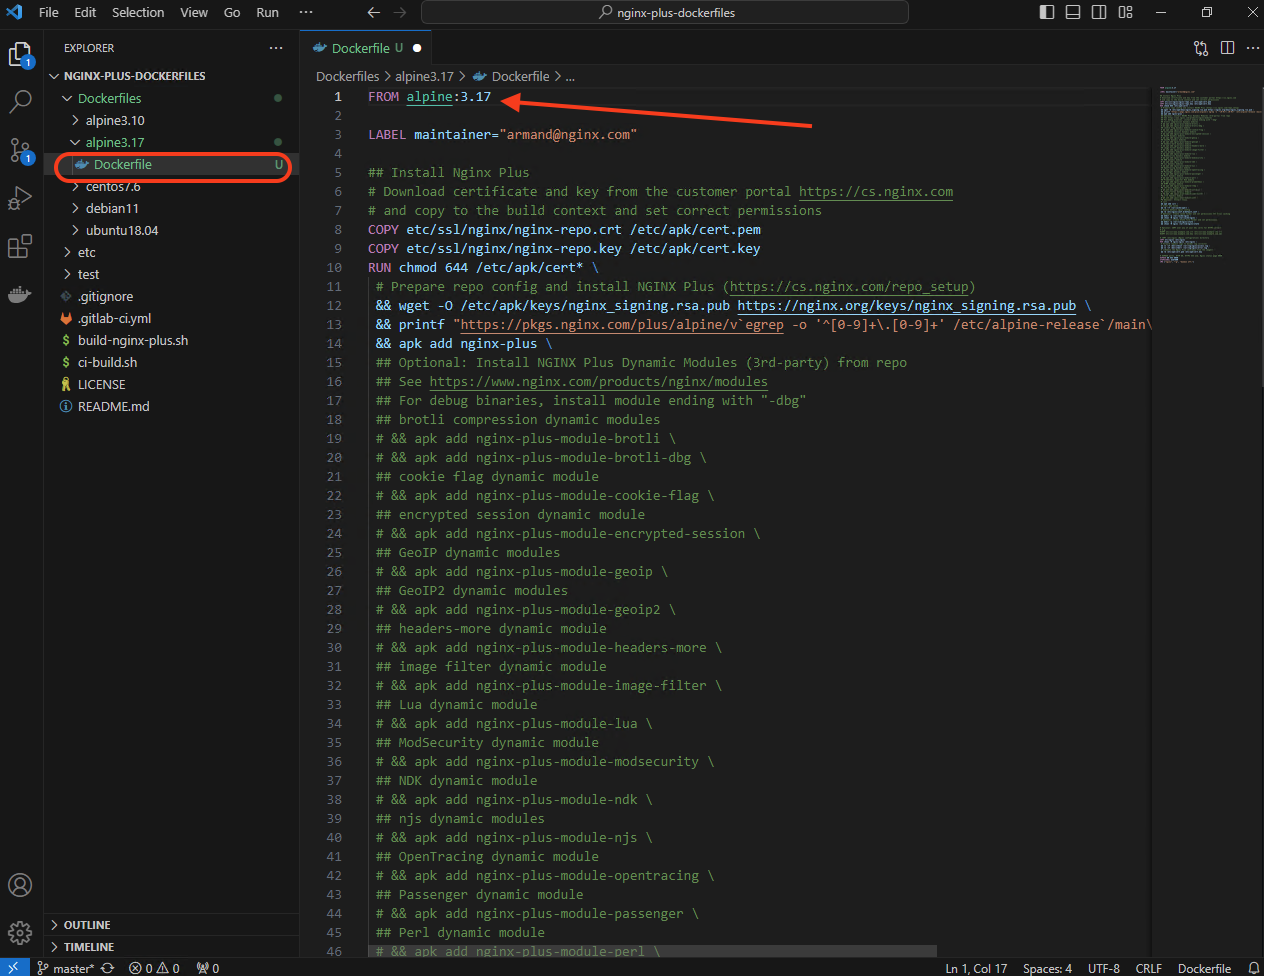
Once you have edited
Dockerfileand replaced theFROM alpine:3.10command toFROM alpine:3.17, go ahead and save the file. You can navigate tofile->saveor you can use the shortcut, CTRL+S.
Note
Now we have created a Dockerfile for Alpine 3.17 but still need to create a new Stage in our GitLab CI/CD Pipeline Configuration file, .gitlab-ci.yml
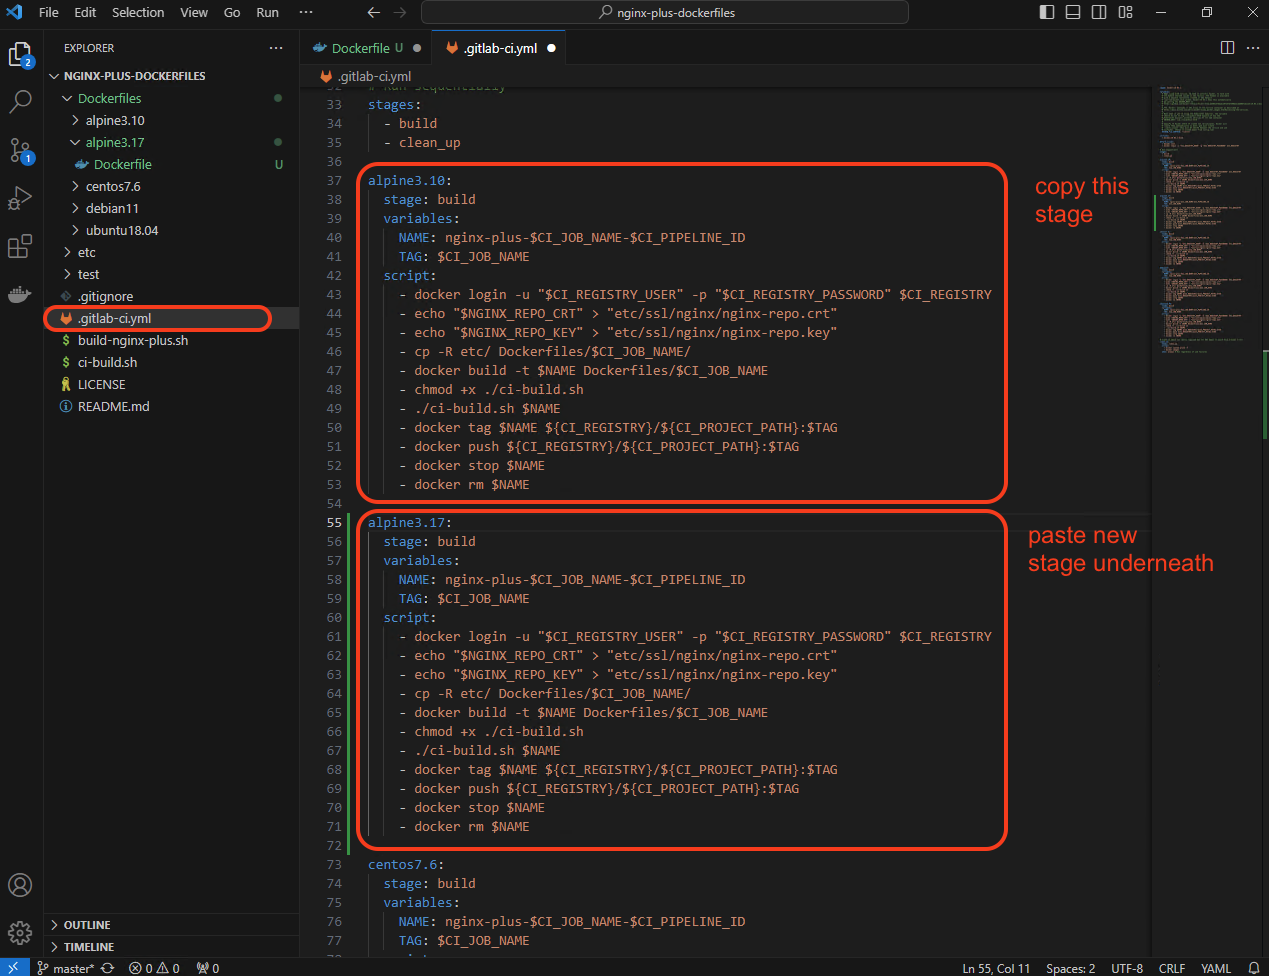
In order to build an Alpine 3.17 image, we also need to add a new stage to our
.gitlab-ci.ymlfile foralpine3.17. Open this project’s GitLab CI/CD Pipeline Configuration file,.gitlab-ci.ymland find the stage labeledalpine3.10(use Find Ctrl+F).- Go ahead and Copy (Ctrl+C) this stage, and Paste (Ctrl+V)
it underneath the existing
alpine3.10stage. - Lastly, edit the stage label
alpine3.10toalpine3.17
Important
The correct indentation in a
yamlfile must be valid and make sure your.gitlab-ci.ymlfile looks like the example above.- Go ahead and Copy (Ctrl+C) this stage, and Paste (Ctrl+V)
it underneath the existing
- Once you have edited
.gitlab-ci.ymland created the new alpine3.17stage, go ahead and save the file. You can navigate tofile->saveor you can use the shortcut, CTRL+S.
- Once you have edited
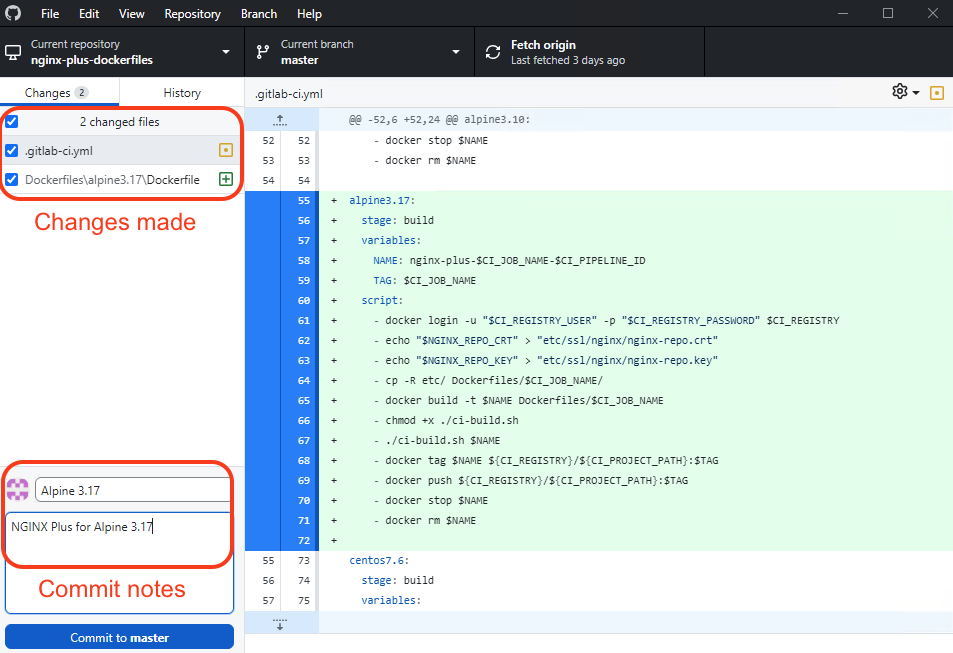
Open or switch back to GitHub Desktop Client, and you will now see the changes made.
Attention
The GitHub Desktop Client has automatically tracked the changes that were made to the project folder, and is highlighting those exact changes, “2 changed file: .gitlab-ci.yml and Dockerfilesalpine3.17Dockerfile”
We are now going to push these changes to our repository on GitLab. In the lower-left of the GitHub, Desktop Client provide a Commit title and note before we can commit to master.
You can see two boxes. Go ahead and type in the Summary field:
"Alpine 3.17".Additionally, you can provide notes as well, type in the notes field:
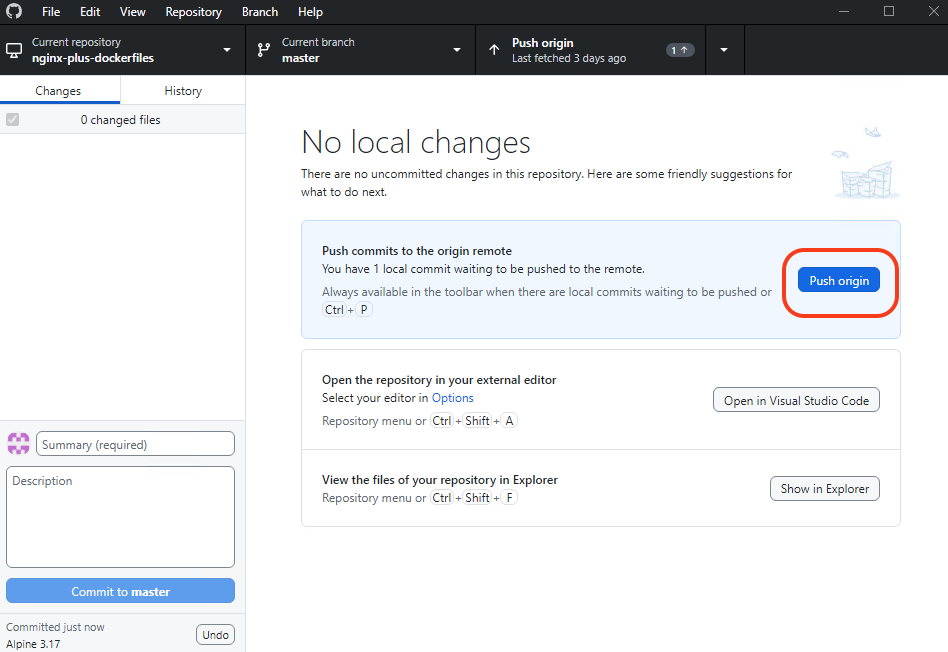
"NGINX Plus for Alpine 3.17"Once you fill in both boxes, click on Commit to Master and on the next screen, press “Push Origin” to push the new code commit to our git repository on Gitlab.
In Google Chrome, open up the nginx-plus-dockerfiles repository on Gitlab, https://gitlab.f5.local/f5-demo-lab/nginx-plus-dockerfiles or using the “nginx-plus-dockerfiles” shortcut provided. (udf/P@ssw0rd20)
Note
- If the browser shows you a warning to indicate the connection is not secure
- and shows an error code of “NET::ERR_CERT_AUTHORITY_INVALID”, this is due to the use of a self-signed certificate on the server. We will be using self-signed certificates for the purposes of this lab. However, you should use authentic certificates from known Certificate Authorities in any production environments. Click on Advanced, followed by the link to proceed to the site.
This will take us to the repository where we just pushed our modified Docker file to
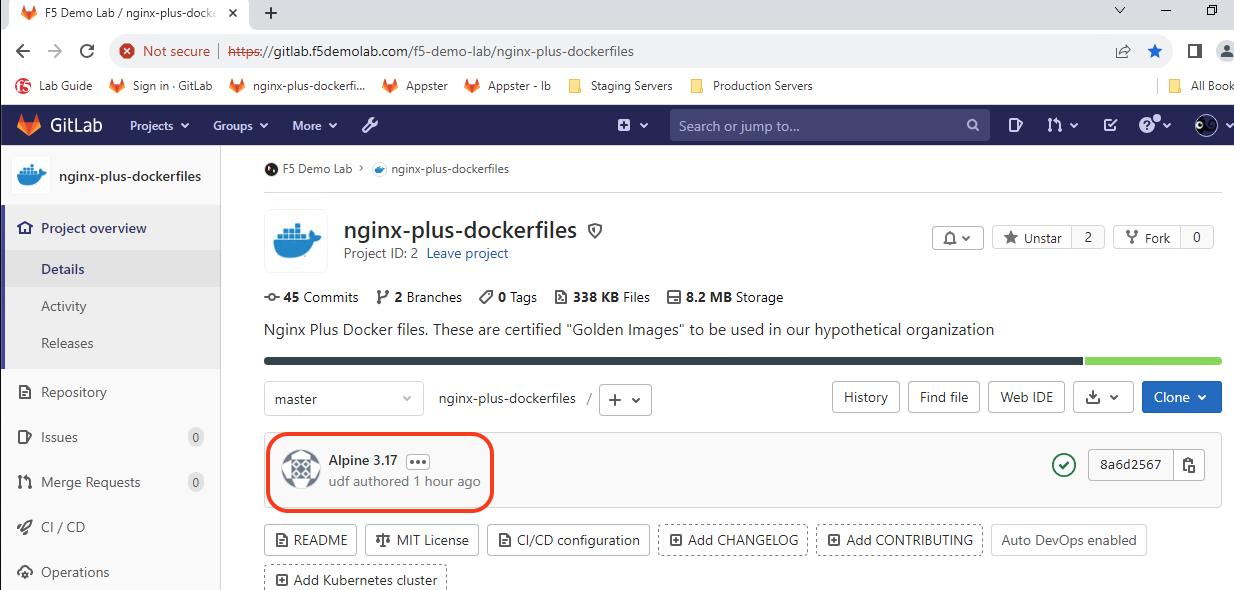
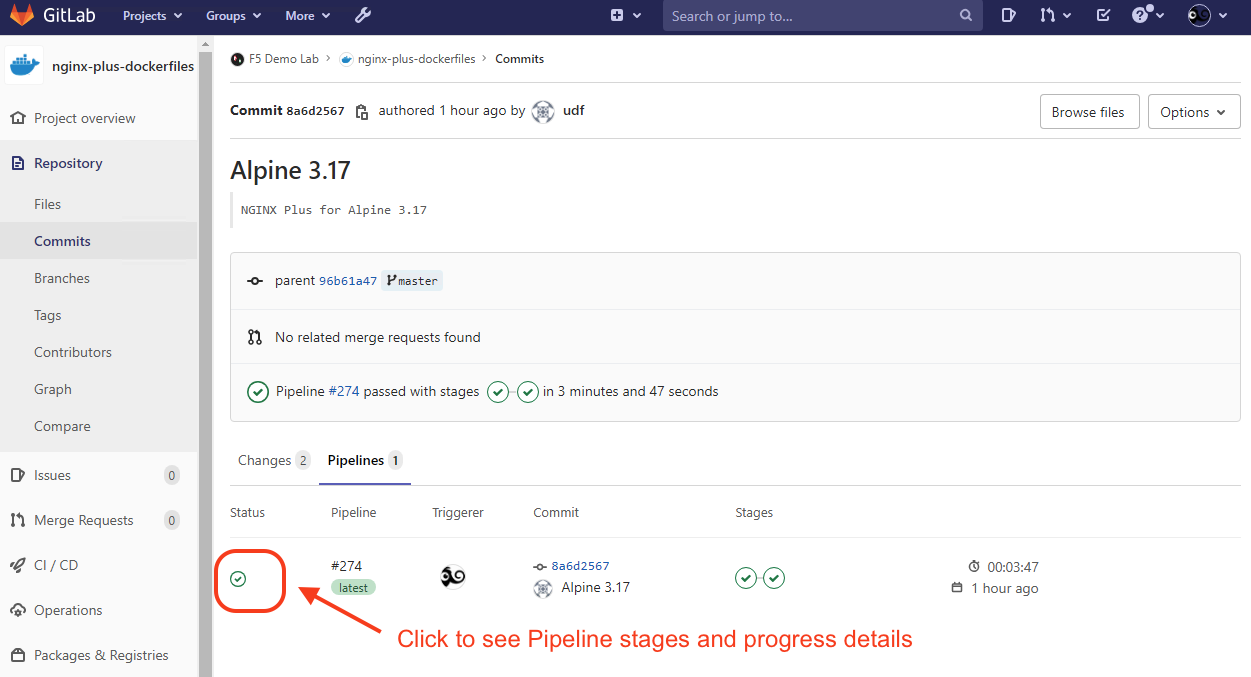
On this nginx-plus-dockerfiles repository page, you will see the pipeline status icon next to the latest Commit SHA. When the pipeline currently in progress, you will see an orange icon (waiting to start), a blue circle (running), or a green check (passed). Hopefully, we don’t see a red icon, which indicates the pipeline has failed. We can click on the pipeline status icon to view the pipeline progress
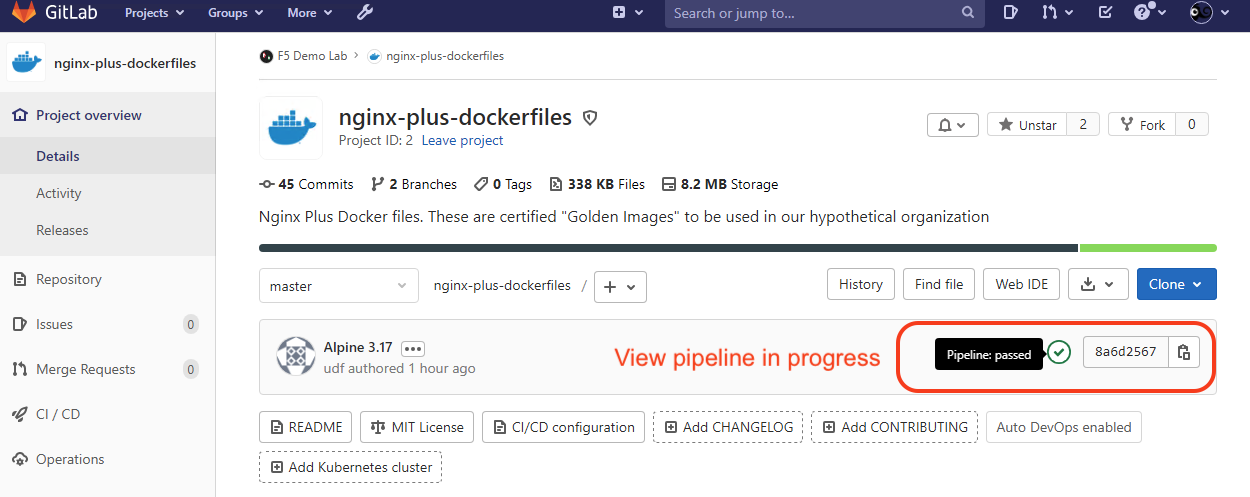
The next screen shows a high-level view of the pipeline triggered for this commit. We can click on the pipeline status icon on this screen to view the pipeline progress in greater detail.
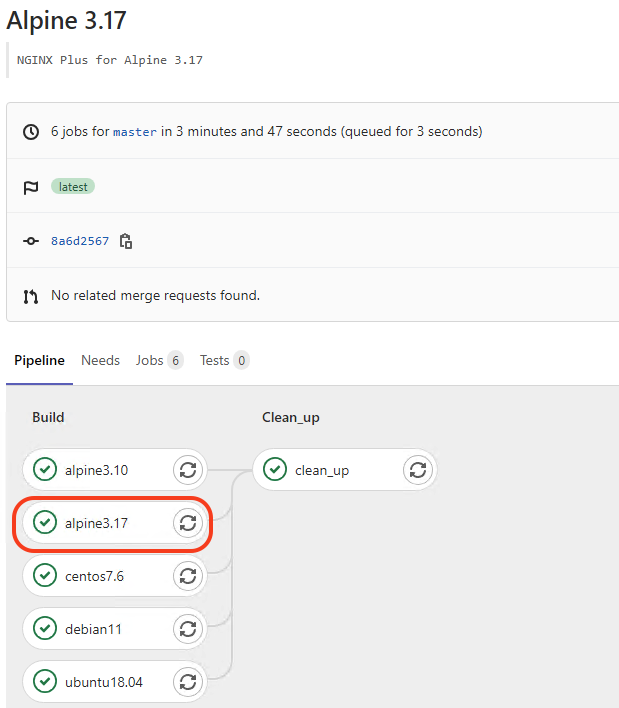
After clicking on the pipeline status icon, we can view the full pipeline. As you can see, we can now see our pipeline: BUILD and CLEANUP. This pipeline was automatically triggered after we submitted our changes to Dockerfile (when we clicked ‘push origin.’) and we can see at a high level the stages in the pipeline progressing and the final result
If all stages were successful, then we should have updated our Docker images up to our Docker container registry on this repository.
Attention
Stop: This is a good time to inspect the GitLab CI/CD Pipeline file, .gitlab-ci.yml, while waiting for the pipeline to complete.
- Look at stage definitions near the top of the file, labled
stages, and see there are two stages defined,buildandcleanup, these stages run in order, sequentially, but the stages Continous Integration Jobs ($CI_JOB_NAME) e.g.alpine3.10,alpine3.17, etc., within those stages run in parallel. - Look at the CI_JOB_NAME,
alpine3.10, and here like other jobs, we have set a varible$NAMEwithnginx-plus-$CI_JOB_NAME-$CI_PIPELINE_ID: This uses the Job name (alpine3.10) and the unique Pipeline ID of this run as the docker image name. Having a unique image name that references a build job allows us to roll back or deploy to a previously know good build
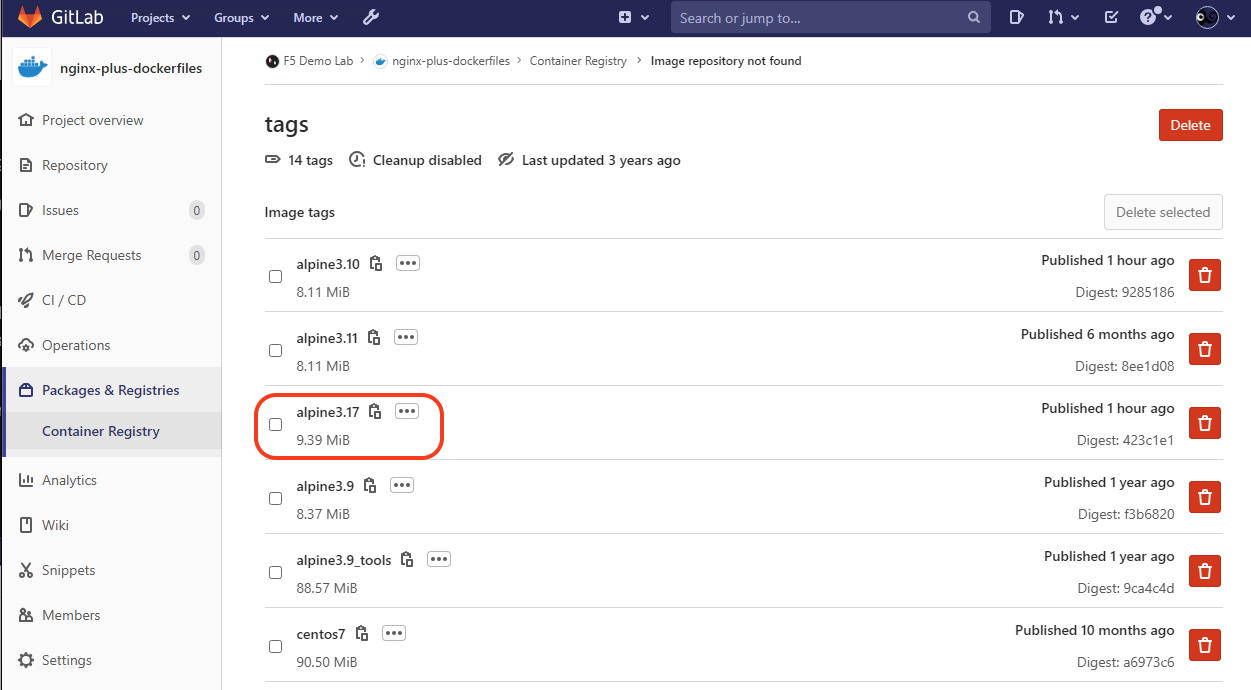
A Docker Container Registry is integrated into GitLab, and every project can have its own space to store its Docker images. We can see our image in the Package > Container Registry. On the Container Registry page, expand the title, and you will see a list of Docker images ready for use
Here you should see your new alpine3.17 image