NGINX Modern Apps > Class 2 - NGINX Plus CI/CD Lab > Module 1: Creating docker images for NGINX Plus Source | Edit on
Lab 2: GitLab CI/CD environment variables
Environment variables are a powerful feature provided by Gitlab that is useful for customizing your jobs in GitLab CI/CD’s pipelines. Using variables means no hardcoded values and prevents sensitive secrets from getting exposed in the code or logs. There are two types of variables in GitLab:
- Predefined environment variables: GitLab CI/CD has a default set of predefined variables that can be used without any specification needed. You can call issues, numbers, usernames, branch names, pipeline and commit IDs, and much more.
- Custom environment
variables:
When your use case requires a specific custom variable, you
can set them up quickly from the
UI or
directly in the
.gitlab-ci.ymlfile and reuse them as you wish. There are two variable types:- Variable type: The Runner will create an environment variable named the same as the variable key and set its value to the variable value.
- File type: The Runner will write the variable value to a temporary file and set the path to this file as the value of an environment variable, named the same as the variable key
Attention
Let’s take a look at variables used in our lab …
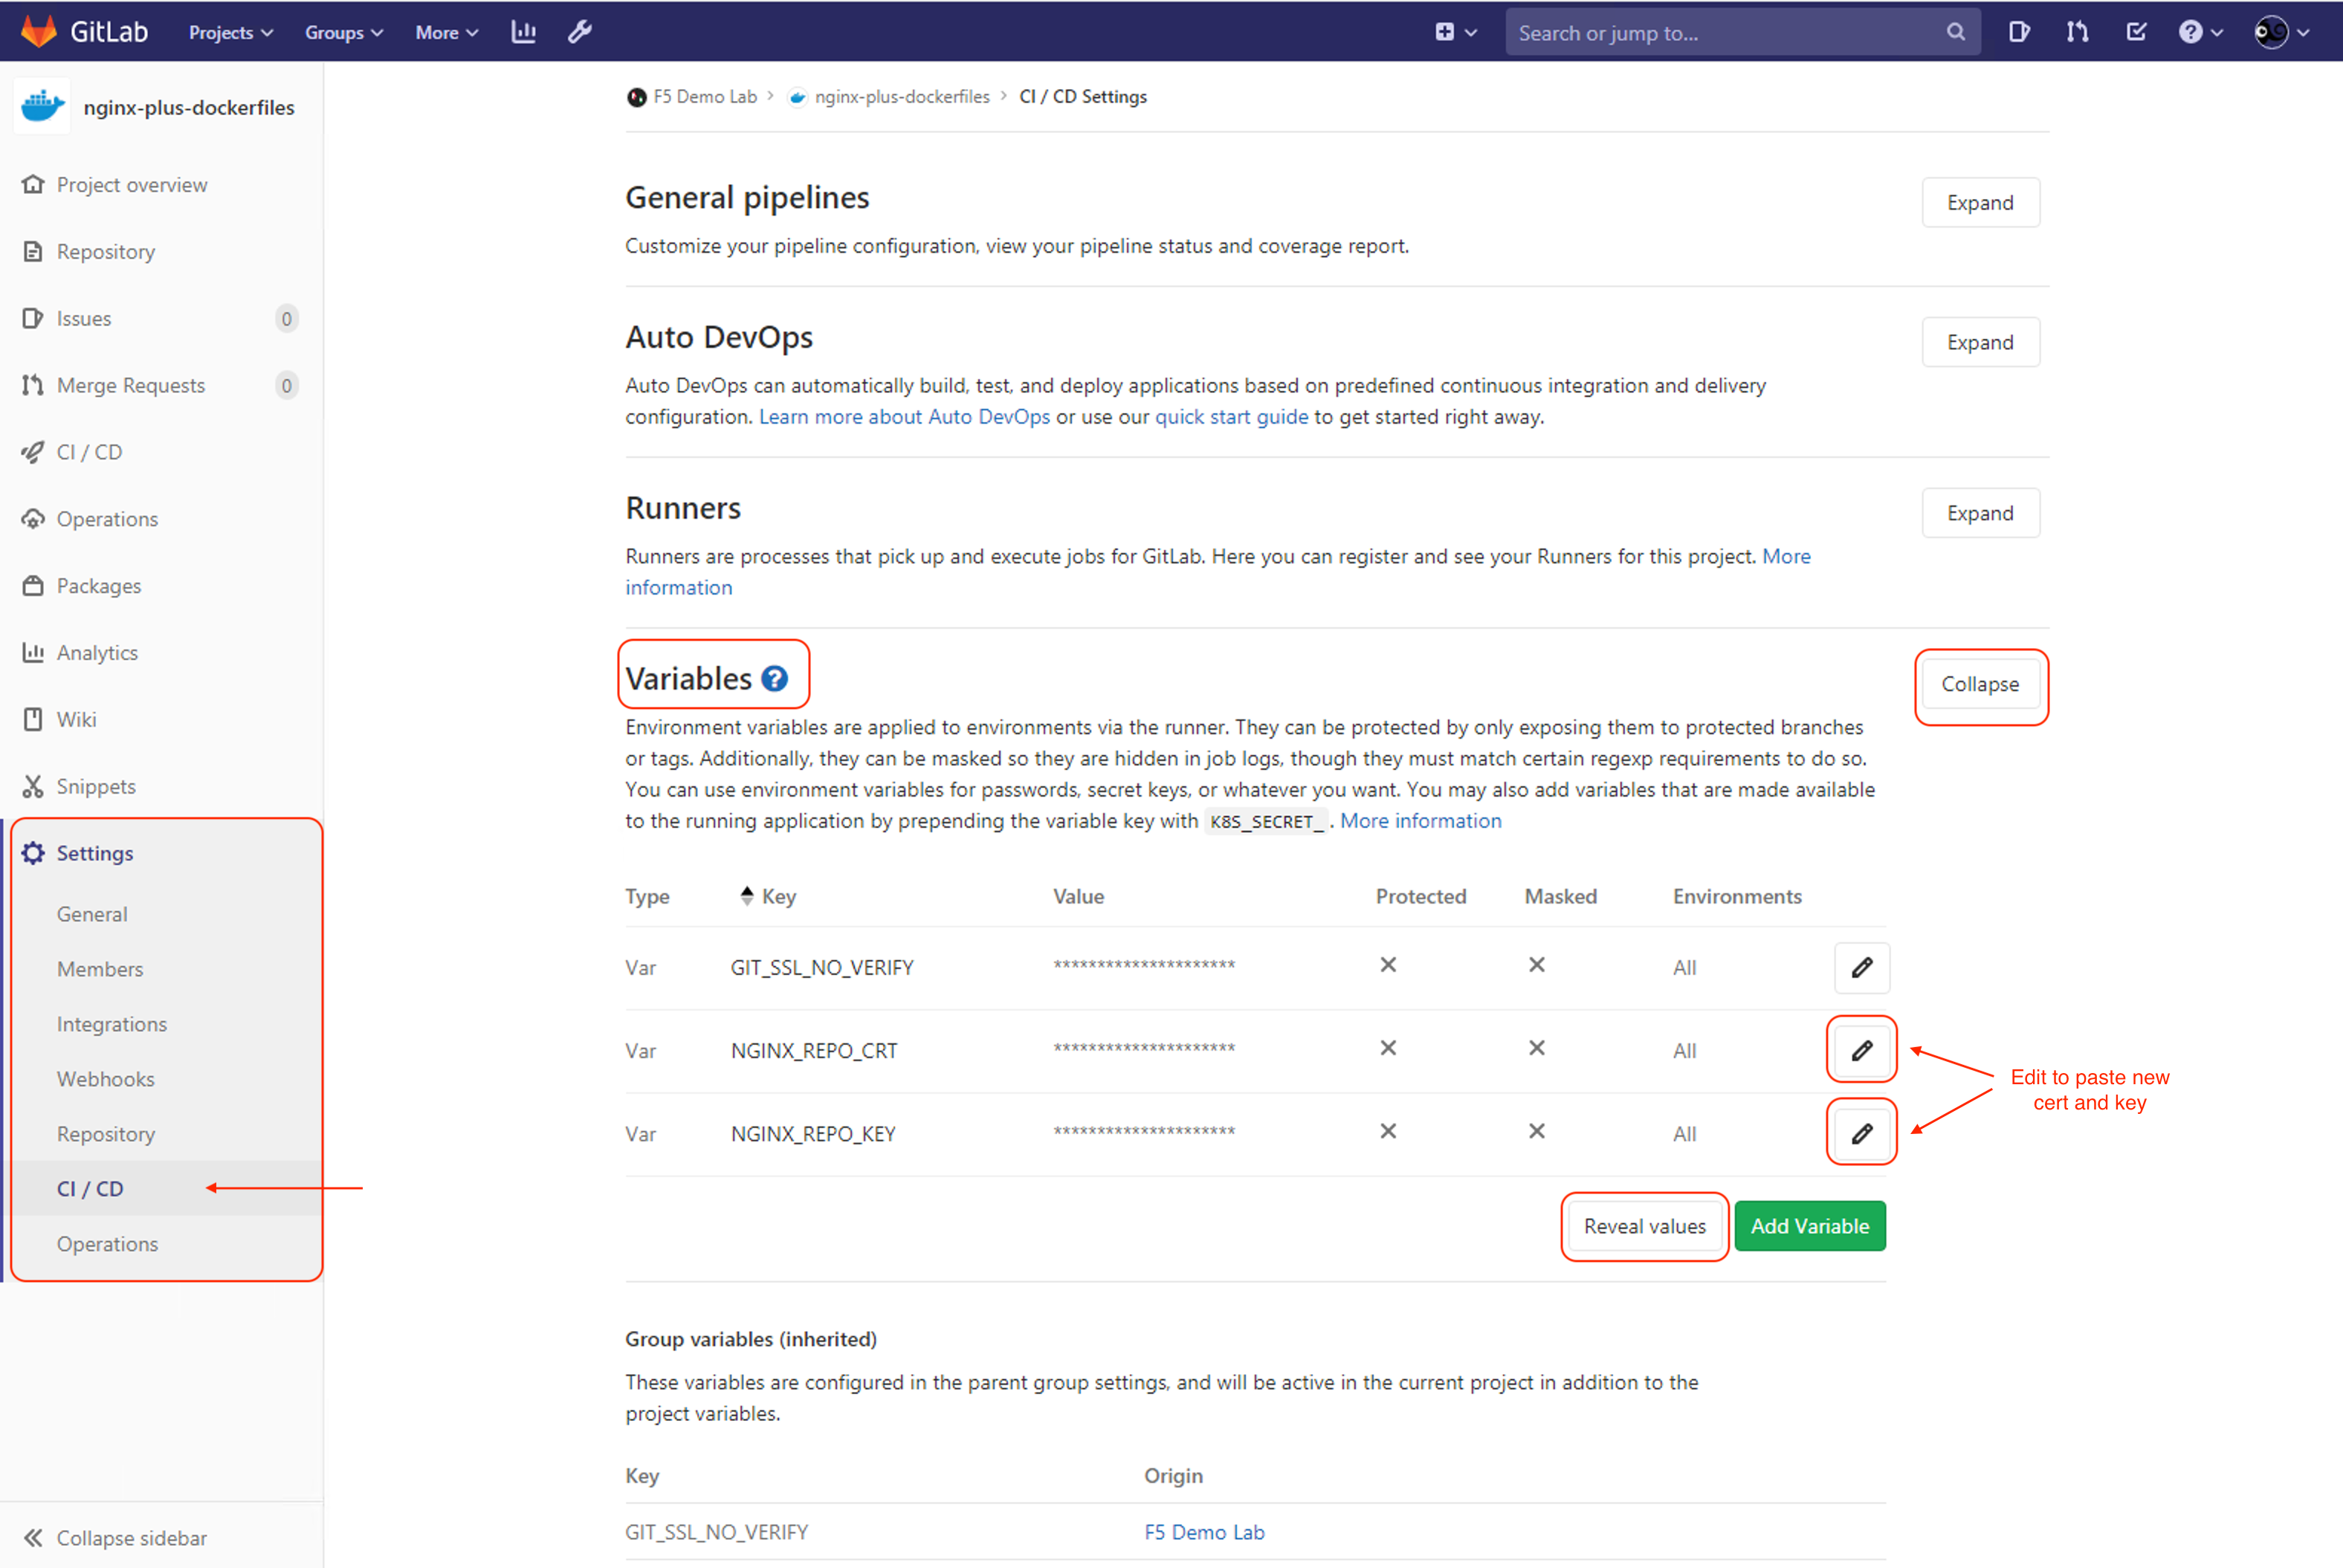
Navigate to the Gitlab nginx-plus-dockerfiles repository > Settings > CI/CD. Once on that screen, expand Variables. Here you can see we have pre-configured variables
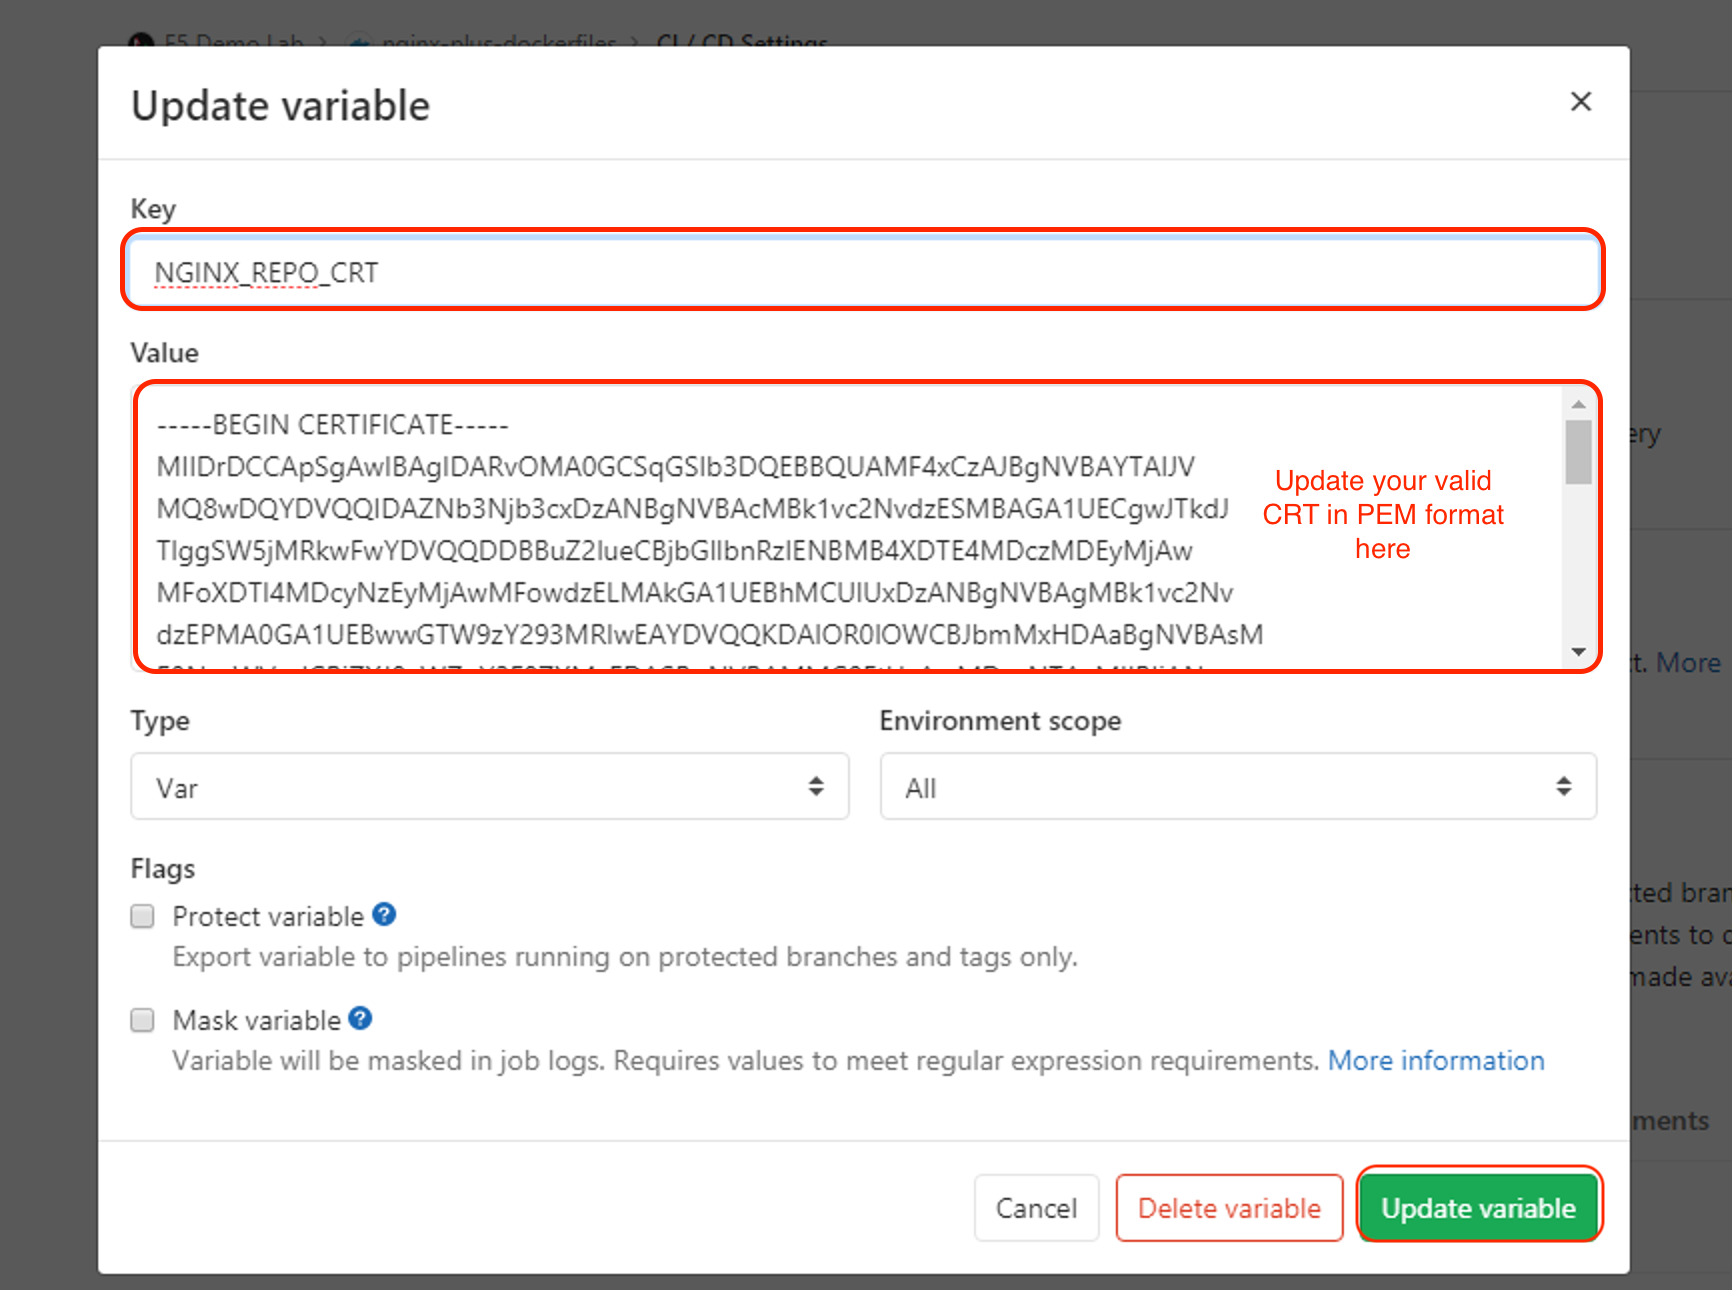
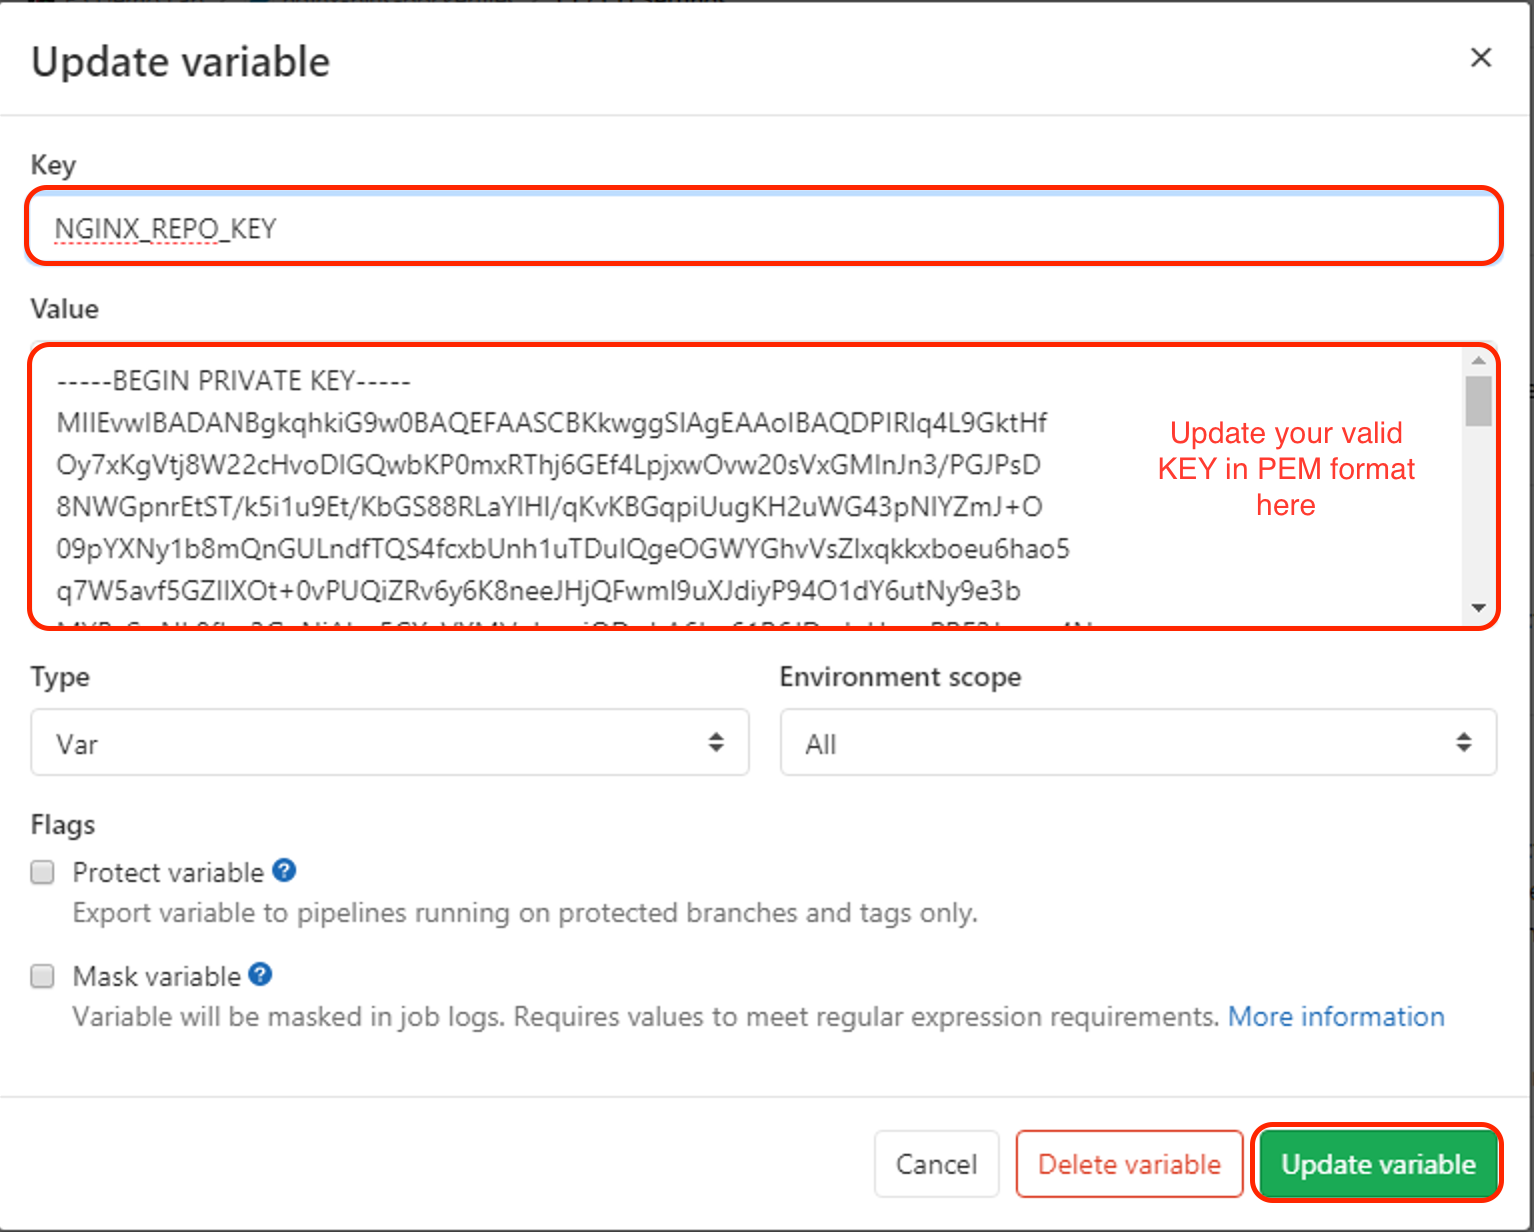
The following variables are the NGINX Plus certificate and key files in PEM format, used in our CI/CD pipeline:
NGINX_REPO_CRTNGINX_REPO_KEY
We have prepopulated the contents of both variables into the
VALUEfield, and it is as a string in CI/CD Pipeline jobs.Note
We cannot set these values with a
Maskedtype because our NGINX PEM files do not meet the Base64 alphabet (RFC4648) format requirement. We want to make sure we do not echo that value in any of the Pipeline logs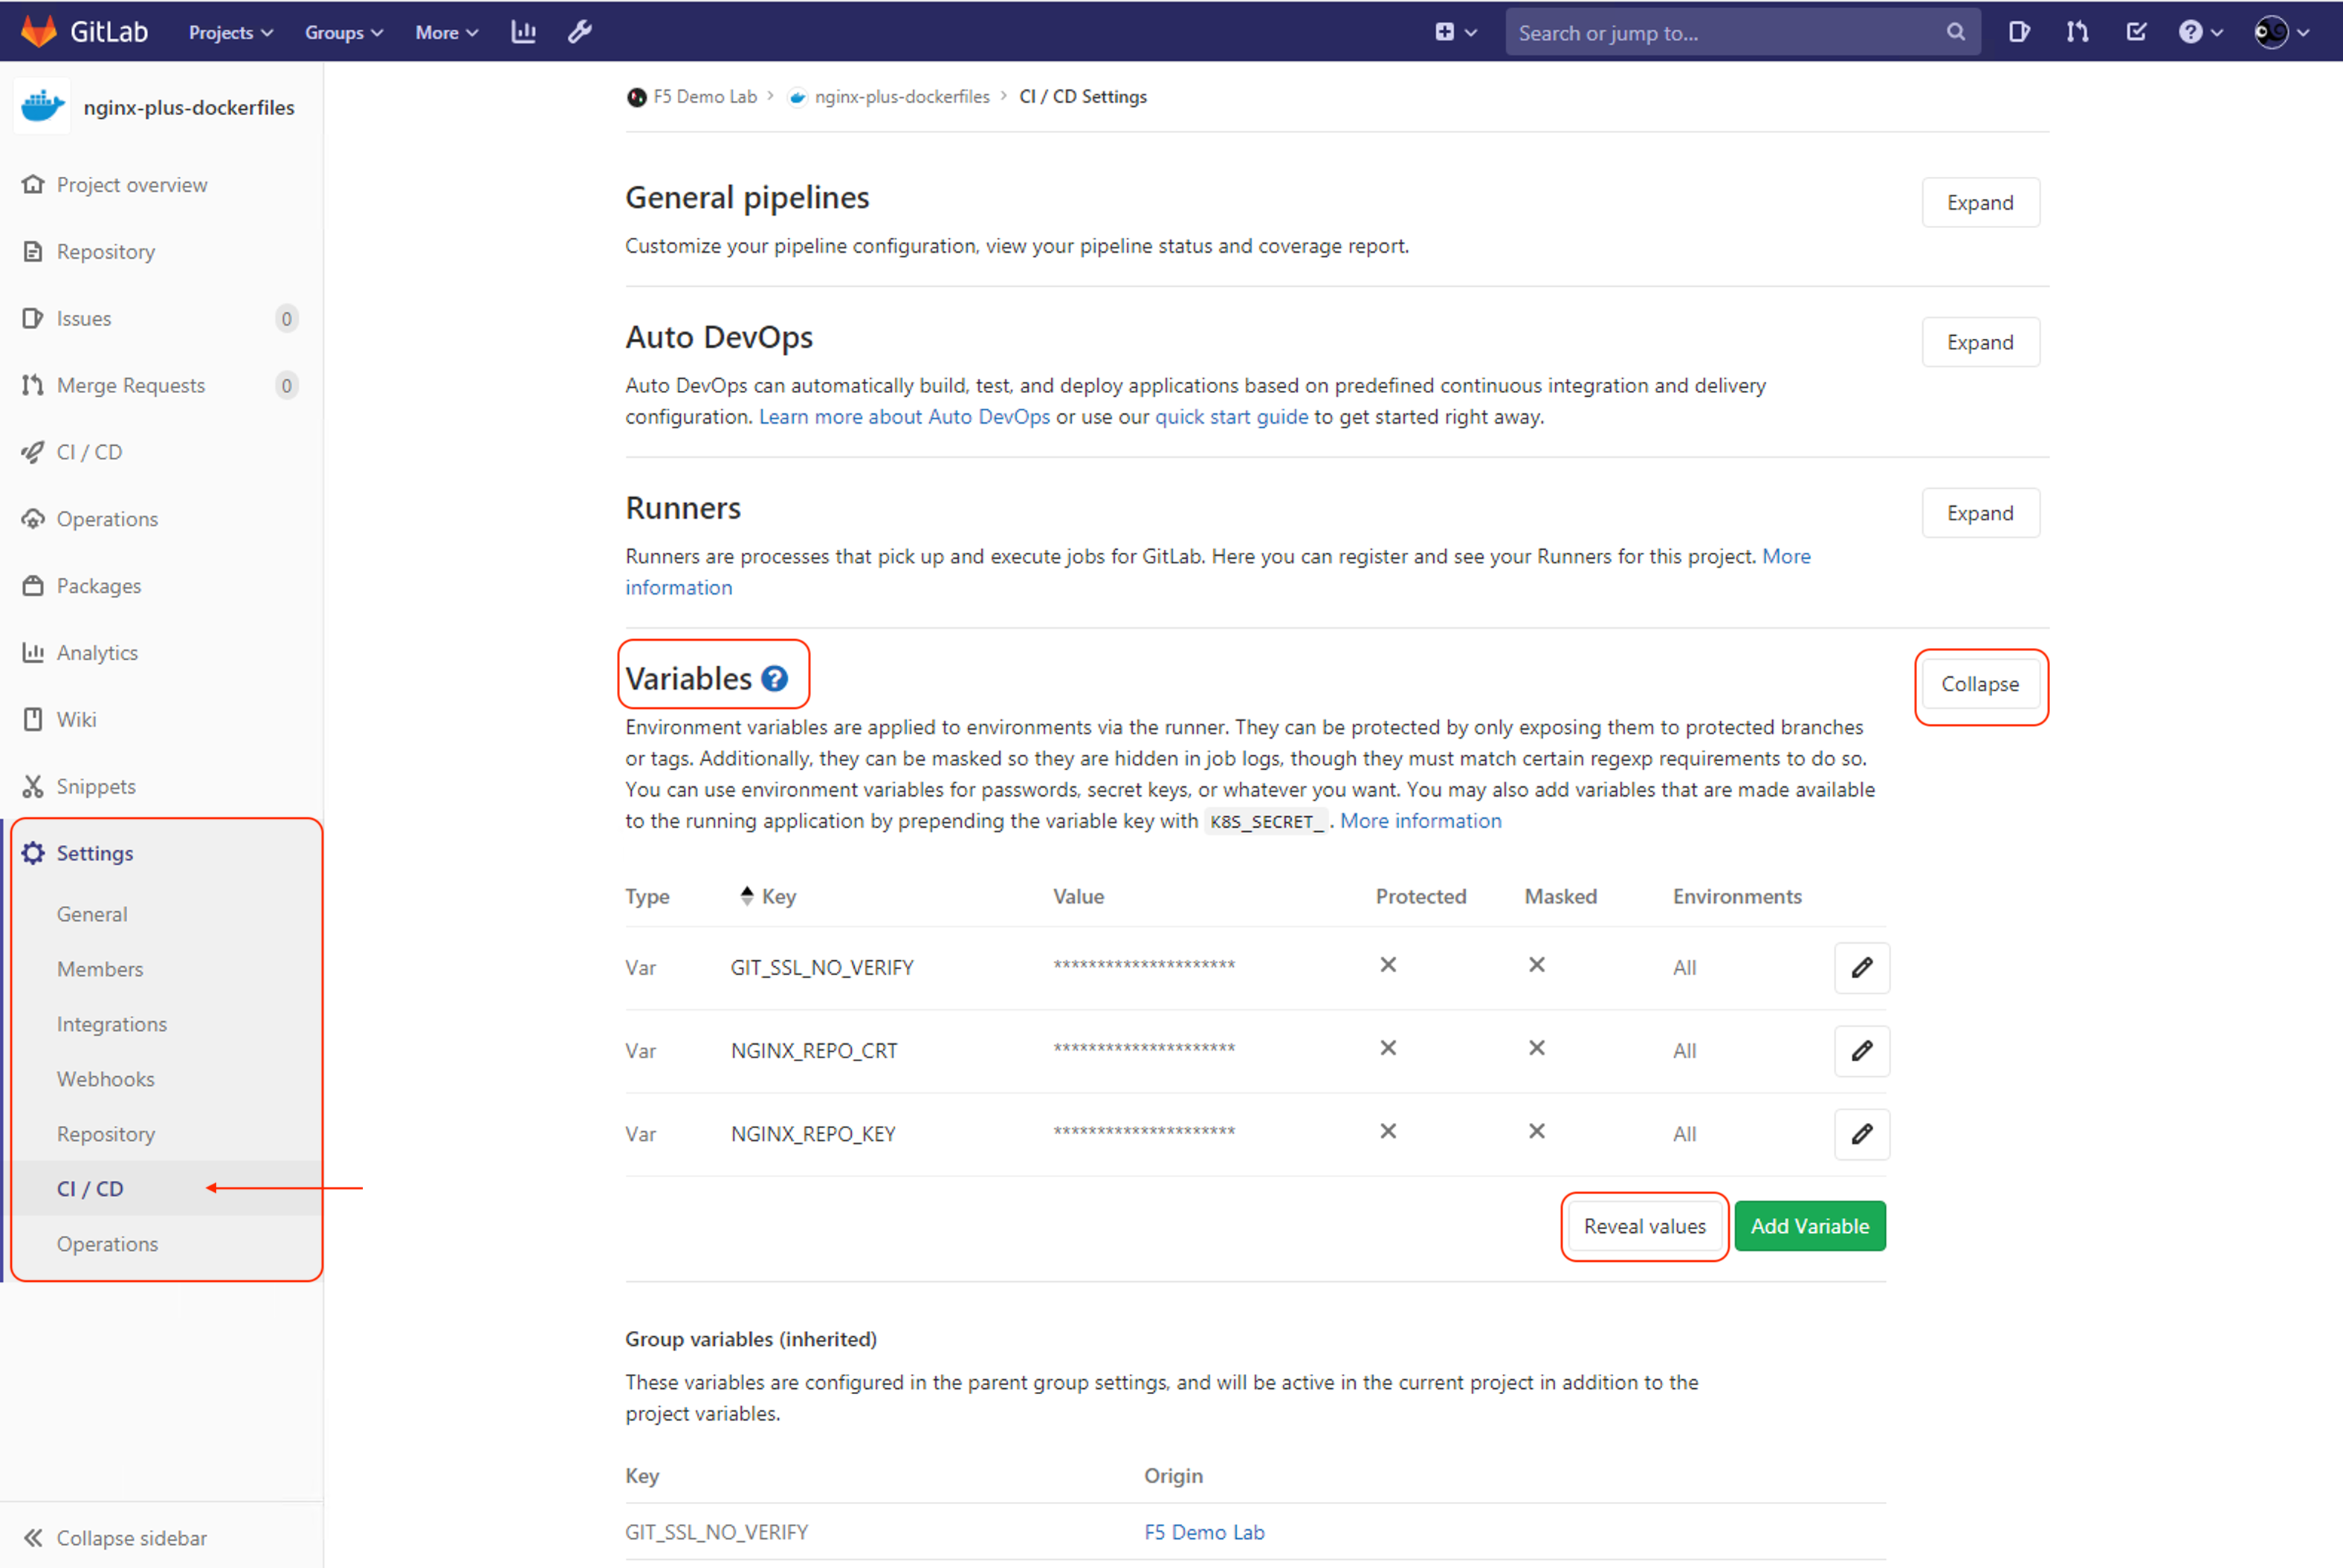
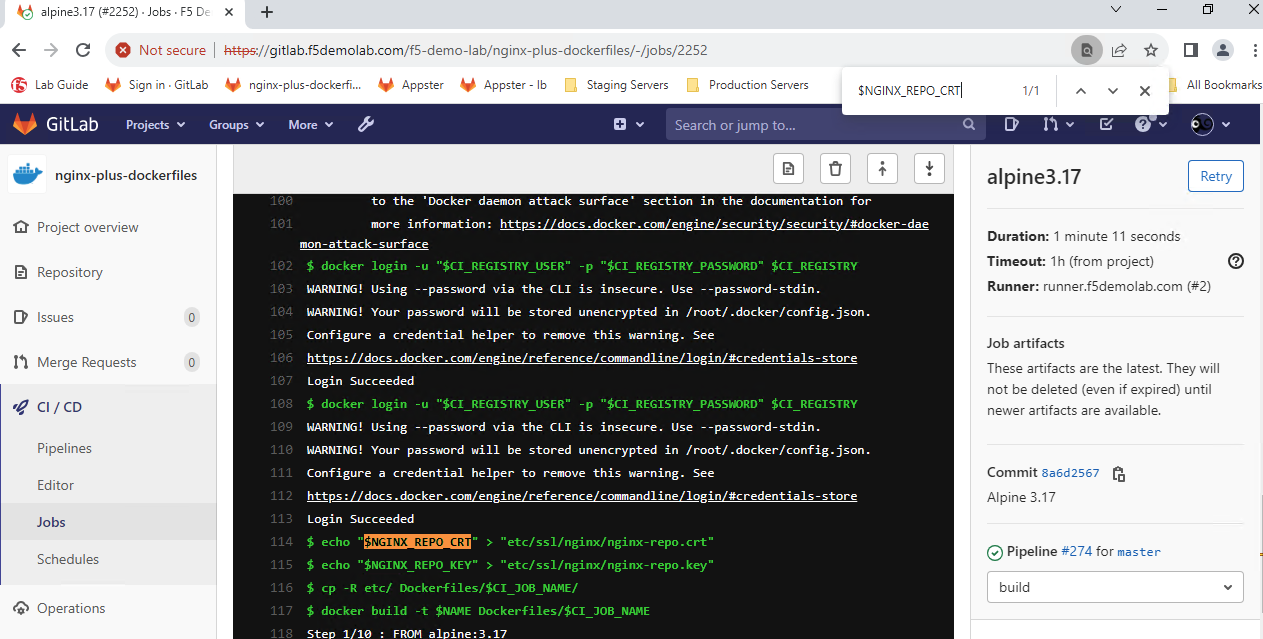
Let’s take a look at that variable in action: Open a log output of a recent successful pipeline job from the sidebar menu, go to CI/CD > Jobs and click on a status: passed icon associated with an image build stage. In the example below, we selected the Alpine 3.17 image. e.g.
alpine3.17(Stage - build)
Use the web browser’s FIND (Ctrl + F) function to find
$NGINX_REPO_CRTand you will find the following output:echo "NGINX_REPO_CRT" > "etc/ssl/nginx/nginx-repo.crt" echo "NGINX_REPO_KEY" > "etc/ssl/nginx/nginx-repo.key"

FYI and Troubleshooting only: If the CI Pipeline fails due to invalid or expired licenses, we will expect the nginx-plus-dockerfiles pipeline to fail since NGINX Plus requires valid licenses to install NGINX Plus. The errors in the pipeline job will show this error too.
ASK YOUR INSTRUCTOR for a new NGINX Plus Certificate and Key
Copy and paste your new valid PEM keys, nginx-repo.key and nginx-repo.crt, in the value fields and then press the Save variables button.