F5 BIG-IQ Centralized Management Lab > BIG-IQ All Labs > Class 1: BIG-IQ Application Management and AS3 > Module 2: BIG-IQ Application Templates & Deployment with AS3 using the API Source | Edit on
Lab 2.14: Application Creation using AS3 with shared objects through BIG-IQ (new 8.0)
Note
Estimated time to complete: 10 minutes
In this lab, we are going to show you how to create and AS3 application referencing AS3 objects in /Common/Shared using the API. You can find more details on how to use the Shared Application in AS3 on the AS3 Declaration Purpose and Function page.
We will use a declaration taken from the AS3 miscellaneous examples which will create 2 HTTP application services referencing the same WAF security policy.
Copy below example of an AS3 Declaration into the IDE (Integrated development environment) available within the lab environment, click on the Access button of the Ubuntu Lamp Server system and select Visual Studio Code.
Note
It is recommended to validate your AS3 declaration against the schema using Microsoft Visual Studio Code.
1 2 3 4 5 6 7 8 9 10 11 12 13 14 15 16 17 18 19 20 21 22 23 24 25 26 27 28 29 30 31 32 33 34 35 36 37 38 39 40 41 42 43 44 45 46 47 48 49 50 51 52 53 54 55 56 57 58 59 60 61 62 63 64 65 66 67 68 69 70 71 72 73 74 75 76 77 78 79 80 81 82 | {
"$schema": "https://raw.githubusercontent.com/F5Networks/f5-appsvcs-extension/master/schema/latest/as3-schema.json",
"class": "AS3",
"action": "deploy",
"persist": true,
"declaration": {
"class": "ADC",
"schemaVersion": "3.25.0",
"target": {
"address": "10.1.1.7"
},
"Common": {
"class": "Tenant",
"Shared": {
"class": "Application",
"template": "shared",
"wordpressWafPolicy": {
"class": "WAF_Policy",
"url": "https://raw.githubusercontent.com/f5devcentral/f5-asm-policy-templates/master/owasp_ready_template/owasp-auto-tune-v1.1.xml",
"ignoreChanges": true
},
"mobileDefenseProfile": {
"class": "DOS_Profile",
"application": {
"scrubbingDuration": 42,
"remoteTriggeredBlackHoleDuration": 10,
"mobileDefense": {
"enabled": true,
"allowAndroidPublishers": [{
"bigip": "/Common/default.crt"
}],
"allowAndroidRootedDevice": true,
"allowIosPackageNames": [
"theName"
],
"allowJailbrokenDevices": true,
"allowEmulators": true,
"clientSideChallengeMode": "challenge"
}
}
},
"constants": {
"class": "Constants",
"securityCollection": {
"policyWAF": {
"use": "/Common/Shared/wordpressWafPolicy"
},
"profileDOS": {
"use": "/Common/Shared/mobileDefenseProfile"
}
}
}
}
},
"Tenant1": {
"class": "Tenant",
"Application1": {
"class": "Application",
"vipOne": {
"class": "Service_HTTP",
"virtualPort": 8080,
"virtualAddresses": [
"192.0.2.1"
],
"include": [
"/Common/Shared/constants/securityCollection"
]
},
"vipTwo": {
"class": "Service_HTTP",
"virtualPort": 8080,
"virtualAddresses": [
"192.0.2.2"
],
"include": [
"/Common/Shared/constants/securityCollection"
]
}
}
}
}
}
|
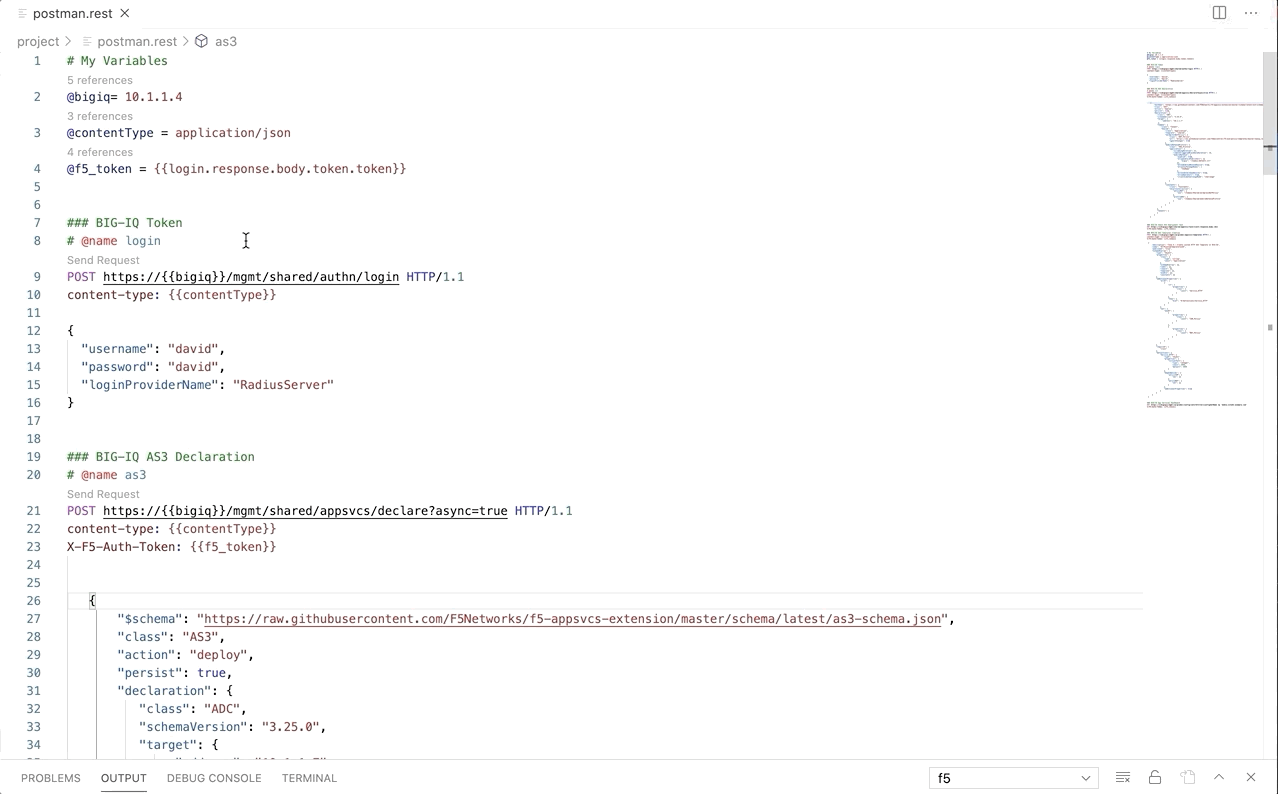
- Now that the AS3 declaration is validated, use the Visual Studio code REST client extension and authenticate to BIG-IQ (follow instructions).
Note
Instead of using the Visual Studio Code REST client extension, you can also use F5 vscode extension. See Module 2 Lab 9 to see how to.
Use the BIG-IQ AS3 Declaration call in order to create the service on the BIG-IP through BIG-IQ. The method and URL used will be
POST https://10.1.1.4/mgmt/shared/appsvcs/declare?async=true. Copy/Paste the AS3 declaration to the body under the call using the REST client VS code extension.This will give you an ID which you can query using the BIG-IQ Check AS3 Deployment Task.
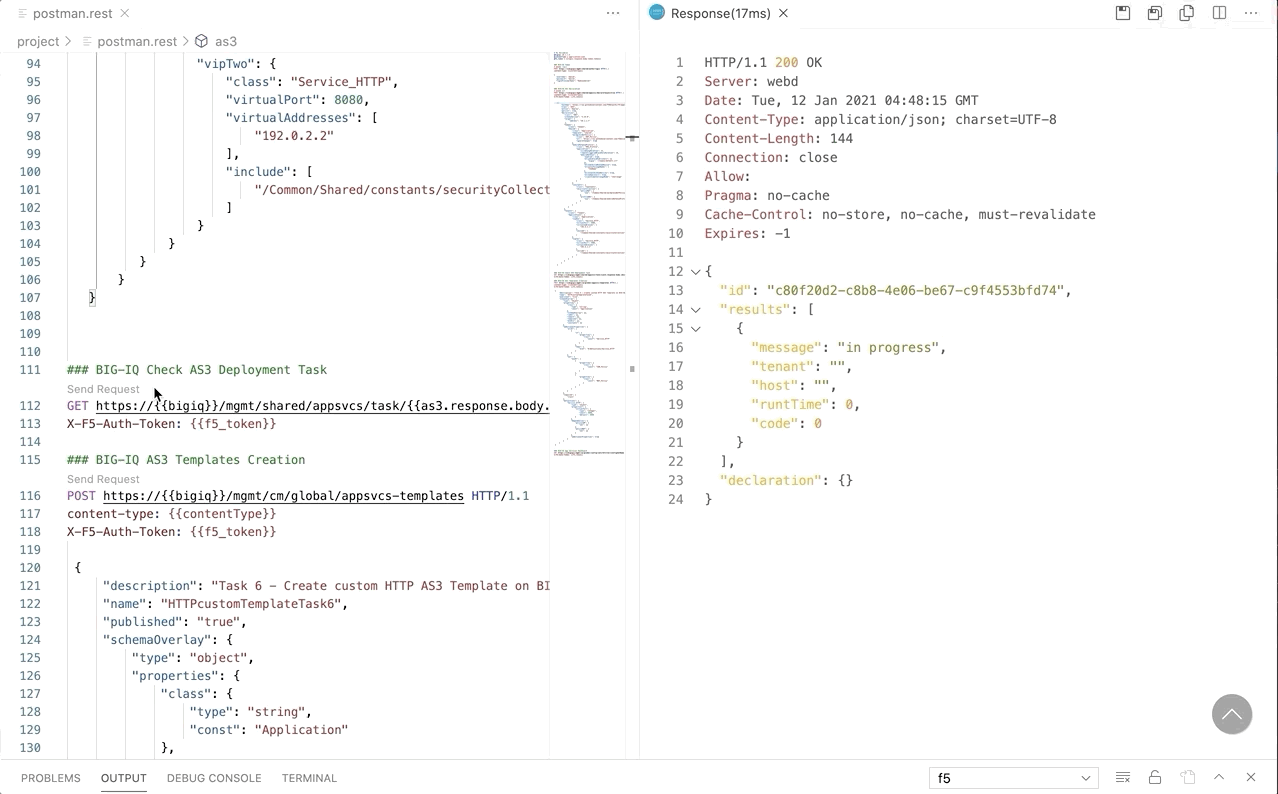
Use the BIG-IQ Check AS3 Deployment Task call to ensure that the AS3 deployment is successful without errors:
GET https://10.1.1.4/mgmt/shared/appsvcs/task/<id>
Note
Notice that the app deployment may take a few minutes.
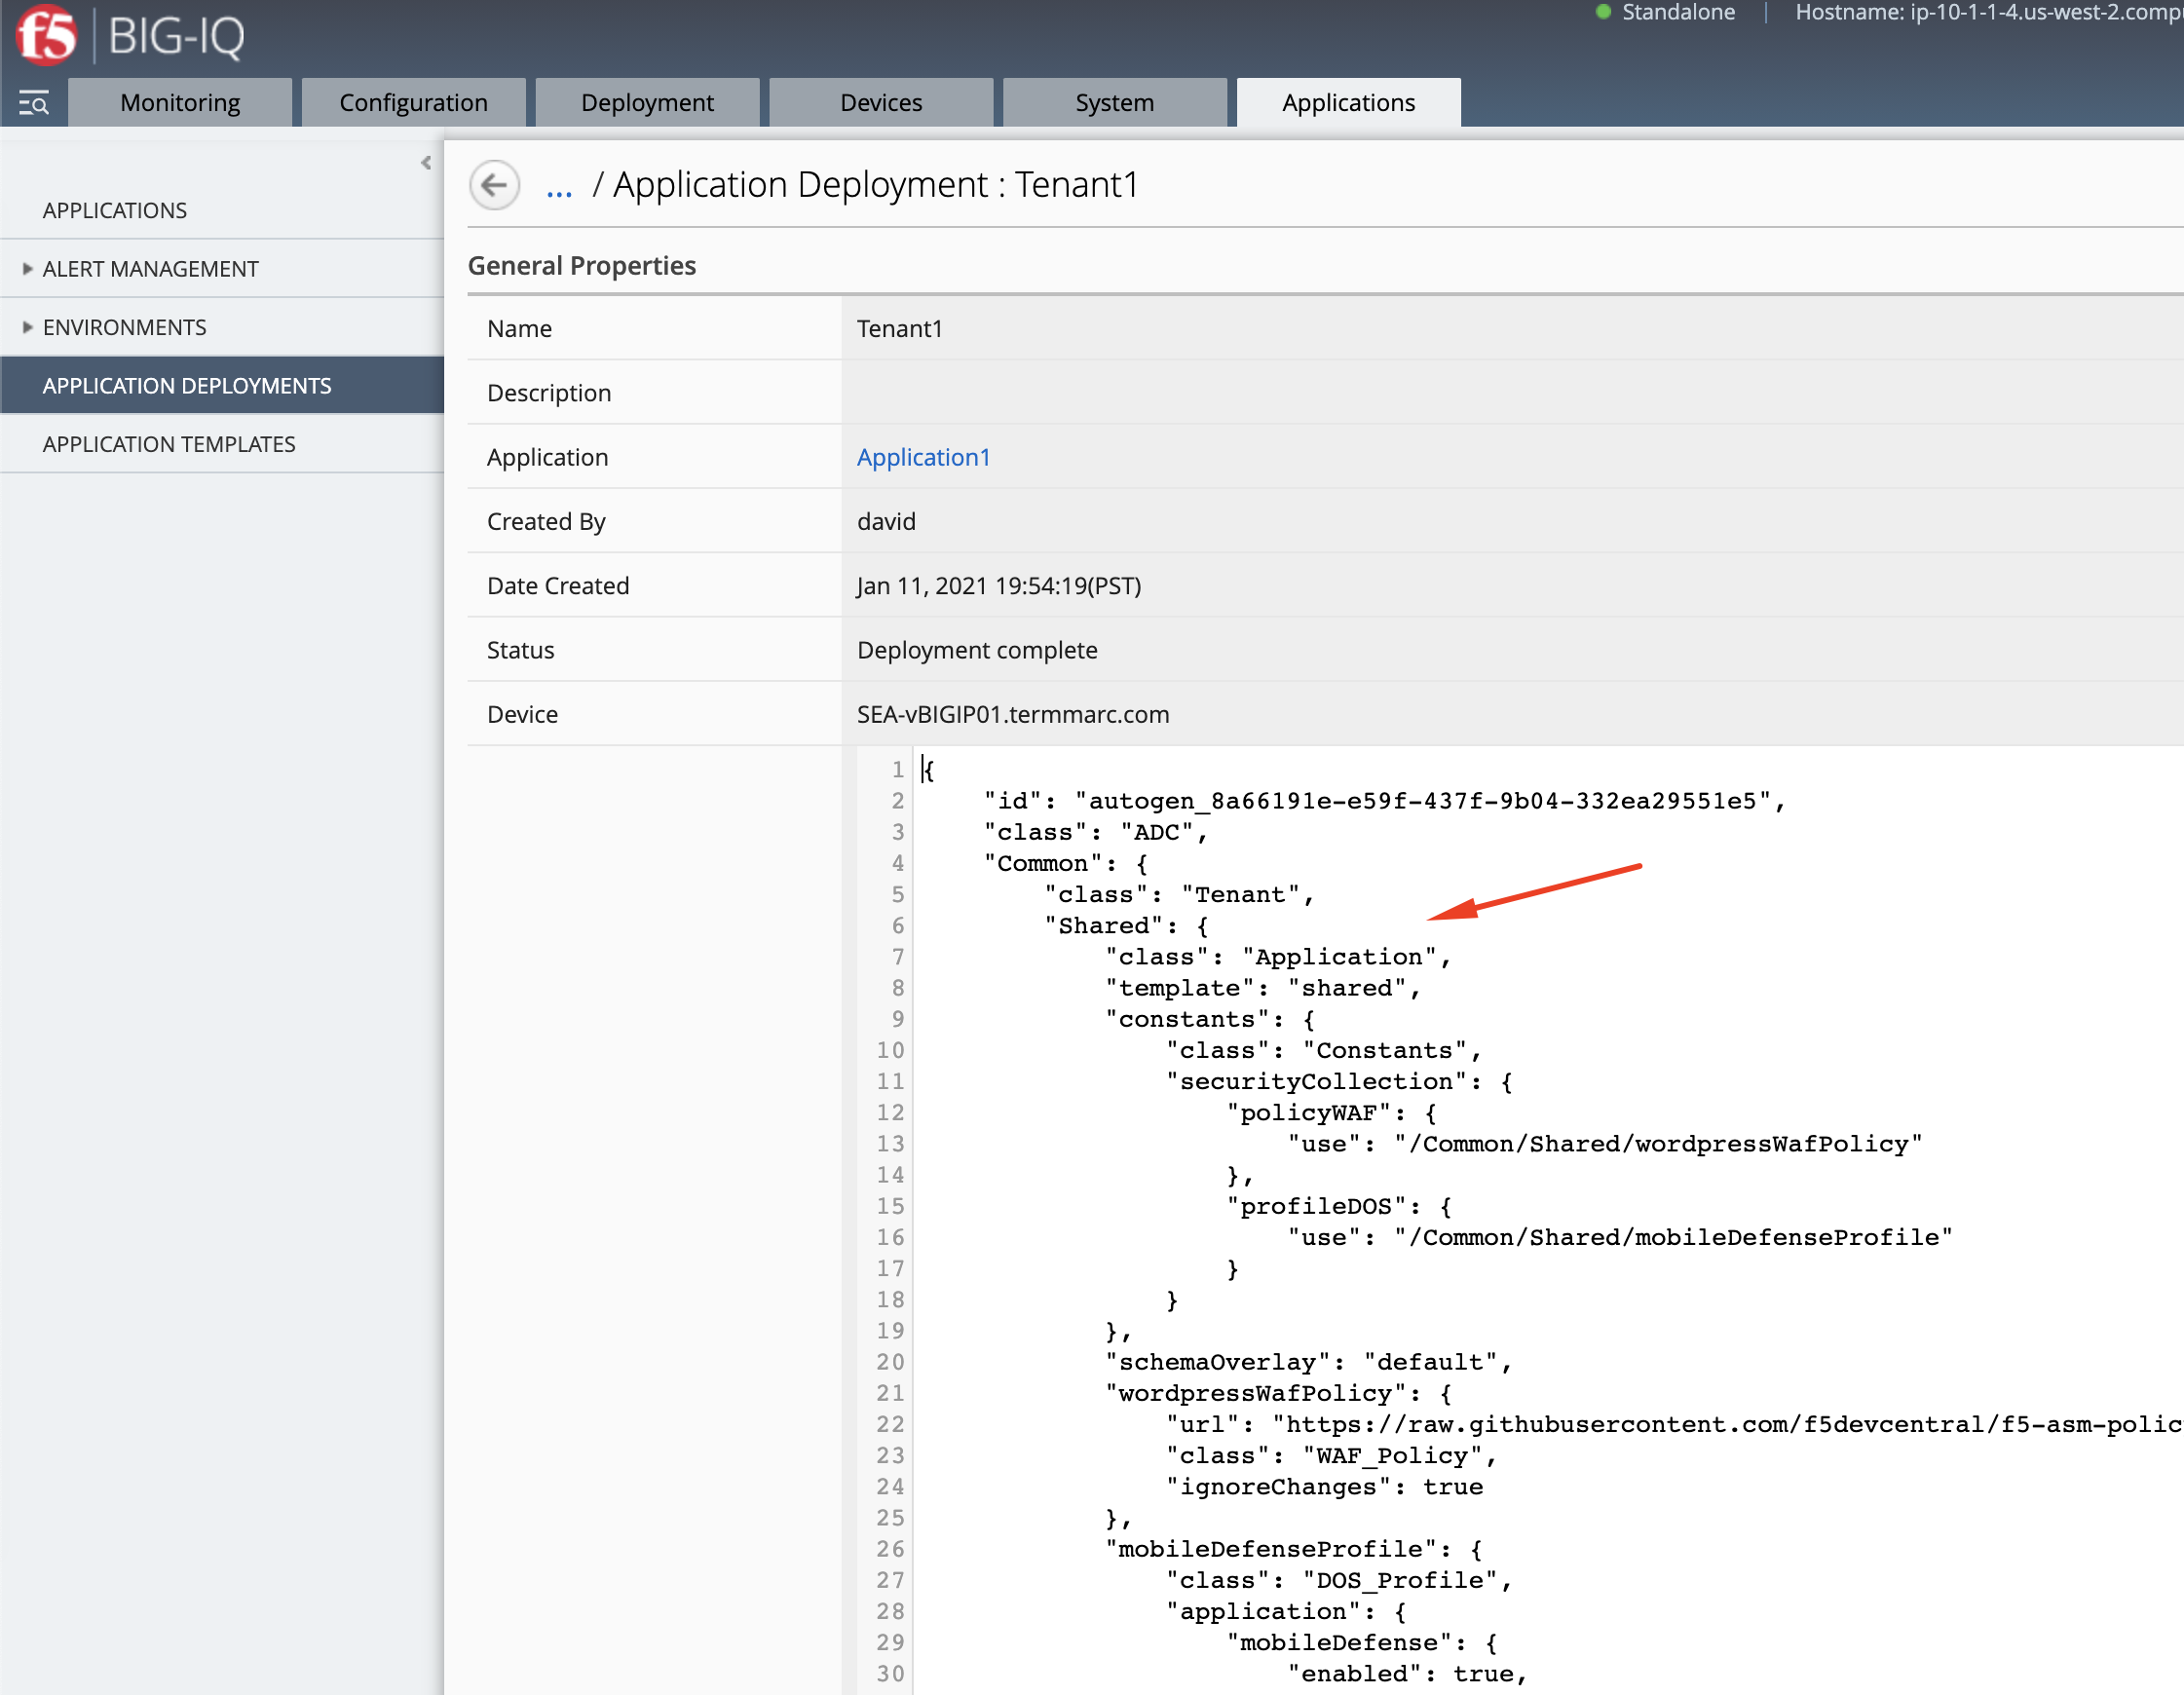
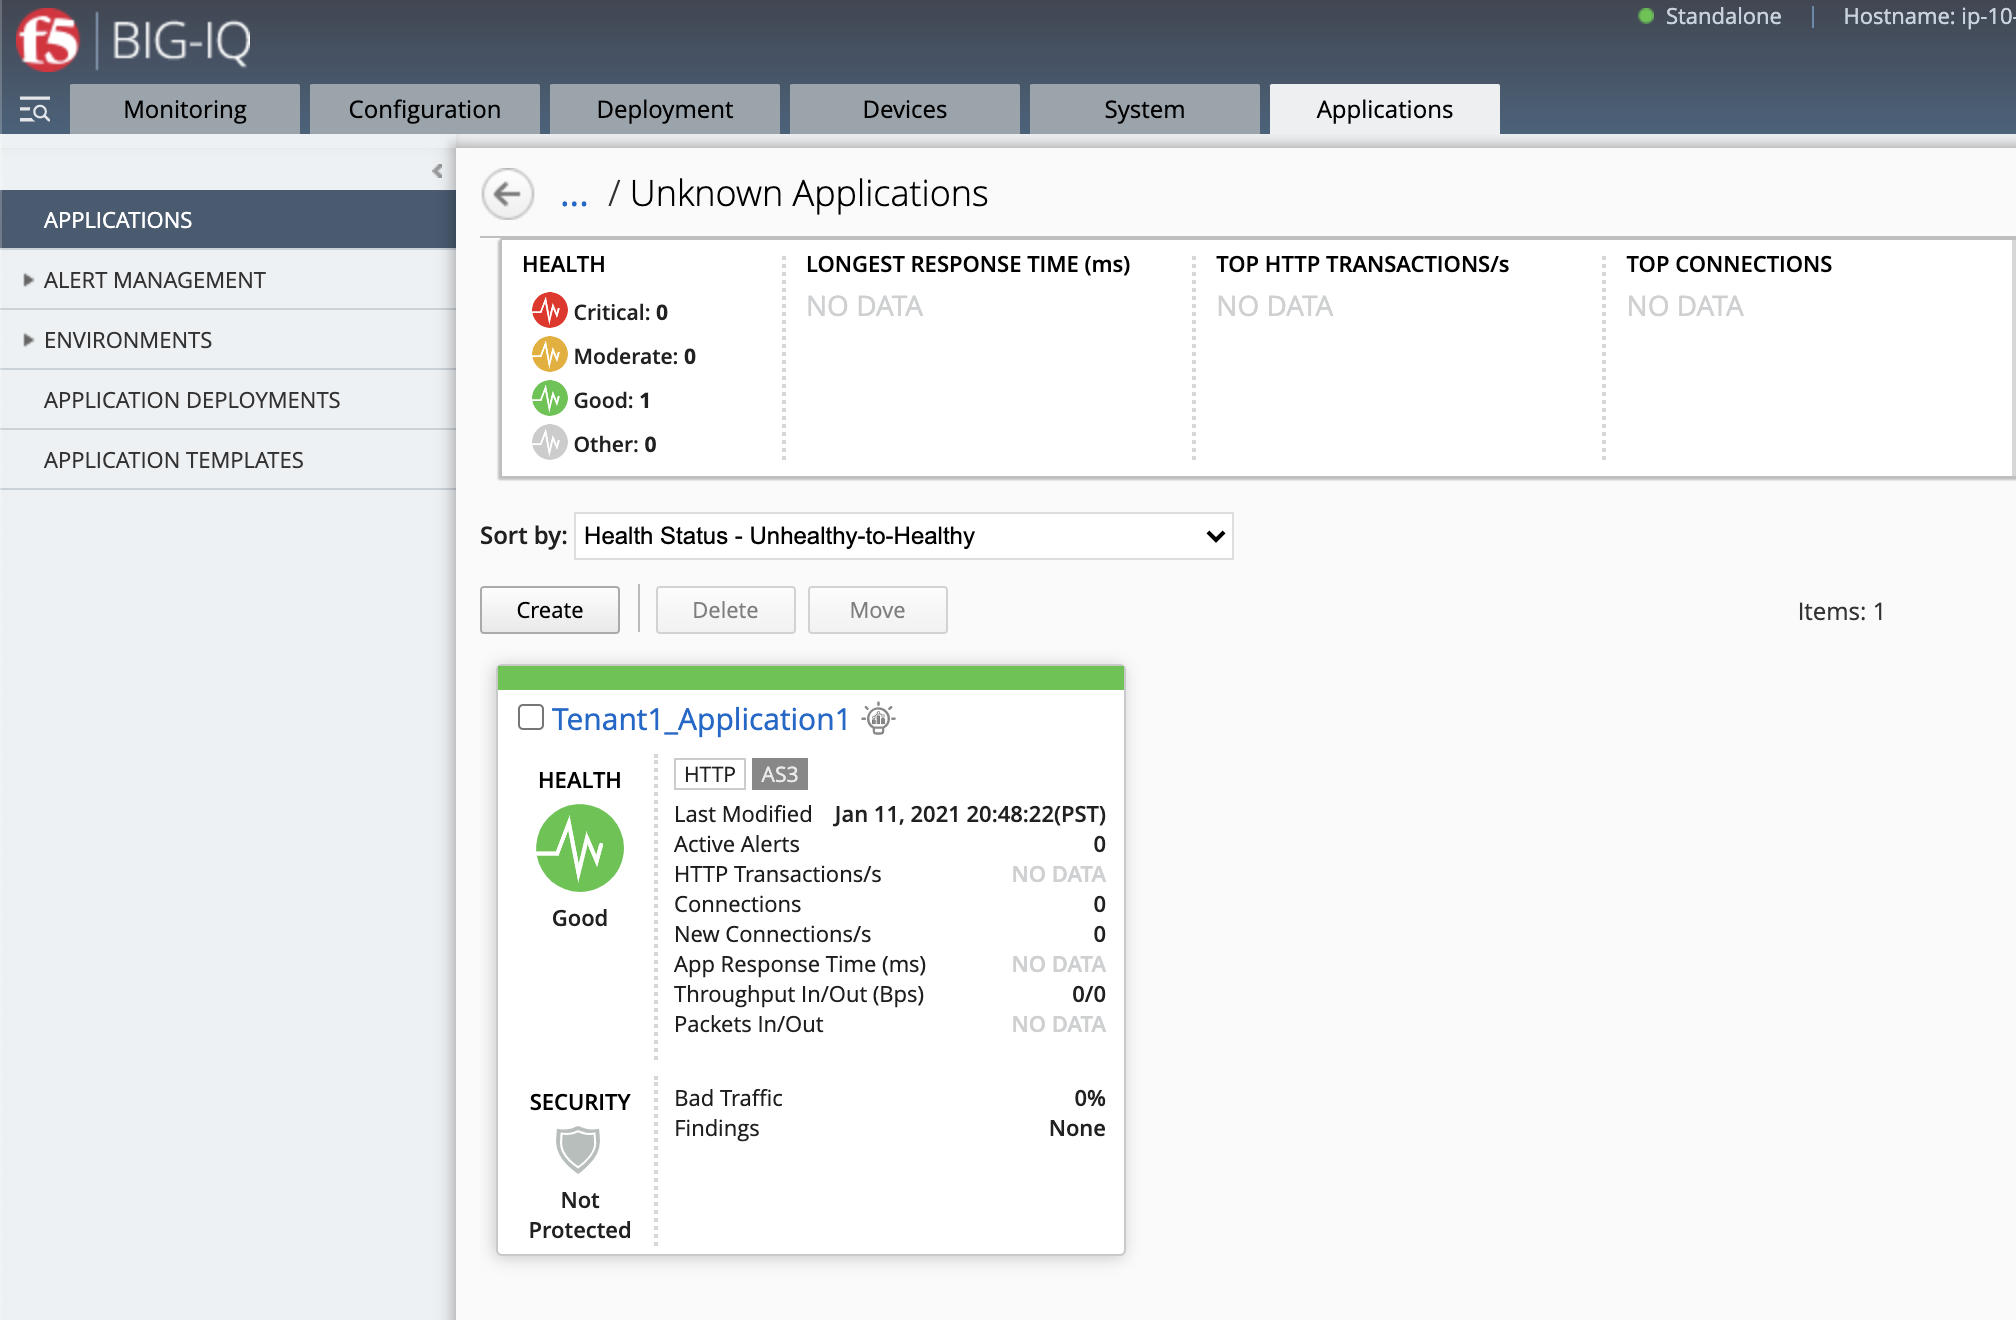
- Login on BIG-IQ as david, go to Applications tab and check the application is displayed. Note that because the WAF policy is shared between the 2 app services, the protection mode isn’t reflected on the BIG-IQ dashboard.
Warning
Starting 7.0, BIG-IQ displays AS3 application services created using the AS3 Declare API as Unknown Applications. You can move those application services using the GUI, the Move/Merge API, bigiq_move_app_dashboard F5 Ansible Galaxy role or create it directly into Application in BIG-IQ using the Deploy API to define the BIG-IQ Application name.
- Click on your Application Service called Tenant1_Application1, then View Sample API Request, look at the AS3 declaration.

- Finally, navigate under Applications > Application Deployments where David can look at the full definition of the app service including the objects in /Common/Shared.