F5 Distributed Cloud > F5 Distributed Cloud: Web Application Security & Scanning Source | Edit on
Lab 3: Malicious Users
Objective:
Leverage User Identification Policies to isolate individual users
Utilize F5 Distributed Cloud’s native AI technologies to block malicious users
Narrative:
A recent security request came into your queue where multiple WAF violations and 403 http reqsponse codes were originating from the same public IP address. ACME’s security incedent response team has asked you to block all requests coming from that public IP address as they are concerned about potential attackers successfully accessing the application and then trying to move laterally to access sensitive portions of the application without authorization. Before blocking the public IP, a conversation with the application team uncovered that the public IP address maps the headquarters of a ACME’s largest sand supplier. Since not all of the requests coming from that public IP address are attacks, your goal is to leverage F5 Distributed Cloud to identify only the specific attackers and stop their probing activities but still maintain a low-friction experience for the rest of the valid users.
Expected Lab Time: 15 minutes
Task 1: Creating a User Identification Policy
In this task you will build a user identification policy which will be the basis of identifying clients/users for machine learning driven analysis for malicious user mitigation and actions.
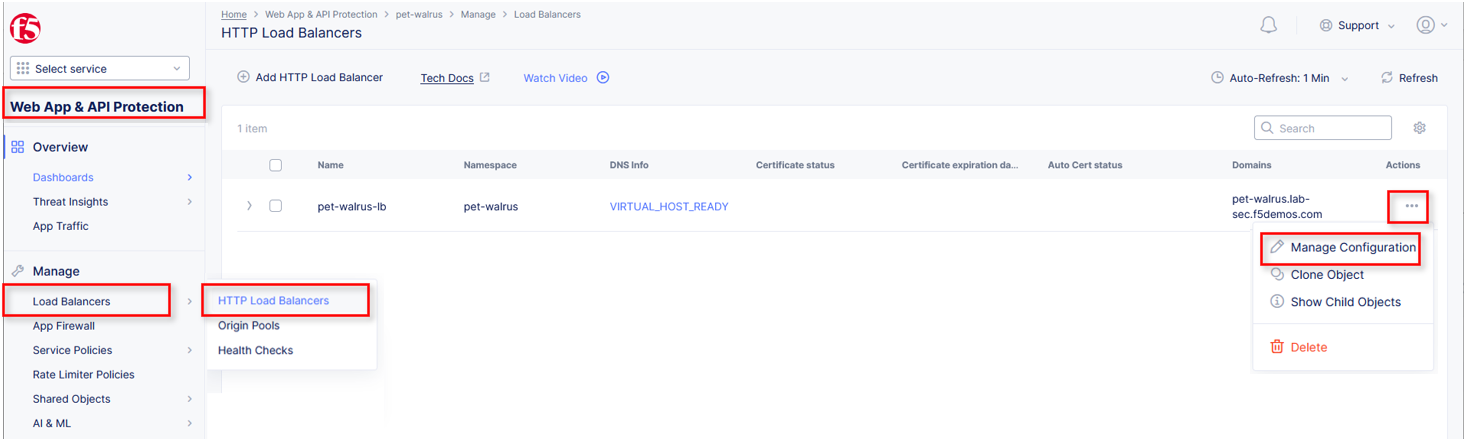
Within Web App & API Protection in the F5 Distributed Cloud Console, Manage > Load Balancer > HTTP Load Balancers and use the Action Dots and click Manage Configuration.
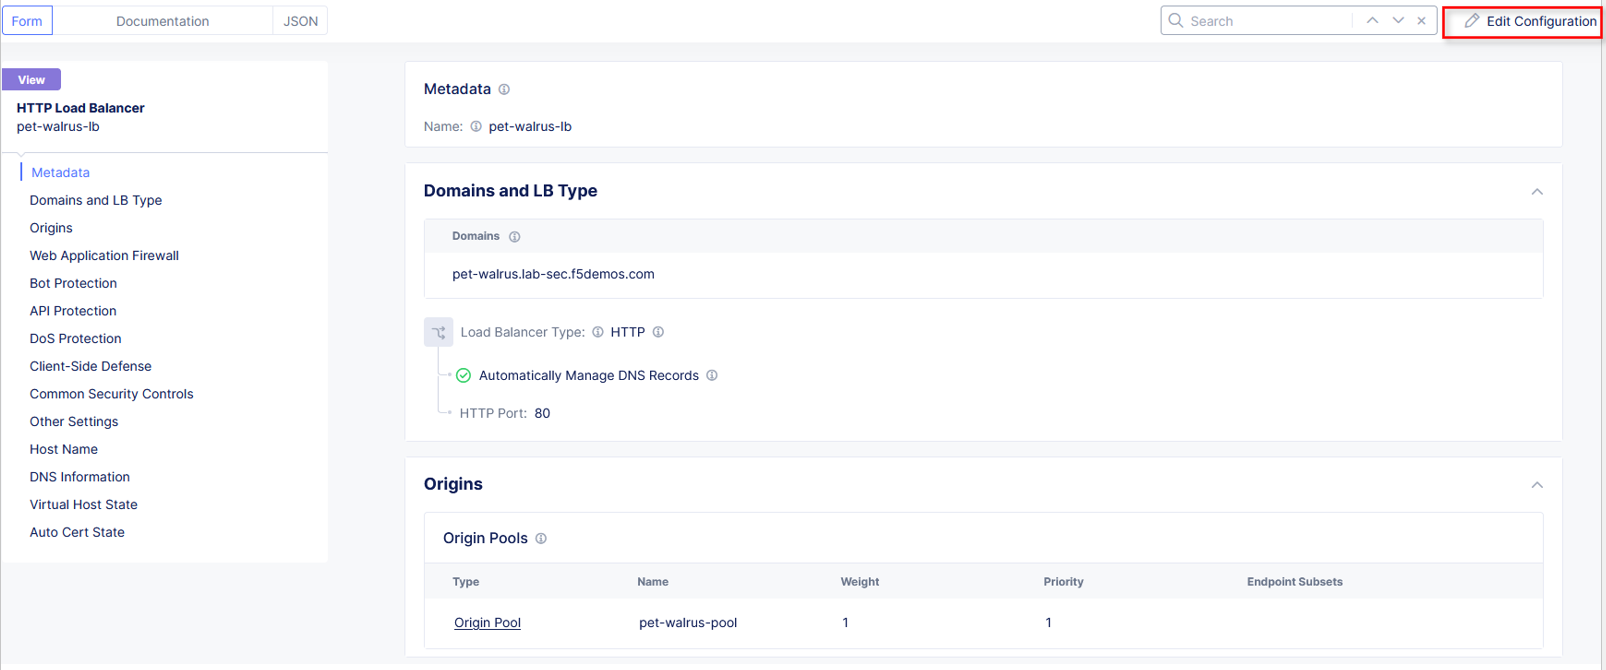
Click Edit Configuration in the top right-hand corner.
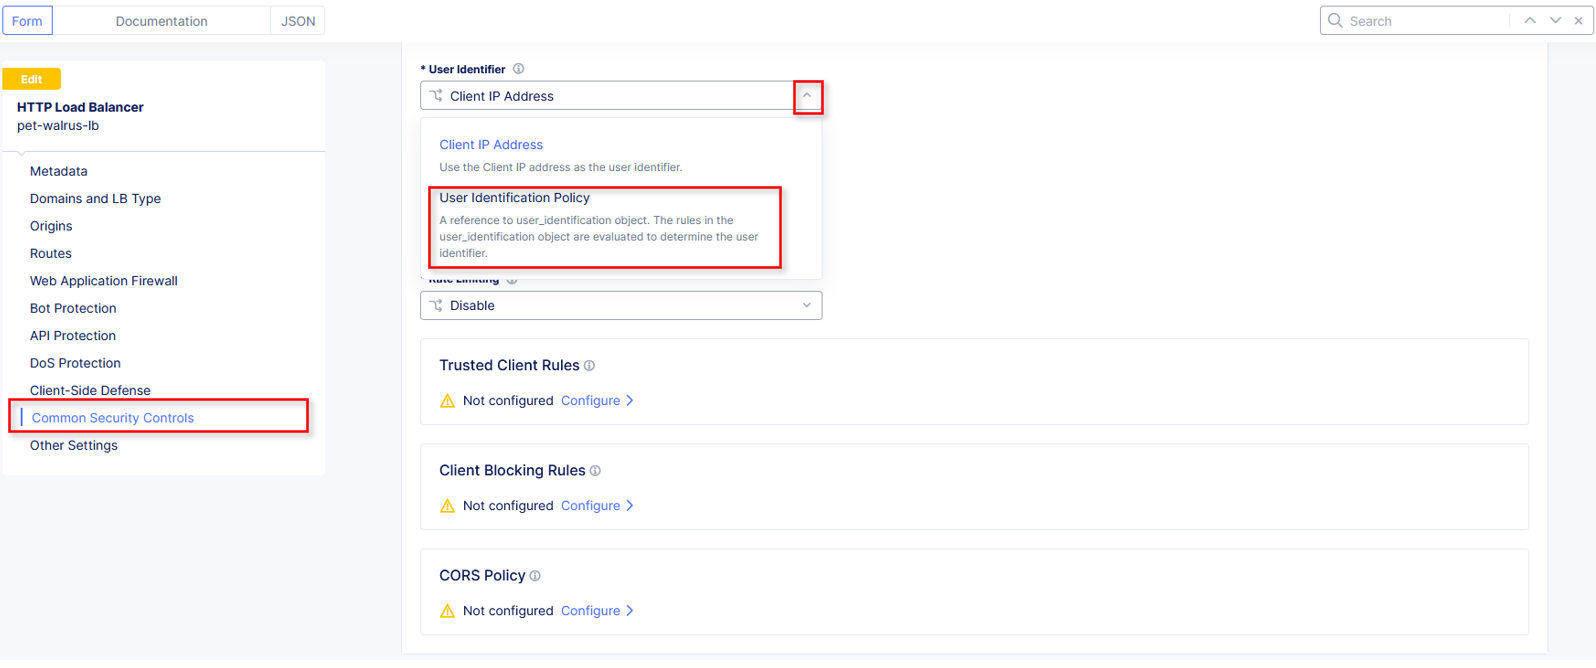
Click Common Security Controls in the left-hand navigation and locate User Identification.
Click the drop-down under User Identifier and select User Identification Policy from the list.
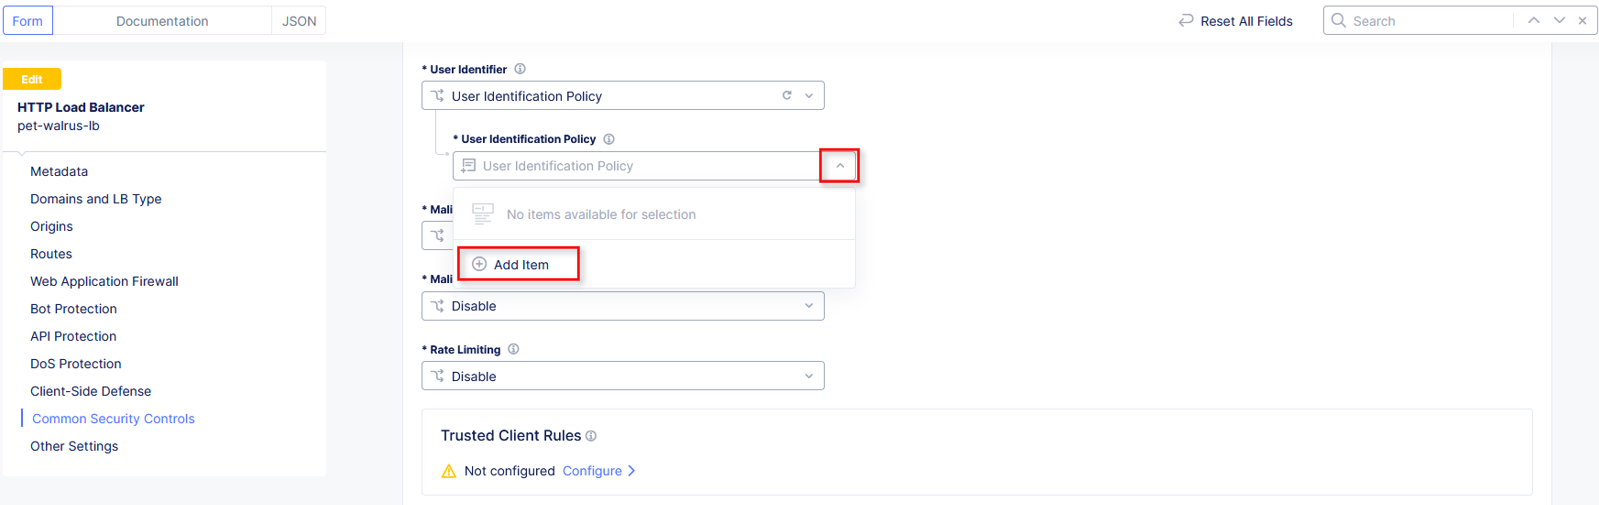
Click the dropdown for User Identification Policy and select Add Item.
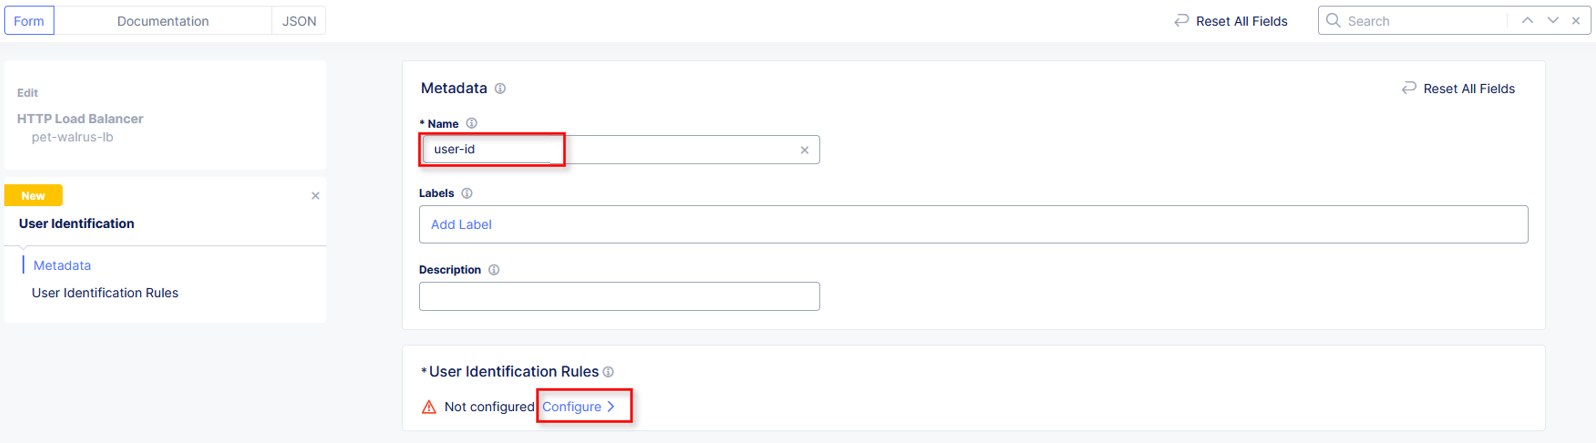
In the User Identification window, in the Metadata section enter user-id for the Name and then click configure under User Identification Rules.
In the resulting window for User Identification Rules, click Add Item.

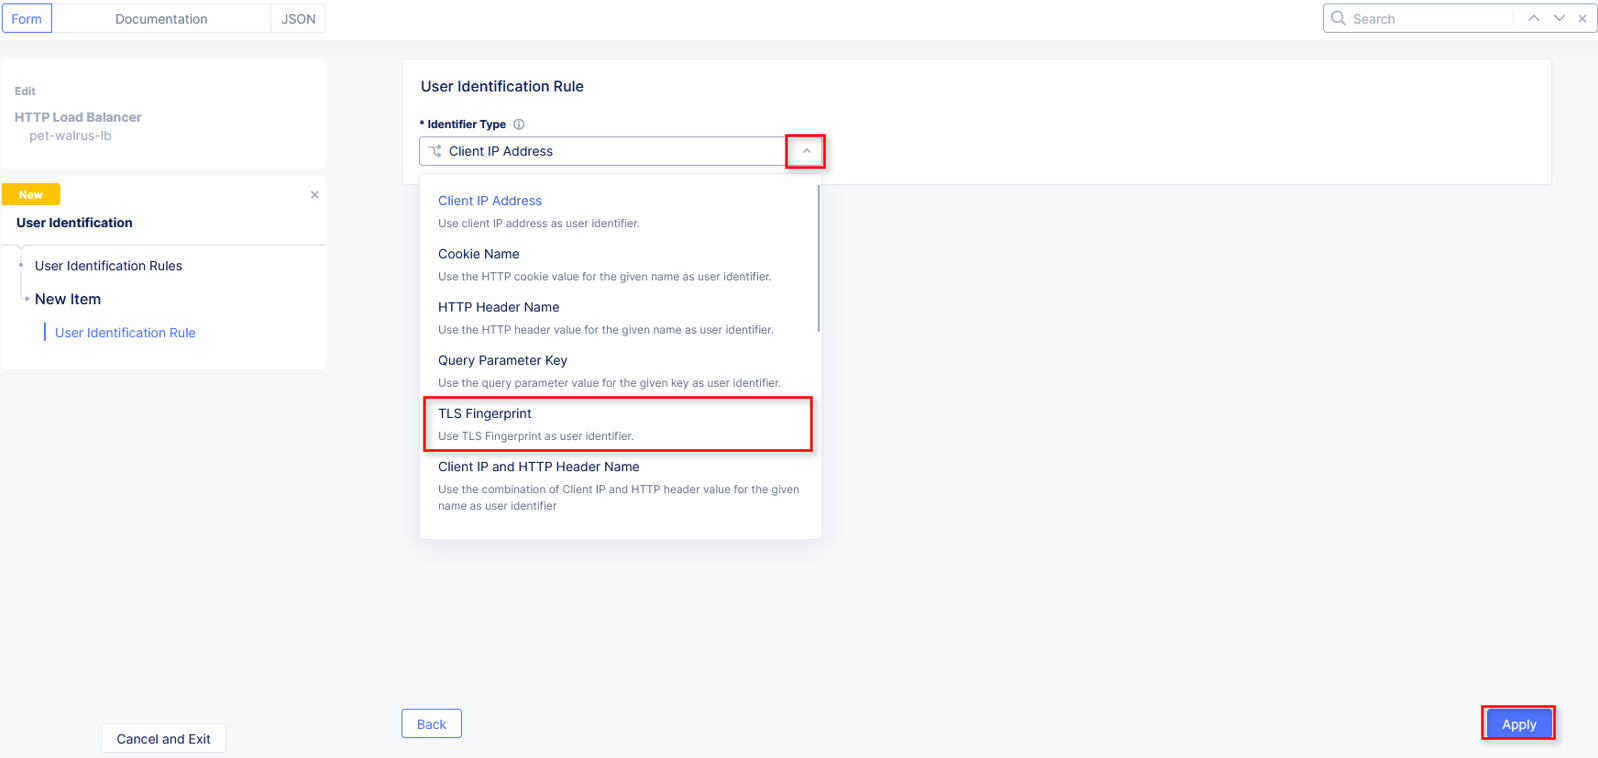
In the User Identification Rule window click the drop-down for Identifier Type.
Select JA4 TLS Fingerprint and click Apply.
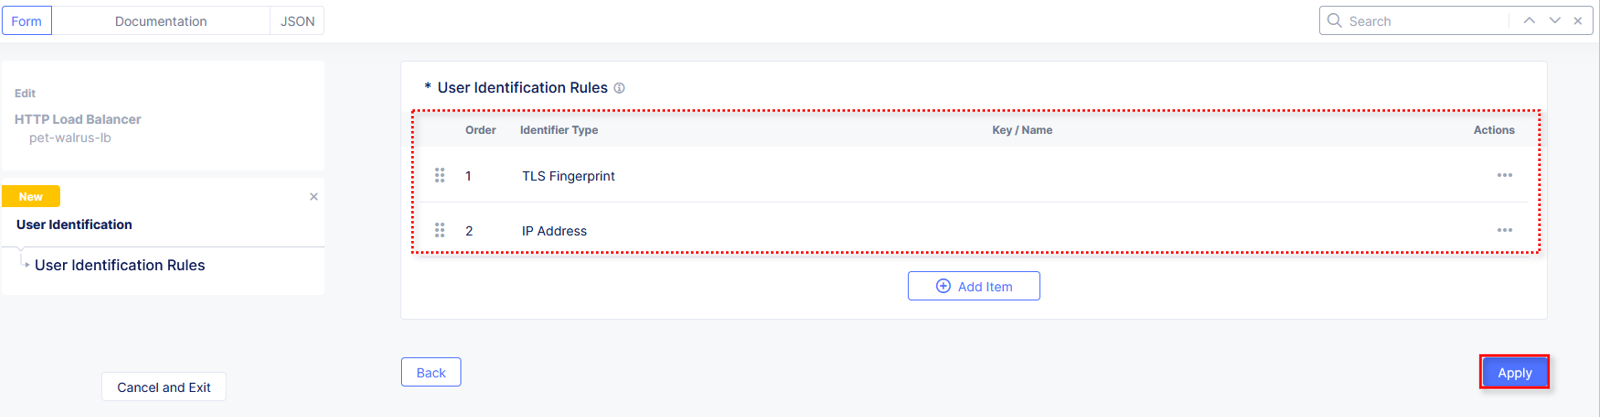
Returning to the window for User Identification Rules, observe the prior selection and click Add Item.

In the User Identification Rule window click the drop-down for Identifier Type. Select Client IP Address and click Apply. (It should be already selected)

Review the two User Identification Rules and click Apply.
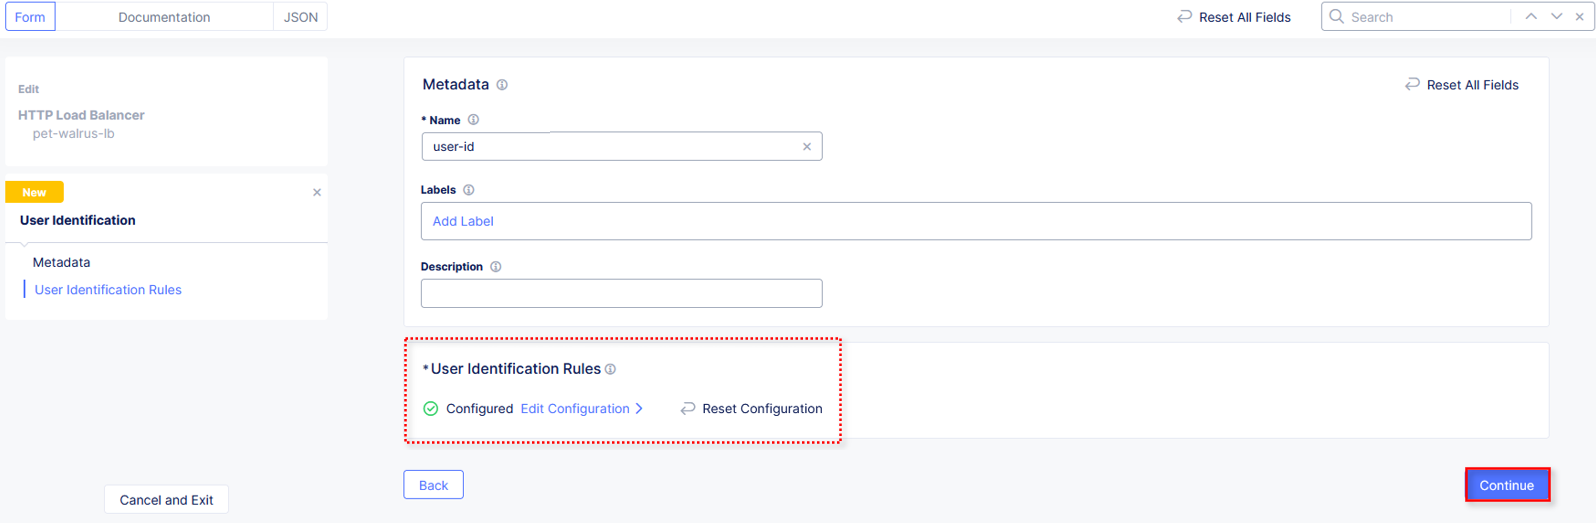
Returning to the User Identification window, note that User Identification Rules are now Configured and click Continue.
Narrative Check
With User Identification Rules, F5 Distributed Cloud can pull in multiple data points as unique indicators to identify an individual user. In addition to the IP address and TLS fingerprint of the browser, Cookies and HTTP Headers can also be leveraged to specifically build policies around the individual users. Now that the users are more specifically identified, let’s move on to how to block malicious users.
Task 2: Enable Malicious User Detection and Mitigation Actions
In this task you will leverage the user identification policy just built and then enable malicious user detection and create a malicious user mitigation and challenge.
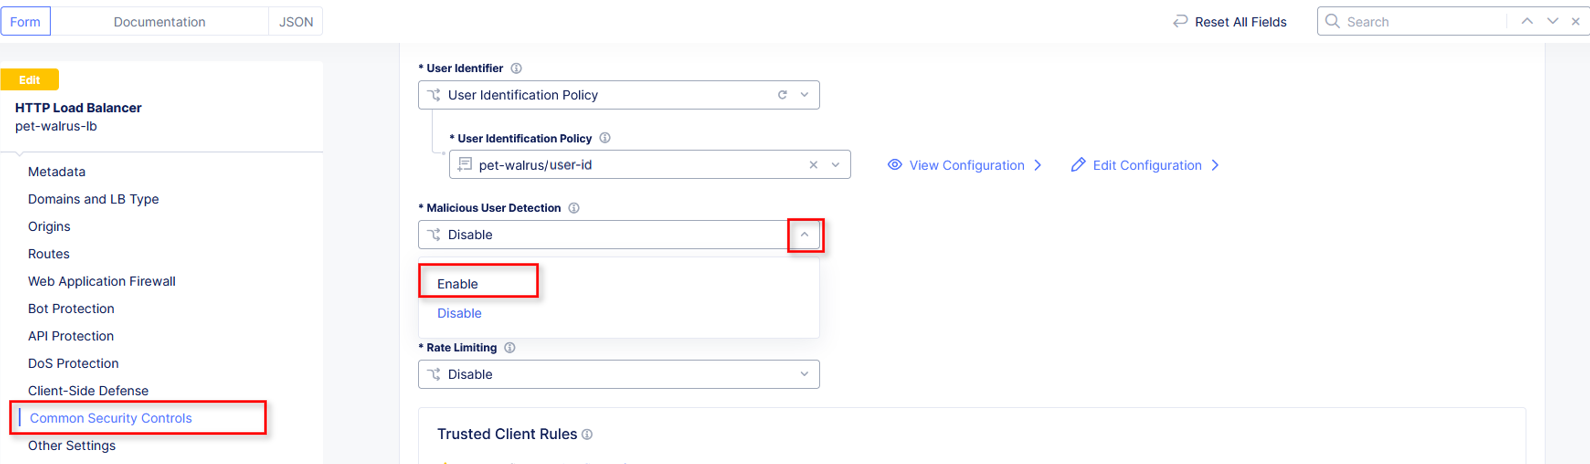
Click Common Security Controls in the left-hand navigation.
Click the dropdown for Malicious User Detection and select Enable.
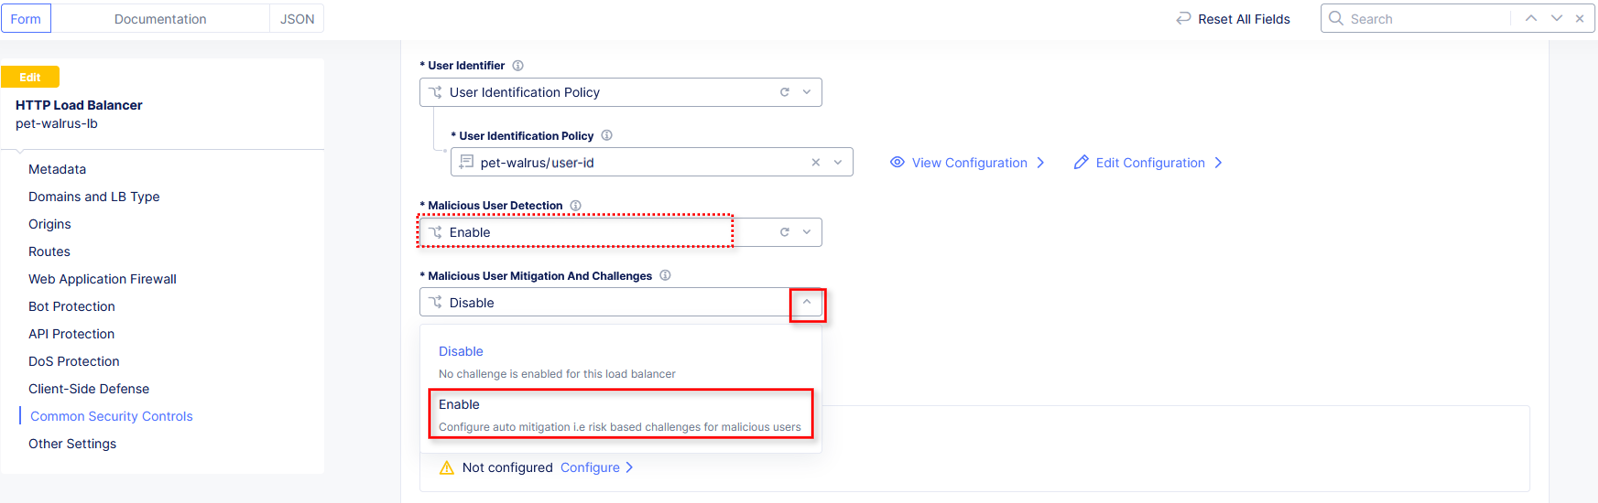
Click the dropdown for Malicious User Mitigation And Challenges and select Enable.
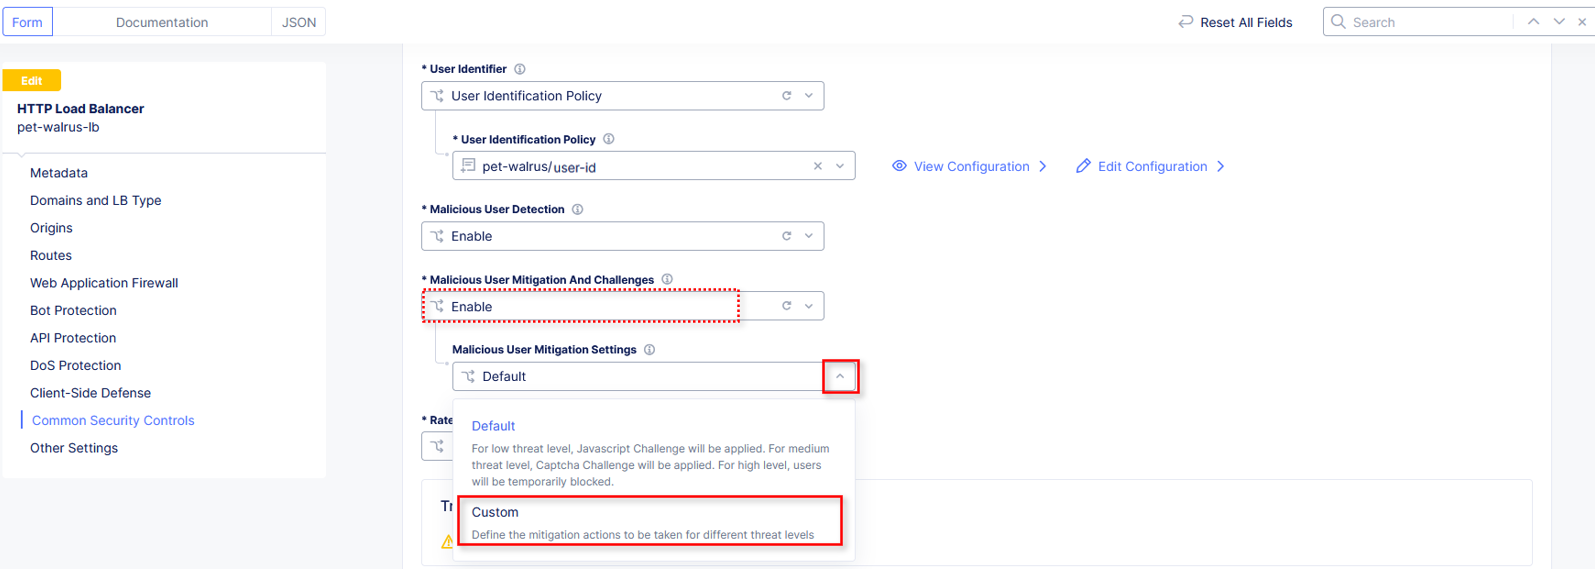
Click the dropdown for Malicious User Mitigation Settings and select Custom.
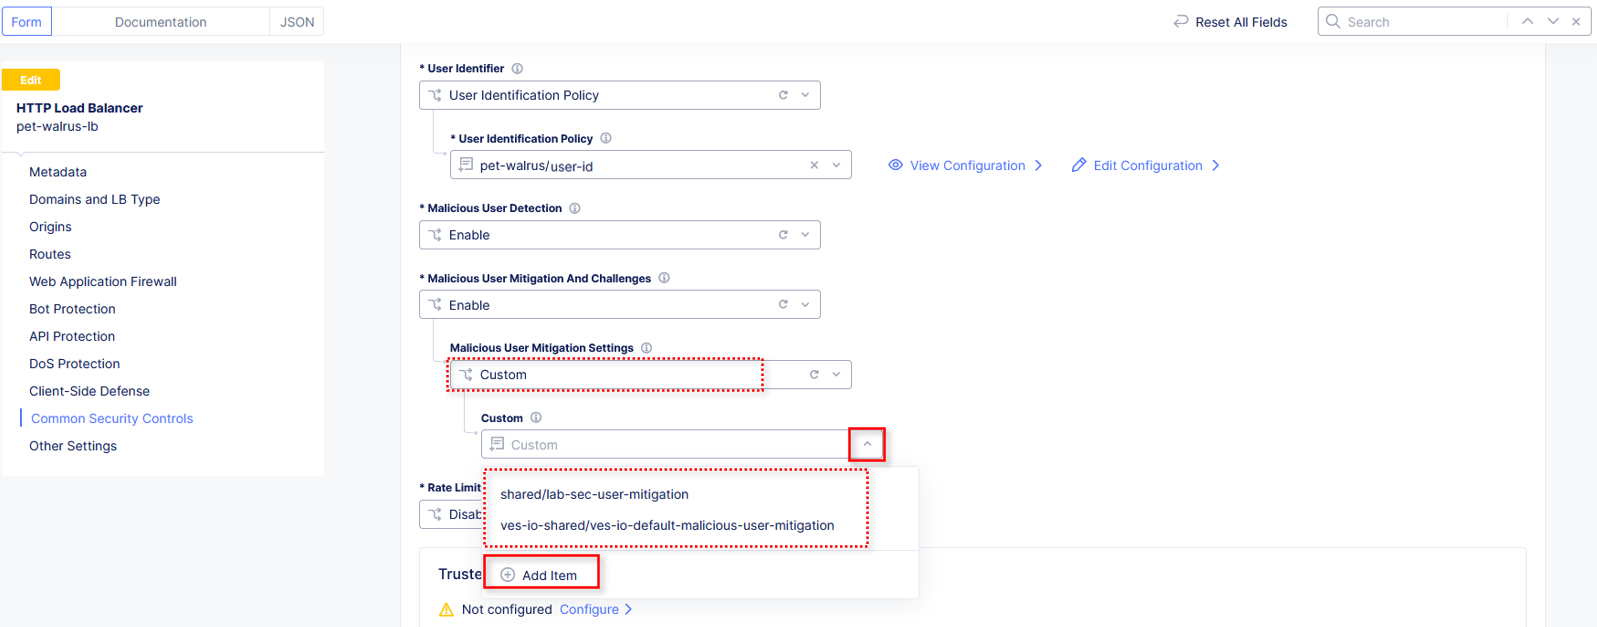
Click the dropdown for Custom. Observe the existing other shared policies.
shared/lab-sec-user-mitigation
ves-io-shared/ves-io-default-malicious-user-mitigation
Note
Using shared namespace Malicious User Mitigation provides the ability to use API-updated mitigation controls to implement common service security across multiple resources.
Select Add Item.
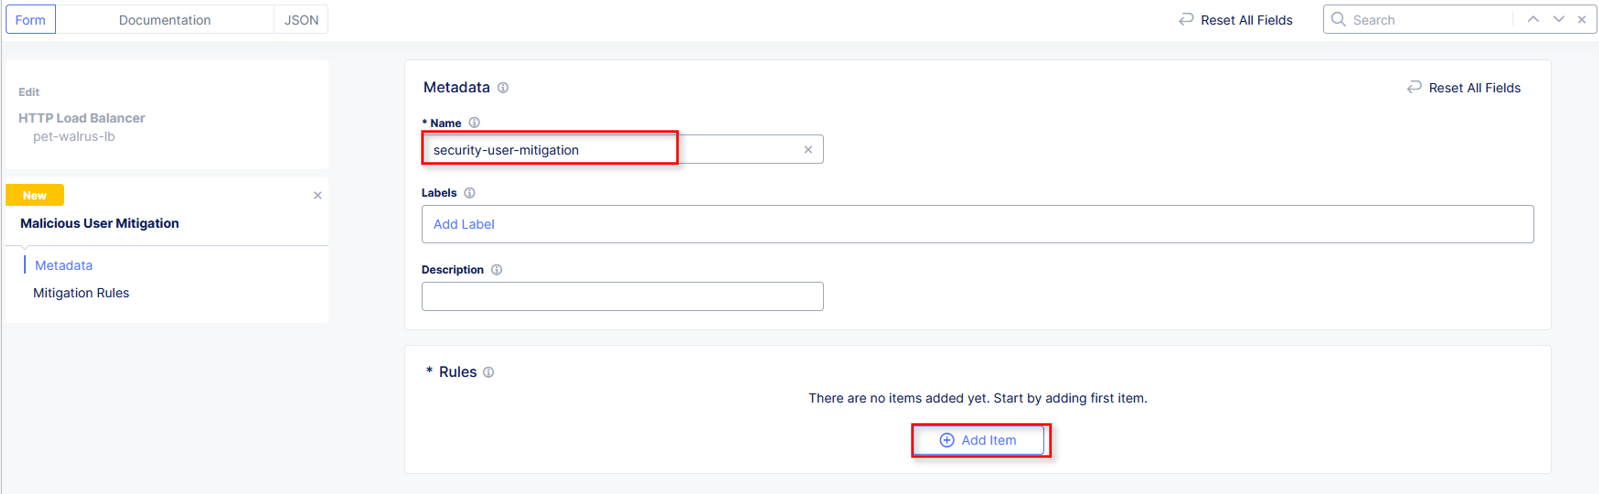
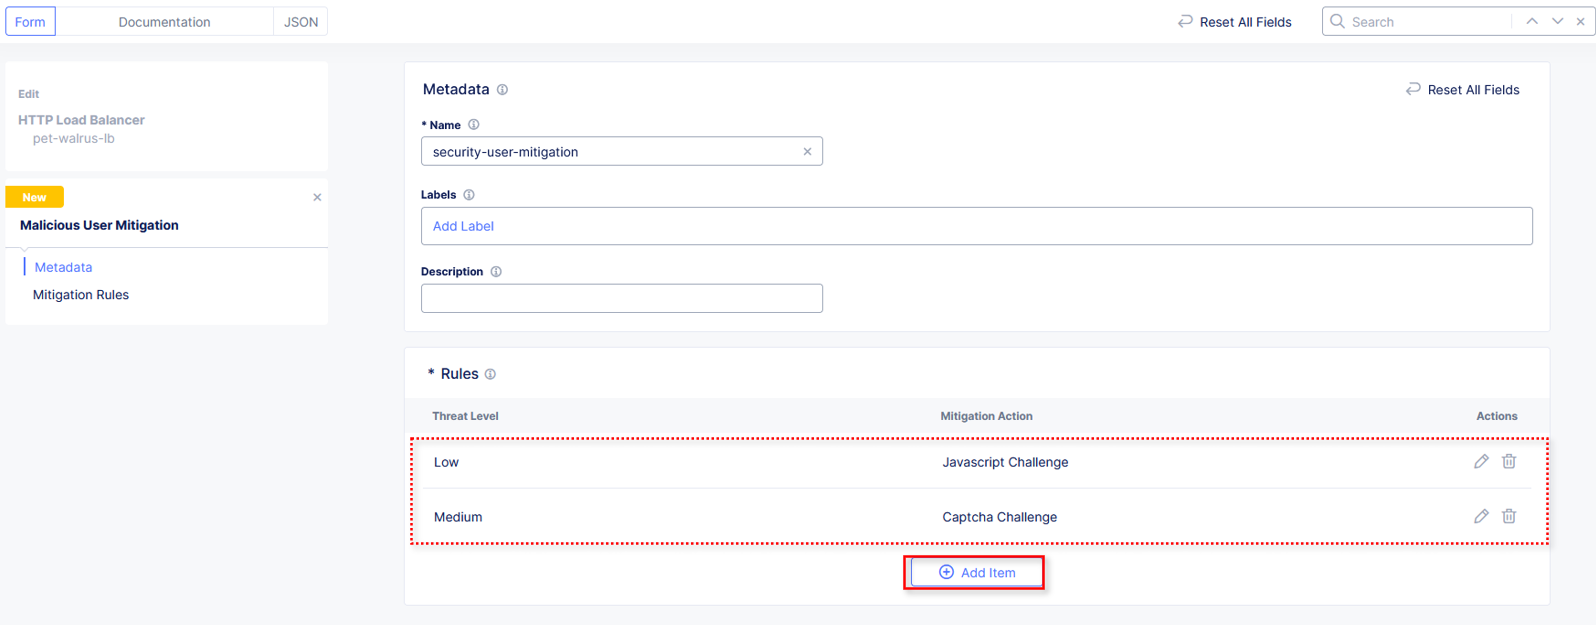
In the Metadata section enter security-user-mitigation for the Name and then click Add Item under Rules.
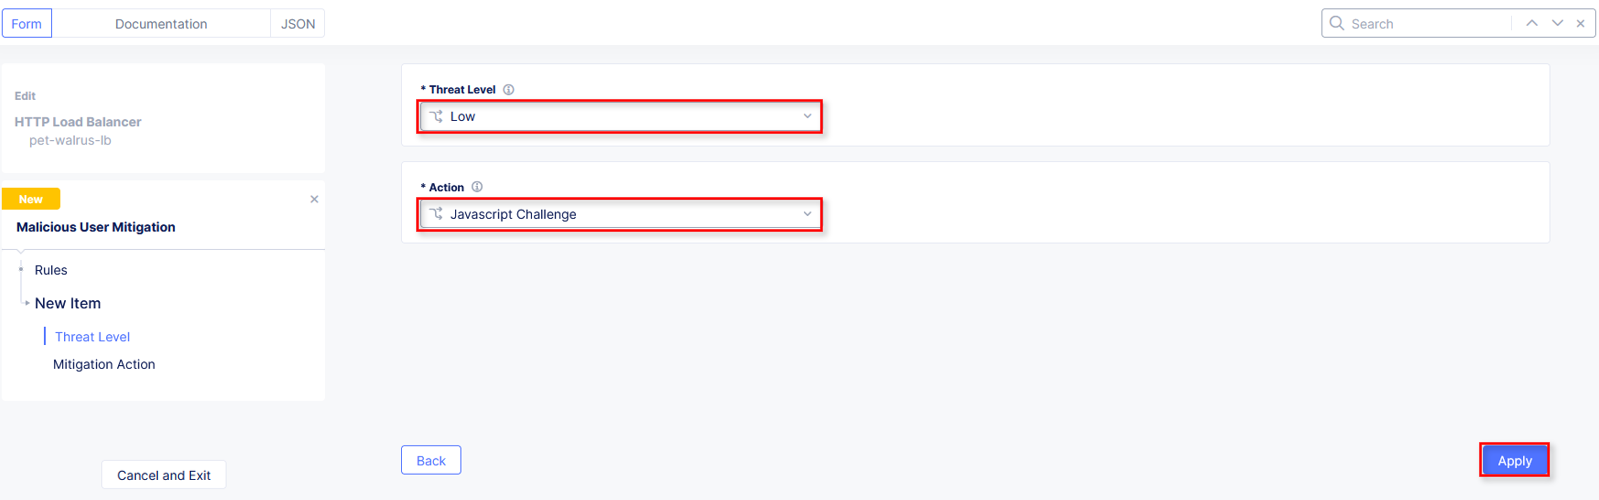
In the resulting window, click the dropdown for Threat Level and select Low.
Click the dropdown for Action and select Java Script Challenge.
Select Apply.
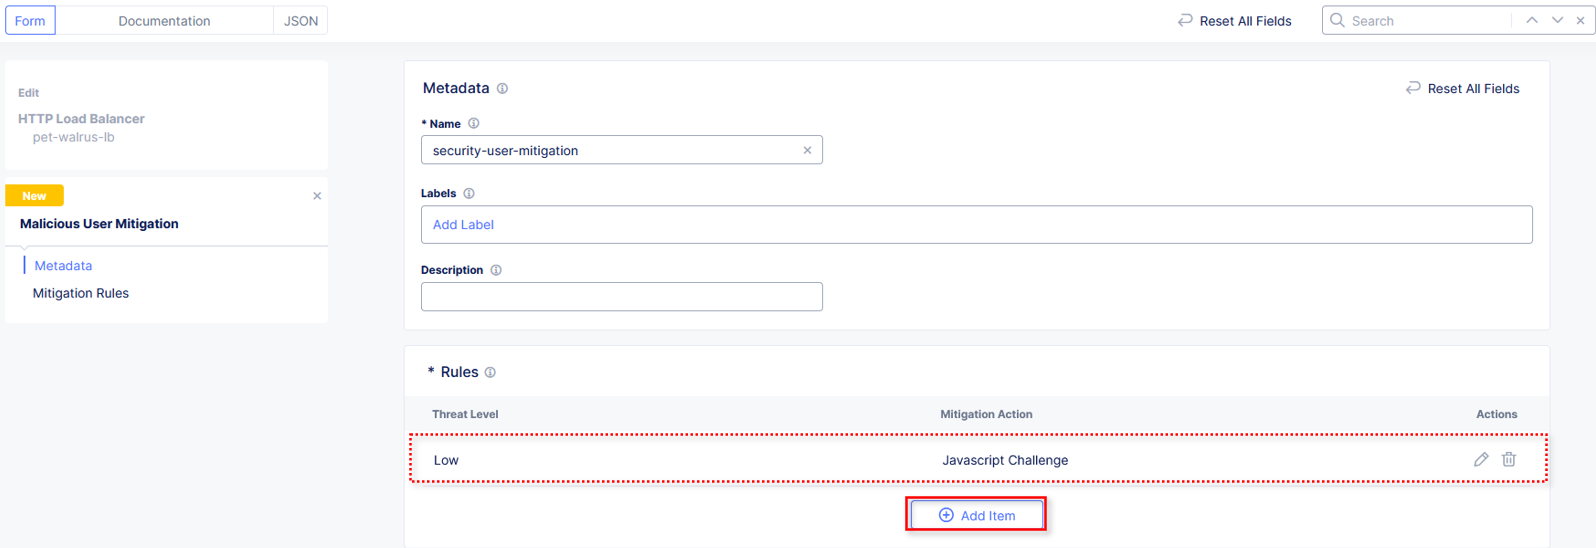
In the Malicious User Mitigation window review the rule just created and click Add Item again.
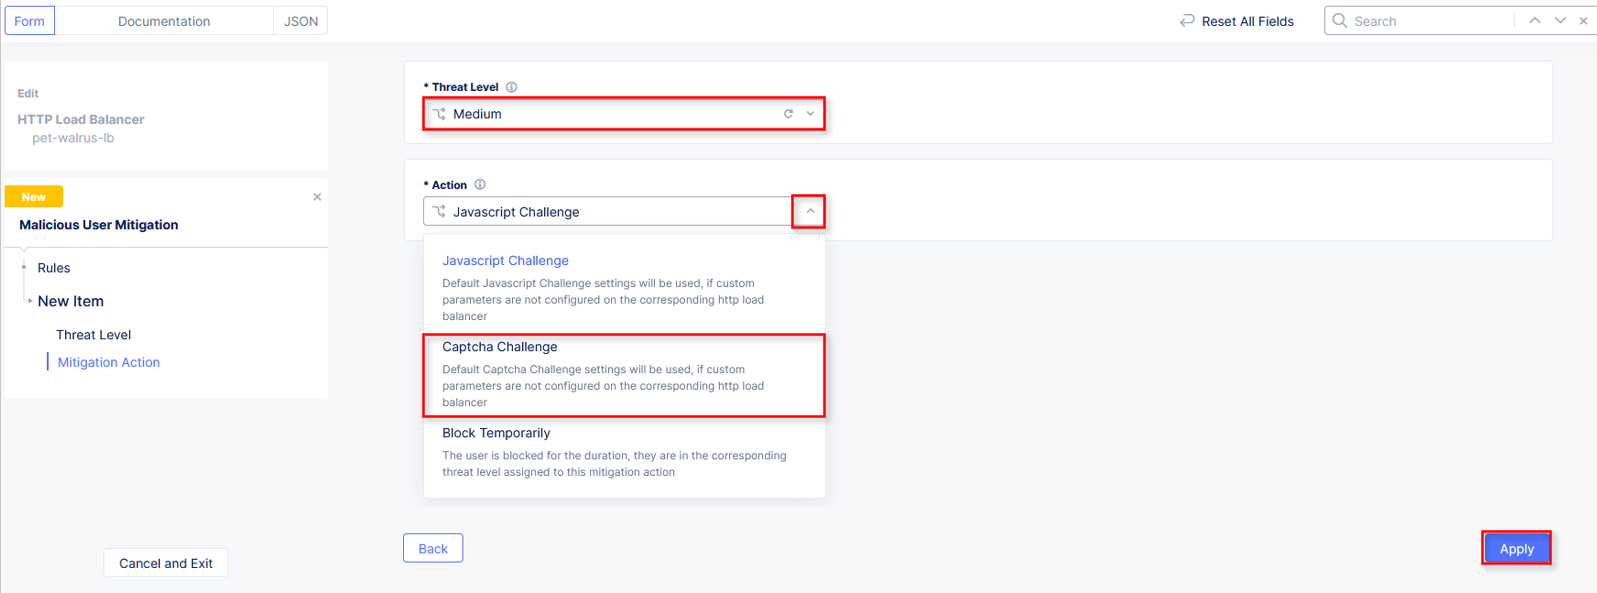
In the resulting window, click the dropdown for Threat Level and select Medium.
Click the dropdown for Action and select Captcha Challenge.
Select Apply.
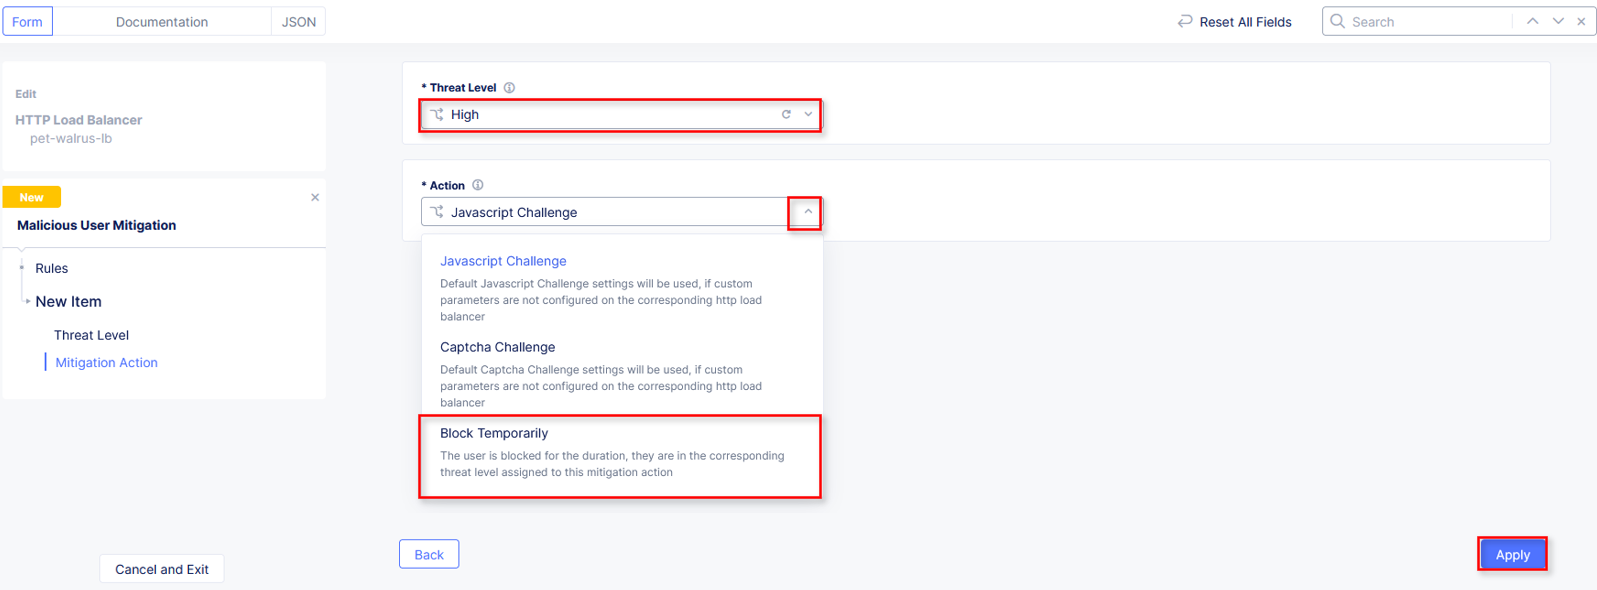
In the Malicious User Mitigation window review the rules just created and click Add Item again.
In the resulting window, click the dropdown for Threat Level and select High.
Click the dropdown for Action and select Block Temporarily.
Select Apply.
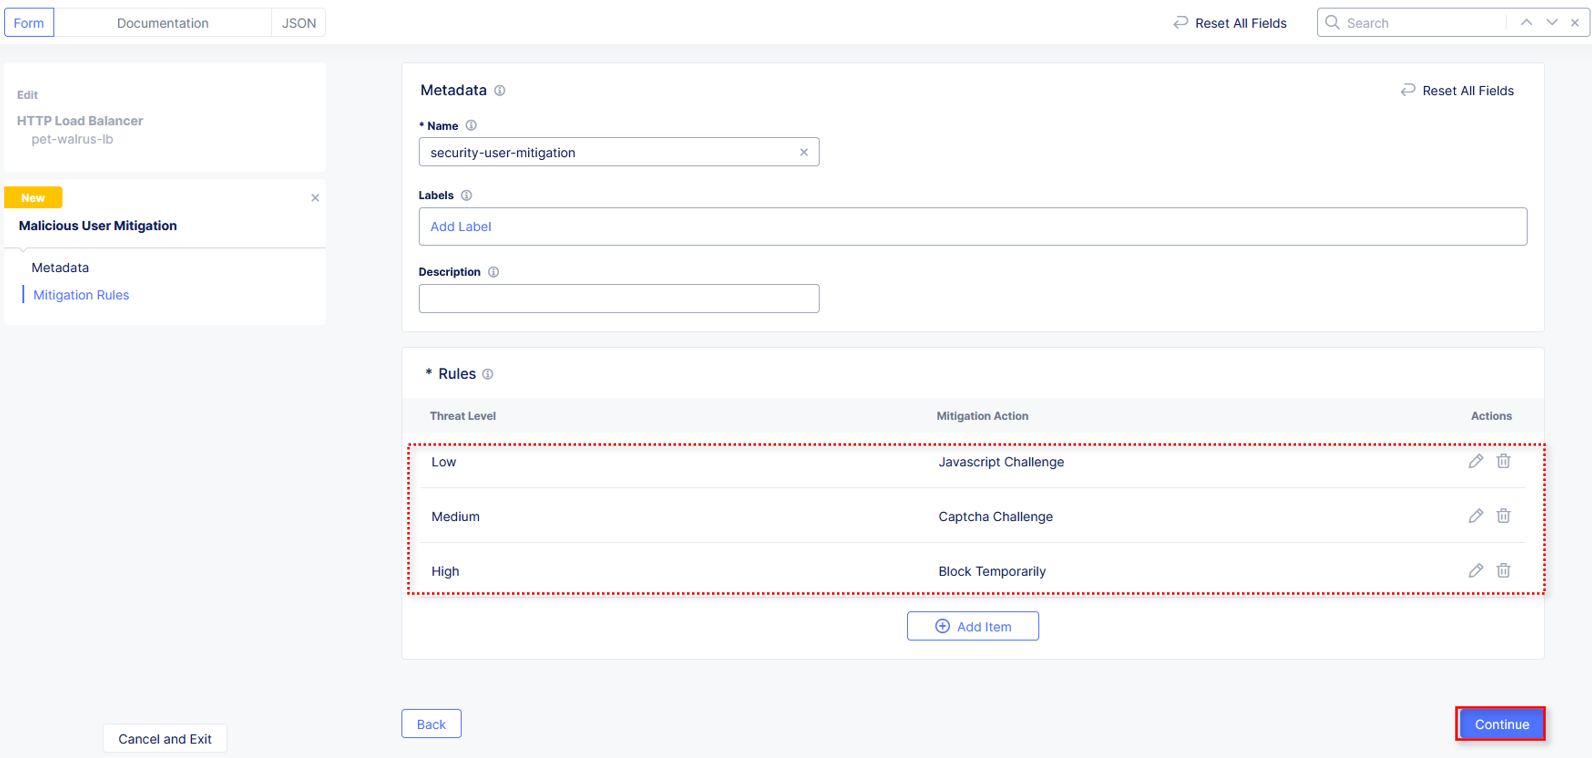
Observe the three Rules created and select Continue.
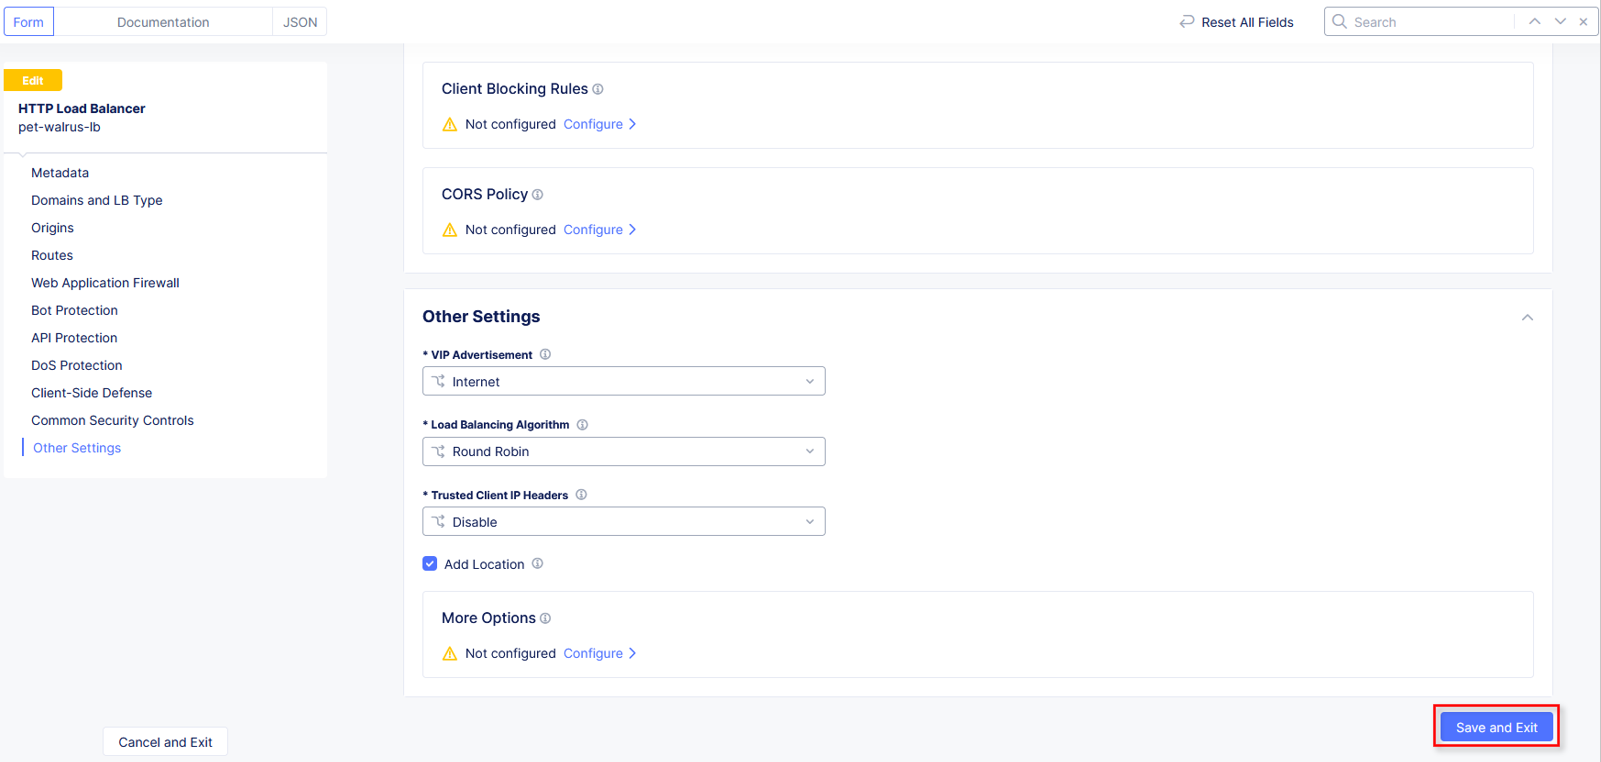
Note the updated Malicious User Mitigation and Challenges section and click on Other Settings in the left-hand navigation or scroll to the bottom of the window and click the Save and Exit button.

Narrative Check
With a combination of user identification and malicious user policies, ACME Corp can now detect malicious activities and apply mitigation steps. The mitigation steps include issuing JavaScript Challenge or Captcha Challenge or temporary blocking of the user. Malicious User capabilities from F5 Distributed Cloud leverages AI/ML techniques to correlate multiple suspicious user actions together in order to build a risk score around the user. As the risk score goes up, users who are violating the ACME’s security policies can be stopped from accessing the site while other users who are coming from the same public IP can still access the site without issue.
End of Lab 3: This concludes Lab 3, feel free to review and test the configuration. A brief presentation will be shared prior to the beginning of Lab 4.